2016
Machine Design Apr 6. 2016
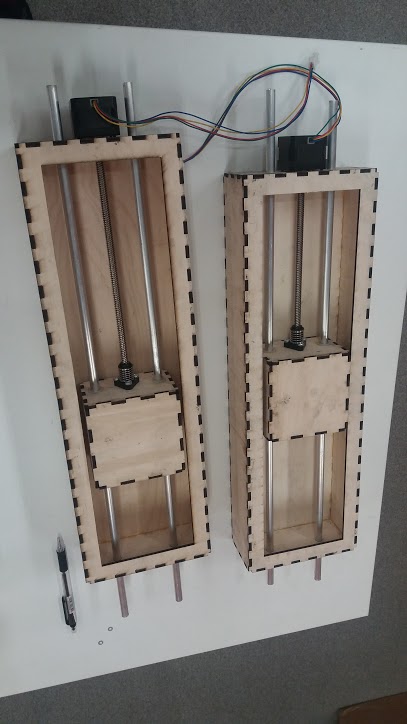
This week we continued our machine building that does something and includes an actuator. We finally decided to build an automatic guitar playing robot. The whole project is presented in our lab site. This page describes my main contributions to the project.
To control our two linear stages, we needed to connect the Gestaltnodes into a computer by using FTDI RS485 cable. We followed instructions on two sites; Week 16 of Fab Academy 2016 tutorials page and an excellent description on Machine Building assignment during Fab academy 2015 by Lisbon Fab Lab.
To summarize the steps for the connection, we needed to complete the following steps:
- Build the RS485 cable PCB connector board for making the physical wire connection from USB to the Gestalt nodes. This was handled by Dorina We followed the design by Bas.
- Making the 10 wire ribbon cables for the connections
- Download and install the Linux pygestalt code
sudo python ./setup.py install The file can be found in examples/machines/htmaa directory. - When all the coccentions were correctly setup (we started with one motor), test python script was ran:
sudo python single_node.py - If everything went fine, the blue led on the Gestalt module starts to blink and the running script asks for indentification of the node.
FABNET: port /dev/ttyUSB0 connected successfully.
X Axis: please identify me on the network
This is the time that you press the button on the node. - If no connection to the board is found, you can delete automatically generated percistence file called test.vmp. You should do that also when new node is added. Also, double check the right polarity of the ribbon cables.
You may also need to install pyserial python support but this was in my Linux installation already, so I did not need to do that.
Coding of the Robot:
Initial starting point for the coding was the xy-plotter.py in the examples/machines/htmaa directory. That Python program moves two Gestalt linear units in XY-coordinate plane. The coordinate point (0,0) is the starting point where the linear units are when the python script is initiated. After that you can address the points with coordinate pairs.
The main idea of the edited part of the code is as follows:
Each guitar string is defined as a X movement and Y movement is binary depth of free or picking movement.
Every note is described with four movements
- Go in front of a string (X movement)
- Go down (Y movement)
- Move 10mm to pick the string (X movement)
- Come up (Y movement)
Below is the code and additions to the original are colored red:
# Two stage example Virtual Machine file
# moves get set in Main
# usb port needs to be set in initInterfaces
# Nadya Peek Dec 2014
#------IMPORTS-------
from pygestalt import nodes
rom pygestalt import interfaces
from pygestalt import machines
from pygestalt import functions
from pygestalt.machines import elements
from pygestalt.machines import kinematics
from pygestalt.machines import state
from pygestalt.utilities import notice
from pygestalt.publish import rpc
#remote procedure call dispatcher
import time
import io
# These are the movements needed for each string
E=0
A=8
D=16
G=24
H=32
E2=40
#This is the movement for going to picking depth
z=4
#------VIRTUAL MACHINE------
class virtualMachine(machines.virtualMachine):
def initInterfaces(self):
if self.providedInterface: self.fabnet = self.providedInterface #providedInterface is defined in the virtualMachine class.
else: self.fabnet = interfaces.gestaltInterface('FABNET', interfaces.serialInterface(baudRate = 115200, interfaceType = 'ftdi', portName = '/dev/ttyUSB0'))
def initControllers(self):
self.xAxisNode = nodes.networkedGestaltNode('X Axis', self.fabnet, filename = '086-005a.py', persistence = self.persistence)
self.yAxisNode = nodes.networkedGestaltNode('Y Axis', self.fabnet, filename = '086-005a.py', persistence = self.persistence)
self.xyNode = nodes.compoundNode(self.xAxisNode, self.yAxisNode)
def initCoordinates(self):
self.position = state.coordinate(['mm', 'mm'])
def initKinematics(self):
self.xAxis = elements.elementChain.forward([elements.microstep.forward(4), elements.stepper.forward(1.8), elements.leadscrew.forward(8), elements.invert.forward(True)])
self.yAxis = elements.elementChain.forward([elements.microstep.forward(4), elements.stepper.forward(1.8), elements.leadscrew.forward(8), elements.invert.forward(False)])
self.stageKinematics = kinematics.direct(2) #direct drive on all axes
def initFunctions(self):
self.move = functions.move(virtualMachine = self, virtualNode = self.xyNode, axes = [self.xAxis, self.yAxis], kinematics = self.stageKinematics, machinePosition = self.position,planner = 'null')
self.jog = functions.jog(self.move) #an incremental wrapper for the move function
pass
def initLast(self):
#self.machineControl.setMotorCurrents(aCurrent = 0.8, bCurrent = 0.8, cCurrent = 0.8)
#self.xNode.setVelocityRequest(0) #clear velocity on nodes. Eventually this will be put in the motion planner on initialization to match state.
pass
def publish(self):
#self.publisher.addNodes(self.machineControl)
pass
def getPosition(self):
return {'position':self.position.future()}
def setPosition(self, position = [None]):
self.position.future.set(position)
def setSpindleSpeed(self, speedFraction):
#self.machineControl.pwmRequest(speedFraction)
pass
#------IF RUN DIRECTLY FROM TERMINAL------
if __name__ == '__main__':
# The persistence file remembers the node you set. It'll generate the first time you run the
# file. If you are hooking up a new node, delete the previous persistence file.
stages = virtualMachine(persistenceFile = "test.vmp")
# You can load a new program onto the nodes if you are so inclined. This is currently set to
# the path to the 086-005 repository on Nadya's machine.
#stages.xyNode.loadProgram('../../../086-005/086-005a.hex')
# This is a widget for setting the potentiometer to set the motor current limit on the nodes.
# The A4982 has max 2A of current, running the widget will interactively help you set.
#stages.xyNode.setMotorCurrent(0.7)
# This is for how fast the
stages.xyNode.setVelocityRequest(8)
# Some random moves to test with
#moves = [[10,10],[20,20],[10,10],[0,0]]
#assumption: [0,0] is in front of E string not able to plug the string with x movement
# going to plug distance is z = 3mm
#Play D E E strings one after another
hmoves = [[D,0],[D,z],[D+10,z],[D+10,0],5,[E,0],[E,z],[E+10,z],[E+10,0],5,[E,0],[E,z],[E+10,z],[E+10,0],5] # Play D string and play E string twice string fThere is four movements and a pause thatt makes one note.
# Move!
for x in range(1, 4):
stages.move(hmoves[5*x-5], 0) # go to start for a pluged string
status = stages.xAxisNode.spinStatusRequest()
stages.move(hmoves[(5*x-5)+1], 0) # go down
status = stages.xAxisNode.spinStatusRequest()
stages.move(hmoves[(5*x-5)+2], 0) # plug
status = stages.xAxisNode.spinStatusRequest()
stages.move(hmoves[(5*x-5)+3], 0) # go up
status = stages.xAxisNode.spinStatusRequest()
time.sleep(hmoves[(5*x-5)+4])
while status['stepsRemaining'] > 0:
time.sleep(0.001)
status = stages.xAxisNode.spinStatusRequest()


Files: See the code above