Final Project
| Project Proposal | Project Planning | Project Documentation | Final Project Presenation |
|---|
It works!
All of the task are completed & questions answered.
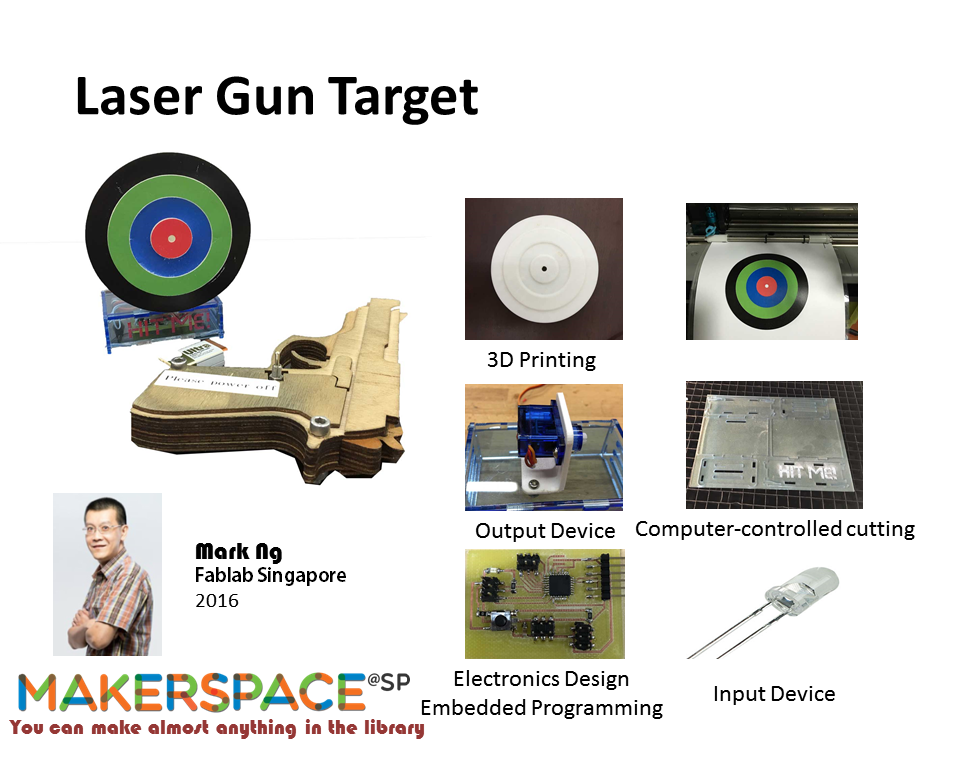
1. I have designed the circuit board
2. 3D printed the target, mount and servo holder.
3. Programmed the circuit
4. Laser cut the gun and chasis
5. This target just needed a 5V to operate. As most of the handphones use 5V usb adapters, the usb adapter can use to power it. As for the gun, I opted for a 9V battery so that it can be easily consealed in the gun and is not so bulky as 4AA size batteries.
6. The chasis is able to withstand the weight of the target falling because the target is very light as it is 3D printed.
What can be improved?
1. Replace the phototransistor with IR receiver to eliminate false trigger.
2. The LED is not bright enough to get the attention that the target is hit. Instead of using just one smd LED, I should have used a row of LEDS.
Creative license
I will choose the Creative commons license. I will use the same one that Neil uses in the Fab Academy material(c) Mark Ng, 15 June 2016.
This work may be reproduced, modified , distrbuted and display for any purpose but must acknowledge my Laser gun & Target project.
What I have learnt..
1. This course has exposed me to various expects of digital fabrication.
2. I have gain more confidence in soldering and pcb design.
The journey has been tough but I gain a lot from it. Every week trying to complete the assignment is a challenge to me. Thanks to the help of my course mates, i have have a better understanding of how to use the various mechanical equipment. If has been a fruitfull journey and I am able to say "I'm possible" instead of impossible!
Download
Download the target.ipt
Download the servo mount.ipt
Download bracket.ipt
Download guntarget.ino
Download targetbox.cdr
Download gun.cdr
Download laser.brd
Download laser.sch
Download atmega328target.brd
Download atmega328target.sch
Would you like to insert more style/elements?
Check the documentation of Bootstrap here.