Week 3: computer-controlled cutting
February 10 - 16
Assignment
- Cut something on the vinylcutter
- Design, make, and document a parametric press-fit construction kit
Vinyl Cutting

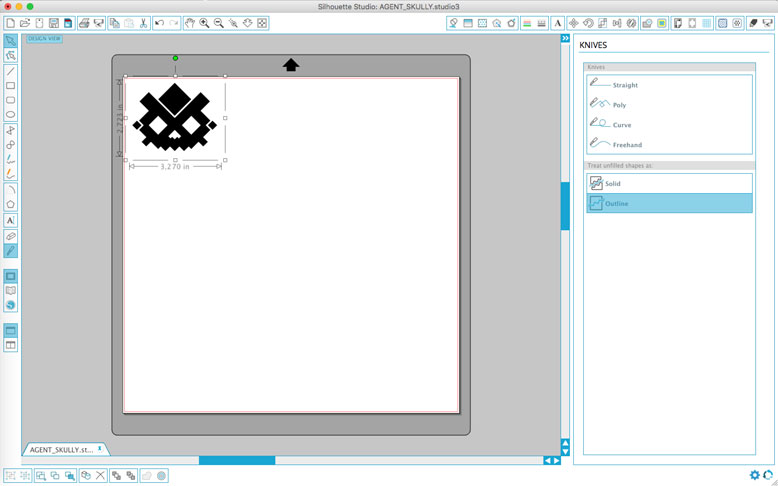
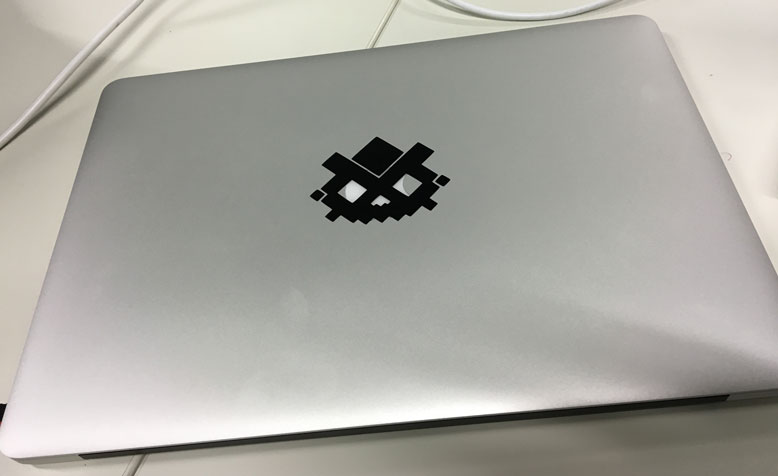
The design for the vinyl cut was made in illustrator once again. It is a simple design using pixels on a 45 degree bias. What is the design exactly? Not sure, some kind of pixel cat skull or something.
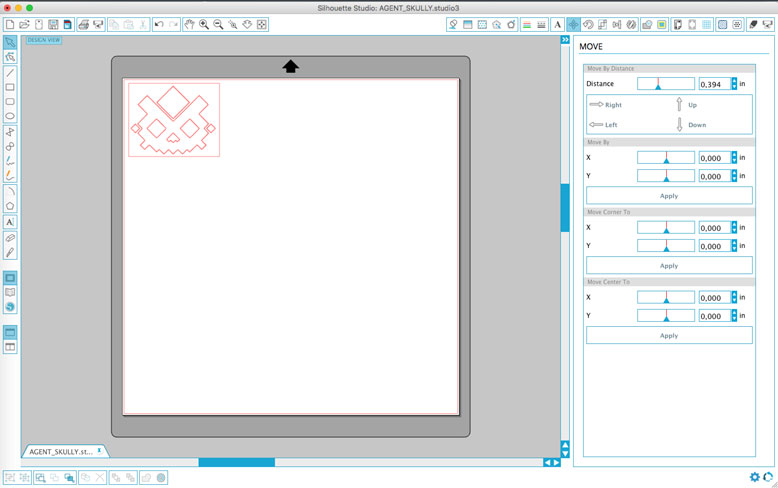
In our lab, we have two choices of vinyl cutters. One being the larger Summa cutter, and the other being the smaller Silhoutte cutter. Because my design is pretty smalle, I went with the latter. The software for the Silhoutte cutter isn't that great unless you go for the paid version, however the freeware one is capable with some workarounds. The first issue is that it cannot import vector files, so I had to rasterize my image and then use the software's equivalent of a live-trace function to re-vectorize it. Convoluted yes, but also free.
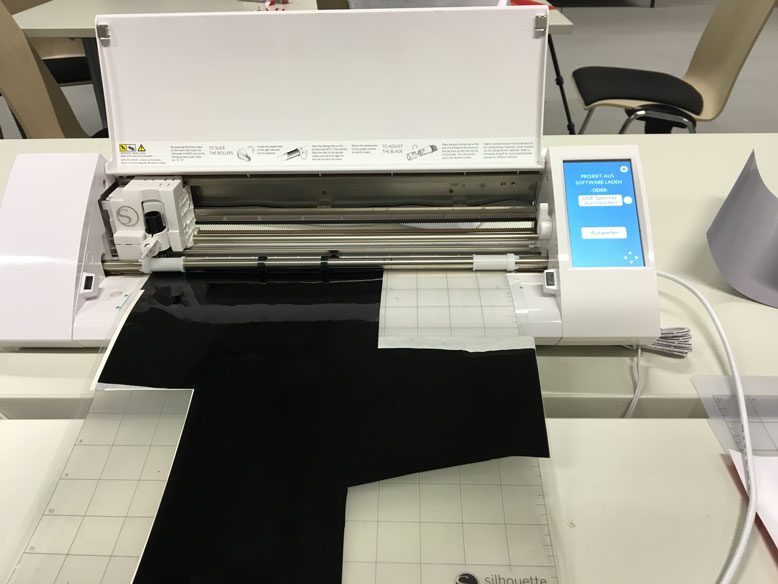
The vinyl and backing is attached to a semi-tacky processing plate and then fed into the machine. It made quick work of the design. It was important to select the correct cutting depth for the material, so that only the vinyl is cut without affecting the backing. Luckily, the software provides instructions for the correct cutting depth based on your material selection.
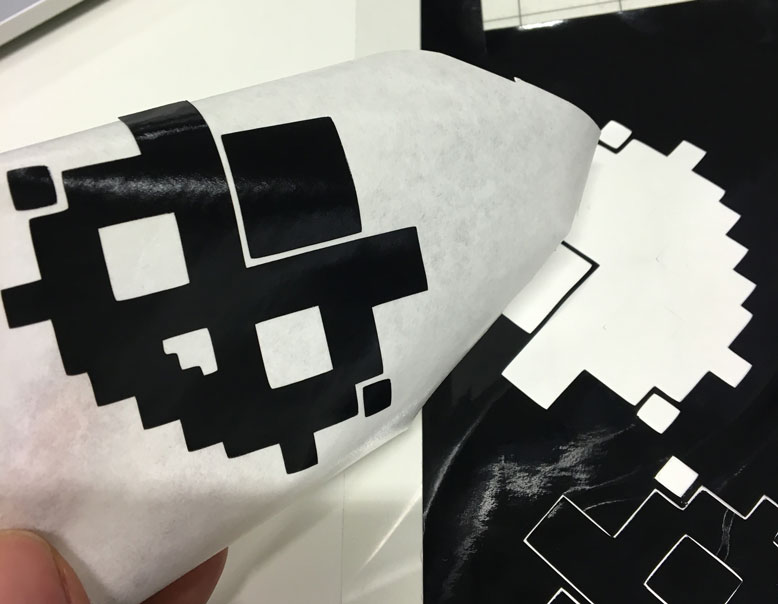
To get the sticker ready for application, a transfer paper is applied to the top of the design. Then using a lateral peeling motion, the design is separated from the backing. The use of a knife was use to gently keep the negative forms on the backing to negate the amount of weeding necessary. All in all, the design came off the backing easily.
The application to the surface was pretty uneventful. Alignment is important and as well as applying it in a one directional method as to prevent bubbles trapped underneath the vinyl. A plastic scraper and a felt block was then used to create a solid adhesion. Now I have a Catskullbook Pro. And so can you!
Files
Laser Cutting
When it comes to designing for the laser cutter, the tool I turn to is once again Illustrator. While it lacks some parametric design capabilities, it makes up for it everywhere else. If the project is primarily parametric, then I will turn to another tool for that design. However, I find primaryly parametric projects to not be inline with my desgin sense. I tend to treat the laser cutter as a precision tool for certain materials as a carpenter would make a hand crafted chair. So, each joint, each face, and each component are individually adjusted for their purpose and fit.
Using this way of thinking, I was able to create very intricate and complex 3D geometry, using primarily 3mm to 5mm MDF. One of the discoveries was to create structural laser cut bent MDF using a cross support beam periodically mid curve. To calculate the placement and length required for each curve is documented below.
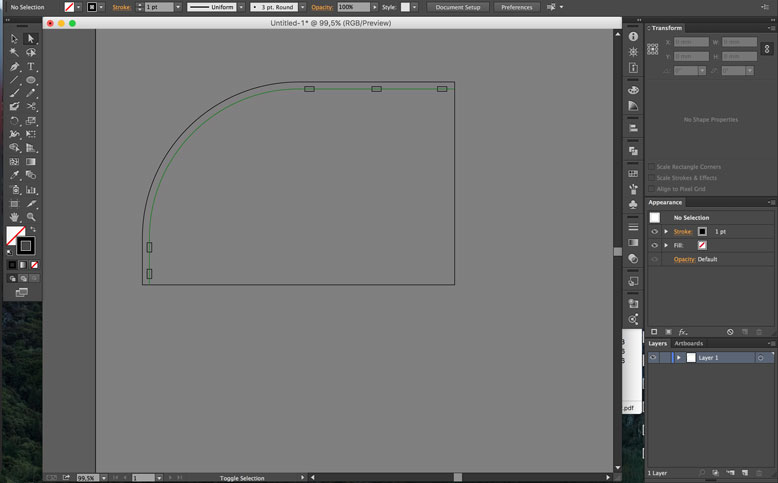 In a piece like this, an improper length curve, even with proper support on the end may end up buckling and warping due to either a miscalculation of length or weakness of the material after it has been cut to allow bending. So in order to calculate the length, we first find the center line of the piece that will be fitted.
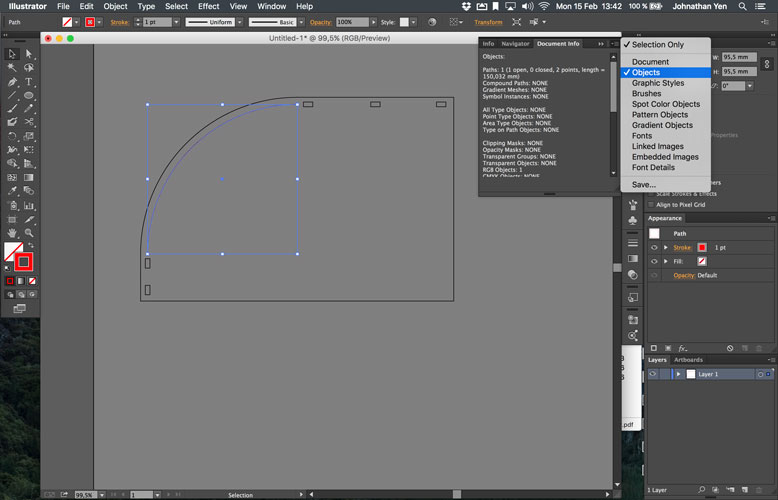 Next, isolate the curved portion as its own path. Then open up the 'Document Info' panel in Illustrator. It wont show the information yet, but if you go to the options dropdown in the panel, switch it into 'Object's and you'll see the length of your line in the information display. In this case it is 150.032 mm.
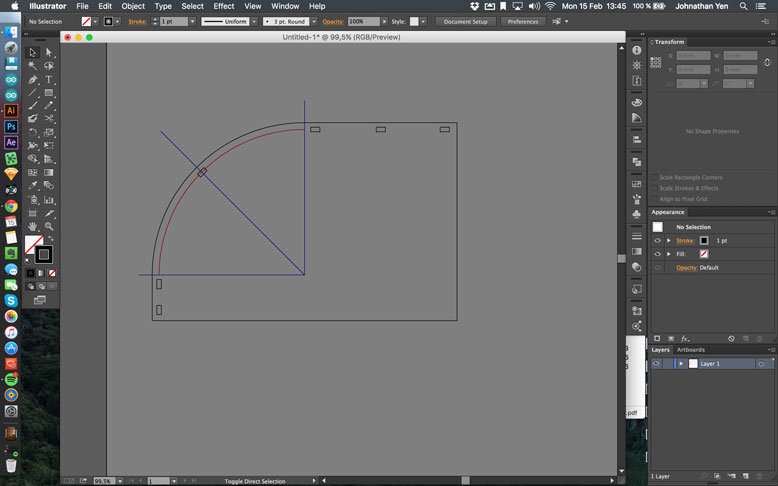 To create the support insert, find the midpoint of the curve. In this case, it is a quarter circle, so finding it is pretty simple. Turn the hole 45 degrees and place it where the line intersects the curve. Illustrator's smart guides will make this a snap (literally and figuratively!).
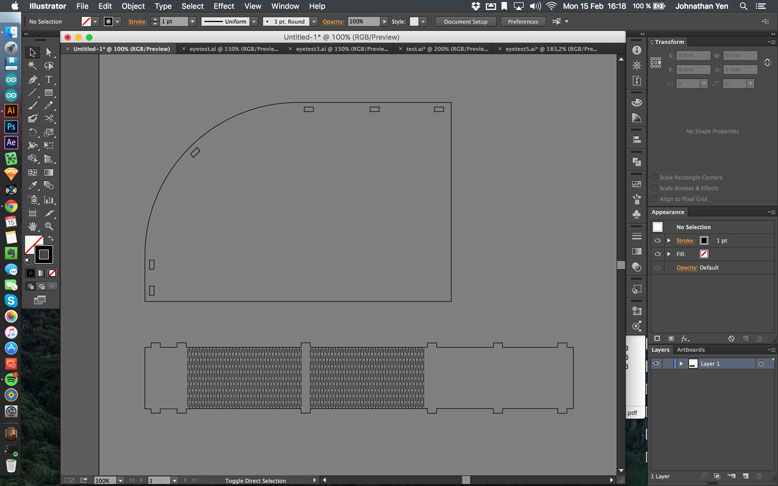 Using the found dimensions, finish the design of the insert piece and it should fit quite cleanly into the curved design.
One thing to note when working with Illustrator for laser cutting, make sure to turn off the 'Align new objects to pixel grid' option under the 'Transformation' panel options menu. This will save you hours of headaches where Illustrater changes your dimensions for no reason. Also, Illustrator has some parametric ability under the 'Transformation Effect' menu, increase the number of copies and the direction you want the copies to travel. Your cloned pieces will then reflect the changes you make to the master. Unfortunately, this only works in a linear fashion. However, for the simple application of tabs like this, it was good enough.
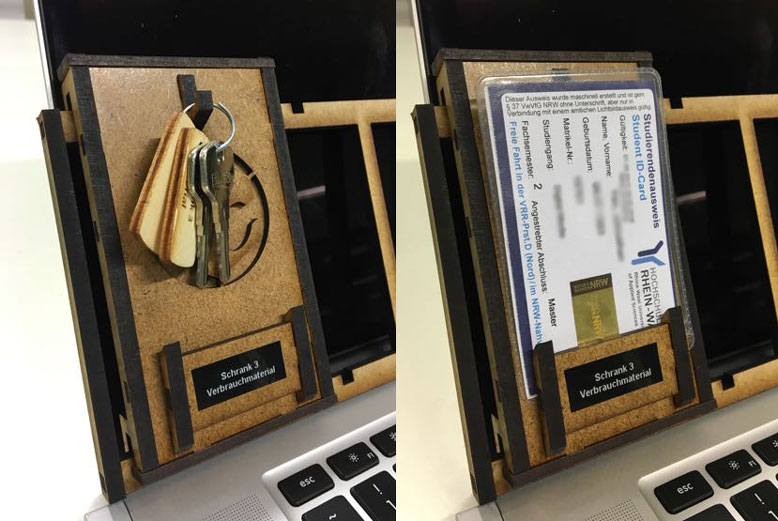
The goal of the press-fit construction kit object was a modular key holder system that would be used for our FabLab. There are a variety of locked cabinets containing tools. We had some issues with tools going missing, so we decided to keep them locked and check out the keys to people as they needed them. One would trade in a form of ID in return for use of the key. When the key is returned, they would receive their IDs back. We wanted the key hanger board to reflect logically the positions and groupings of the cabinets, so we wanted the system to be modular in case things would be re-arranged in the future.
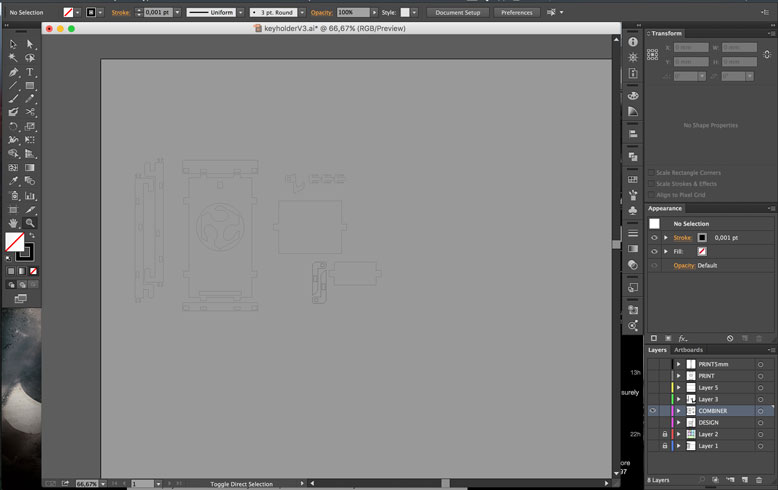
The Design was done in Illustrator, and the fit was pretty easy to figure out after a couple of tests. I keep the peg sizes the same as a control, and reduce the sizes of the the holes, as this is easier to do. When cutting 3mm MDF, the holes would only need to be reduced by 0.1mm while when cutting 5mm MDF, the reduction is 0.2mm because of the difference in speed necessary to cut through the material.
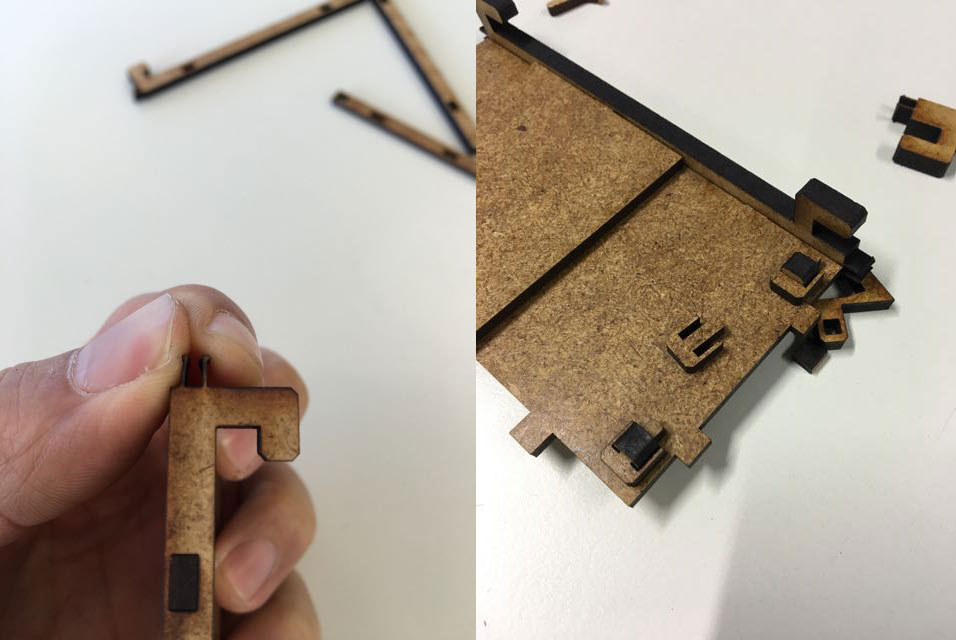
To make the design work and hold together for a very long time, I create two connector types that would click in once pressed. While these joints are not very strong, they work in conjuction with regular joints to ensure that the pieces would not eventually back out over time due to vibrations. I found the most efficient thicknesses were to make a 1mm bendable piece with a 0.5mm overhang to hold on. It does hold up over multiple uses, but it isn't designed to be. Once fit together, it should stay together.
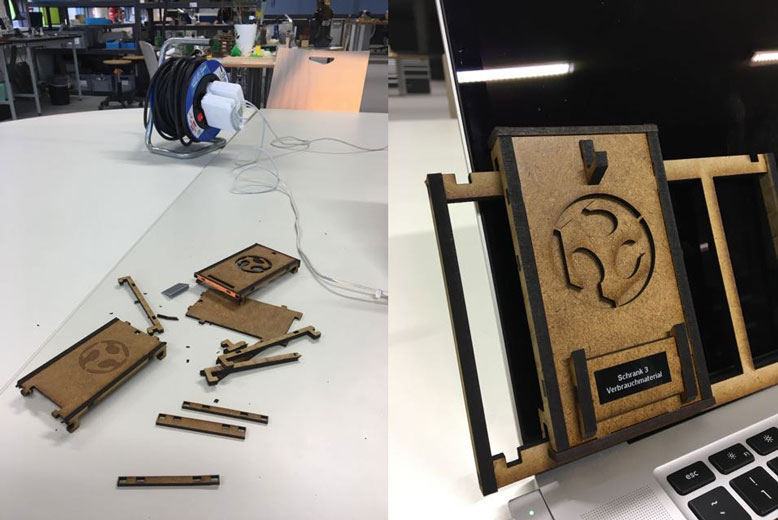
The end result is a lightweight modular key hanger that is cheap to make and pretty easy to put together. A little care is needed for the clip hinges, but it isn't something that can't be reproduced. Finally, it should hang snuggly on two bars of 5mm MDF. You can notch them with 5mm spacings if you want to prevent any horizontal movement.