
Step 1
I downloaded the schematic files from the page FabISP, a fab-able in-system programmer
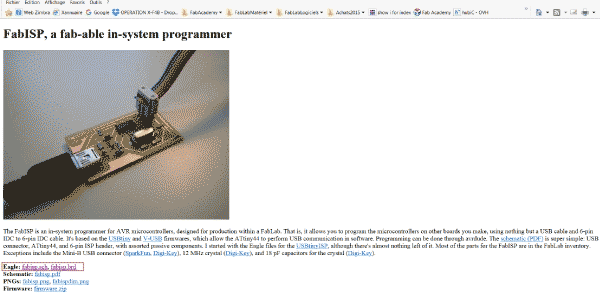
I downloaded the schematic files from the page FabISP, a fab-able in-system programmer
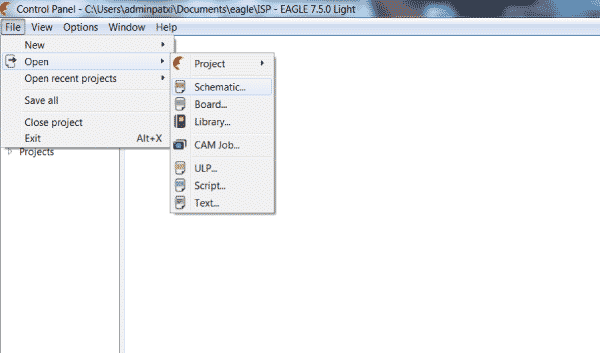
I downloaded and installed Eagle V7.5 (Free version)
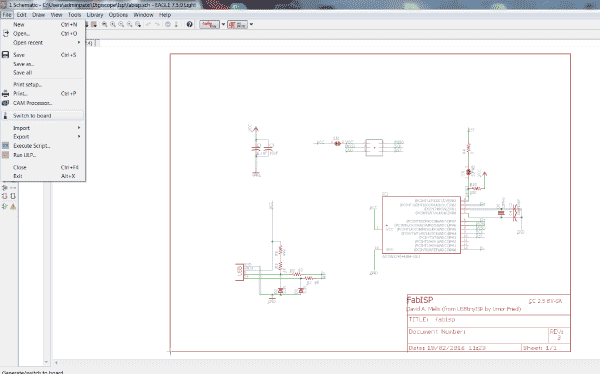
Open the schematic file with Eagle (i did so to see how to get the board form the schematic in Eagle)
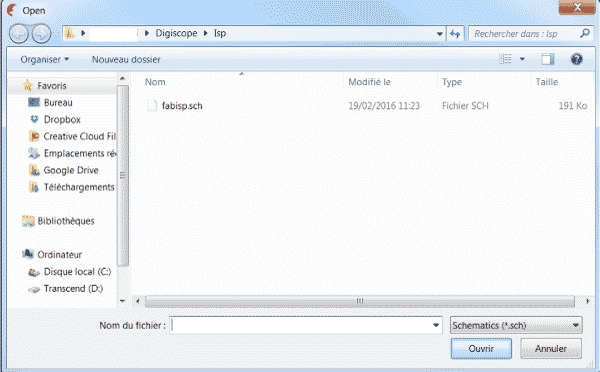
The schematic file appears in a new window
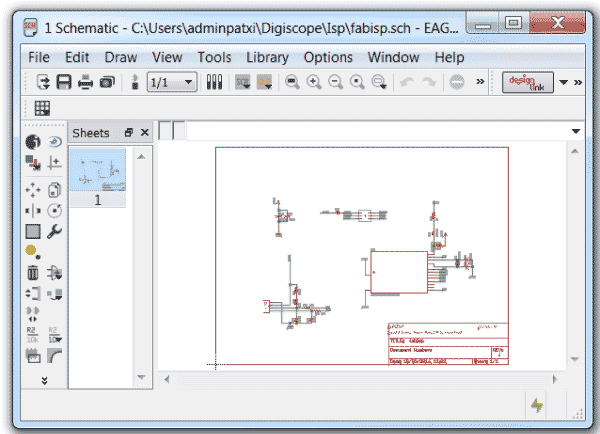
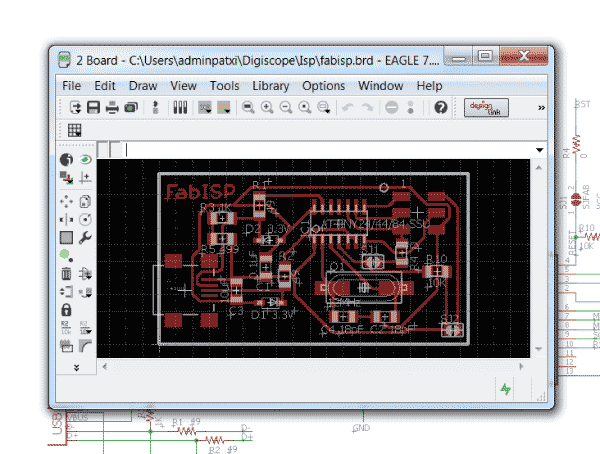
i used the Eagele's module made to switch from schematic to board
And the board appeared in a new window
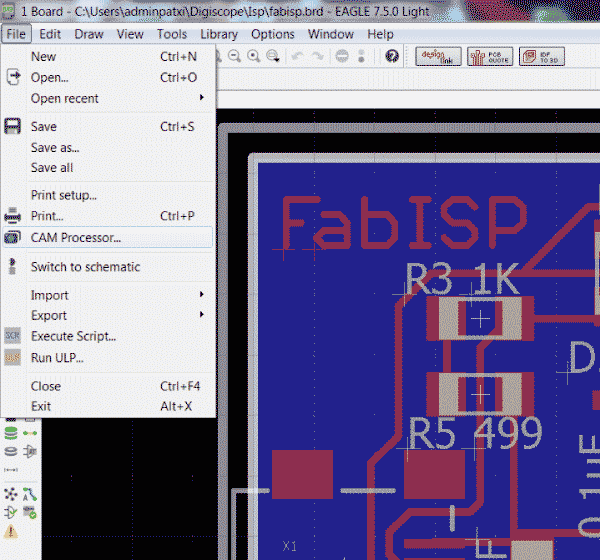
I am using a CIF machine running with Galaag3, which means that i need Gerber files
Lucky me a user of the lab has already done a little script to make things easier
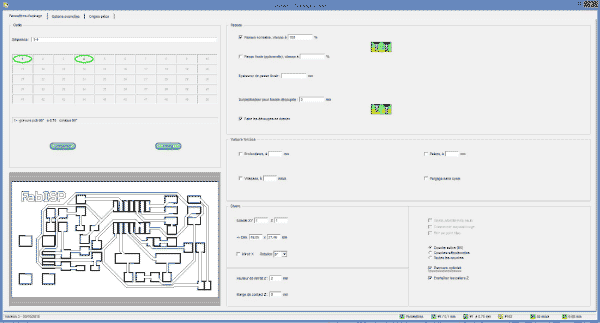
So i open the CAM Processor form Eagle first
In the CAM Processor i open a new job (the script)
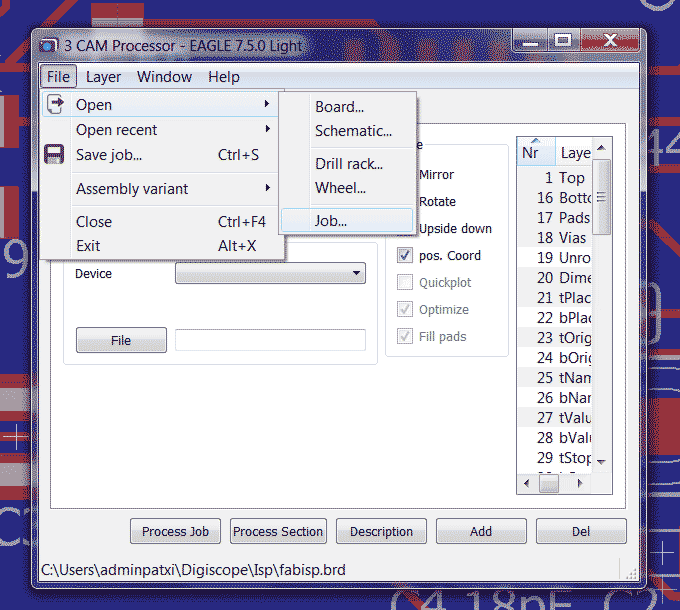

It gives me the good settings that match with our machine, just need to click on process job

Milling with the CIF Technodrill4
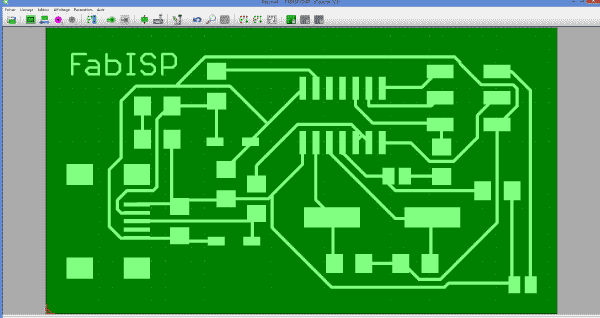
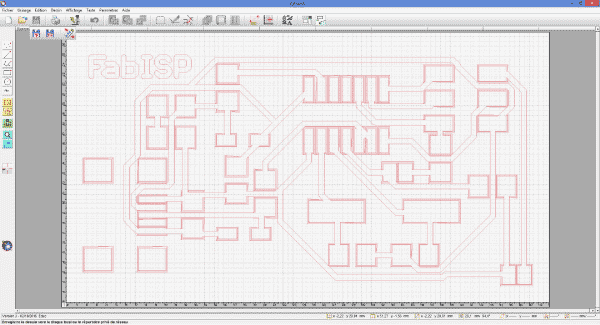
Open Percival (part of Galaad) and import the Gerber file
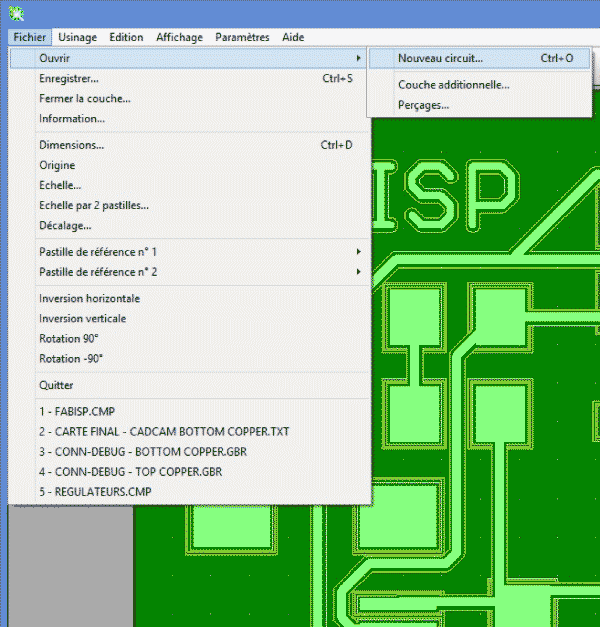

And the full board is diplayed
Because i haven't done it in Eagle, i must add a cropping line all aroud the board
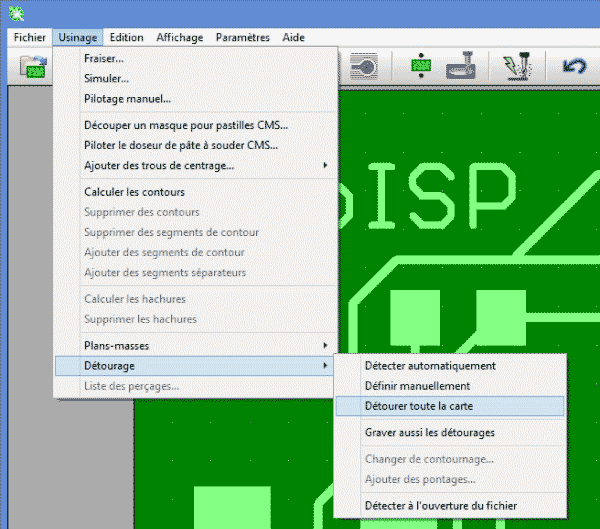
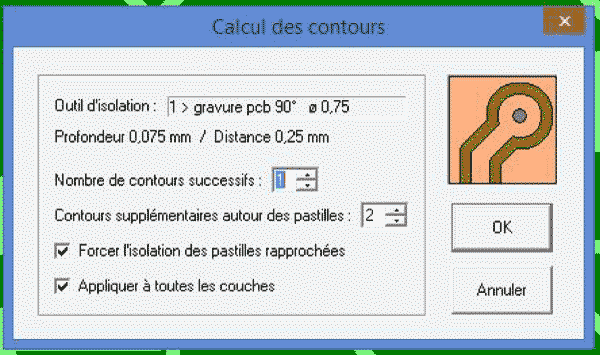
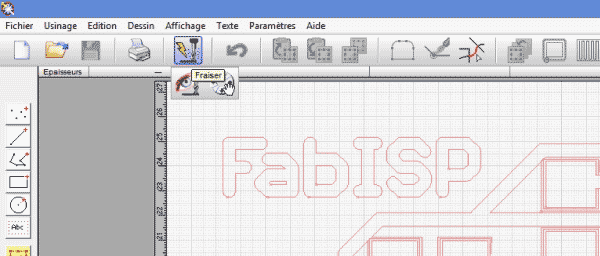
Then i ask Percival to calculate the tools paths

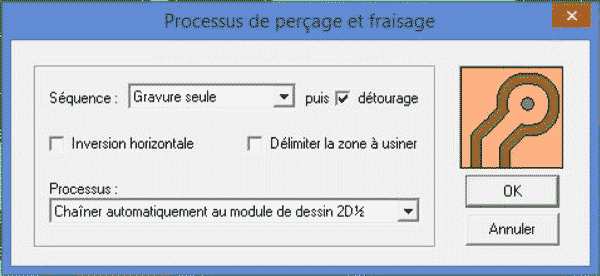
I go to milling and i ask to engrave and cut the board
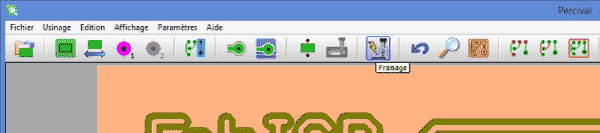
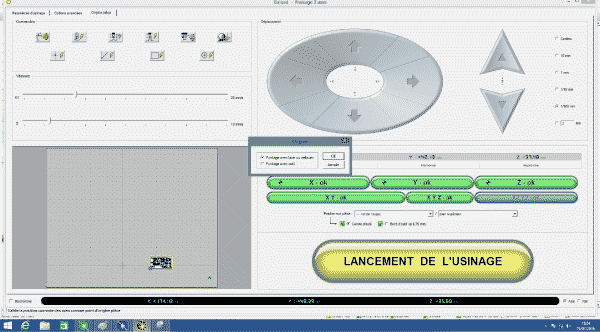
Gallaad opens and display the board
Click on milling to go forward
Gallaad's milling setups opens, don't forget to choose "optimised paths" to win time
Once the setups has been checked you have access to the controlling machine interface, where we have to do the offset of the machine
Then start milling
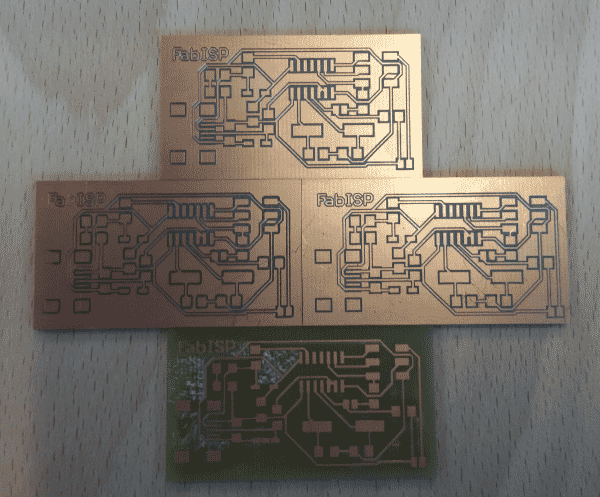
At first attempt i had a level trouble, something was wrong, board was not that flat
The two second tries went well, and i've even tried it a last time taking away all unusefull copper
Components finaly arrived so...
I discovered that the list of components was a little different form what i was expected. The 20 Mhz chrisal was different (much smaller)
So i started again from scratch, but tihs time i milled it with the Modela 40 and the Fab Module
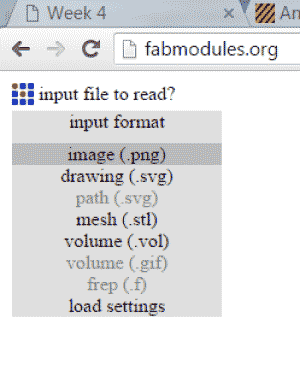
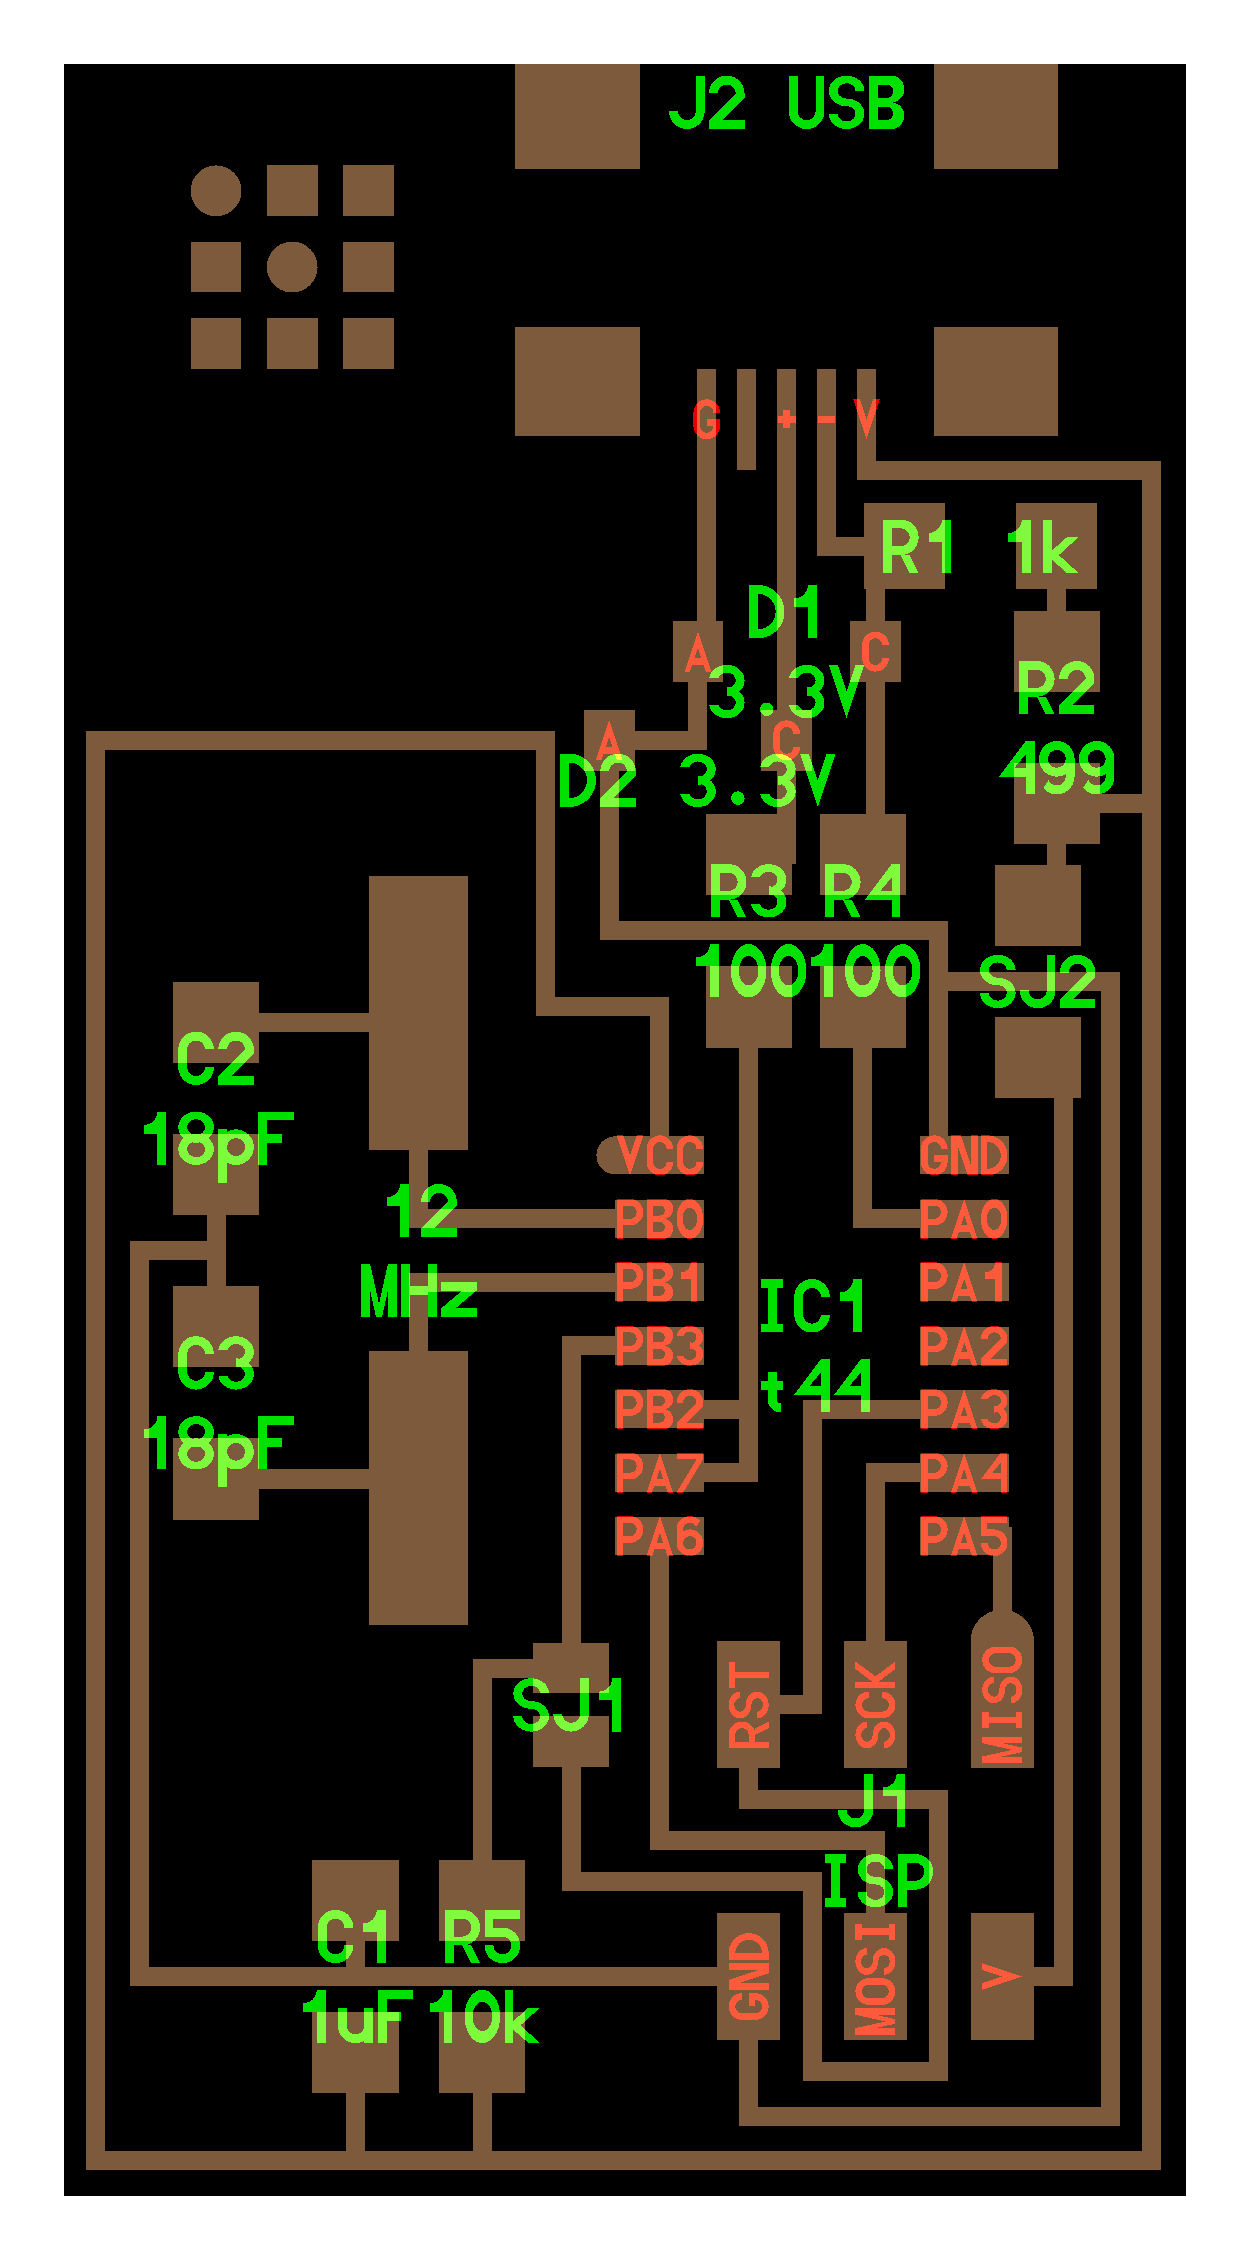
And it is much more easer than using Galaad, i just needed to download the .png files of the ISP board (Traces, Outlineand the Full board as a help to solder)
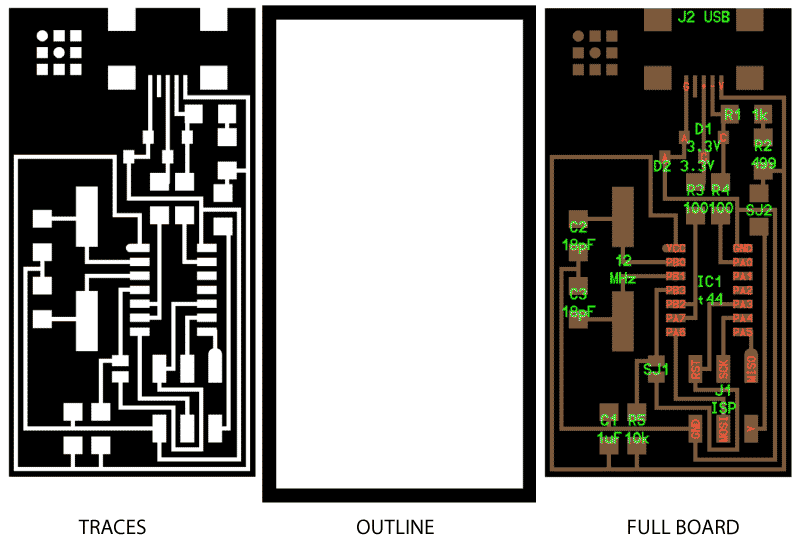
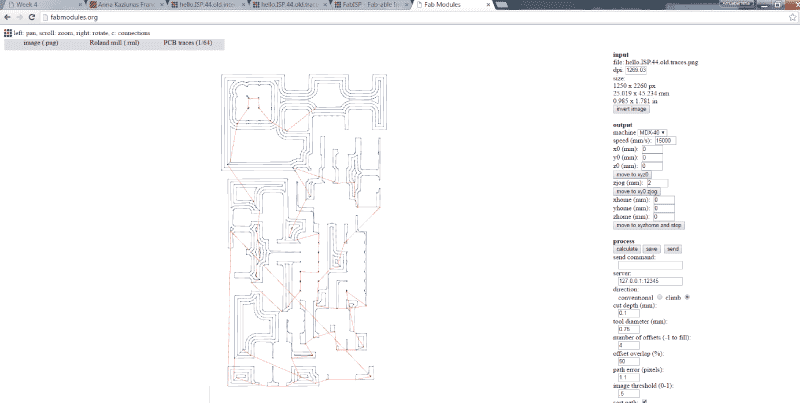
Then i imported the traces it in the Fab Module
I choosed the Output format : .mrl for Rolland mil
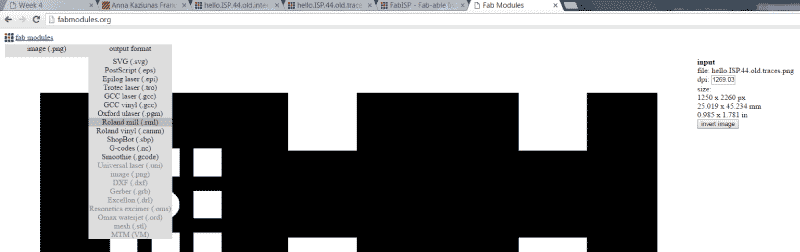
I entered Output settings (Speed 15000, Type of machine MDX-40 and offset's values)
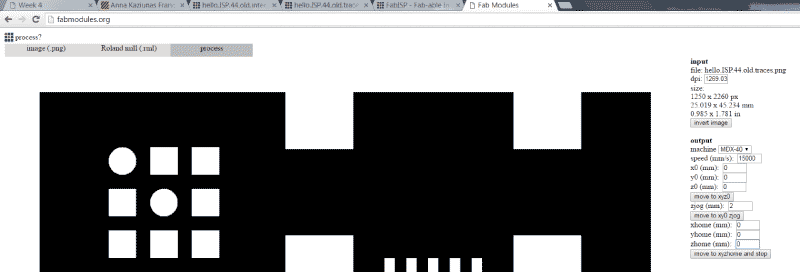
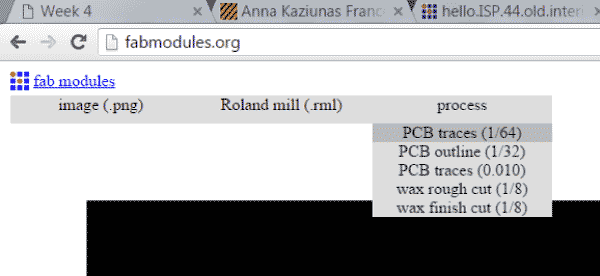
I choosed the process i wanted to use to mill traces : PCB traces 1/64
Then the process settings were displayed. I left them as they were and in clicked on calcute

The Fab Module calculated the tool path and displayed it
And i saved the result : a .rml file of the traces.
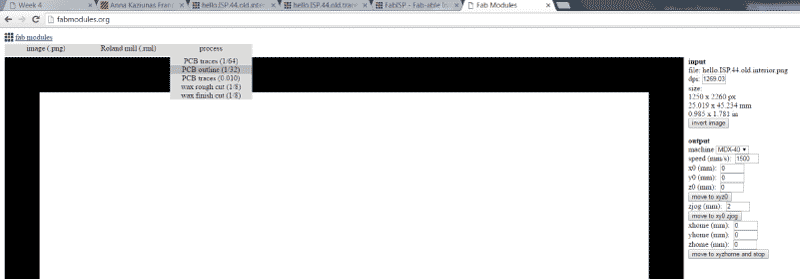
I did everything again with the outline to get the second .rml file.
I had to change the process setting because i was using a bigger tool to cut the board
Milling was a bit tricky. I milled twice to deep and i broke one tool by doing so
But after i checked all my settings everything went well

Soldering was really cool, but i loved it so that i forgot to take pictures.
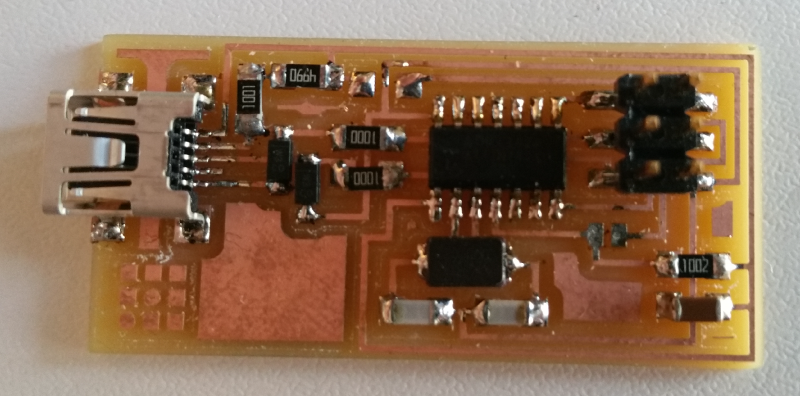
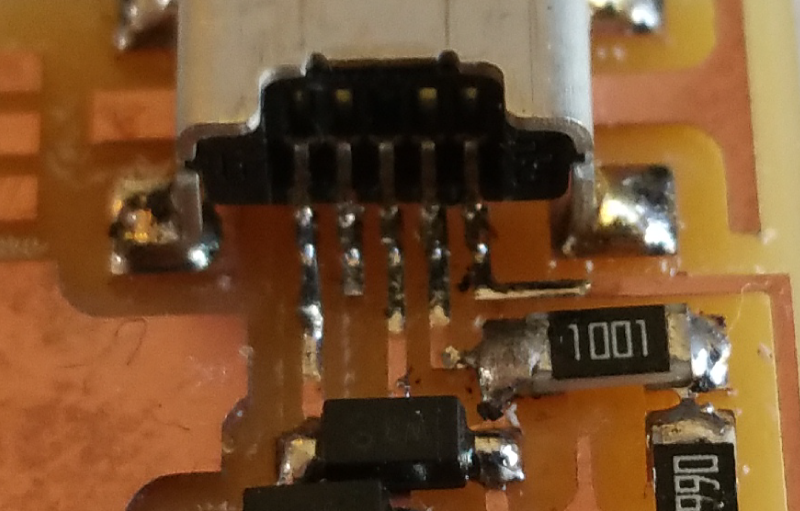
For the USB i didn't try to make it clean. I soldered everything and i cleaned the mess with desoldering braid as Neil Gershenfeld said during the class and it was perfect
Programming the ISP
I first downloaded and installed AVR for windows
I downloaded the Firmware and i copied it in a specific folder before to extract files from the .zip folder
Using Sublime Text 2 i opened the Makefile to modify it. I needed to change the type of USB from normal to TinyUSB

I took an already programmed FabISP and an plugged my laptop to FabISP to program (USB/TinyUSB). Then i plugged the card to program to the programmeg FabISP (Ribbon cable). And finaly i plugged the programmed FabISP to my laptop (TinyUSB/USB)
No smoke came out, so, using Git cmd i went to the file Makefile

I started to program it but at the last command i had this error message
avrdude: error: usbtiny_transmit: usb_control_msg: sending control message failed, win error: Un périphérique attaché au système ne fonctionne pas correctement.
I had two options: my board or the programmed FabISP had a problem
I first changed the programmed ISP, and everything went well, i still don't know what was wrong with the other FabISP
C:\Users\adminpatxi\Desktop\ISP\fabISP_mac.0.8.2_firmware>make clean
rm -f main.hex main.lst main.obj main.cof main.list main.map main.eep.hex main.e lf *.o usbdrv/*.o main.s usbdrv/oddebug.s usbdrv/usbdrv.s
C:\Users\adminpatxi\Desktop\ISP\fabISP_mac.0.8.2_firmware>make hex
avr-gcc -Wall -Os -DF_CPU=20000000 -Iusbdrv -I. -DDEBUG_LEVEL=0 -mmcu=atti ny44 -c usbdrv/usbdrv.c -o usbdrv/usbdrv.o avr-gcc -Wall -Os -DF_CPU=20000000 -Iusbdrv -I. -DDEBUG_LEVEL=0 -mmcu=atti ny44 -x assembler-with-cpp -c usbdrv/usbdrvasm.s -o usbdrv/usbdrvasm.o avr-gcc -Wall -Os -DF_CPU=20000000 -Iusbdrv -I. -DDEBUG_LEVEL=0 -mmcu=atti ny44 -c usbdrv/oddebug.c -o usbdrv/oddebug.o avr-gcc -Wall -Os -DF_CPU=20000000 -Iusbdrv -I. -DDEBUG_LEVEL=0 -mmcu=atti ny44 -c main.c -o main.o avr-gcc -Wall -Os -DF_CPU=20000000 -Iusbdrv -I. -DDEBUG_LEVEL=0 -mmcu=atti ny44 -o main.elf usbdrv/usbdrv.o usbdrv/usbdrvasm.o usbdrv/oddebug.o main.o rm -f main.hex main.eep.hex avr-objcopy -j .text -j .data -O ihex main.elf main.hex avr-size main.hex text data bss dec hex filename 0 2050 0 2050 802 main.hex
C:\Users\adminpatxi\Desktop\ISP\fabISP_mac.0.8.2_firmware>make fuse
avrdude -c usbtiny -p attiny44 -U hfuse:w:0xDF:m -U lfuse:w:0xFF:m avrdude: AVR device initialized and ready to accept instructions Reading | ################################################## | 100% 0.02s avrdude: Device signature = 0x1e9207 avrdude: reading input file "0xDF" avrdude: writing hfuse (1 bytes): Writing | ################################################## | 100% 0.02s avrdude: 1 bytes of hfuse written avrdude: verifying hfuse memory against 0xDF: avrdude: load data hfuse data from input file 0xDF: avrdude: input file 0xDF contains 1 bytes avrdude: reading on-chip hfuse data: Reading | ################################################## | 100% 0.00s avrdude: verifying ... avrdude: 1 bytes of hfuse verified avrdude: reading input file "0xFF" avrdude: writing lfuse (1 bytes): Writing | ################################################## | 100% 0.02s avrdude: 1 bytes of lfuse written avrdude: verifying lfuse memory against 0xFF: avrdude: load data lfuse data from input file 0xFF: avrdude: input file 0xFF contains 1 bytes avrdude: reading on-chip lfuse data: Reading | ################################################## | 100% 0.00s avrdude: verifying ... avrdude: 1 bytes of lfuse verified avrdude: safemode: Fuses OK avrdude done. Thank you.
C:\Users\adminpatxi\Desktop\ISP\fabISP_mac.0.8.2_firmware>make program
avrdude -c usbtiny -p attiny44 -U flash:w:main.hex:i avrdude: AVR device initialized and ready to accept instructions Reading | ################################################## | 100% 0.02s avrdude: Device signature = 0x1e9207 avrdude: NOTE: FLASH memory has been specified, an erase cycle will be performed To disable this feature, specify the -D option. avrdude: erasing chip avrdude: reading input file "main.hex" avrdude: writing flash (2050 bytes): Writing | ################################################## | 100% 1.95s avrdude: 2050 bytes of flash written avrdude: verifying flash memory against main.hex: avrdude: load data flash data from input file main.hex: avrdude: input file main.hex contains 2050 bytes avrdude: reading on-chip flash data: Reading | ################################################## | 100% 1.14s avrdude: verifying ... avrdude: 2050 bytes of flash verified avrdude: safemode: Fuses OK avrdude done. Thank you. avrdude -c usbtiny -p attiny44 -U hfuse:w:0xDF:m -U lfuse:w:0xFF:m avrdude: AVR device initialized and ready to accept instructions Reading | ################################################## | 100% 0.03s avrdude: Device signature = 0x1e9207 avrdude: reading input file "0xDF" avrdude: writing hfuse (1 bytes): Writing | ################################################## | 100% 0.00s avrdude: 1 bytes of hfuse written avrdude: verifying hfuse memory against 0xDF: avrdude: load data hfuse data from input file 0xDF: avrdude: input file 0xDF contains 1 bytes avrdude: reading on-chip hfuse data: Reading | ################################################## | 100% 0.02s avrdude: verifying ... avrdude: 1 bytes of hfuse verified avrdude: reading input file "0xFF" avrdude: writing lfuse (1 bytes): Writing | ################################################## | 100% 0.02s avrdude: 1 bytes of lfuse written avrdude: verifying lfuse memory against 0xFF: avrdude: load data lfuse data from input file 0xFF: avrdude: input file 0xFF contains 1 bytes avrdude: reading on-chip lfuse data: Reading | ################################################## | 100% 0.02s avrdude: verifying ... avrdude: 1 bytes of lfuse verified avrdude: safemode: Fuses OK avrdude done. Thank you.
To finish i desoldered the 0 ohms restistor and took the solder bridge away.