This week we are going to learn how to program a board with another board and experiment with the programation.
Connecting Boards
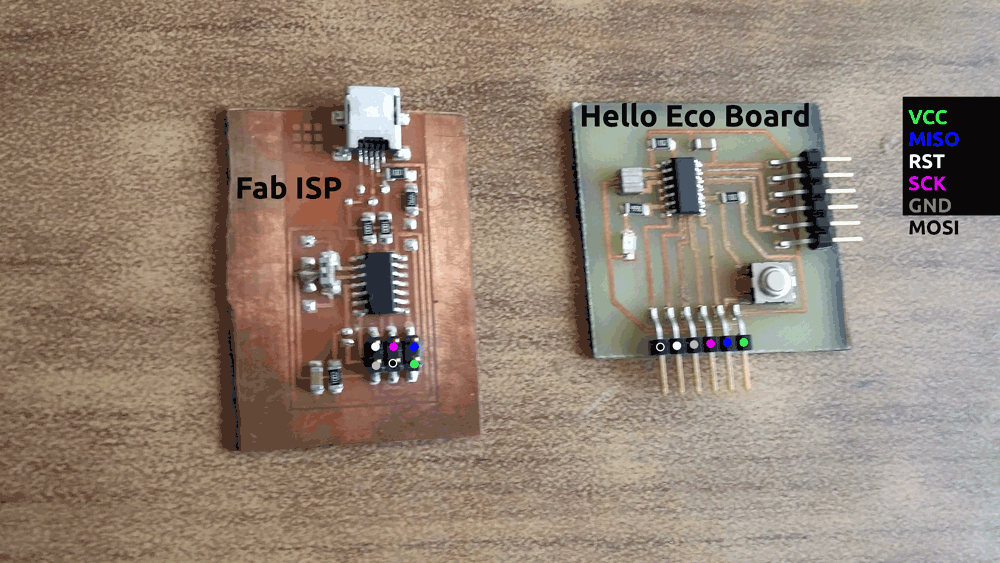
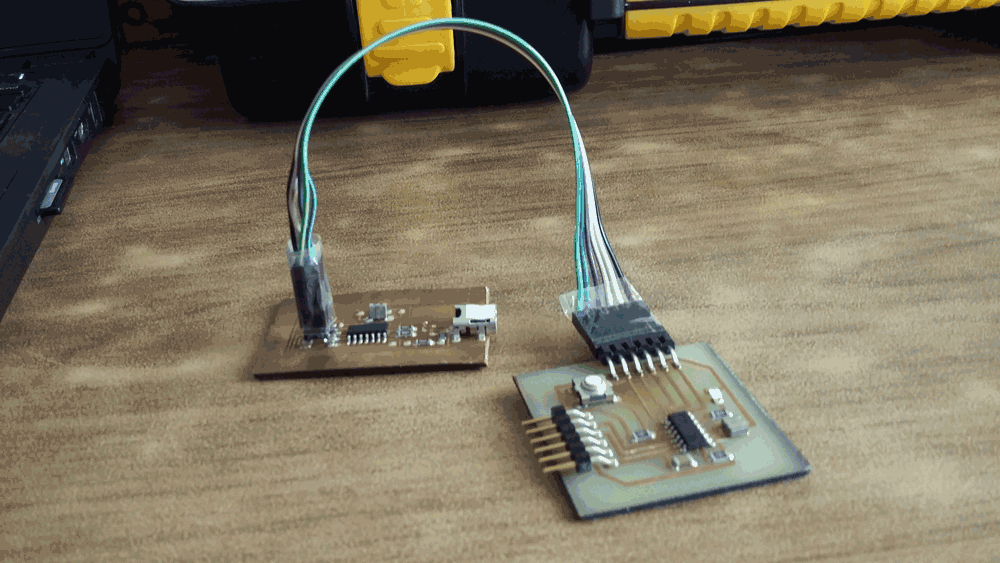
First we need to recognize our boards, and their connectors. Do not connect yet.
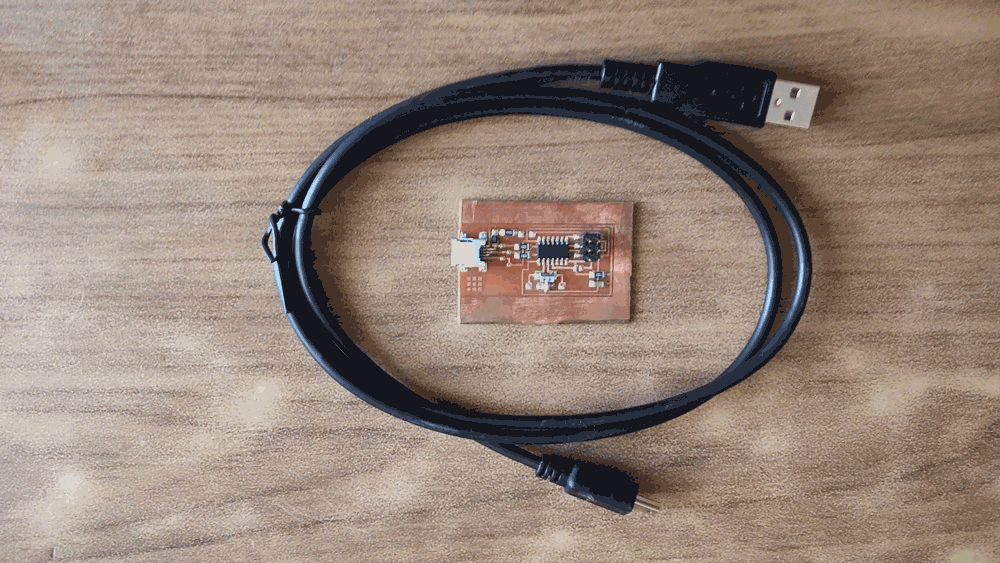
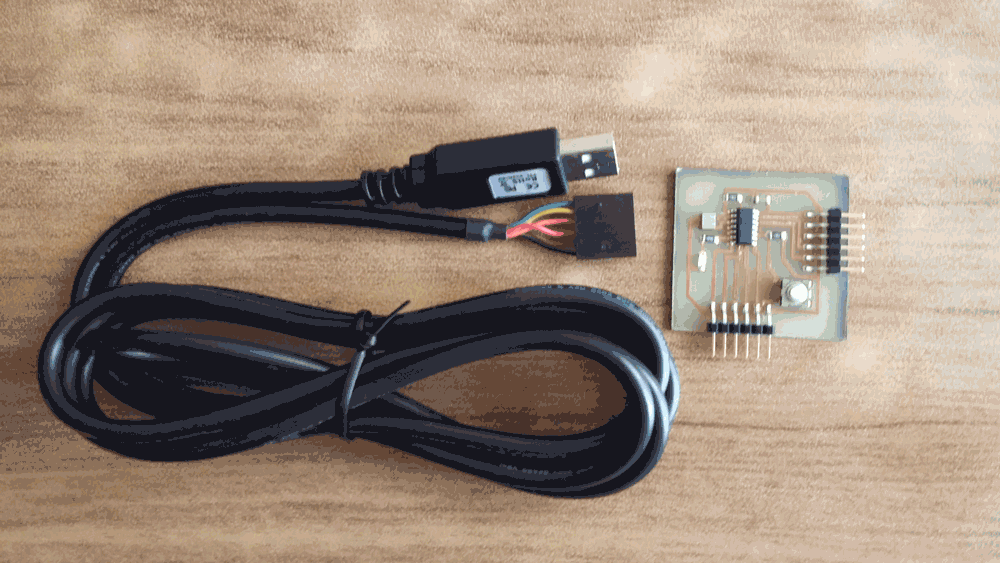
Then recognize the cables and what it will connect
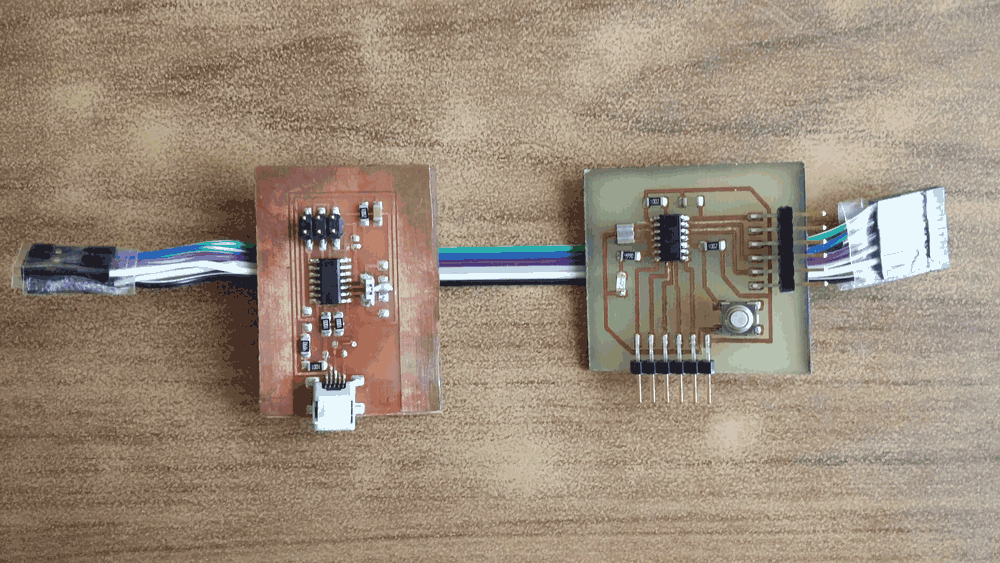
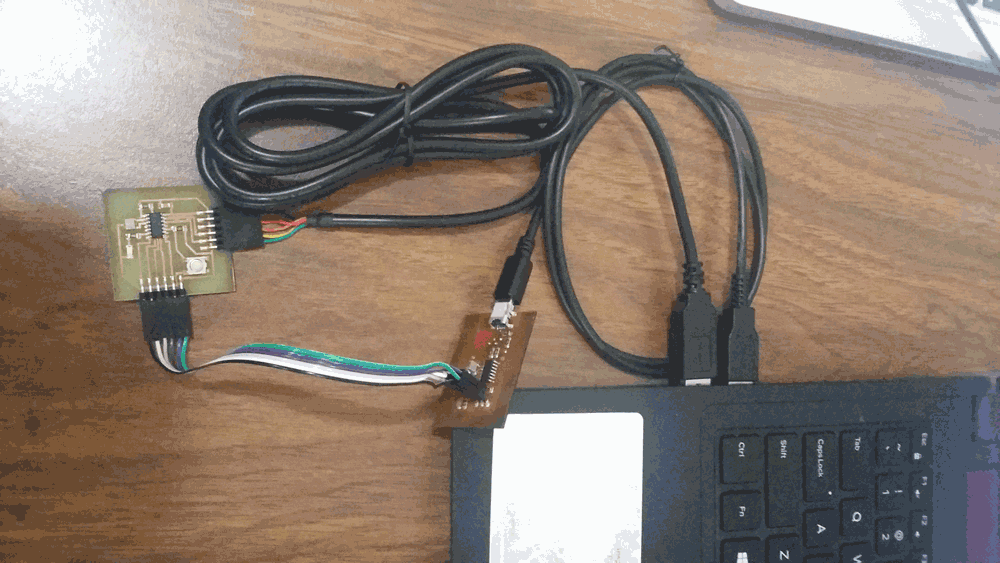
And now connect FabISP to Hello Eco Board using Ribbon Cable. Follow the connections indicated on the first image. FabISP VCC to Hello VCC, FabISP MISO to Hello MISO, and so on. And connect both boards to the PC with their respective cables.
Preparing IDE
We need to follow this steps:
https://raw.githubusercontent.com/damellis/attiny/ide-1.6.x-boards-manager/package_damellis_attiny_index.json
View larger
Programming Something
Due to our board only have one input (switch) and one output (led) we are going to use a simple example of ArduinoIDE. We need to go to File > Examples > Digital > Button.
First thing we have to change are the switch and led pins, by default they are assigned to pin 2 and 13 and we have to change them by the number of the Port A that they are connected, in my case the button is connected to PortA 3 and LED is conected to PortA 7, so I have to replace the striked lines below.
// constants won't change. They're used here to
// set pin numbers:
// variables will change:
int buttonState = 0; // variable for reading the pushbutton status
void setup() {
// initialize the LED pin as an output:
pinMode(ledPin, OUTPUT);
// initialize the pushbutton pin as an input:
pinMode(buttonPin, INPUT);
}
void loop() {
// read the state of the pushbutton value:
buttonState = digitalRead(buttonPin);
// check if the pushbutton is pressed.
// if it is, the buttonState is HIGH:
if (buttonState == HIGH) {
// turn LED on:
digitalWrite(ledPin, HIGH);
} else {
// turn LED off:
digitalWrite(ledPin, LOW);
}
}
const int buttonPin = 3;
const int ledPin = 7;
int buttonState = 0; void setup() {
pinMode(ledPin, OUTPUT);
pinMode(buttonPin, INPUT);
}
void loop() {
buttonState = digitalRead(buttonPin);
if (buttonState == HIGH) {
digitalWrite(ledPin, HIGH);
} else {
digitalWrite(ledPin, LOW);
}
}
The program above will turn off the LED if you push the button. If you want to turn on the LED if you push the button you need to make this changes:
const int buttonPin = 3;
const int ledPin = 7;
int buttonState = 0; void setup() {
pinMode(ledPin, OUTPUT);
pinMode(buttonPin, INPUT);
}
void loop() {
buttonState = digitalRead(buttonPin);
if (buttonState == HIGH) {
digitalWrite(ledPin, HIGH);
} else {
digitalWrite(ledPin, LOW);
}
}
const int buttonPin = 3;
const int ledPin = 7;
int buttonState = 0; void setup() {
pinMode(ledPin, OUTPUT);
pinMode(buttonPin, INPUT);
}
void loop() {
buttonState = digitalRead(buttonPin);
if (buttonState == LOW) {
digitalWrite(ledPin, HIGH);
} else {
digitalWrite(ledPin, LOW);
}
}
And finally we code a program to blink one more time than last one until it make five blinks and reset. It means that first time will blink only one time, second time will blink two times and so on. This is the code:
const int buttonPin = 3;
const int ledPin = 7;
int n = 1;
int i = 0;
int buttonState = 0;
void setup() {
pinMode(ledPin, OUTPUT);
pinMode(buttonPin, INPUT);
}
void loop() {
buttonState = digitalRead(buttonPin);
if (buttonState == LOW) {
while (i < n) {
digitalWrite(ledPin, HIGH);
delay(1000);
digitalWrite(ledPin, LOW);
delay(1000);
i++;
}
if (n < 5) {
n++;
i = 0;
} else {
n = 1;
i = 0;
}
} else {
digitalWrite(ledPin, LOW);
}
}
Week 8 - Embedded Programming from Ivan López on Vimeo.
Sponsors