Week 16 - Interface and Application Programming
This week's assignment was:
- Write an application that interfaces with an input
and/or output device that you made, comparing as many tool options as
possible.
First I decided to
make a program/app that I will use in my final project. It will be
linked to the device that I made “output” from a previous week.
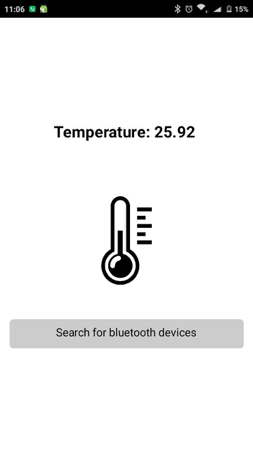
The program is a temperature sensor that will measure the water
temperate after the distillation in the extractor. The program that I
used is App Inventor. I did not know anything about App Inventor,
so a Guru taught me the basic tools.
I tried to make an android interface to interact with the
Arduino. I have chosen the mobile platform due to its wide spread use.
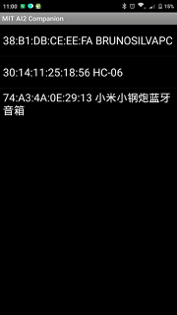
I intend to use a Bluetooth module for this assignment to speak to the
board and the phone. Since I have an IPhone, I used the Guru’s phone,
which is Android to run the App.
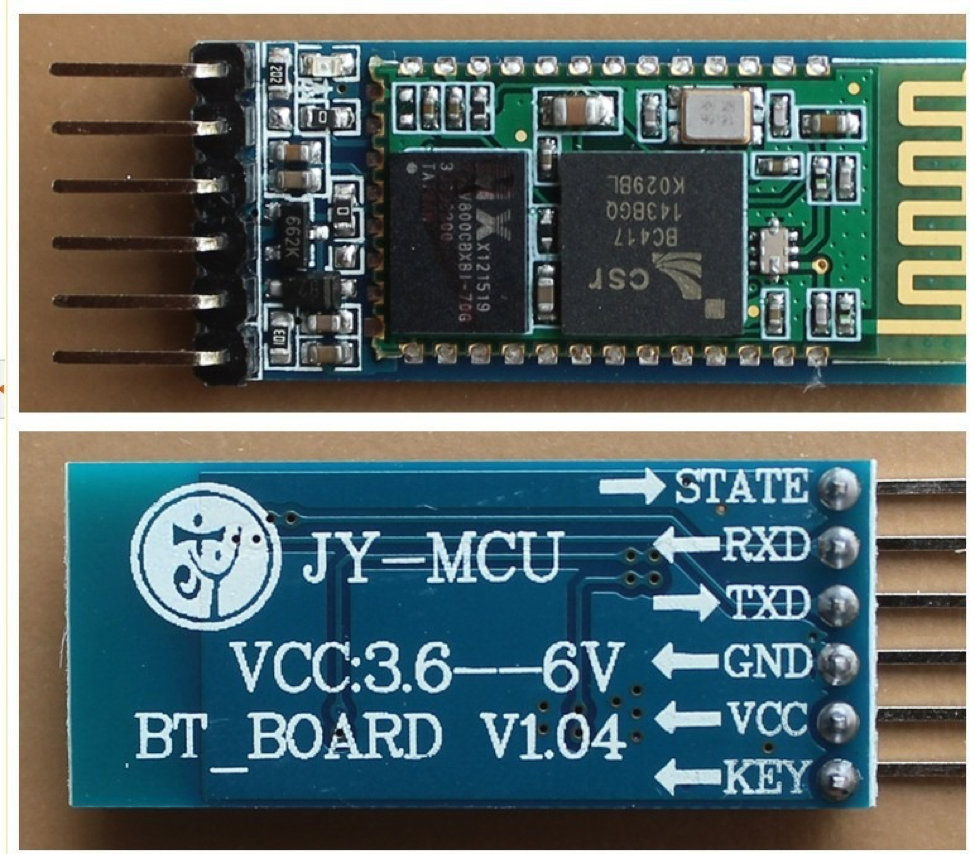
Bluetooth module HC-05
HC-05 module is an easy to use Bluetooth SPP (Serial Port Protocol)
module, designed for transparent wireless serial connection setup.
There is lot of information regarding the pinouts and usage on the
internet. A few useful links are
itead.cc/HC-05 and
developer.mbed.
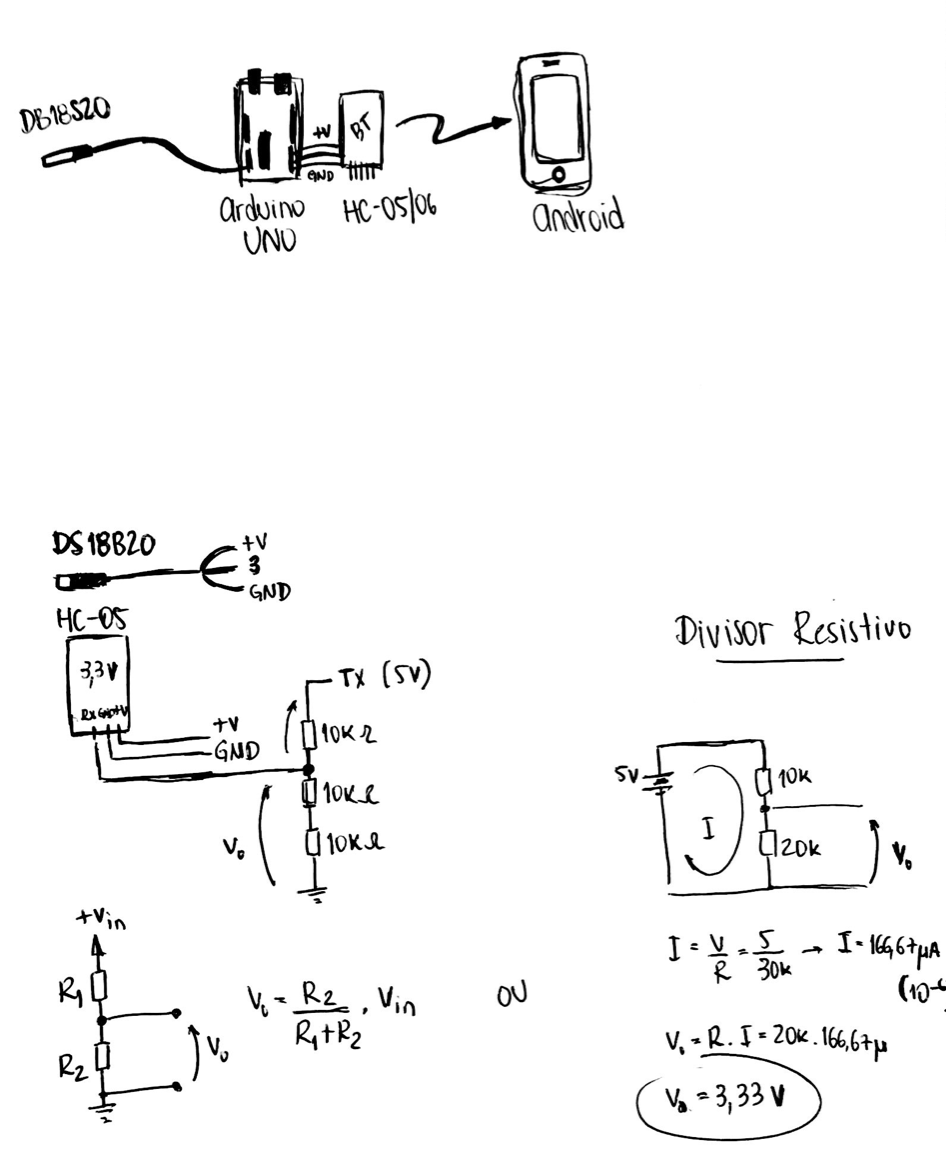
Below is a schematic of the Project:
At first I couldn’t
think of a way to make the thermometer work with my project. So, I sat
down with one of our gurus and he drew a schematic sketch to help me
understand how the thermometer would work with an app and my project.
When we worked together he reminded me how to do the math since I had a
brief electrical course at my university. Bellow you can see the math
that was done. Basically, I had to figure out how many resistors I
would need for my Bluetooth device. After doing the math I concluded
that I needed three parallel resistors of 10K.
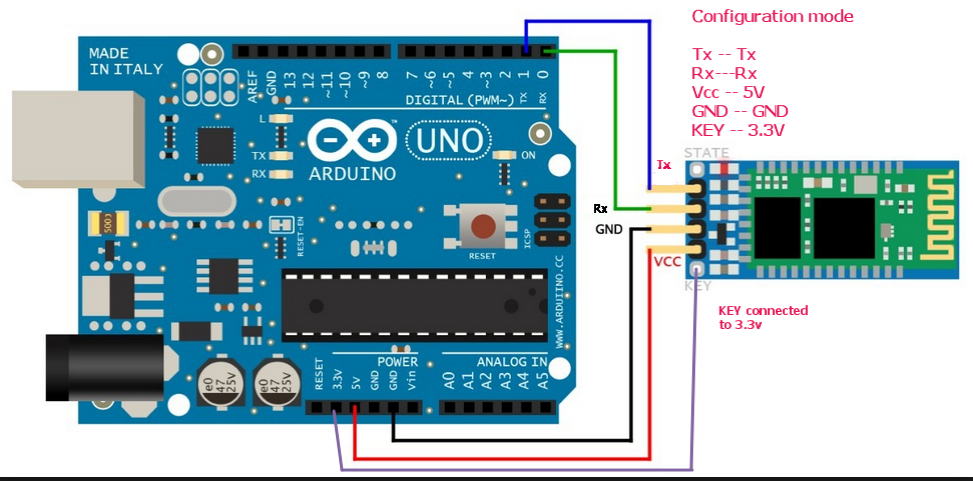
Below is a picture of how Adriano connects to the Bluetooth connector using the color-coded jumper cables.
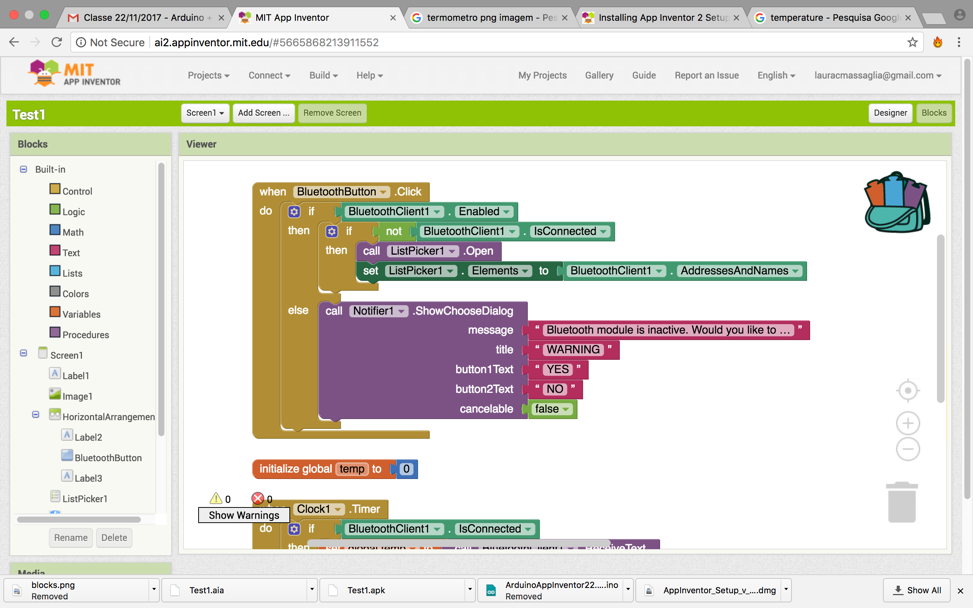
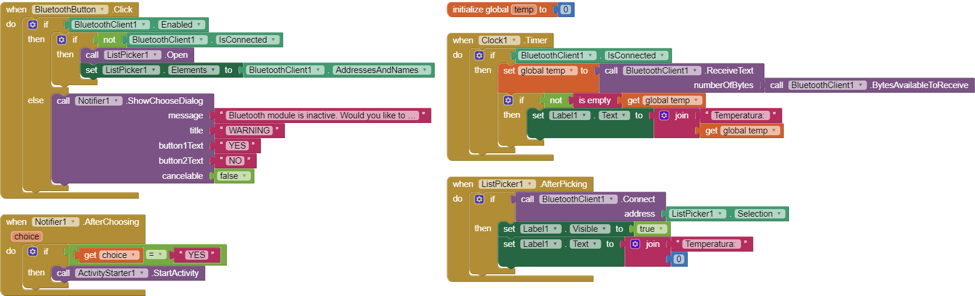
MIT Appinventor:
The Initial testing using Arduino:
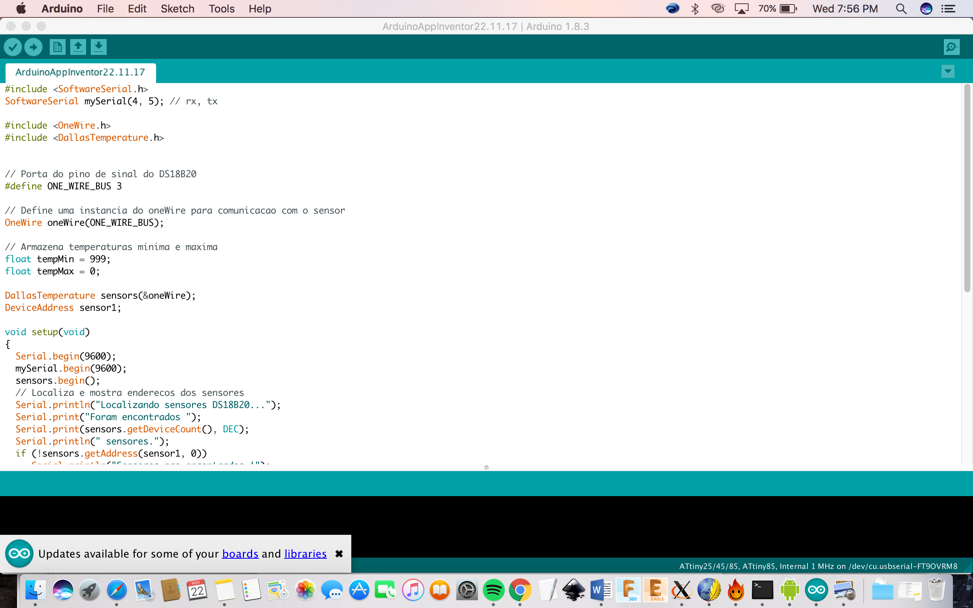
I programmed the board by using Arduino.
First I needed to download the Dallas Temperature at the Arduino
library by clicking: Sketch > Include library>
DallasTemperature.
Then the Guru helped me to program the board since I don’t have a lot of experience.
We worked together for a while figuring out the correct code for my specific project.
Below you can see the screen shots of my coding:
Video:
If you have any troubled understaniding how to do these steps here is another tutorial:
http://archive.fabacademy.org/archives/2017/fablabtrivandrum/students/312/exercise16.html
Project Files:
• Arduino code


