Week 15 - Composites
This weeks assignment is about making a composite with epoxy. Our Engineerring and Robotics club has already worked with
fiberglass and epoxy. We built a solar boat to participate the annual
SMUD Solar Boar Regatta
in the Rancho Seco Recreational Area near Sacramento. The boat is made out of plywood and to make it waterproof it is covered with
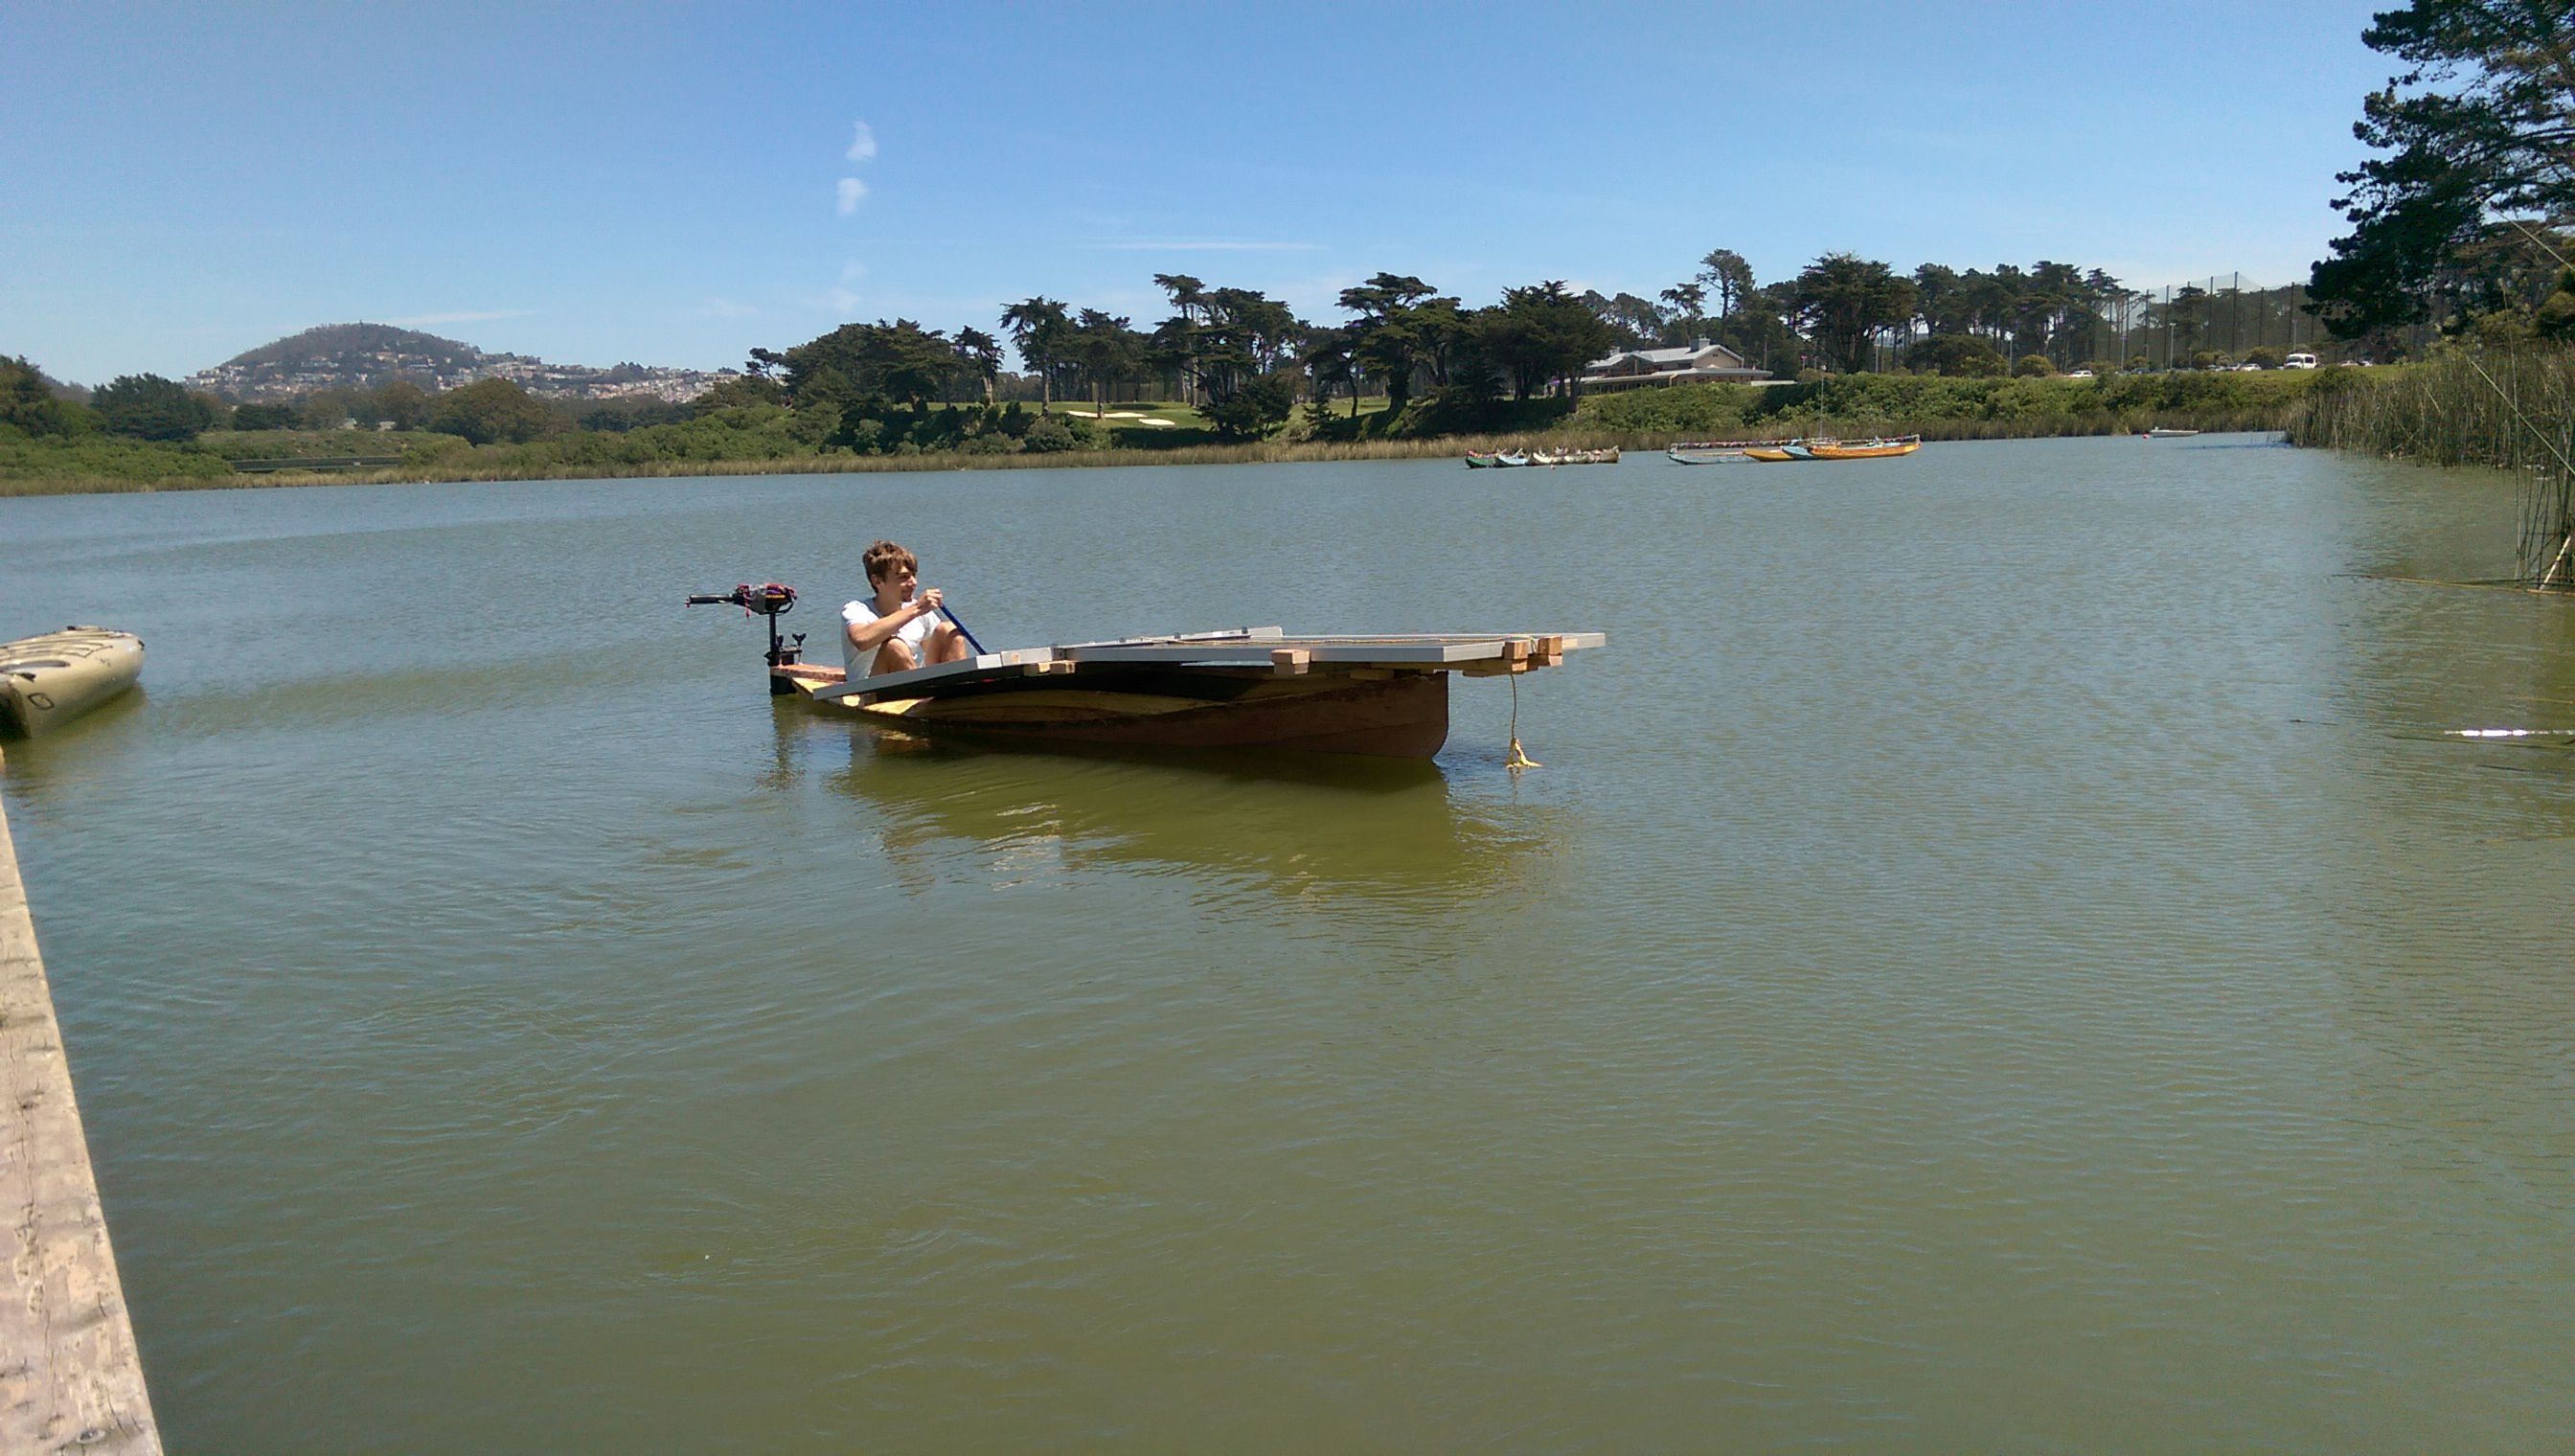
fiberglass and epoxy. Here it is in the lab without the solar-panels.
The first test in the lake Merced near San Francisco. It floats!
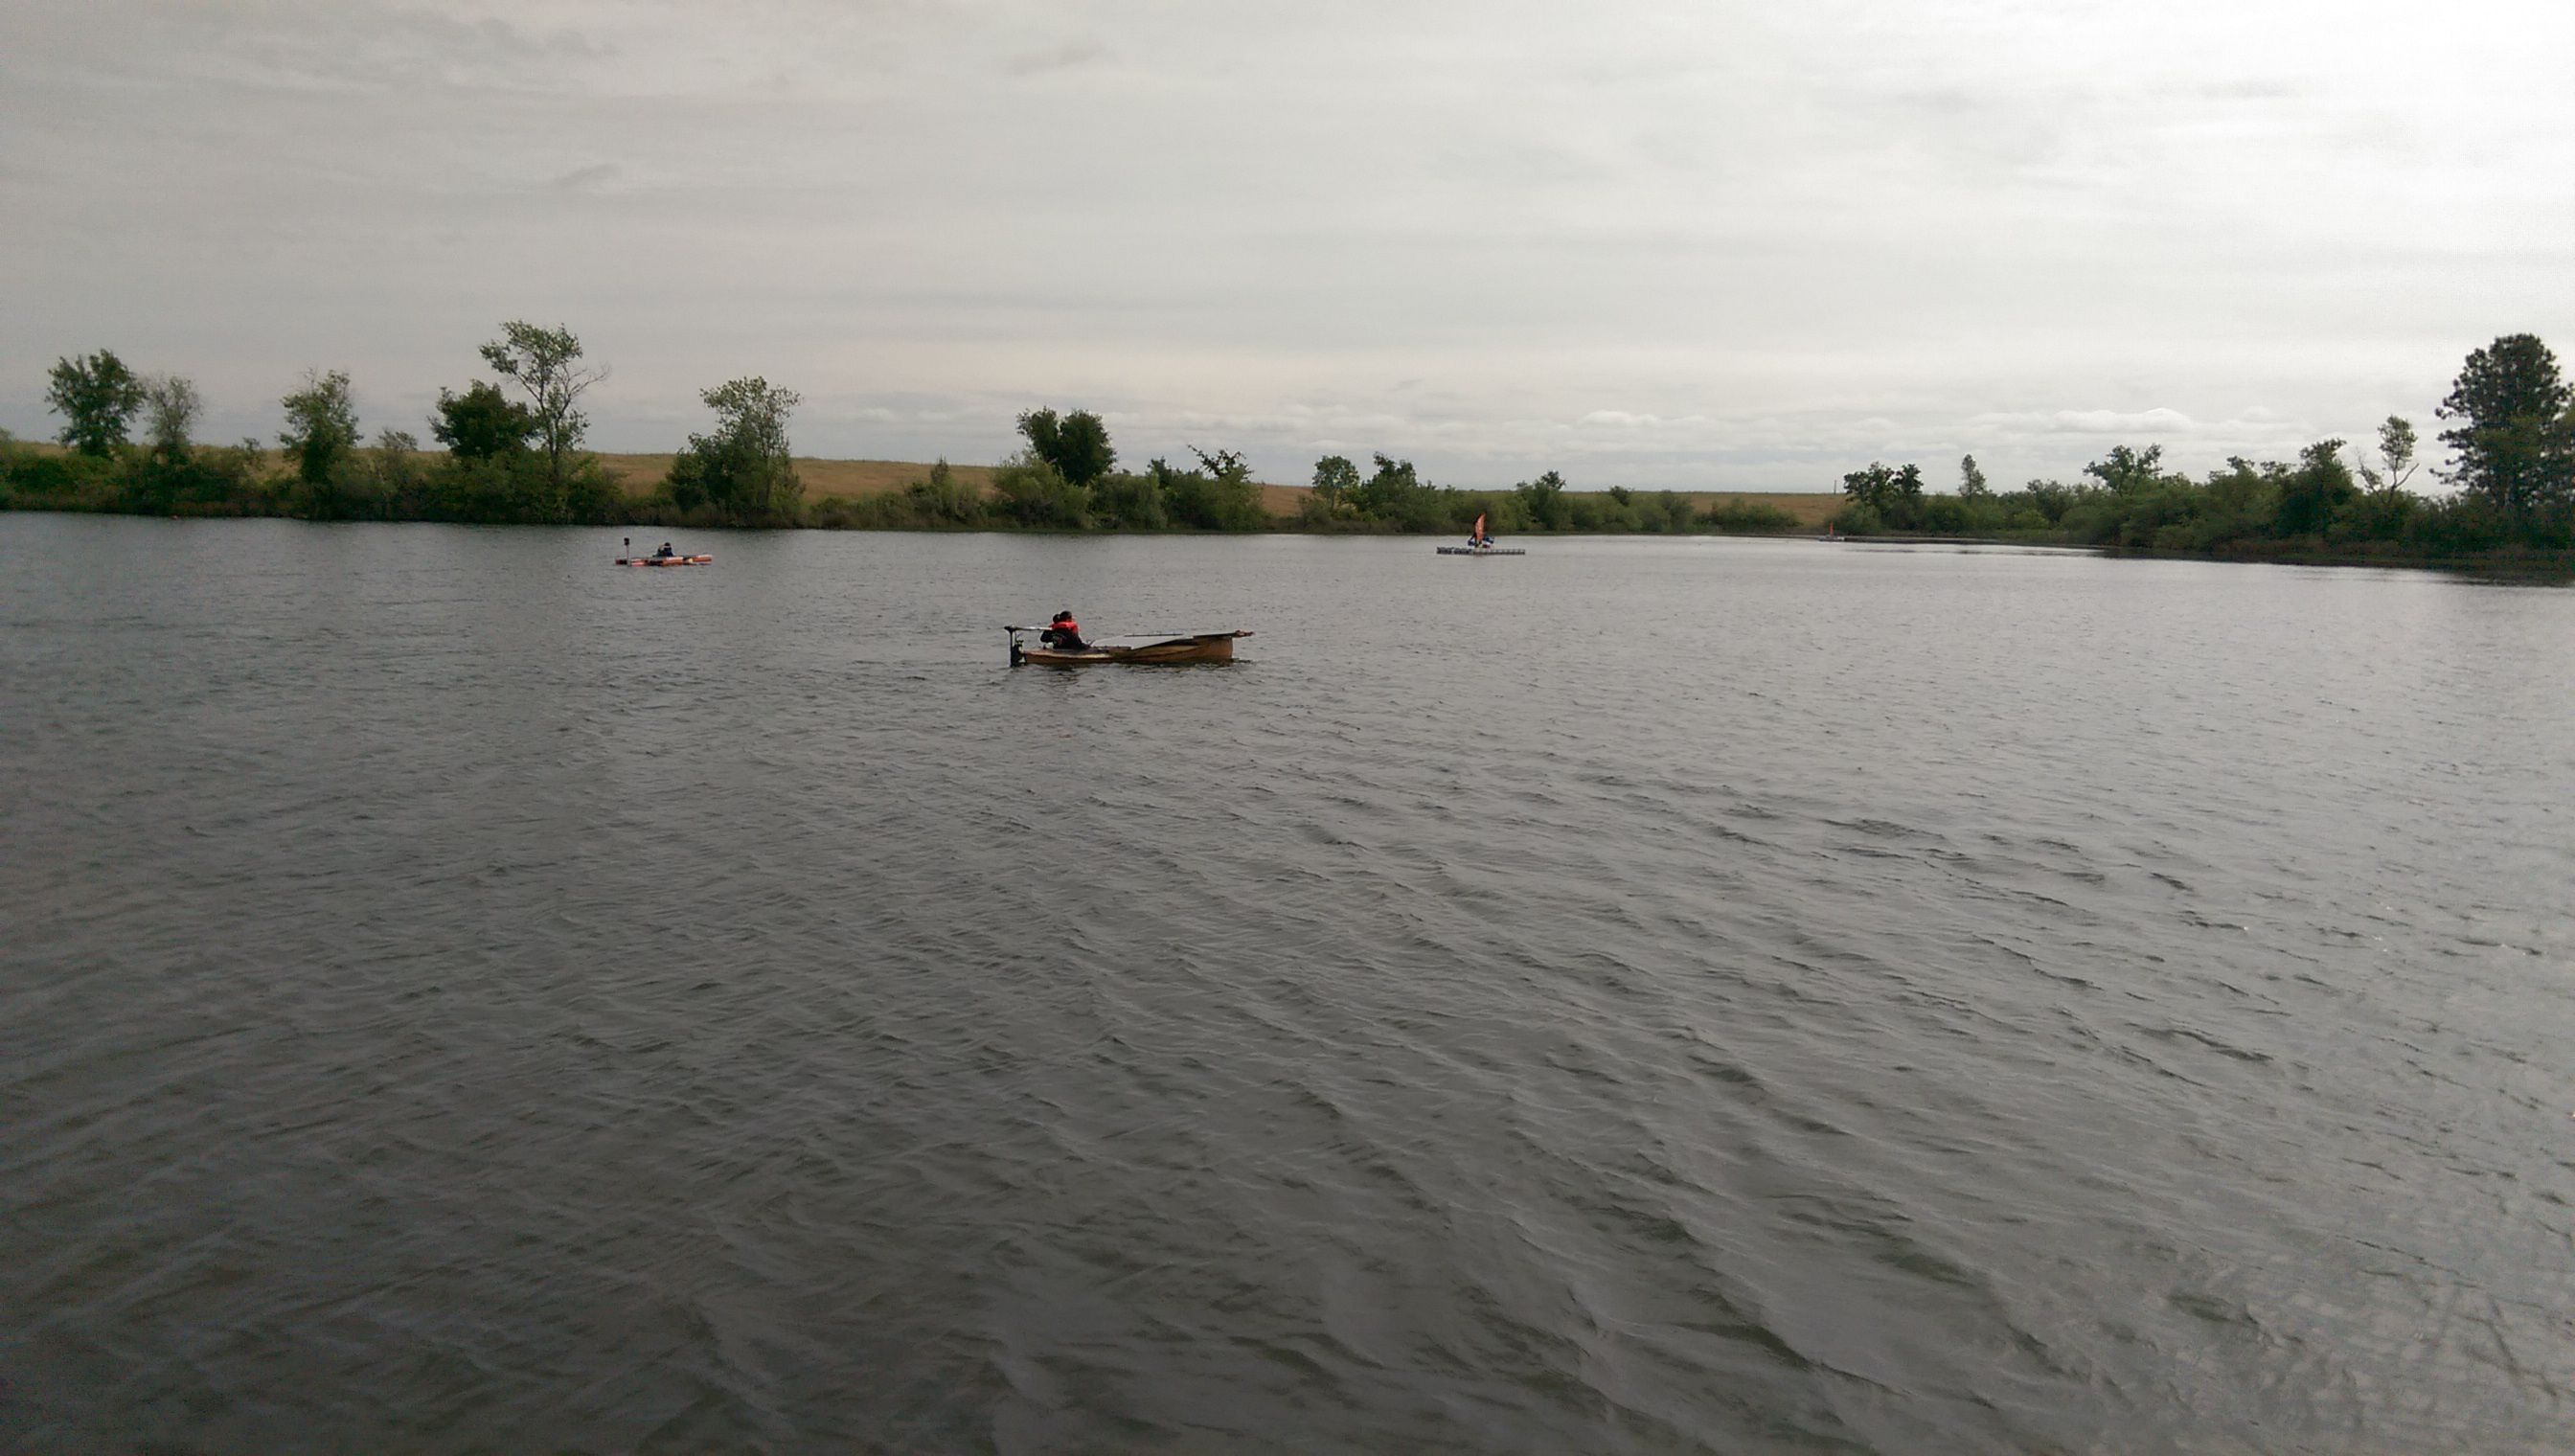
This is at the race in Rancho Seco, unfortunately not much sun but the boat did well.
Making a test coupon
For starters I will make some test with the fibergalss and epoxy. From the canoe I know, it is sturdy and waterproof.
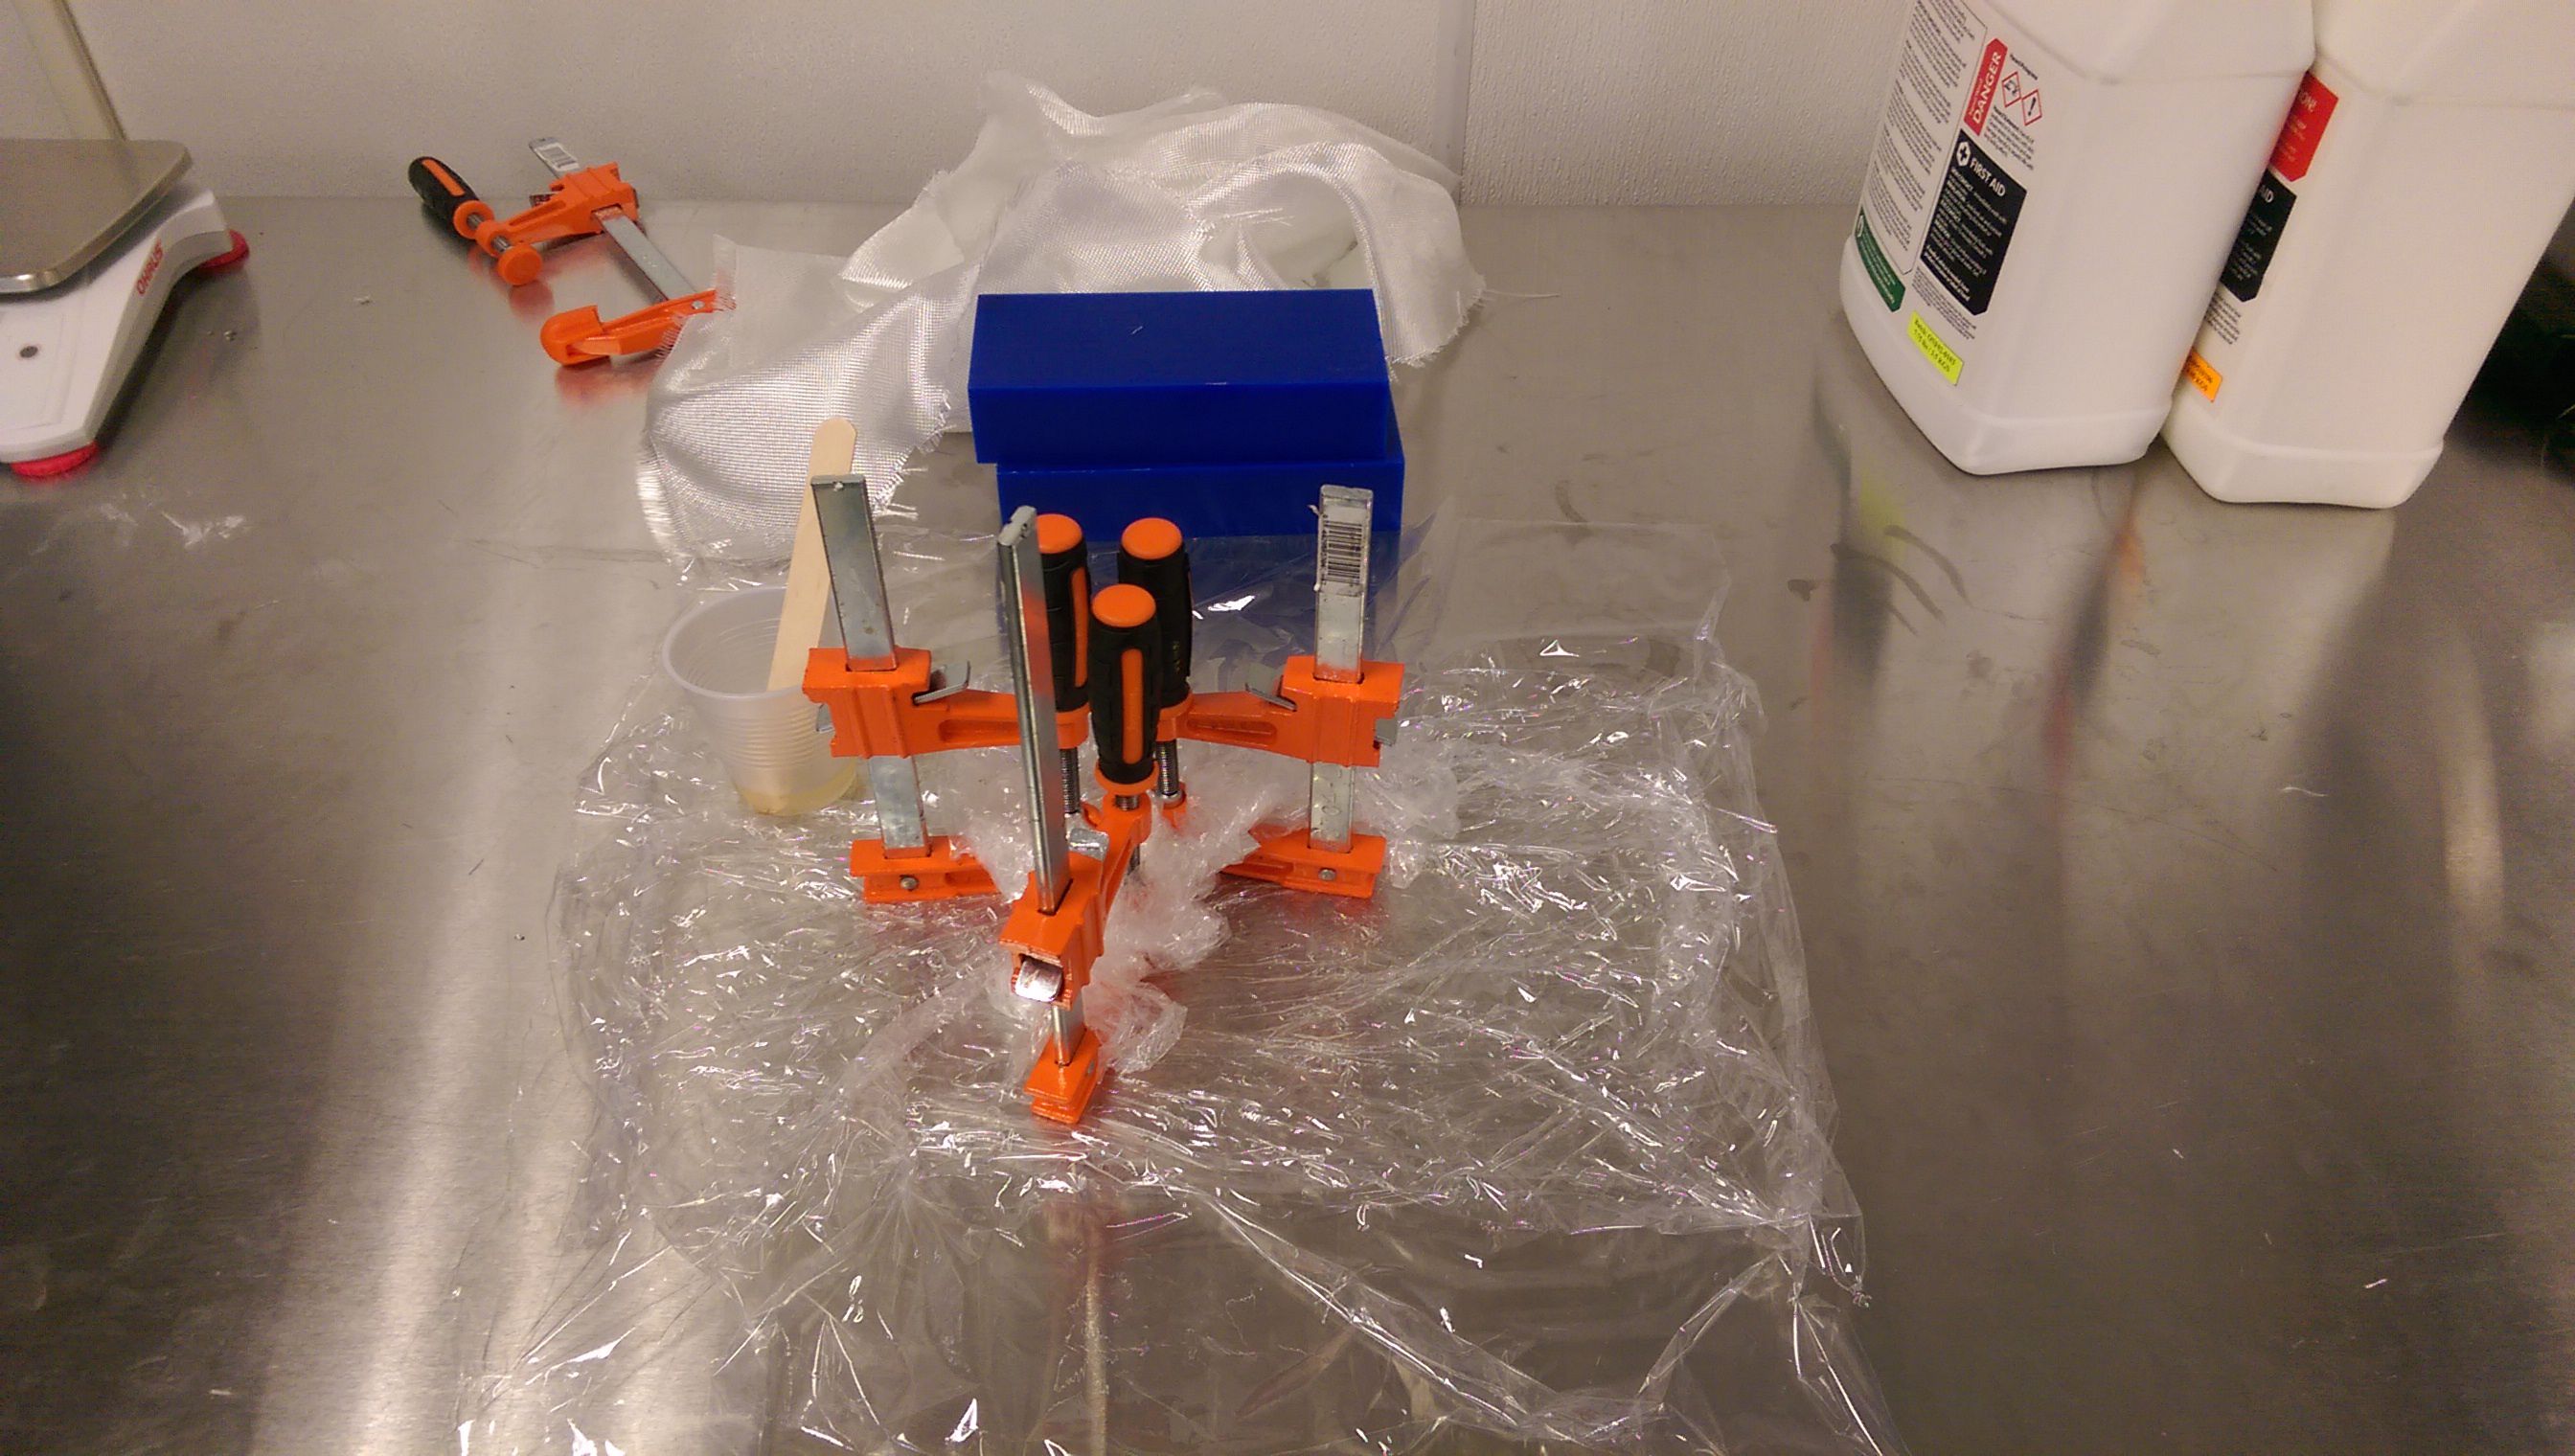
I am using this assignement to understand the material better. I will start with making a test coupon of the size
of 2 x 2 inches of seven layers of fiberglass and epoxy. We have several types of epoxy in the lab.
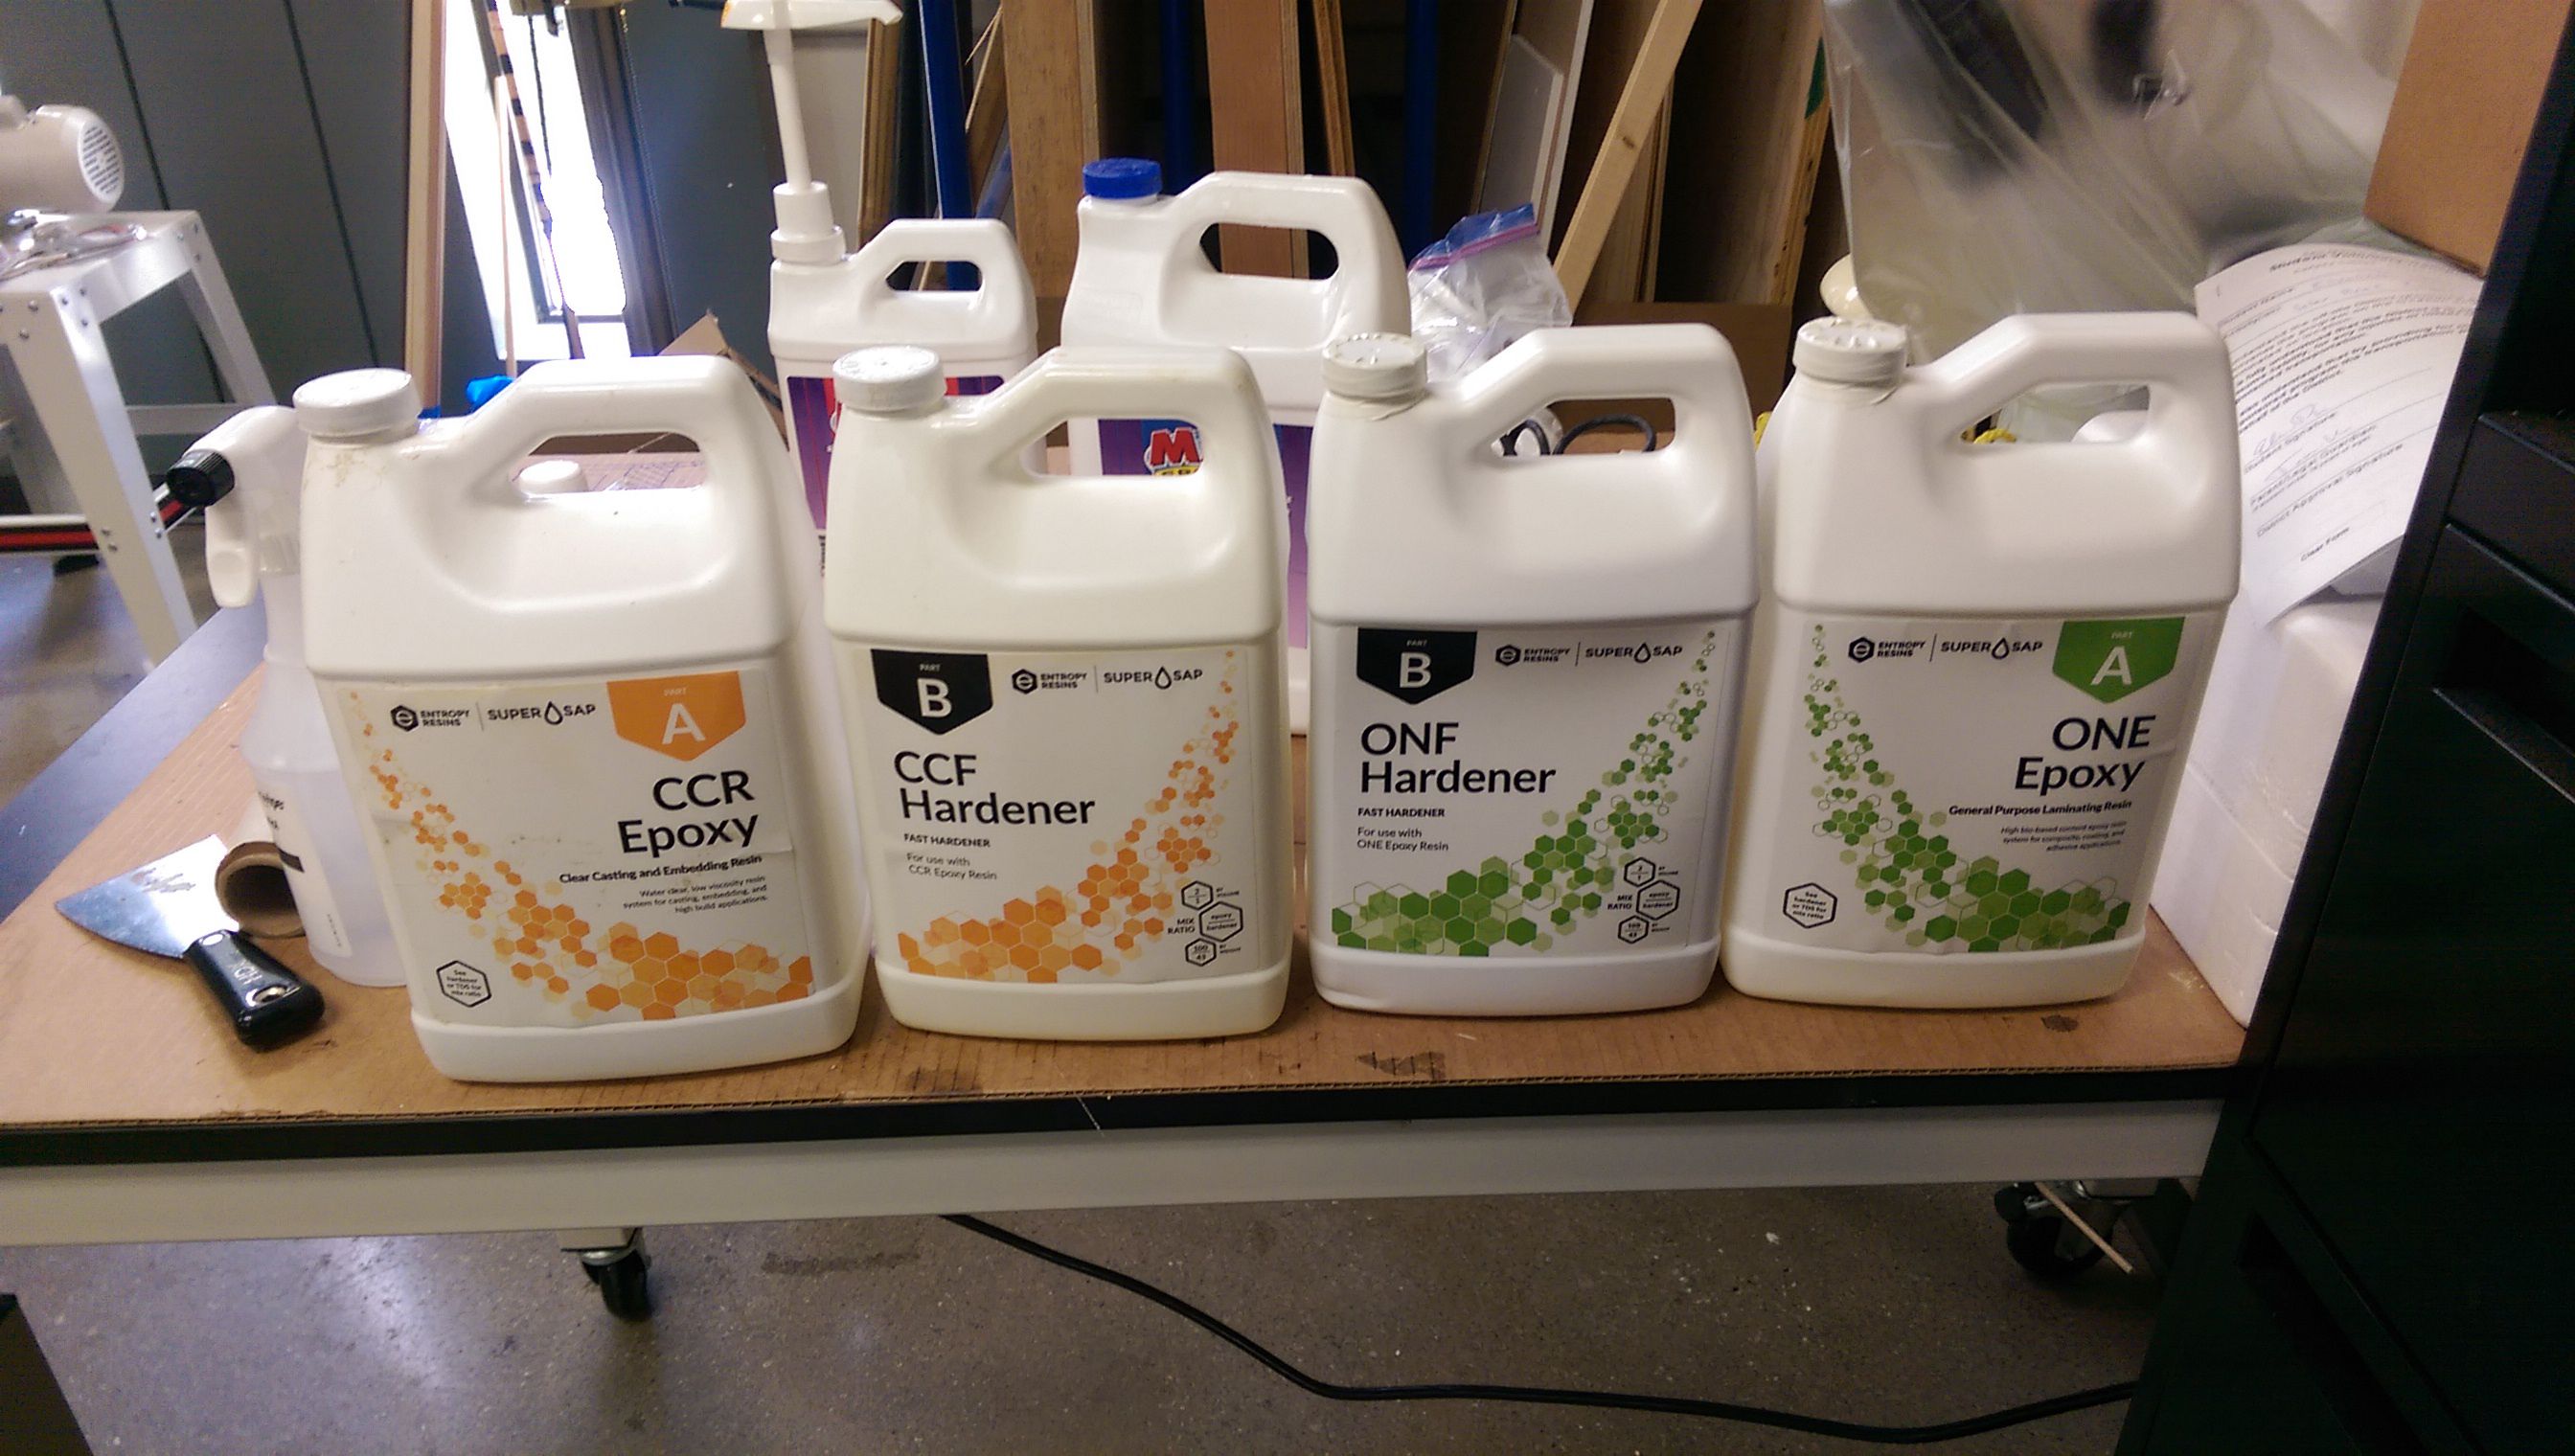
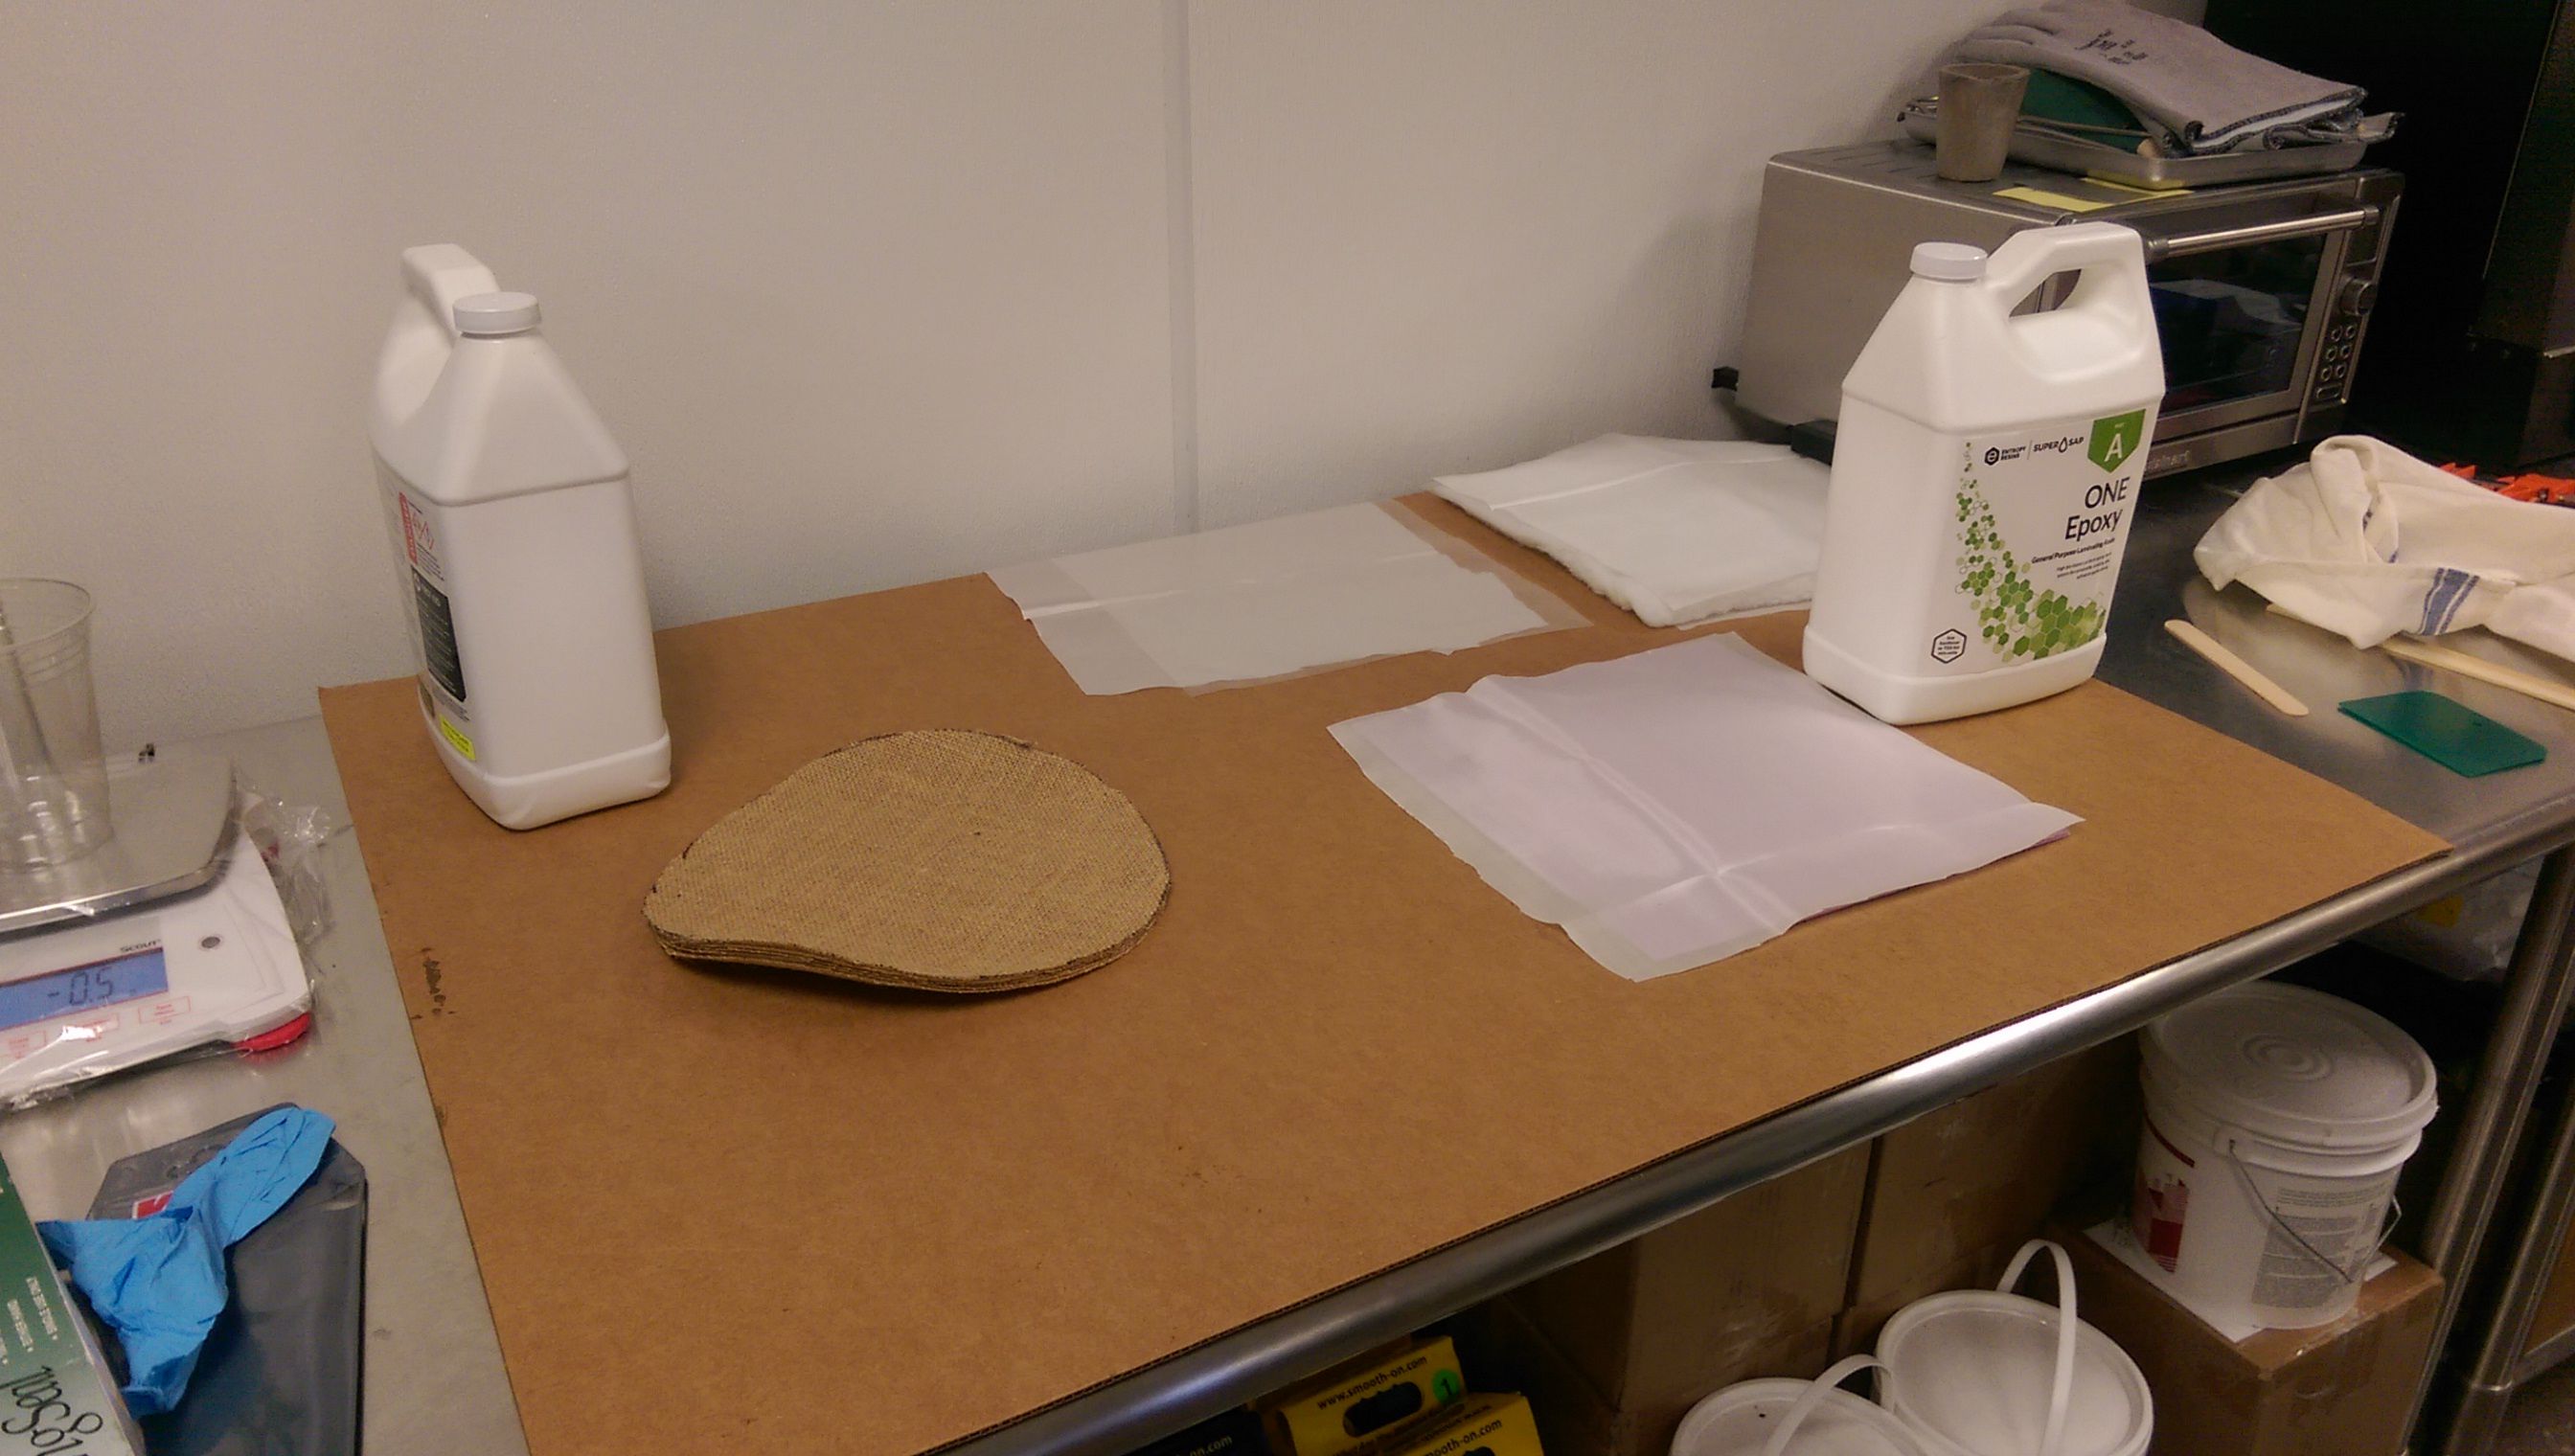
For the coupon I am choosing ONE Epoxy, since it is made for comnposites. Neil mentioned in class, the mixing ratio
epoxy-composite is around 50:50. The mixing ratio for hardener and resin is 1:2. I wnat to press the coupon between
two metal plates. I have to consider a way to let the unnecessary resin flow out, without making a mess in the lab.
he resin has the viscosity of heoney. No matter how careful you are, after a while it is everywhere.
A good solvent is alcohol, to remove it from tools and yourself. The recommended full curing time is 7 days.
Since it is a small batch I will check it after 24 hours.
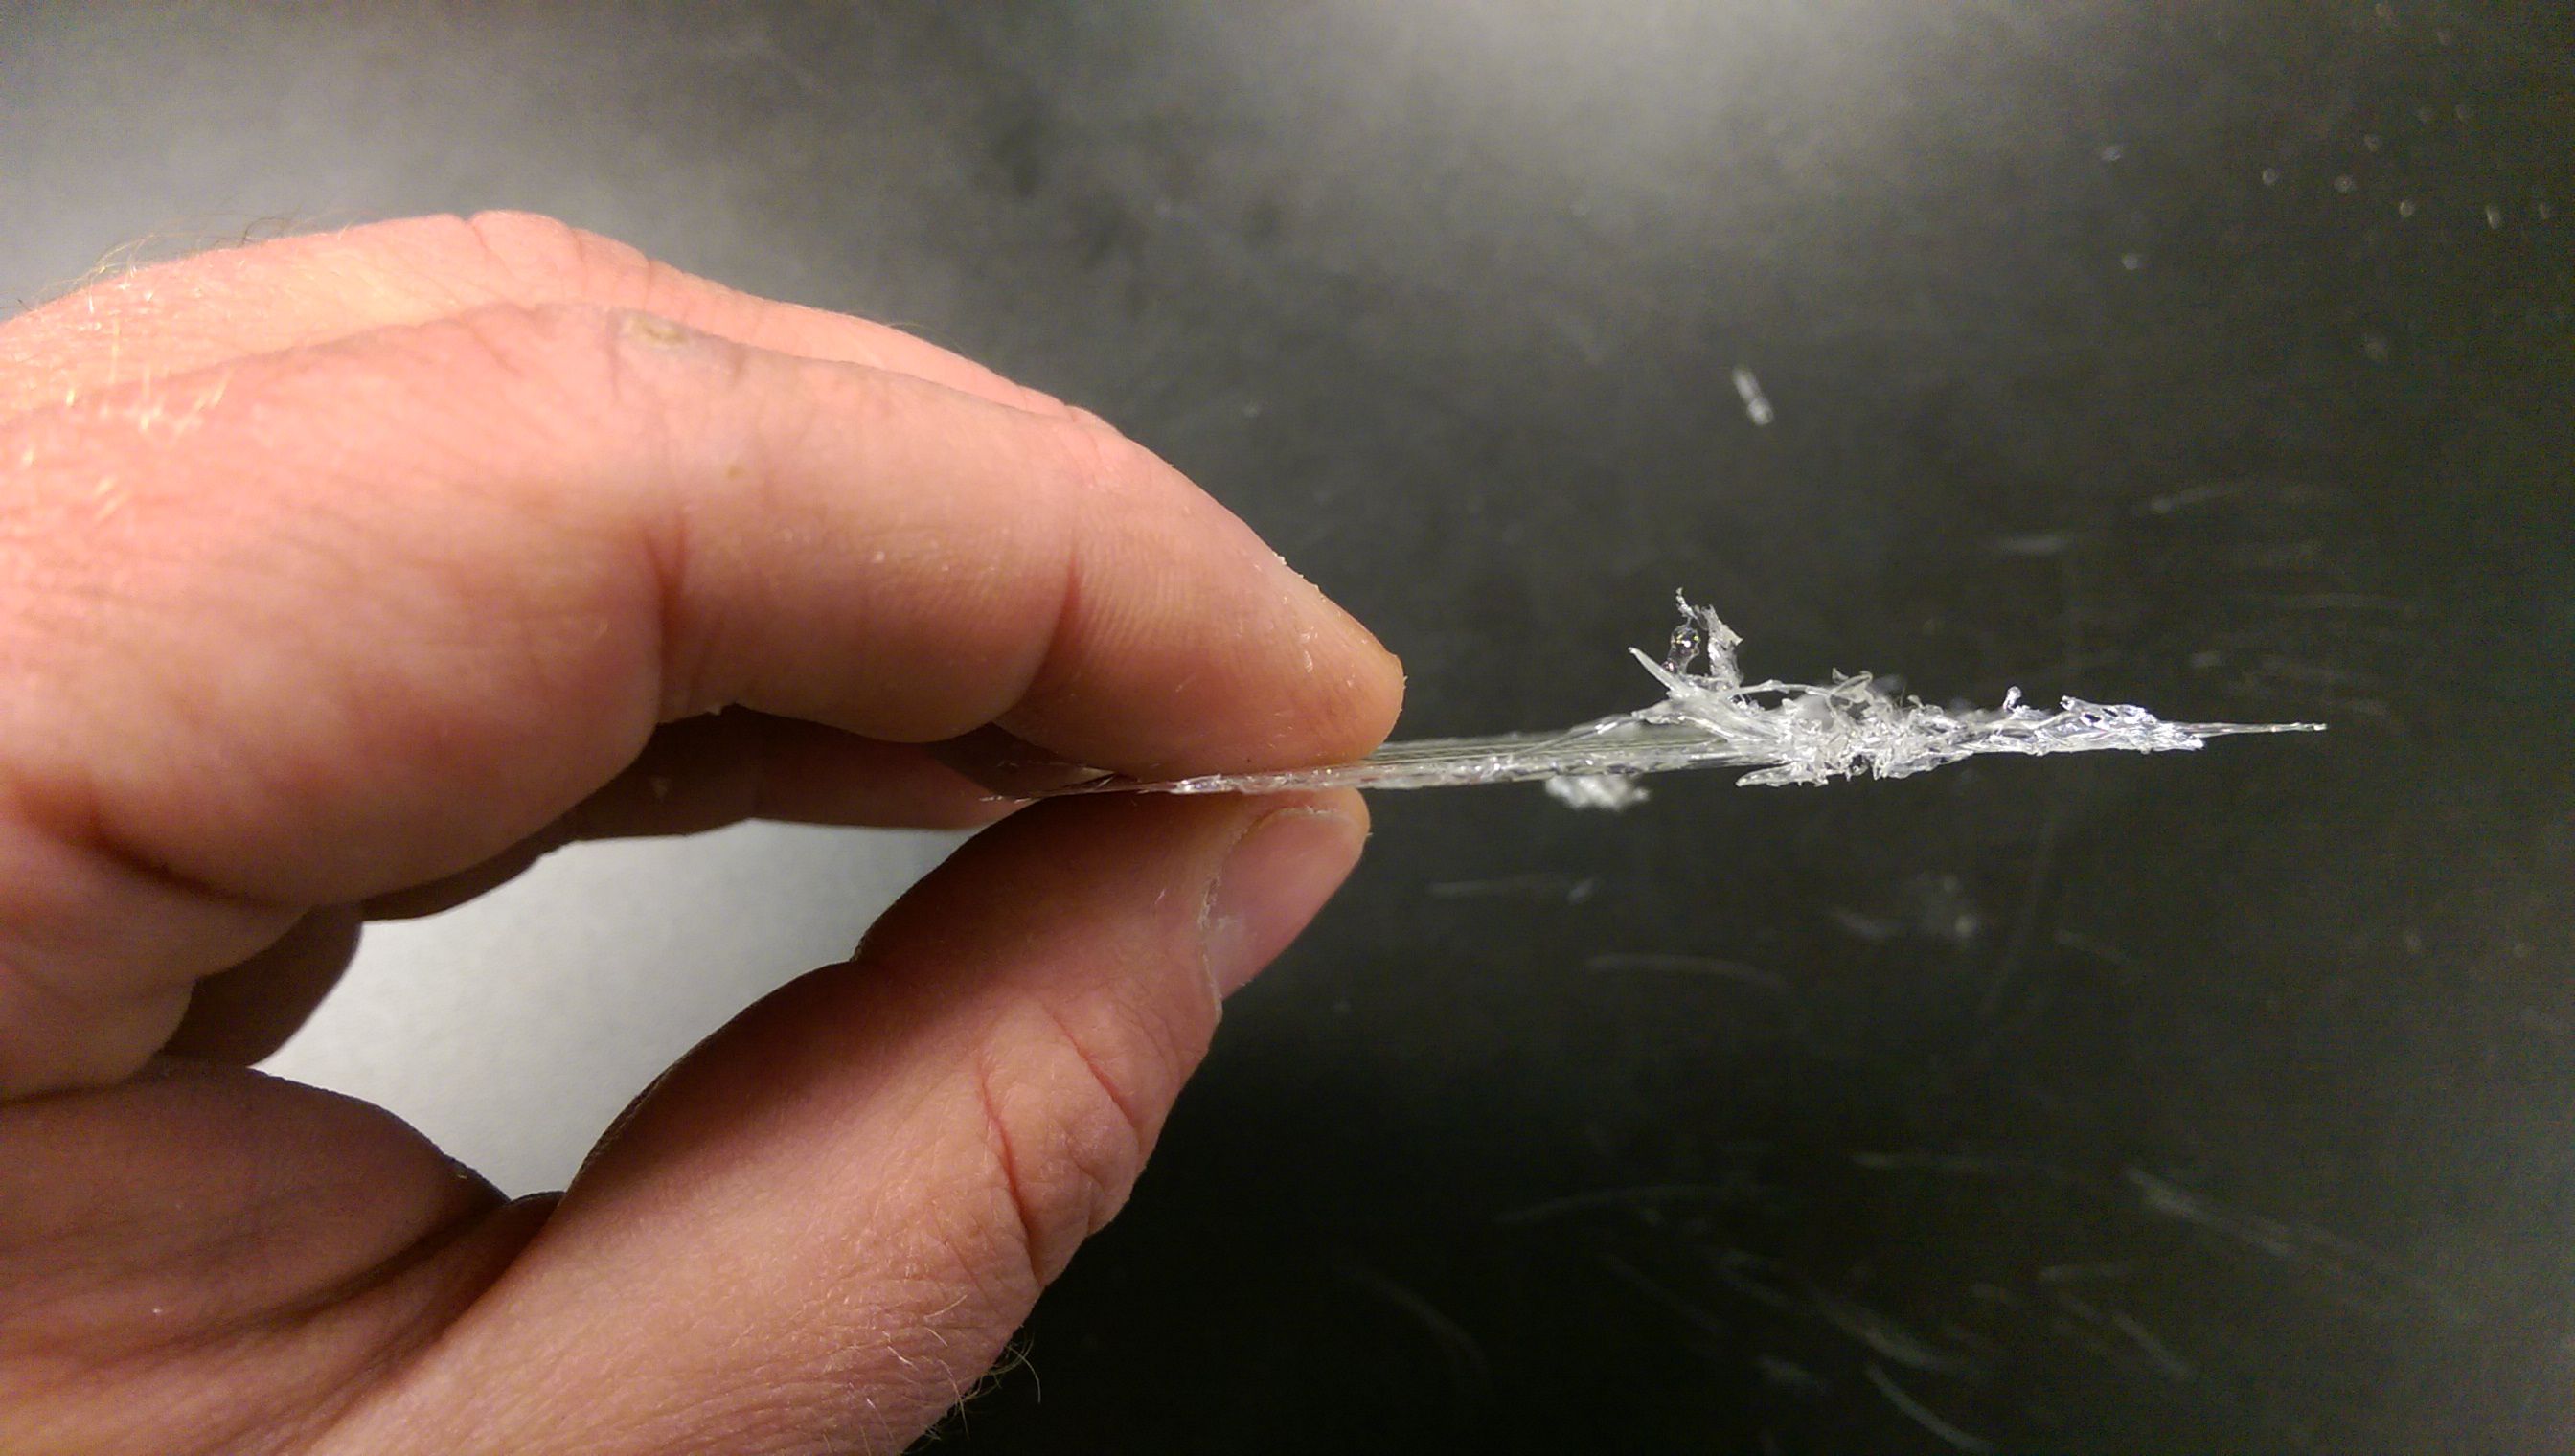
After curing my coupon it came out pretty well. Hard and tough and transparent.
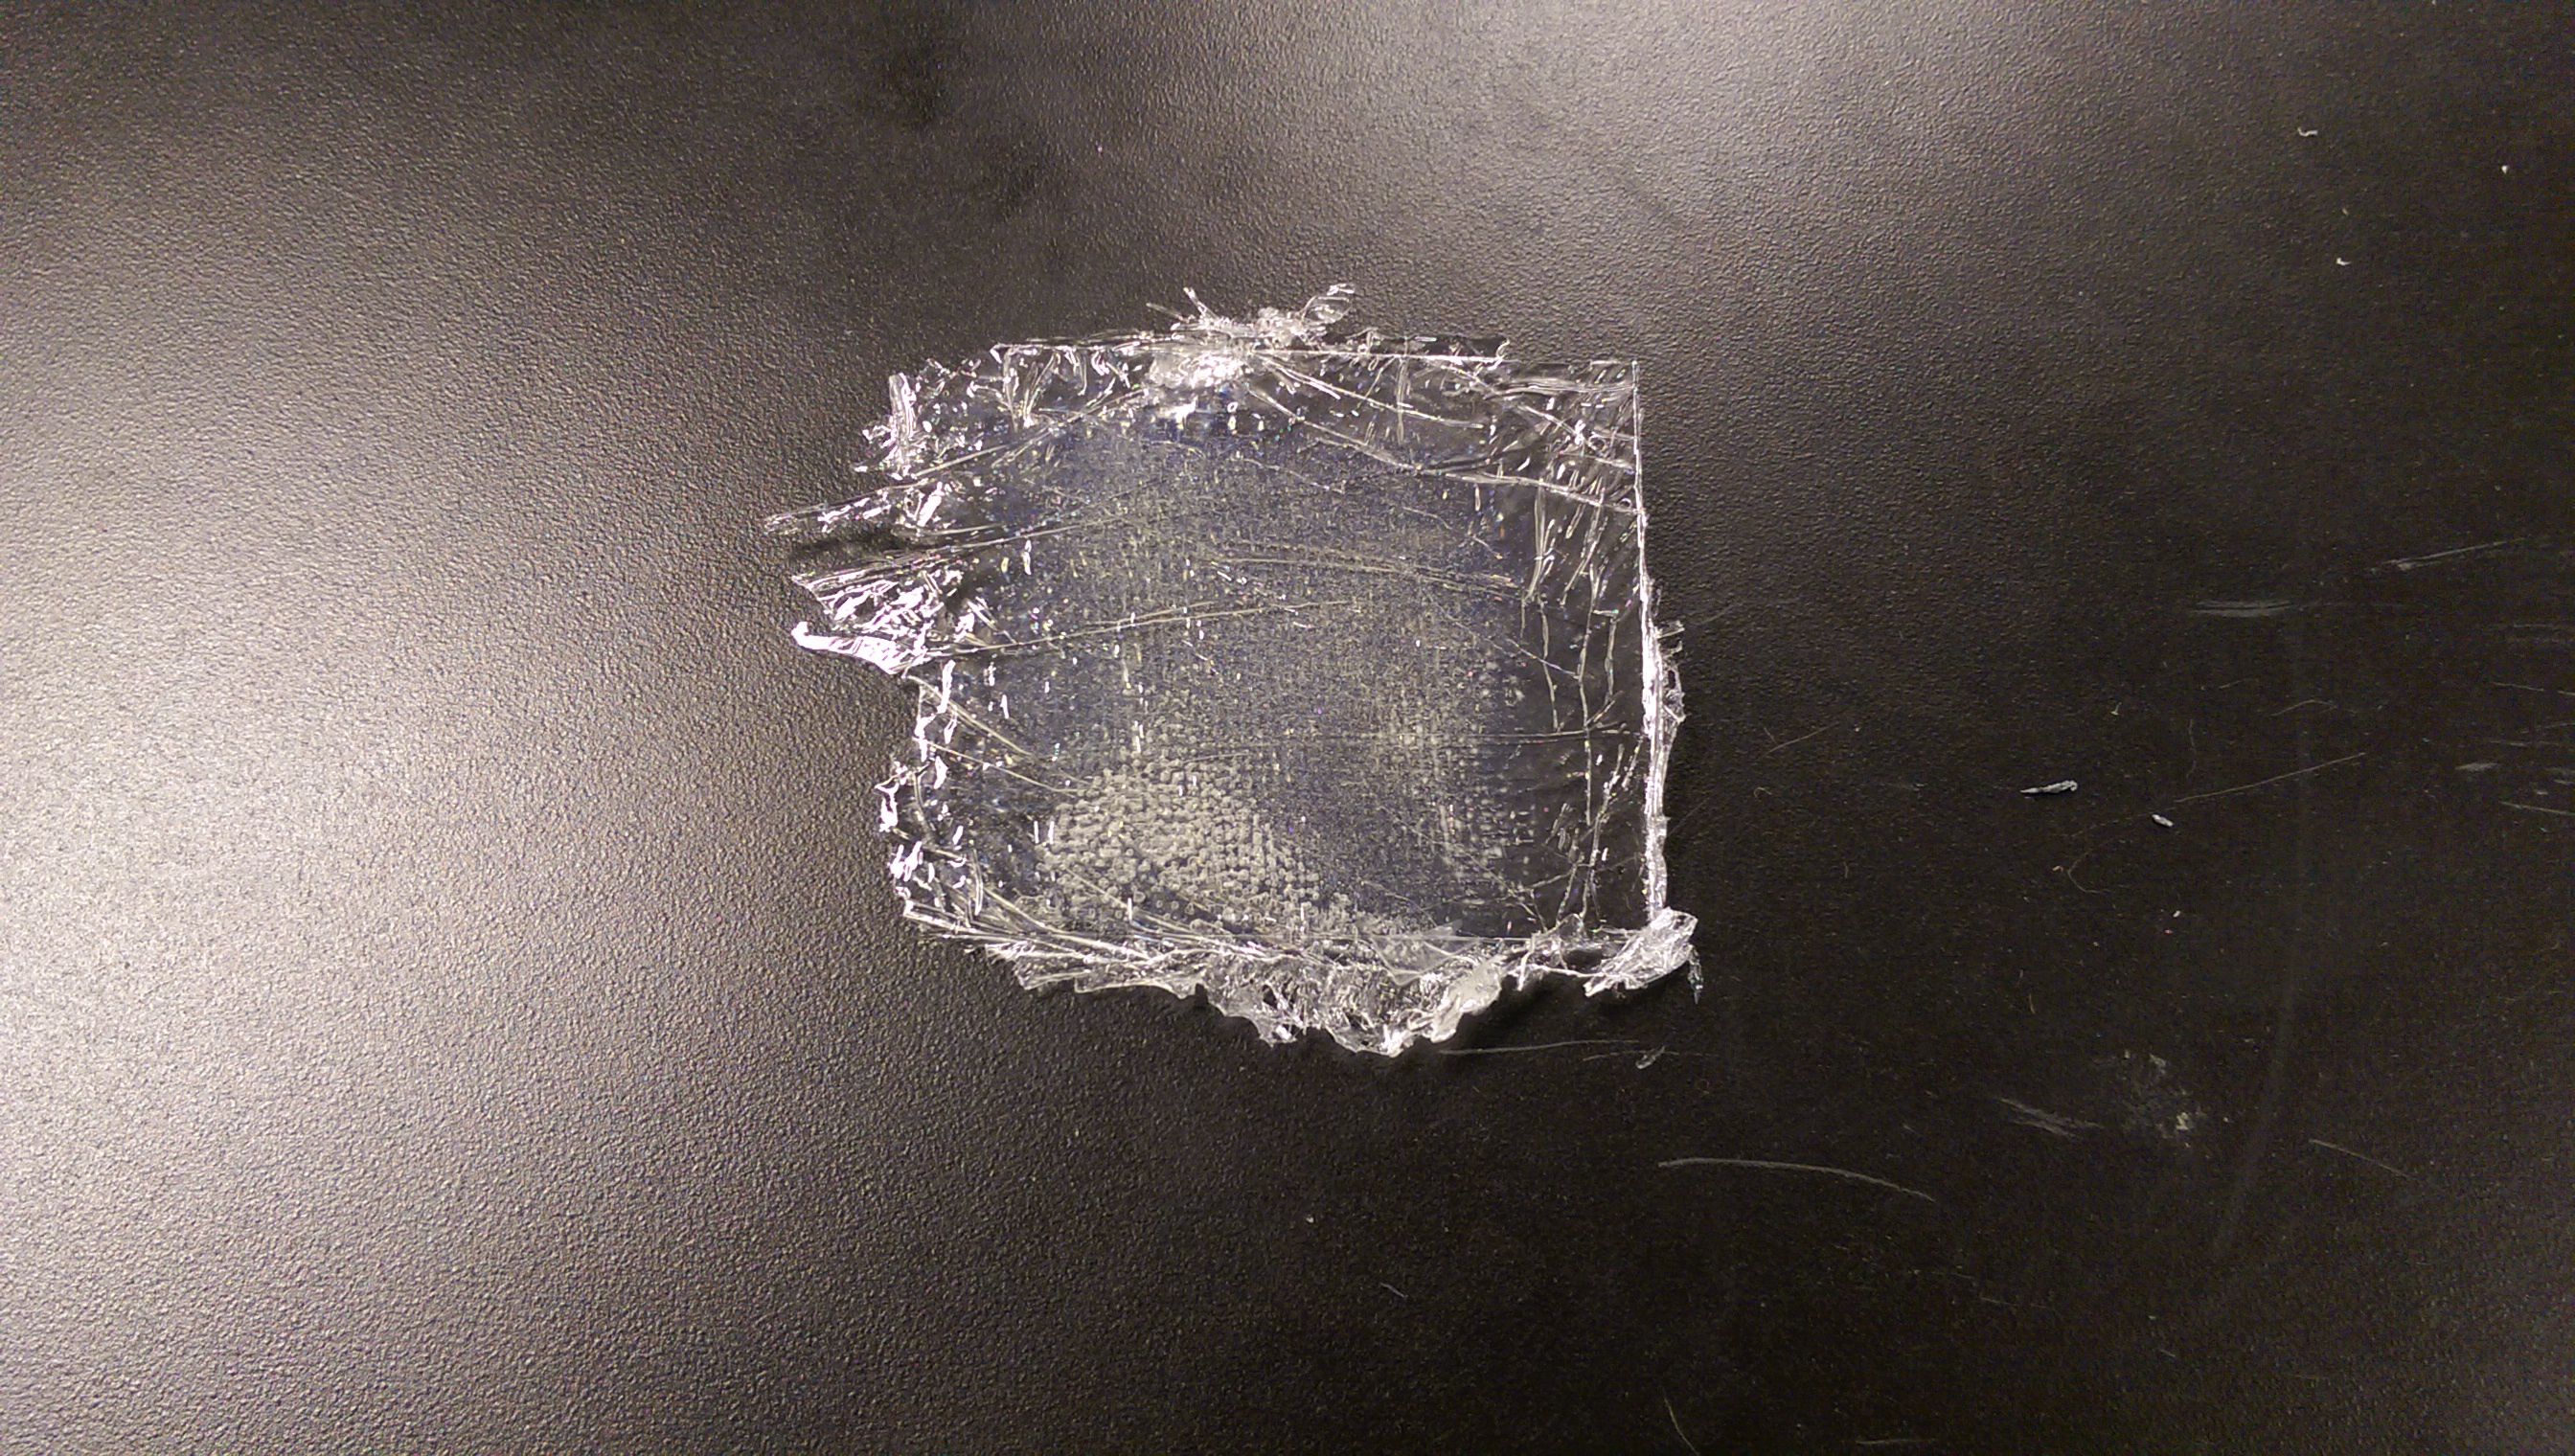
Pretty thin though, even when there were seven layers of fiber. The edges are also not smooth and need trimming.
As Neil mentioned in class, always under respiartory protection and with special attention to the waste material.
Making a mold out of foam
For the next step I am making a mold with the shopbot and will use burlap and the same epoxy as for my coupon.
As a material for the mold I decided to make it out of isolation foam from Homedepot.
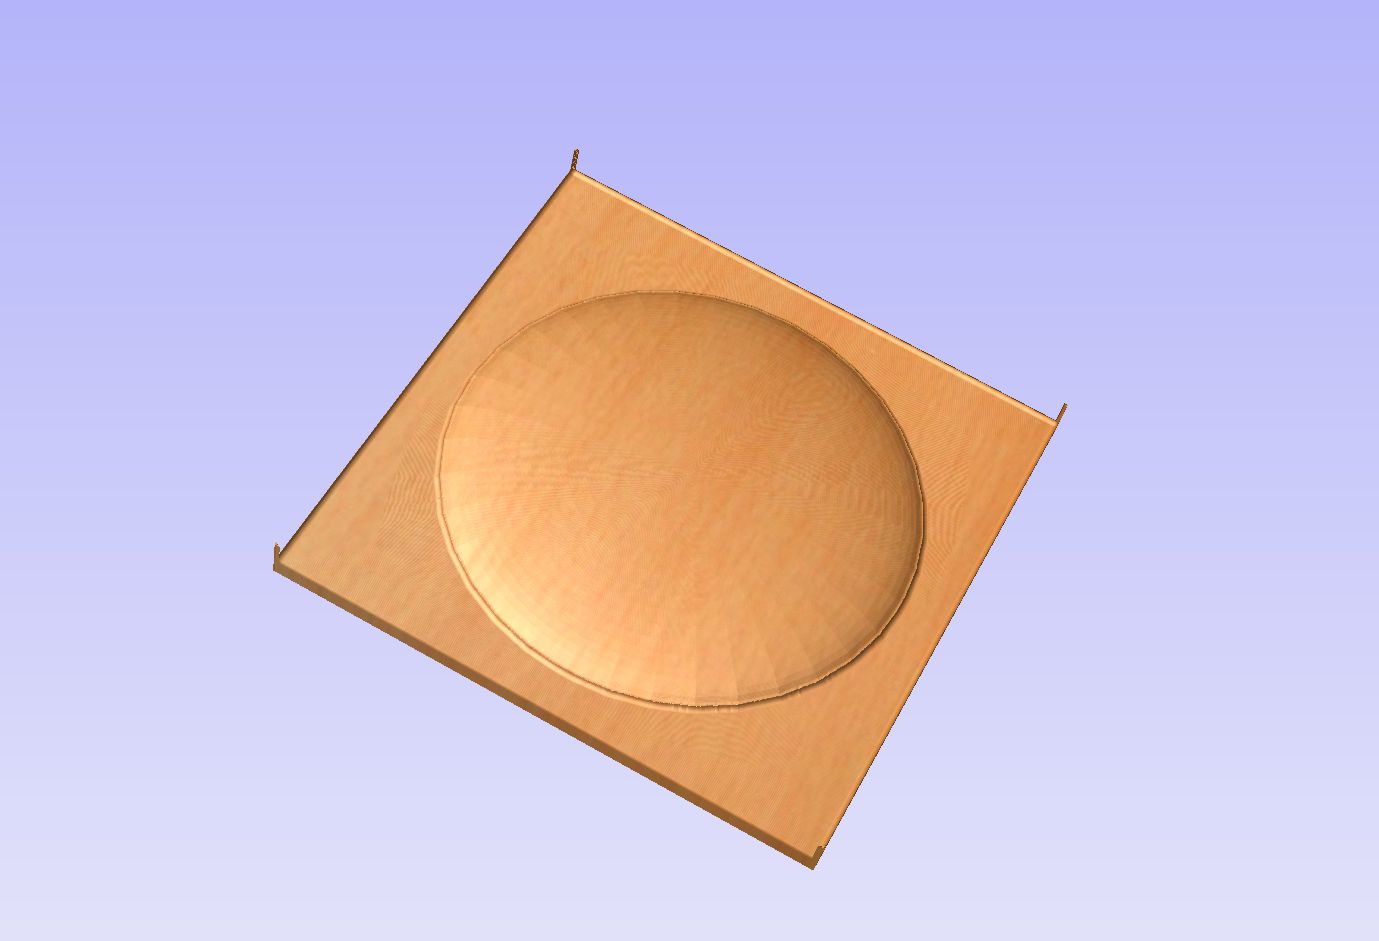
For designing the mold I am using tinkercad. I am making a frisbee with the hidden agenda to use it
as a bowl for my desk.
The frisbee is easy to import to Vcarve, the shopbot software.
Here is how it shall look like according to Vcarve.
I used a 58-280 BL bit with 12000 rpm and a feed rate of 3" per second. For the rough and finishing cut, I cranked
up the speed to 15000 rpm and 4" and 50" per second feeding rate, since there is not much material to remove.
Here are my
vcarve-file and my
cutting-file .
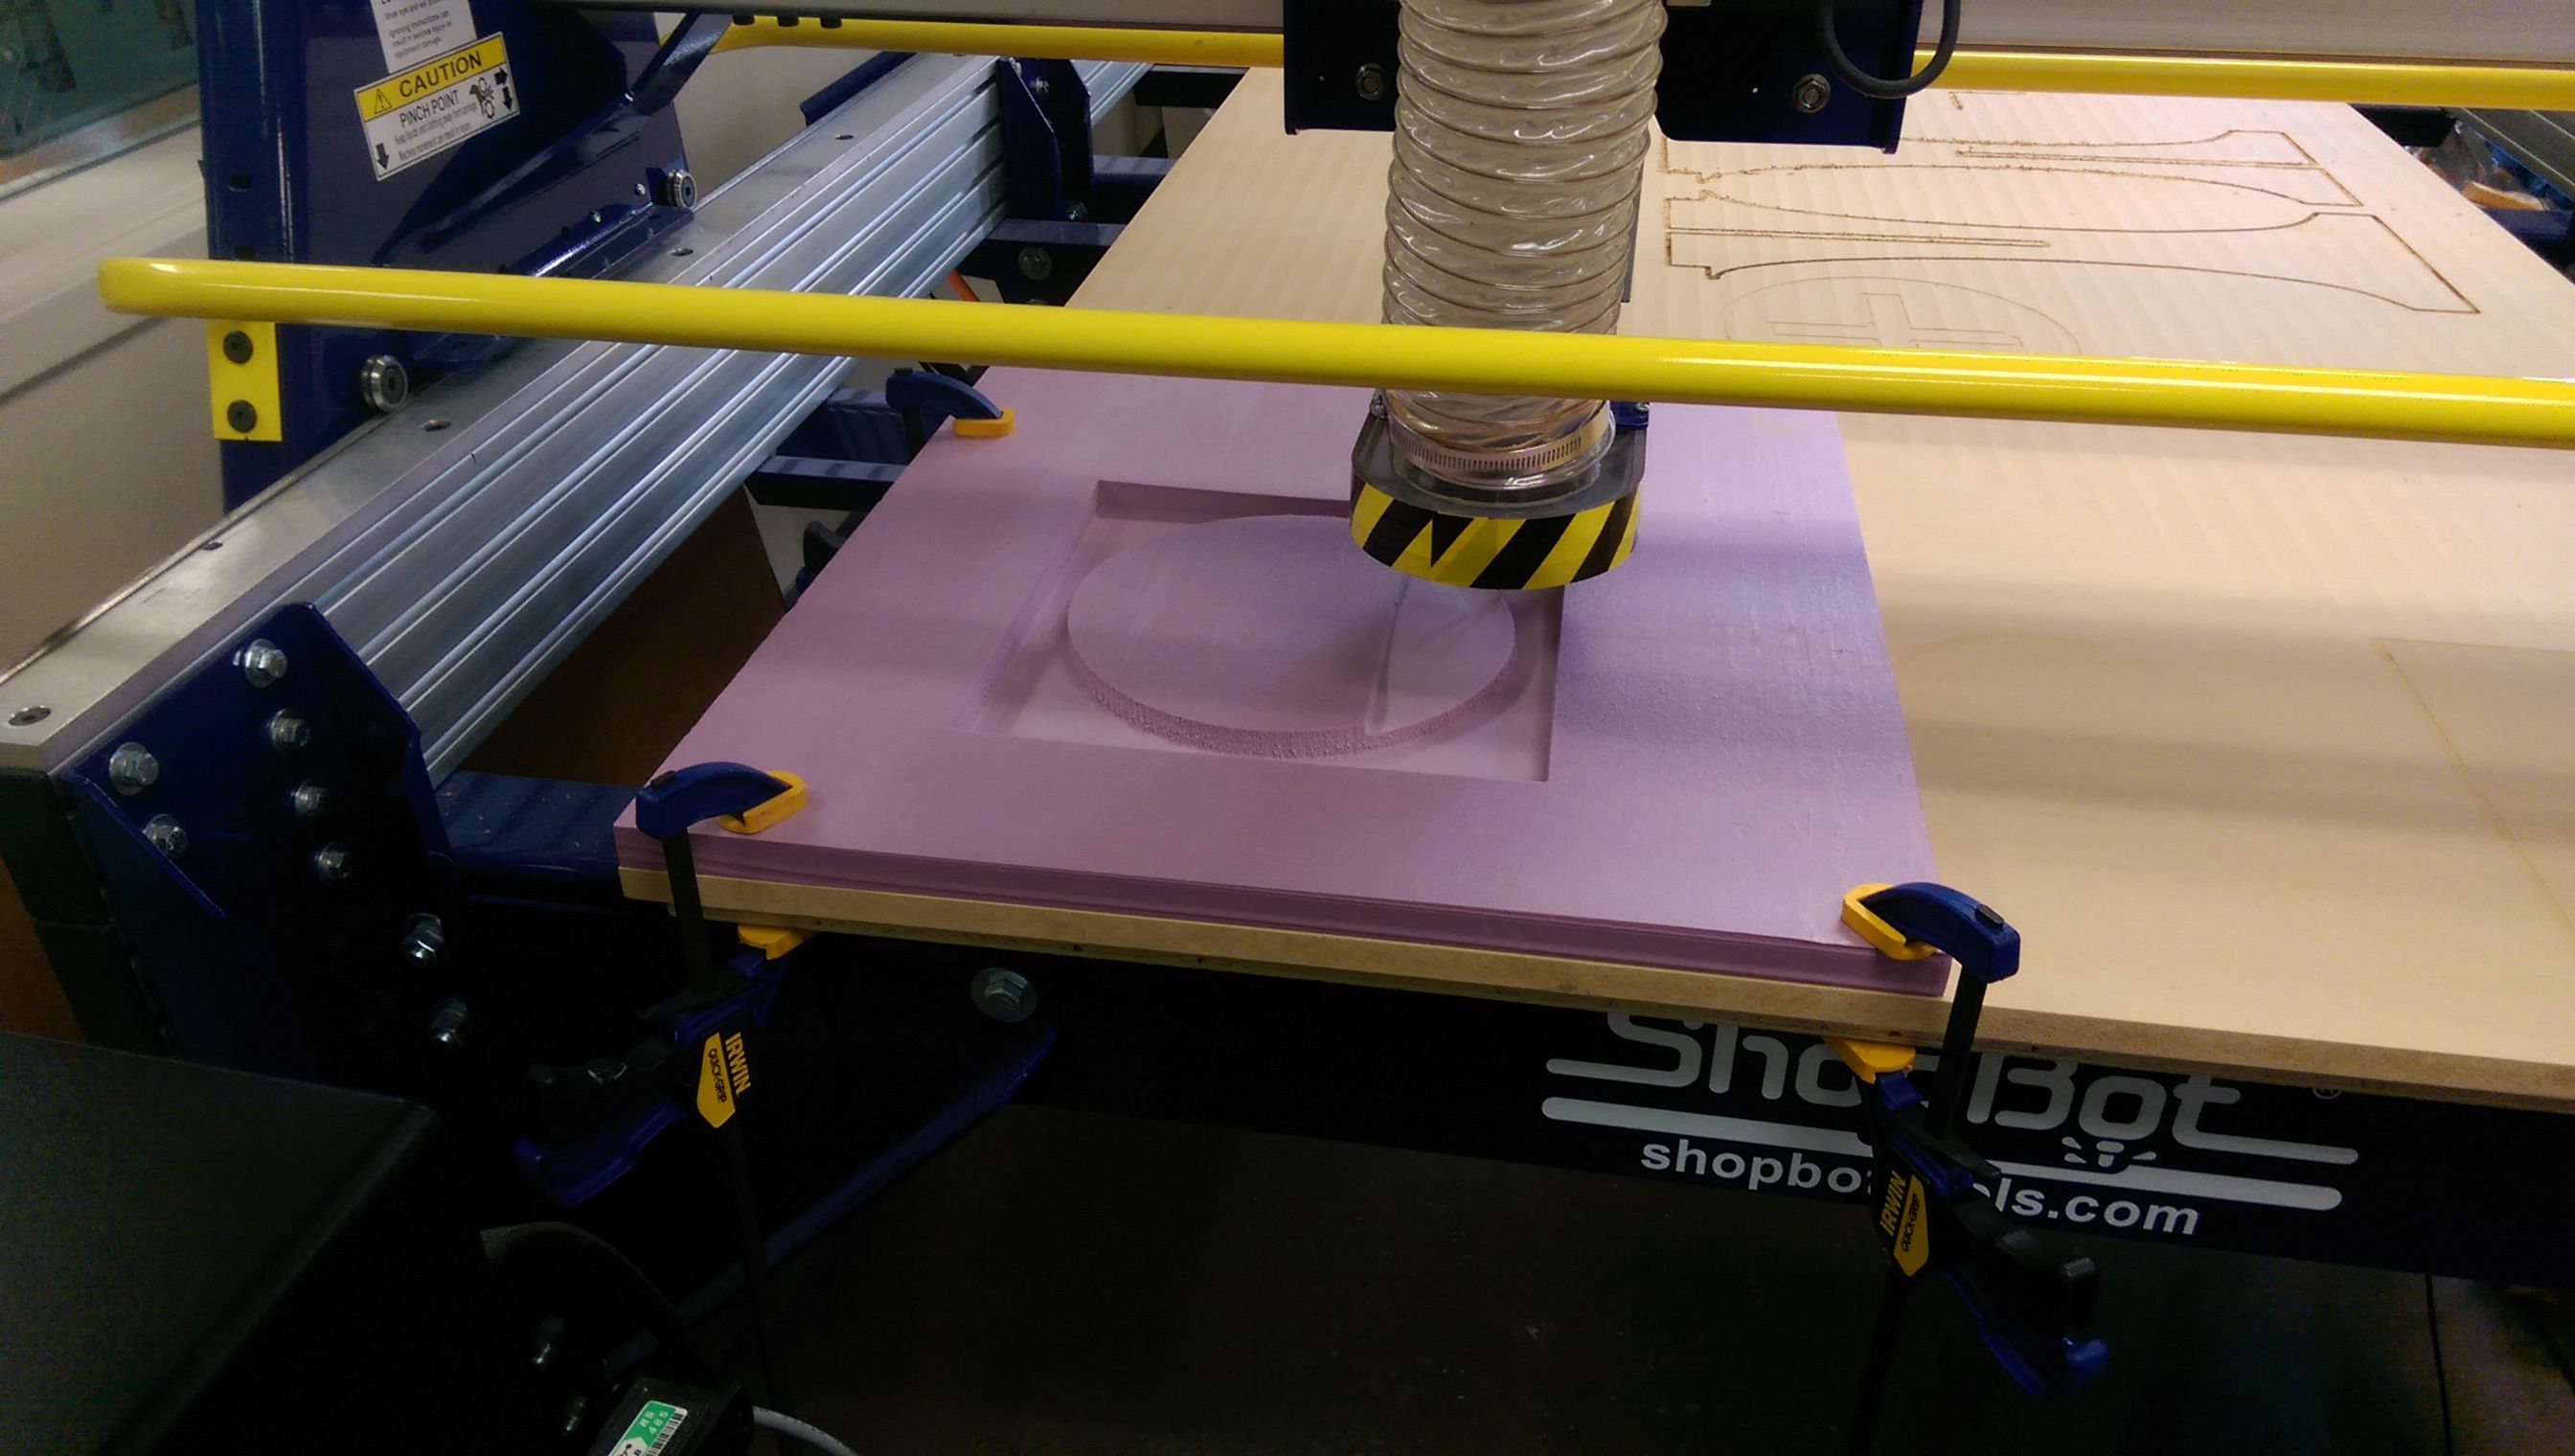
The milling took quite a bit of time since I made a rough and finishing cut.
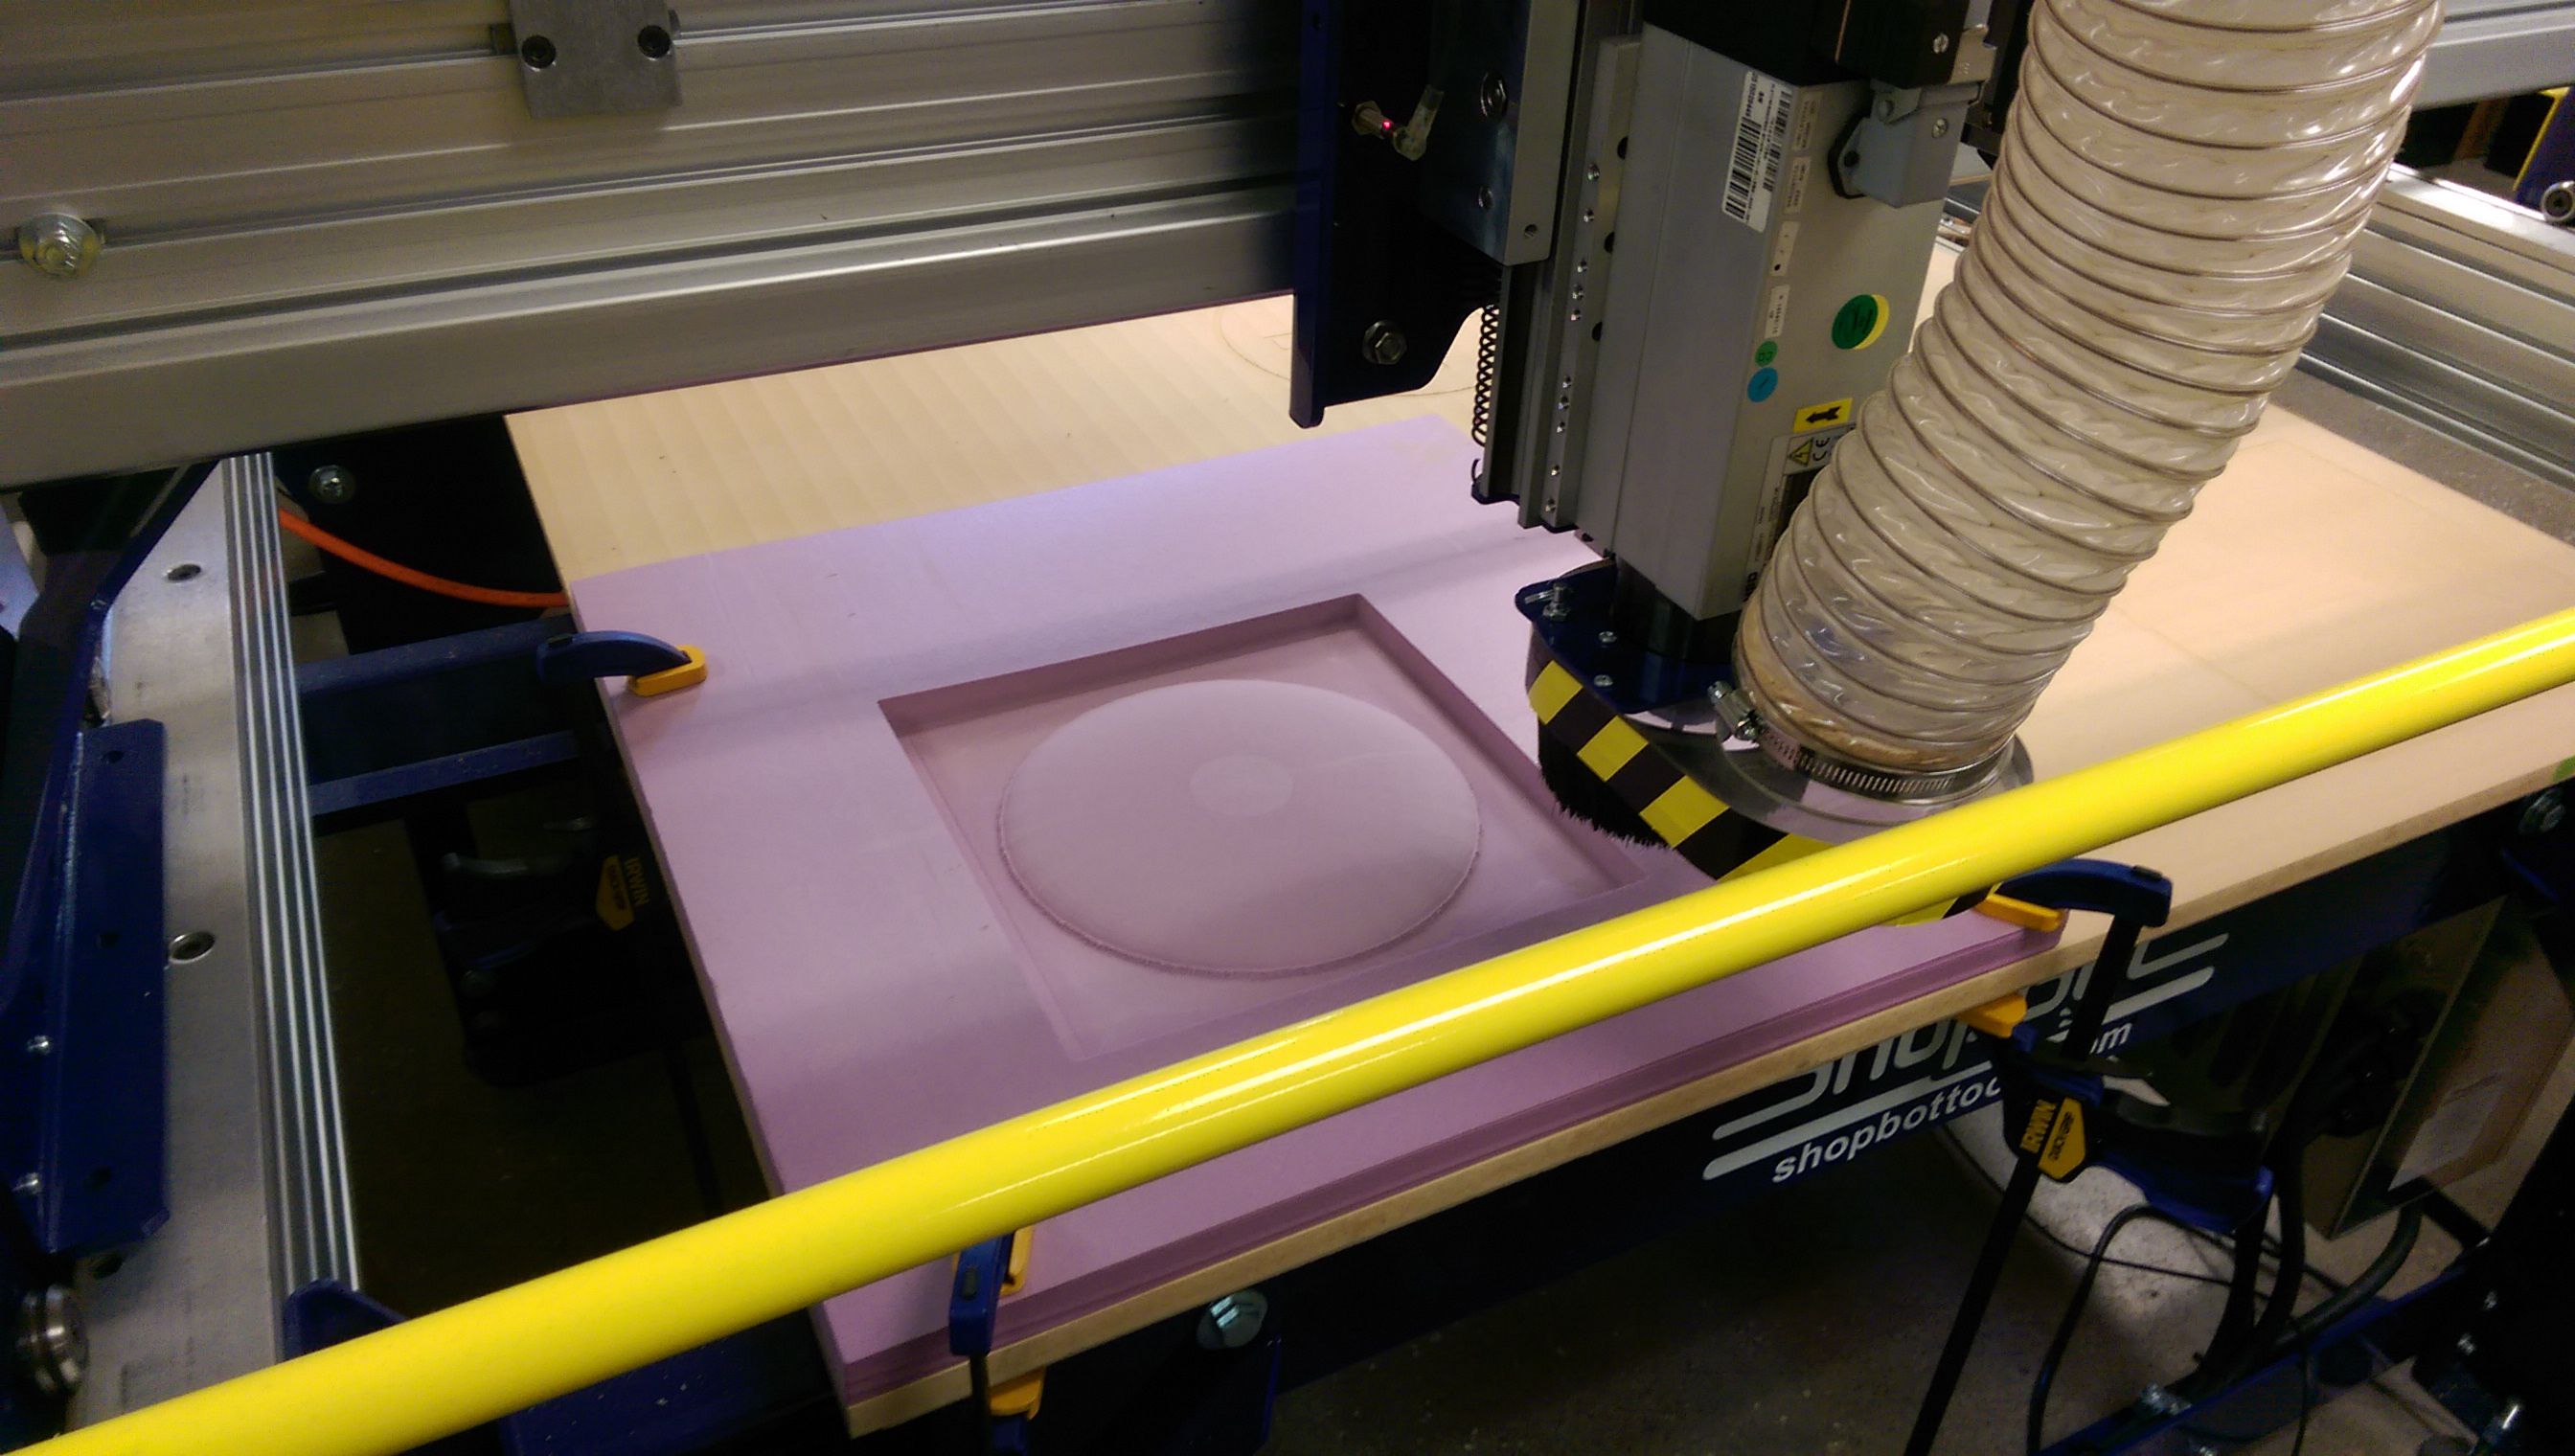
The mold came out pretty good.
Making the Composite
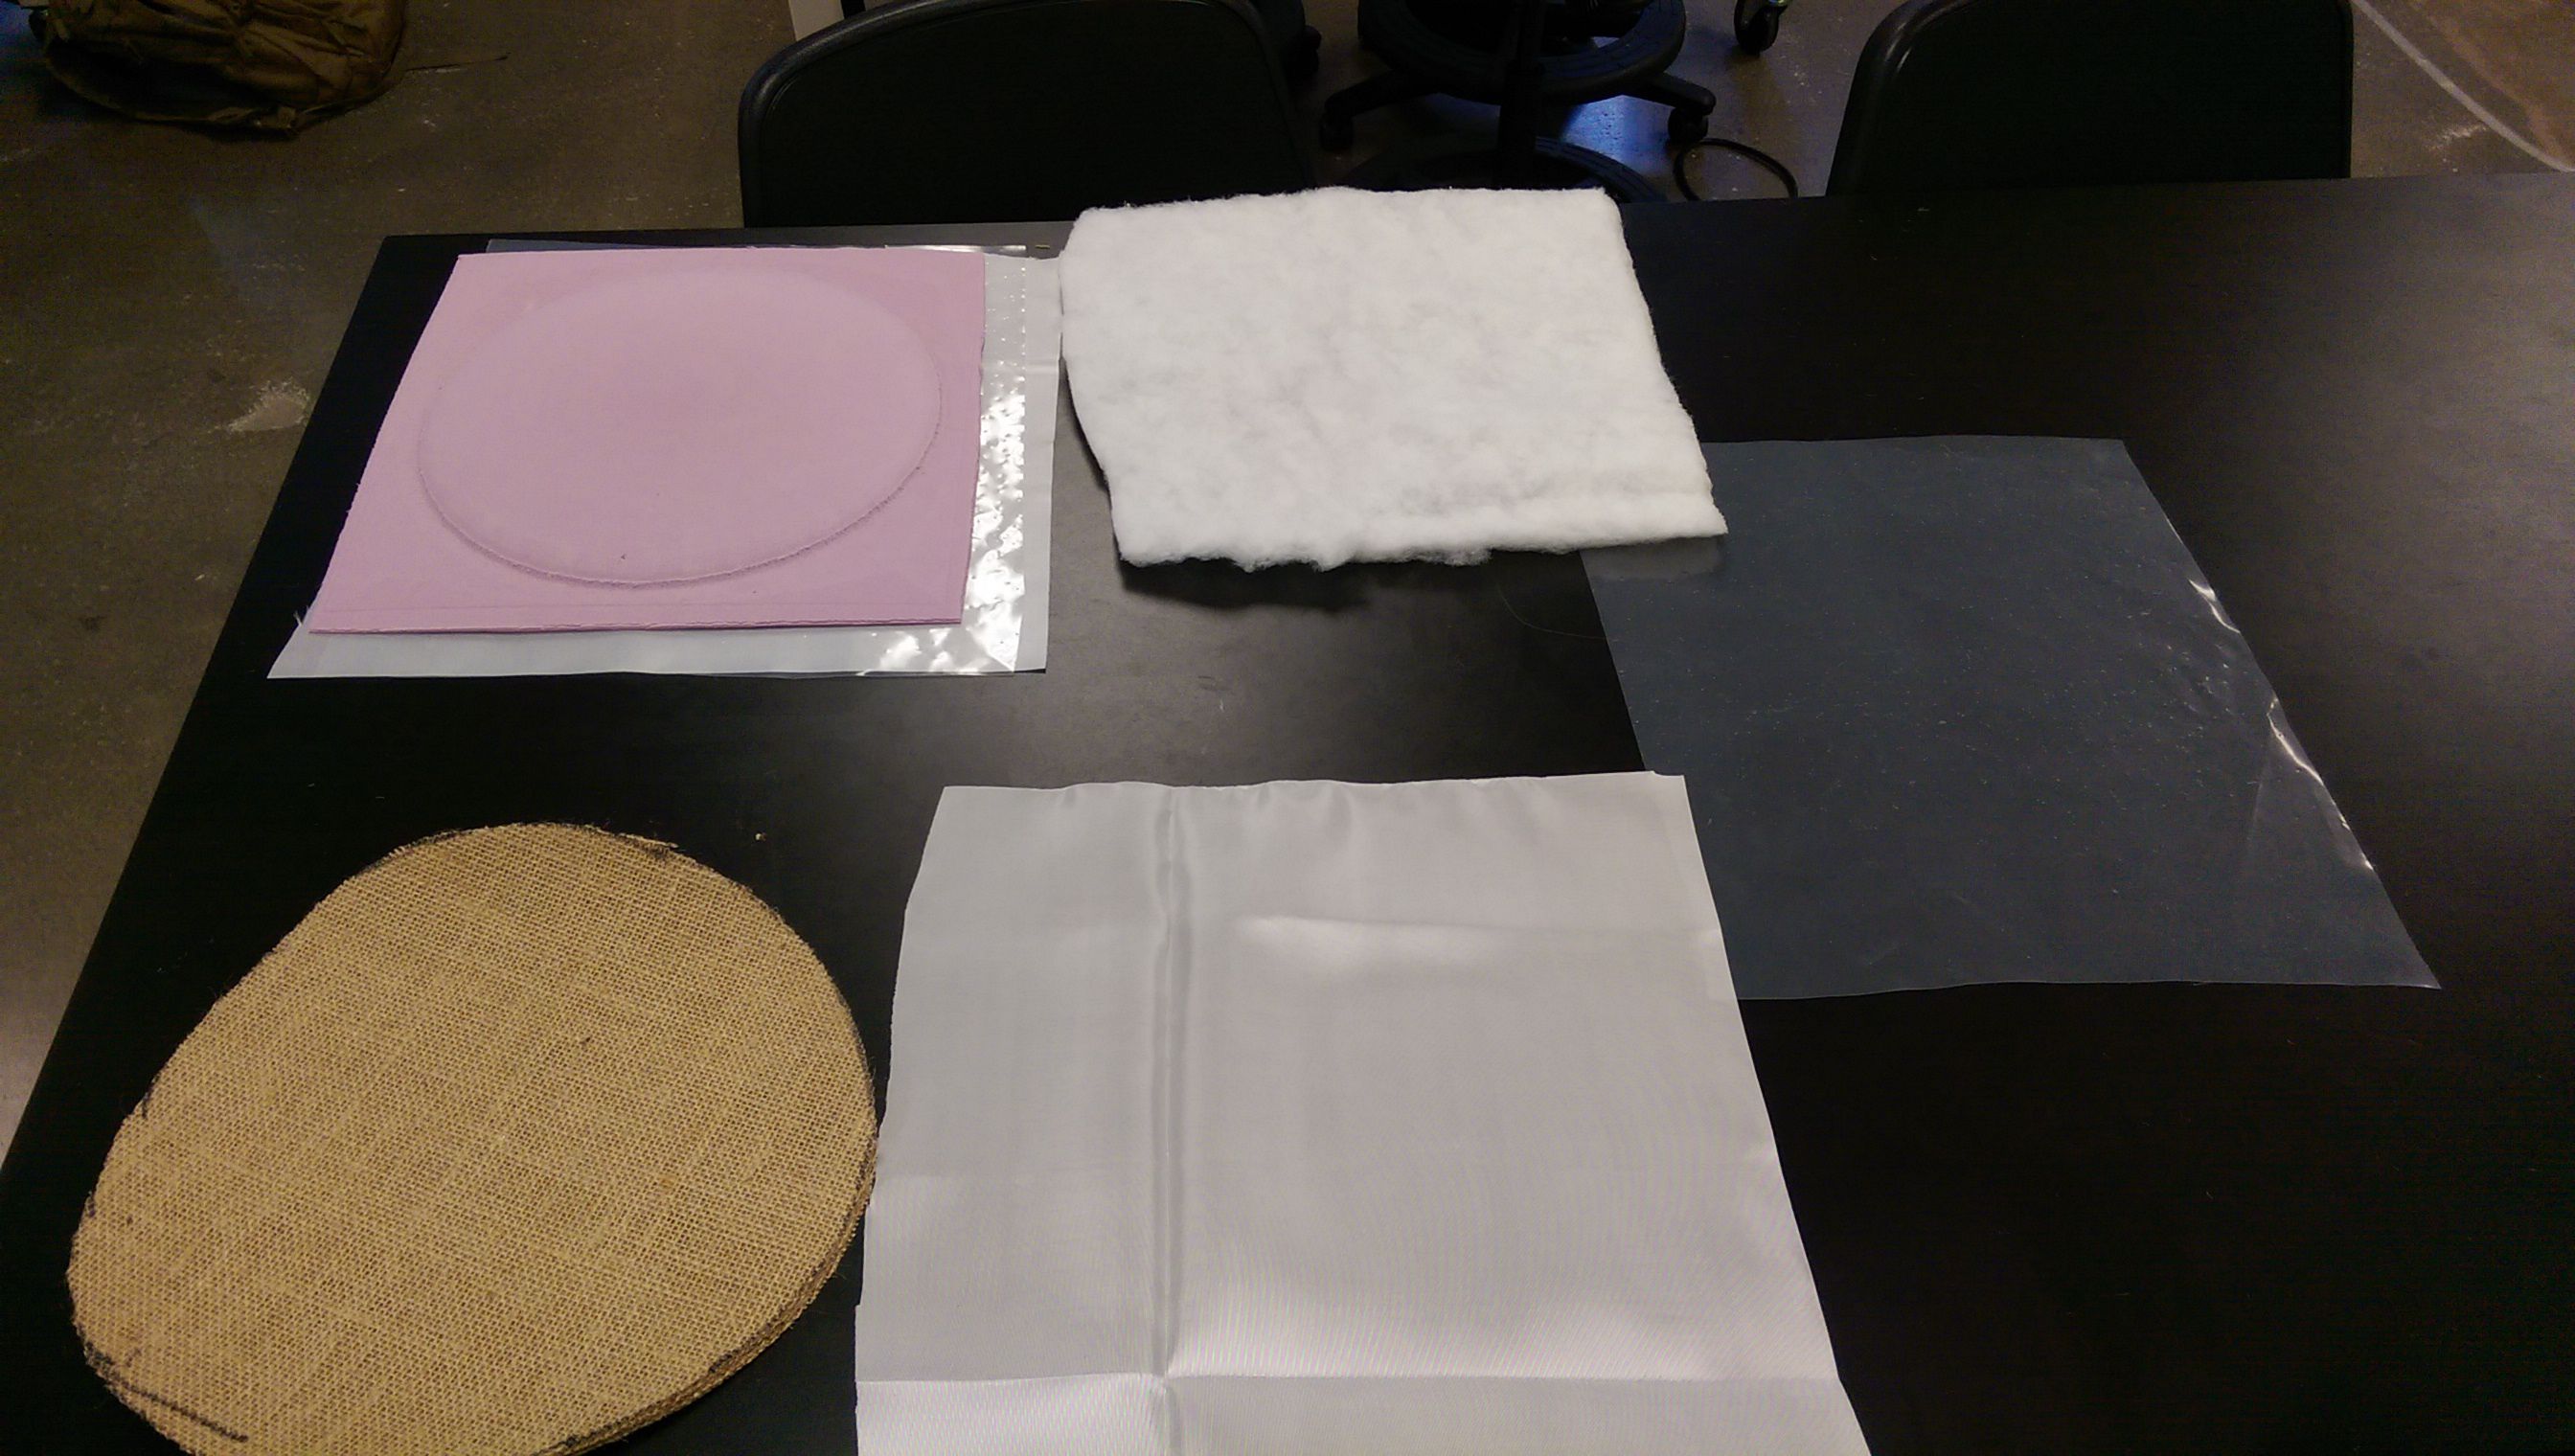
Since this piece is bigger I have decided to use the vacuum technique. First I have to figure out the right order of the layers. I don't want my piece sticking in the bag. My order of the layers is this:
-
- Release Fabric
- Breather Film
- Mold
- Release Fabric
- 5 Layers of Burlap
- Release Fabric
- Breather Film
- Bleeder Layer
- Release Fabric
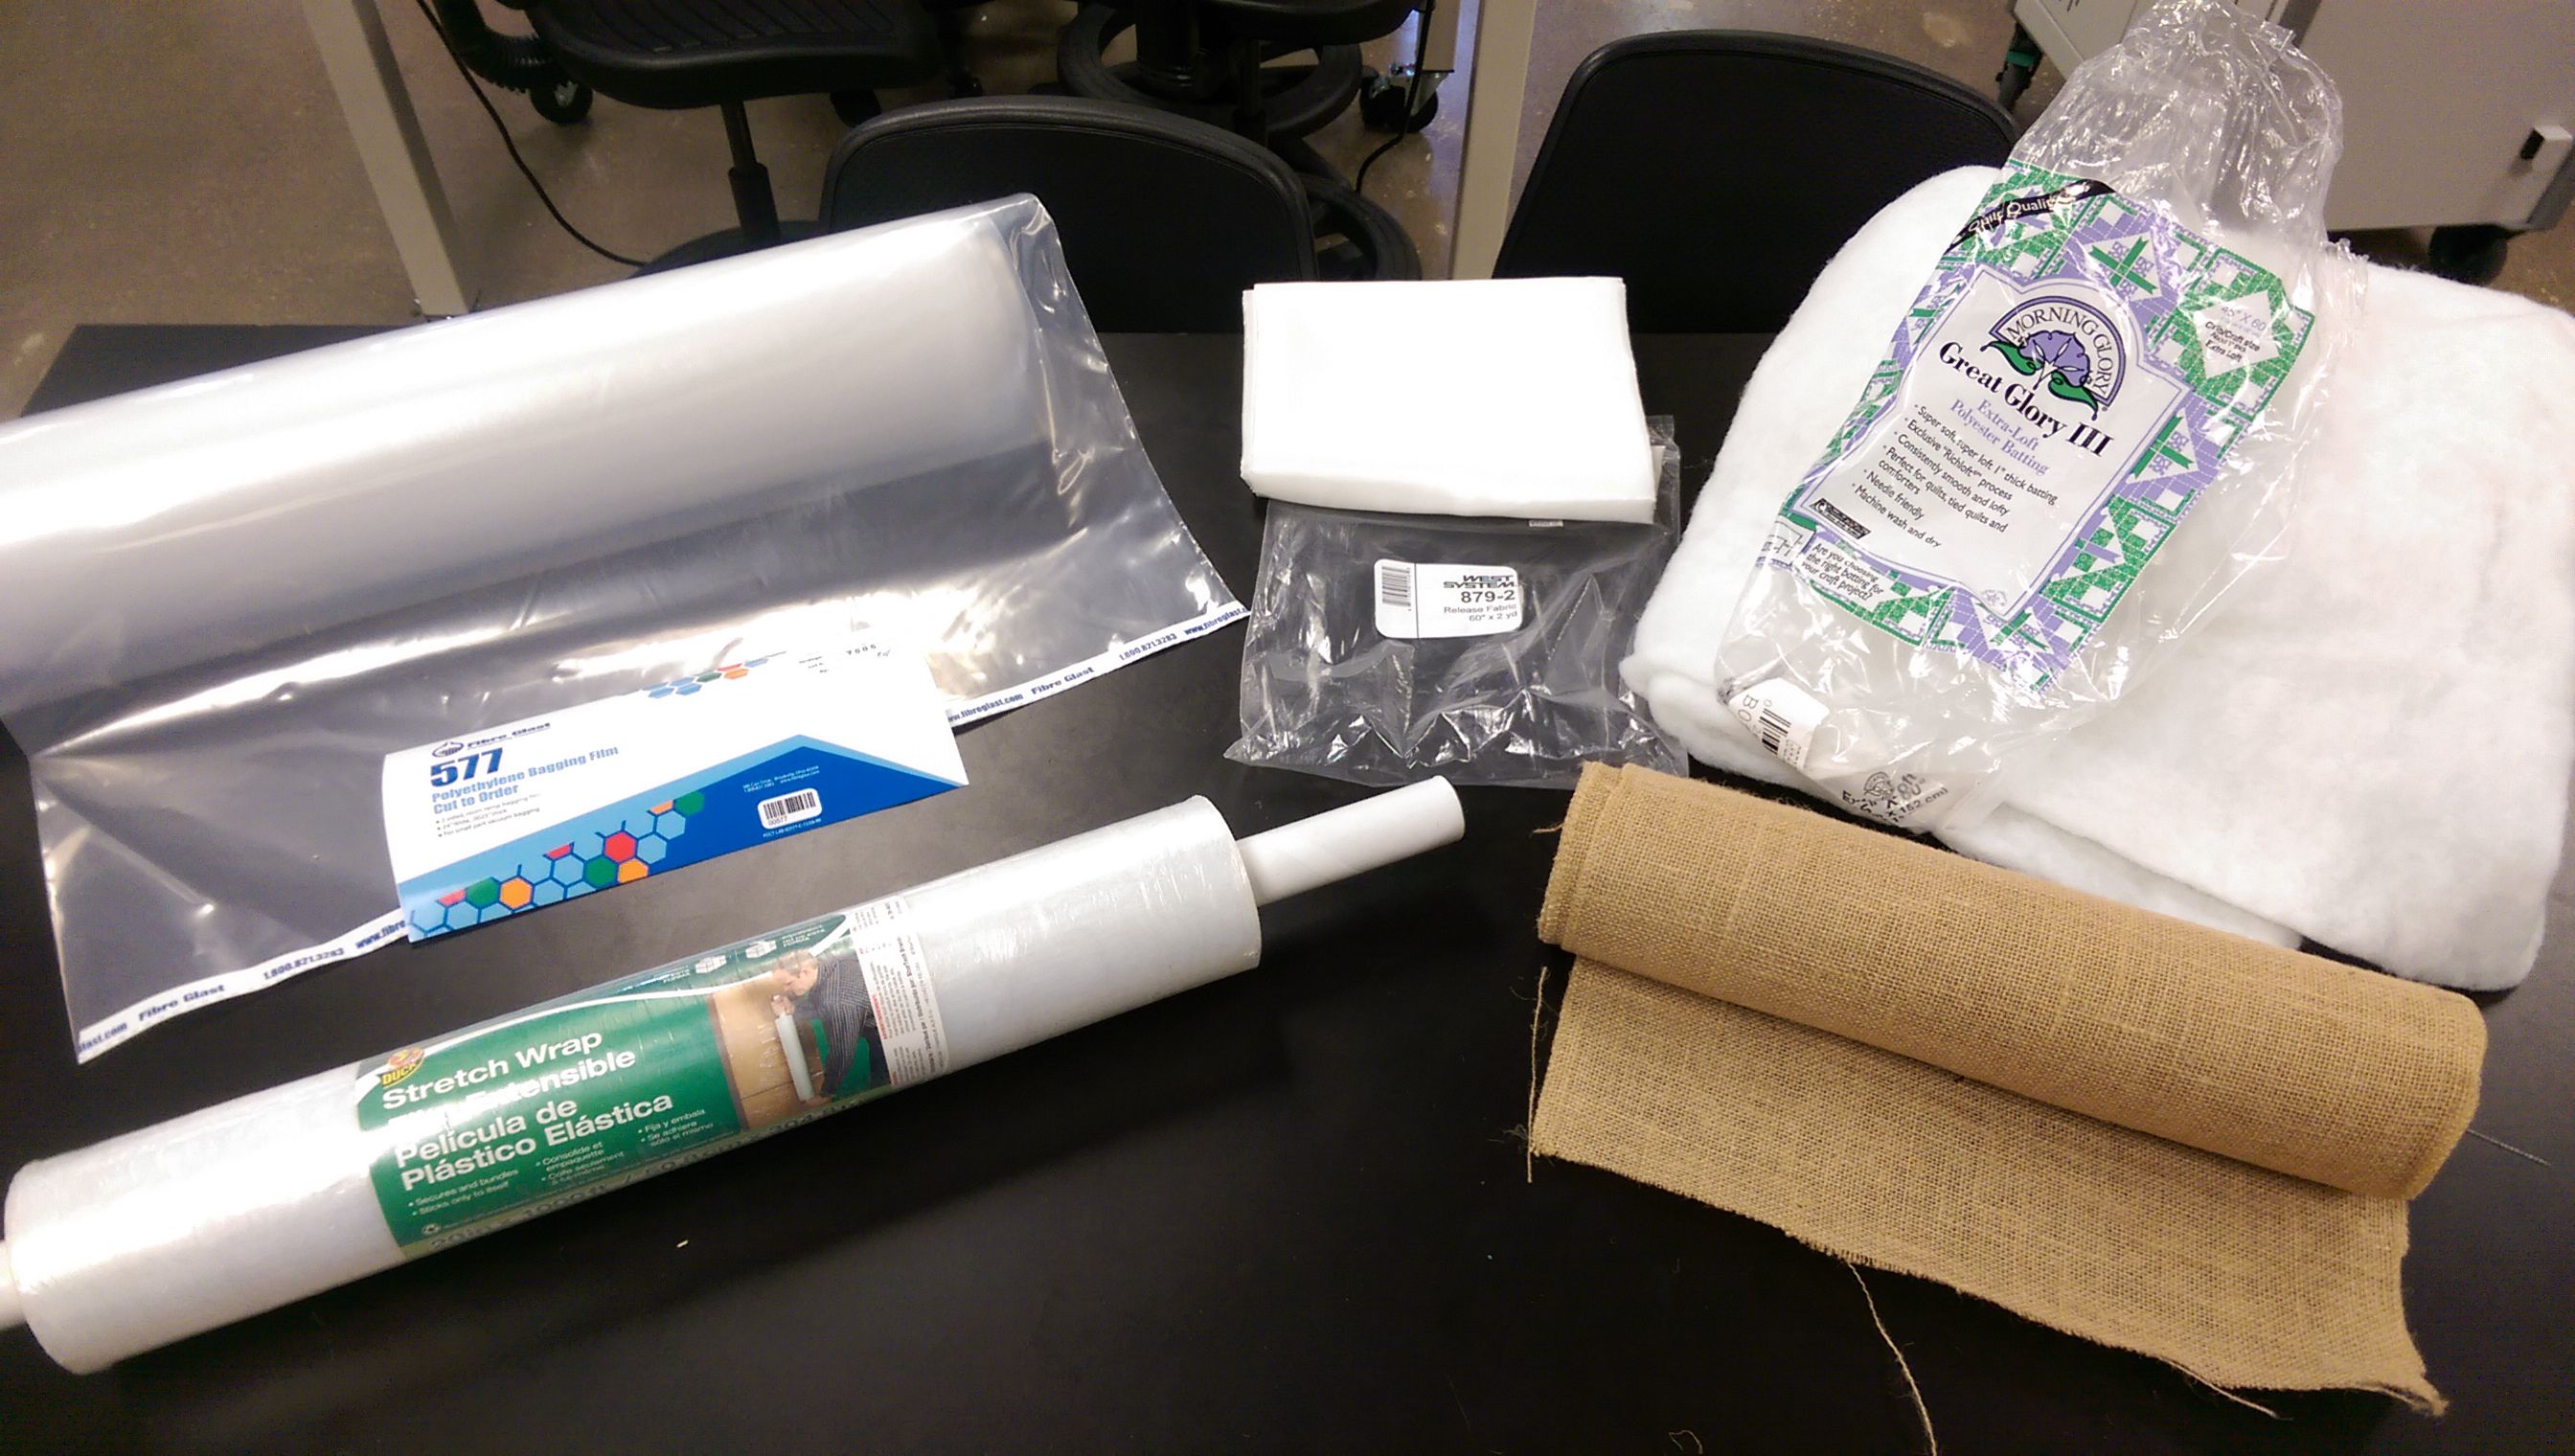
Instead of using the food wrap as a release film, I used the white nylon relase fabric. As a breather layer I used the bagging film, after perforating it with the torture tool.
As bleeder layer, I used the polyester batting. I precut the burlap and the sheets.
Here is my setup.
And here my mixing bench.
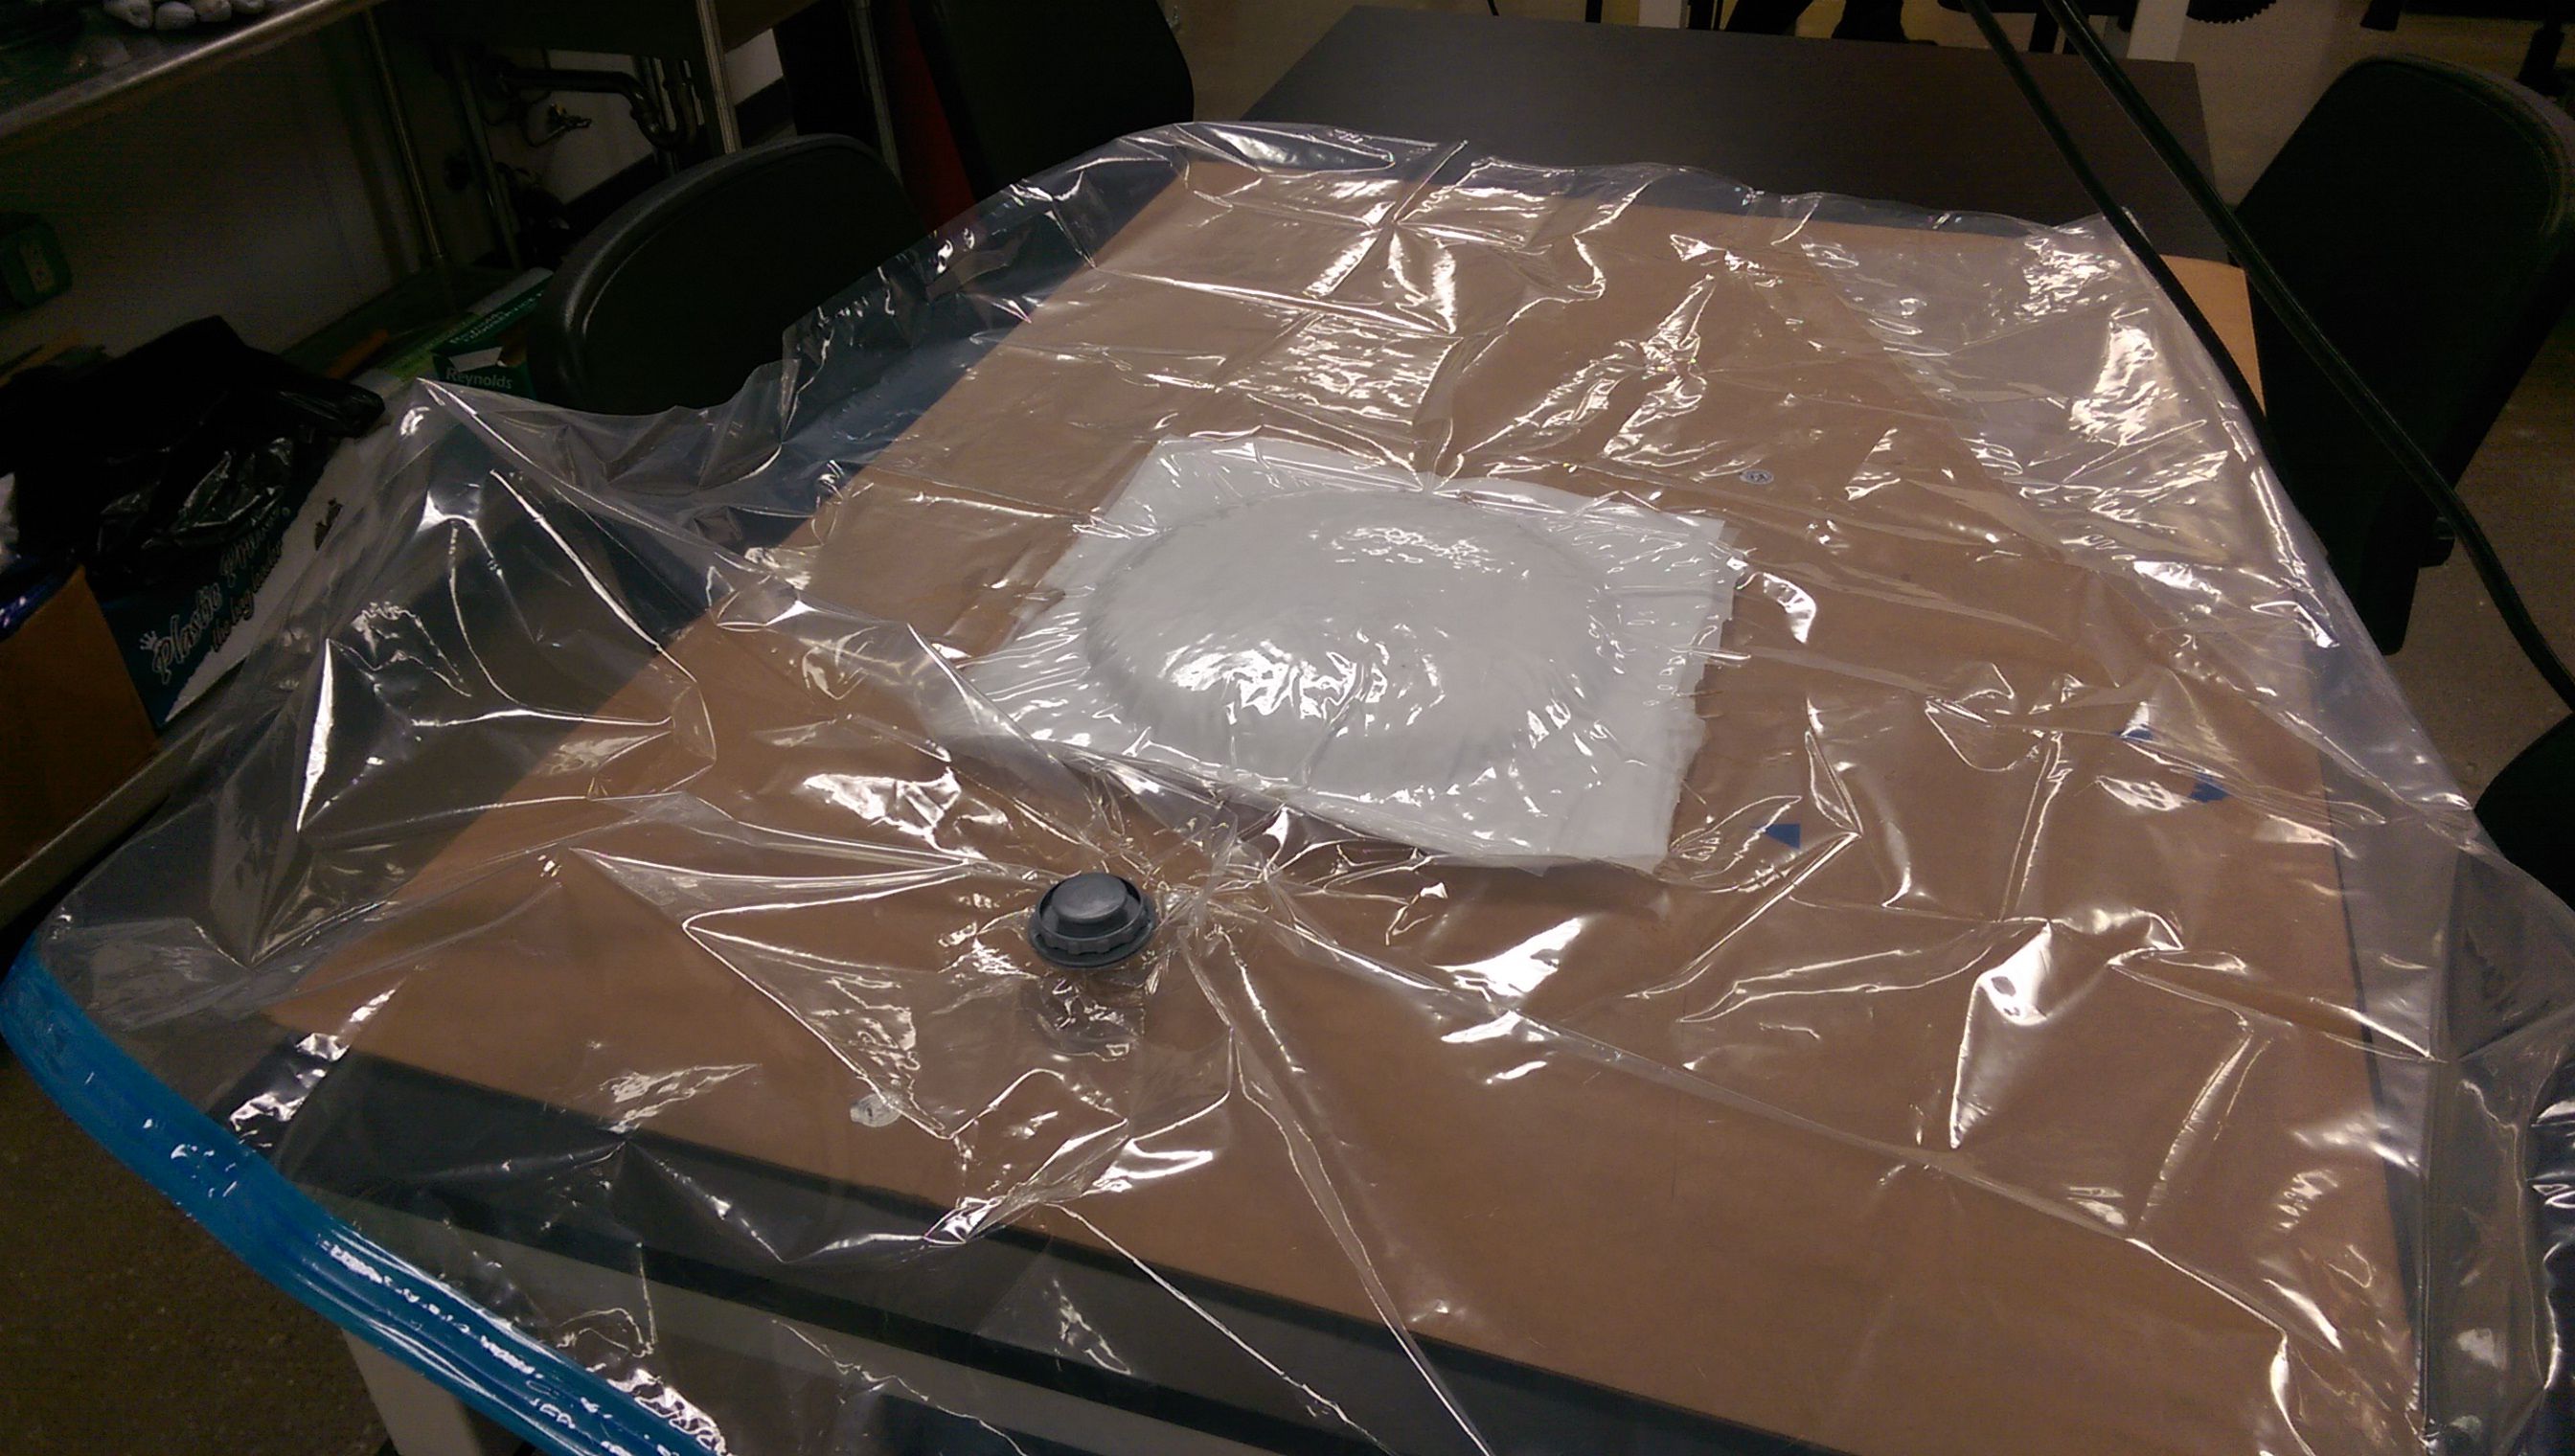
After applying all the layers I vacuumed it. Here I put it in the bag.
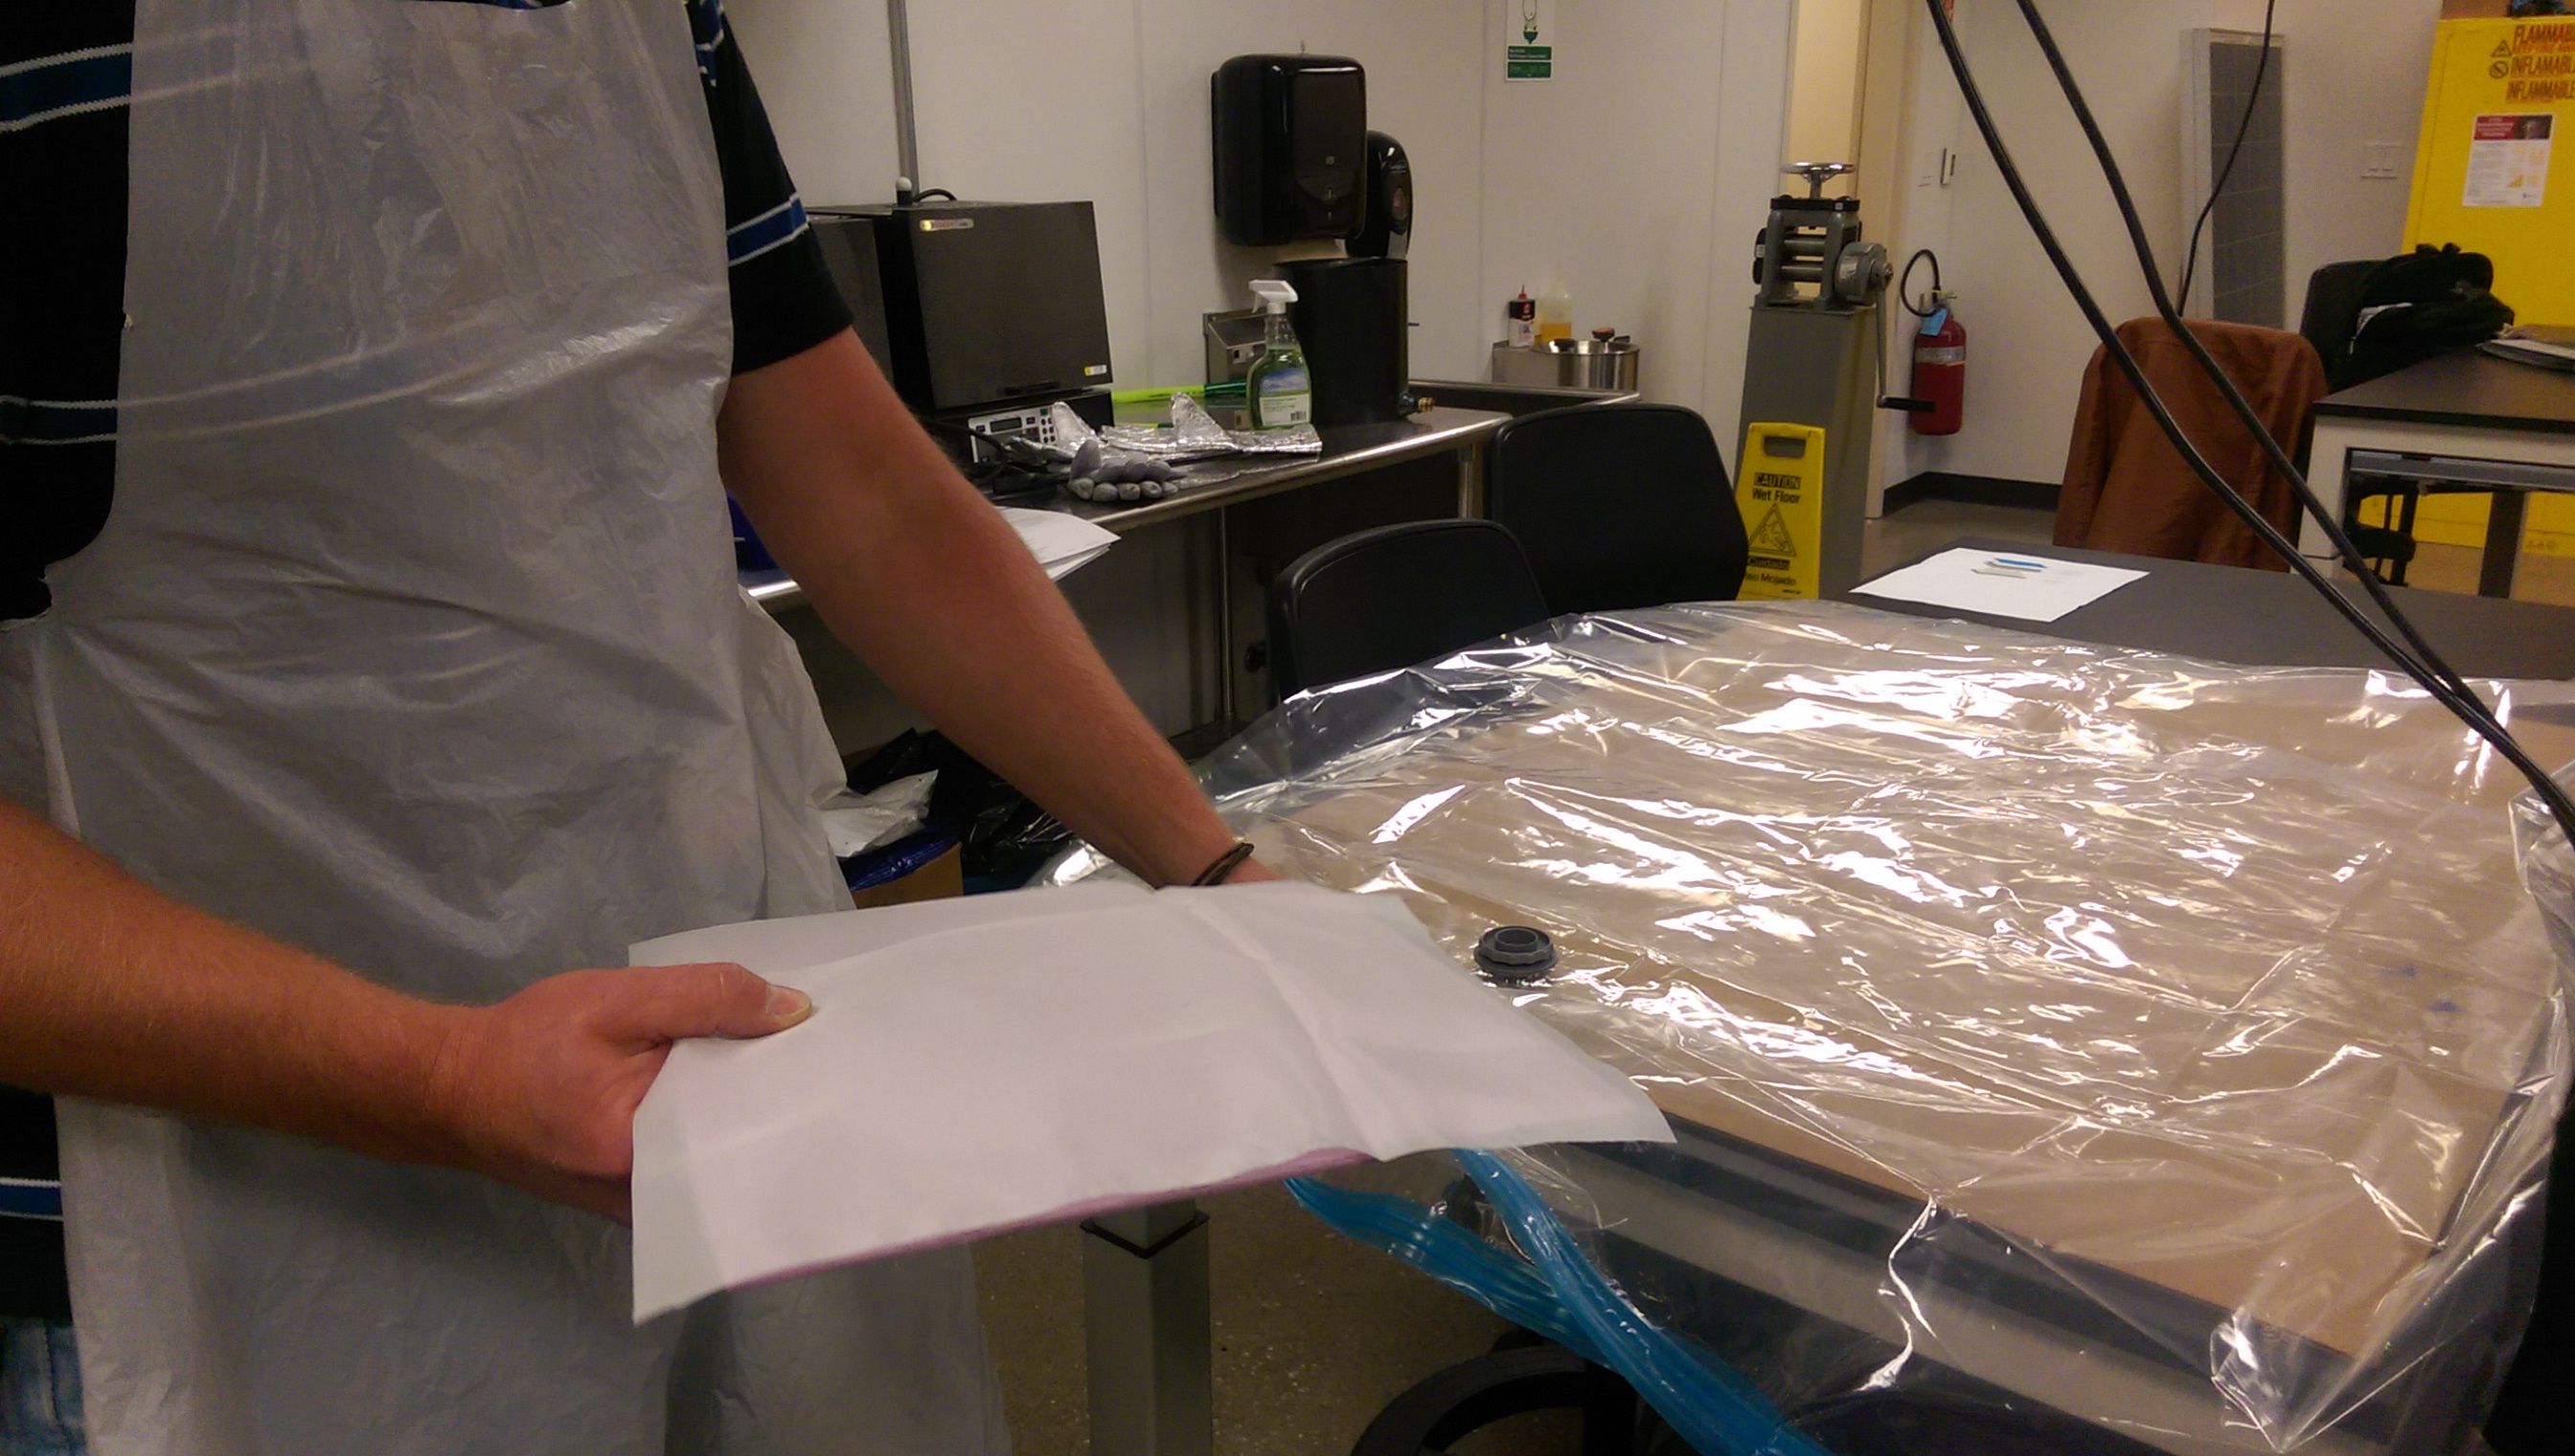
And there it goes for the over-night drying. Carefull, the epoxy dries exotherm and gets really hot. Take this into account, when you have some leftovers in a mixing cup.
After drying over night, I took it out. I could remove all layers quite easily.
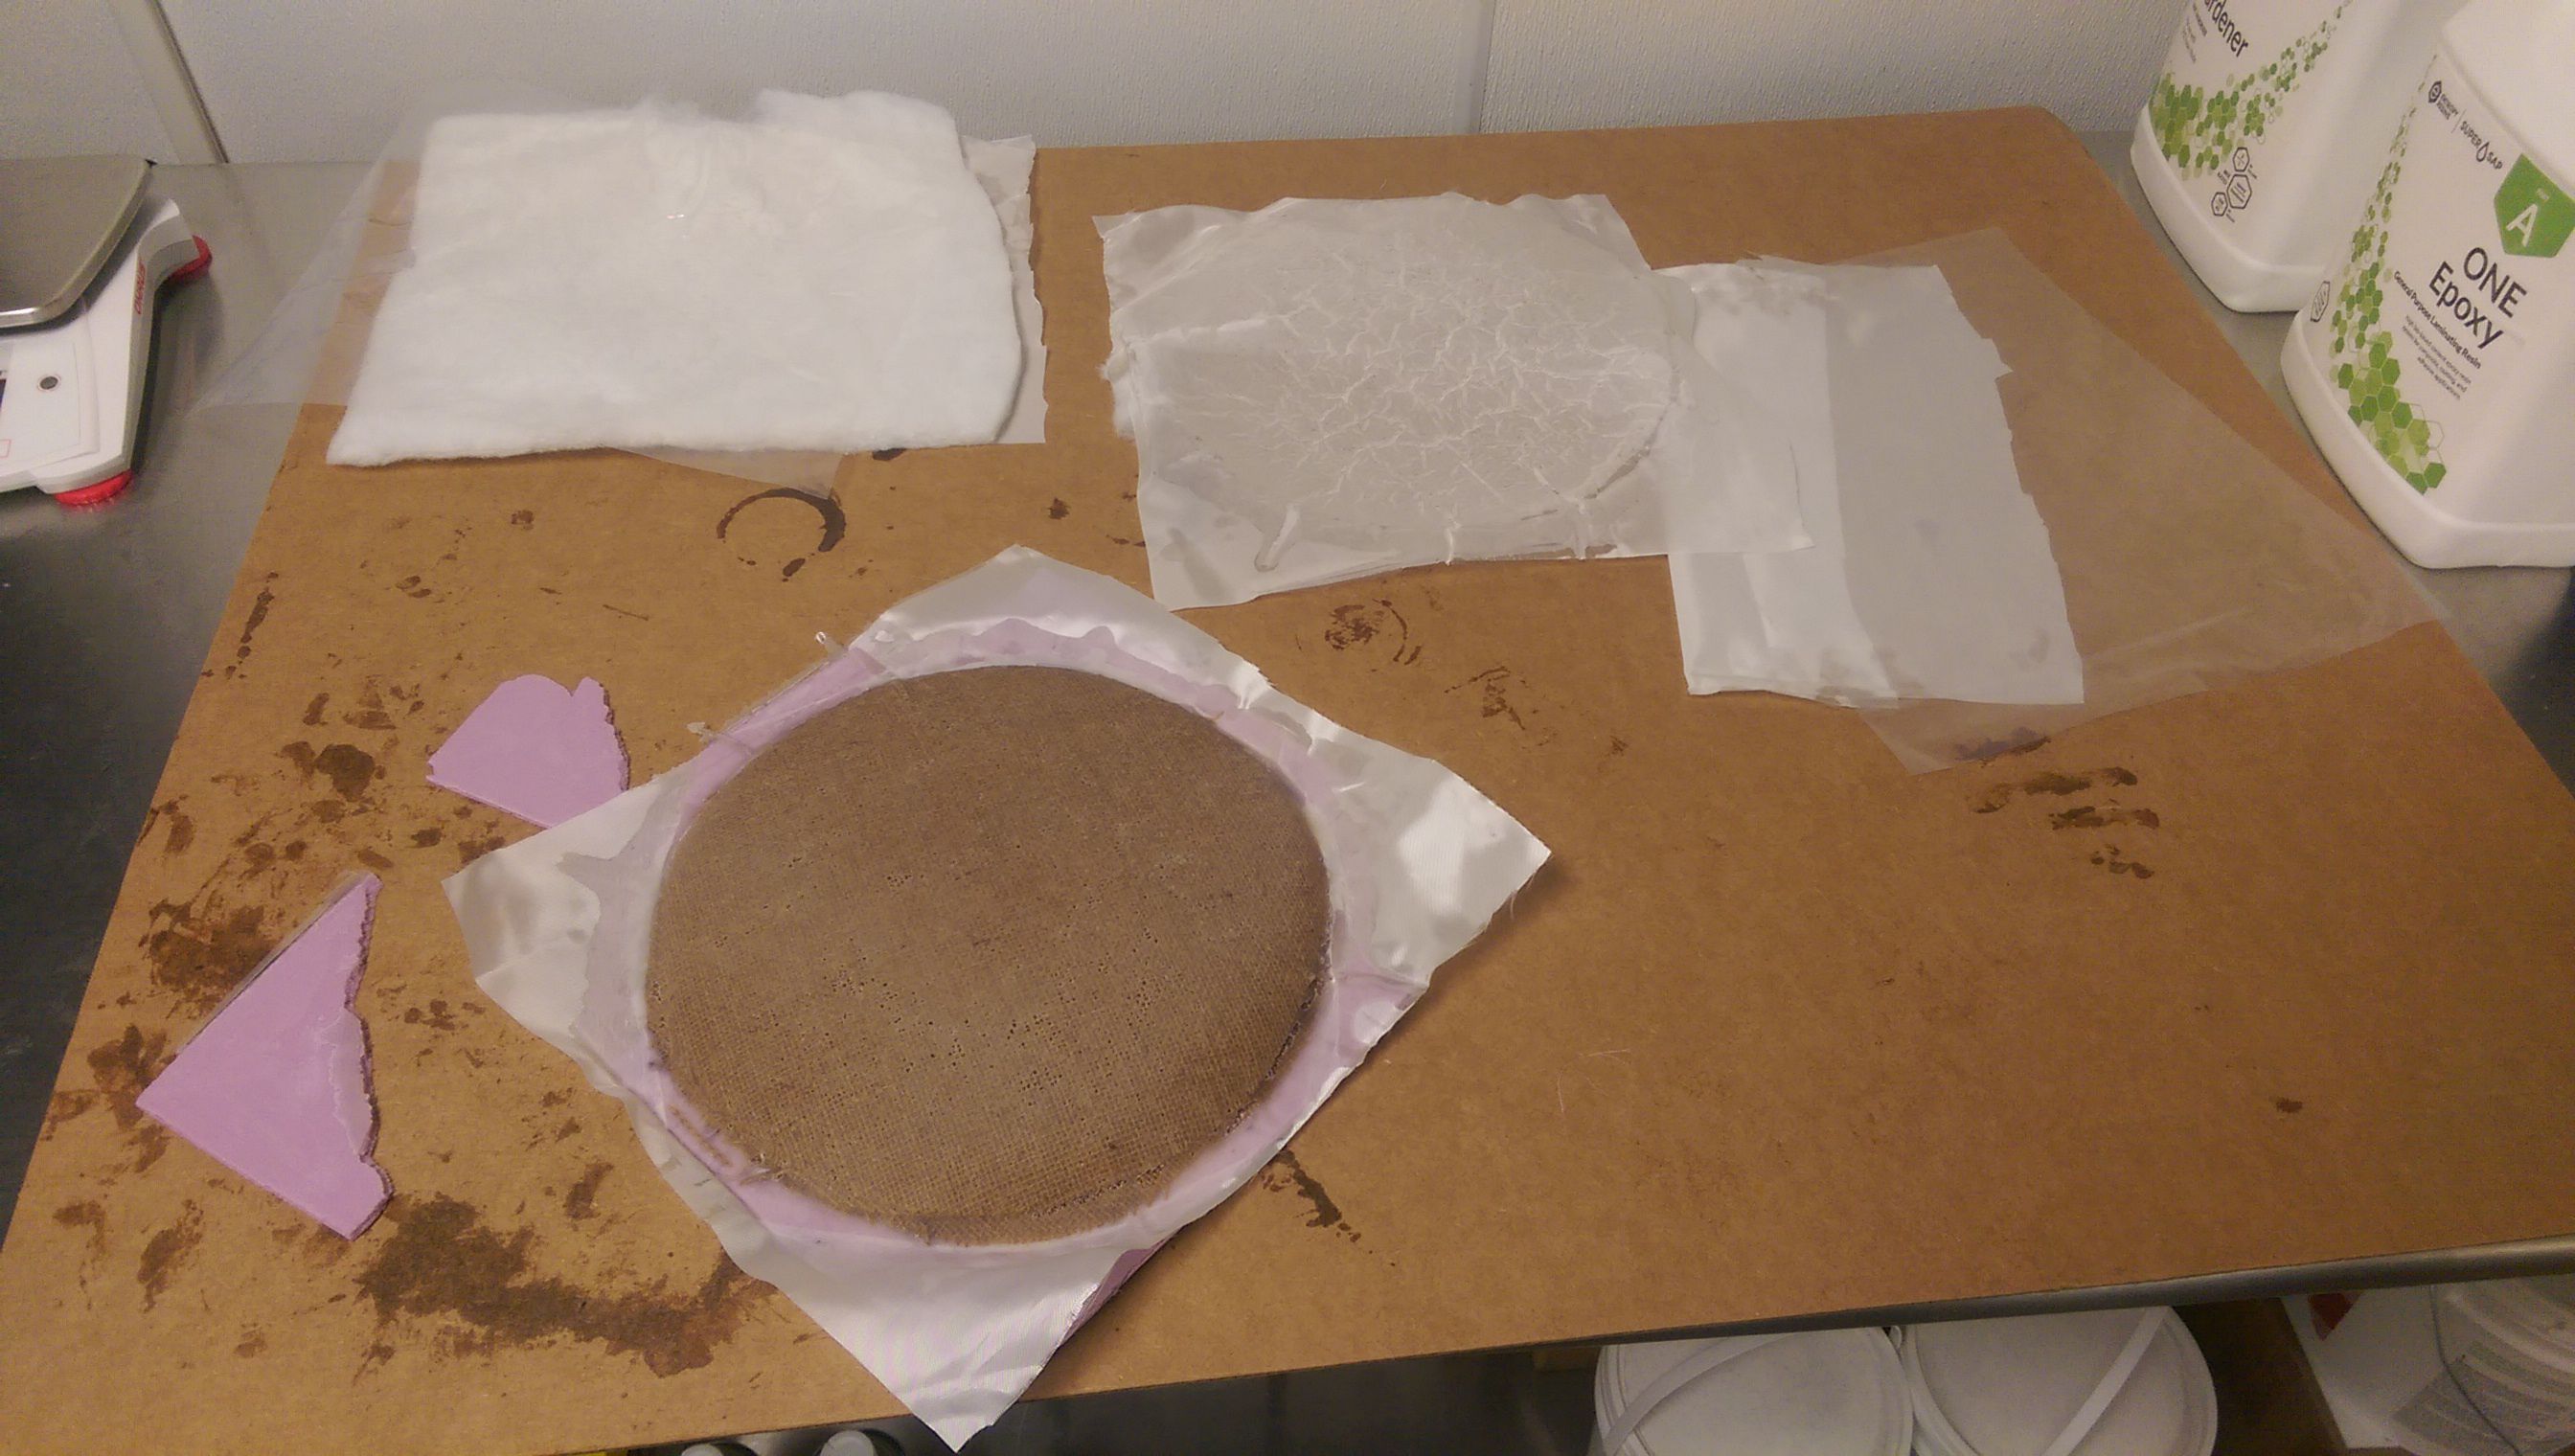
Except the frisbee off the mold. Apparently the relase fabric and the foam mold are not that easy to separate. I took a little bit of effort and brute force to remove the disc. The mold broke during this process.
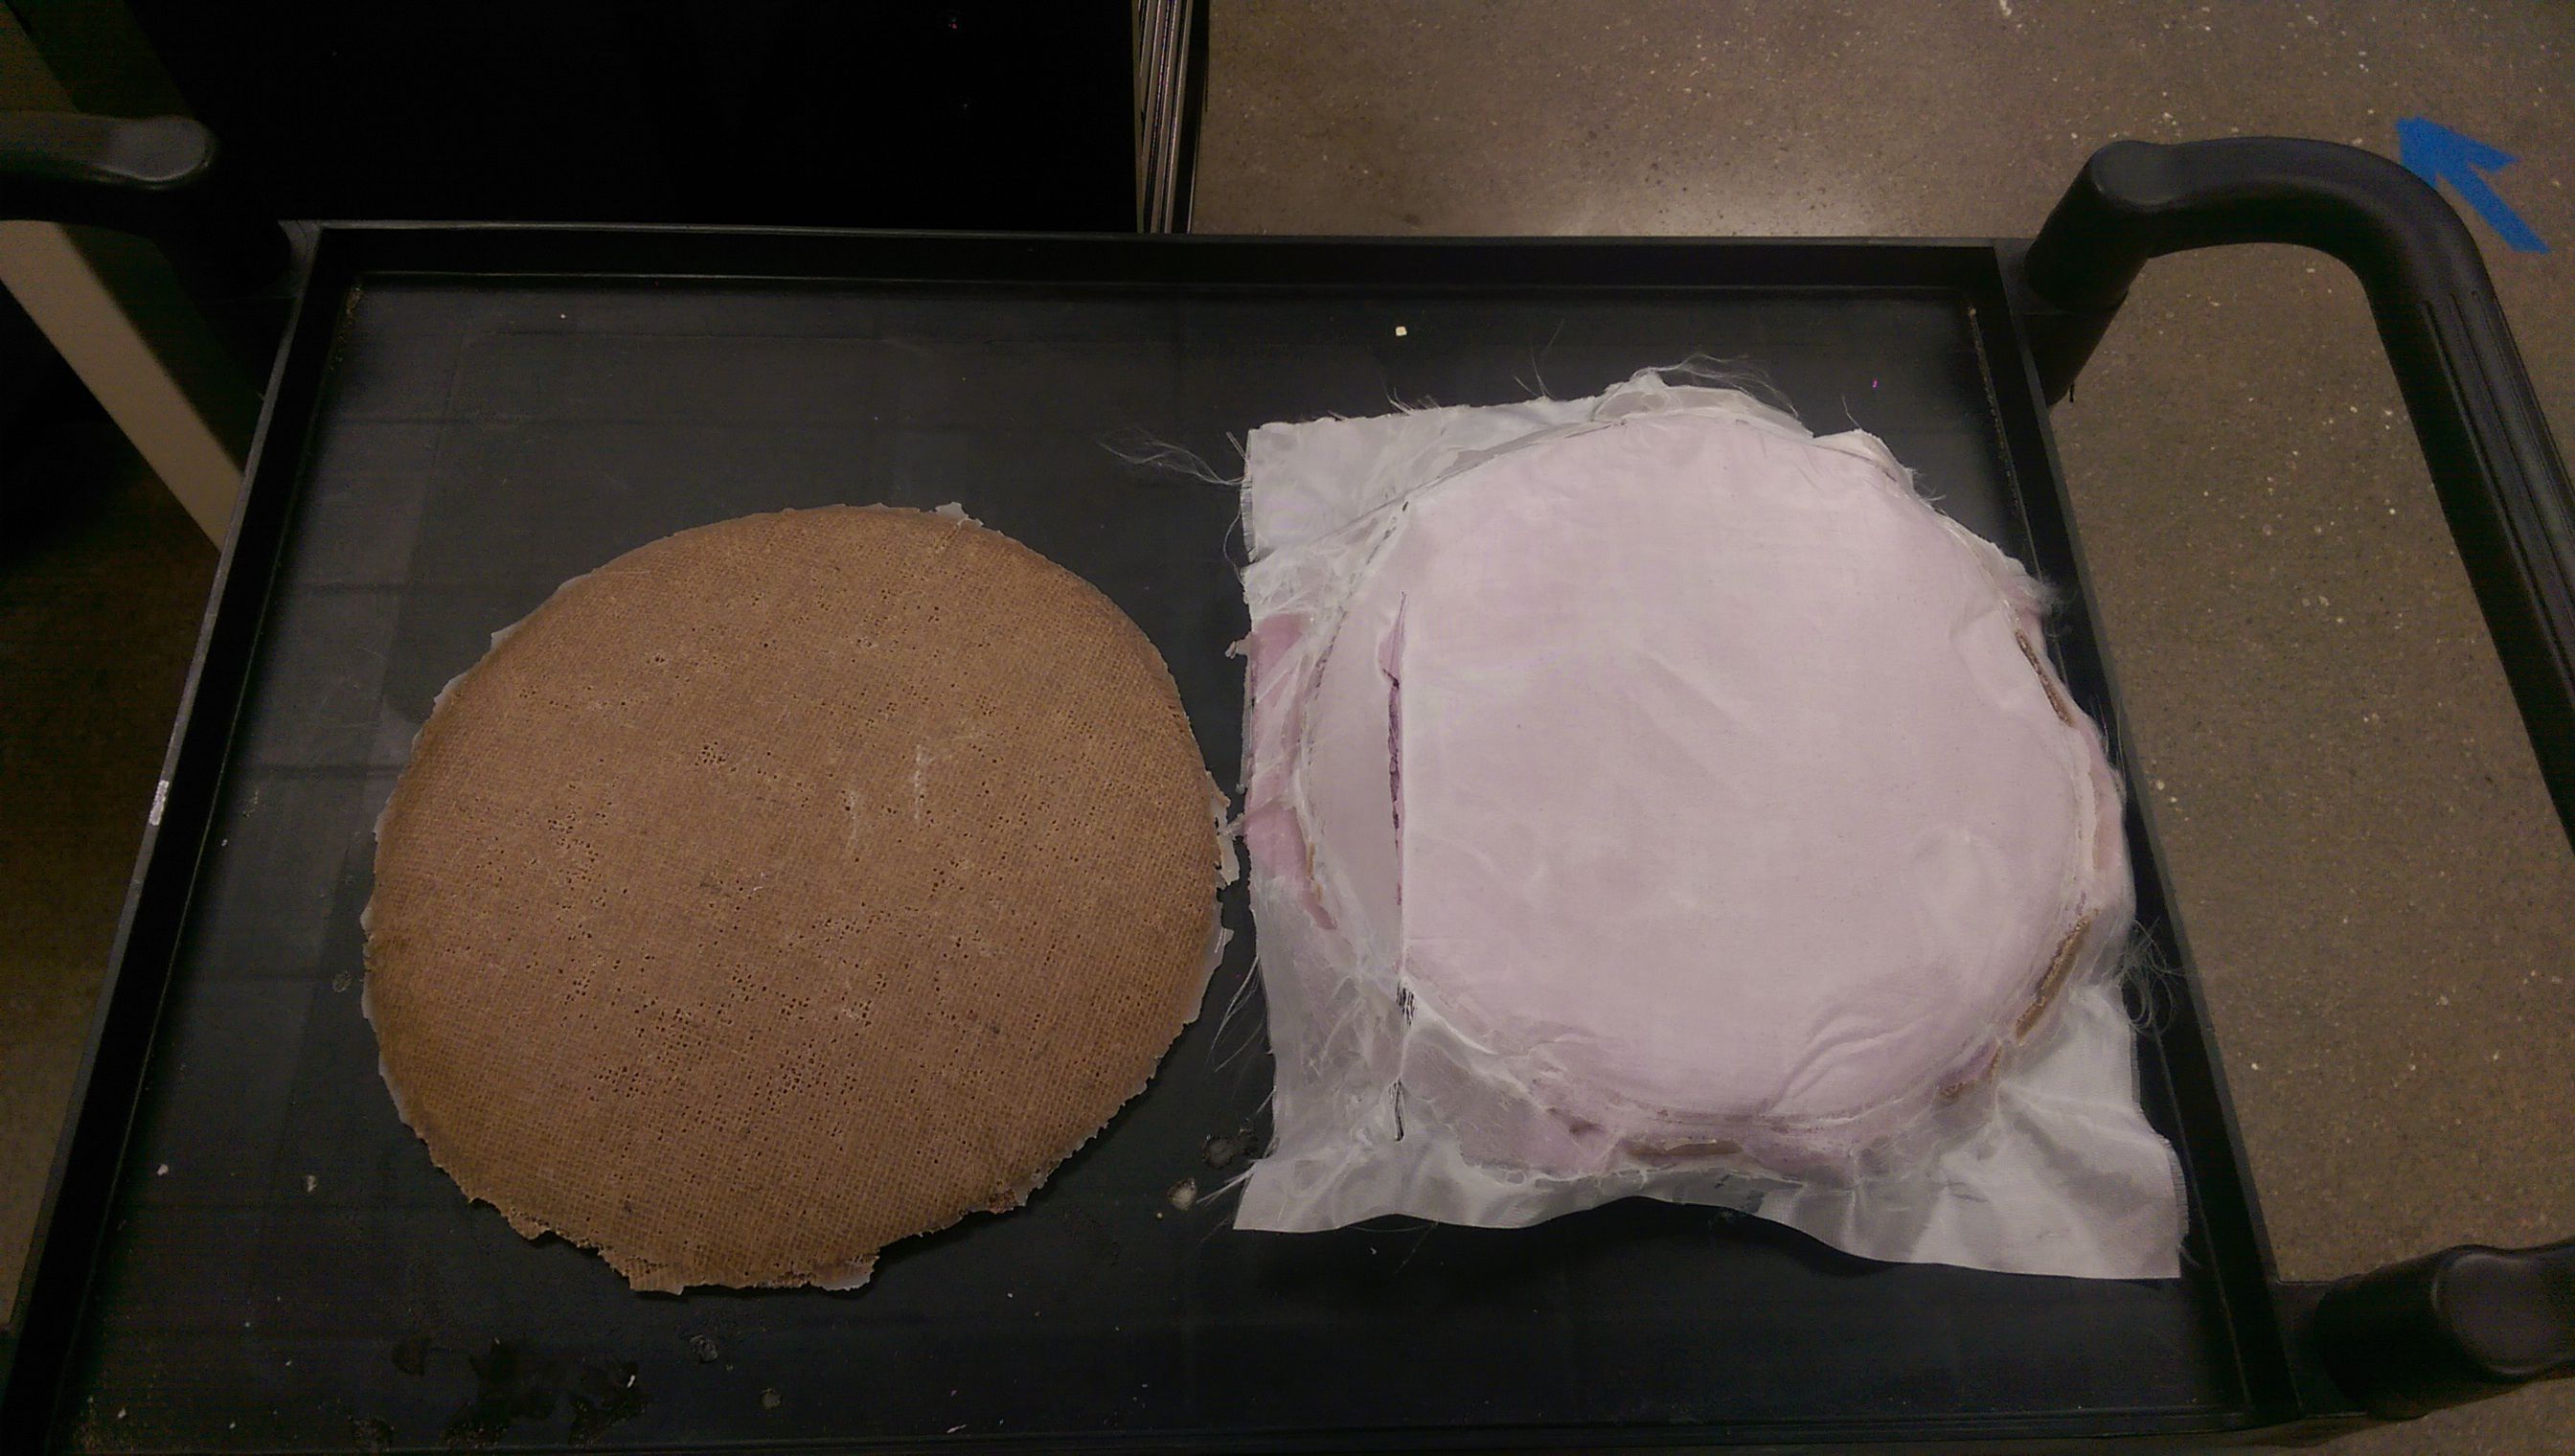
The lesson, I have learned here is that I am going to use food-wrap as a release film between mold and burlap.
Final Test
The frisbee is a bit thin but pretty tough. The vacuum was not that bad at all, since the air pressure could
squeeze it together. It has some little voids in the surface, apparently there could have been a little more
epoxy poured on the layers.
In the second and more advanced test, the seciment will be investigated regarding it's flying abilities.
After passing this advanced test by the local frisbee-experts, the disc found its place on my desk.