I was very excited about this week as I consider molding and casting a very interesting process. All the doubts I still have about 3D printing, are solved with casted pieces, you can choose the right material for your goal, and the issues of the structural weaknesses of the layers doesn’t exist. I must to admit after all this weeks, that well 3D printing is an art. I have seen amazing resolution pieces made with the same machines, but it also compromised the fast prototyping part of it. Anyway, molding and casting! It is not an immediate process, but allows to fabricate fairly fast lots of pieces once the mold is done.
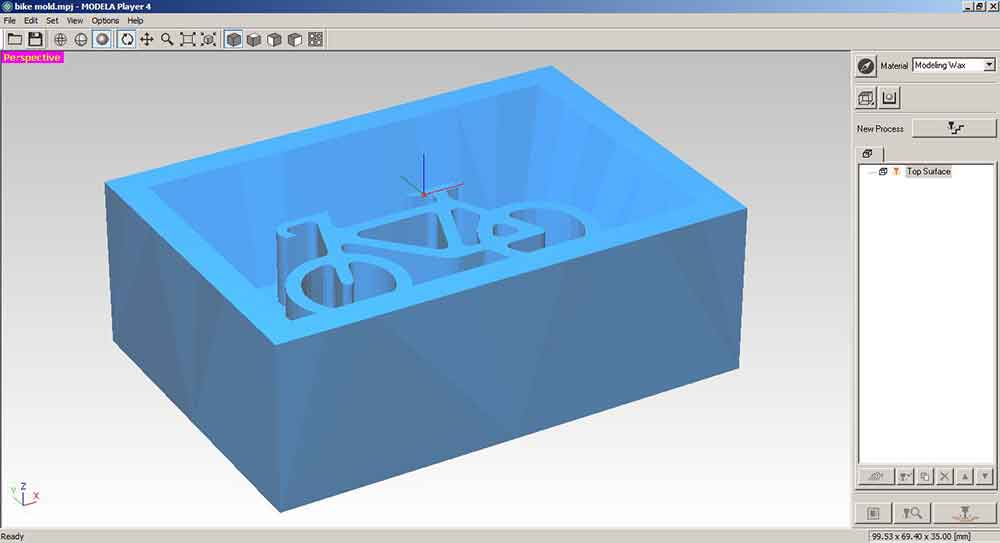
I wanted to experiment a lot, but having read past years' documentation about this week I realized and considering we are a very big class, I opted for playing smart. I modelled a very fast one side object, to be ready to mill as fast as possible. I wanted to finish the assignment requierments as soon as posible to have the time afterwards to experiment a little more. I opted for a bike, because it is my theme and also, because I thought it could be really cool to eat small chocolate bikes! XD
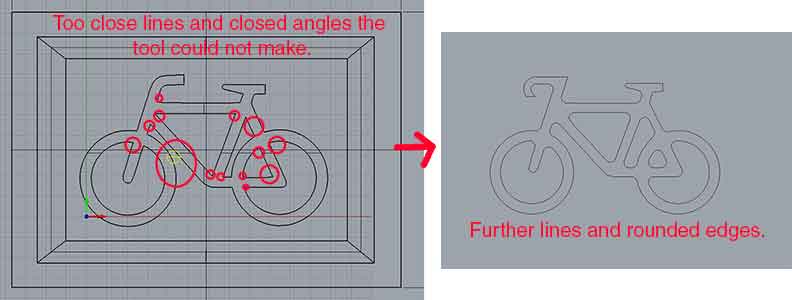
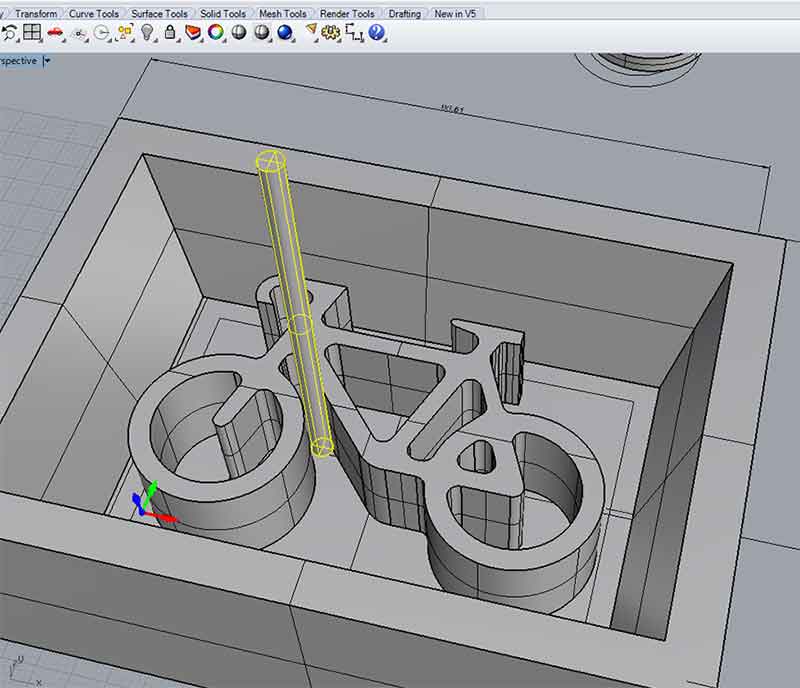
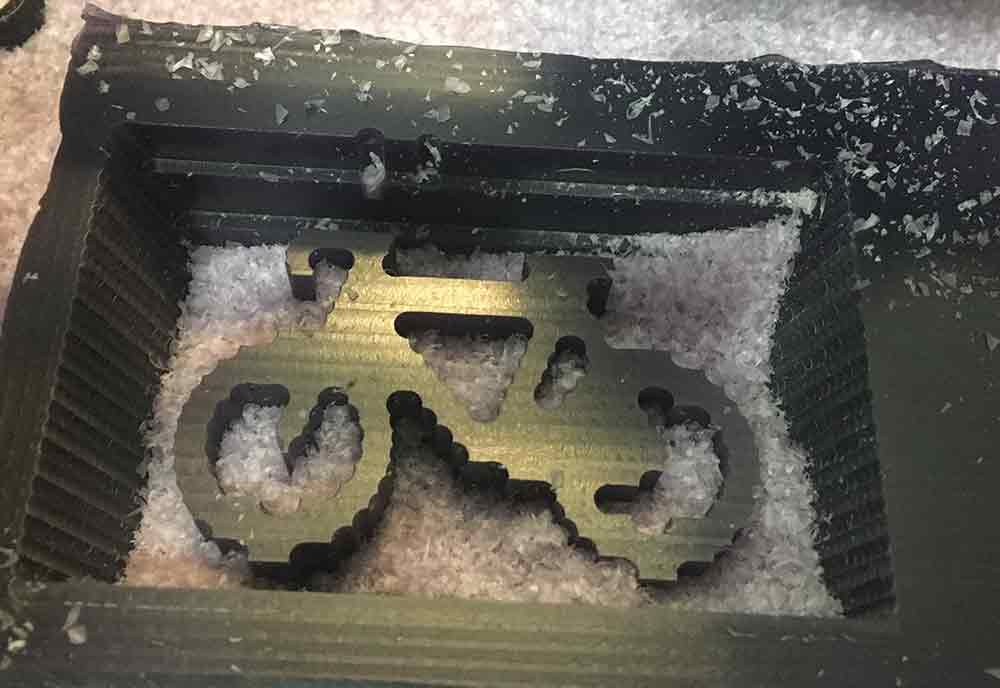
I started by doing a 2d bike in rhino, and extruding it. I modelled the box around it, that would be the wax perimeter to contain the silicon. After having done that I realized my closed angle geometries were not going to be millable by the machine. I changed all those angles to 3.18 mm diameter fillets, as that is the tool diameter. I had to adjust the drawing in order to make these changes. Once I was sure enough that the machine would be able to mill my geometry I exported it as a .STL, by selecting only my mold and FILE>EXPORT SELECTED> .STL.
Once I had an .STL, I used Modela Player 4 for generating the path for the machine. It is a much simpler CAM software than Rhino CAM. It has fewer options, and I think is explicitly made for making molds, which gives some useful options I did not really used as I had modelled the container box.
First, we open the program and we open our .STL model. FILE>OPEN>.STL

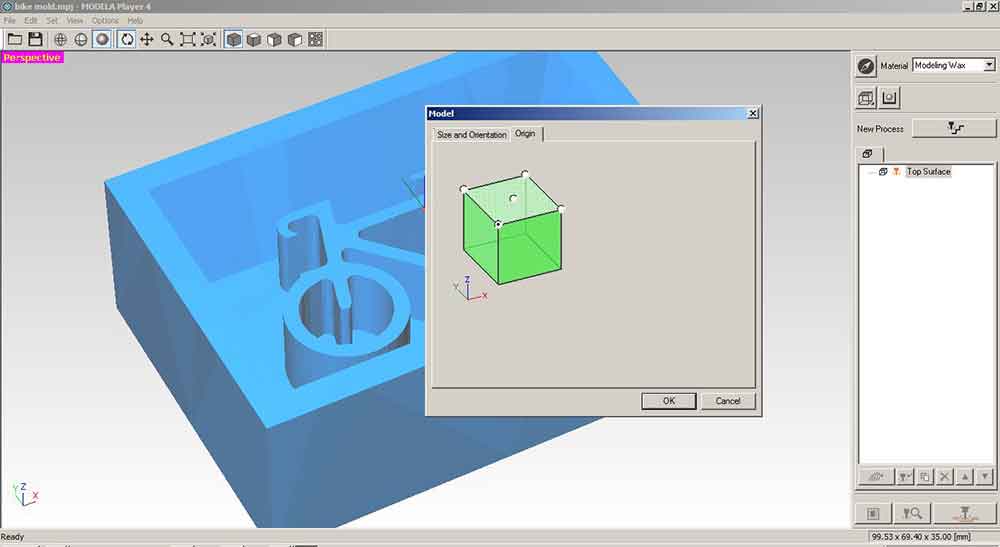
Second, we have to change the origin. By default it is set on the midle of the geometry, but we want it on the bottom left corner as it is where we will set it on the machine. SET>MODEL>ORIGIN. There we can choose which corner we want the origin to be placed. I chose the bottom left.
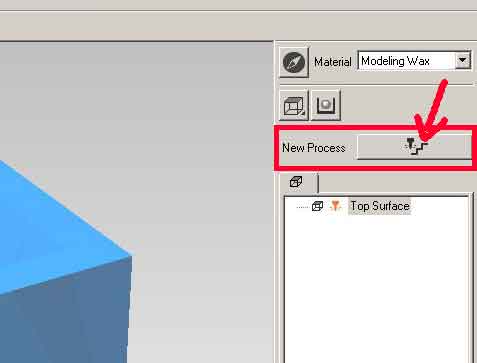
Third, we need to create a new process, by clicking on the NEW PROCESS icon on the top of the right side bar.
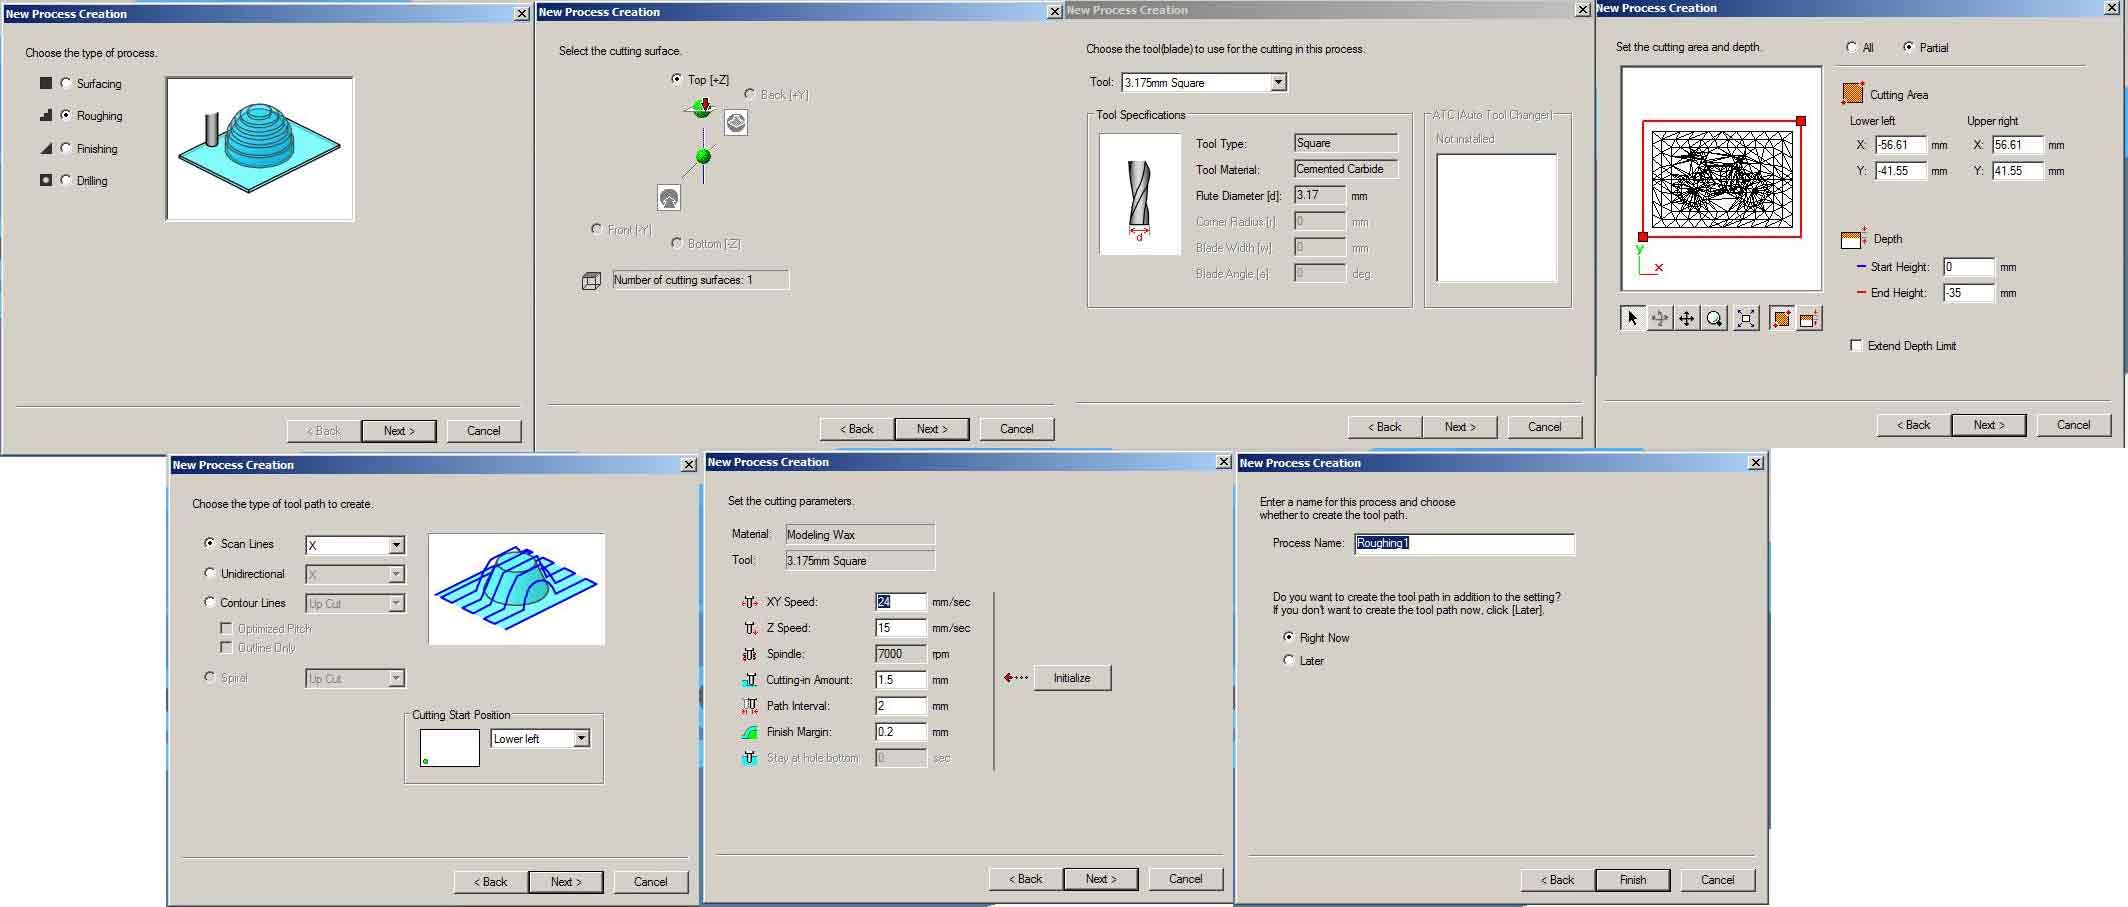
Afterwards, a new window opens. It will lead us to trhough the steps to create a toolpath. The right way of milling for molding & casting, is by first run the machine doing a rough take of material, and afterward running a finer path for resolution. If we run directly the fine toolpath, the milling could just take forever. The software knows this and it allow us to choose what kind of process we want. I selected ROUGHING, as that was the first path I created.
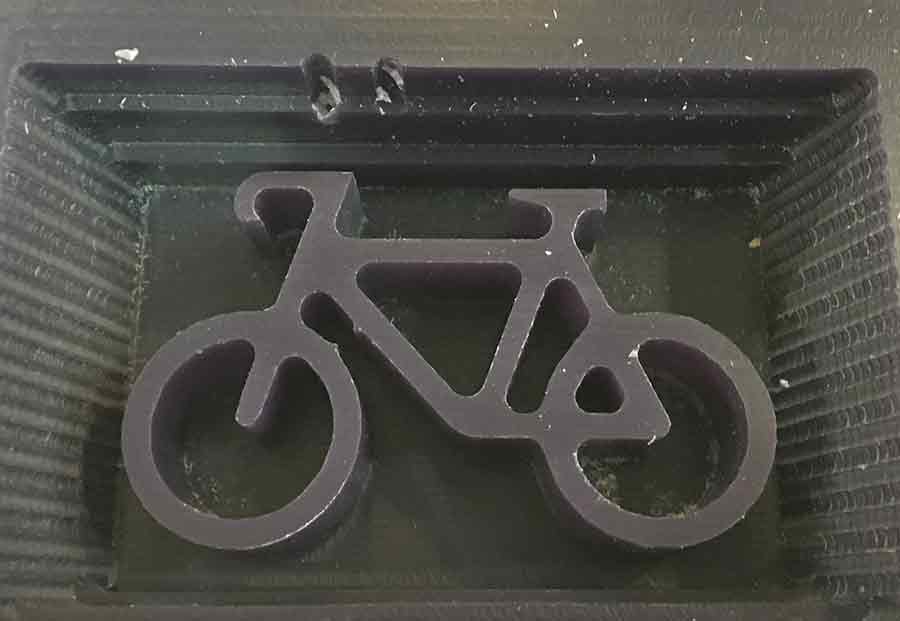
Once both the ROUGHING and FINISHING processes were created, I moved to the Roland SRM-20, and by using the exact same software we use for PCB milling and selecting the recently created files in the window that opens by pressing CUT, and pressingOUTPUT, the process starts. I went for a fast milling I wanted to make a resin keyring, but while the piece was milling and idea ocured to me, chocolate bikes and ice-cubes!! :P So I decided I will be using food-safe silicon for my first mold.
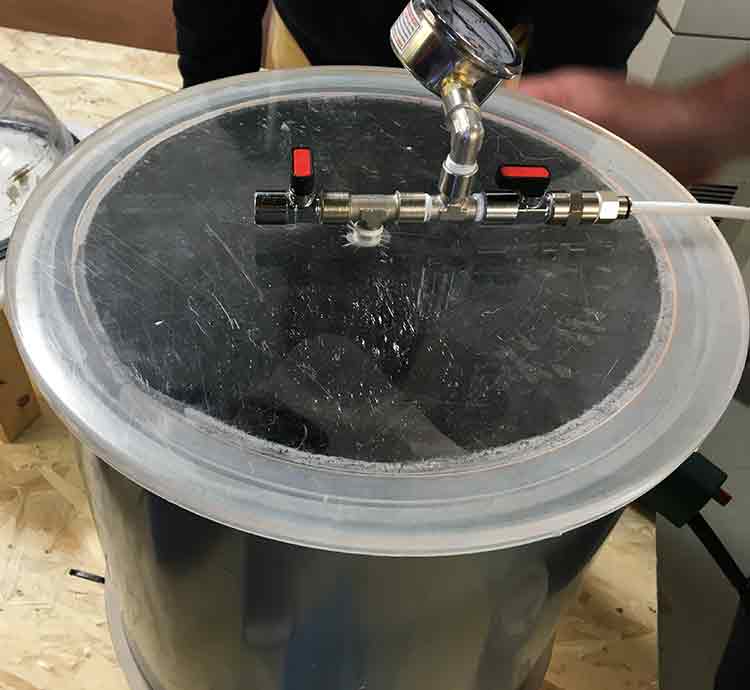
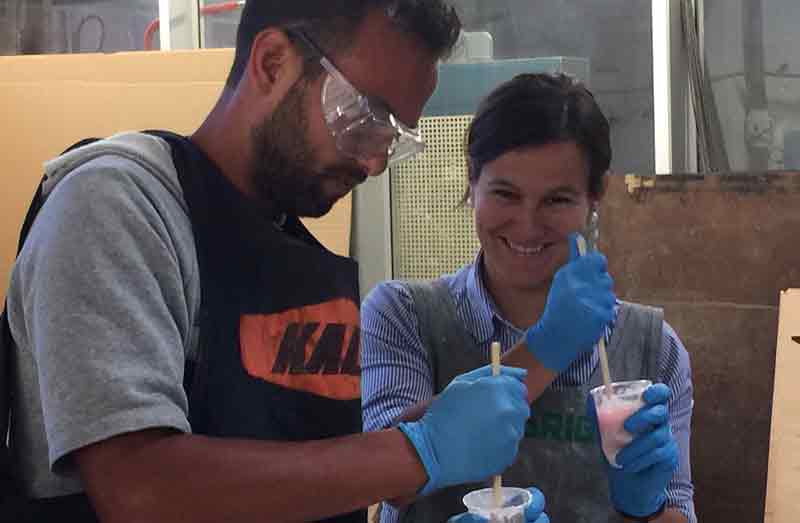
Once my wax piece was milled it was time to move to the mold making station we had set up in the lab. Martin, the lab encharged had made a new vacuum system using a PBC pipe and two acrylic pieces with a presure valve. My class mate JC and I were going to be the first ones to use it.
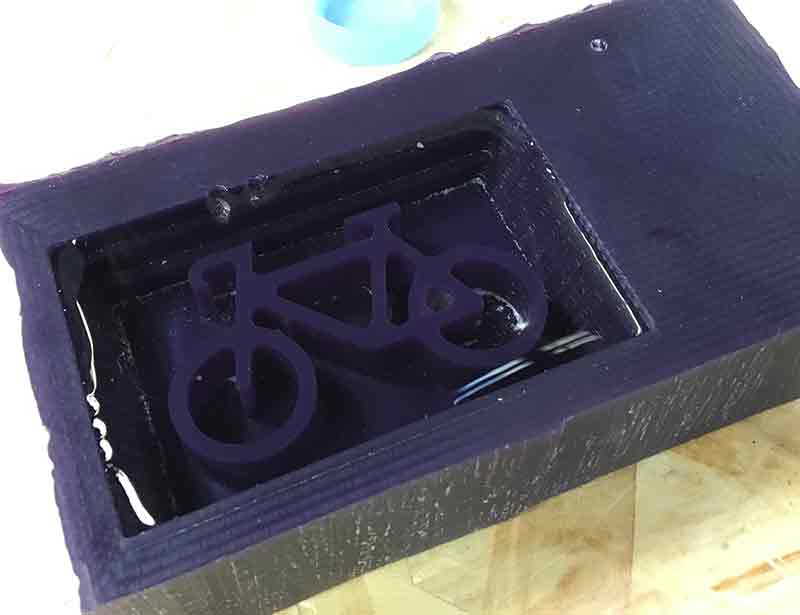
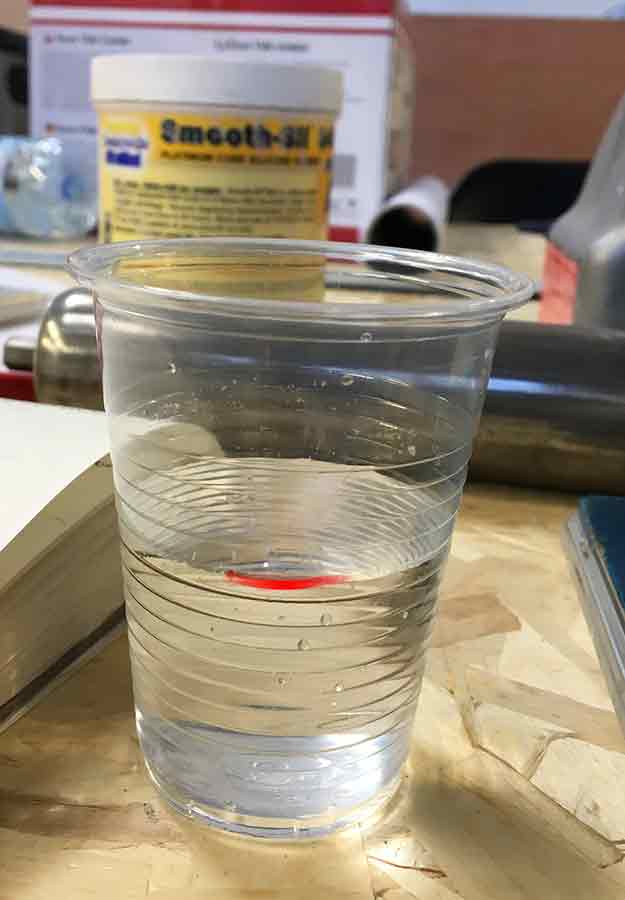
The first step was calculating how much silicon we were going to use. There are two ways of doing it. The first one, is to pore water in the mold and weight it. Checking out the data sheet of the silicon we are using look for the density, and calculate the grams of silicon we need in relation to the grams of water we had. The second one uses volume. In a clear gass, we mark the height of the water that fits in the mold and we replace it with silicon till the mark. I used the second method. Once we had wight the silicon we can calculate the amount of cataliser. We were using smooth sil-940, which uses 1/10 cataliser. I had 10.31 g of silicon so I needed to add 1g of calaliser. Once the cataliser was pured it was time for mixing. Our instructor told us: "Once it looks it is already mixed, just mix more!" So we did. We read wrongly the datasheet and though the cure timing was shorter than we though. We though we didn't have enought time for doing a degasing on the cup before pouring the mix in the mold, so we poured it straight to the mold and Forgot to spray mold releaser!
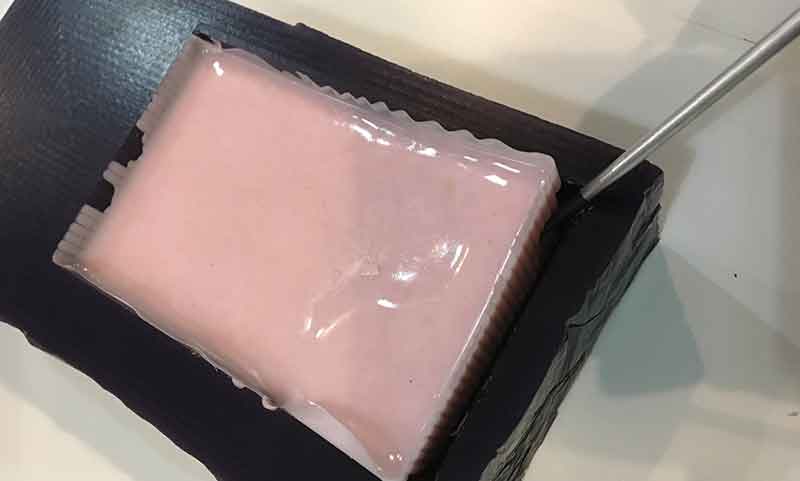
We put our molds into the vacuum and turned the pump on. The valve starts comig down, if the perfect void is created, the valv would reach -1, but the truth is that for getting to that point a very powerfull pump is needed. Once the pump was on tons of bubles started coming up to the surface. Martin told us that is good practise to open the chamber from time to time a get rid of those bubles by using the heat gun. I learned that the mold walls should have been a bit higher in order to prevent the loss of mix when it starts to grow. I recorded a video of the bubles, it is fast foward, at the end you can see how many bubles came up to the surface.
This silicon has to cure for 24h. After this time, I took it out. It was very dificult as I had forgoten the mold releaser. I had to use a srewdriver and a lot of patience to take it out, but when I finally took it out it was very good. Not a single bubble, so I was very happy.
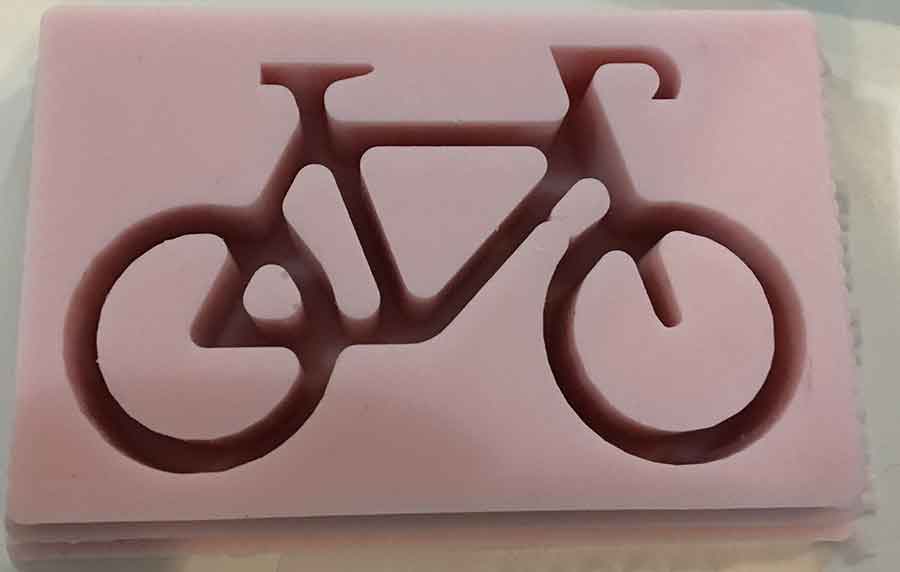
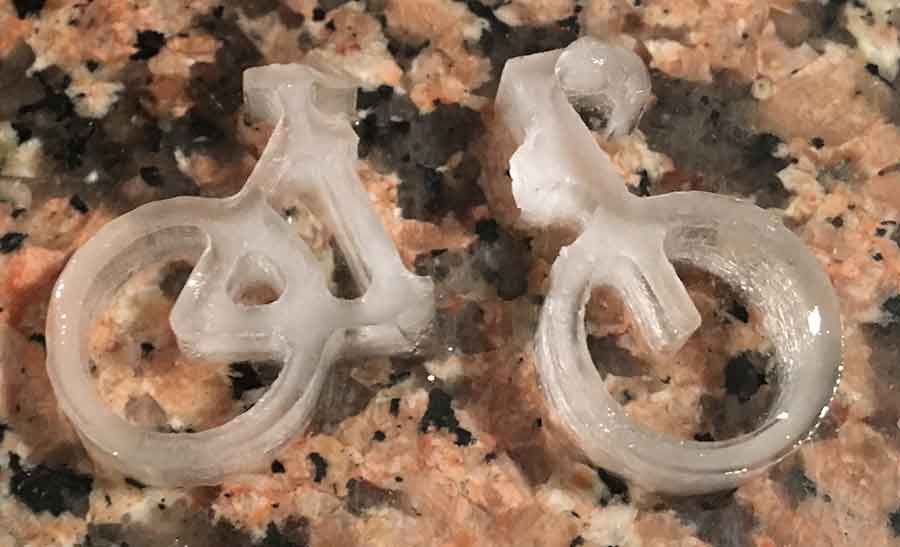
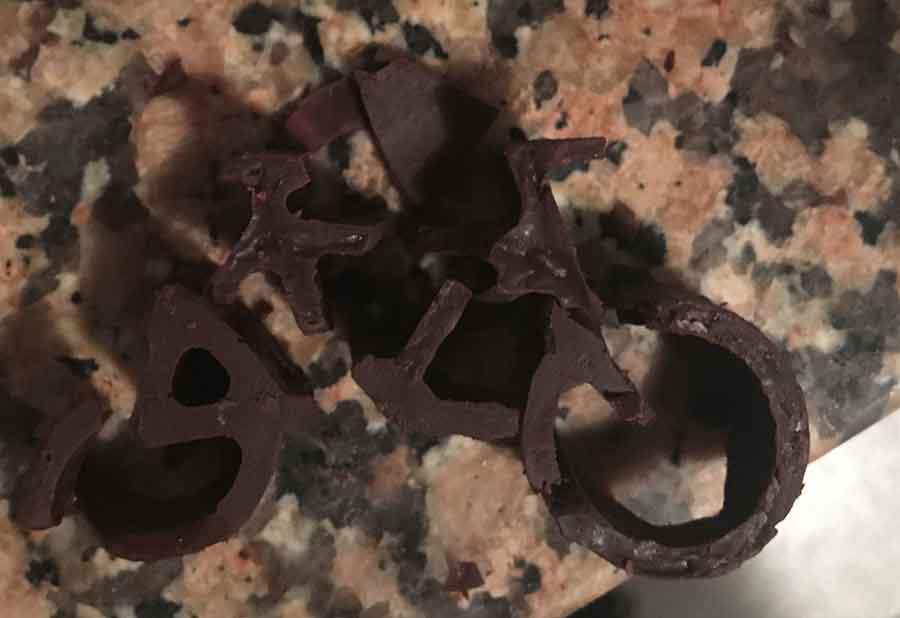
SMOOTH SIL-940 once the mold is done need to be in the oven for 4 hours at 100 celsius degrees. This is an important step as it will be casting food. Once this step was done, and the mold was cold, I did my first test with ice. Then I realised it was not a suitable mold for casting food. The model was designed for casting a small resing keyring, and resin is stronger that either ice or chocolate. The model was not think as a food element so it was very thing and deep. This was an issue whe demolding, all my pieces were totally broken... :( Now I will need to do a regular silicon mold for resin casting in order to get some use for my bicicle.