Week4 : Electronics production
The programmer a tale of two cities, two ISP's
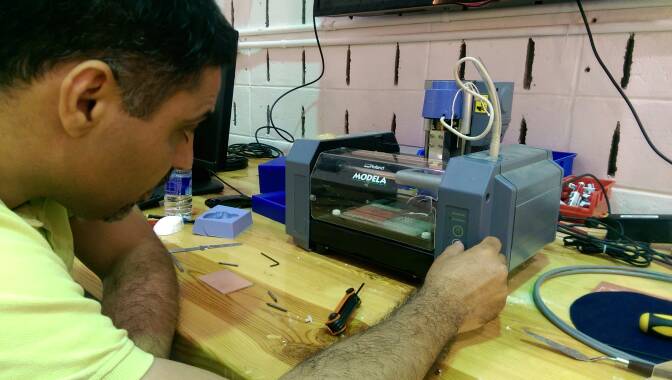
Milling the board
When I first started the fab academy we still didn't receive our Modela MDX-15; a key machine in Fab Academy as I came to realize later. The story of our fine milling didn't start too smooth but I will get to that later. First we had to start milling some pcb boards to get started, and our best shoot with no access locally to a milling machine was to travel across borders; well not really far it's just 48 minutes drive by car without traffic.

Fab Lab Dhahran is a well equipped facility and the team is young and extremely helpful. They have been very active since their start in Jan 2014.
We received the MDX-15 just few days prior to our travel to Dhahran, but it was in a bad condition. The shipping caused the machine tension wires to get loss. Thanks to our remote instructor Francisco we got a copy of the service manual and were able to repair it. ( We still owe you a drink Francisco).
But we had some issues with connecting it to a computer, the software and driver where for windows and even without that fact it didn't work for some reason. The available cable required a serial com port, not available in any of our desktops or laptops. So the quest to find a converter started.
I tried fab modules but nothing happened.
I started by hocking up my laptop to the MDX-20 in Dhahran, I used the fabmodules version i installed on my laptop just prior to starting Fab Academy. I chose two different traces the hello.isp.44 traces and the FabISPkey.
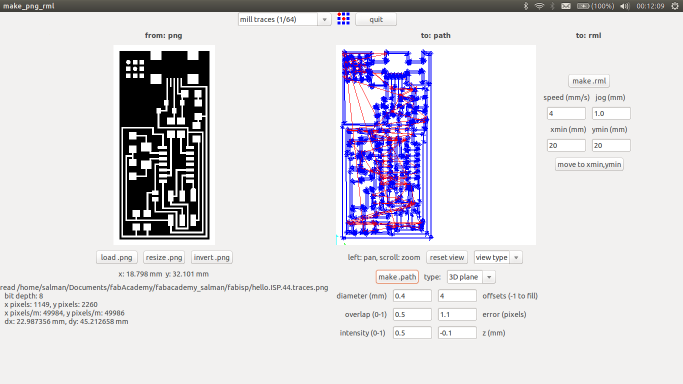
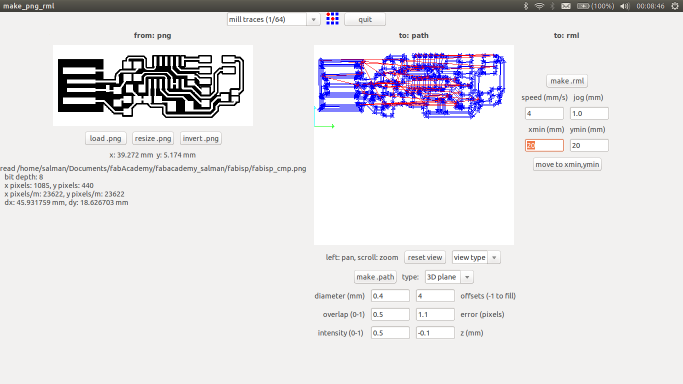
But waited and nothing happened, the machine didn't start, I thought that there is something with my compiled version of fabmodules. Which I never tried before. I pulled the USB cable out and put it back again to another port, but also nothing. Then I thought let me try something which works usually with usb cables and arduino, and also used to be a source of trouble with an old Makerbot Thingo-O-Matic machine.
sudo chmod a+xrw /dev/ttyUSB0
And after that the machine worked like magic.
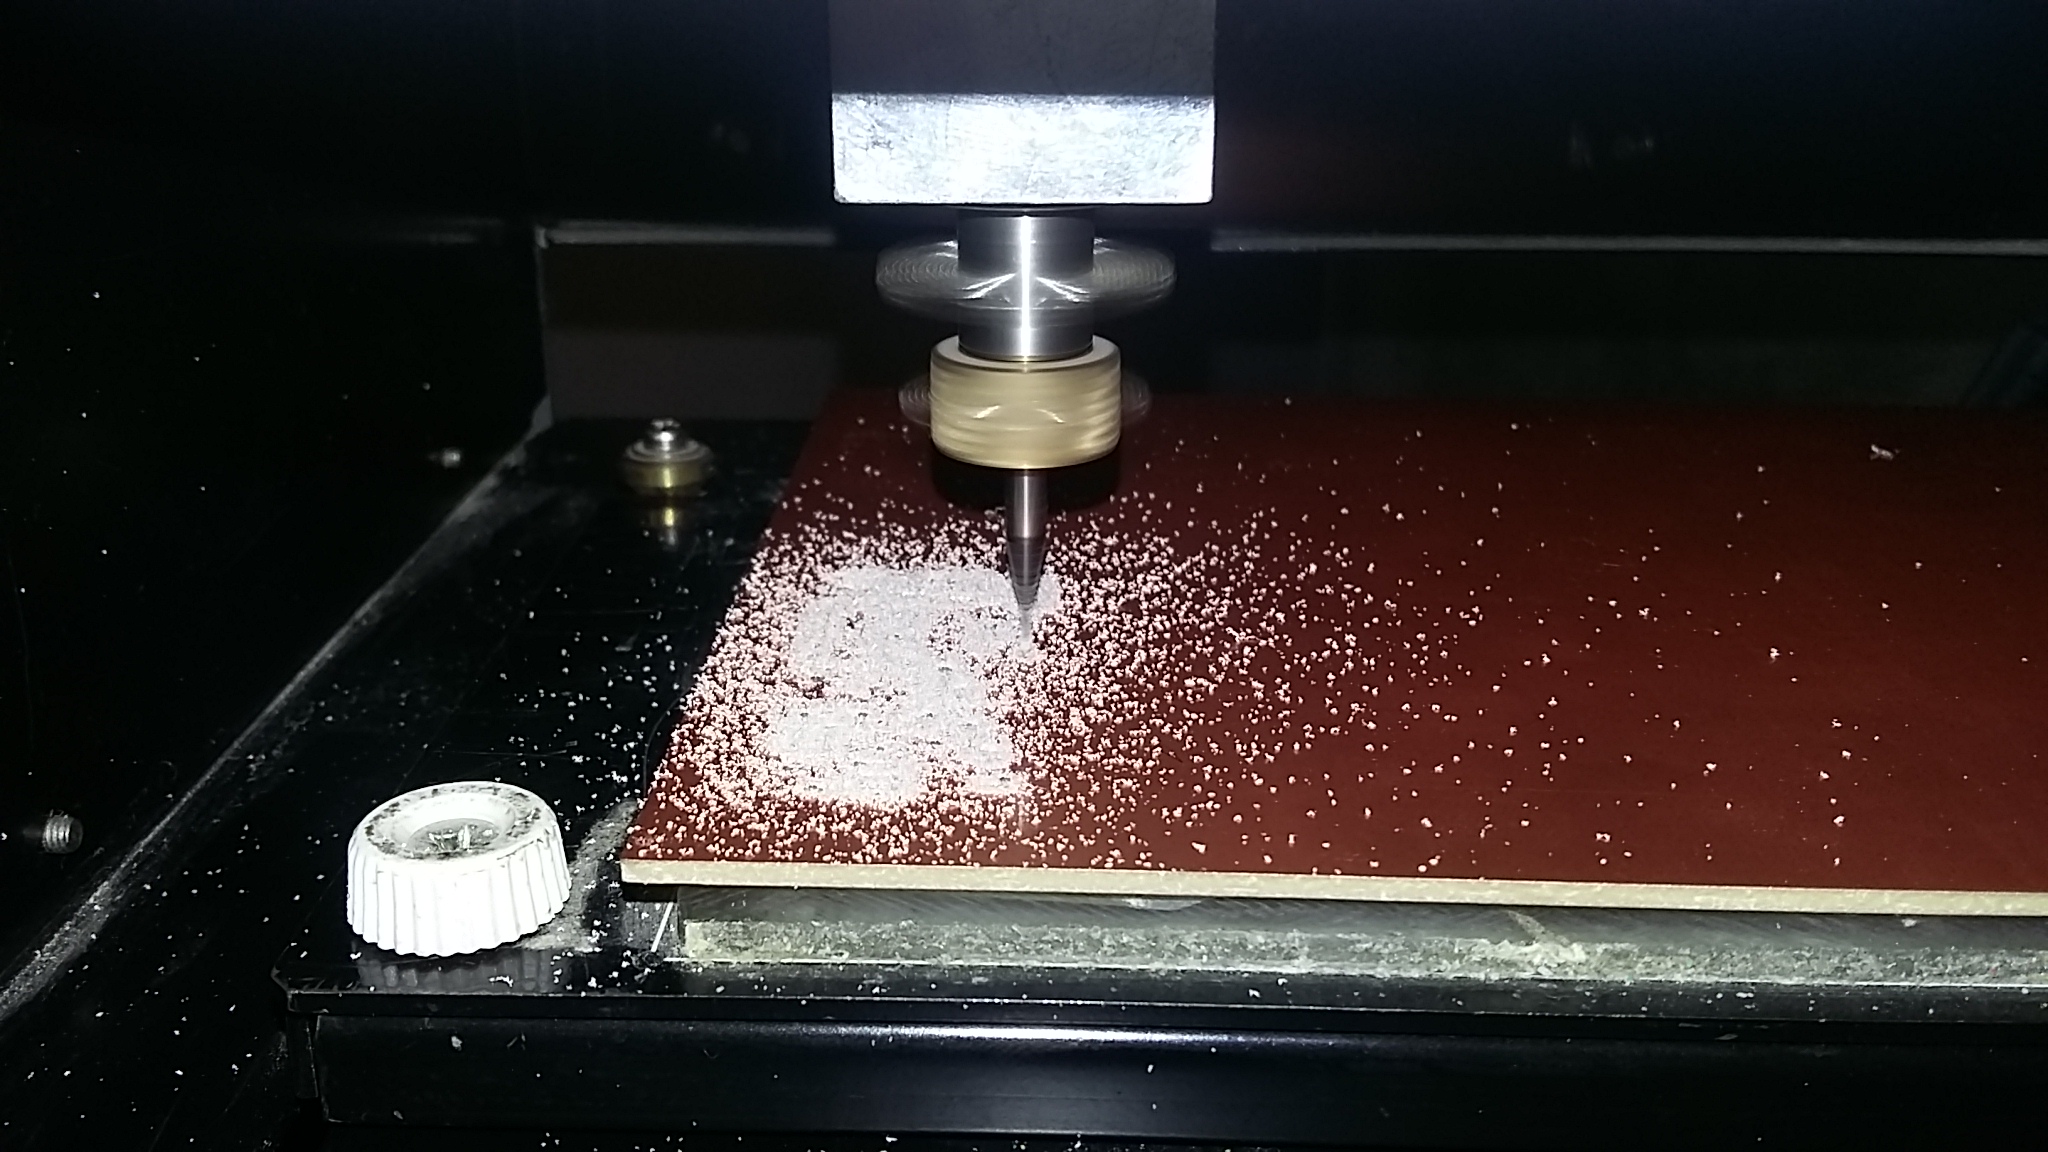
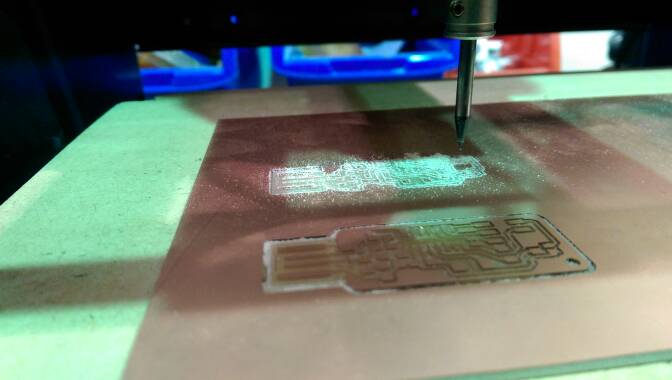
This is an image i took later from our own MDX-15 not the one in Dhahran I don't have images from the milling there available, I provided this one just to maintain a visual continuity. The process will look similar anyway.
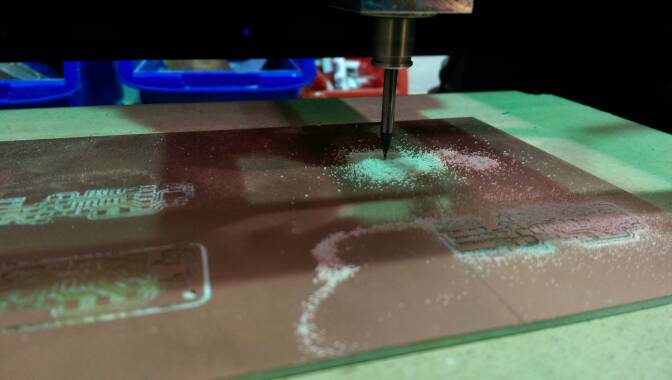
the following are images I found recently after searching my g-drive

We learned few things from this experience :
1- First how to switch between traces and outline bits. 2- How to zero the Z access level.
In this session we achieved the following:
-Our mdx-15 worked smoothly and we are able to use the cable with a usb-serial converter on a linux with fabmodules( not the online version though).
-We milled few circuits ( Hello.ISP.44 x 2, KeyISP x 3, Hello World x4)
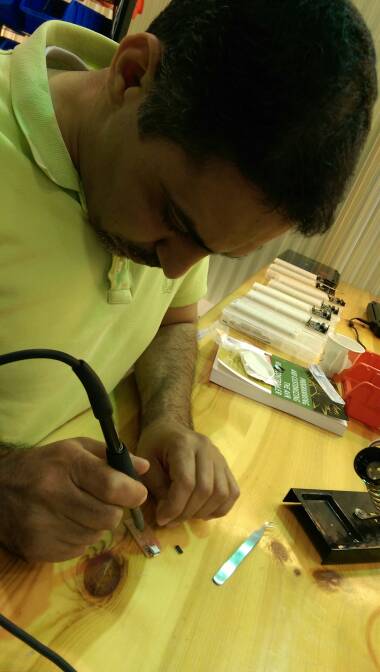
Soldering the components
It was an interesting thing to try to solder SMD components for the first time. The interesting part is that you realize how surface tension is your friend in this process and you eventually can solder components fairly well in a short period.
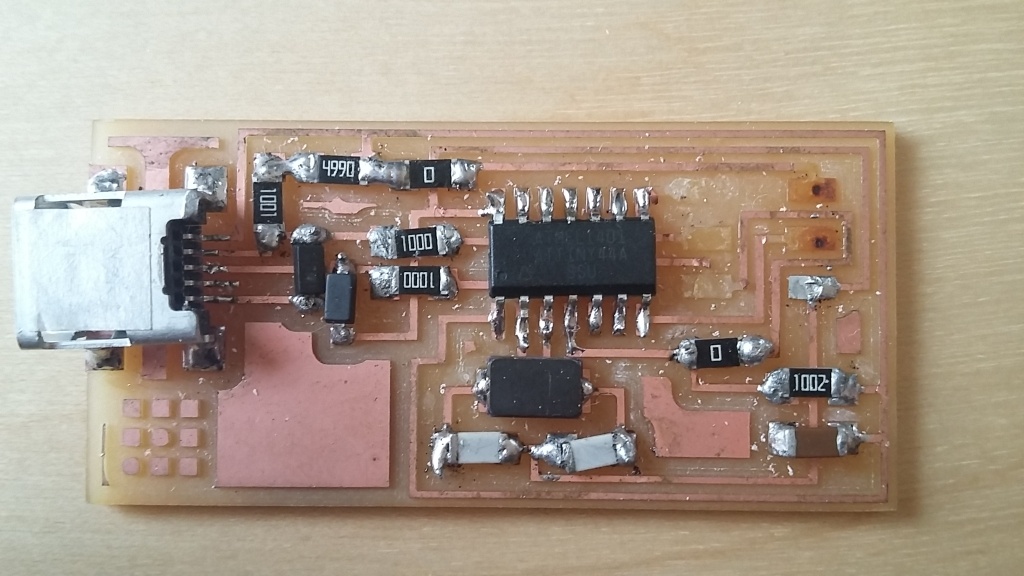
Not a master piece obviously but I would say it was a good start. -We got the components soldered on the ISP ( david)
-Tested for shorts and did the smoking test and both are fine.
Few tricky things that we had to search for online while soldering
- The polarity of some components specially the diodes
notice that the ISP pin out is missing, I have snapped it out when attempting to remove the AVRISP2. ( More about that later).
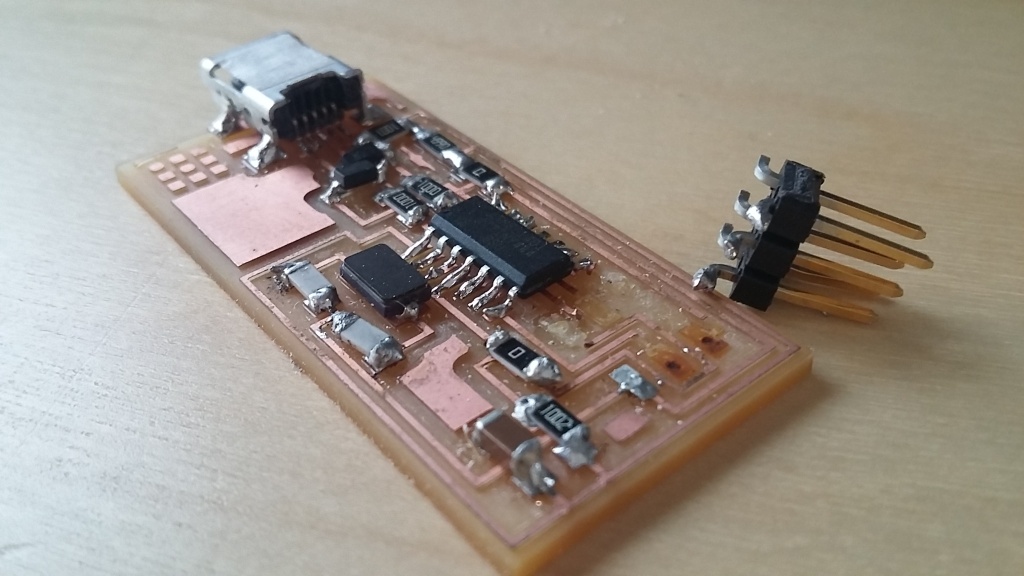
So that was the end of my first attempt, and I left it as it is for some time.
Then when I decided to do the ISP again I decided this time to try another design. So I went for the ISPKey instead. I did the soldering this time at one go, something like 1 hour and 30 minutes from the moment I laid all the components on a piece of paper until the finish.
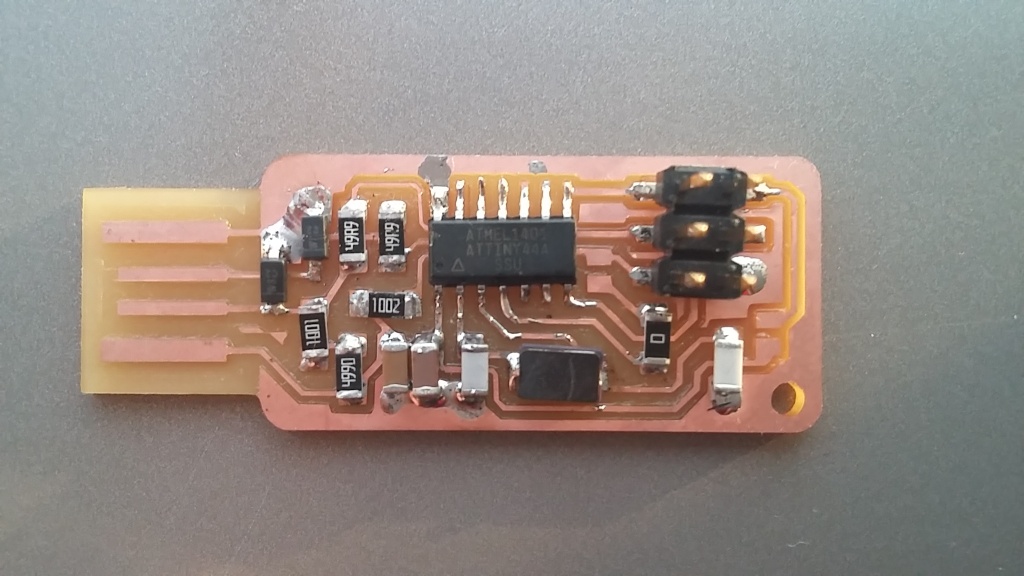
This just prior to adding the solder jumpers. And I had to cut a piece of plastic card the size of the ISP to make it more stable when connected to the USB port.
I then started inspecting my soldering and again ran few tests with a millimeter test for a possible short and also assure continuity. All was OK.
Programming
First I when I was planning try using an Arduino as an ISP.
Uploaded the Arduino as ISP to an arduino UNO, but couldn't program the other ISP neither using the IDE nor the make file from the ISP firmware. I just went through the makefile before and found a possible line to be changed:
AVRDUDE = avrdude -c avrisp2 -P usb -p $(DEVICE) # edit this line for your prog$
I think i need to replace 'usb' with /dev/ttyACM0 but not sure if I need to change 'avrisp2'
The question, should i follow this route or should we better purchase a ready ISP programmer.
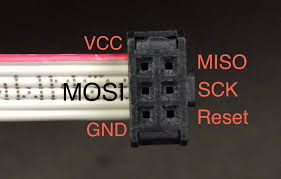
I continued trying with Arduino but then i asked the guys at Dhahran is we could borrow their AVRISP2 which they don't use frequently. I got it and with much excitement i immediately connected my ISP pins to the AVR cable and I realized that I didn't check if the direction was correct I rushed to pull the cable and that caused the pins to snap out as shown in the image above.
So In my second attempt with the KeyISP I made sure to have the image of the PINS layout in front of me before starting to connect the programmer to the AVRISP2.
I connected the AVRISP2 following this layout carefully this time, not to get into the same old issue and not to make mistakes again.
Then following with the simple three commands after downloading and unzip of the firmware.
make clean
make hex
make fuse
(sudo make fuse) worked eventually
make program
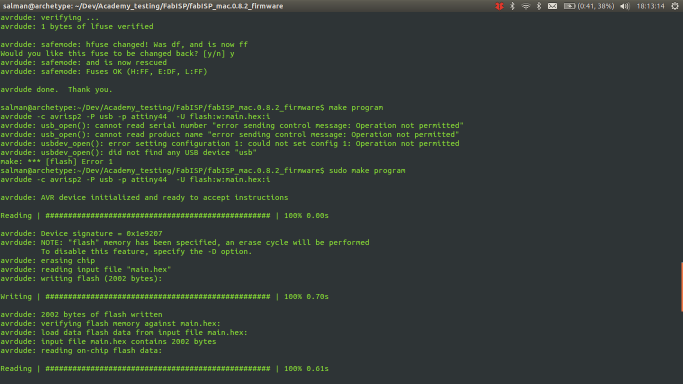
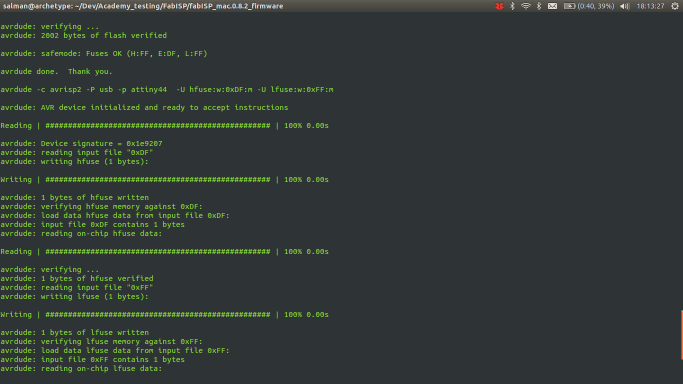
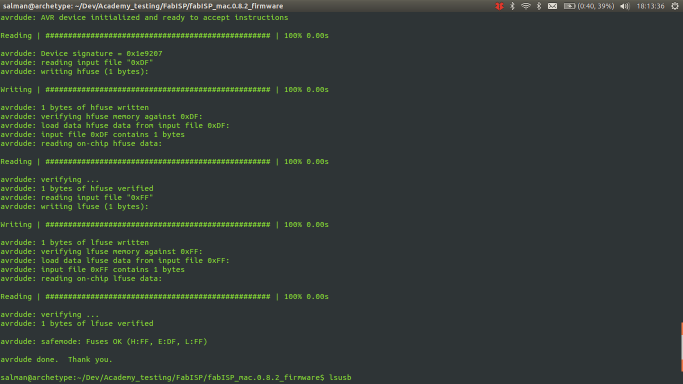
And that was it after a long attempt the ISP programmer, it's ready. Well I still need to desolder the solder jumpers to start programming. Which I should do the first time I am going to use it, but for now I am so excited to have done it in one go with just minimal debugging needed, maybe this is not in my favor. Because one usually learns more form debugging, but I guess I had learned more in this exercise about starting Fab Academy with no proper setup than anything else.
I connected to usb port and listed from my laptop the usb deviced connected, I get the following results
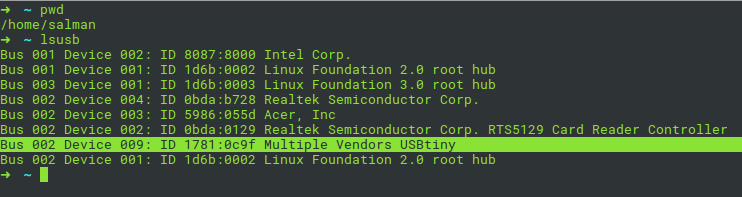
Which indicats that the usbtiny has been identified correctly through the USB bus connection.
So my recommendation:
1 - Make sure you have all your materials and machines handy before starting ( The inventory is you friend in this one) 2 - Don't rush to connect anything before figuring out the proper layout, and keep that in front of you. 3 - learning from mistakes is the best way to find solutions, and every small detail you learn along the way will come handy at one point. 4 - Document with writing and images immediately, so you don't do double work later on to search for images or notes.