Week 8
Embedded Programming.
ASSIGNMENT:
1.) Read a microcontroller data sheet.
2.) Program your board to do something, with as many different programming languages and programming environments as possible.
ASSIGNMENT:
1.) Read a microcontroller data sheet.
2.) Program your board to do something, with as many different programming languages and programming environments as possible.
This week consisted basically on learn about microcontroller programming.
It is the first time I have contact with everything related to microcontroller programming, so this assignment was very difficult for me, but I think I could understand the basics that enabled me to finish the job.
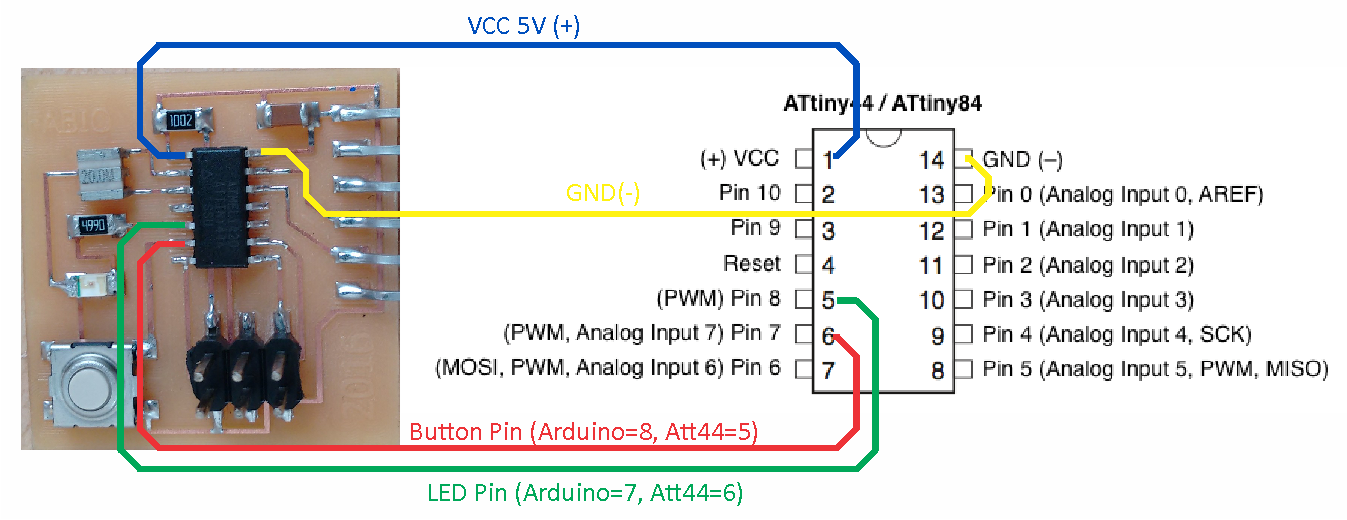
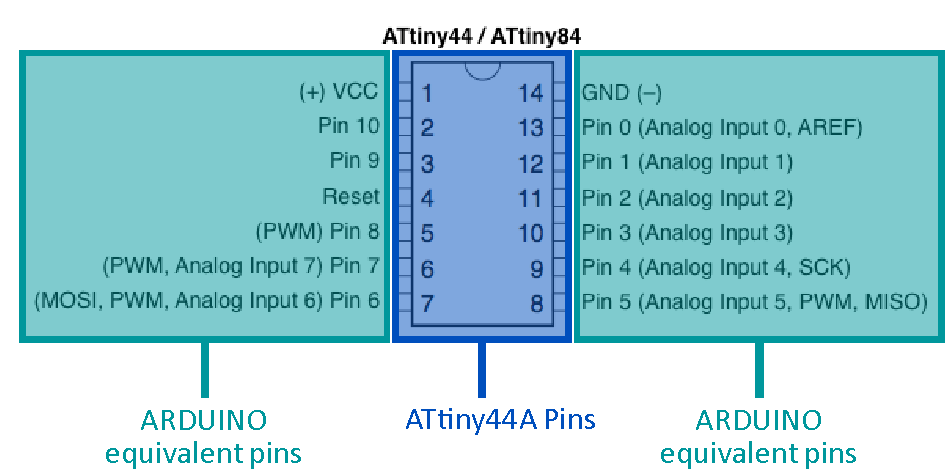
I read the datasheet of microcontroller AYtiny44A; that allows me to observe and understand the order, the role and capabilities of each pin. I could see that some pins accept analog inputs and digital outputs as well, while others only serve to digital or analogic outputs.
Given that I am new to all this, my instructor Roberto Delgado recommended me to start experimenting with Arduino to program the microcontroller. For this reason, the datasheet was helpful to observe the equivalence of ATtiny44A pins for Arduino IDE.

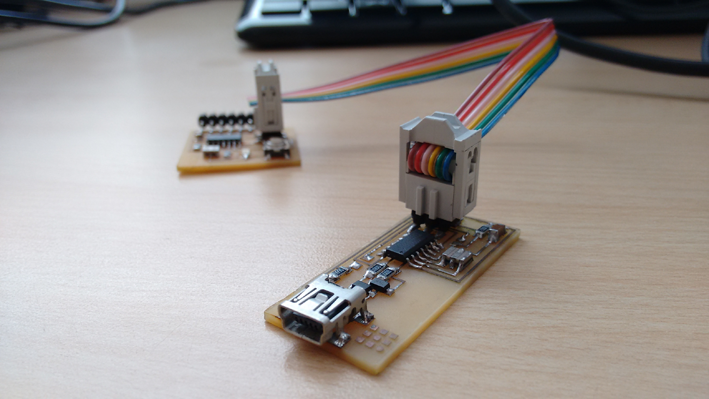
In the assignment 4 I had used Arduino to program my FabISP, so this time I was more familiar with the Arduino IDE interface.
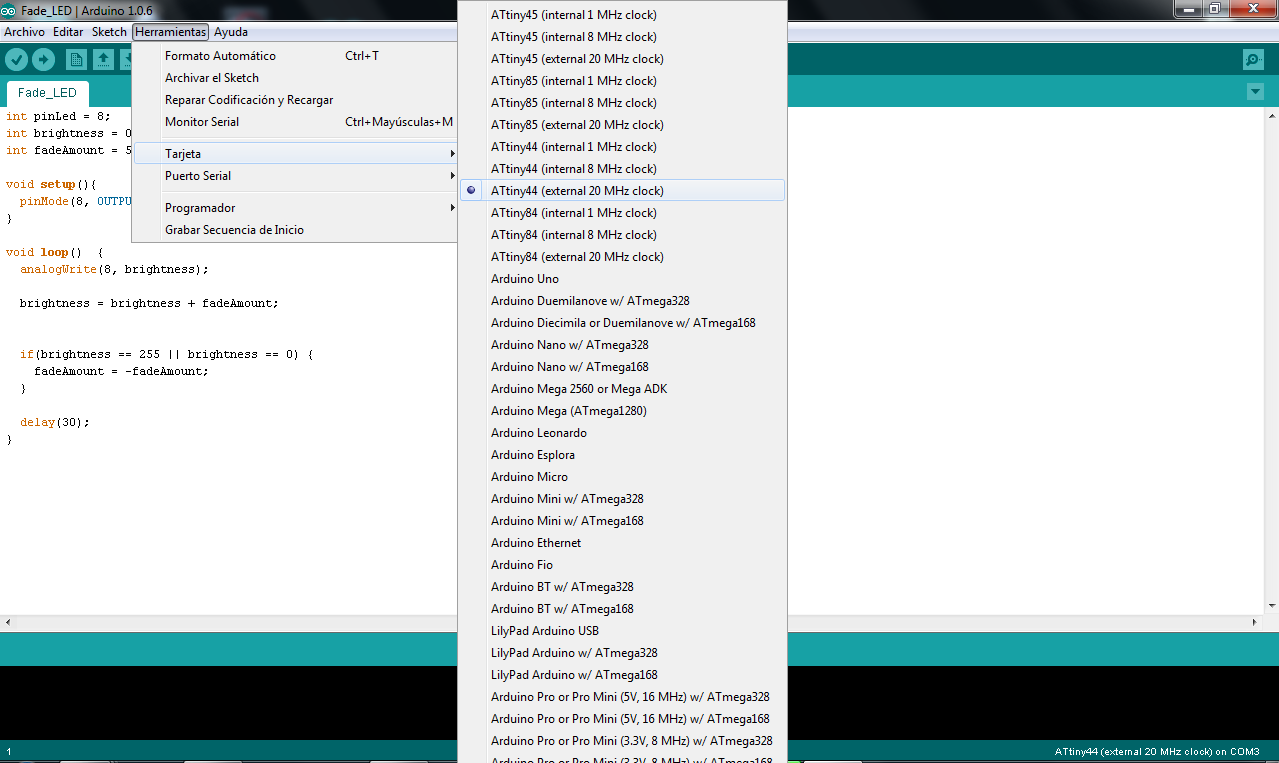
1.) To start we need to ensure that the section of "tools" have selected the "ATtinny44 External 20 MHz clock" card.
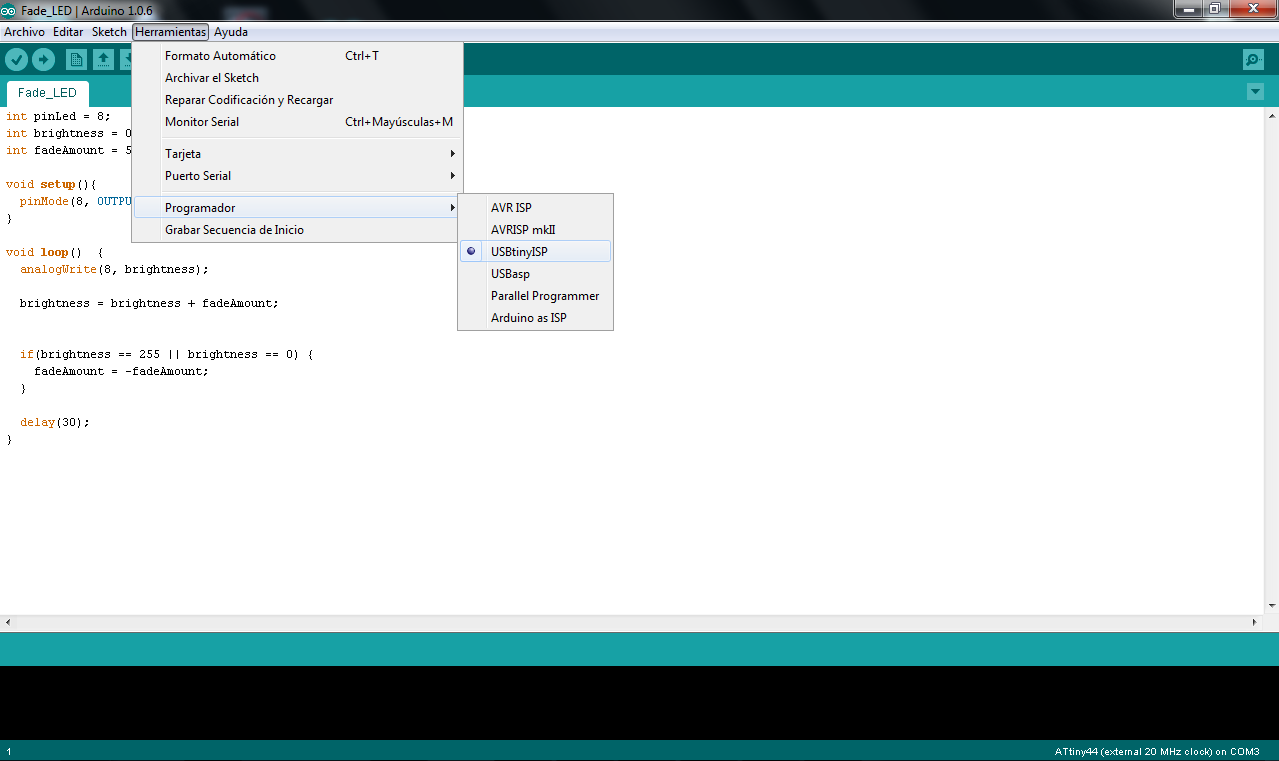
2.) Then we need to ensure that the programmer "USBtinyISP is selected.
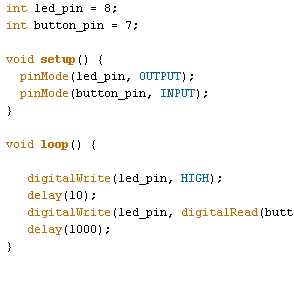
To start I only use the sample exercise "Blink" of Arduino IDE, it helped me to learn that instead declare variables and assign pins I will use later in other exercises. In this exercise, the number 8 is the corresponding green LED pin.
As you can see, the button has no function in this exercise because I have not declared at the beginning as a variable.
I use some Fab Academy 2015 Web pages as reference and I could write the code to burn my board, it was to basically to turn on and off the LED with the button.
This exercise take me a lot of time, because I failed over and over, but finally I can fix the mistakes and my board works as well.
In this exercise I used the "analogWrite()"" function in fading a LED off and on. AnalogWrite uses pulse width modulation (PWM), turning a digital pin on and off very quickly with different ratio between on and off, to create a fading effect.
Arduino file: Fade_LED.ino
Arduino file: Pullup_code.ino
You can download more files here from DROPBOX.
- I could program my board with arduino IDE.
- I identify the function of the codes into a physical board.
- I tried to test ATMEL Studio but it did not work.
- Try with more options to program boards.
I'm currently taking this course in FAB LAB TECSUP, in Lima-Perú, through CIDI FADA UNA with the support of CONACYT and PARQUE TECNOLOGICO ITAIPU FOUNDATION


©DESIGNED AND BUILD BY FABIO IBARRA - FAB ACADEMY 2016
EMAIL: fabioibarrab@gmail.com