In this week we are a little bit behind also because we did an introduction with Thomas Kroop meister in molding and casting, Explaining the hold process how can we work with the new machines for casting at fab lab.
kinder surprise
I wanted to did a KINDER surprise egg. Because I find one of the nice tradition in germany , and also because I could work with this model to generate more chocolate models. For this model the workflow of the following: Make the modelling Milling two pieces of wax in order to have the basis of the model.
Making the mold of this piece . Well this process for the time that we have and also for using the machine could take really long.
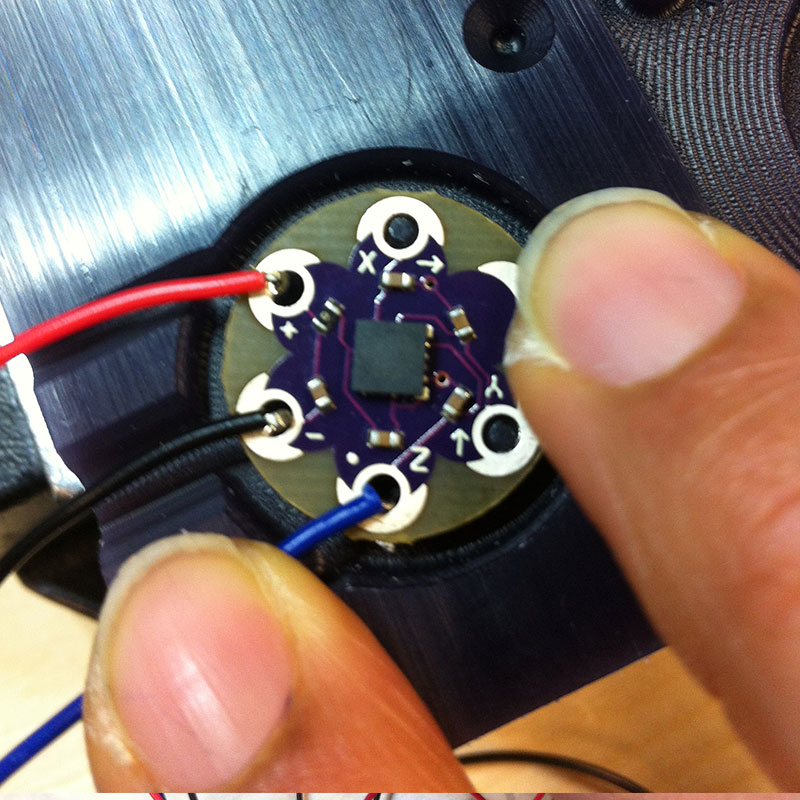
I have to optimize my model and also left time to my classmates to use the machine. Well change my Idea to do the mold of a gyroscope from the Lilypad version, in order to do a wearable sensor that you can wash without damaging the electronics.
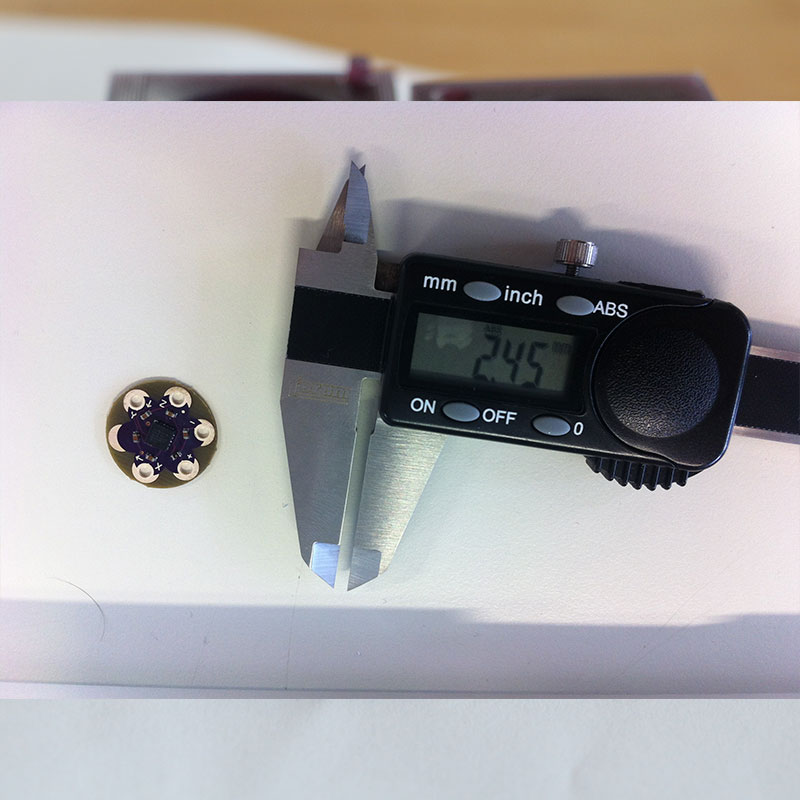
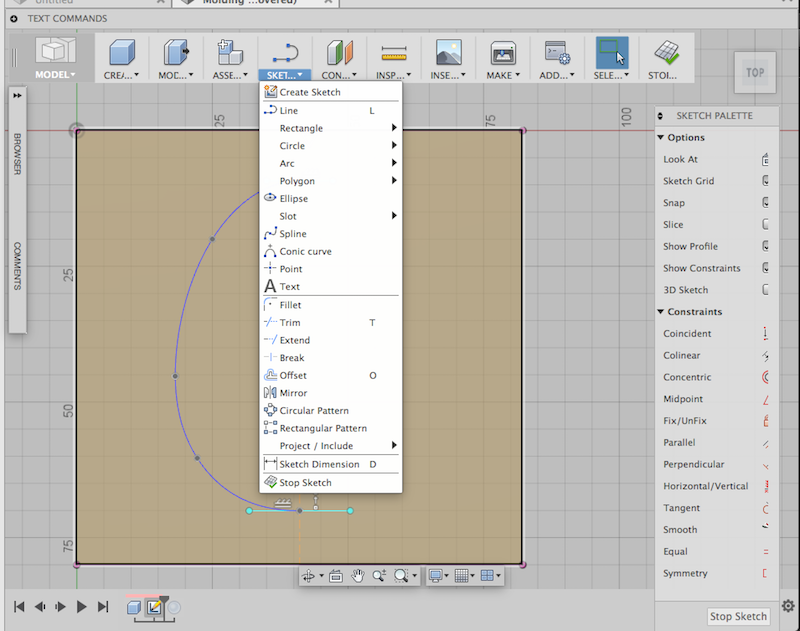
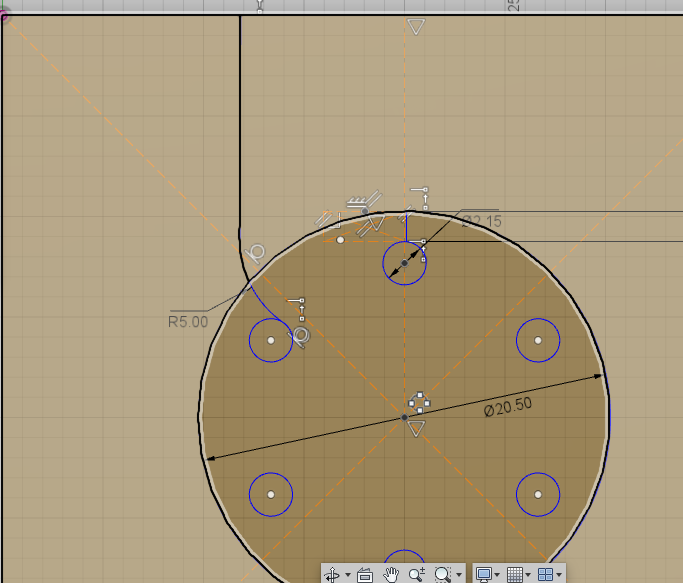
The first step : Take measurement of the sensor , with the caliper ! And make the first sketch of the model. As you can see, I did some supports for both part of the mold, in order to maintain the sensor in the middle of the cast.!
IMPORTANT: you have to consider that it's enough space for the material, in this case the silicon, it has as high level of viscosity, and it is probable that the material, will not enter in the mold , in this case you have to : 1. Modified your mold, or 2 you have to do a big Funnel, with mor are for in the top part , in order to press the material inside.
Ventiles
For doing this sketch I used the function of circular pattern, to make to orientation for this support and the ventiles design.
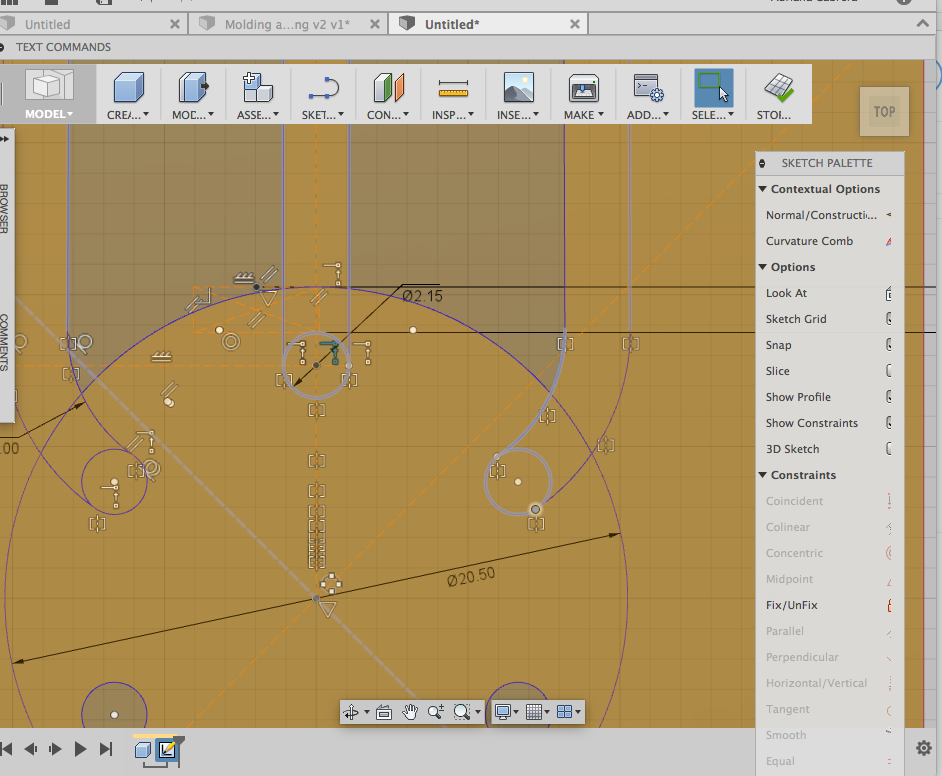
I left 3 ventiles in order to lef space to eliminate the air inside the mold , but also to make place for the cables.

.
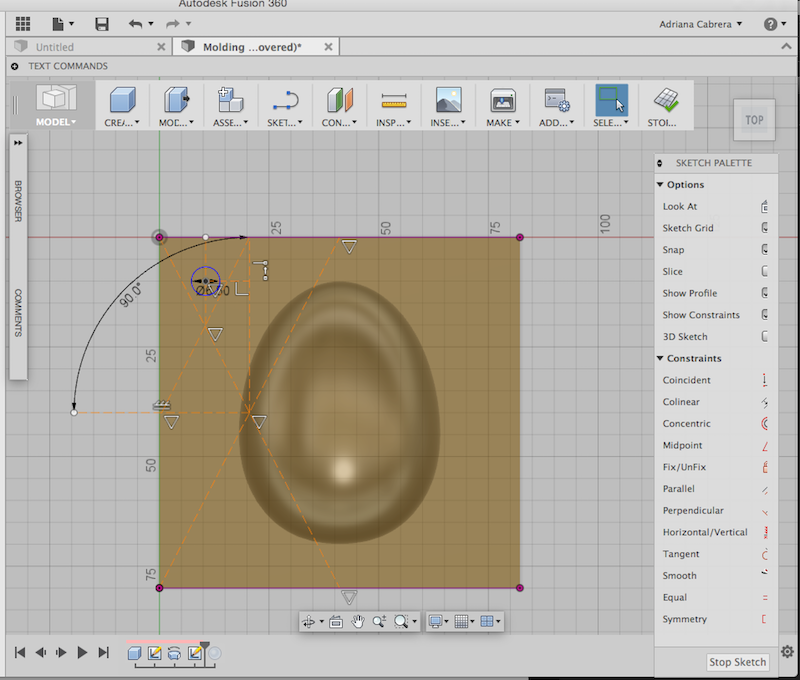
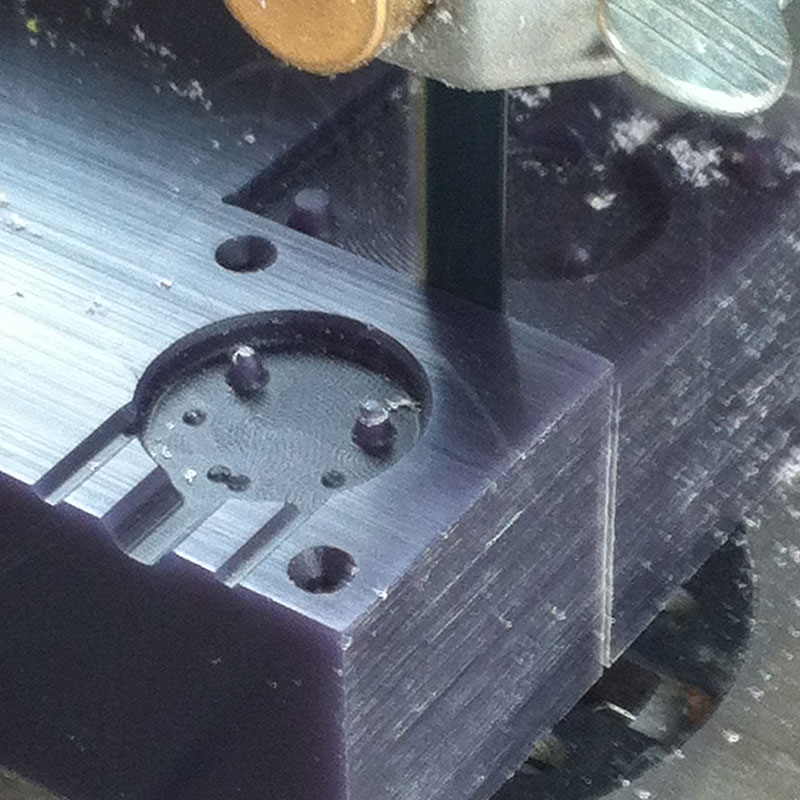
In the next part I created the angle draft in order to extract the model easily, And also I did a canal for the adjustment of both molds.
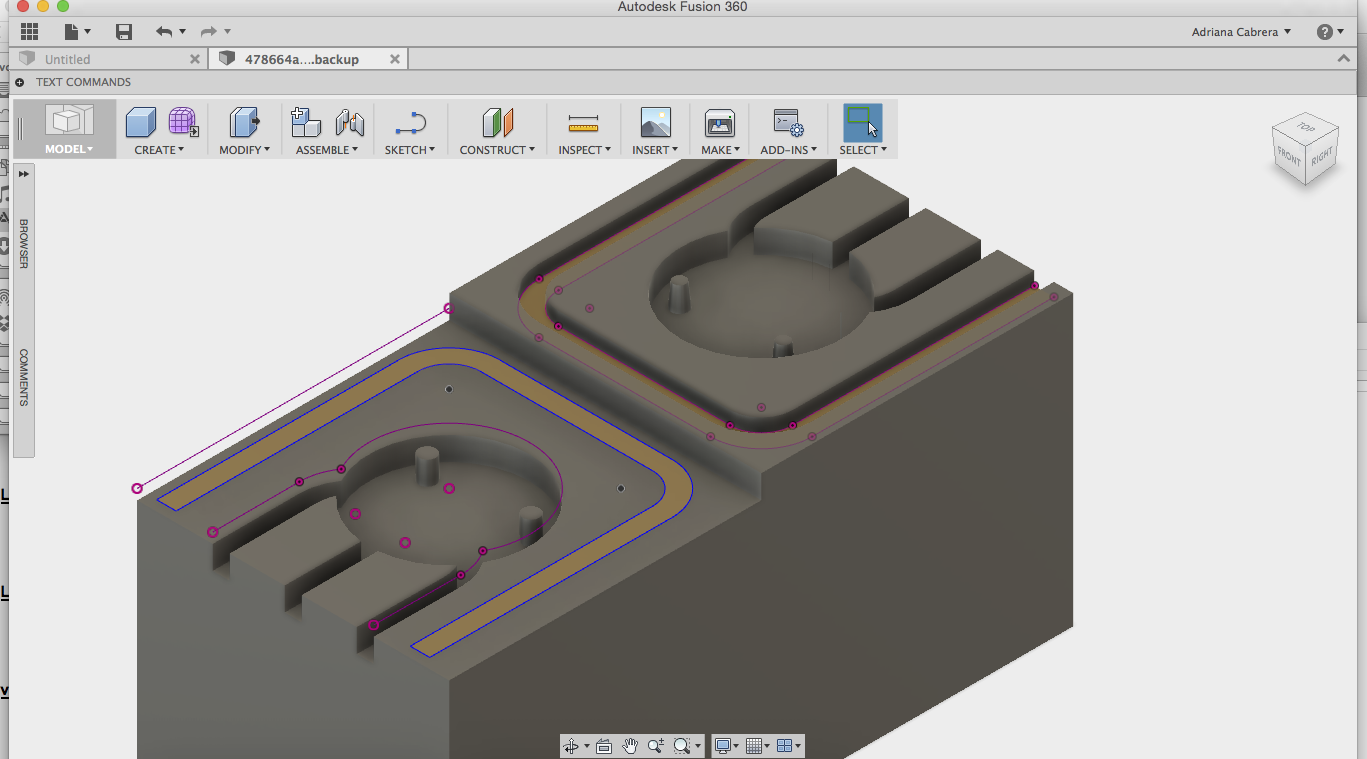
About the experience of my other colleges they recommend me to use to point of contact because it was a little bit difficult to adjust both in the same position. When the modelling was finished ,
I activate the Cam functions of the Fusion 360, in this you can see the parameter of the tools and use directly the cam processor in the ROLAND MODELA MDX40a! For set up the job you can selgo to the panel Setup> New setup>and proceed to select the option For my model I used the following settings:
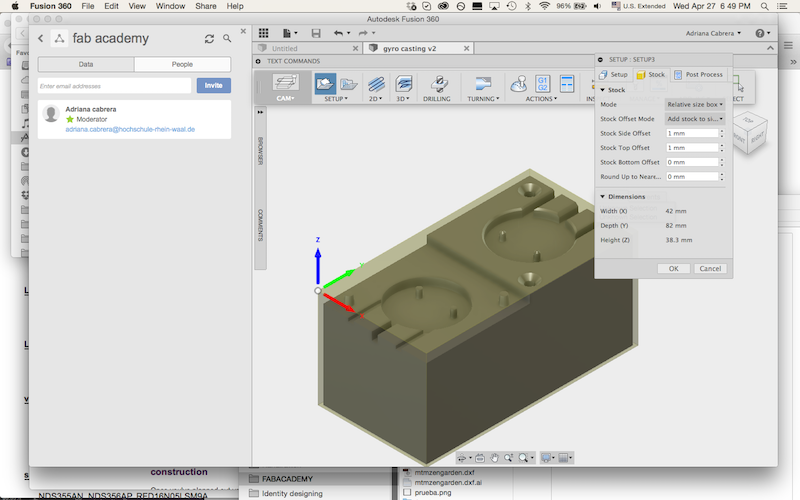
SETUP Operation type : milling Orientation: Select Z axis /plane & X axis (it means in which plane you want to begin the calculation of the job) Origin: Stock box point In the stock and post process I used the sam from the Program.
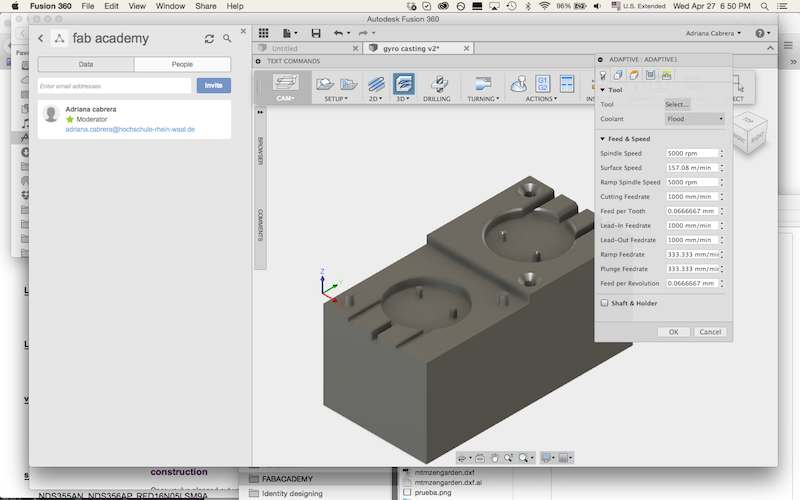
I select the ADAPTIVE CLEARING as a first tool selecting the following settings :
3D ADAPTIVE CLEARING As a subtractive process we have to consider to retire the material of the block in a 3D process. You can find this tol going to the menu 3D and here there are different possibilities to edit your block,
The tool that you need, you have to take measurement of your tool as we did in the assignment make something big:
First the Tool: You can select the tools in the library, and see which finishing and for that , and select the adequate for your work, also you can create your tool, it is my case . Radius: 1,5 mm Shaft diameter 6, lengths: 6, Shoulder length 8 mm Body length: 37 mm Overall Length: 560 An here you have to put the information about the machine, in this case we were working with wax , it means that we can use the a high speed spindle and feedrate.
You can see in the pictures the following settings. For the passes you and also and editing the maximal roughing of the Step Down , as we weill sei in ohre software as condacam. You can do two setups , one for a rough cut , and other for the fine details In the panel action you can make a Simulation, in order to prewies the toolpaths and stock material removal, also you can see if the process has some collision and correct the settings. It the model is correct you can proceed to go tho the interface of the ROLAND MODELA MDX40a. And set up your yob ,
In our case we have to be sure that we have the right Post Processor and upload the post processor data.
Positioning the machine in the O point
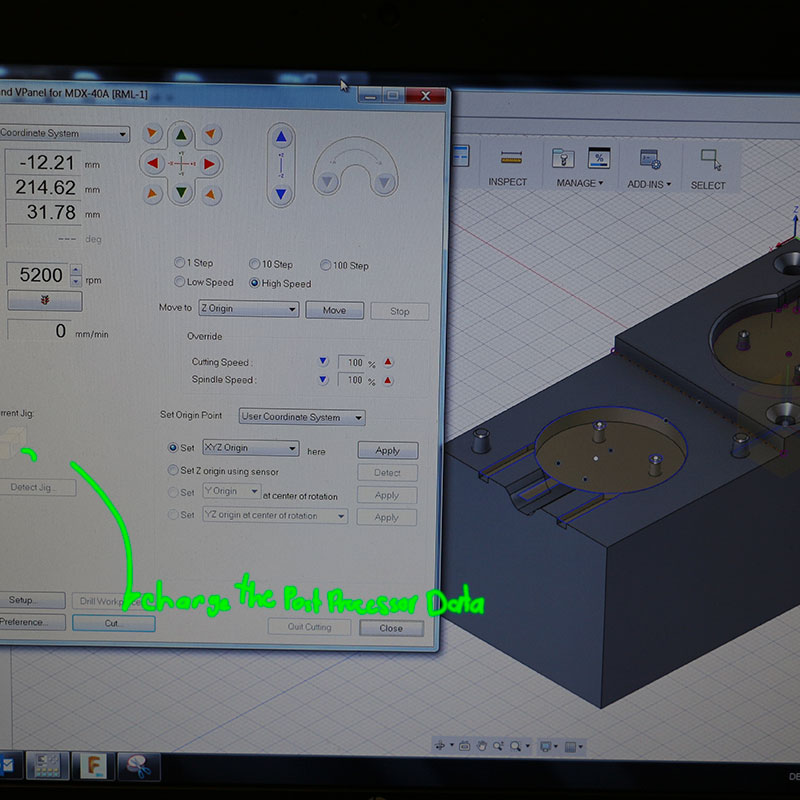
you can use the interface of the machine to go to 0 X,Y,Z. Following the settings that the picture illustrates,
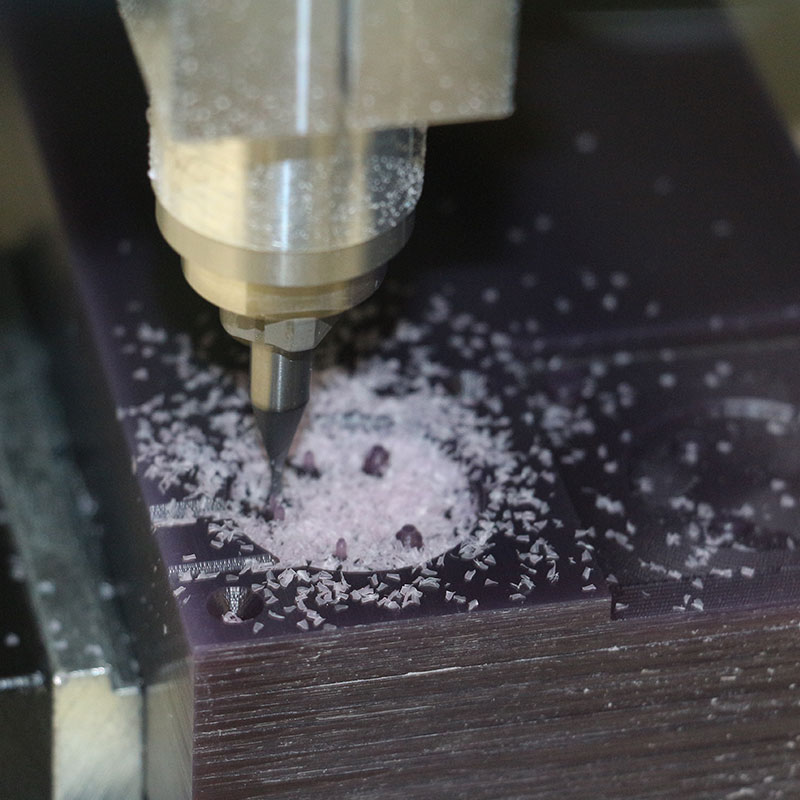
you can proceed to mill the material
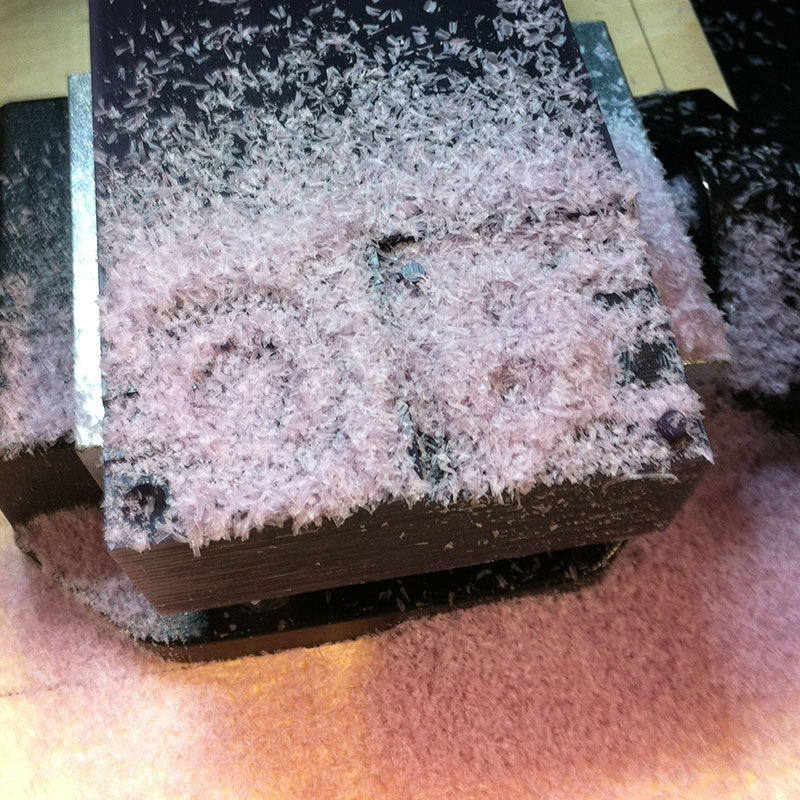
1rough cut 2. Milling the supports 3. Fine milling
Testing the lilypad in the mold
5 cutting the final mold in the band saw
When the mold is ready , we can proceed to mix the components I use Pur Polyurethan [ISOCYANATE and POLYOL (UR 3440) (15 g : 30 gr)at the rate of 1:2] put it into the vacuum chamber. This is an exciting process In the first time that I tried to do the composite , didn’t work , because the model has a lot of air inside.
Due to the small funnel , I did in the first trial a paper funnel. And it doesn't make enough pressure in the components. The second time I isolate the cable in the other direction in order to give the model more space to the liquid, in this case i us for the funnel a piece of a plastic bottle, and I past it with silicon to have an hermetic union.
After combine again the component and put the material inside I used again the Vacuum machine until this achive the maxímun pressure and slowly I opened the valvule , in order to retire the hold air inside the mold, and the component could get inside the model well. I left my model 2 days (machine assignment process) Afterward the model works really well! I have a washable gyro !
DIY EGG SURPRISE
I wanted to do a Kinder Surprise Egg with a 3D printed surprise inside, because I find it a nice easter tradition here in Germany, and also, because I could work with this model to generate more chocolate models. I made it with the following steps:
Make a wax or normal candle block model of half of the egg (In case, if you don't have enough wax you can also do the same process with the candle it does not require higher precision. It is my case german provider )
Make the negative with alginate (or look for a silicon compatible for food).
Make two chocolate casts of the half of the egg
Finally, put the surprise inside of the egg and close it.
I began to work with the model in Fusion 360 as I explained in the previous sample with the washable GYRO.
I did one solid egg, and one hollow egg.
As you can see in the photos, you can join both parts making them a little bit warm, and also, thus eliminating the rests. In the second part of the empty egg I put a 3D printed surprise, as in the traditional “Kinder Surprise”.