WEEK 9 + WEEK 10 :
MECHANICAL DESIGN, MACHINE DESIGN
GROUP ASSIGNMENT: -make a machine
-including the end effector
-build the passive parts and operate it manually
-document the group project and your individual contribution
-automate your machine
DOWNLOAD
'Model'
'Prototype1' 'Prototype2'
'Electronics'
'Code'
PRESENTATION BOARD
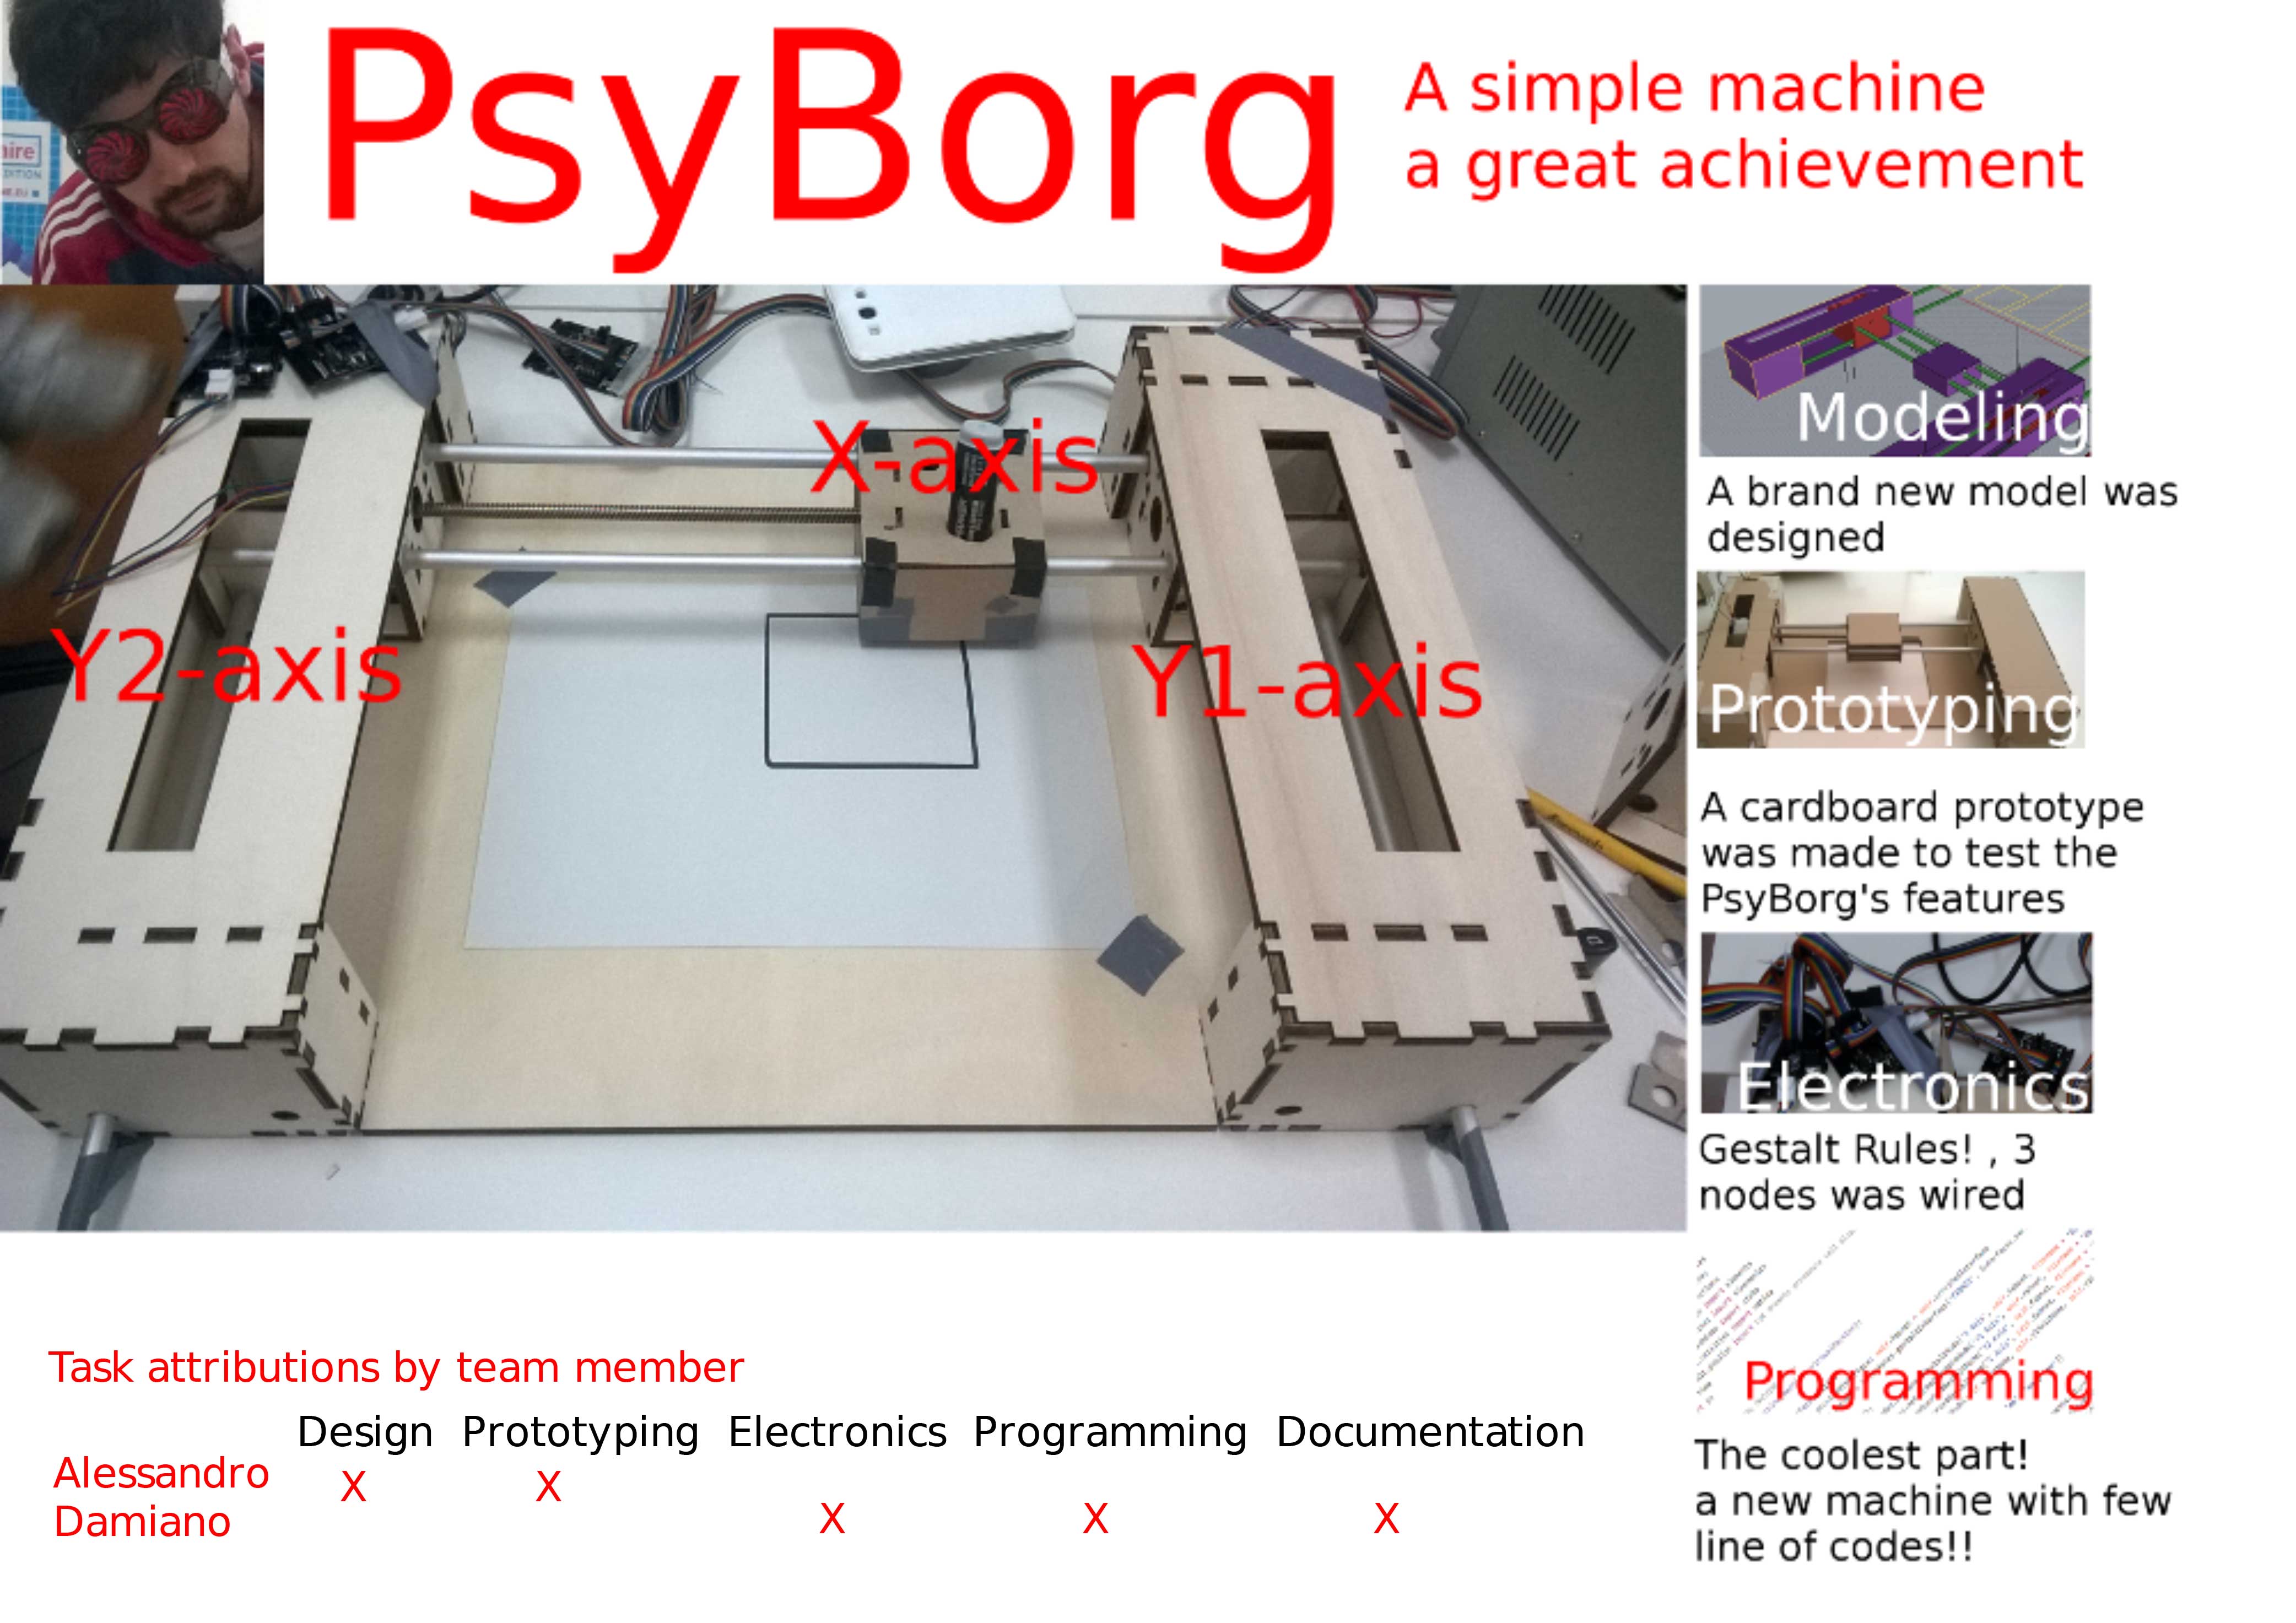
PsyBorg is the contraction of the words "Psyco" and "Cyborg", we called it becouse we have no technical backgroud and we started the Academy from scratch, so building a simple plotter for us means building something very big like a Cyborg. Psyco becouse we got almost crazy building it :-) Download the presentation
WHAT WE MADE
Because we started the Academy from scratch we decided to built the simpliest machine as possible, so we started making a simple plotter reproducing the pygestalt's plotter example
-MODELING,PROTOTYPING AND CONSTRUCTION.
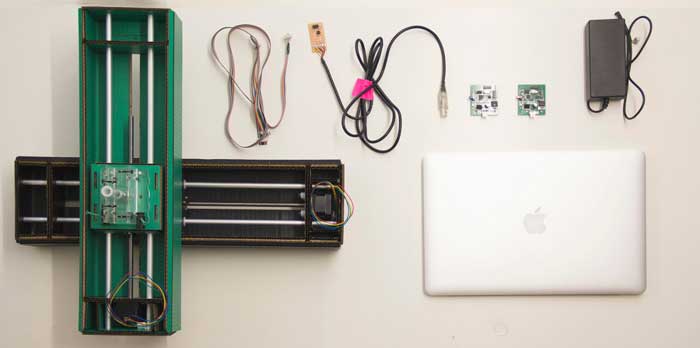
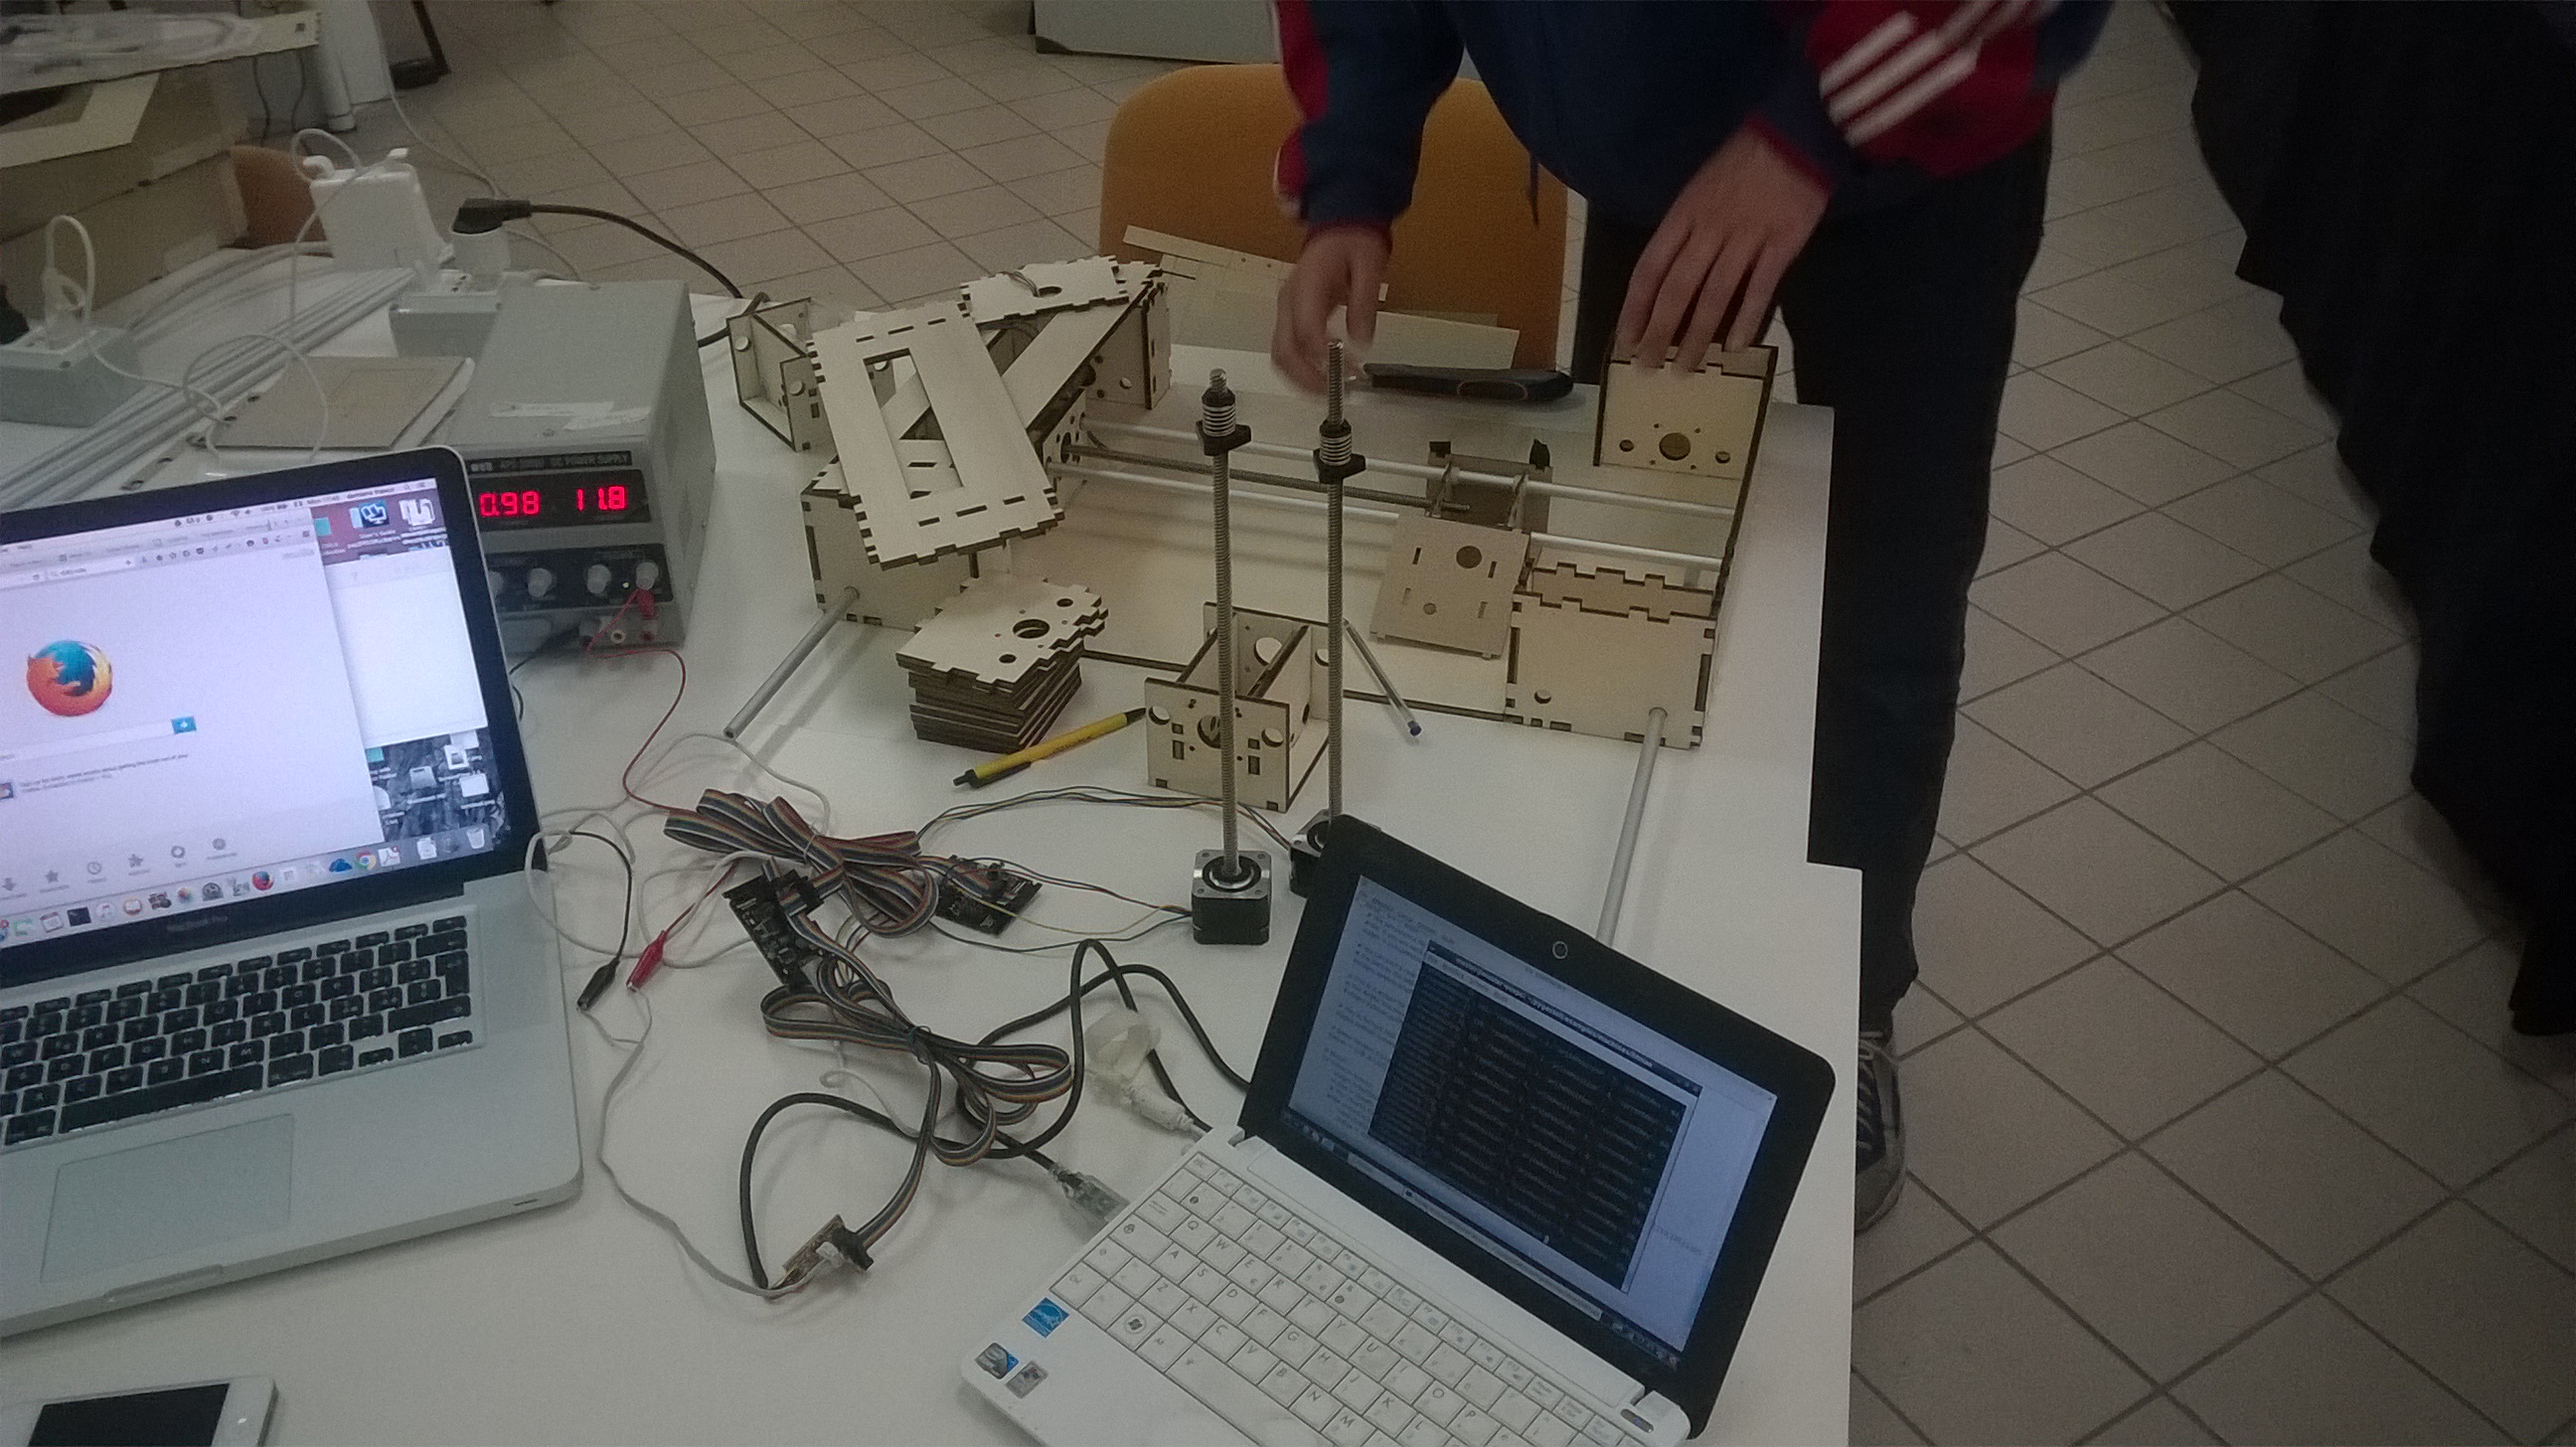
-4 stages = stepper + rod bar
-8 guide bars
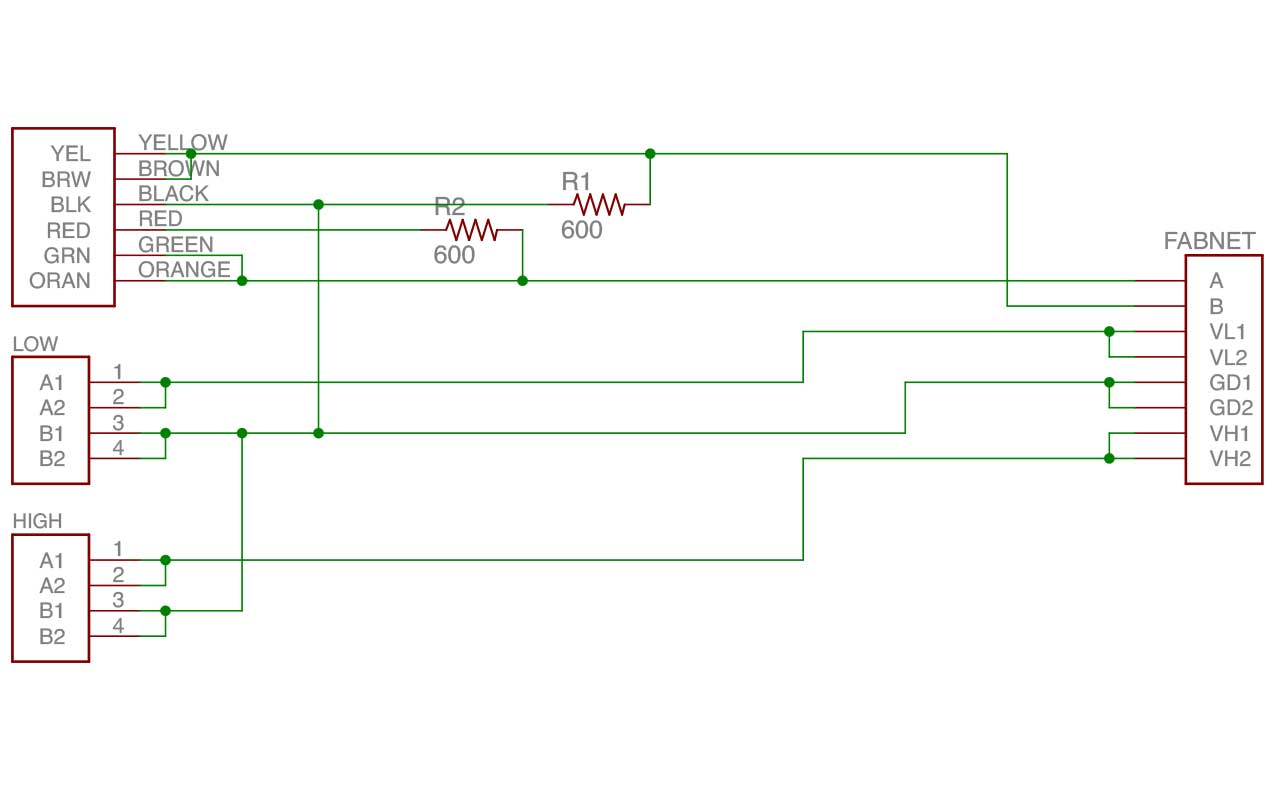
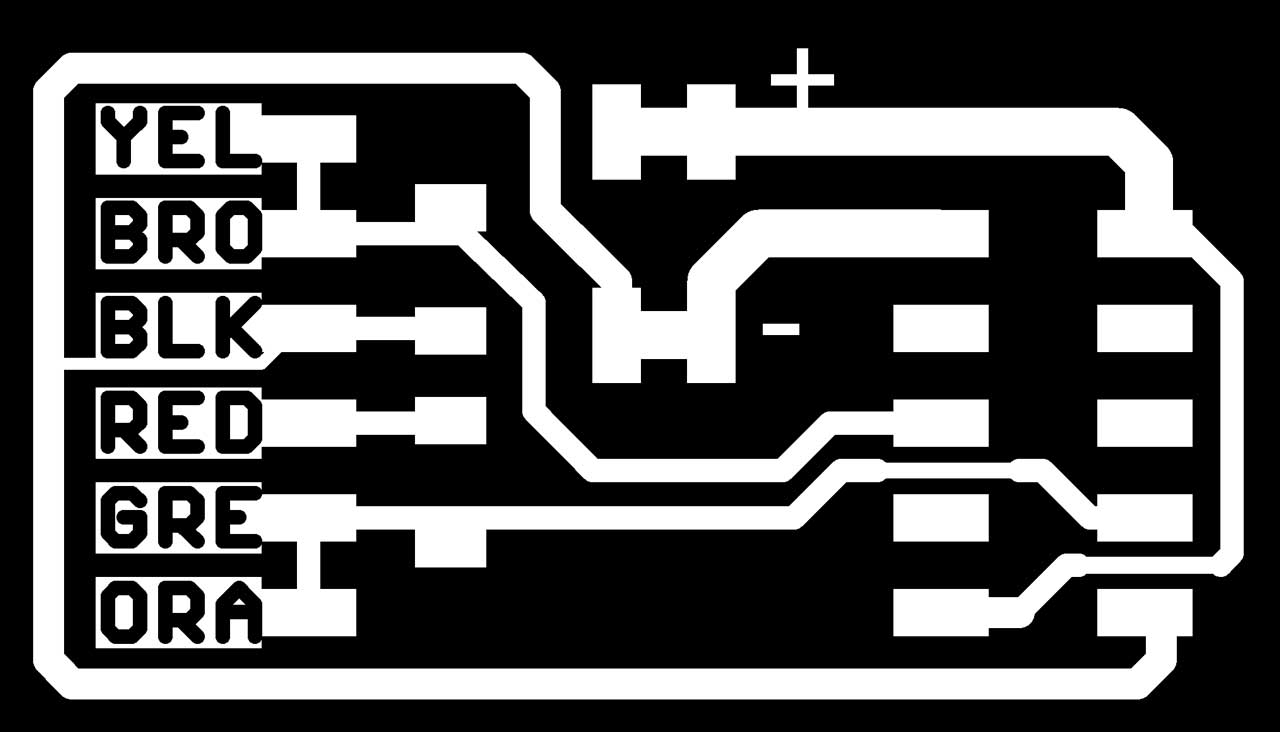
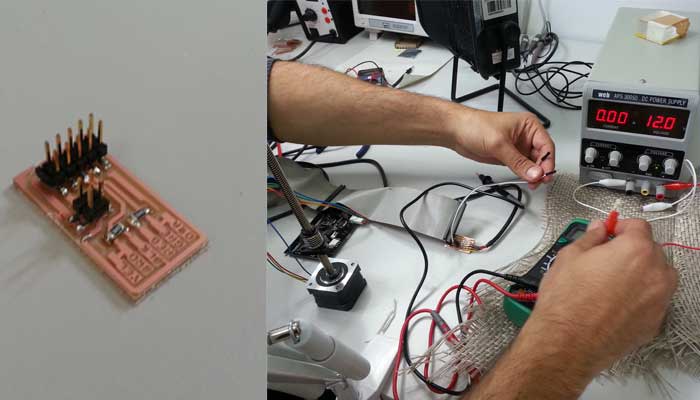
-4 gestalt circuit boards
-misc materials as nylon bearings
-RS485 connecting cable
-4 resistor
-plugs
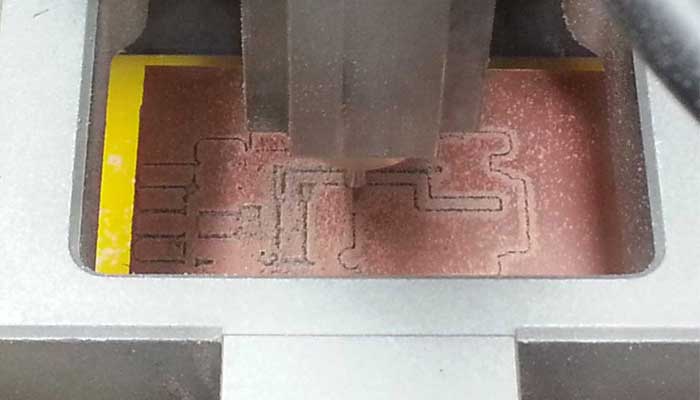
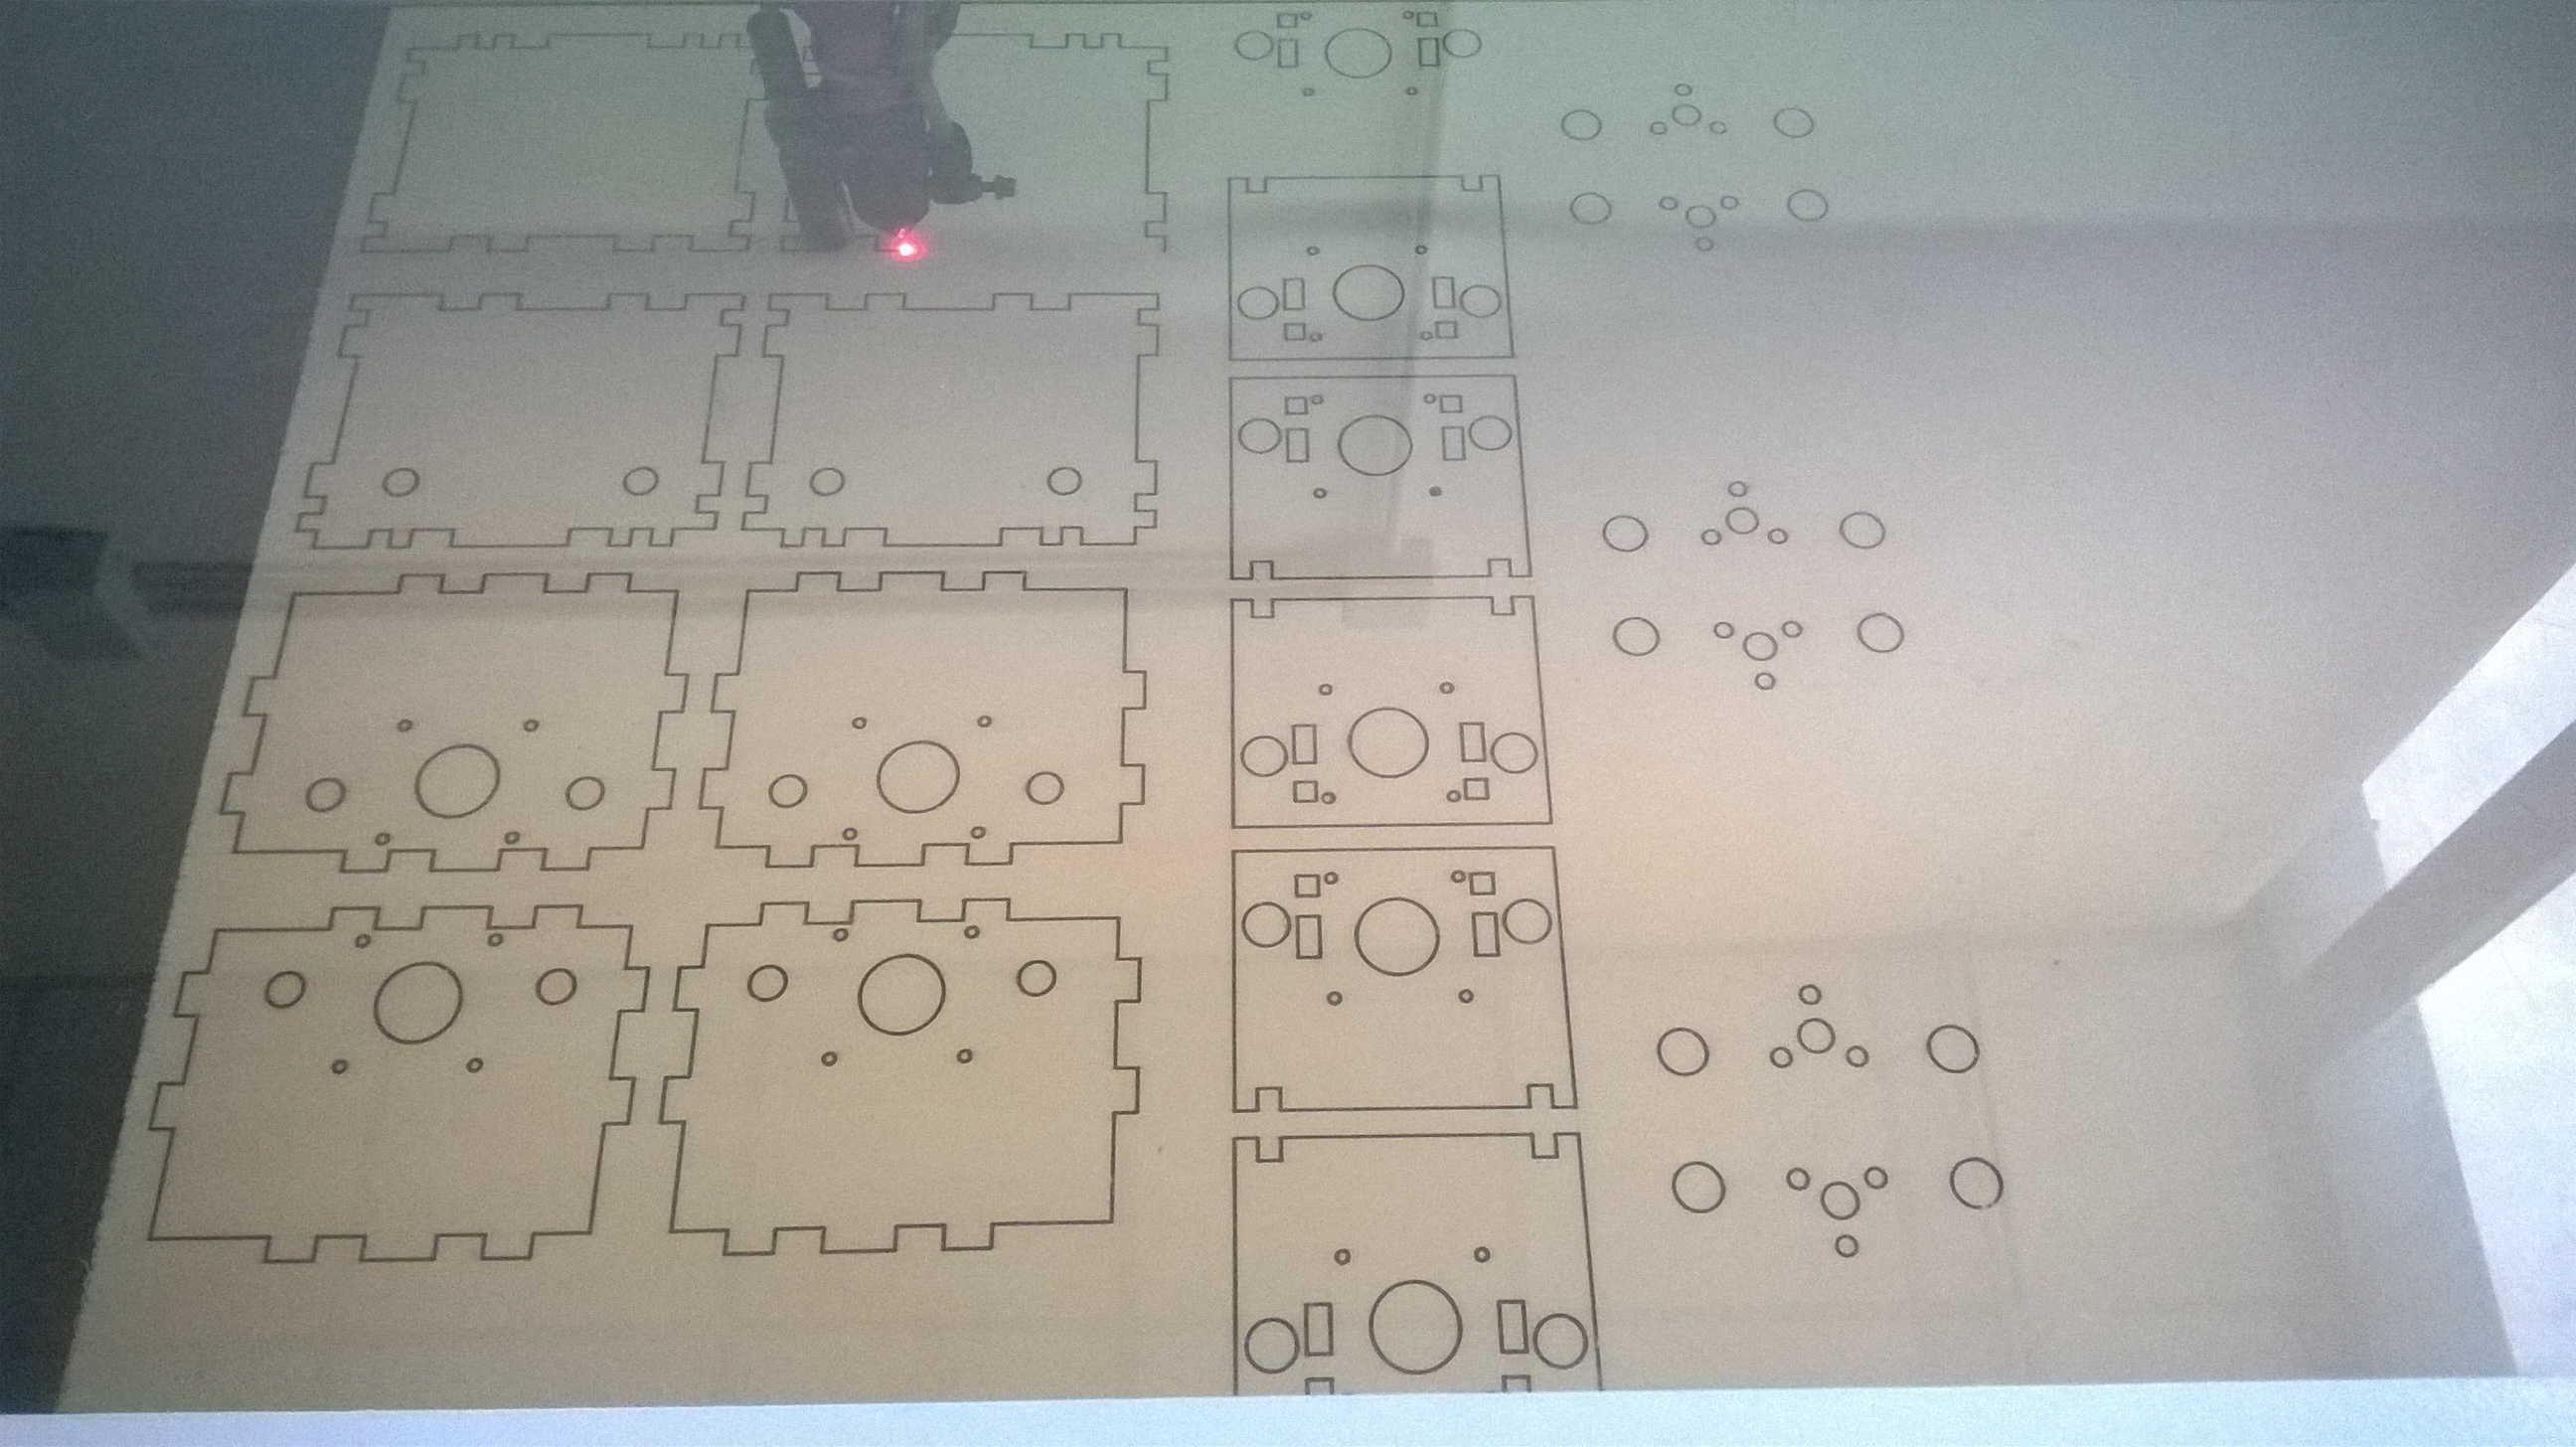
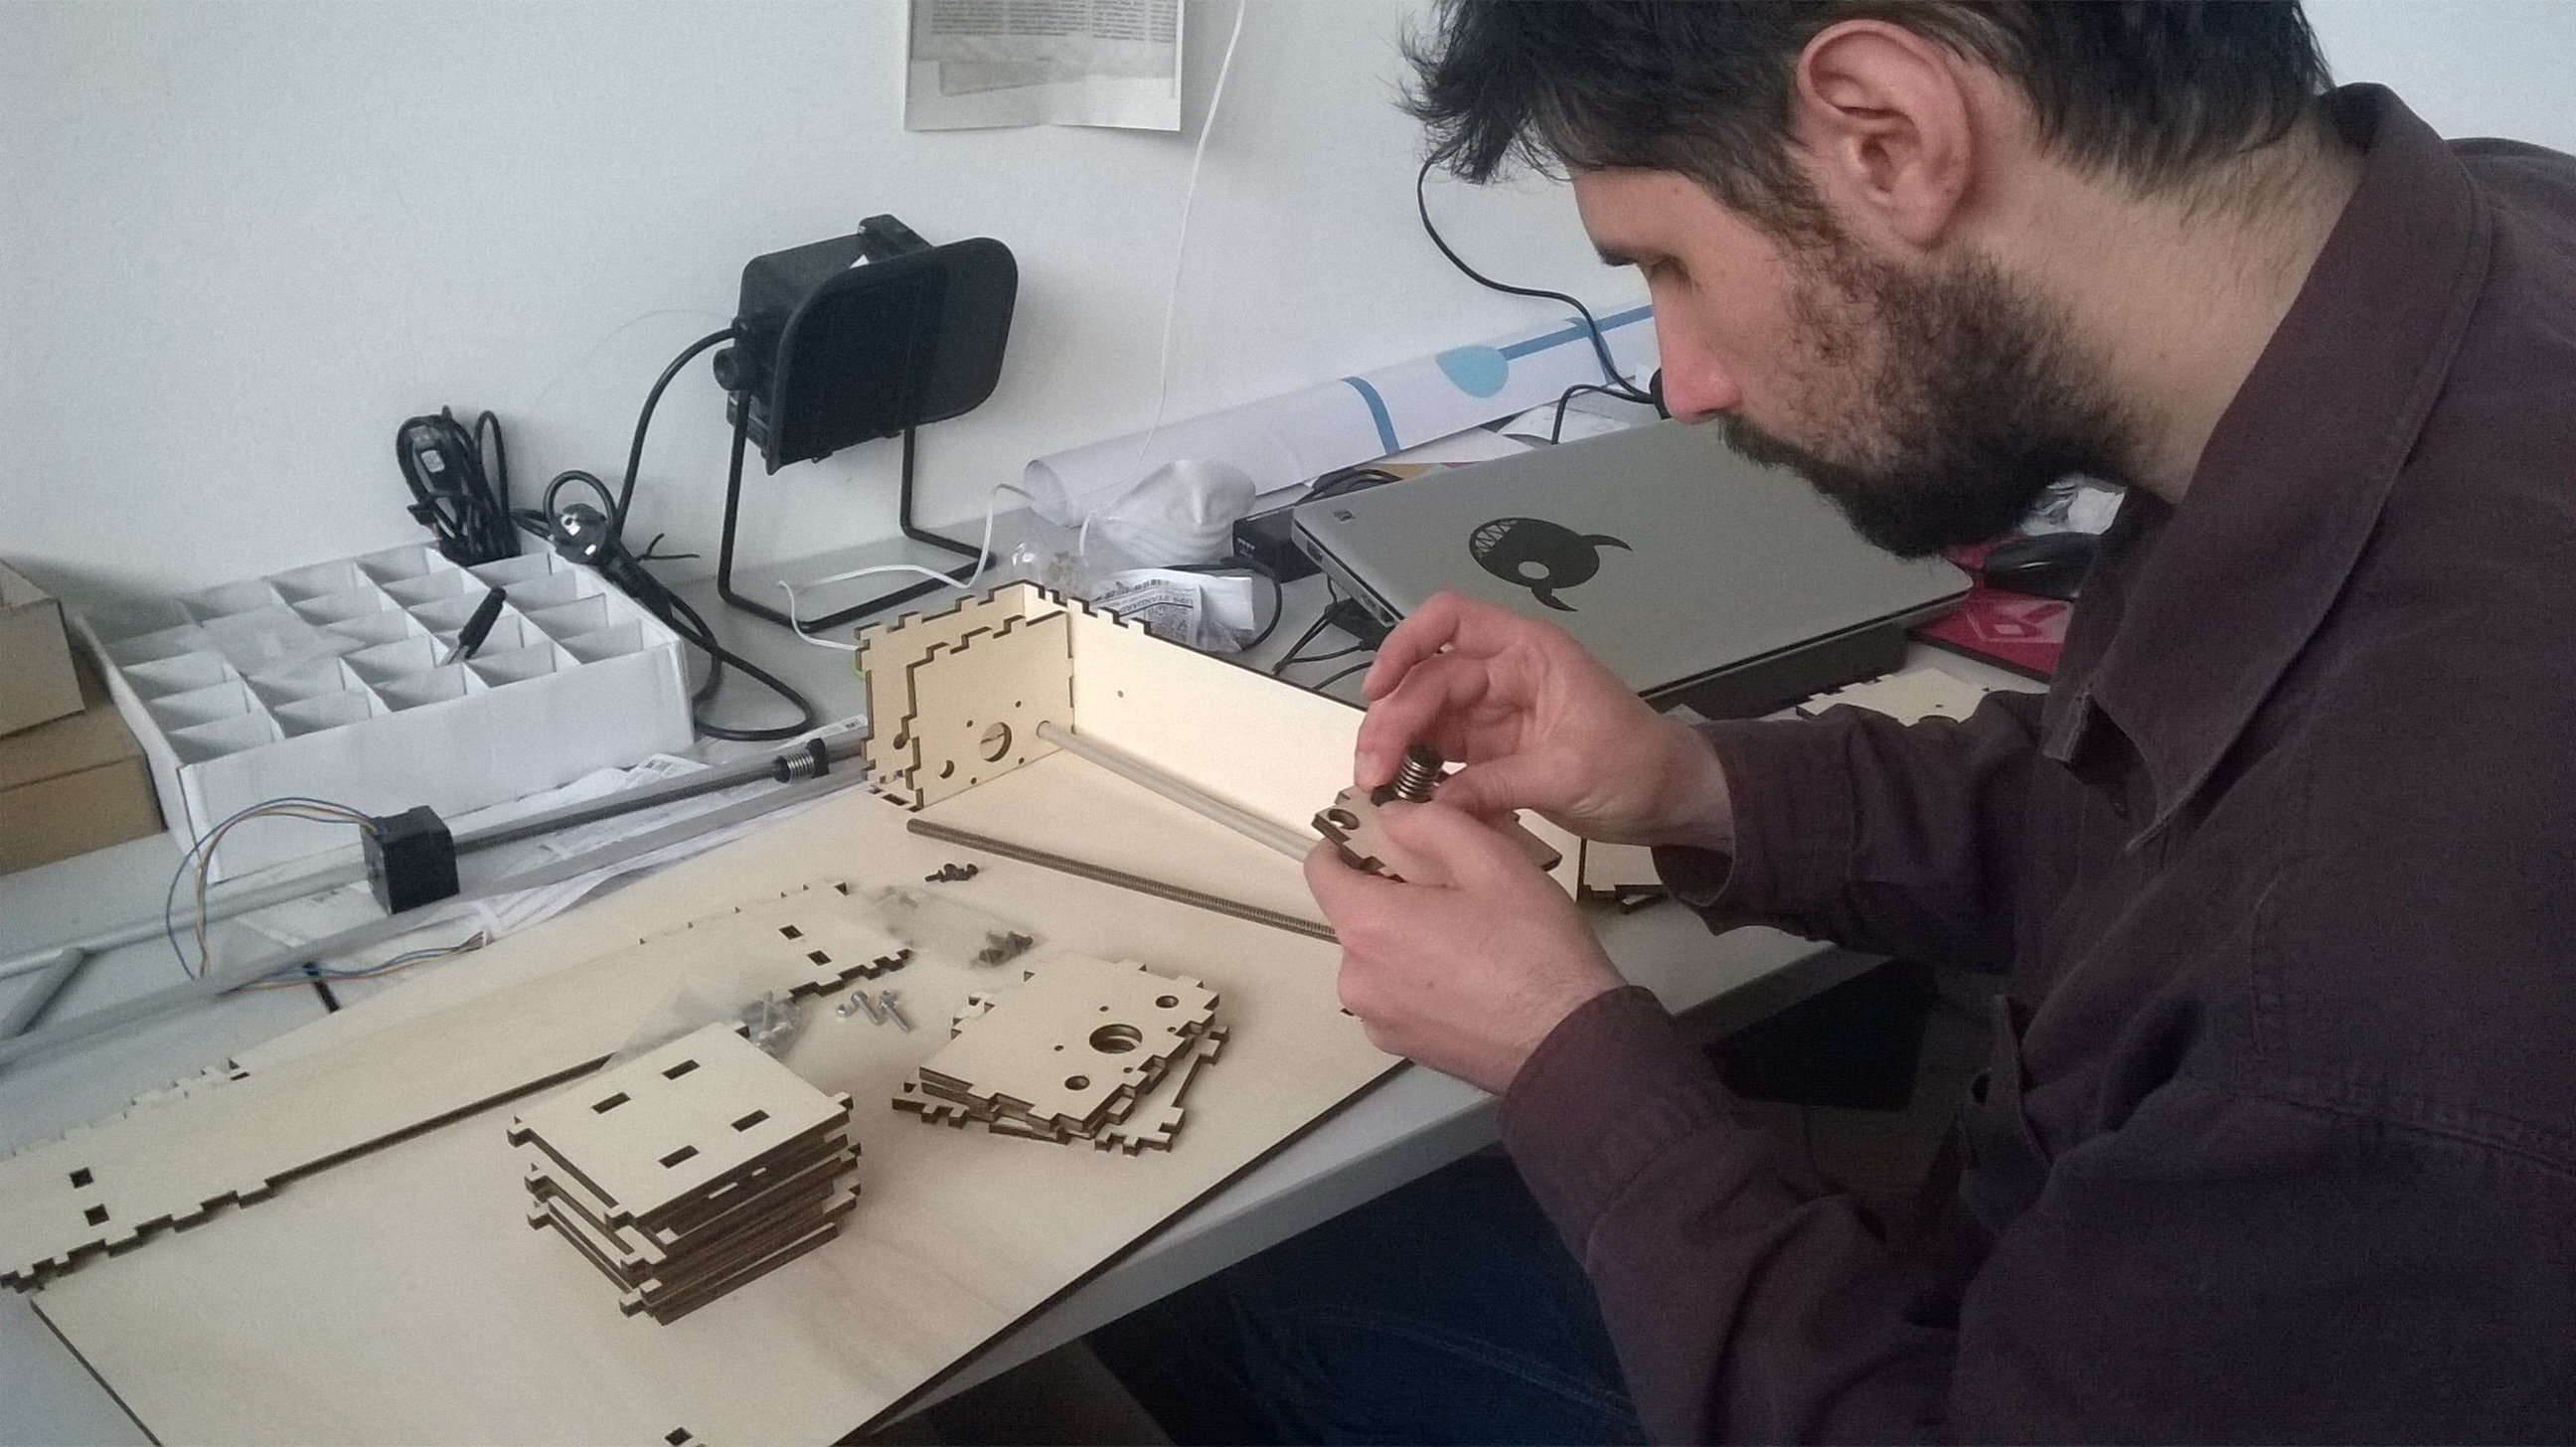
Checked all the material we started milling and soldering the FabNet.
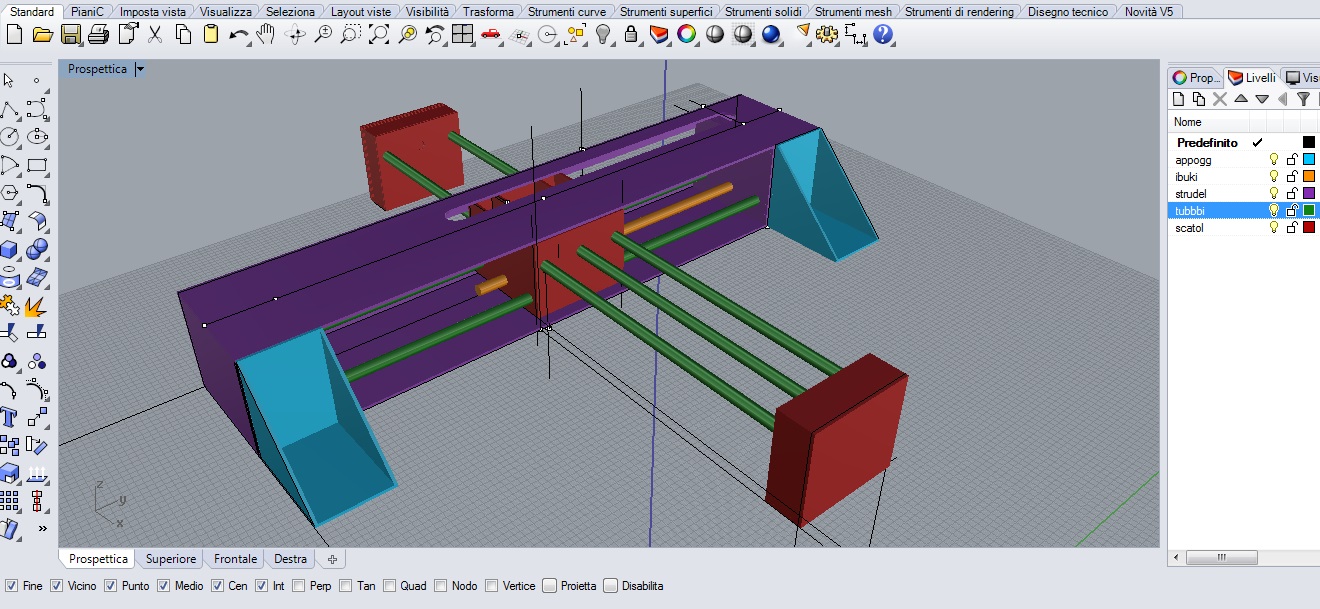
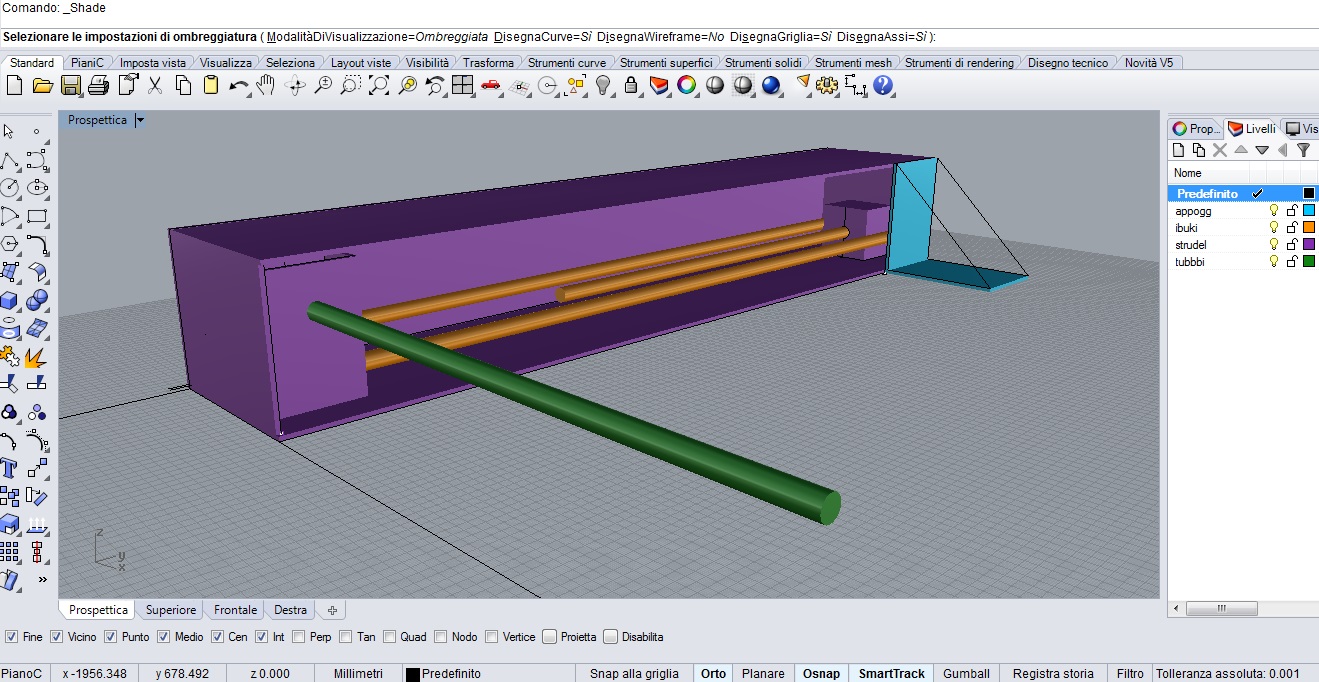
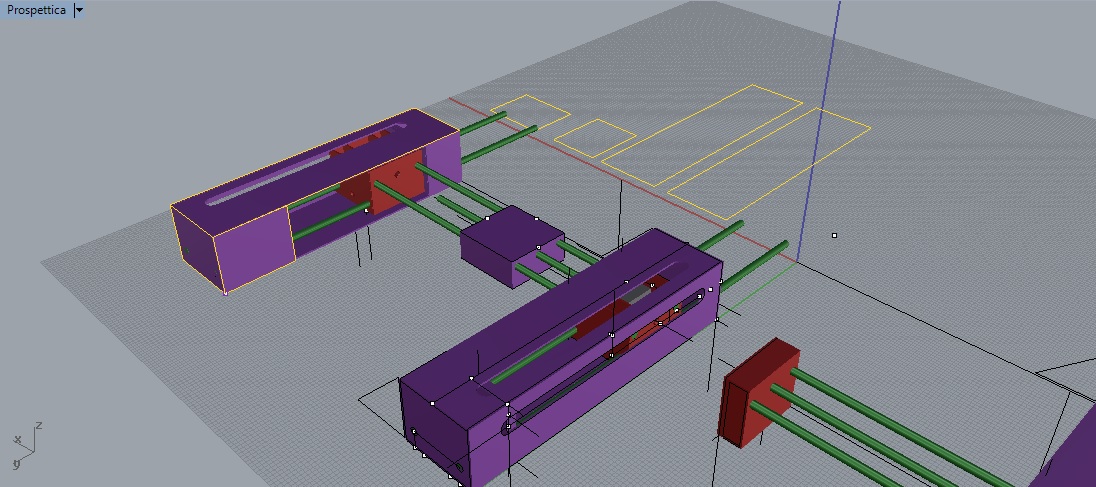
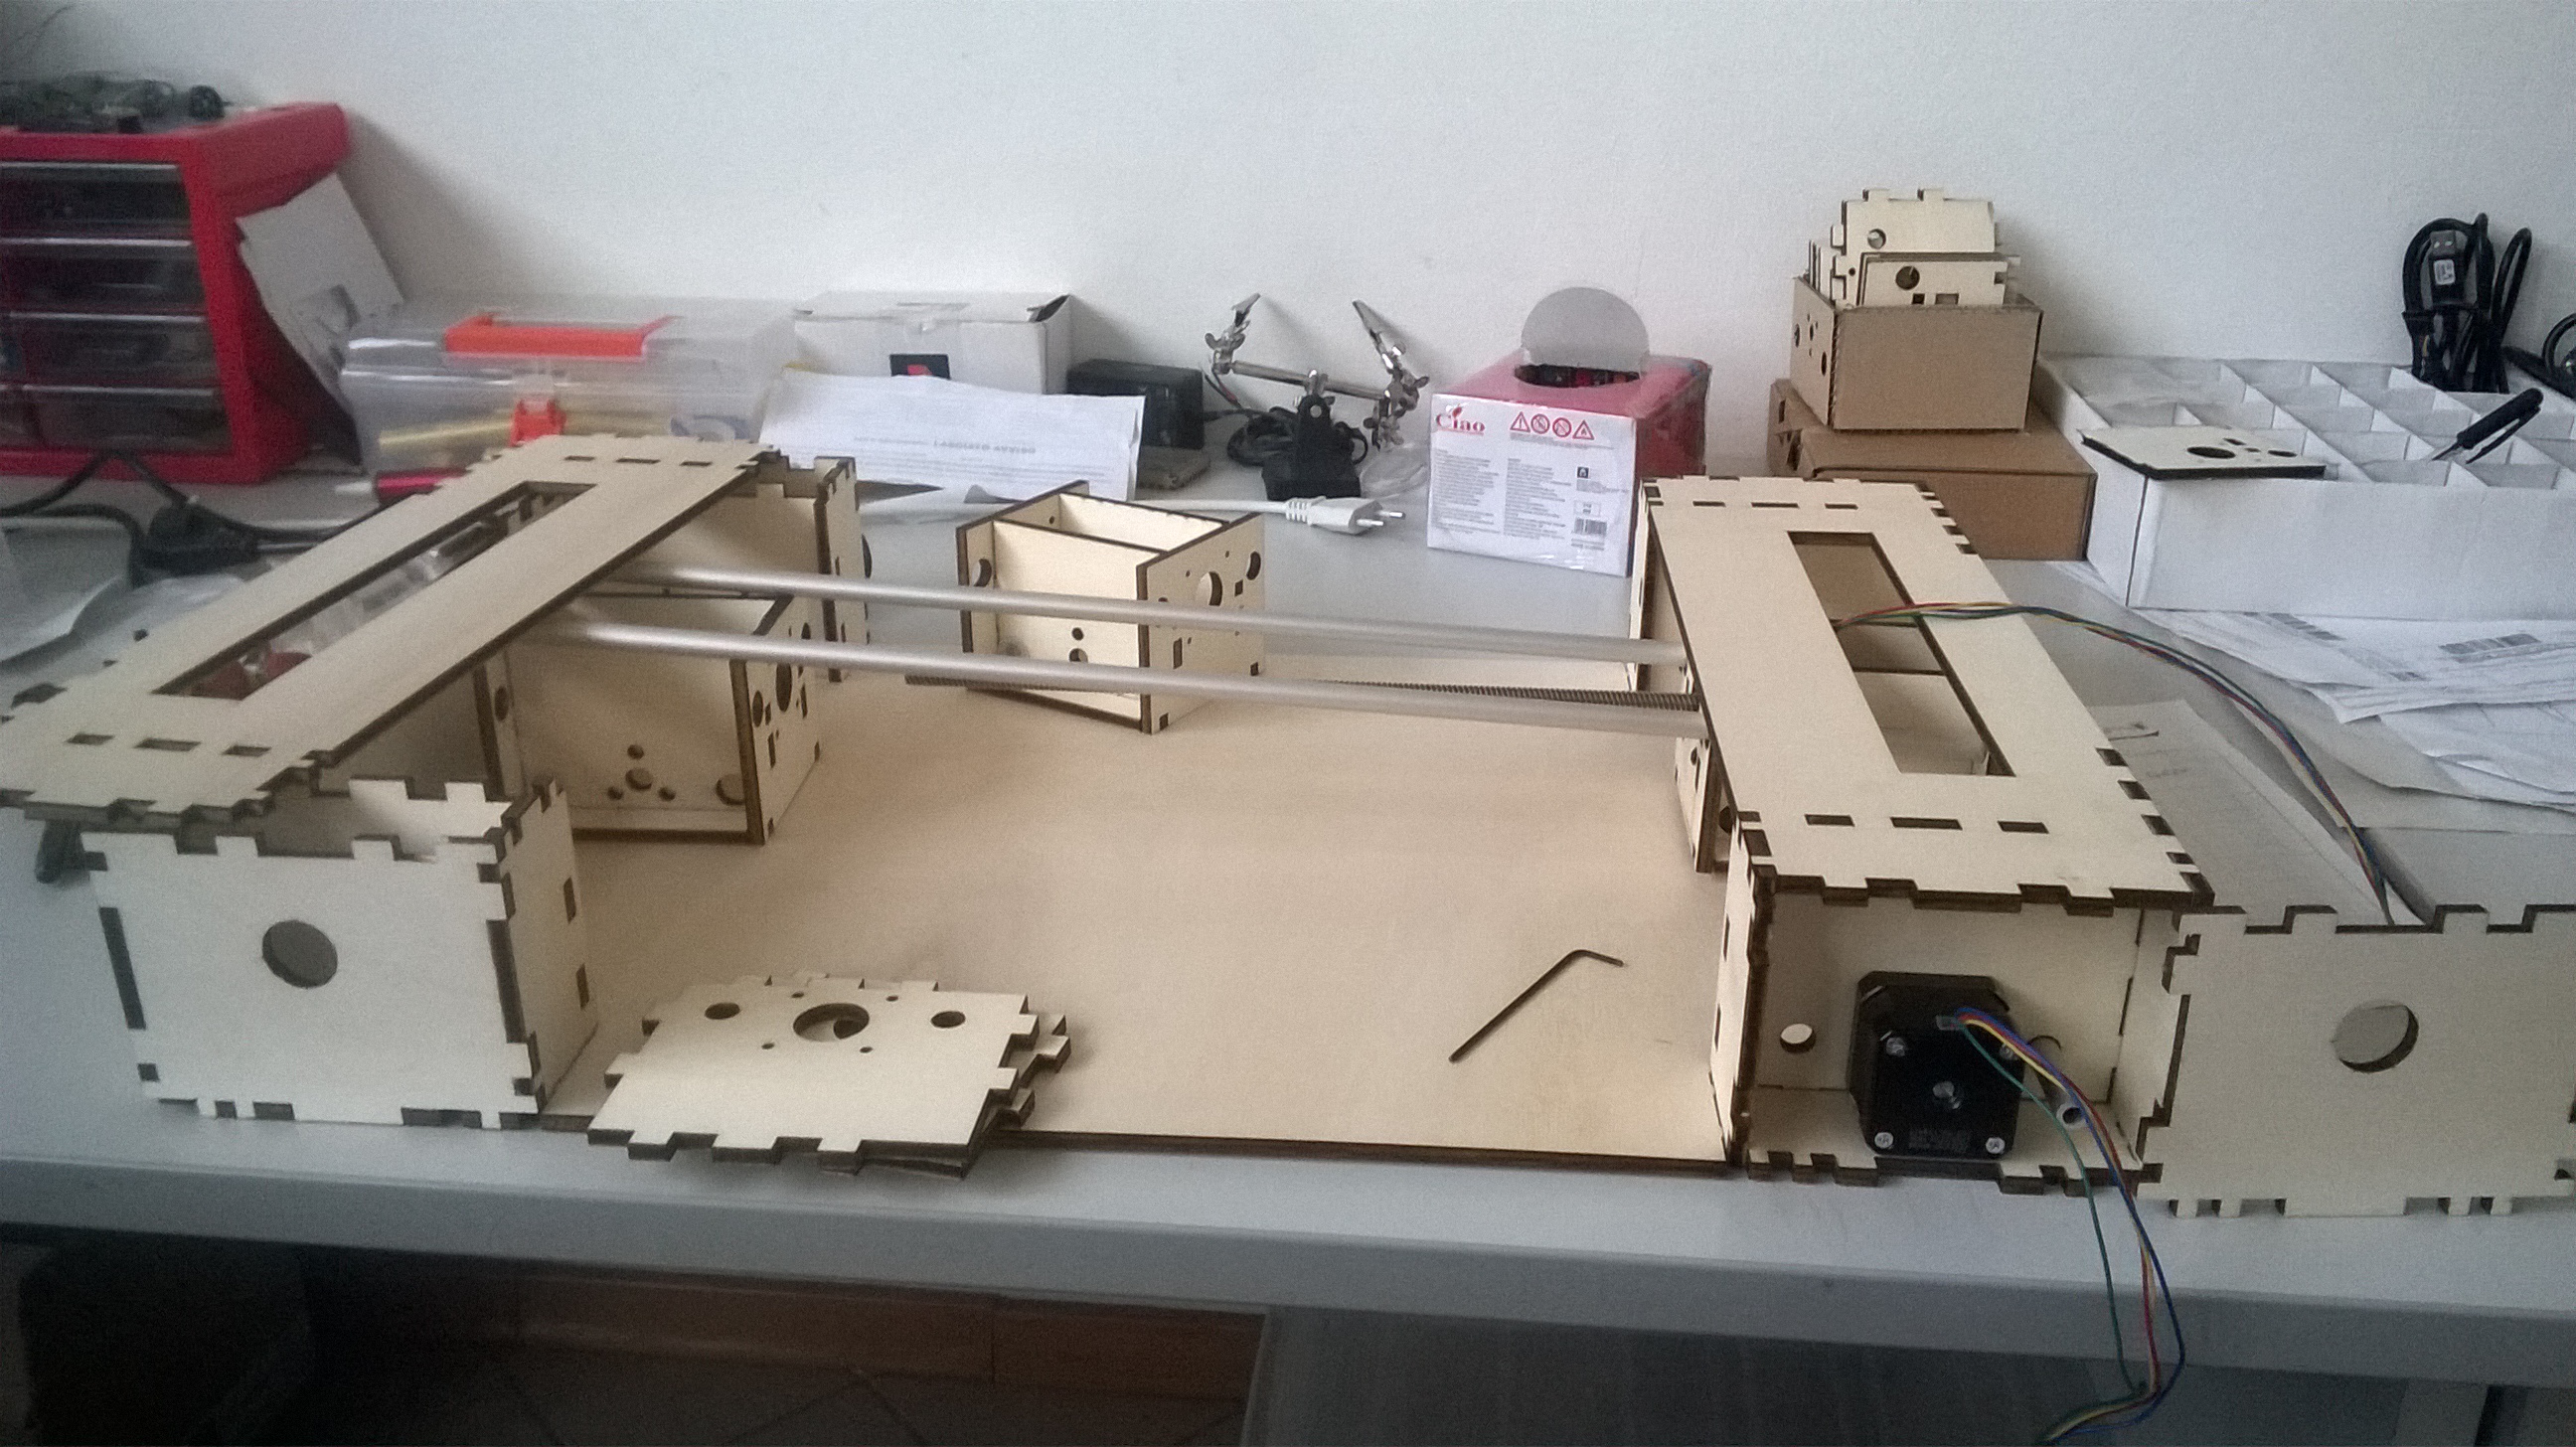
 We modelled a 2 axis machine
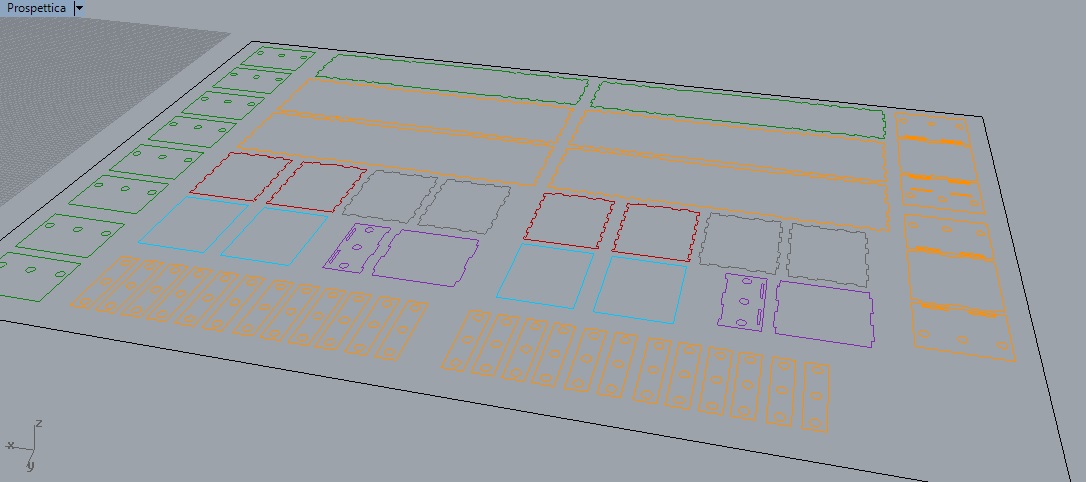
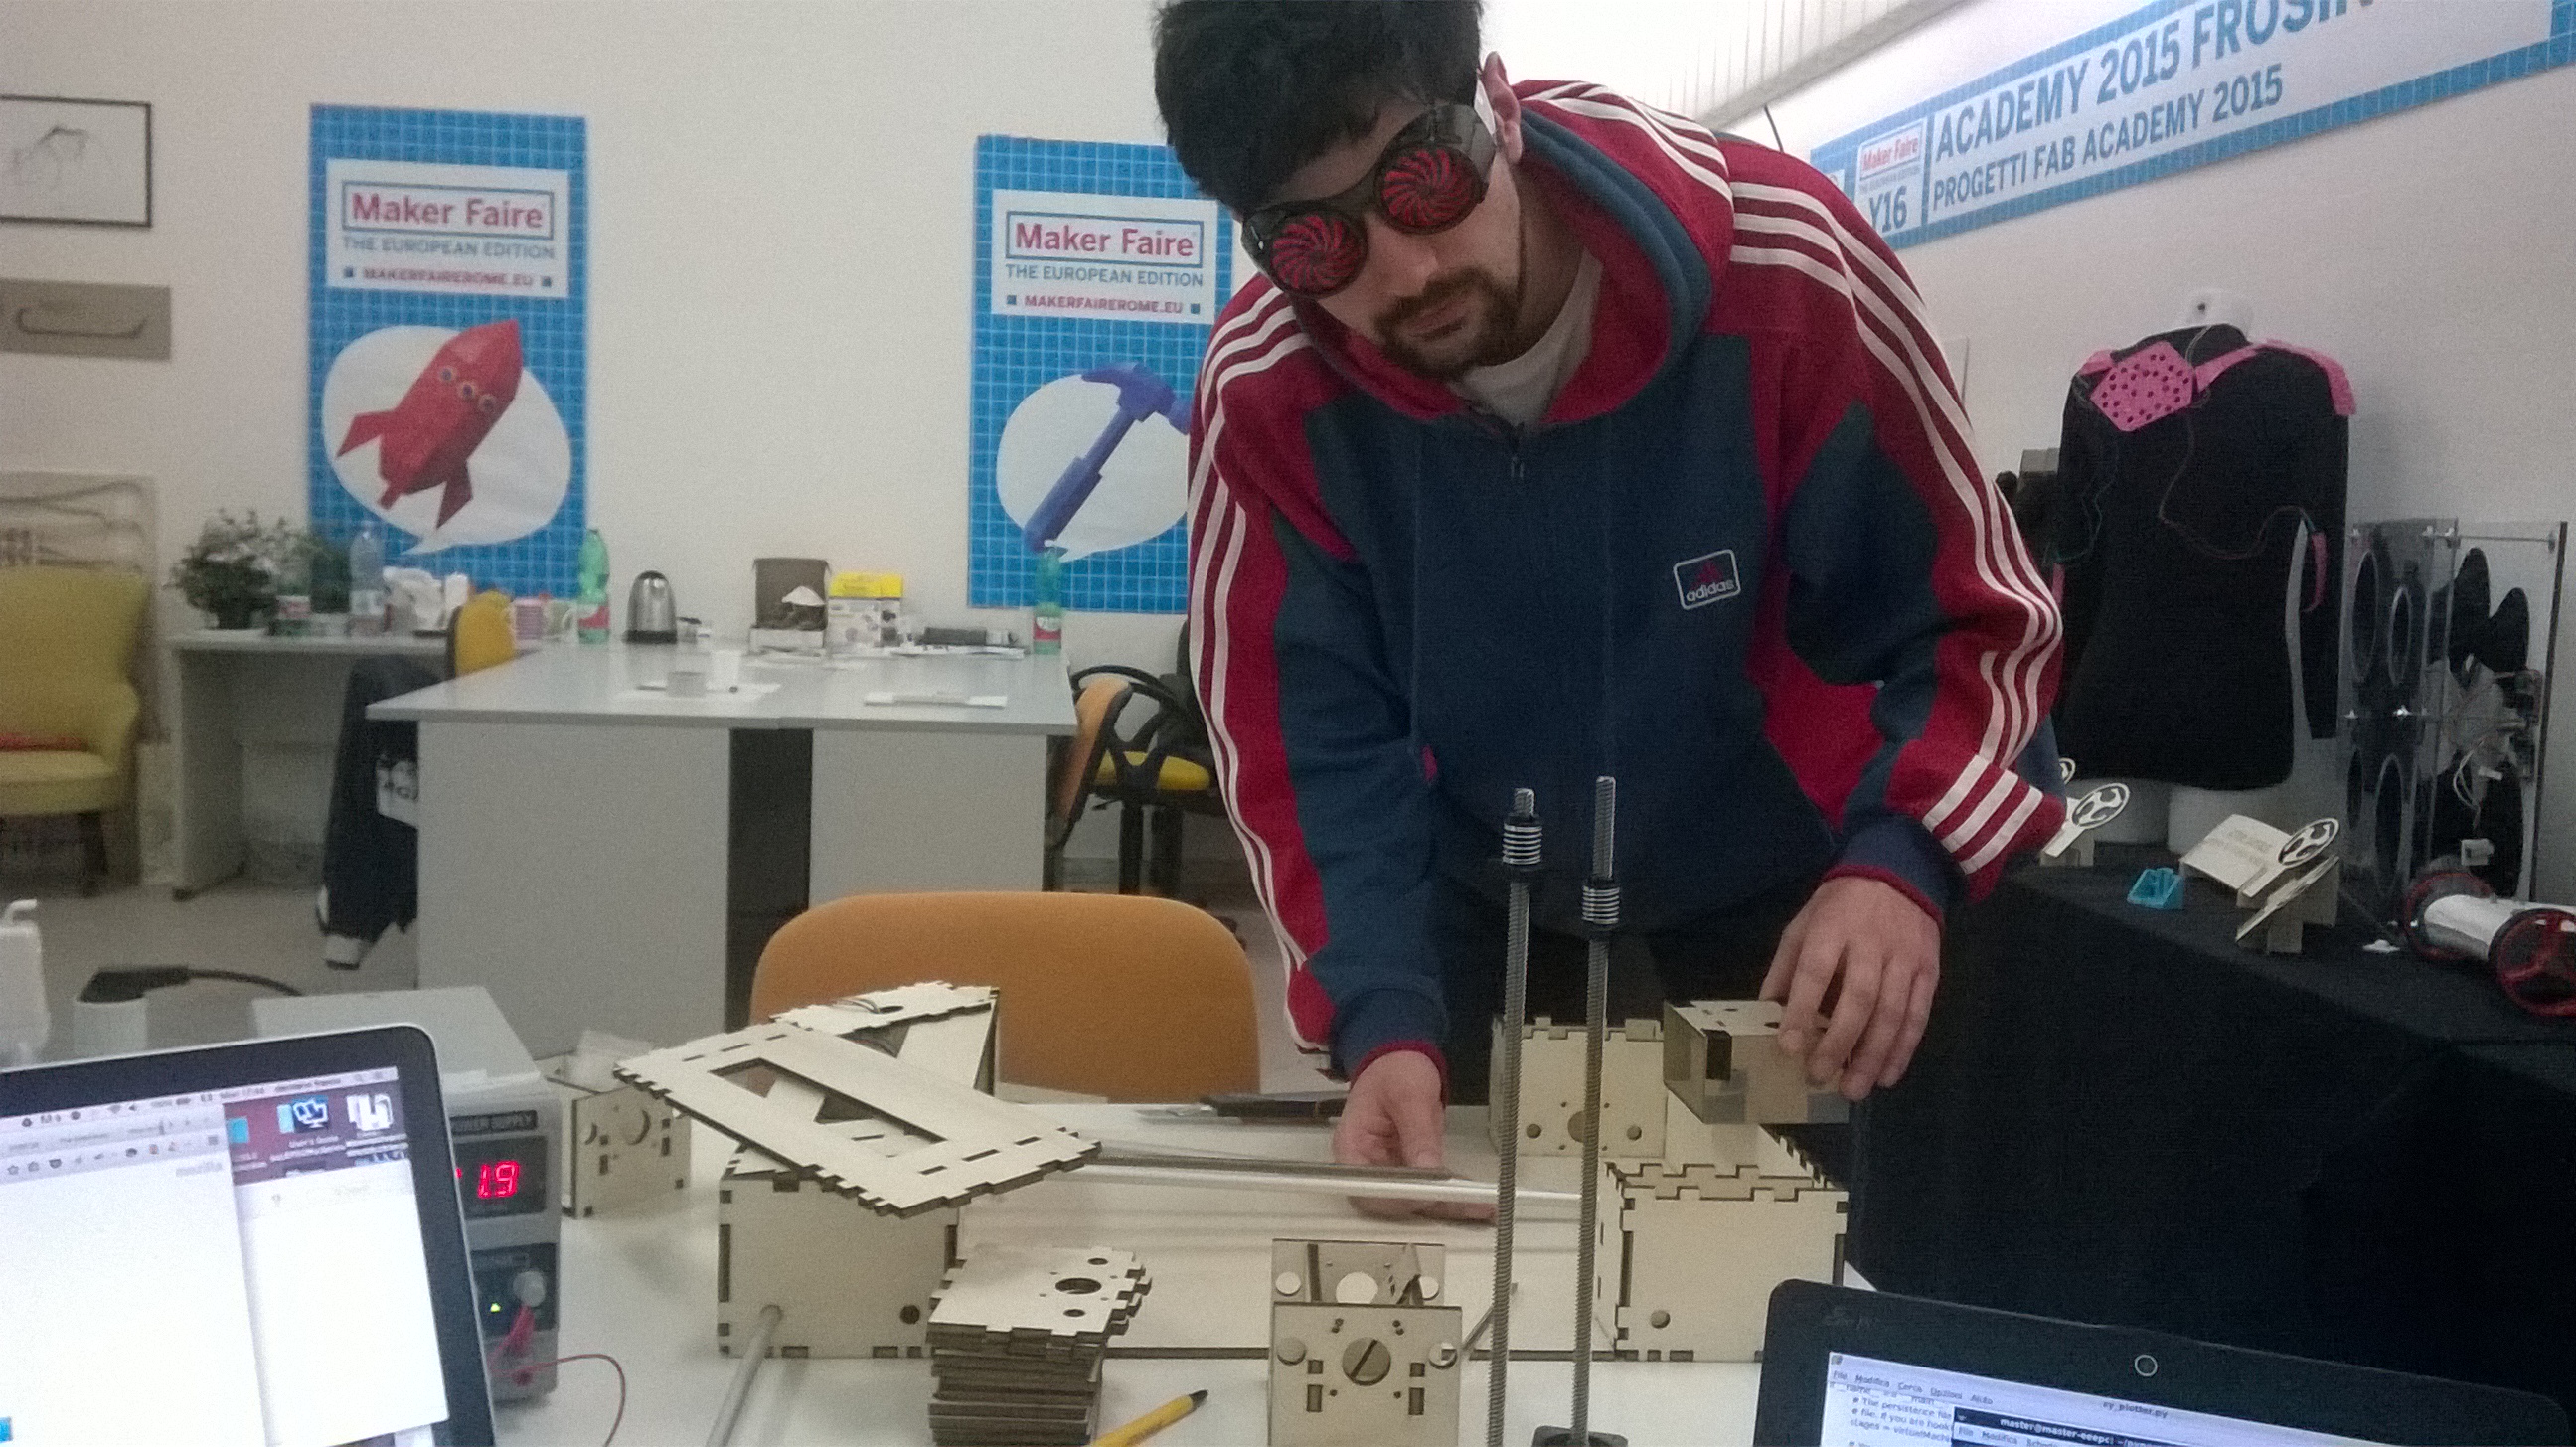
 After we lasered the stage using the DXF settled and exported from the cutfiles available in the fab inventory.
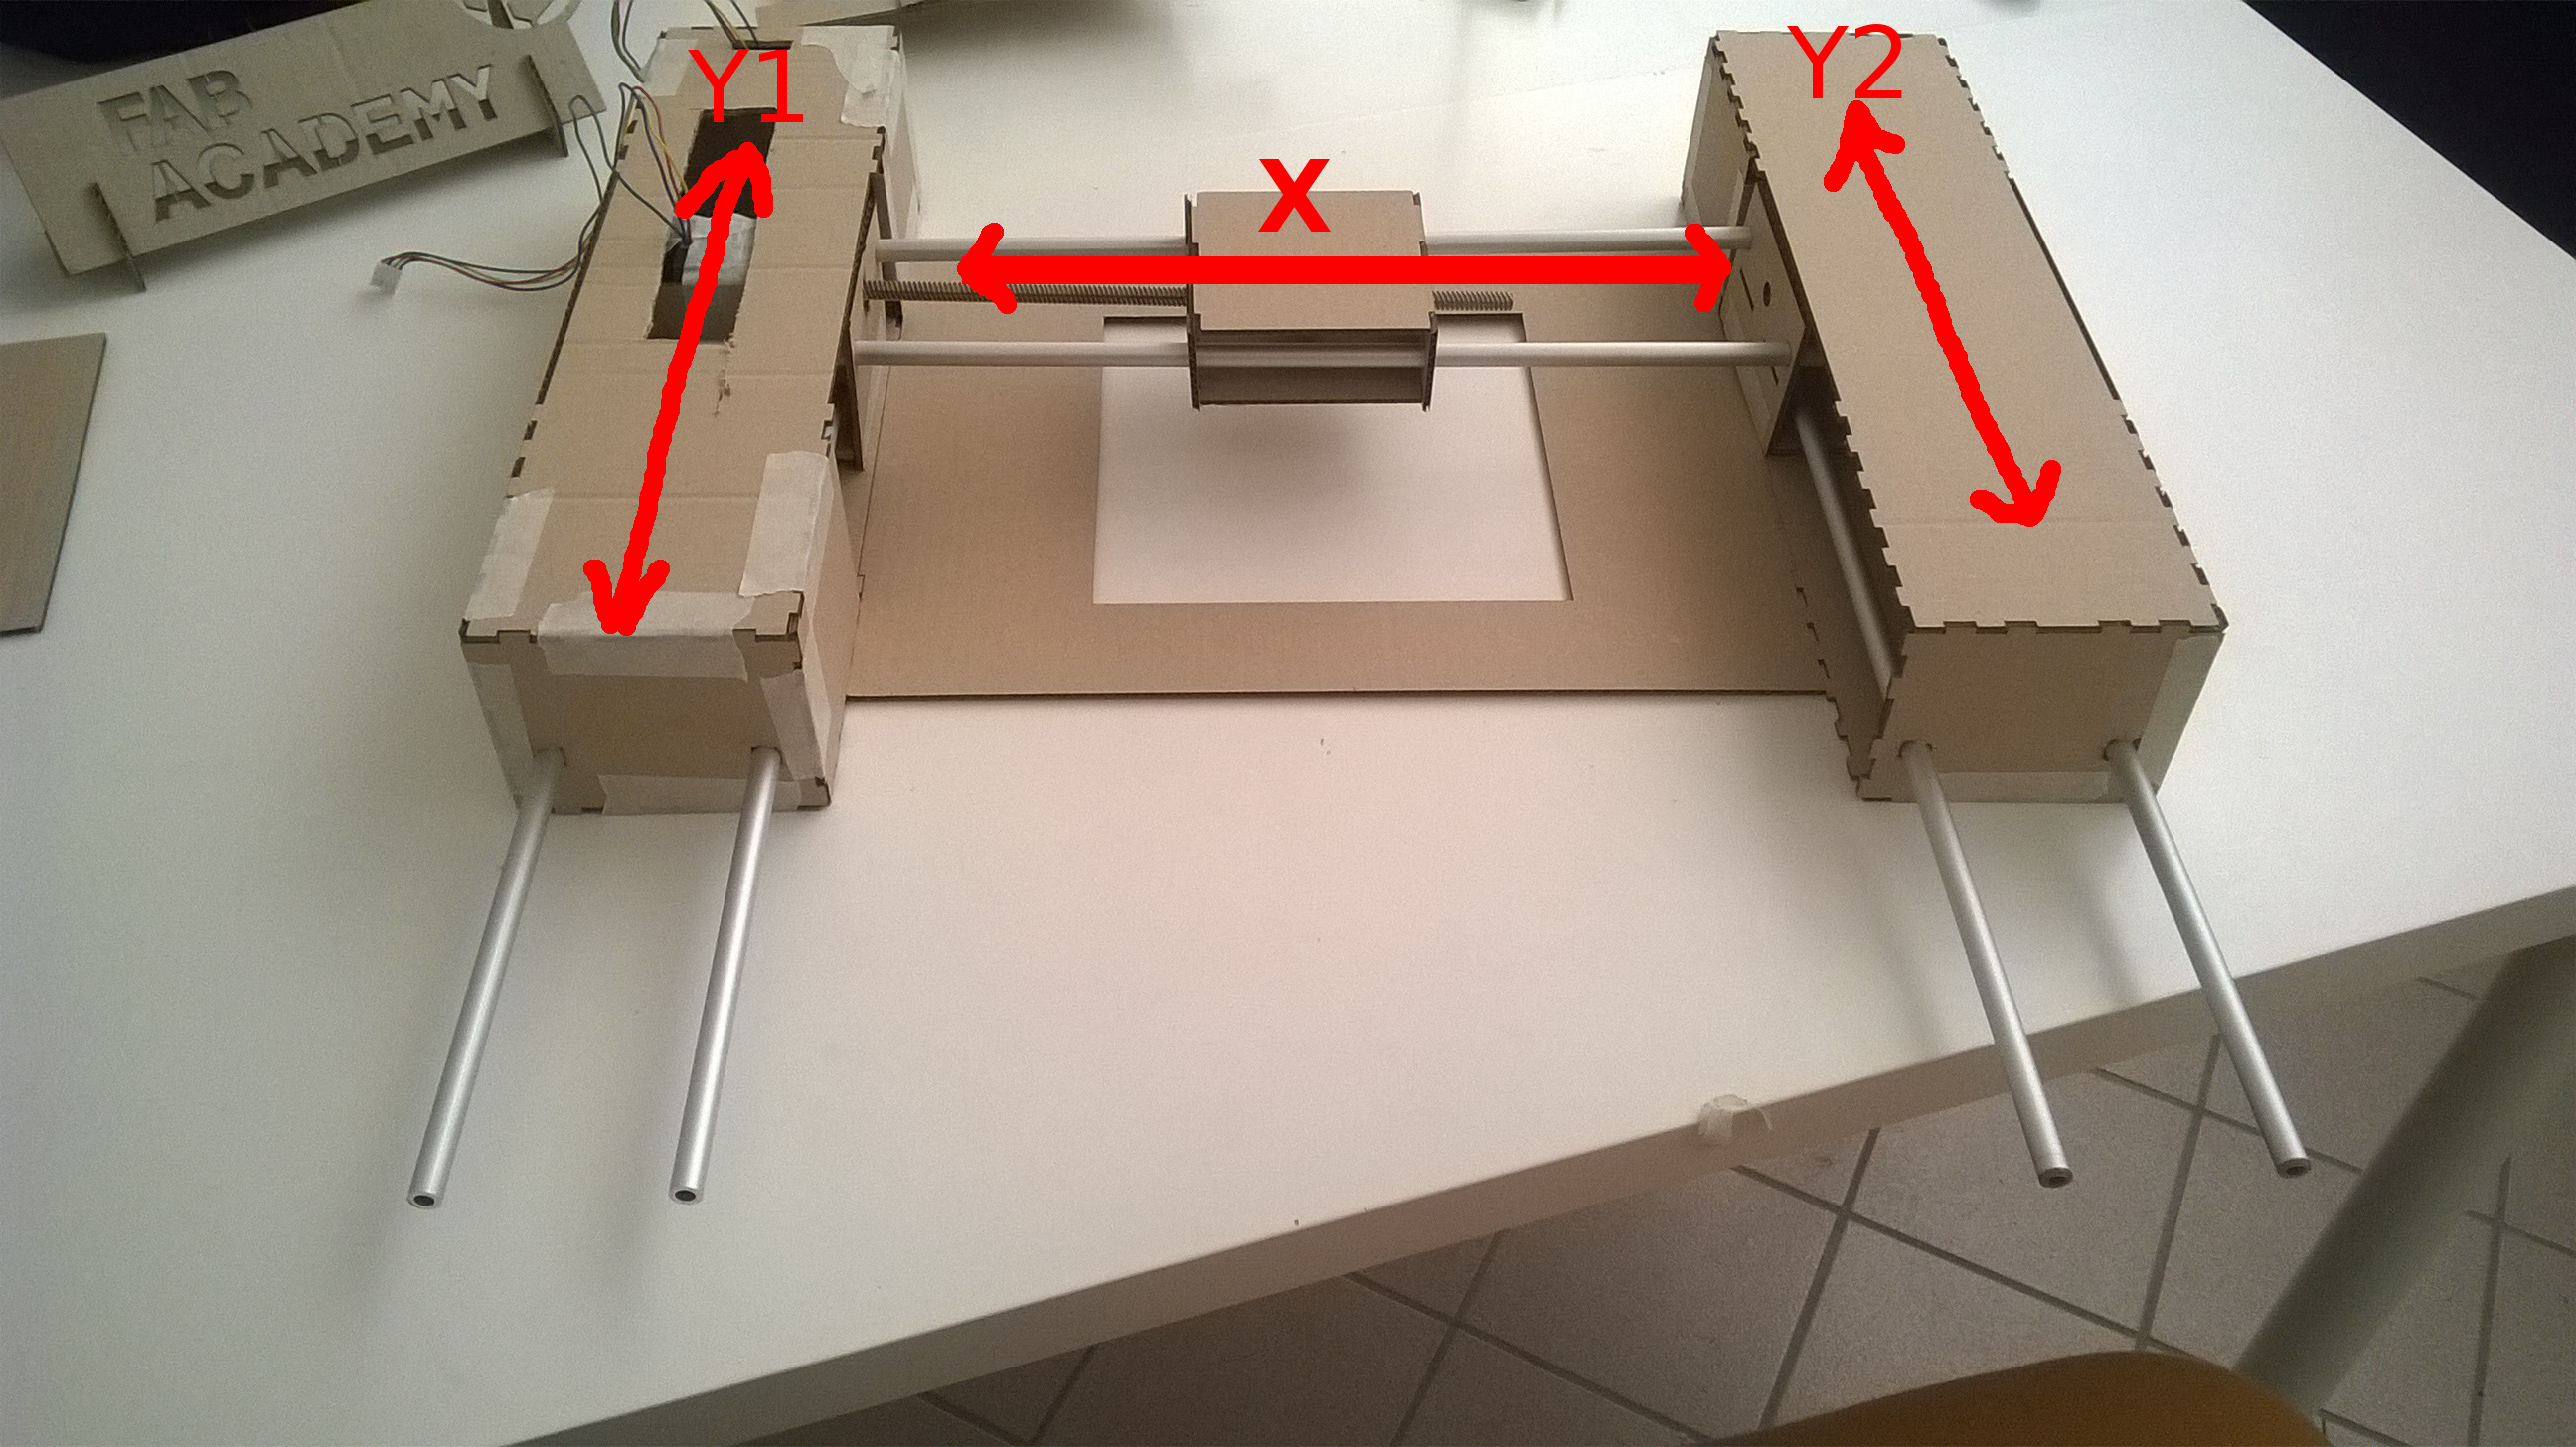
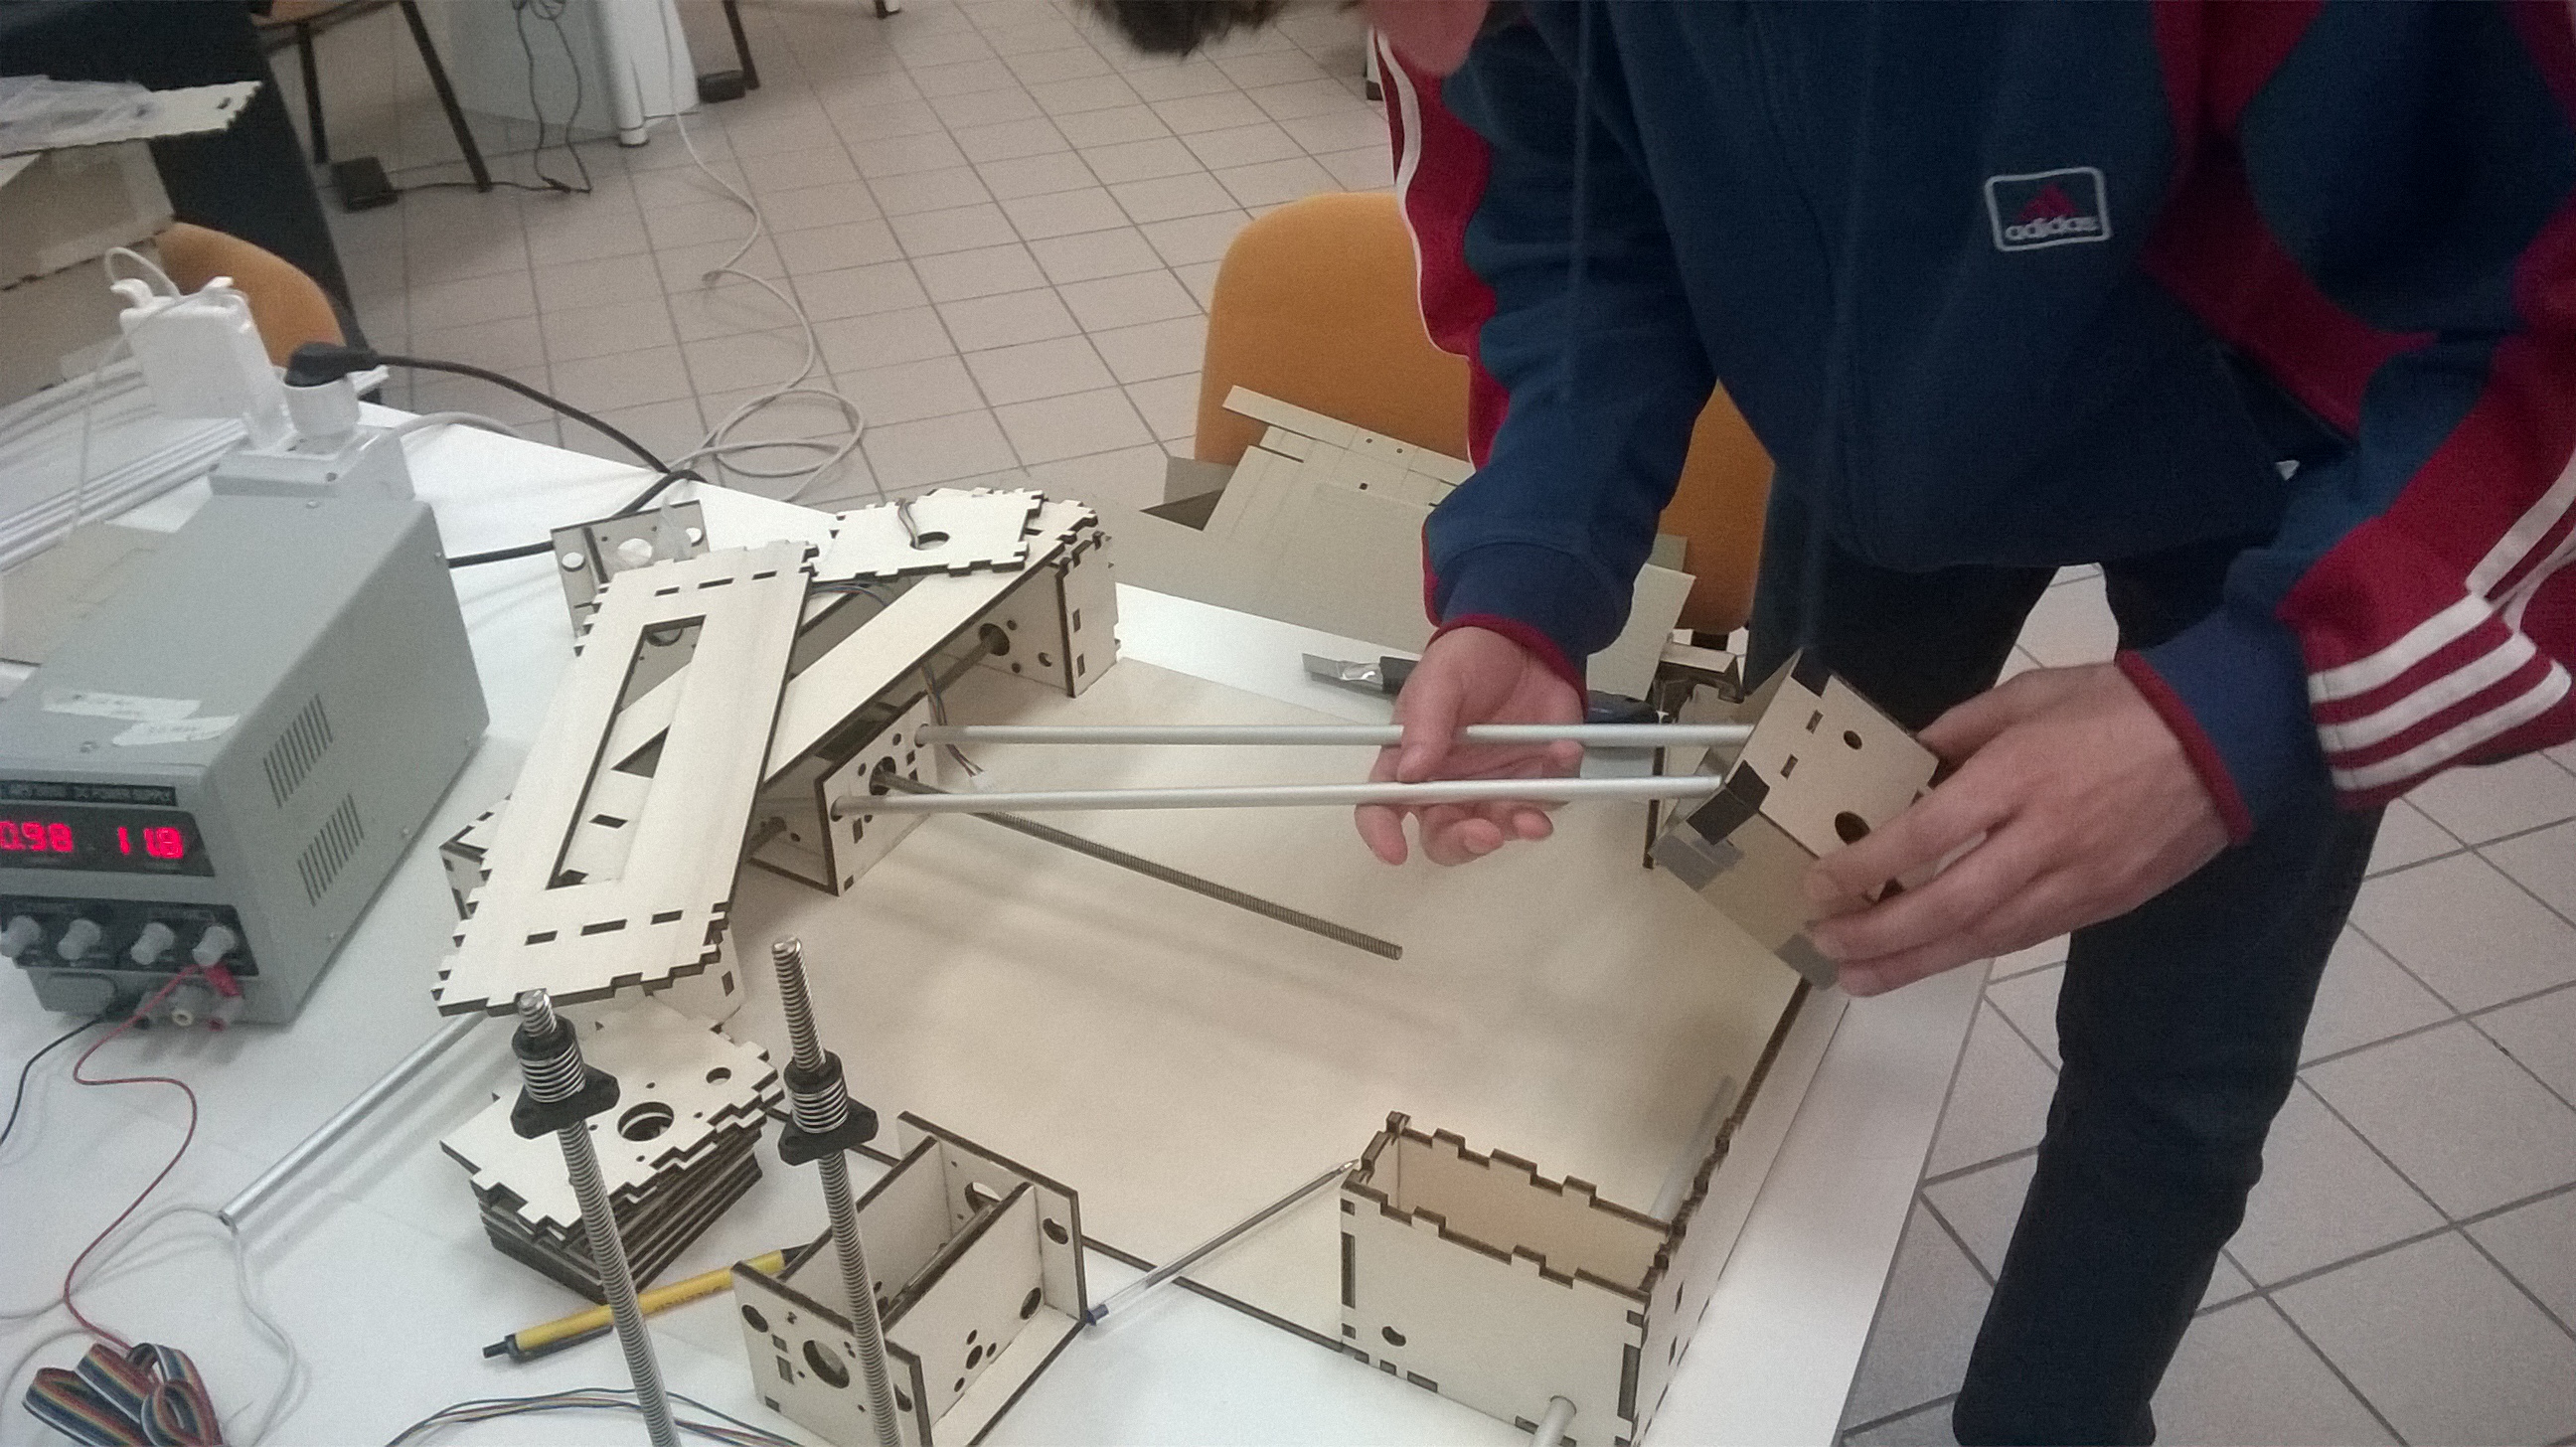
First was made a cardboard sample to test manually all the machine's features. Theres's 2 Y1 and Y2 axis each with a motor and 1 X axis witha 1 motor
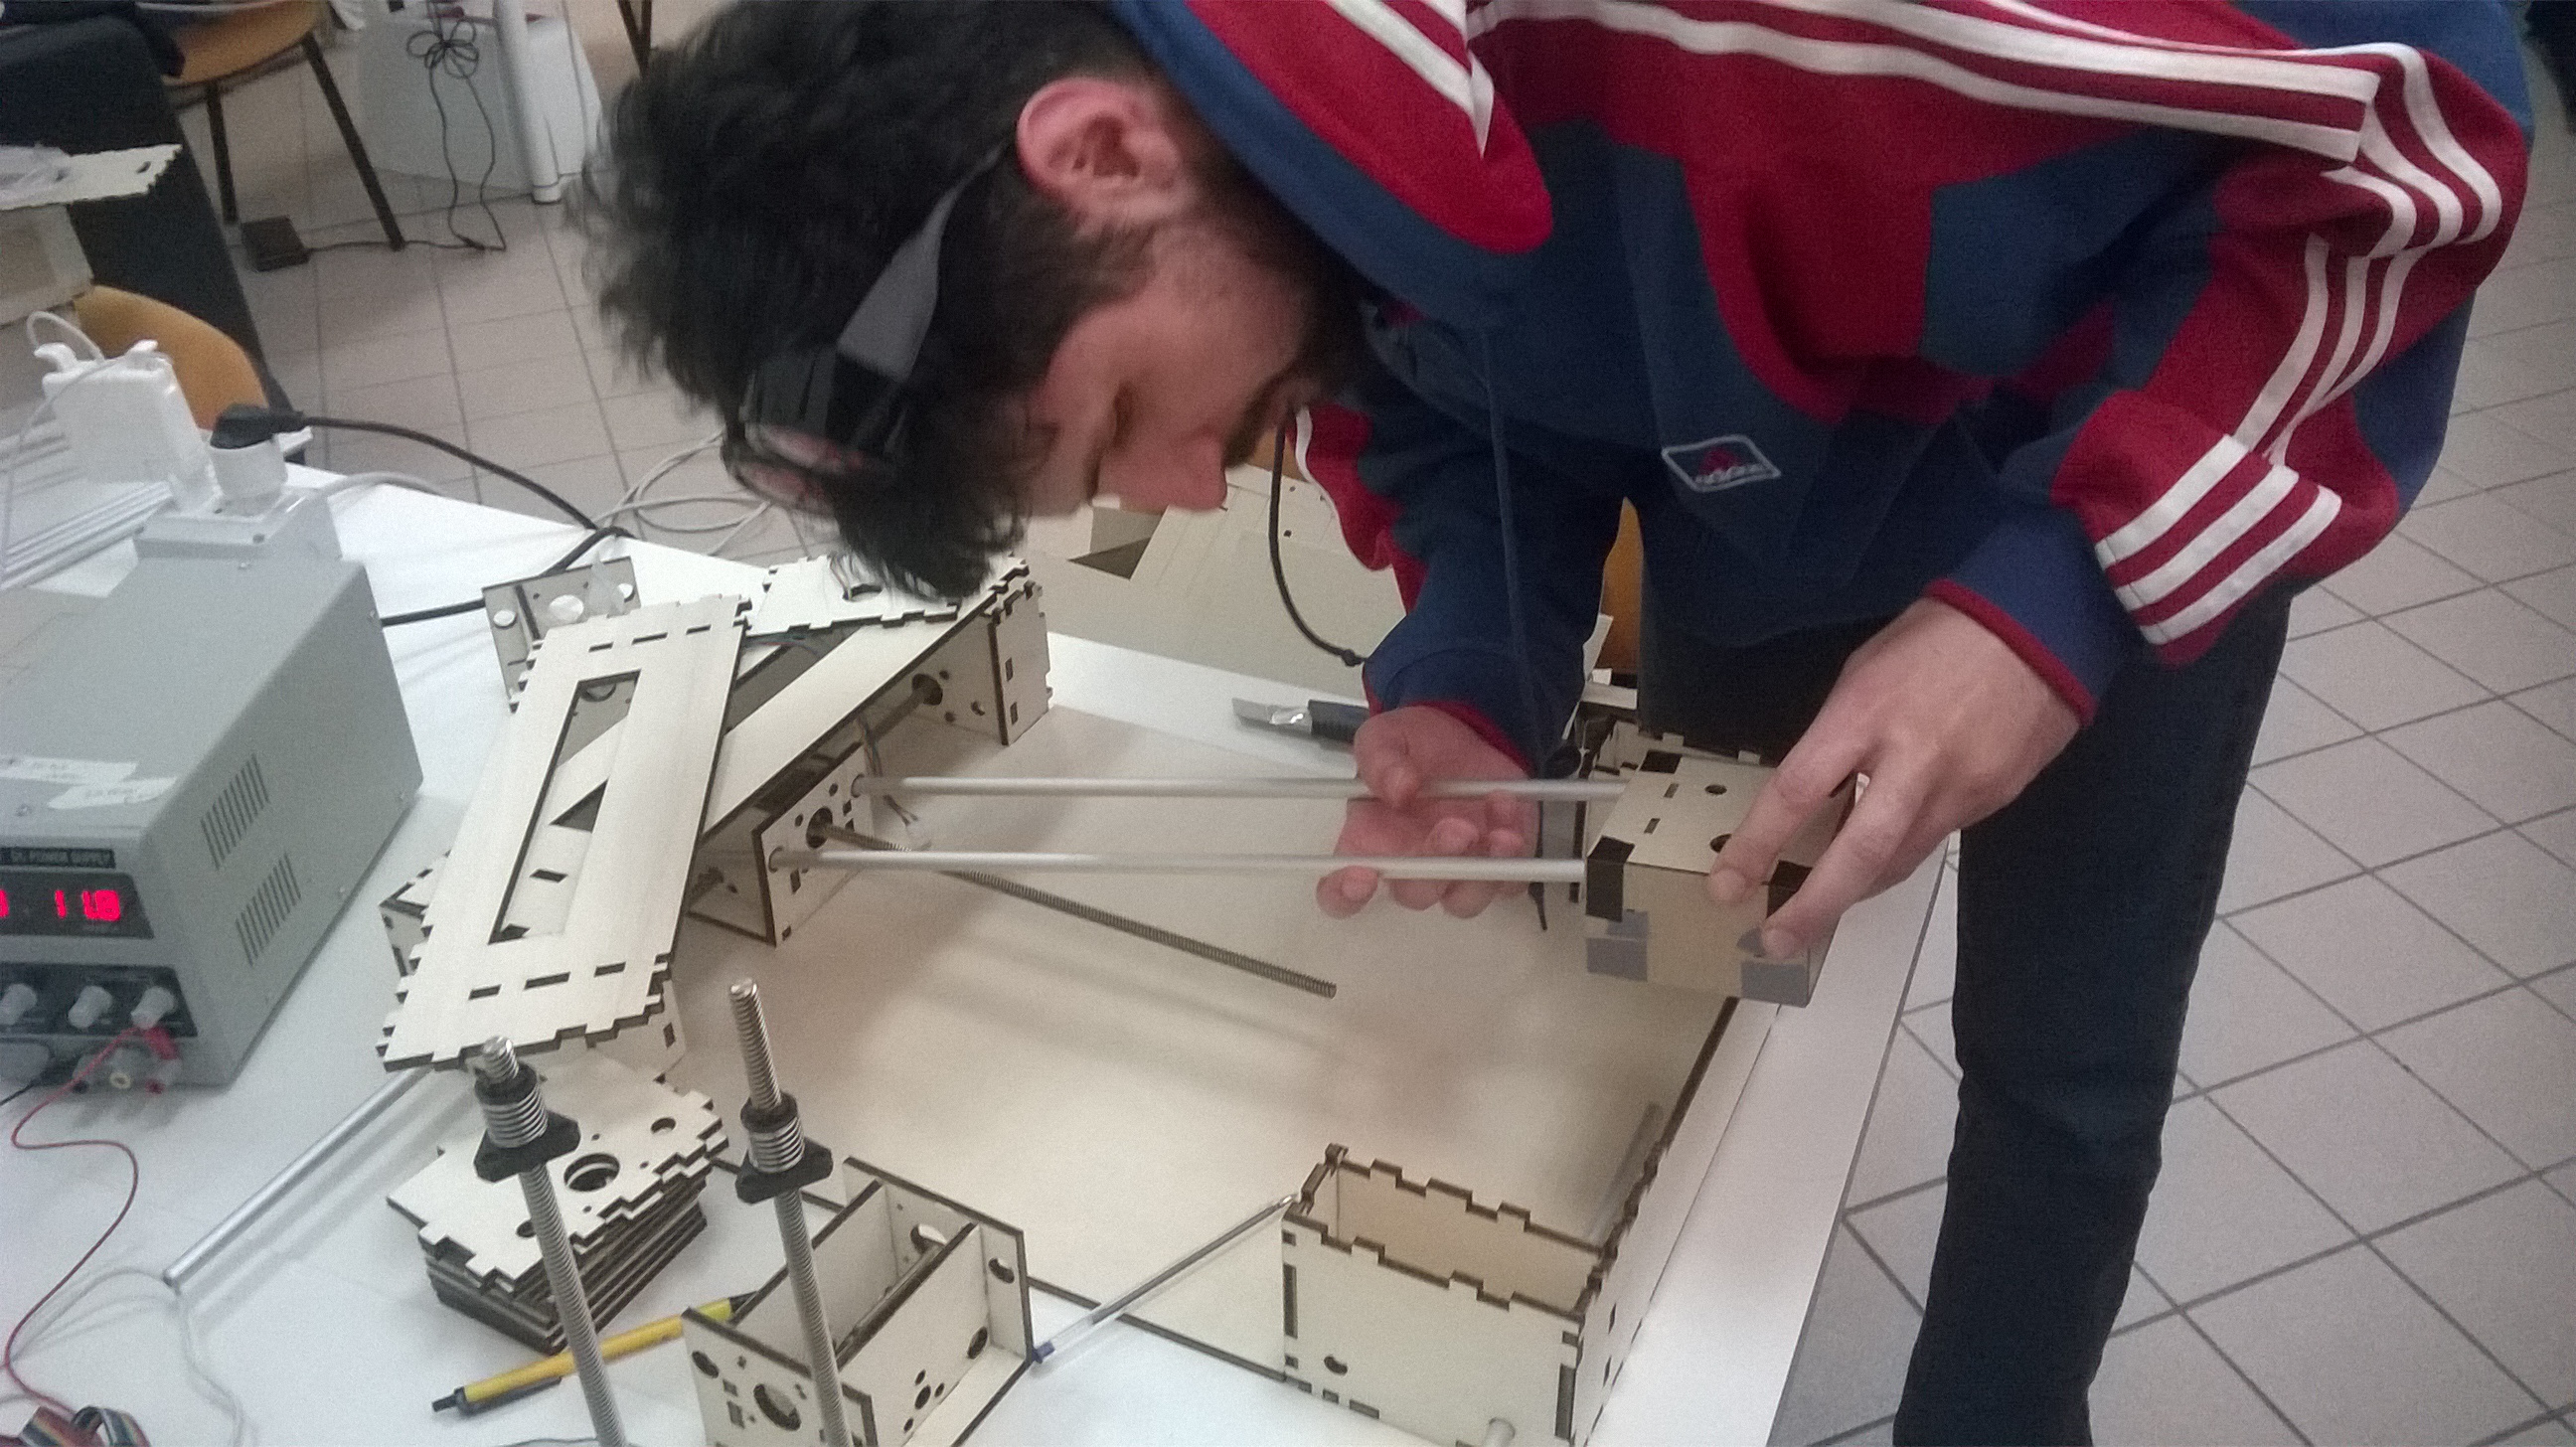
The was lasered and mounted the wooden machine
-PROGRAMMING, INTERFACING AND CODING.
We got the documentation of Gestalt from Ilan's thesis: http://www.pygestalt.org/
from Nadya's repo: https://github.com/nadya/pygestalt
and from examples https://github.com/nadya/pygestalt/tree/master/examples/machines
and from and the modular machine page: http://mtm.cba.mit.edu/machines/science/
To make the machine work you need to install:
-The gestalt library
-Python setup.py install
-Pyserial (if not installed because Pygestalt need pyserial for serial communication with the nodes.)
It is important to do not hot plug the boards. So the correct procedure is connecting the boards together and to the Fabnet, connect them to the pc and then to the power supply.
To connect the boards together you can use a ribbon cable. Pay attention to the two connectors on the board. One for in and one for out. Always check the polarity when plugging the cable.
Testing nodes:
To create new machine you have to import the Gestalt library
from pygestalt import nodes
from pygestalt import interfaces

from pygestalt import machines

from pygestalt import functions

from pygestalt.machines import elements

from pygestalt.machines import kinematics

from pygestalt.machines import state

from pygestalt.utilities import notice

from pygestalt.publish import rpc   #remote procedure call dispatcher

import time

import io
then you define the virtual machine class that is a set of functions and parameters that defines the machine (i.e. number of axis, kinematics etc)
from pygestalt import nodes
class virtualMachine(machines.virtualMachine):
then you tell to gestalt how to connect with the nodes. Here is important to change the name of the serial port used:
def initInterfaces(self):

        if self.providedInterface: self.fabnet = self.providedInterface     #providedInterface is defined in the virtualMachine class.

        else: self.fabnet = interfaces.gestaltInterface('FABNET', interfaces.serialInterface(baudRate = 115200, interfaceType = 'ftdi', portName = '/dev/ttyUSB0'))
Now is time to define axis
def initControllers(self):


        self.xAxisNode = nodes.networkedGestaltNode('X Axis', self.fabnet, filename = '086-005a.py', persistence = self.persistence)


        self.y1AxisNode = nodes.networkedGestaltNode('Y1 Axis', self.fabnet, filename = '086-005a.py', persistence = self.persistence)


        self.y2AxisNode = nodes.networkedGestaltNode('Y2 Axis', self.fabnet, filename = '086-005a.py', persistence = self.persistence)


        self.xyyNode = nodes.compoundNode(self.xAxisNode, self.y1AxisNode, self.y2AxisNode)
The kinematics properties of the nodes depends on the physical characteristics of the nodes used (step, microstep, pulleys etc). It is very important to correctly set up the parameters or it will result in an incorrect movement
    def initKinematics(self):


        self.xAxis = elements.elementChain.forward([elements.microstep.forward(4), elements.stepper.forward(1.8), elements.leadscrew.forward(8), elements.invert.forward(True)])


        self.y1Axis = elements.elementChain.forward([elements.microstep.forward(4), elements.stepper.forward(1.8), elements.leadscrew.forward(8), elements.invert.forward(False)])


        self.y2Axis = elements.elementChain.forward([elements.microstep.forward(4), elements.stepper.forward(1.8), elements.leadscrew.forward(8), elements.invert.forward(False)])


        self.stageKinematics = kinematics.direct(3) #direct drive on all axes
we decided to draw a square from the command line hardcoding coordinates inside the python script
moves = [[0,100,100],[100,100,100],[100,0,0],[0,0,0]]
-THE WORKING MACHINE
We got helped by the youngest FabLab's member :-)