~ Applications and Implications.
~ post date: 2017.5.24, recent update: 2017.5.24
This post is related to my final work, Pure Imagination : A Garden where almost everything you see is electric. Data critical to the build of that work contained within this post is likely redundant or out of date to information within that post.
What will it do?
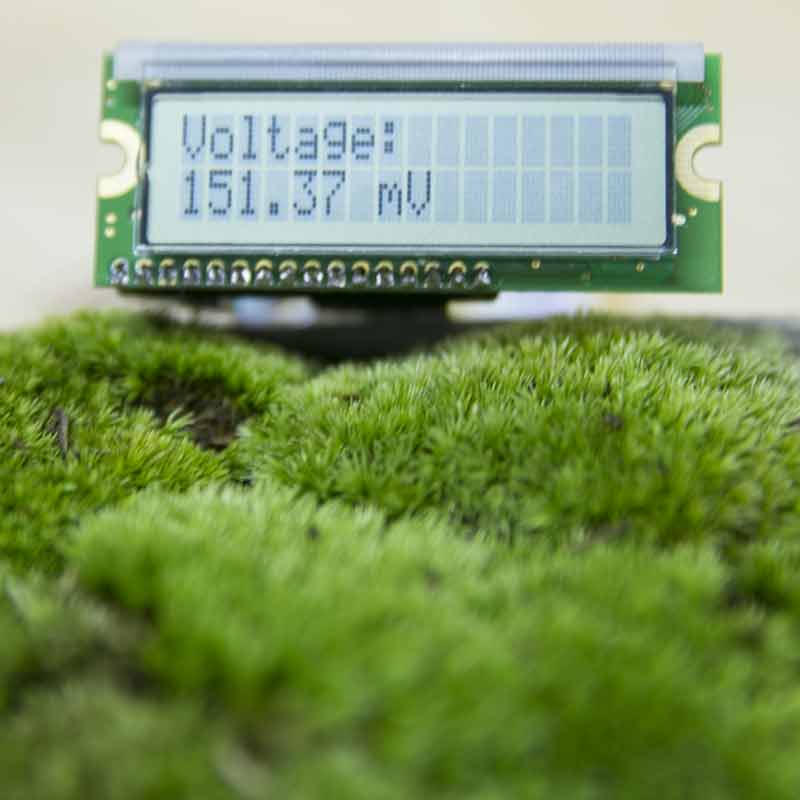
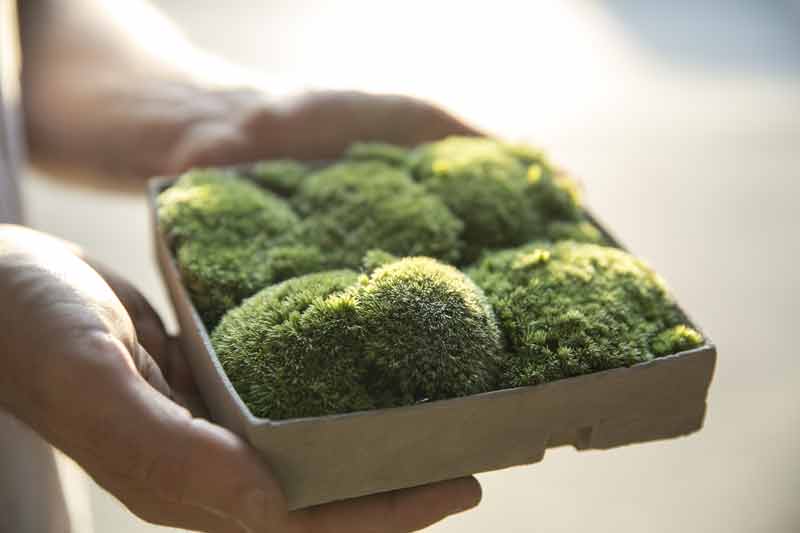
I will fabricate a set of microbial fuel cells in disguise as a tabletop moss garden. The cells will be connected to a custom Atmel controller board which will sense electrical output and display that information to an LCD.
Who has done what beforehand?
Most of the science I used comes from Dr. Paolo Bombelli's excellent research in the field of bioelectrochemical processes. This includes his published research: Electrical output of bryophyte microbial fuel cell systems is sufficient to power a radio or an environmental sensor and Biophotovoltaics: oxygenic photosynthetic organisms in the world of bioelectrochemical systems and Biophotovoltaics: Energy from Algae published in Catalyst Vol 21 #4, April 2011.
Alex Driver and Carlos Peralta's collaboration with Dr. Bombelli Moss Table. In a series of collaborations, they were able to run environmental sensors and a small LCD display for two weeks uninterrupted and operate a commercial radio for 80s after a day of charging a battery each using power generated solely from Moss based bioelectrochemical modules. This video shows an earlier work in which the table lamp shown is NOT powered by the [moss].
Elena Mitro's Moss Voltaics. Ms. Mitro generated electricity using moss and fabricated a modular system for containing the power cells.
Jakobe Skote's The Moss Powered Wifi-Jammer is a series of fabricated moss power cells which generate enough electricity to power wifi jammers. The work was conceived as a wearable.
What materials and components will be required?
The work will require some chemistry based components that need to be sourced outside of the lab. I have bought these via Taobao, an online marketplace in China. The small hardware, ie rubber or stainless steel bolts, I have sourced on Beijing Road, here in Shanghai, not far from Fablab O. The remaining components are given to me by Fablab O.
- Bioelectrochemical grow module (9 units, 150mm x 150mm)
- Carbon Fiber (lab owned)
- Cotton, oil free, medical use
- Refined sugar (Starbucks, free)
- Moss : outdoors everywhere
- Wet-proof carbon fabric, Cetech W1S1005 : 9 5cm x 5cm pieces
- Nafion 5% DuPont D520 : 21.875 ml
- 10% wt Pt/ C : 3125 mg
- Rubber sheet at least 2mm thickness: 50 5cm x 5cm pieces
- Stainless steel mesh (small as possible) : 25 4cm x 7cm pieces
- Stainless steel bolts and nuts : 125
- Stainless steel washers : 250
- Alligator clip leads : 25 - 50 dependant on wiring scheme
- High-density foam (lab owned)
- Oomoo silicone (lab owned)
- Concrete, sand, cure accellerator (lab owned)
- Frame
- Plywood (lab owned)
- Electronics
- Atmel ATtiny 44 (lab owned)
- Lumex LCD (lab owned)
- Fab lab stock electrical components
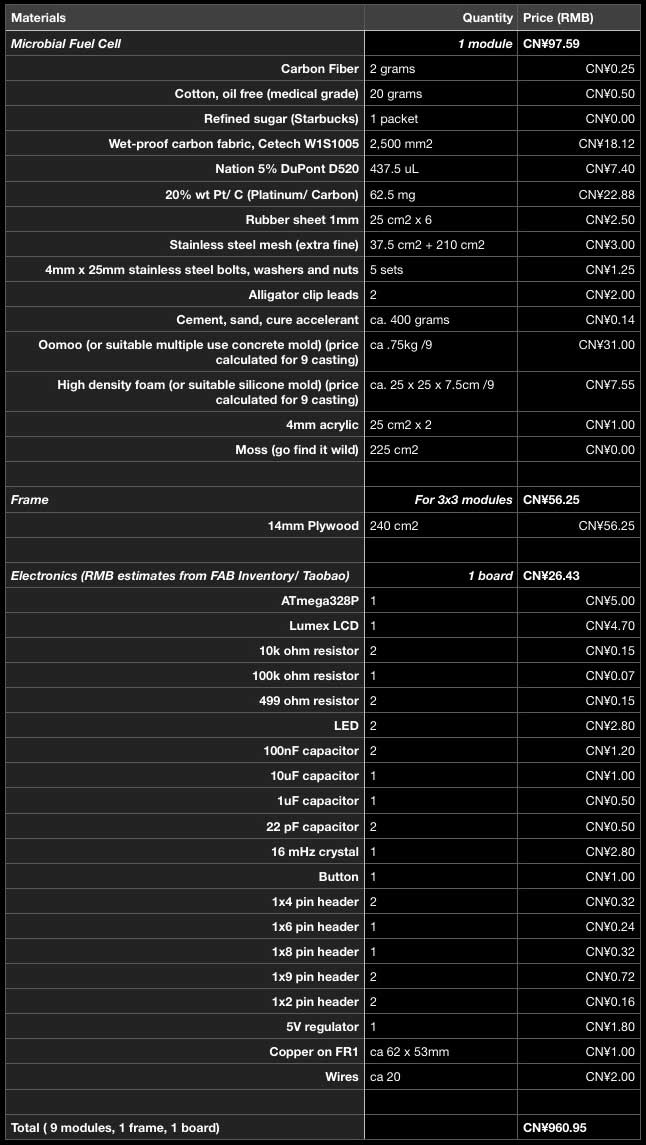
Price Breakdown
Following is a list of prices and quantities for the final build. Many of the materials, ie. acrylic, electronics were donated to the project from the fablab, others as part of the Fab Academy inventory/ session resources. For those materials, I checked online sources. The most expensive parts of the build are the chemical components and, shockingly, the silicone for the concrete mold. The silicone mold survives however, and that price would "decrease" with each successive cast. The bioelectrochemical system needs to be optimized for electricity output and material cost, perhaps alternative materials could be found for the cathode, which is where most of the money goes now. This price list includes the materials for the ATmega328 board I attempted beyond the scope of my Fab Academy build. The price of the ATtiny44 board I fabricated and used in the final build is slightly less than the advanced board, yet the total project cost difference is less than 1%.
What parts and systems will be made?
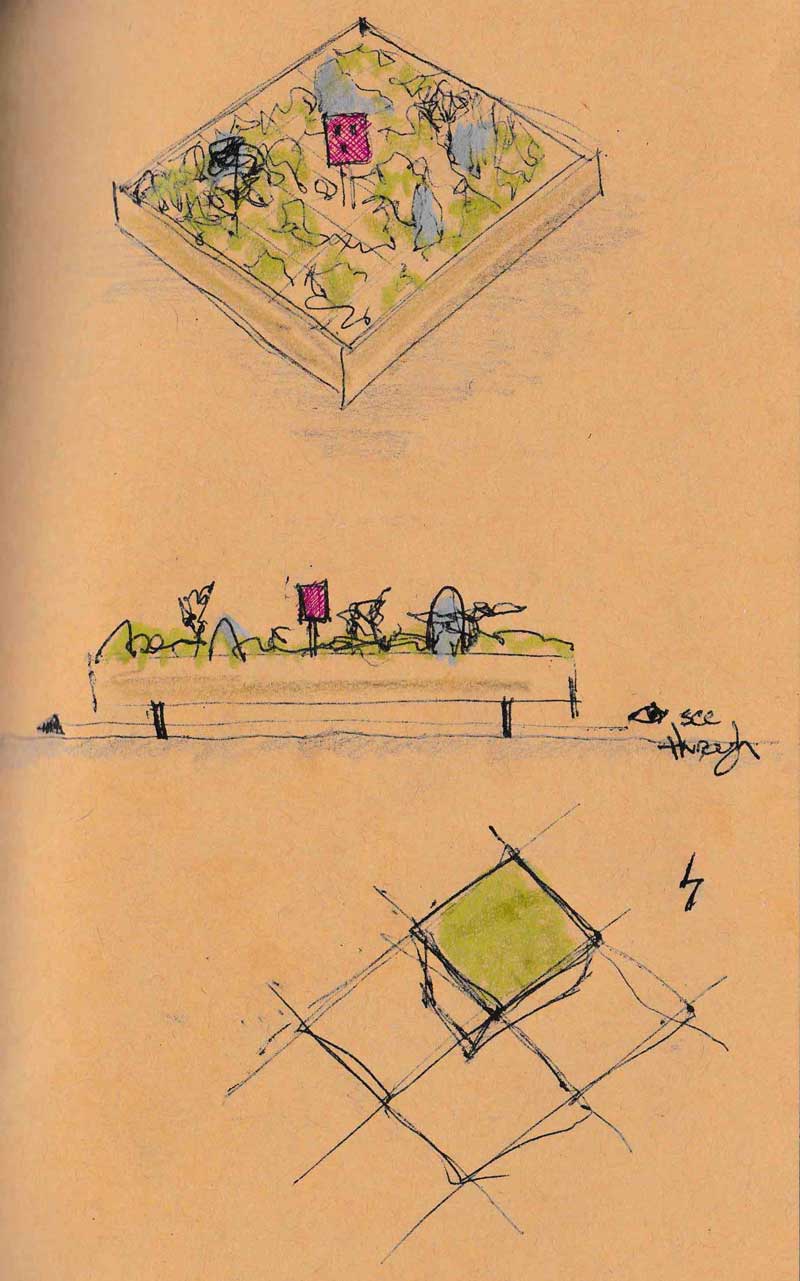
The build can be separated into four parts: bioelectrochemical components, grow modules, frame, and electronics. The first, bioelectrochemical, will involve preparing the cathode and anode and moss. The grow modules are custom fabricated from cast cement to contain the cathode and anode and provide for electrical connections. The frame will be CNC cut plywood to organize the grow modules for presentation and conceal the electronics. The electronics will be an custom fabricated Atmel board programmed with Arduino and Processing to monitor the electrical output of the system.
Processes
- Project management and documentation
- Spiral development cycle and aggregative, modular design
- HTML, CSS, photo, video and written documentation (this page)
- Computer-aided design (parametric)
- Rhinoceros x Grasshopper modeled
- Computer-controlled cutting
- Laser cut washers
- Laser cut molds (or 3d milled, yet unconfirmed)
- Computer-controlled machining
- 2D milled frame
- Molding and casting
- Cast grow modules
- 3d milled form for mold (or laser cut, yet unconfirmed)
- Electronics design and production
- Custom Atmel controller based PCB
- Input devices
- Voltage out monitoring
- (Time dependent) Environmental sensors: UV, humidity/ temperature, soil moisture
- Output devices
- LCD Information readout
- Interface and Application Programming
- Data storage and visualization
What tasks need to be completed?
The task ordering should be based on material acquisition and preparation lead times and principals of spiral development. I will source and purchase the chemical components, create a testing unit with operational cathode and anode. Then design the final grow module, mill the form and begin casting concrete. While waiting on the machine, I will laser cut all the components. Throughout casting concrete, I will work on the Arduino and Processing sketches for the monitoring processes. When the cement hardens, I will begin adding in the cathode and anode components and planting moss. Finally, connect them together and link the electrical wires to the ATtiny board for voltage monitoring.
Update : All tasks have been completed. The project was presented in an unfinished state to the Fab Academy and after, I cast the remaining grow modules, cut the frame and assembled the garden.
Task list
- 3D design and fabricate test modules (complete)
- Calculate assumed Wattage output and garden size (# of modules) (complete)
- Parametric 3D design garden (complete)
- Source cathode materials (complete)
- Source moss (complete)
- Source battery and sensors (complete)
- Design electronics (complete)
- Prepare presentation slide draft and video template (complete)
- Prepare cathodes (complete)
- Mill and cast grow module molds (complete)
- Prepare anodes and fill grow modules (complete)
- Fabricate PCB (complete)
- Program data capture and visualization (complete)
- Connect modules to sensor and begin testing data capture (complete)
- Update presentation material for video conference (complete)
- Fabricate frame (complete)
- Present progress to colleagues (complete)
- Final assembly (complete)
What questions need to be answered?
Beyond my previous weeks' works, I have the following things to learn.
Unknowns
- How to fabricate a microbial fuel cell?
- How to sense voltage output?
- How to mix and cast concrete, what are the design tolerances?
- How to store long term data (ie, read/ write external flash storage)?
Update : All questions answered.
What is the schedule?
I have two weeks for this build beyond what I have incorporated into previous weeks' lessons. In the first week I will prepare a minimum of one grow module, working electronics and programming. The second week, I will prepare the remaining grow modules and the plywood frame. Throughout, I will document the build and record video for a one minute documentary and compile the clips in Apple iMovie, editing as I progress.
The work is complete.
How will it be evaluated?
The work will be evualated based on the robustness of the modules, the exhibition of Fab Lab knowledge and execution, and the capability of the electronics.
Jump : Index
J.travis Russett © 2017
 All the work contained within is licensed under a Creative Commons Attribution-NonCommercial-ShareAlike 4.0 International (CC BY-NC-SA 4.0) License
You may remix, tweak, and build upon my work non-commercially, as long as you credit me and license your new creations under the identical terms.