Week 7 March 8th: Computer Controlled Machining
Design and Mill Objects using computers
The first time I made something in shop(woodworking) class, I was send to the principals office because apparently making working crossbows was frowned upon. However my teacher Mr. Kirshchenbaum(bless his soul, he was a cool middle school teacher that I still remember how to spell his name) gave me an A in that class and that cemented my interest in making more cool things, no matter the applicational pragmatism.
So the giant CNC machine that I been warned on numerous occasions is the single most dangerous machine in the Fablab, that has caused fires, potentially mortal shrapnel explosions, screaming from both the machine and the instructors, and made me see Edu drop everything he was doing and run to that room on several occasions while muttering some interesting Spanish curses, has naturally made me very interested in using the machine. Oh it can also make cool stuff which is awesome. I decided on making a wall bike mount since I have 5 bikes and need space to buy one more. I've seen some designs on both Etsy and Pin Interest where they used a Reindeer trophy head to hang clothes and jewelery so why not a bike? And it turns out someone already did that on Thingiverse. Damn. So instead I chose a bull shape instead since at least my bike has bullhorn handlebars so it would make some sense(also it turns out it was much easier to design but don't tell my instructor).
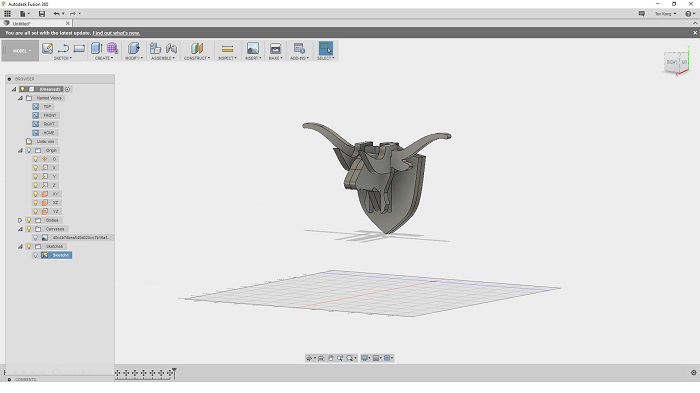
I started initially with a Longhorn since I wanted a bit more personal and represent my alma matter. And then I realized its a stupid idea since it only adds the the weight of it and the horns are more widespread rather than forked in front as I needed. So a simple bull's horn was modeled from using Fusion 360(BTW, the insert picture function to a plane is totes balla, makes its hella ez to design, I 5h17 u not).
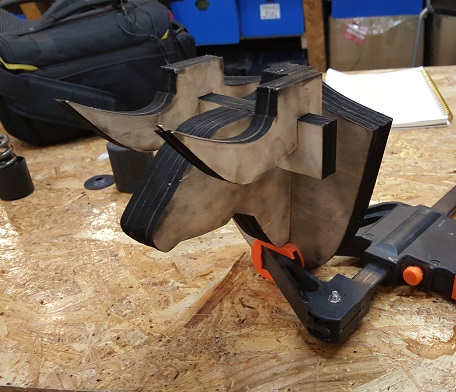
So after streamlining the design a bit I build a half size prototype on the laser cutter. Came out actually pretty solid and I will change that lazy rectangle block shape to something better and then I could probably hang a nice small frame or something.
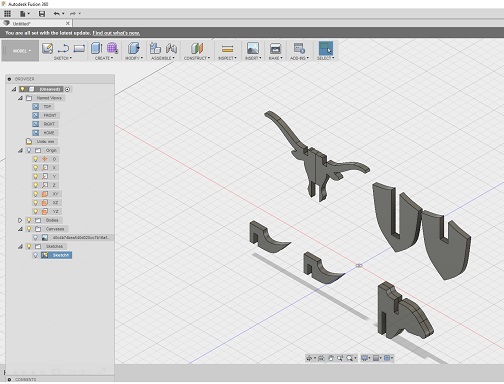
This is the cra- I mean, sub-par .dxf for the design file: Download .dxf file
Alright alright alright, so its good to go. Or so I thought. Once we switched over to the computer connected to the CNC mill and I tried to import my file, it wouldn't work. Alright but it opened in Illustrator here and then we exported it to a 2004 AutoCAD format, and it worked. Or so I thought again, because vector files are misleading as 'heck'. Apparently I had several unclosed drawings and duplicates which again I had to close up, and then finally we had a workable file. Or so I thought but I'll get back to that when I realized it after I cut the design out.
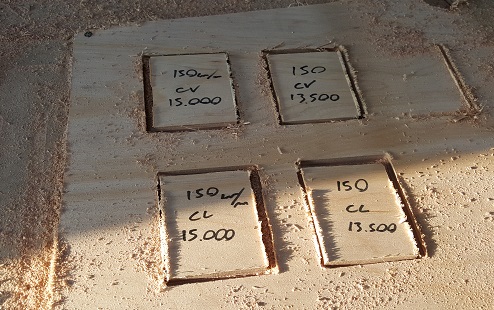
So for our shopbot, we had a variety of values, settings, and procedures(education as well such as on what CNC really means, different types of mill bits, things like ramps and tabs, and ideal cut conditions) to get used to before cutting. However there was some advantage that I found in not going first. You see, I learned a very valuable life lesson when I was younger as a younger sibling: Your older sibling is the test and you're the product that comes out from avoiding the failures that the test experienced. So whether it be international college admission processes or food allergies, the first person gets to find out how to do all of those things or experience all of those things while you learn to avoid such mistakes(but unfortunately my sister still went to Oxford on a full scholarship and is now studying for a PHD while you barely made it through college working campus jobs to get in-state tuition, but hey, at least I found out I'm allergic to cherry blossoms and mackeral without having to test it out so I've got that going for me). Kurina happened to go second and since I used her leftover board, I got to forgoe a lot of the initial settings to see which cut is the best. I did change the depth of the cut a bit more after seeing her have fun with the screwdriver and multiple cuts and did some test cuts on conventional cutting(less to more cutting) vs climb cutting(going counter-clockwise to eat more material initially) and lowered the RPM of the spindle to cool the mill a bit more.
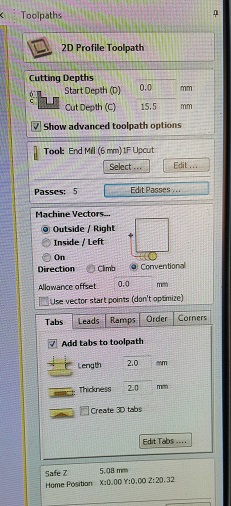
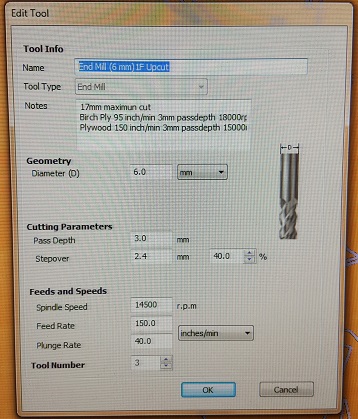
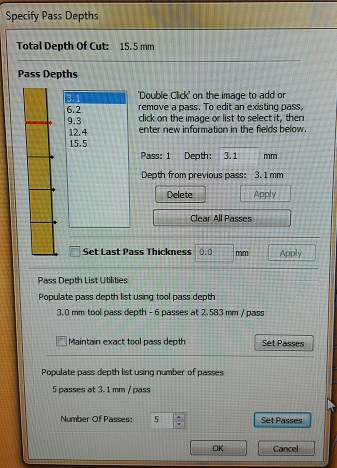
So I settled on the following values for VCarve Pro ShopBot Edition : Job Size = Width(x): 2440.0mm Height(y):1220.0mm , Material = Thickness(z):14.9mm (measured from 4 corners and 2 width midpoints and using the largest value) , No Offest, Units: mm (because inches are stupid) Cutting Depths = Start Depth: 0.0mm , Cut Depth: 15.5mm (increased from previous cut, YMMV as it's plywood) Tool = We used a 6mm diameter Upcut End Mill with 1 flute, at a spindle speed of 14500(less from the original 15000RPM while keeping the Feed Rate at a constant 150.0 and plunge rate at 40.0 inches per min) (just because America monopolized drill mills does not mean its still not stupid) Passes = 5 passes to cut a mostly uniform 3.1mm each (by the which, I was also told if you want a more cleaner cut without switching to an expensive mill bit, you can arrange the pass depths so that the initial top layer is very shallow and the bottom last layer is shallow so it will give a more smoother finish, but since this is plywood and I will probably wear and tear my bullhorns a lot I didn't bother to use it but thanks for the information Edu) Machine Vectors = Outside / Right using Conventional cut with 0.0mm offset Tabs = 2 tabs on each object since my objects were relatively small, while focusing tabs on thinner parts to provide more support. Ramps = Add ramps to tool path : Smooth with a standard distance of 100.0mm And then finally naming the path so I can identify it "conv 14500 out 150 leftside"
So after all the values and constraints and safety precautions and double checking and setting the origin on the machine and positioning the cut path most efficiently, I got a very nice single cut which I can push out using my still intact fingers, and using said mostly functional digits to assemble it.(I'm just really happy about my hands at this point because I tend to get hurt a lot unintentionally without being near a machine that can mortally wound you in 4 different ways).
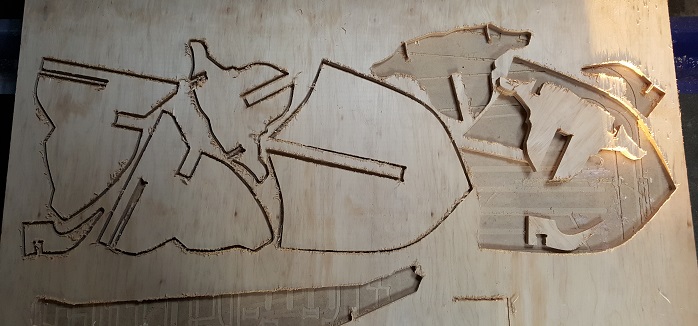
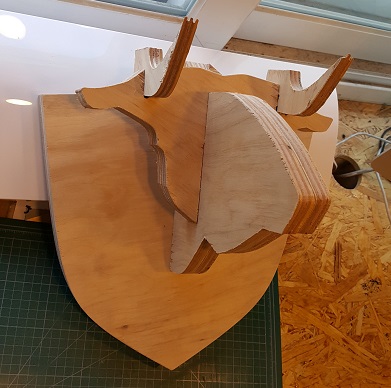
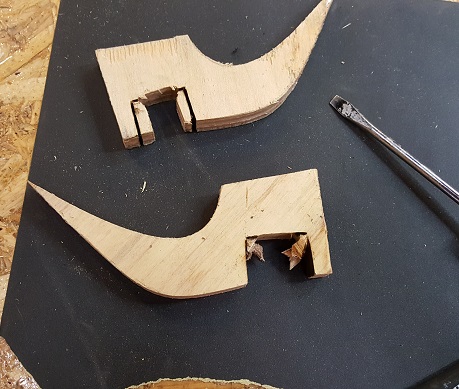
Yeah So Um. Remember I told you so it looks fine? Well it wasn't. I forgot to scale the horn's fit size when I doubled the face plate. So instead of waiting for the person to finish cutting and just relaxing or maybe getting something to eat, I went ahead and got a dremel using the wrong rotary blade and the wrong technique at the wrong angle with the wrong speed and cut it wider. I'm really happy my 9 fingers are still functional.
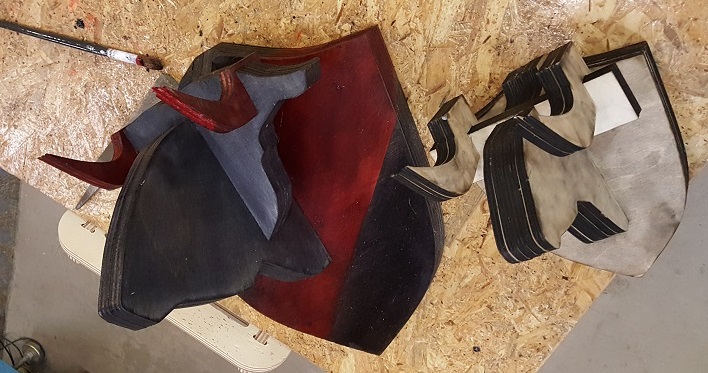
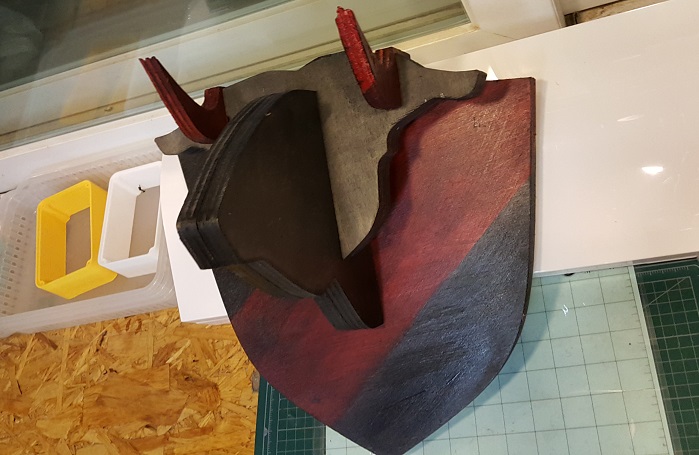
After that it was done. But wait there's more! Because I already knew how to make some wood rings, I also had some leftover wood stain and wood varnish. So I chose red and black(because I already used up all the more neutral colours) and made some improvements on it.
This is the improved CNC mostly okay .dxf for the design file: Download .dxf file
Conclusions: CNC milling is very rewarding once you learn how to use it. There is a lengthy instruction and the precautions using it are very much necessary on how to use it but really, after only learning the basic stuff I already have half a dozen new projects thought up, and since I still have 9 fingers left I think I can make most if not all of them. I definately will see what else I can make and see great potential in it.