FabAcademy2017 - Projects
Electronics production
February 15, 2017 - Week#4
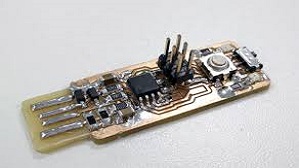
Electronic circutry is one of the most important parts of any device or machine. My first step to making FabISP programmer was a challenging one, because I have never done the same before. But after making one, everything became easier and I began to enjoy the process. I just keep reading more and more and comparing my work with that of experts to measure progress.
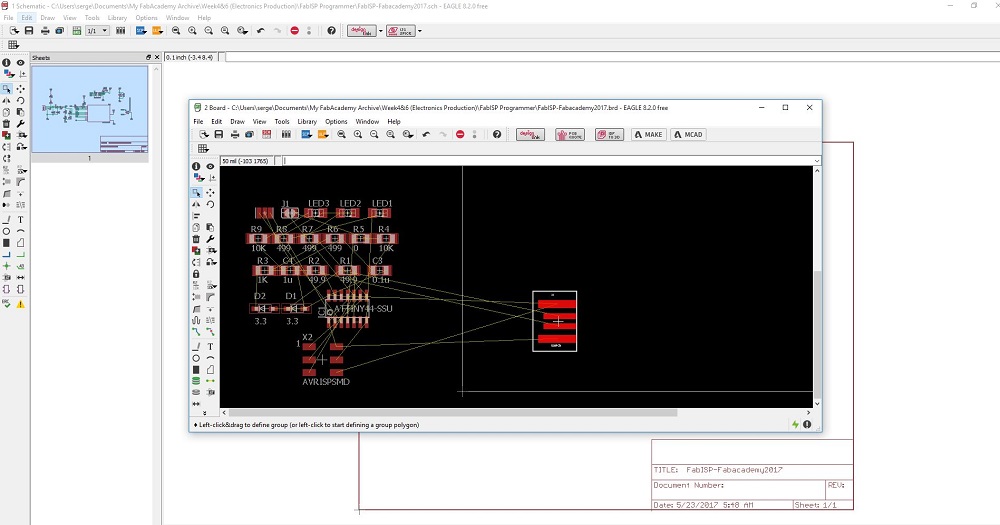
I had first to download the work which was already designed to see how the final work should look like, and
the good thing is that in our Lab we share. So, it is very easy to learn new things.
It was had for me to do the following things:
1. To know how I am going to join components pins so that wires are not going collide.
2. Some of the tools in Eagle were not quickly understood, but I approached one of my friends and he made a few
samples for me and I from that I understood how the tools are used.
The process of milling, stuffing, de-bugging and programming
After working on the design of the FabISP, I saved the trace and outline files in png for Fabmodules to create .rml files.
Here are steps.
Preparing the .rml files for milling
Use the fabmodules.org web application.
Then, steps are:
Select the input format: image (.png)

Select the output format: Rolland mill (.rml)
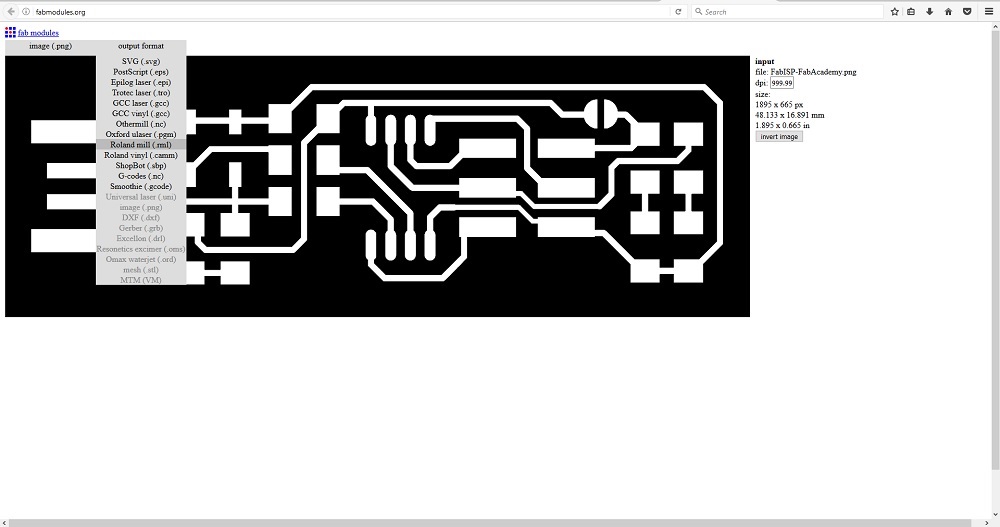
select process: PCB outline (1/32) or PCB traces (1/64)
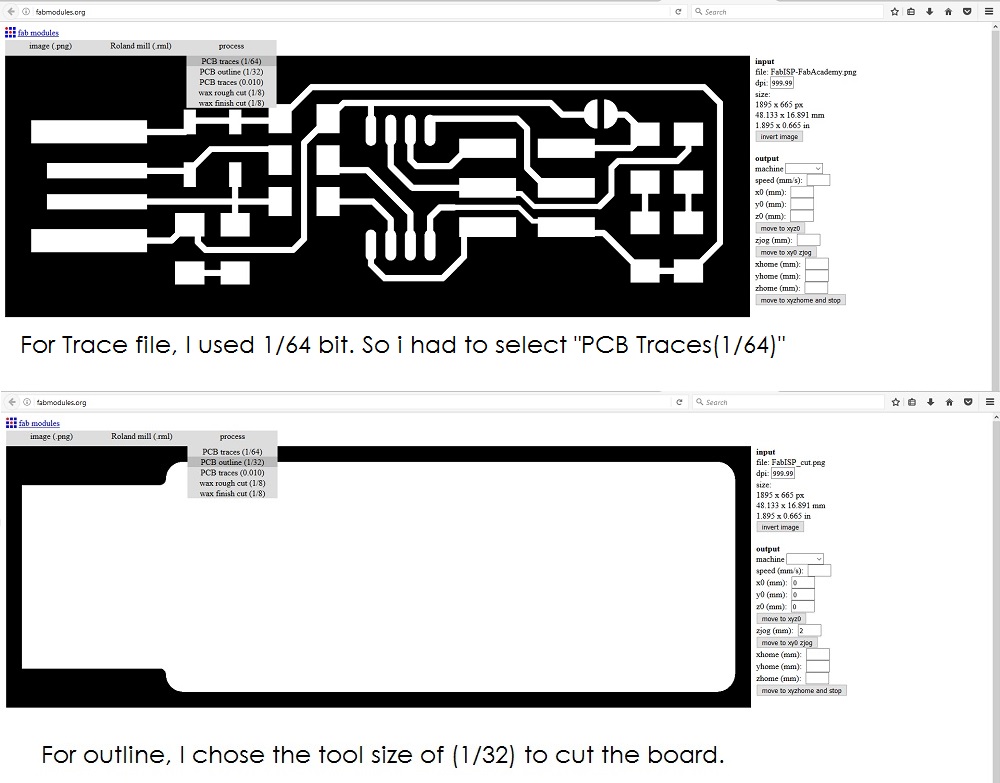
Adjust the milling parameters
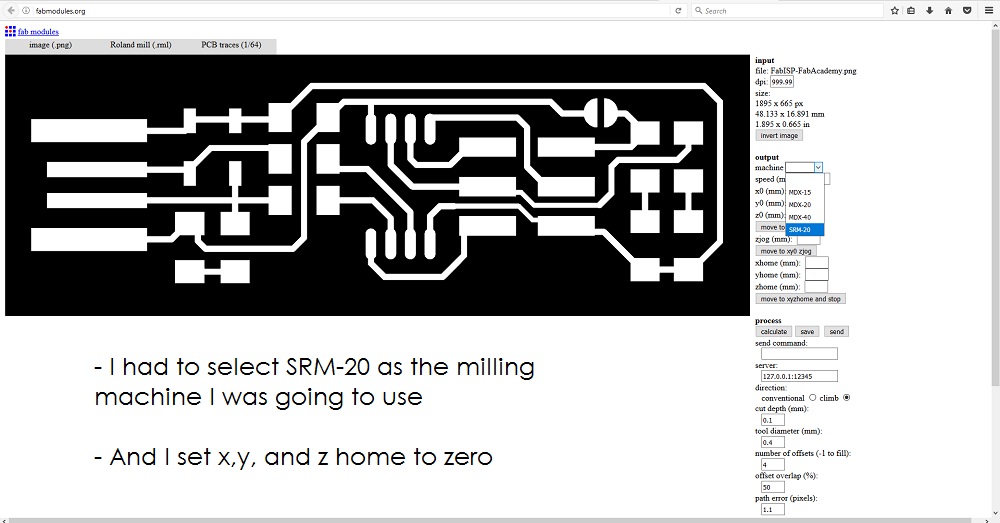
Press calculate

Press save.
The .rml files are created:
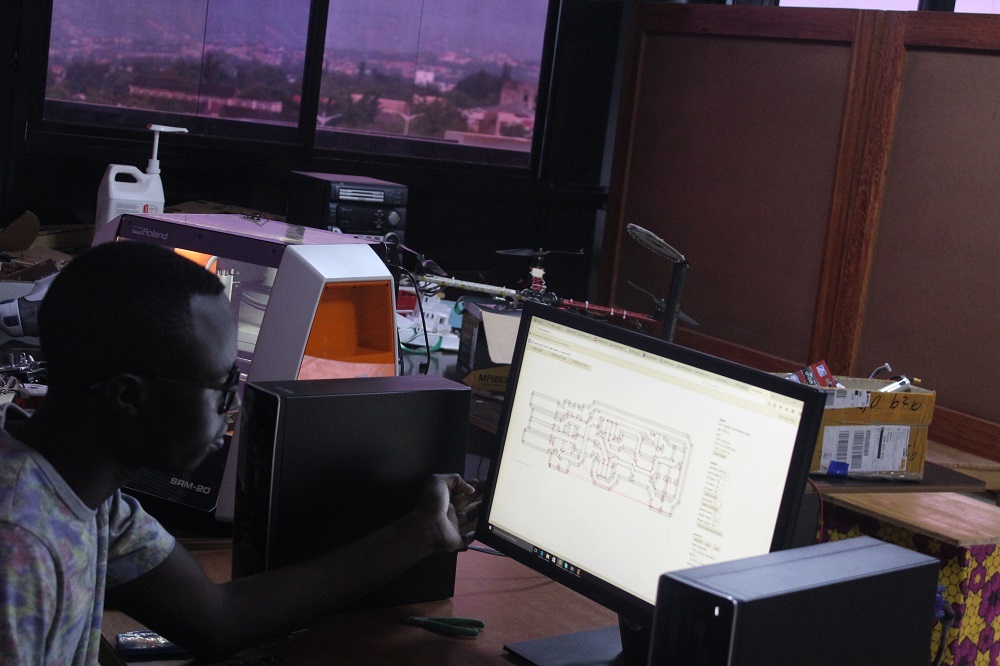
Setting up the milling machine and materials:
To set the machine and start milling involves the following steps.
1. Set up the blank pcb to the milling machine.
2. Set the correct drilling bits to the machine.
3. Define origo and drill bit depth.
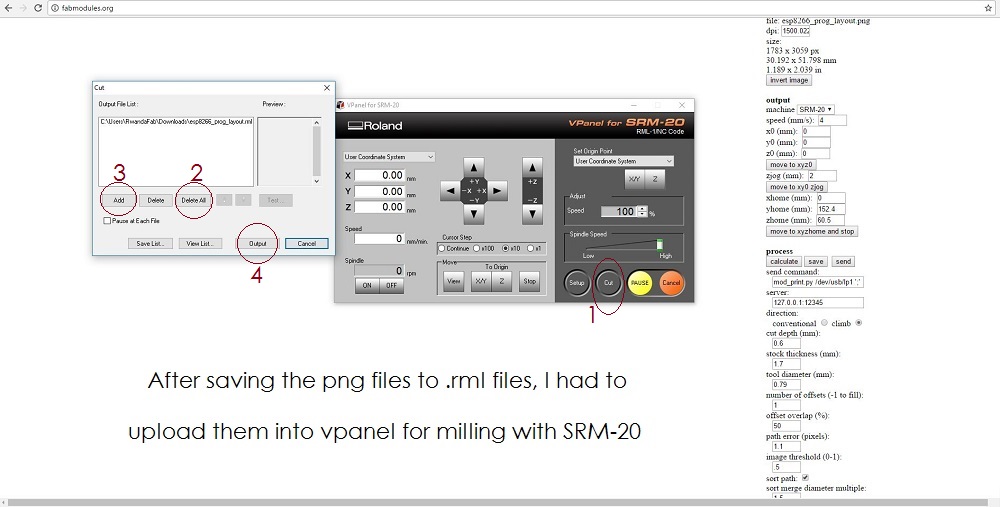
4. Import the milling files (.rml from fabmodules)
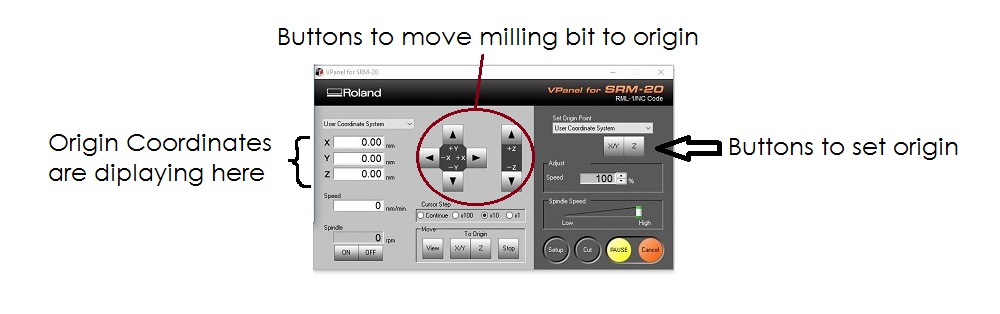
To move the drilling bit head to the origin, press X and Y buttons at the middle of the screen. Press the Set Origin Point X/Y button on the right. This will set the origin. when you move the milling bit closer to the surface, becomes easy to set the origin. Then, using the down and up buttons, set Z by moving the milling bit down close to PCB surface. Be carefull not to hit the surface. Stop the mill bit head close to the surface. Loosen the milling bit using Allen Key and ease it to the surface. Tighten the Allen screw again and set the Z-origin Point by pressing Z-button at left top of the VPanel. the zero coordinates will display on the left top side on the VPanel.
5. Import the milling files (.rml from fabmodules)
6. Milling and removing the ready made pcb
After the above steps, my FabISP Board was made successfully, After milling I had to solder the board to add required components for my Programmer

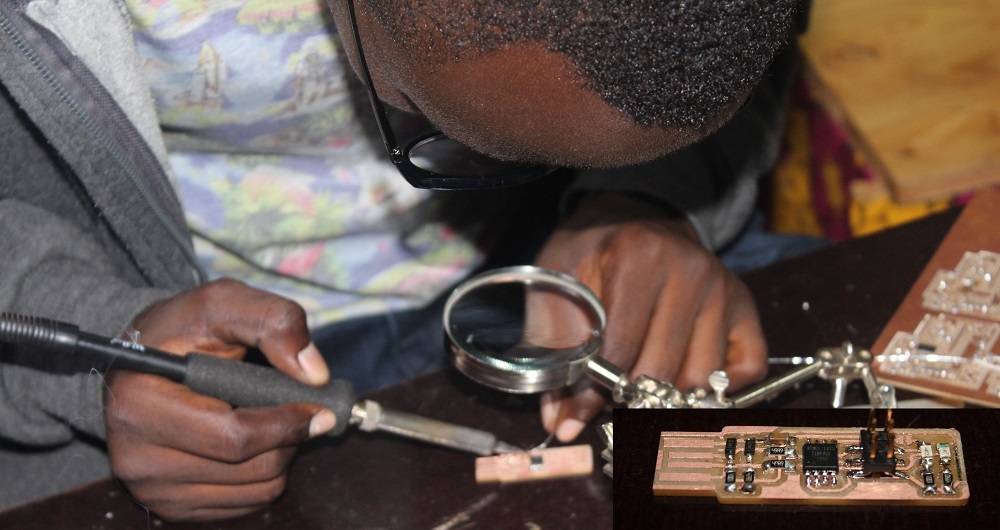
First, I had to power my board, and have a separate programmer attached to FABISP, the programmer can be another FABISP or an Arduino. The steps to program FABISP:
Attach the reset jumper by soldering it
use USB port to power the board
Connect your programmer with another programmer using programming cable and program it using the codes I listed below for Ubuntu OS.
/*This are codes I used for the programmer.*/
/*Installing necessary software for AVR Programming*/

sudo apt-get install flex byacc bison gcc libusb-dev avrdude
sudo apt-get install gcc-avr
sudo apt-get install avr-libc
sudo apt-get install libc6-dev
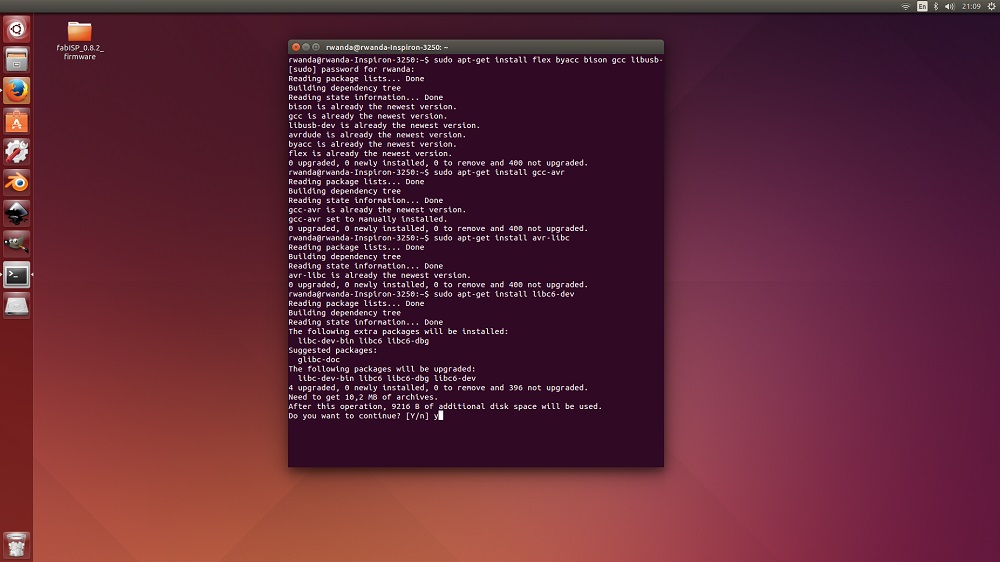
/*I received the following after writing that code*/

rwanda@rwanda-Inspiron-3250:~$ sudo apt-get install libc6-dev
Reading package lists... Done
Building dependency tree
Reading state information... Done
The following extra packages will be installed:
  libc-dev-bin libc6 libc6-dbg
Suggested packages:
  glibc-doc
The following packages will be upgraded:
  libc-dev-bin libc6 libc6-dbg libc6-dev
4 upgraded, 0 newly installed, 0 to remove and 396 not upgraded.
Need to get 10,2 MB of archives.
After this operation, 9216 B of additional disk space will be used.
Do you want to continue? [Y/n] y
WARNING: The following packages cannot be authenticated!
  libc6-dev libc-dev-bin libc6-dbg libc6
Install these packages without verification? [y/N] y
Get:1 http://rw.archive.ubuntu.com/ubuntu/ trusty-updates/main libc6-dev amd64 2.19-0ubuntu6.13 [1914 kB]
Get:2 http://rw.archive.ubuntu.com/ubuntu/ trusty-updates/main libc-dev-bin amd64 2.19-0ubuntu6.13 [69,0 kB]
Get:3 http://rw.archive.ubuntu.com/ubuntu/ trusty-updates/main libc6-dbg amd64 2.19-0ubuntu6.13 [3462 kB]
Get:4 http://rw.archive.ubuntu.com/ubuntu/ trusty-updates/main libc6 amd64 2.19-0ubuntu6.13 [4735 kB]
Fetched 10,2 MB in 21s (464 kB/s)
Preconfiguring packages ...
(Reading database ... 193471 files and directories currently installed.)
Preparing to unpack .../libc6-dev_2.19-0ubuntu6.13_amd64.deb ...
Unpacking libc6-dev:amd64 (2.19-0ubuntu6.13) over (2.19-0ubuntu6.11) ...
Preparing to unpack .../libc-dev-bin_2.19-0ubuntu6.13_amd64.deb ...
Unpacking libc-dev-bin (2.19-0ubuntu6.13) over (2.19-0ubuntu6.11) ...
Preparing to unpack .../libc6-dbg_2.19-0ubuntu6.13_amd64.deb ...
Unpacking libc6-dbg:amd64 (2.19-0ubuntu6.13) over (2.19-0ubuntu6.11) ...
Preparing to unpack .../libc6_2.19-0ubuntu6.13_amd64.deb ...
Unpacking libc6:amd64 (2.19-0ubuntu6.13) over (2.19-0ubuntu6.11) ...
Processing triggers for man-db (2.6.7.1-1ubuntu1) ...
Setting up libc6:amd64 (2.19-0ubuntu6.13) ...
Setting up libc-dev-bin (2.19-0ubuntu6.13) ...
Setting up libc6-dev:amd64 (2.19-0ubuntu6.13) ...
Setting up libc6-dbg:amd64 (2.19-0ubuntu6.13) ...
Processing triggers for libc-bin (2.19-0ubuntu6.7) ...
rwanda@rwanda-Inspiron-3250:~$
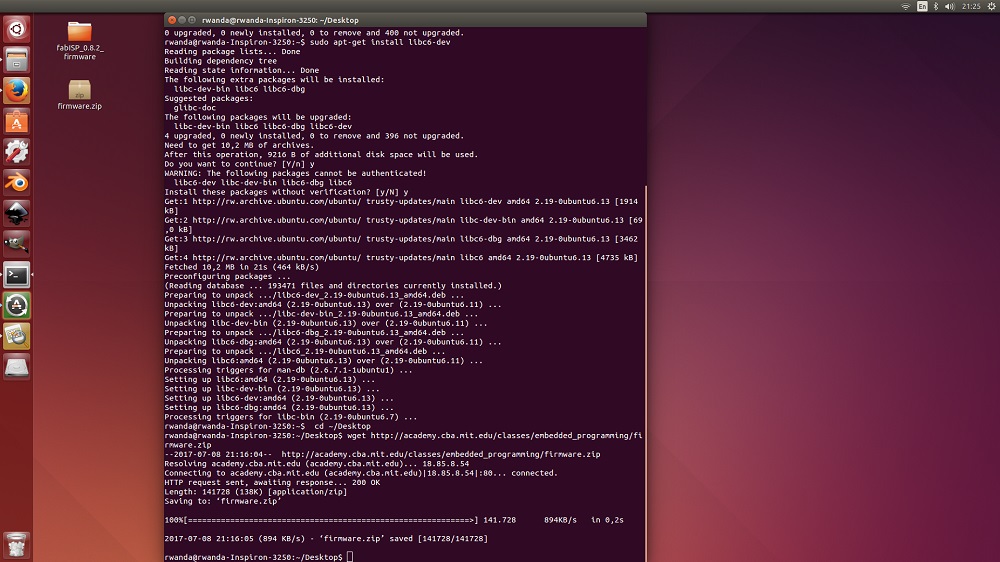
/*Downloading and unzip the firmware*/
 cd ~/Desktop
wget http://academy.cba.mit.edu/classes/embedded_programming/firmware.zip
unzip firmware.zip
The following results will be shown in the terminal after downloading and unzip the firmware
rwanda@rwanda-Inspiron-3250:~$  cd ~/Desktop
rwanda@rwanda-Inspiron-3250:~/Desktop$ wget http://academy.cba.mit.edu/classes/embedded_programming/firmware.zip
--2017-07-08 21:16:04--  http://academy.cba.mit.edu/classes/embedded_programming/firmware.zip
Resolving academy.cba.mit.edu (academy.cba.mit.edu)... 18.85.8.54
Connecting to academy.cba.mit.edu (academy.cba.mit.edu)|18.85.8.54|:80... connected.
HTTP request sent, awaiting response... 200 OK
Length: 141728 (138K) [application/zip]
Saving to: ‘firmware.zip’

100%[============================================================>] 141.728      894KB/s   in 0,2s

2017-07-08 21:16:05 (894 KB/s) - ‘firmware.zip’ saved [141728/141728]

rwanda@rwanda-Inspiron-3250:~/Desktop$
/*Programming the FabISP*/
make clean
make hex
sudo make fuse
sudo make program
After I had to unplug all the cables and de-solder the jumper