
Week 8 - Enbedded programming
This weeks tasks:
1. Install programming environment (Atmel AVR Studio)
2. Editing the pre-made code for my hardware (correct pins)
3. Compiling the code
4. Defining and programming fuses
5. Flashing the microprosessor
6. Testing the results
Reading the datasheet
One of this weeks assingments is to read the datasheet of microprosessor ATtiny44A. This is the prosessor we are using on this weeks assingment or on future assingments.
The datasheet is 238 pages long. There is also a short version of the datasheet that is only 22 pages and gives a quick reference on the microprosessor features, lists Registers and Command. If one is familiar with the chip, it is good reference to go to, but when chip is not familiar one must go to the long and extensive one.
Datasheet is split into 27 chapters, that define general and specific features. For general understanding the first 3 chapters are good. They give general overview, pins configurations and other general info about the microprosessor. Chapters from 4 to 19 explain operating and programming all chips features. Chapters from 20 to 27 give again general information of chips specifications, register and instruction set summaries, info about ordering, packaging and so on. At the end of the document Table on Contents is available.
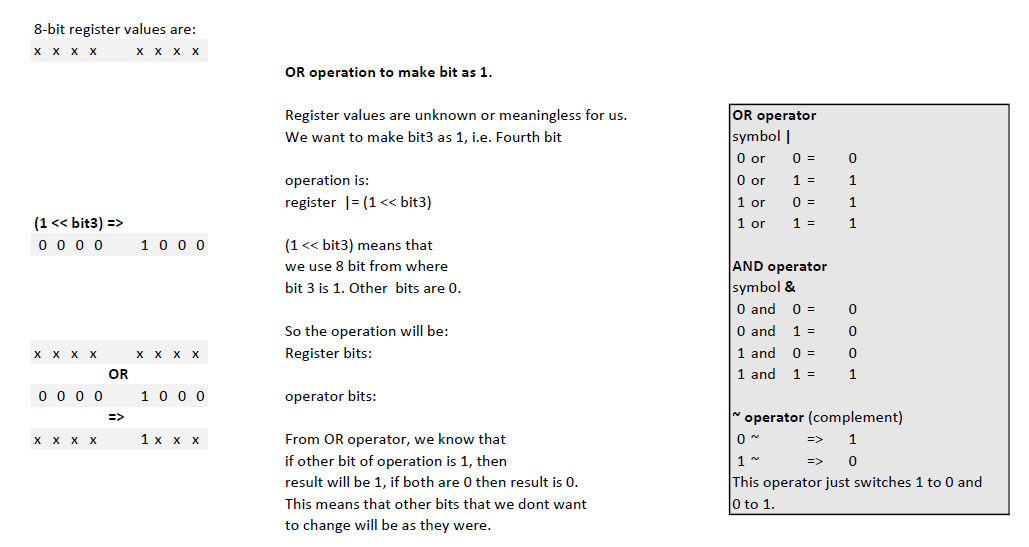
Datasheet has examples in C code to show how to program the microchip. Going through the examples from datasheet and from examples from Fab Academy and from internet, some errors was found from datasheet code examples. One that was really confusing to a starting programmer with no earlier experience was using 1 or zero when defining register bits. As I have learned from my fab teachers is that you can not use 0 when defining register bits, here is an example written on paper. Correct way to make a bit in register as 1 is:
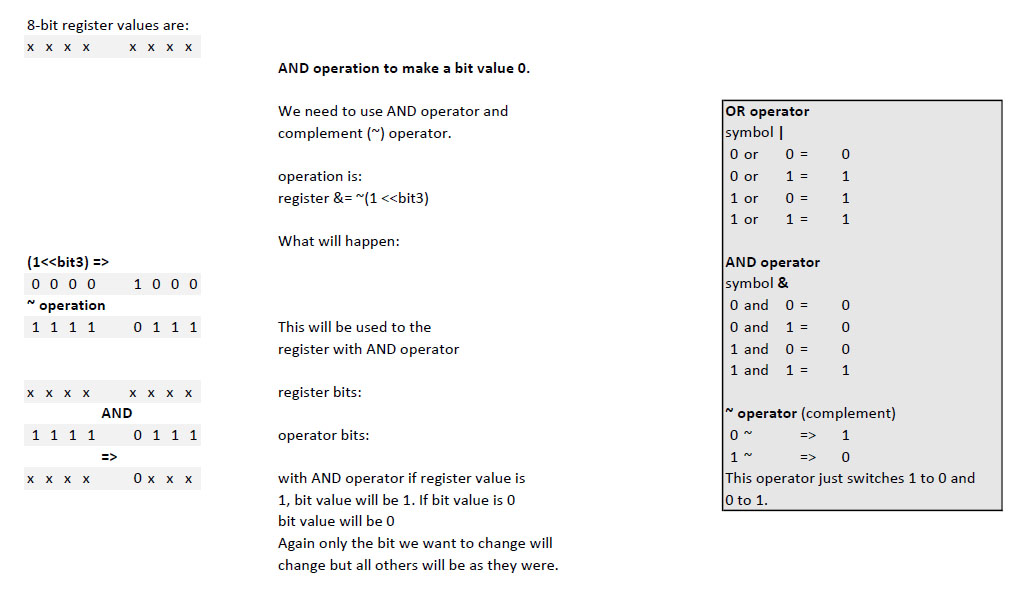
To make a bit in register 0.
What questions was left unanswered
Reading a datasheet is really slow process for someone that has no knowledge of working with microprosessors beforehand. It leaves much more questions than it answers. After working with microprosessors and datasheets it will surely make more sense and at some point datasheet will be the quick reference source to change from one prosessor to an other.
Installing AVR Studio
To start, I needed to install AVR Studio from Atmel. So I downloaded the program from Atmel page and installed it to my computer. I used AVR Studio to edit and compile the code and programmed the microprosessor with AVR Dude. Programming could be done with AVR Studio but I did not try it this week.
Editing pre-made code
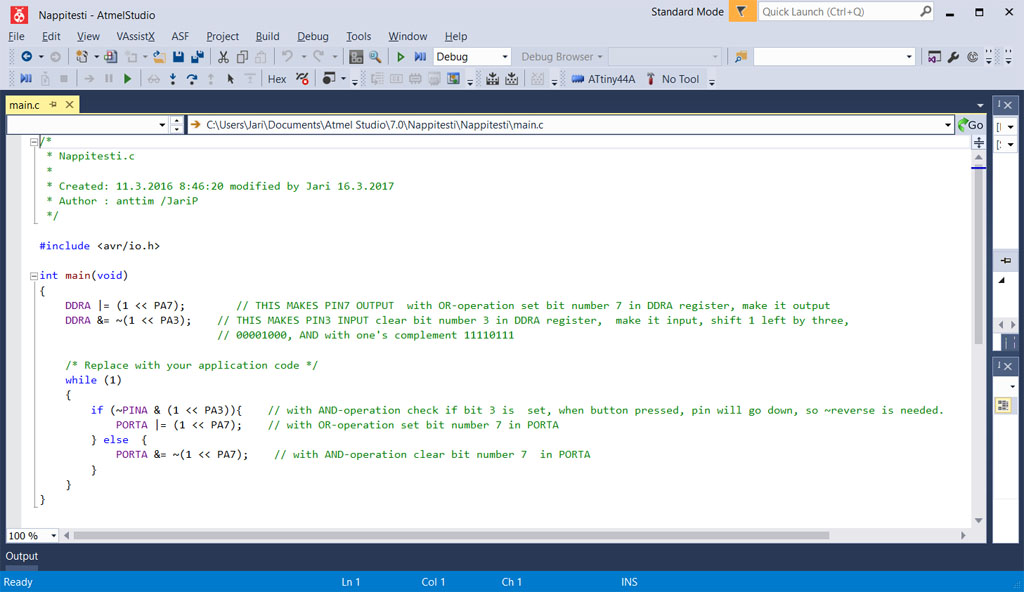
To start, I took a code from last years student from our FabLab, Antti Mäntyniemi. As his hardware was a bit different, I edited the pins to match my own design. Here is the code.
Compiling the code
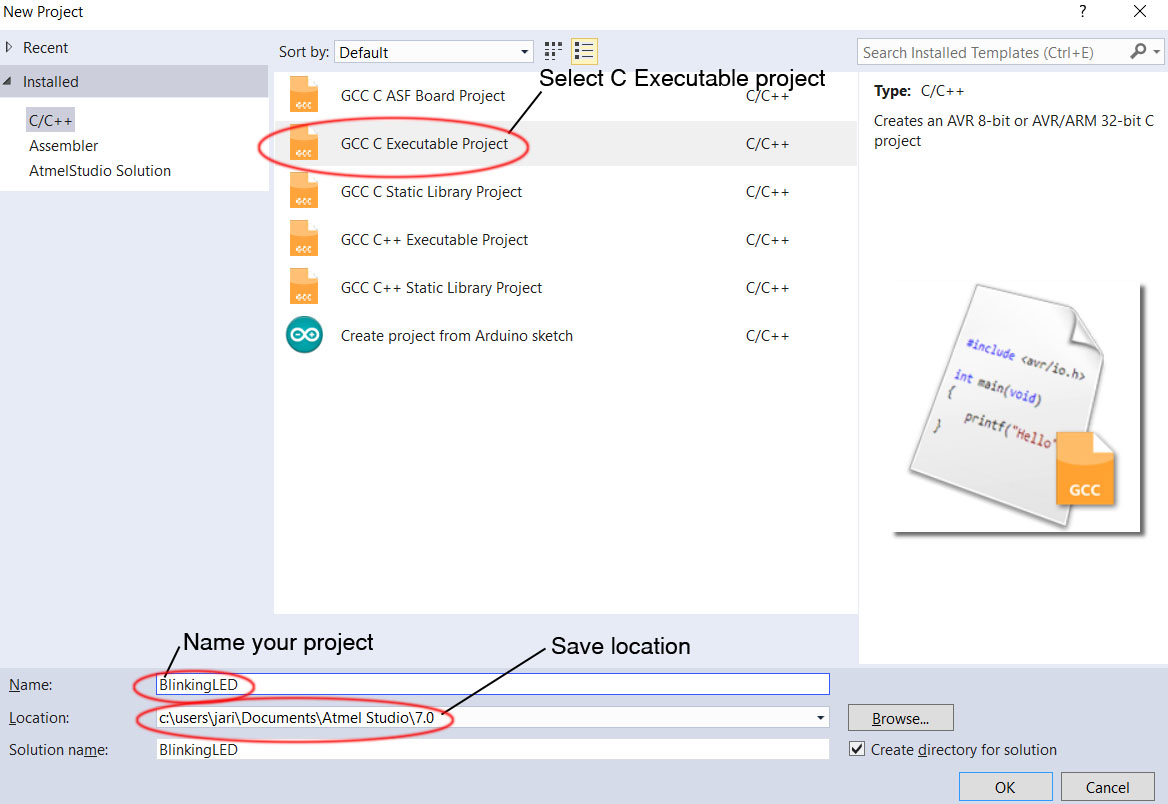
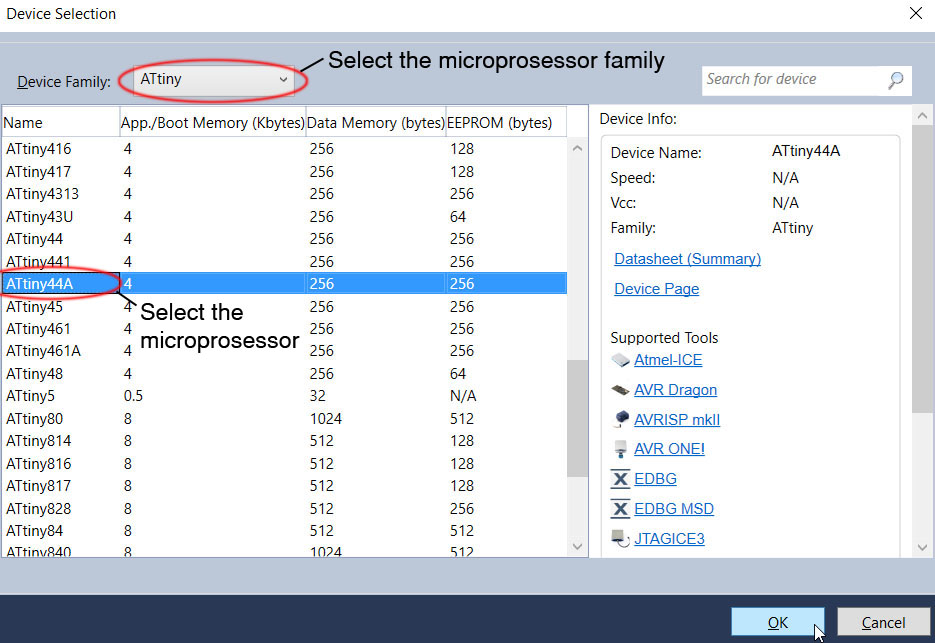
To make the code we wrote earlier into a format that the microprosessor understands, we have to compile it. This will be done in Atmel AVR Studio. After opening the program we must select a new project -> C Executable Project -> And select the right processor.

The program will start with a bare bone code ready to be edited. This can be deleted or used as starting point for the code. In my case, I copy/paste the code from Antti to the main file and start editing it.
When the code is ready it is time to compile it. Go to Build -> Build Solution. This will generate the .hex file among other files. After you have done this building once, you can use Rebuild Solution to redo it.
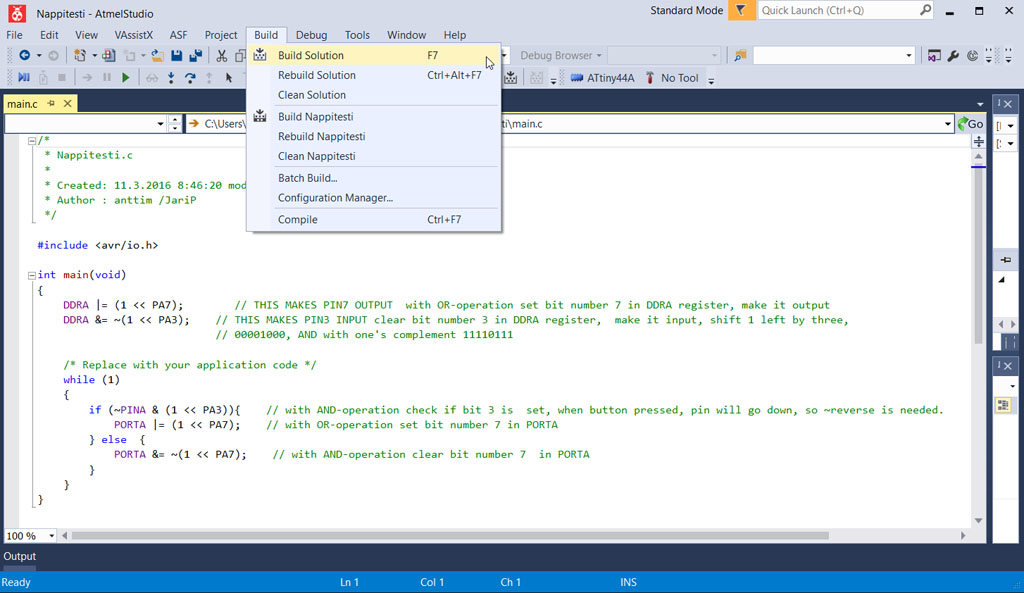
Now we have the .hex file that can be flashed into the microprosessor.
Programming fuses
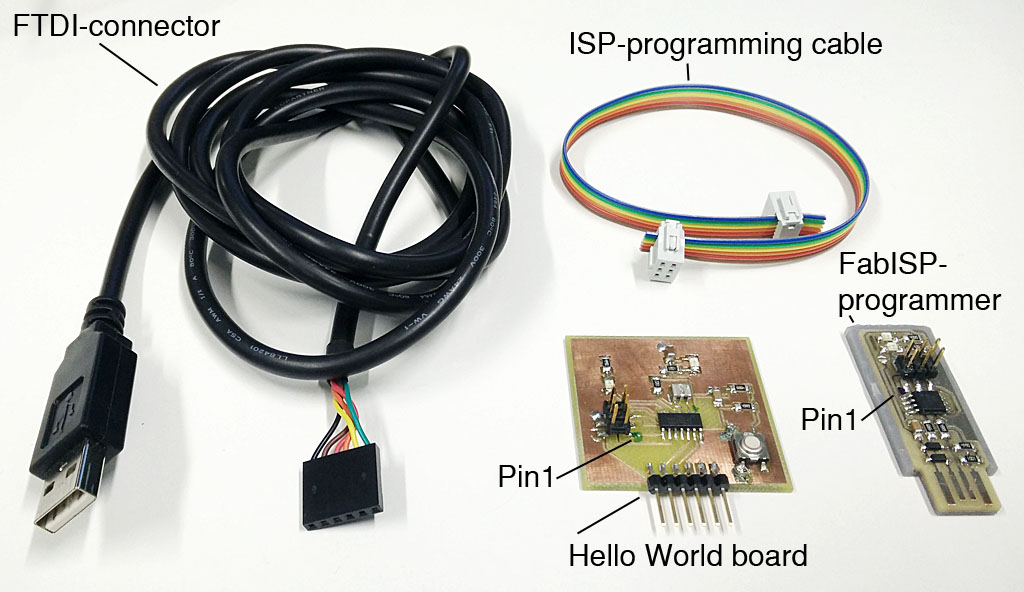
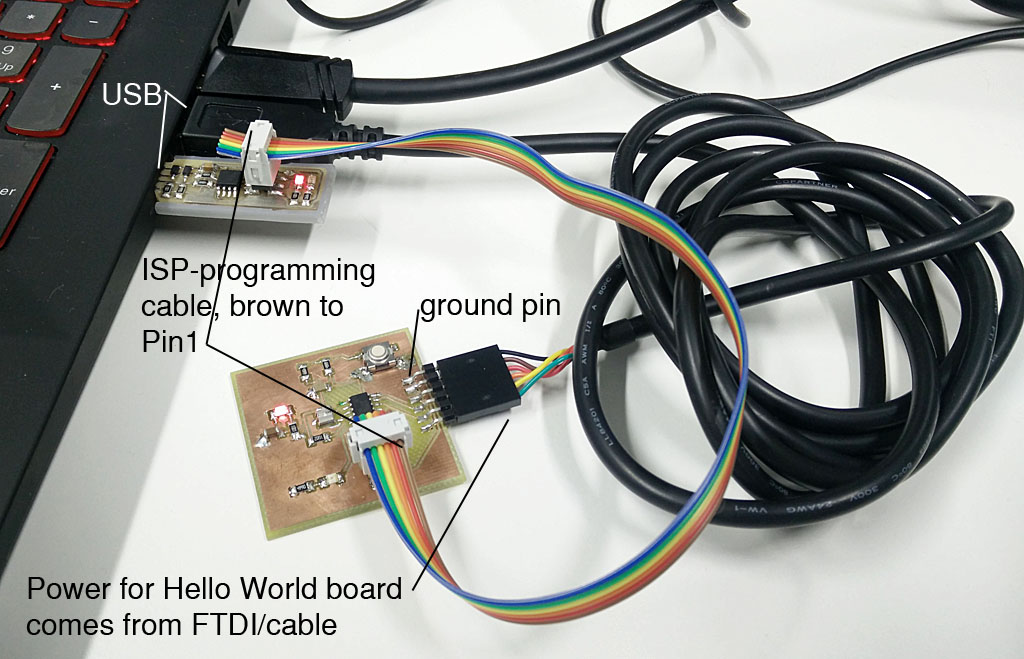
Now that we are about to start programming the microprosessor, we have to connect the target board and our FabISP-programmer. Here are the componenets that we need. The Hello World board, week 4 made FabISP-programmer and cables. ISP-connector connects the programming pins from programmer to target board and FTDI-cable provides power for the target cable.
On our board, we have 20Mhz resonator. Now that our board would start using the resonator and the faster clock speed, we have to let it know that it should use it. This is done by programming so called fuses, sort of standard parameters the chip will use. From www-page Engbedded we can check what are the default fuses on AVR family microprosessors. There we can see if fuses need re-programming.
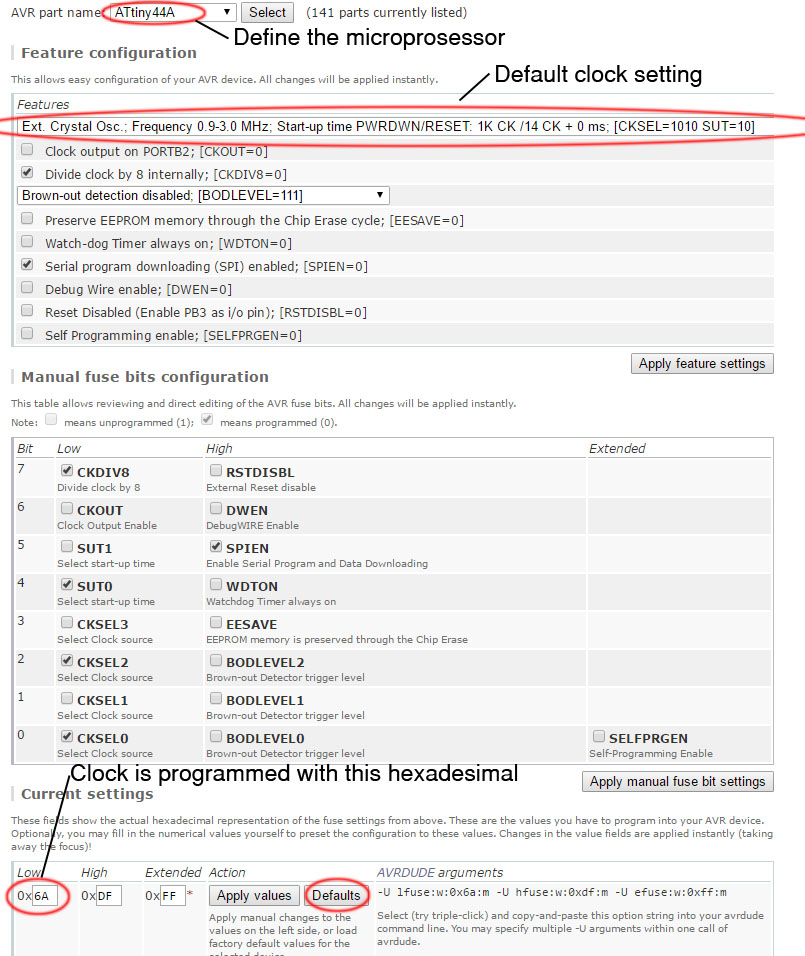
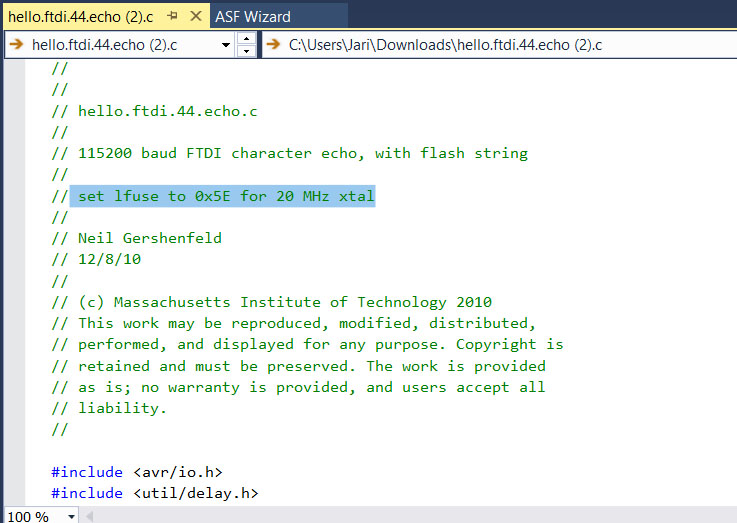
From the www-page (and from examples from Neil) we can see that the clock fuse needs to be programmed.
From Neils example code Hello world we can see what needs to be programmed.
Using this fuse setting we can see from the Engbedded what the settings look like.
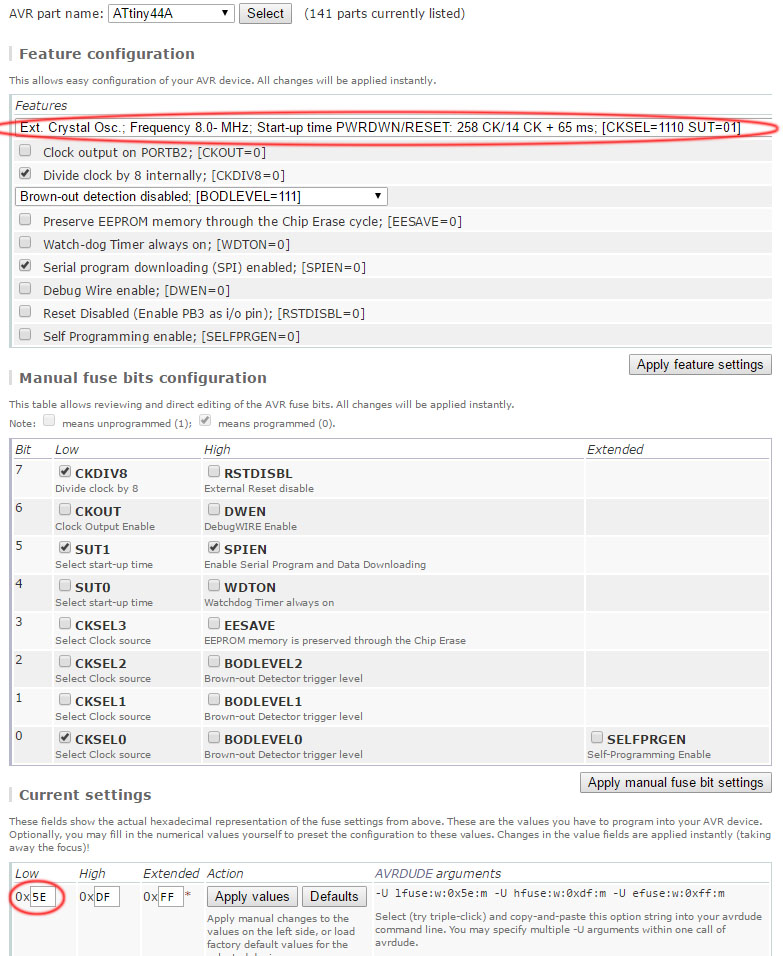
So this is what we want to program into microprosessor.
This is done using AVR Dude. Make sure you have everything connected as shown earlier. On command prompt (I am using Git Bash) write:
avrdude -p t44 -P usb -c usbtiny -U lfuse:w:0x5E:m
And now we have the right fuses set.
Flashing the microprosessor
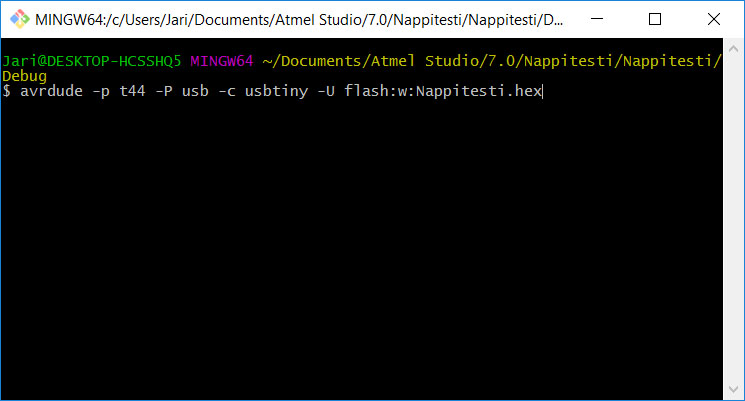
I did this with AVR dude that was installed earlier on week 4 when the FabISP-programmer were programmed. So I will go into the folder that my .hex file is and open the Git Bash console there and write the command on it. This is the command that avr dude flashes the microprosessor with my program Nappitesti.hex.
avrdude -p t44 -P usb -c usbtiny -U flash:w:Nappitesti.hex
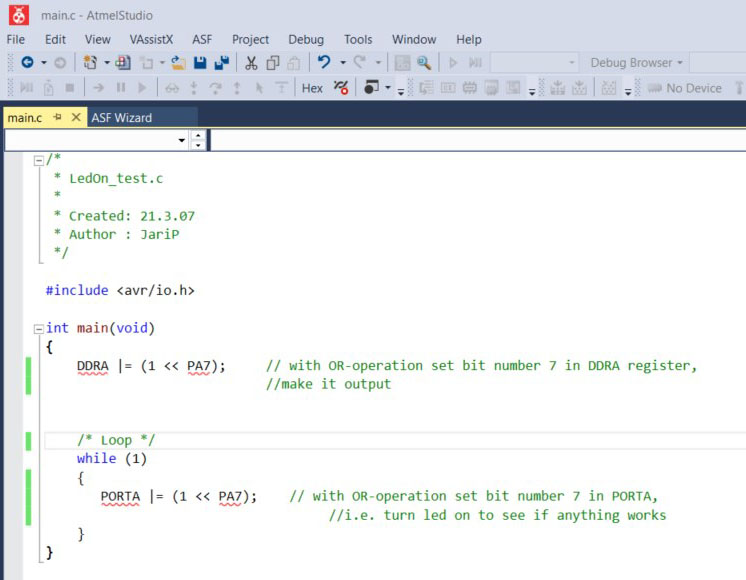
Now the board should work. Later on I did try some other codes to just flash the led, change led flash speed while pressing the button. One program just lights the led, just to see if that works. .c files can be found from the bottom of this www-page. Here is the code for led on.
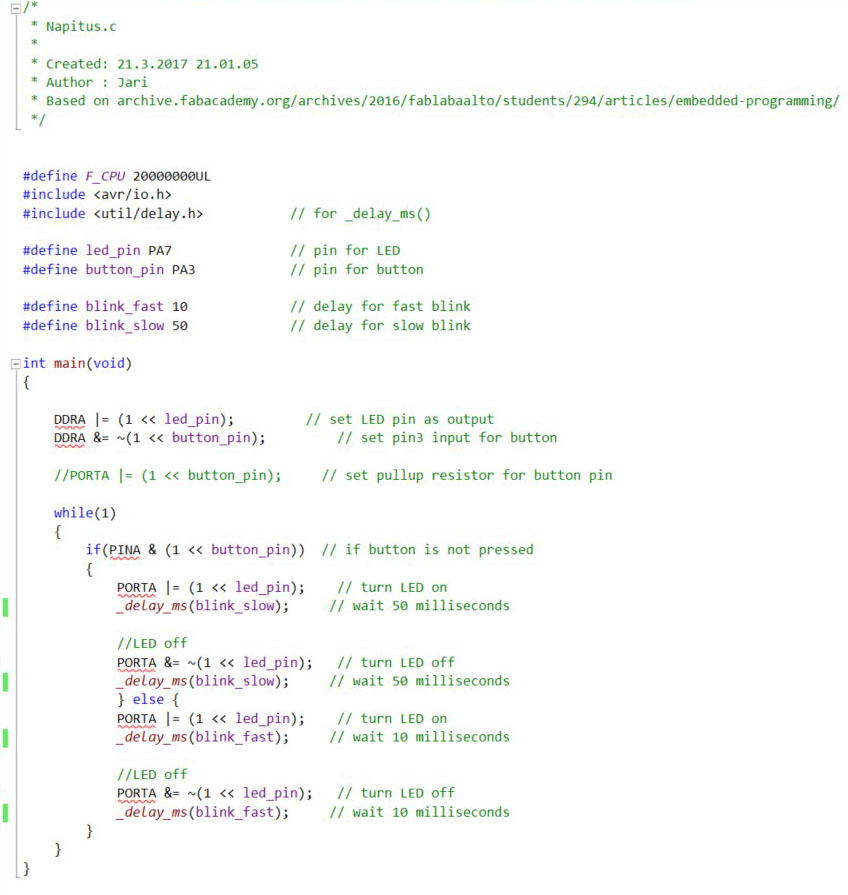
To make the led blink in different speeds I modified the c-code. If the button is pressed the delay time is smaller that if the button is not pressed. See the code below.
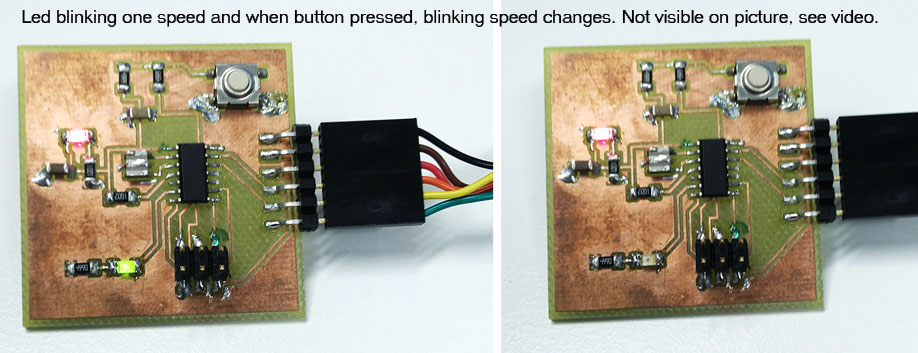
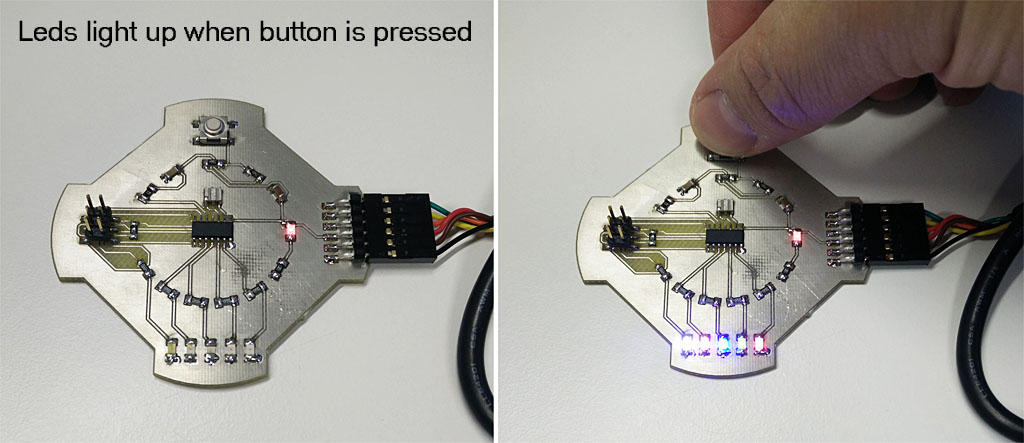
Here are the main led blinking board I made for this week and an other board I made just for fun. I did not have time to make more code for the second board but I will later.
LED blinking video
Second LED board video
Afternote: Later on during the academy, I found out that Arduino environment is really nice and easy way to start programming microcontrollers. First you have to make sure that Arduino environment supports the microprosessor you are about to use. If it does, usually there is lots of example that are directly written to the prosessor or it is fairly easy to edit exisisting examples to match used prosessor. Mappings of different prosessor pins are available in internet, so just google to find out.
I started using Arduino environment at output week, week 10 and of final project
Files used with this weeks assignment
Nappitesti.c LED lights when button is pressed.
Nappitesti.hex
LED-ON.c LED on all the time.
Button_LED2speed.c LED flashing in two speeds depending if button is pressed or not.