Designing a bedframe
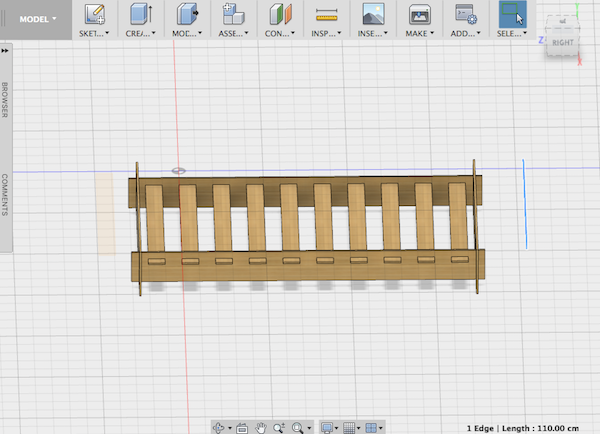
My big project this week is designing and making a bedframe. I used Fusion 360 to generate the design and to create CAM files. Below are commands used for creating the design.
Change Workspace - Modelling
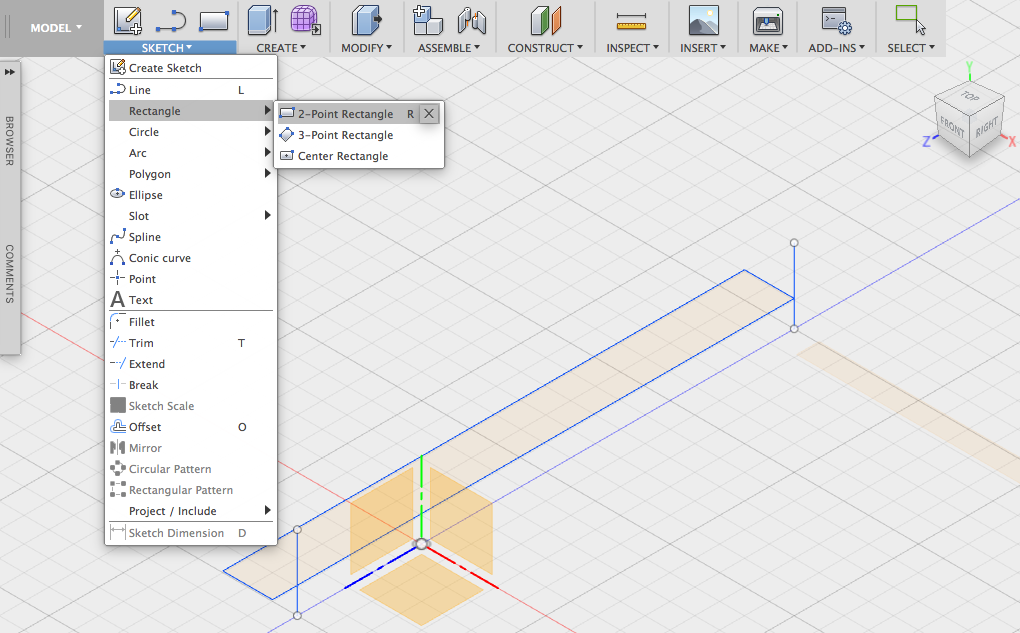
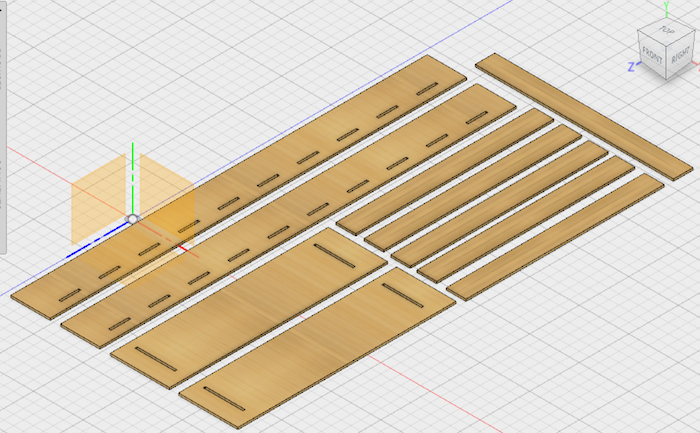
Sketch - Rectangle - 2-Point Rectangle to sketch all parts
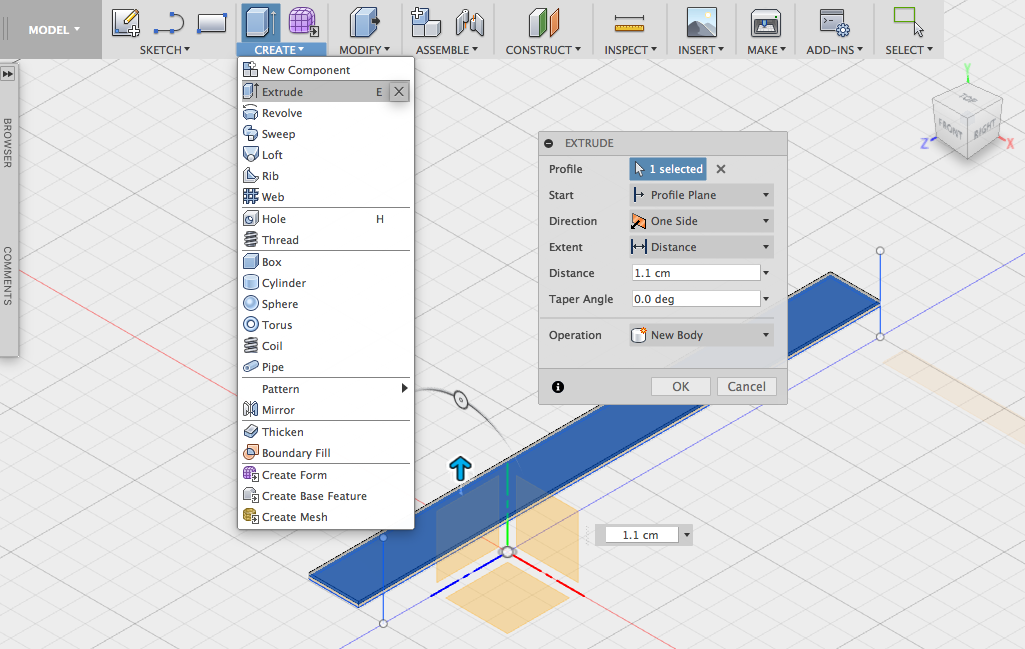
Create - Extrude to turn sketches into 3D parts
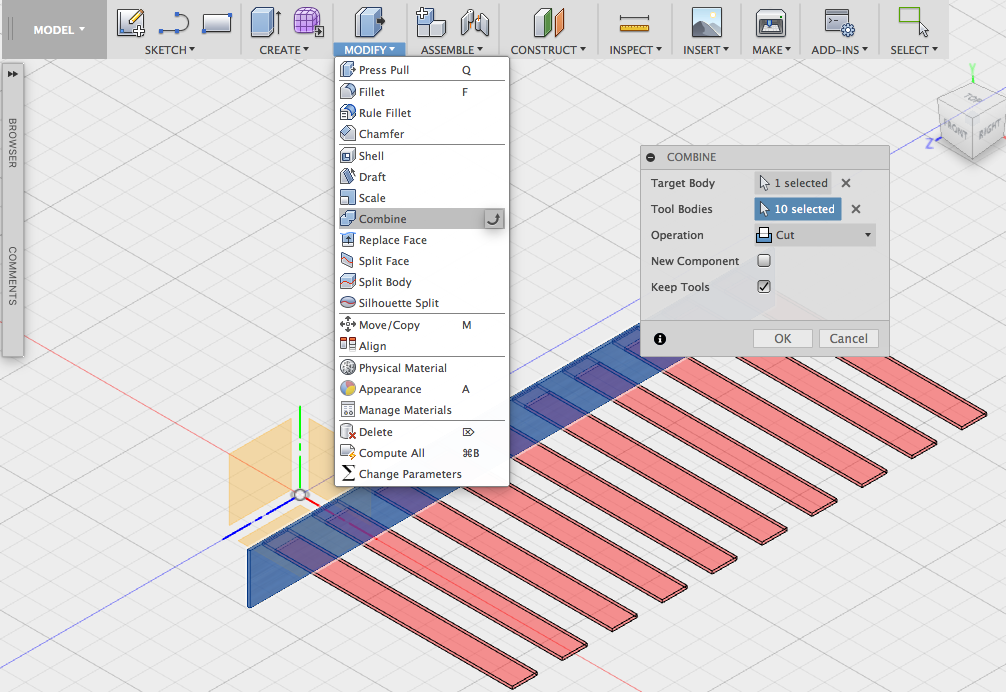
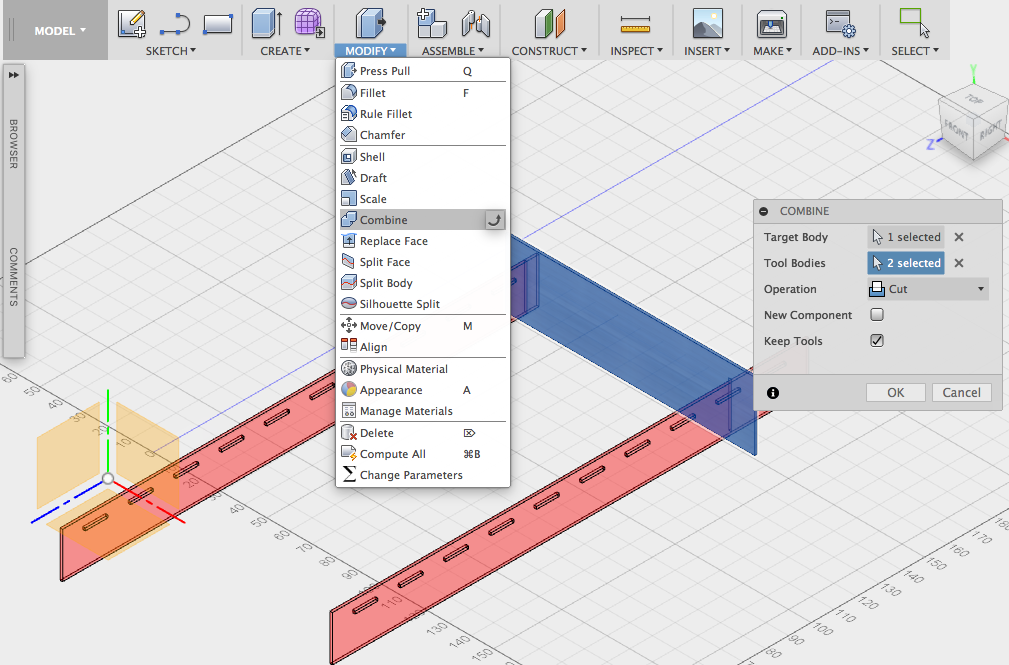
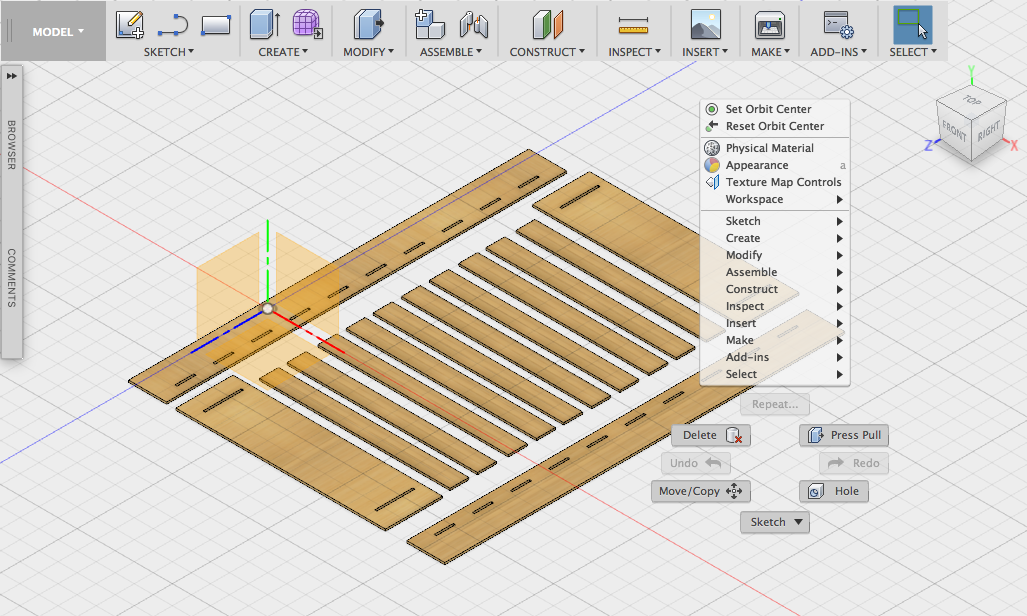
Modify - Combine - Cut to create holes
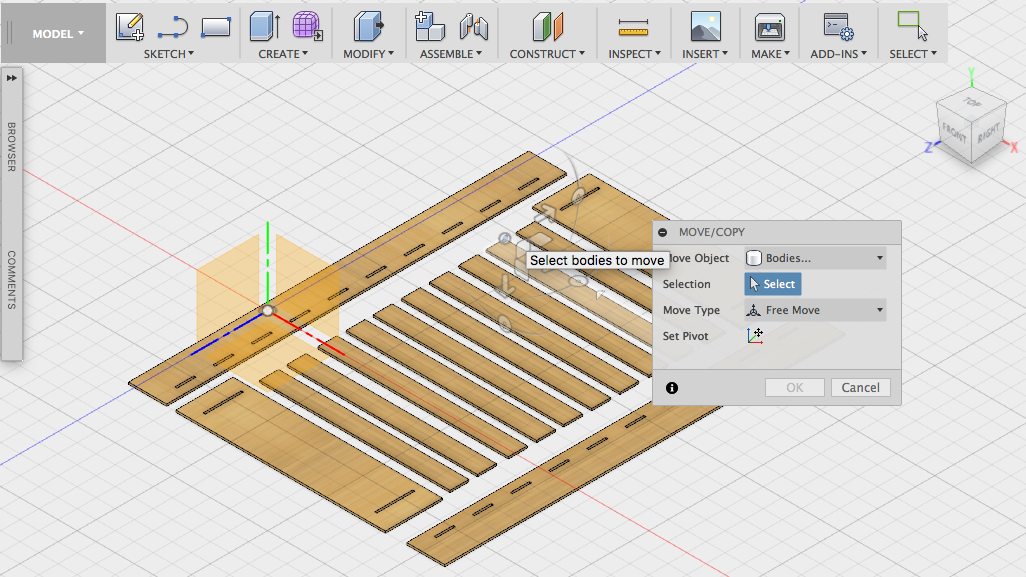
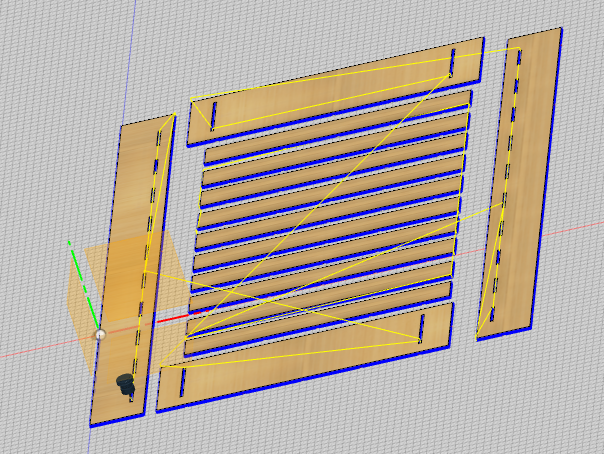
Right Click - Move/Copy to arrange pieces in one plane in order to prepare them for cutting
Next, Change Workspace - CAM to generate files for milling
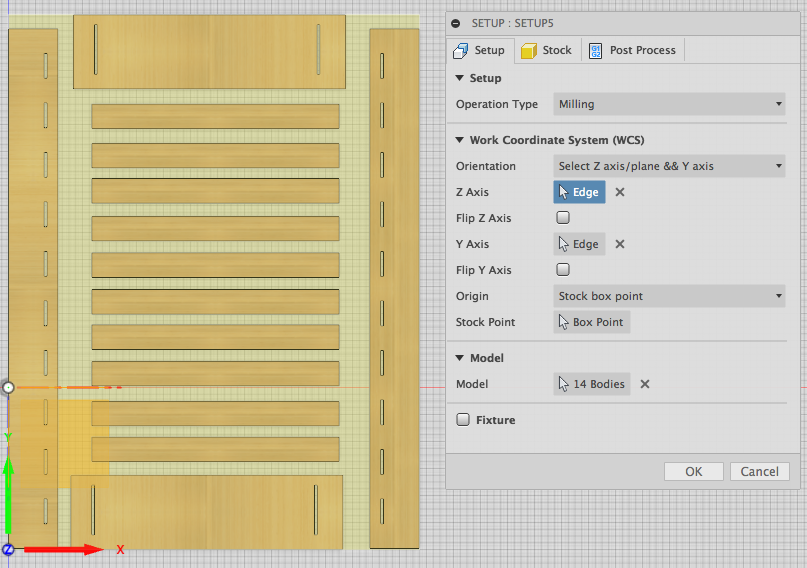
Setup - New Setup to choose appropriate settings

Tab Setup: Operation Type - Milling, WCS - Orientation - Select Z axis/plane && Y axis, both Y and Z Axes - Edge, Origin - Stock box point, Stock Point - Box Point, Model - 14 Bodies.
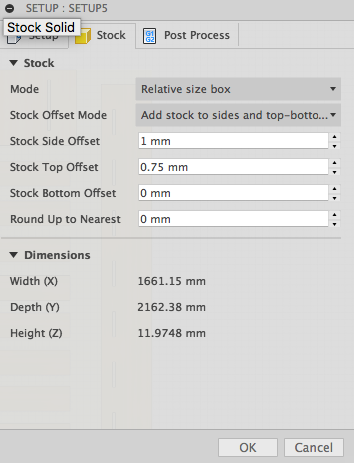
Tab Stock: Mode - Relative size box, Stock Offset Mode - Add stock to sides and Top-bottom, Stock Side Offset - 1mm, Stock Top Offset - 0.75mm, Stock Bottom Offset - 0mm, Round Up to Nearest - 0mm.
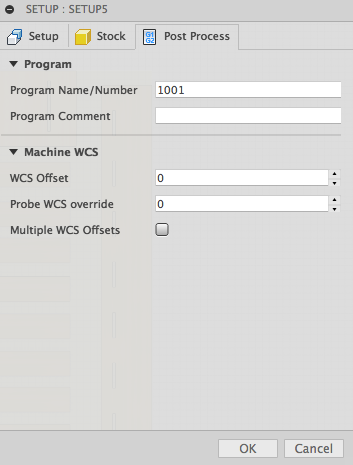
Tab Post Process: Default values.
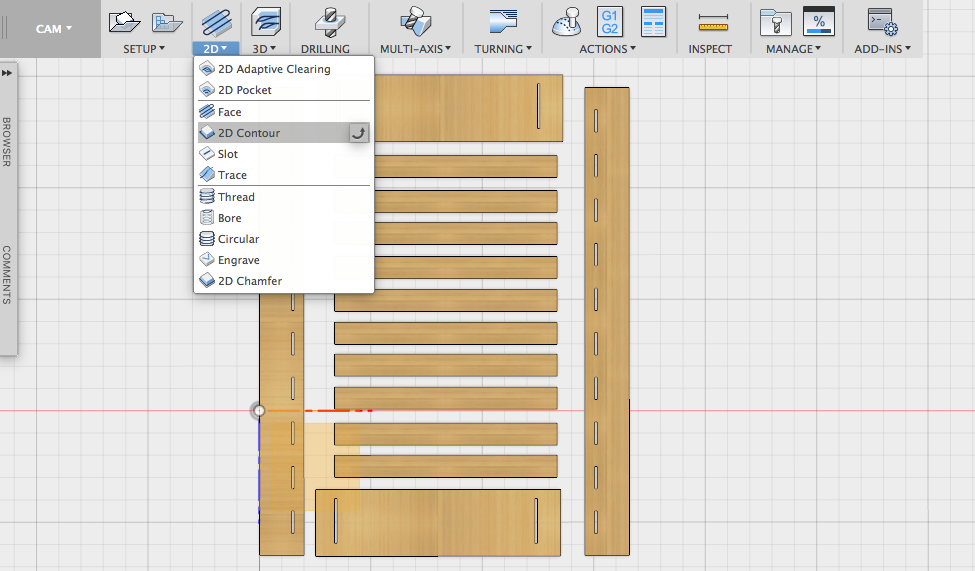
2D - 2D Contour setup
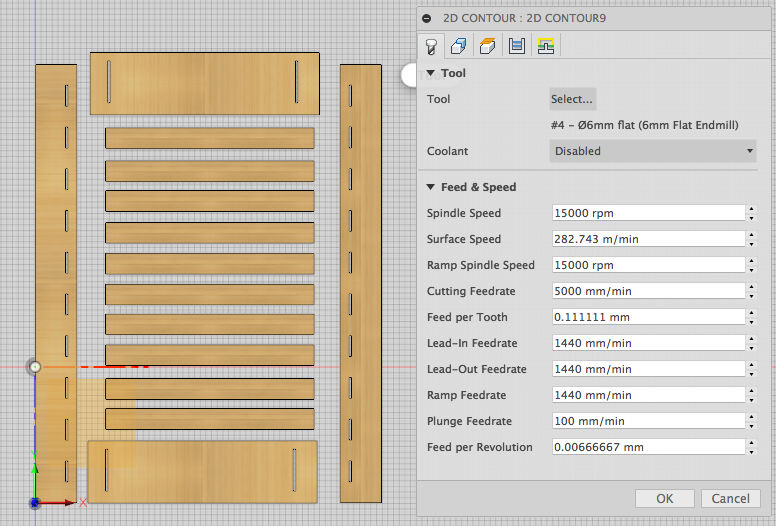
Tab Tool: Tool - #4 - 6 diam mm flat (6mm Flat Endmill), Coolant - Disabled; Feed & Speed - Spindle and Ramp Spindle Speeds are 15000 rpm, Surface Speed 282.743 m/min, Cutting Feedrate 5000 mm/min, Feed per Tooth 0.111111 mm, Lead-In, Lead-Out and Ramp Feedrates 1440 mm/min, Plunge Feedrate 100 mm/min, Feed per Revolution (calculated) ~0.0067 mm
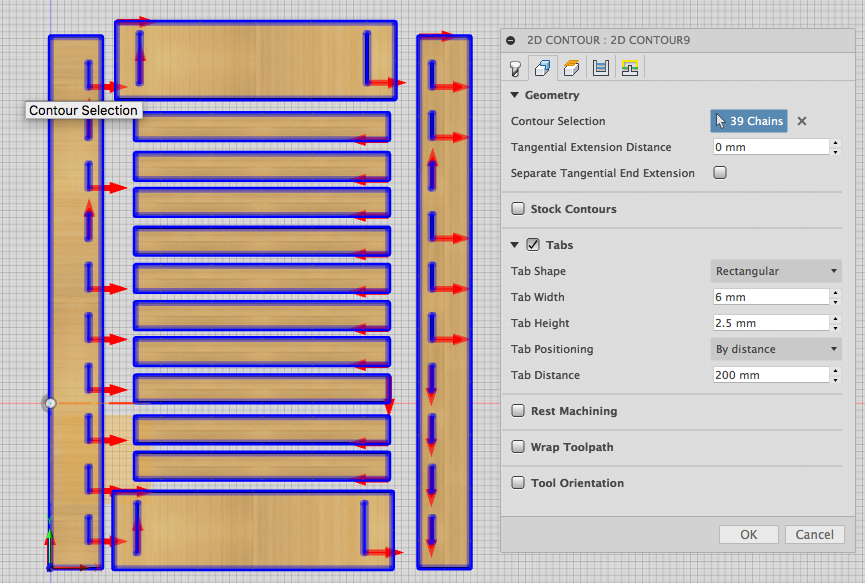
Tab Geometry: Contour Selection consists of 39 Chains, enable Tabs (rectangular, 6mm width, 2.5mm height, positioned by 200mm distance)
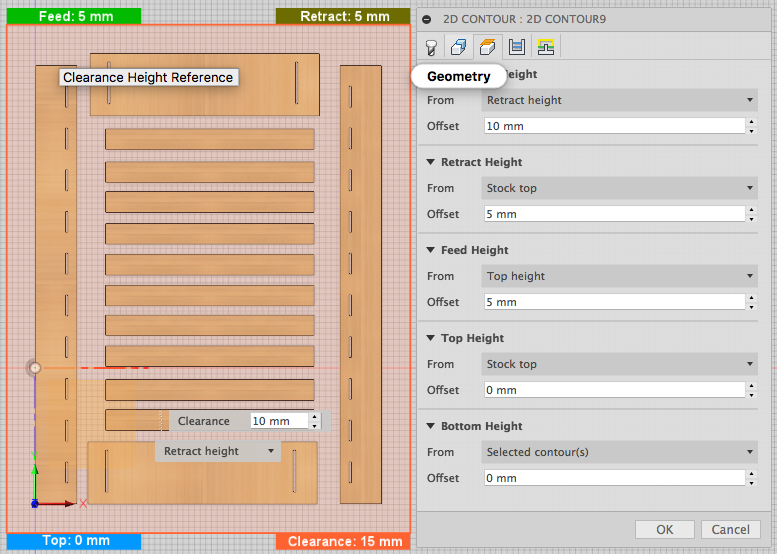
Tab Heights: Default values
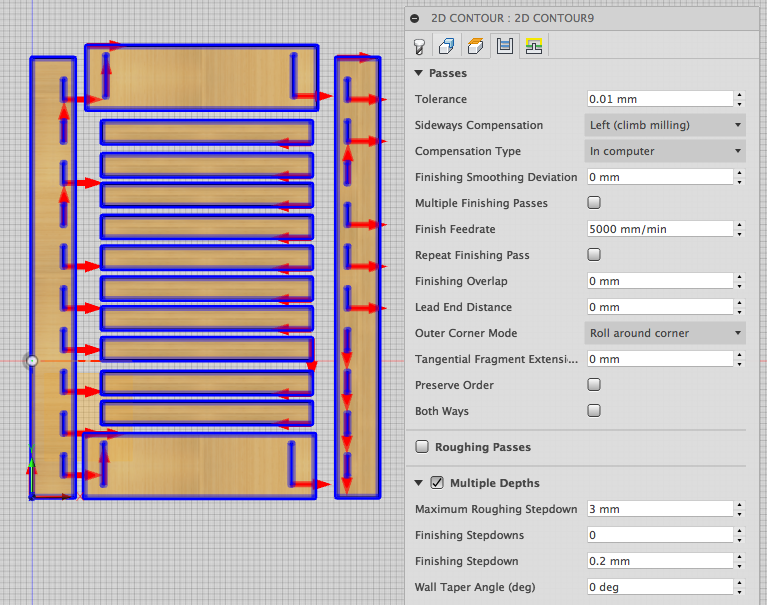
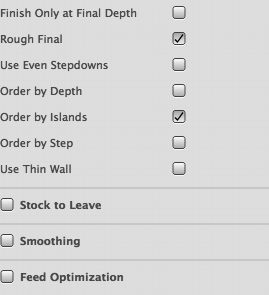
Tab Passes: Tolerance 0.01mm, Sideways Compensation - Left (climb milling), Compensation Type - In computer, Finish Feedrate 5000 mm/min, Finishing Overlap, Outer Corner Mode - Roll around corner; check Multiple Depths - Maximum Roughing Stepdown 3 mm, Finishing Stepdowns 0, Finishing Stepdown 0.2 mm, check Rough Final and Order by Islands
Tab Linking: High Feedrate Mode - Preserve rapid movement, check Allow Rapid Retract, Safe Distance 4 mm, Lift Height 0 mm

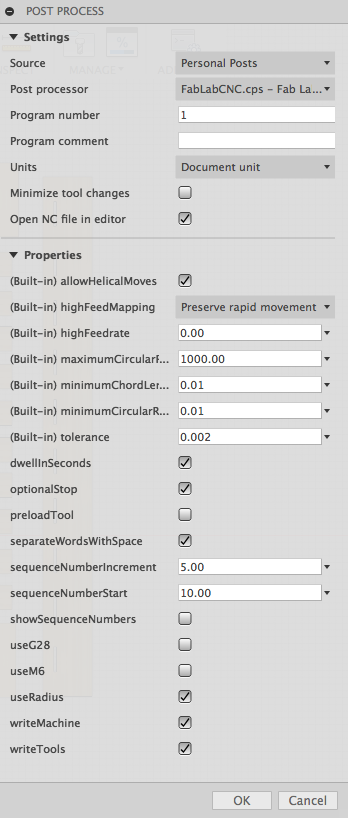
Actions - Post Process. I used the FabLabCNC.cps file created speicfically for our machine provided to us by our FabLab staff during the weekly lecture
Right click on the setup - Simulate
Finally, Save As - choose location to save the .nc file.
I had to rearrange my design prior to milling, as I realized that it will not fit on one piece of stock. As a result I ended up with two .nc files to be milled.
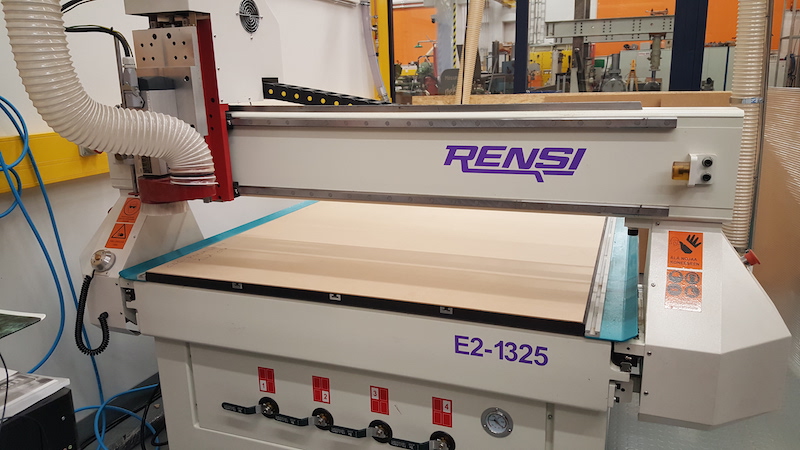
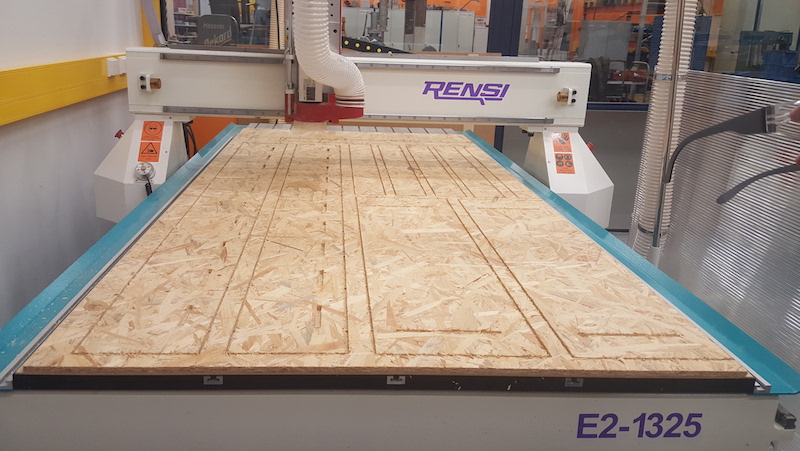
Milling a bedframe
The CNC router machine available in our lab is Eidtech E2-1325 and the software is Weihong NcStudio. Material has to be places on the table and secured with vacuums (four are available) and clamps, in case the vacuums do not provide enough suction to keeep the stock in place. The dust collecor has to be switched on too. Wearing protective gear is highly recommended as well as being ready to make an emergency stop if needed.
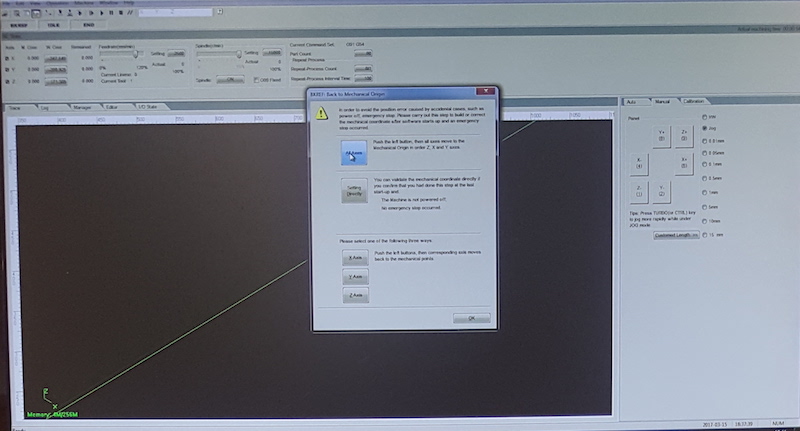
After preparing the stock and prior to start milling, X, Y, and Z coordinates need to be zeroed. The Machine origin is situated on the lower left corner of the table. When NCStudio is startedm the software notifies that the machine will move to the origin, unless otherwise specified. Afer that, the origin for the X and Y coordinates of the work piece need to be set. To set the coordinates, I used arrows in the GUI of the NCStudio panel which is located on the rigth-hand side.
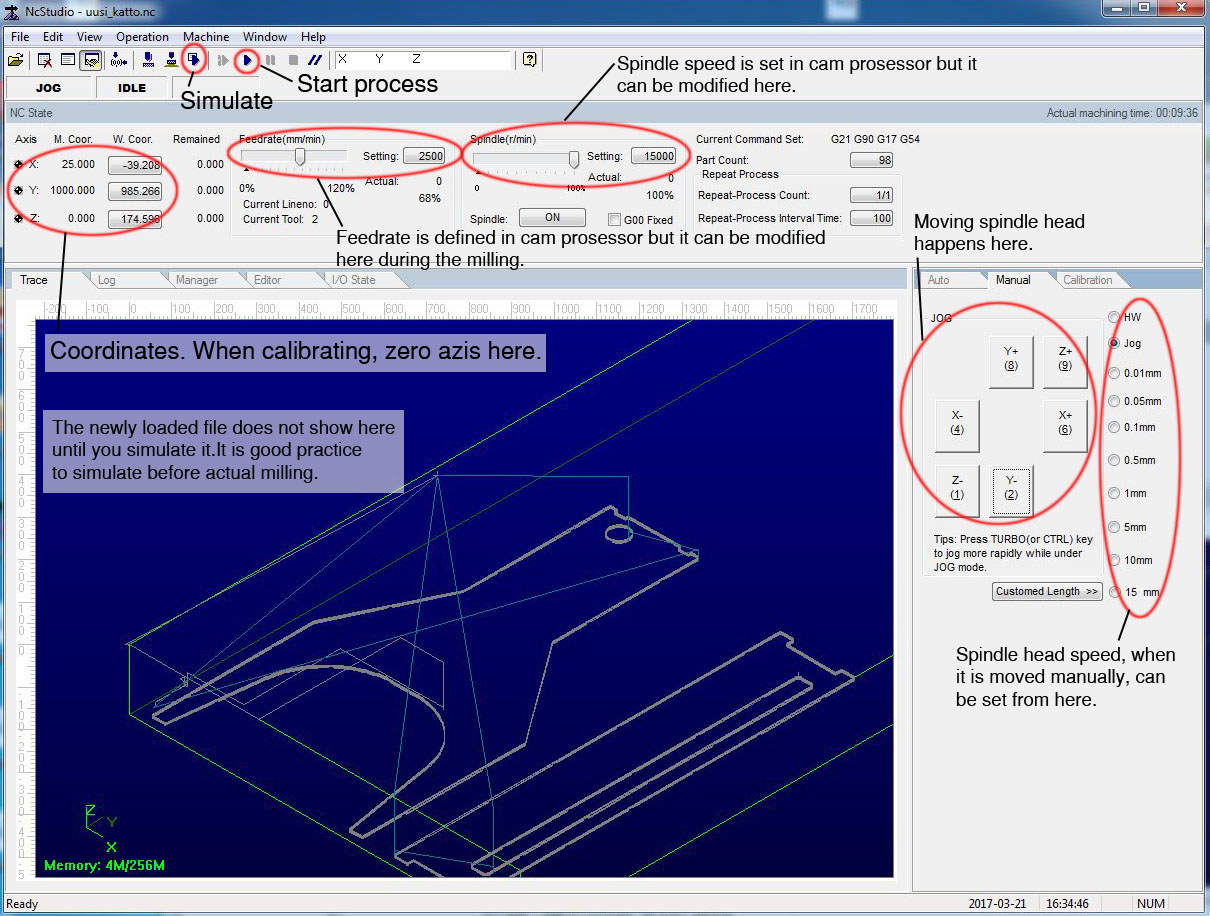
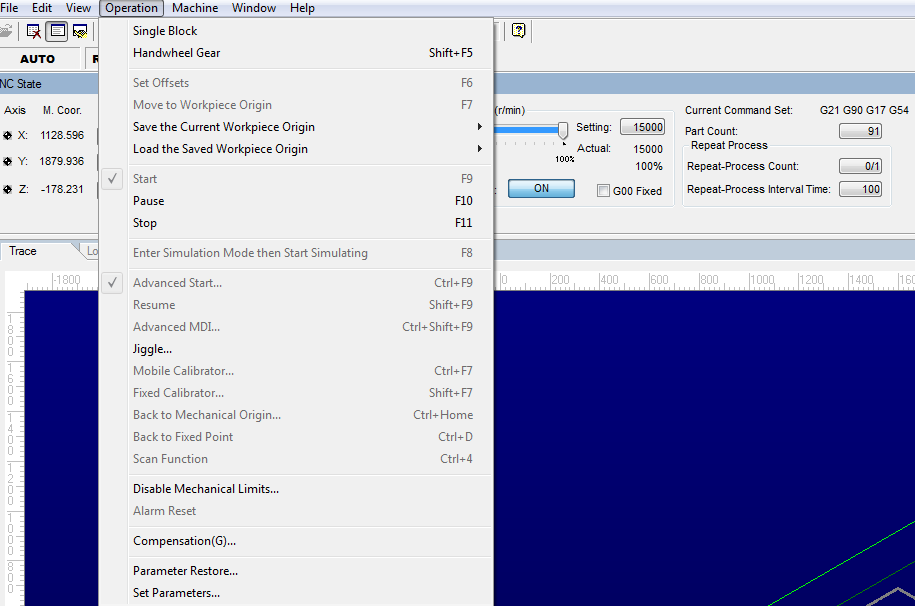
To set the Z axis of the work piece to 0, I used the Mobile calibrator option. To use this option, the Z axis has to be lowered so the the tip of the milling bit is about 7 to 10 cm above the work pice. After Operations - Mobile calibrator is chosen, the calibrator has to be placed under the bit which will move toward the calibrator. It will touch the brass knob int he center of the calibrator, and the electrical signal will indicate the Z position of the bit to the machine. After calibration is finished, the calibrator should be put back in the holder. When the work piece coordinates were zeroed, I unloaded theold nc-files with File - Unload and selected File - Open and Load to select G-code file I created earlier and chose Open. I simulated the work to ensure it looks fine and started milling.
After the first milling, the parts were not cut out completely. Most likely, the problem was not precise thinkness of the stock.
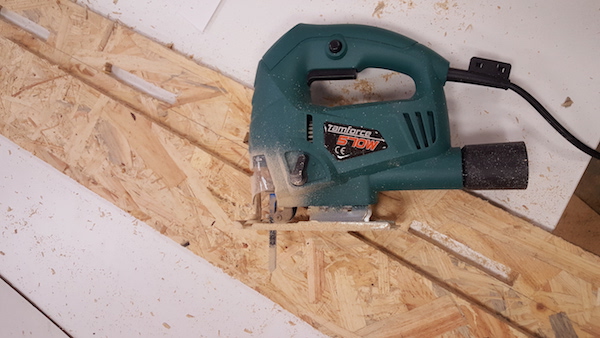
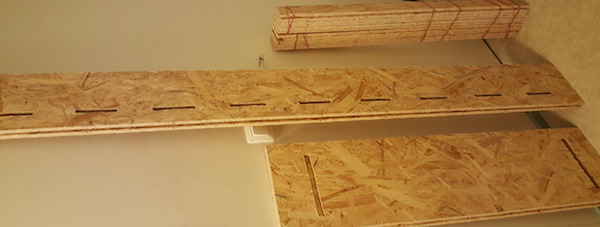
After readjusting the Z coordinate by choosing a different spot, the parts were cut out. However, there was a further issues: the slots in the pieces were not cut out well enough for the parts to interlock as they meant to be assembled. This happened because the shape of the milling bit was not suitable for perfectly recreating the designed slots. At this point, the only solution to assemble the parts was to cut out slots manually. It took time and effort, but enabled the needed outcome.
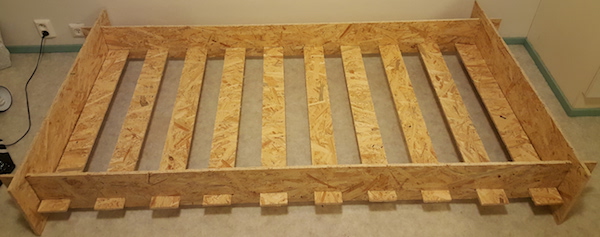
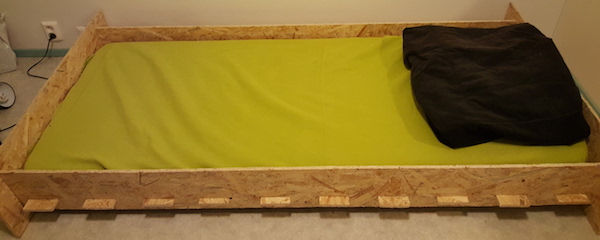
At last, the pieces are put together as intended
Files:
Fusion 360 .f3d bedframe original designs and .stl files, .nc code for milling.
Remember, remember...
- Before starting working with the machine, familiarize yourself with the safety instructions. NCStudio Guide provides an exhausive list of instructions.
- Keep: fingers, hands, and all other objects away from machine while power is on.
- Disconnect power to all system components when not in use, when changing accessories and before servicing.
- Do not loosen, remove or adjust machine parts or cables while power is on.
- Exercise care with machine controls and around keypad to avoid unintentional starting.
- Do not allow debris to build up on machine.
- Machines must be properly grounded.
- Keep cables and cords away from heat, oil and sharp edges. Do not overstretch or run them under other objects or over work surfaces.
- Use proper fixtures and clamps to secure work. Never use hands to secure work.
- Do not attempt to exceed limits of machine.
- Do not attempt to use machine for purposes other than what is intended.
- Use machine only in clean, well-lit areas free from flammable liquids and excessive moisture.
- Stay alert at all times when operating the machine.
- Always wear safety goggles.
- Do not wear loose-fitting clothing when operating machine. Long hair should be protected.
- Always maintain proper balance and footing when working around the machine.
- Maintain equipment with care. Keep cutting tools clean and sharp. Lubricate and change accessories when necessary. Cables and cords should be inspected regularly. Keep controls clean and dry.
- Before using, check for damaged parts. Only identical or authorized replacement parts should be used.
- Remove any adjusting keys and wrenches before turning machine on.