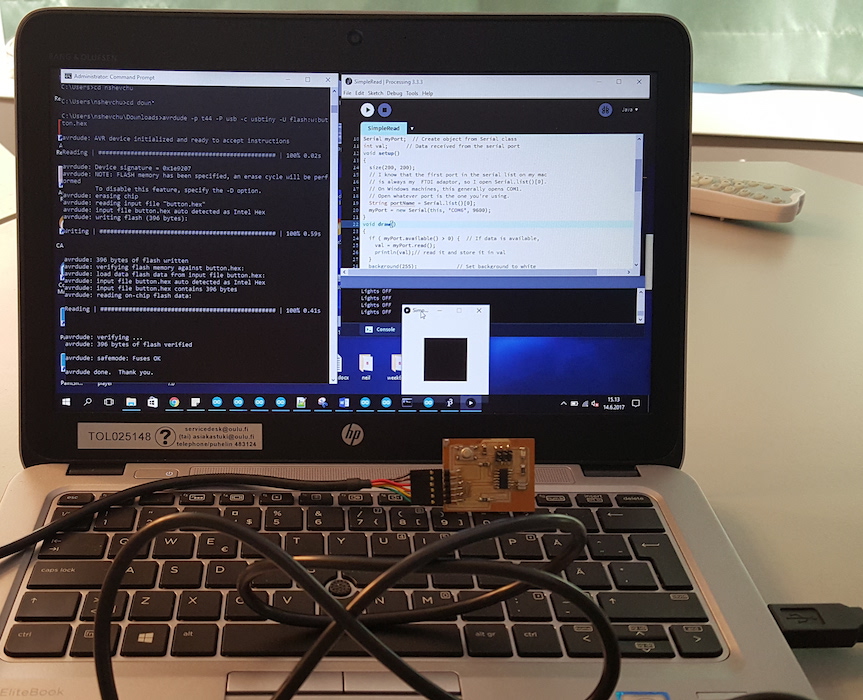
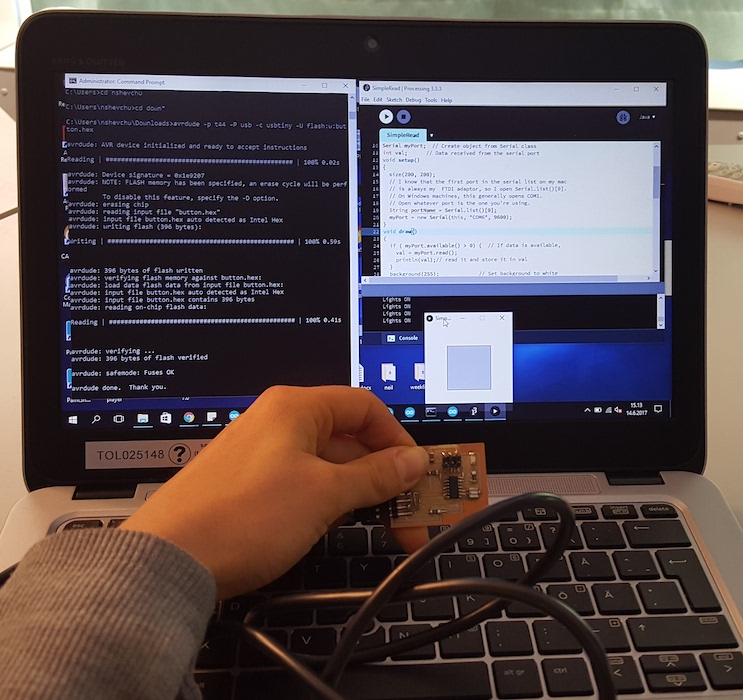
I planned using the boards, I used in the previous week (nodes 0 and 2). However, as I was working this week, two of the boards stopped working. I was left with the board that has a button and a LED made in week 8. I programmed this board with the hello.button.45.c code available in the Input devices week, changing the code to print out 0 and 1, instead of d and u, used in the original code. I tested functionality of the board and code using Tera Term.
Processing
From the examples available in Processing, I modified the Simple Read and Scale Shape ones to practice making applications.
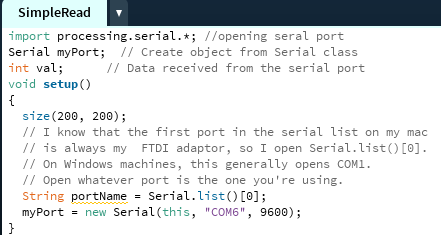
The first exercise is using modification of the Simple Read example. In line
myPort = new Serial(this, "COM6", 9600);
"COM6" was added to identify the port my terminal is using. Next, I added a slight modification of the if statement the original code is using to change color of the square. When value 0 appears, I added println command to print Lights OFF, otherwise, println command will print Lights ON.
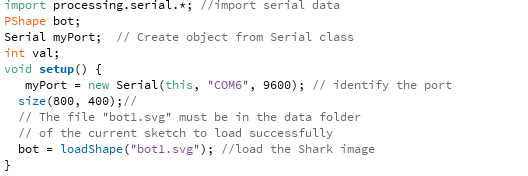
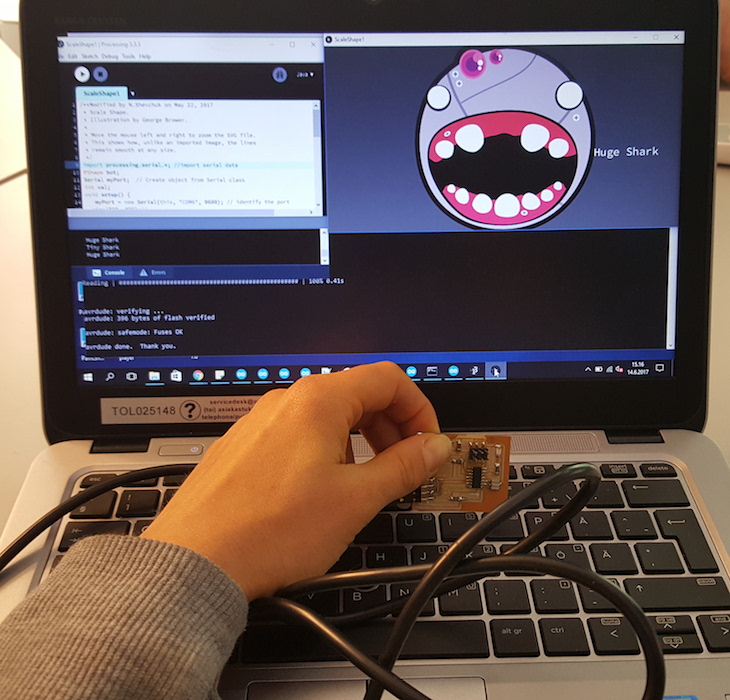
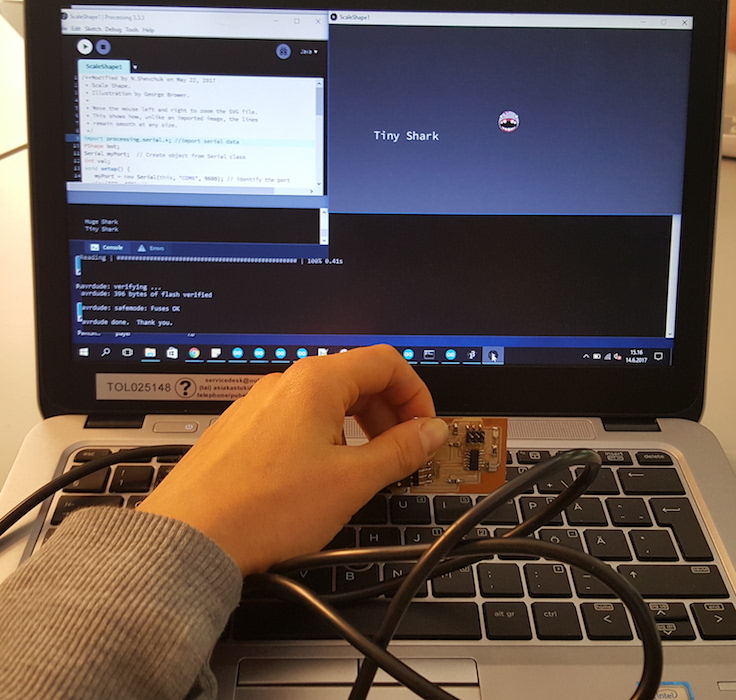
The second excersise combines the Simple Read and the Scale Shape examples. The original Scale Shape example zoom an svg file by moving mouse from the left to the right. I changed the example to scale the svg shape depending on whether 0 or 1 is being read from the serial port. So I added the following lines of code to the original example:
import processing.serial.*;to intiate import of the serial dataSerial myPort;to initiate creatign object from the serial classint val;to store value received from the serial portmyPort = new Serial(this, "COM6", 9600);to identify the serial port which is COM6 in my exampleif ( myPort.available() > 0)to check whether the data is availableval = myPort.read();to read the serial portif (val == '0')to set specific text to be printed when 0 is beign read from the serial.
{ println("Tiny Shark");else { println("Huge Shark");}to print a different output if vale other than 0 is being received via serial.if (val=='1')
{ text("Huge Shark ", 200, 40);
zoom = map(val*5, 0, width, 0.1, 4.5);
else {zoom = map(val/4, 0, width, 0.1, 4.5);
text("Tiny Shark ", -300, 40);
to set scaling and print specific text at the specific position next to the scaled image depending on the value erceived from the serial.textFont(createFont("SourceCodePro-Regular.ttf",24));to set font specifications for the text added next to the image

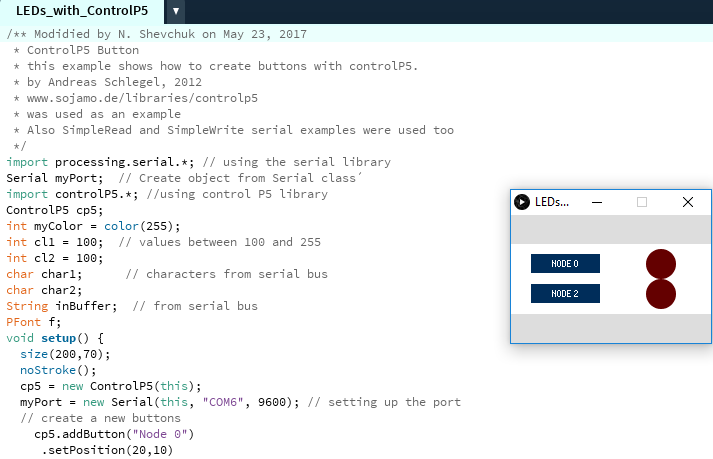
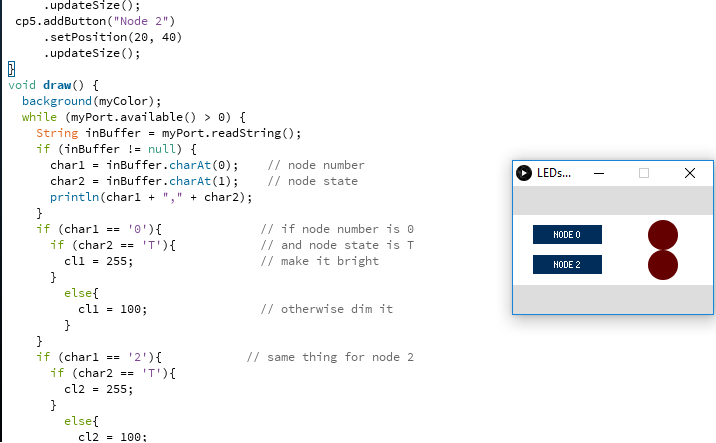
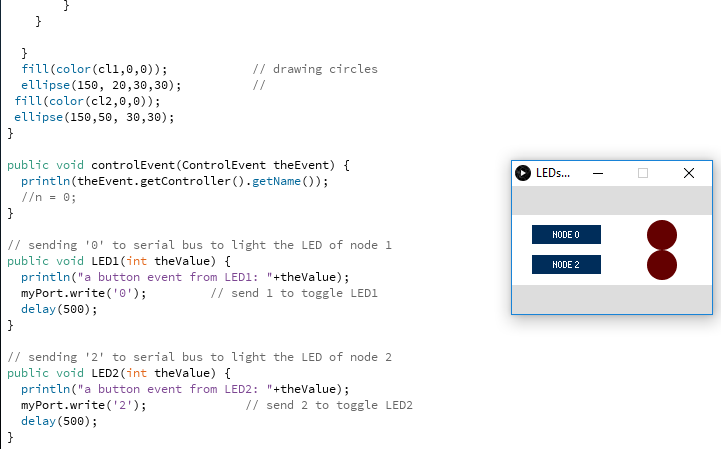
My intial plan was to create a GUI with which LED lights can be triggered on the boards, I used in the previous week. I installed the ControlIP Library, and combined examples ControlP5button and SimpleRead to put together interface below. I also referred to Antti's (a former student of Fablab Oulu 2016 graduate) documentation. I am hoping to fix the boards and test this GUI.
The idea of this application is to switch the LED on a certain node when the application's buttons are pressed and when the LED is on to change the color of the circles in the applications which appear next to the buttons. Two buttons Node 0 and Node 2 and two circles, representing the LED lights are created initially. ControlP5library helps creating buttons enabling to set their size and position.myColor is being initialized and cl1 and cl2 are also defined. Function void draw changes color of the circle depending on the state of the buttons.
Functions public void LED1
and public void LED2 send values 0 or 2 to the serial port and update the message being printed with println.
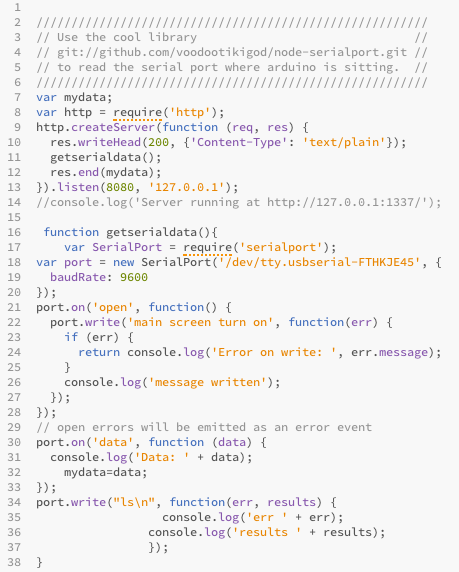
I also wanted to try getting serial port data to html with Node.js. As a reference, I used page http://fab.cba.mit.edu/classes/863.14/people/dan_chen/interface-application-programming/. I went through the steps described, but did not manage to move further than getting the data into console.
I used Mac and inslalling Node.js was successful. I ran command npm install serialport. After the installation process was completed, I checked with I version is beign used.

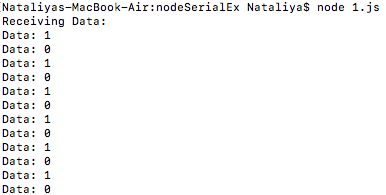
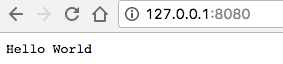
Then I tried to get the serial data in the console and I was able to receive the input from the board.
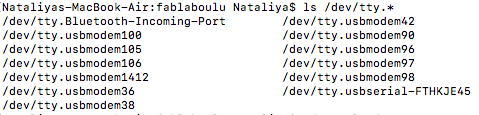
To find out the number of the port the data is coming from, I ran command ls -l /dev/tty*. The name of the port should be somewhere in the beginning of the list.
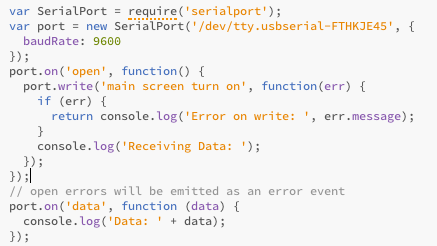
Below is the code I used. In the console, Node files can be opened with the command node filename.js
Next, I tried some example code, provided in http://nodeguide.com/beginner.html#your-first-program
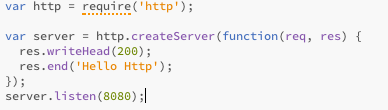


After that, when I tried fetching the data at http://127.0.0.1:8080, using the following code
I kept getting the following error, and I was not able to resolve it.

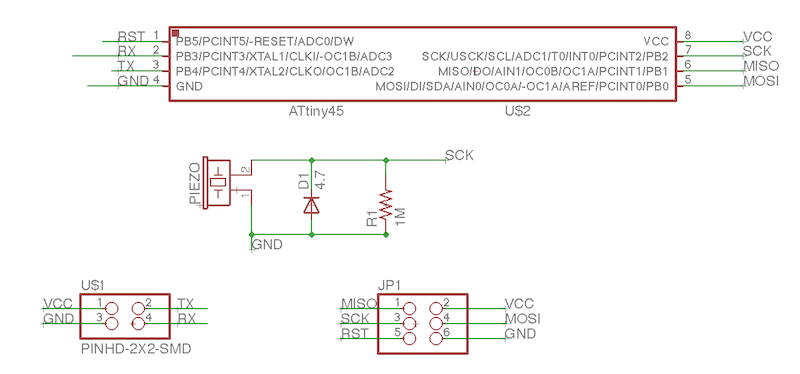
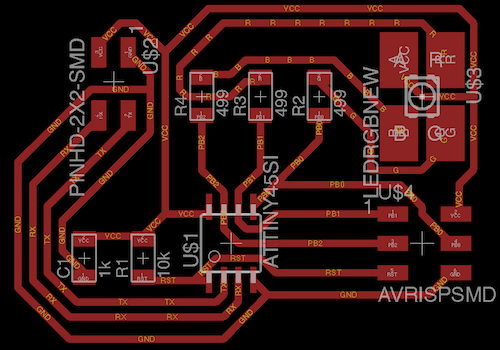
Next, I also made a couple of other boards which I hoped to use in the final project, a board with the RGB LED and a board with a Piezo buzzer. Both designes are based on the board designs provided in the Output devices week.
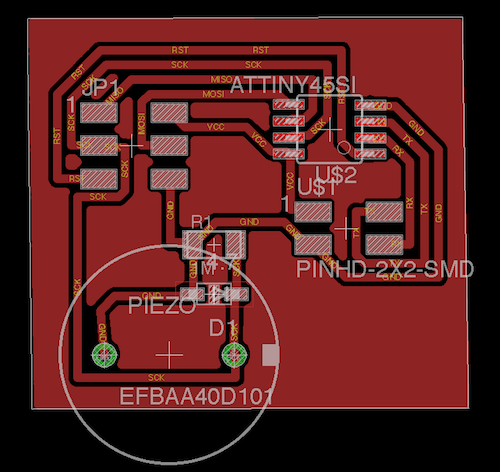
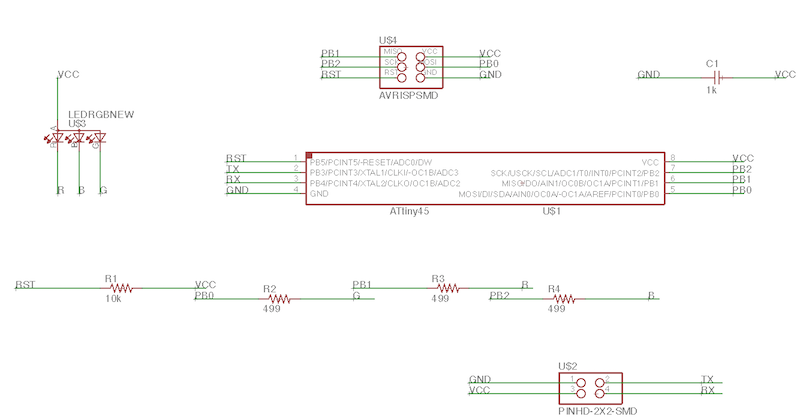
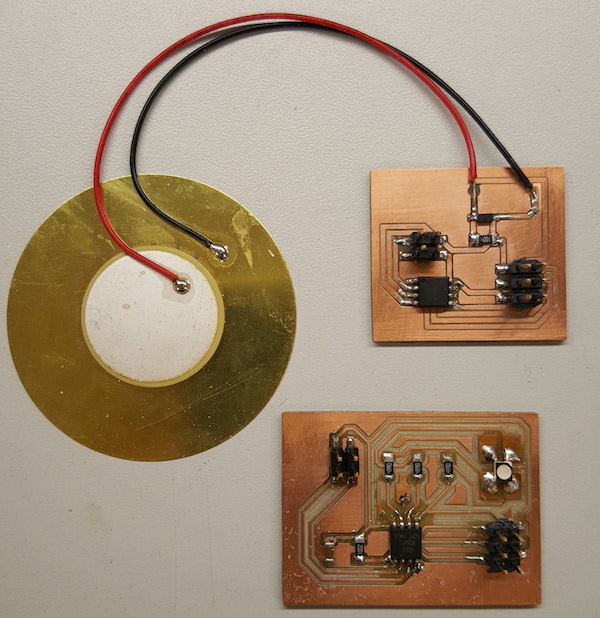
I tried programming the RGB board, however, the board is not responding giving the initialization error. I will try debugging it later.
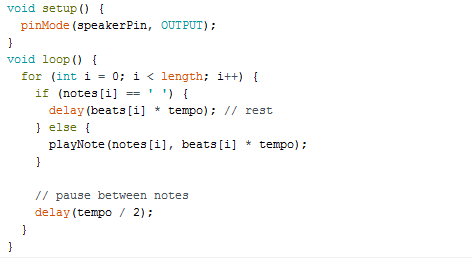
I was able to successfully program the Piezo board with Arduino to play a melody. I found the code here.

Files:
Modified hello.button.45.c code and .hex file generated from it, SimpleRead, ScaleShape and LEDs_with_ControlP5 Processing .pde files, HelloHttp, HelloWorldServer, DatatoCMD, Datato Server Node .js files, Piezo and RGB boards: Eagle .sch and .brd, and Roland .rml traces and cutout files, Piezo Andruino .ino code