Designing a 3D mold
I used Fusion 360 to design a 3D mold for this week's assignment. The reason why I chose Fusion 360 is that I have already been familiarized with the software and it was easy for me to generate the CAM design.
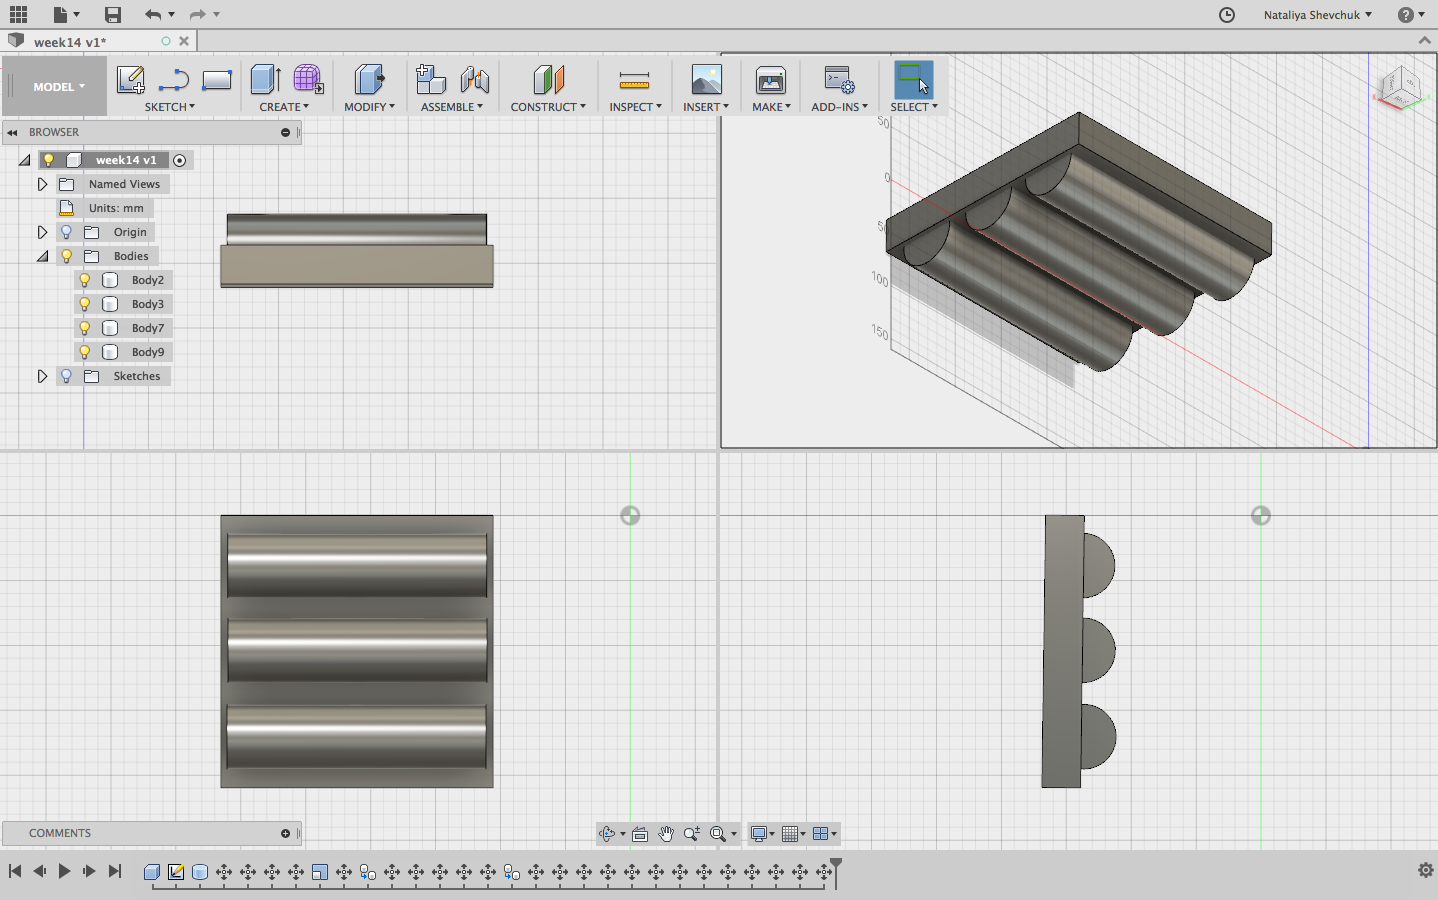
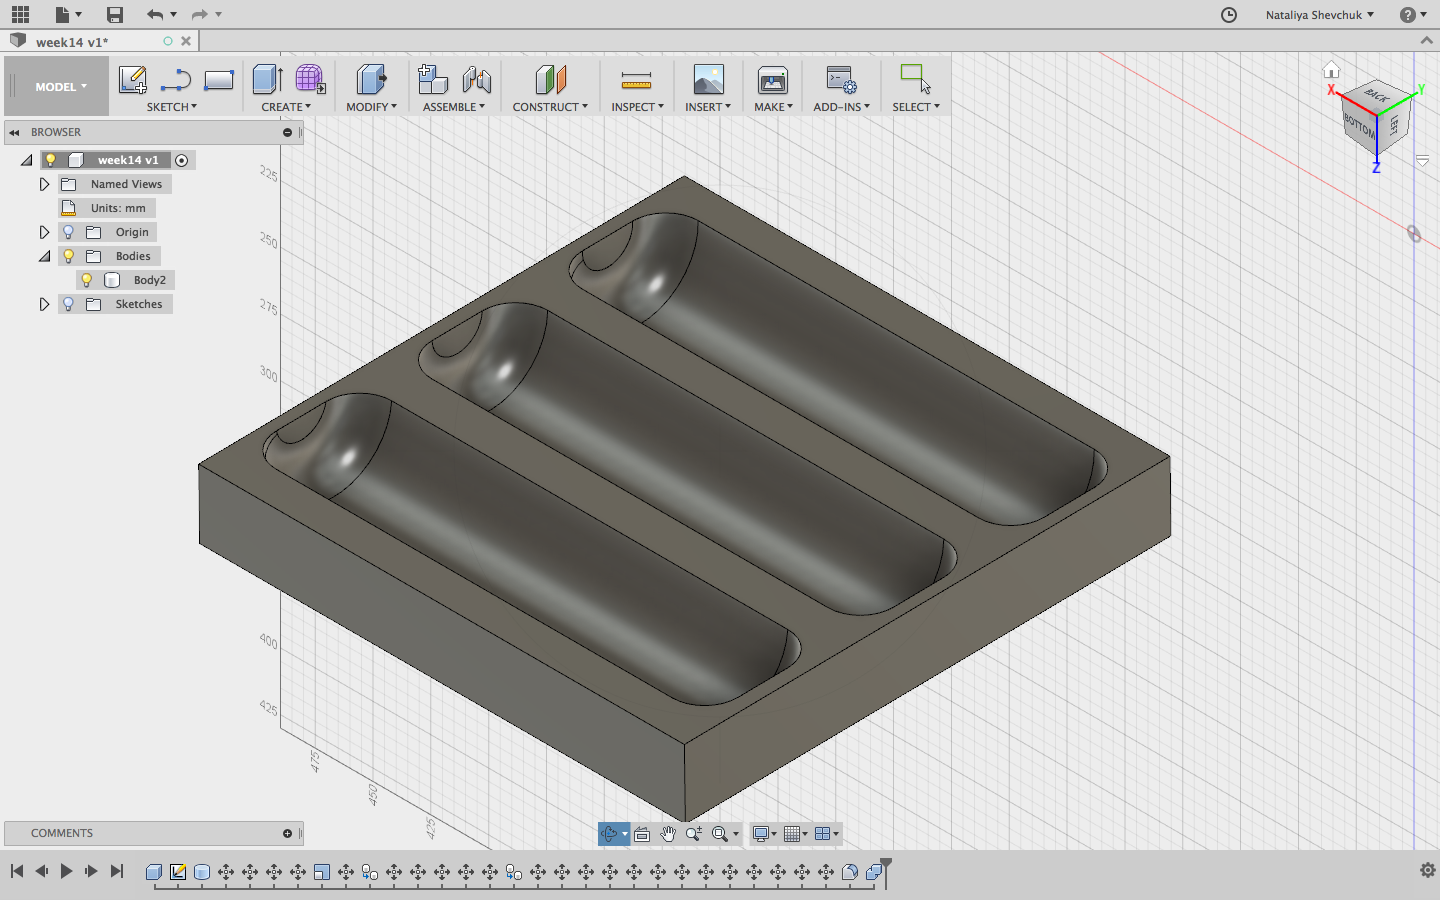
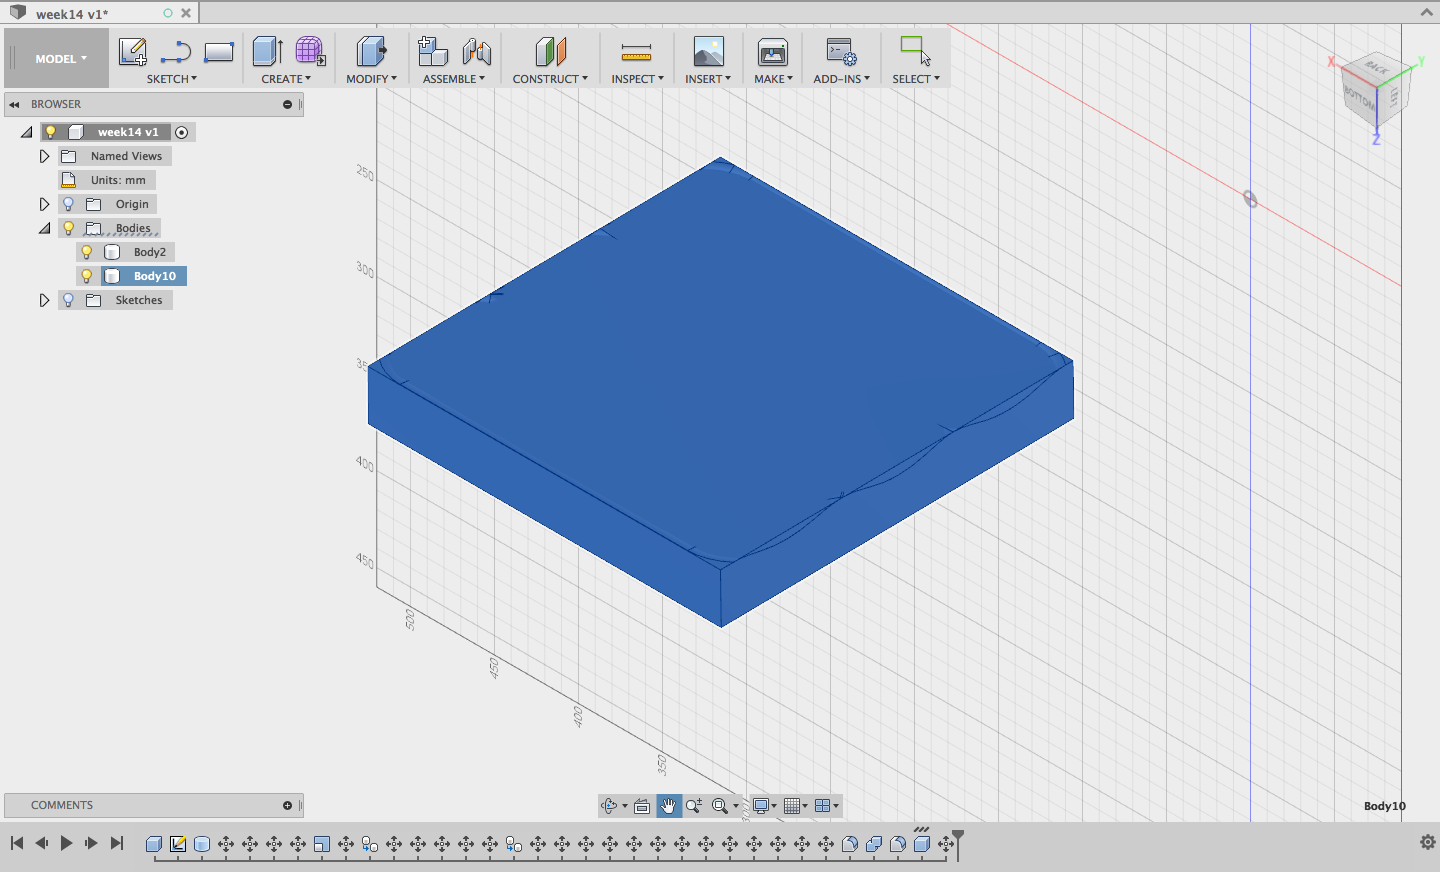
I decided to make a tray/holder where I can keep office supplies or some similar small items. For creating the shape I wanted, it is possible to use a one sided mold, but to reflect the curvature of the shape, a two-sided mold could be a better option. One of the sides of the mold is creates with commands Create - Box and Create - Cylinder. I made a box with dimensions 21 cm X 21 cm X 3 cm, after that three cylinders with 20 cm height and 3 cm diameter.
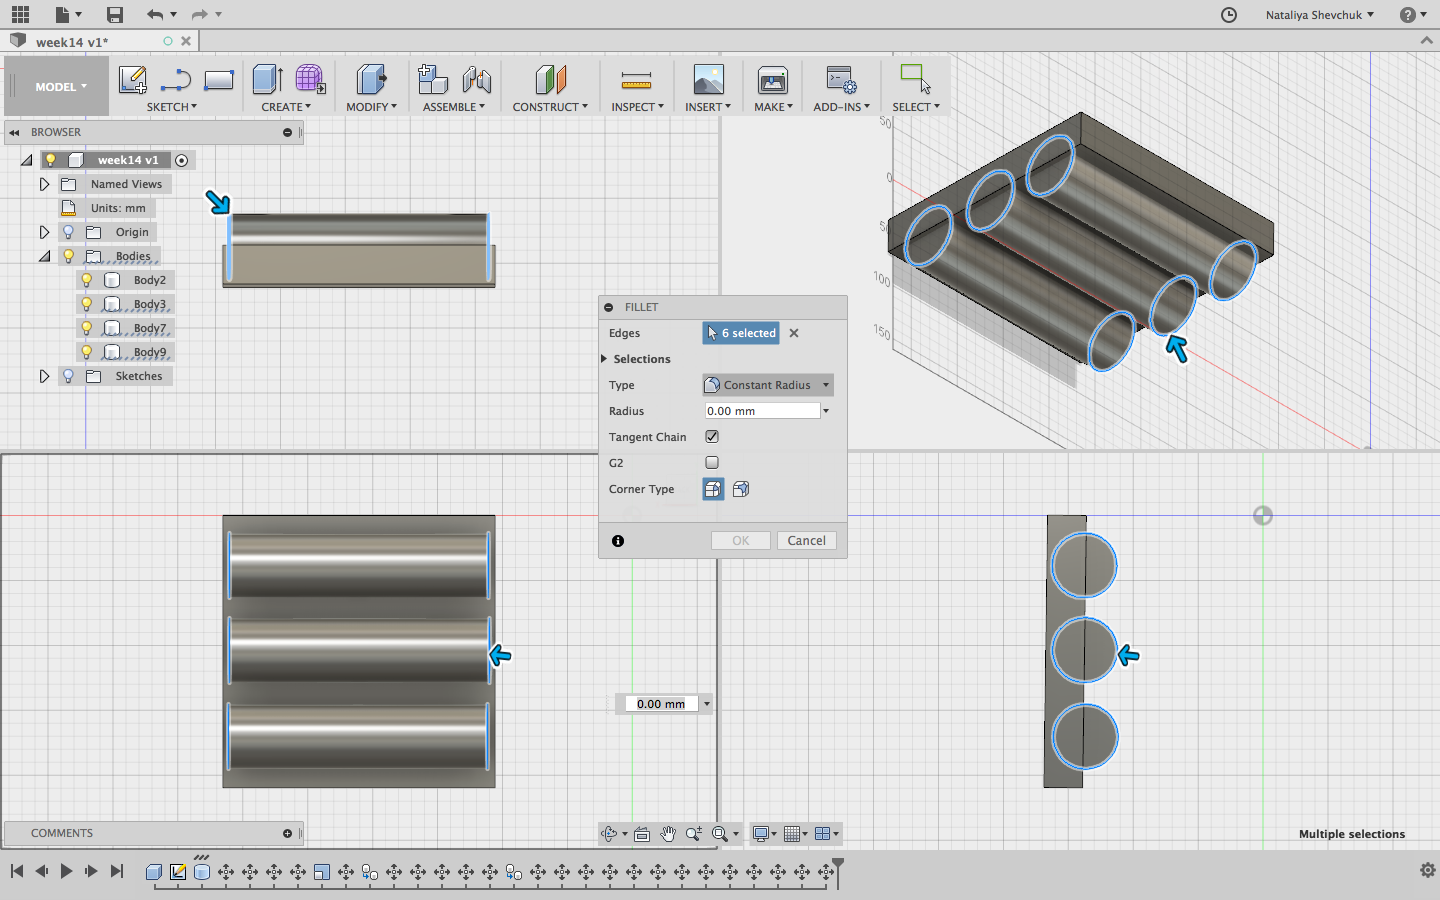
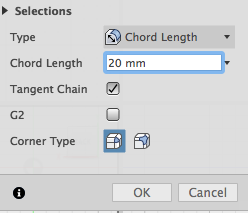
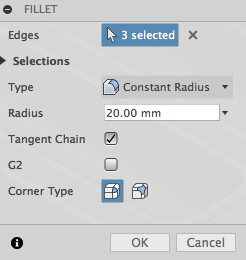
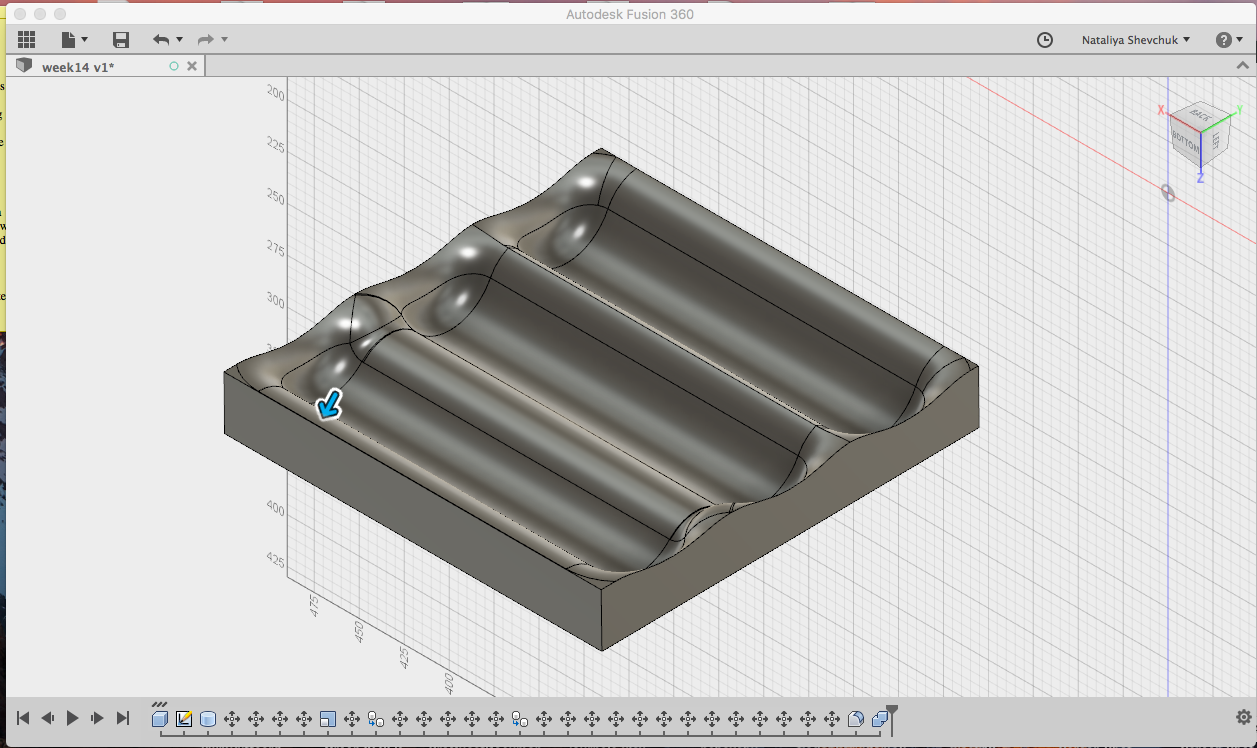
I applied Modify - Fillet - Chord Length to modify the cylilnders' edges
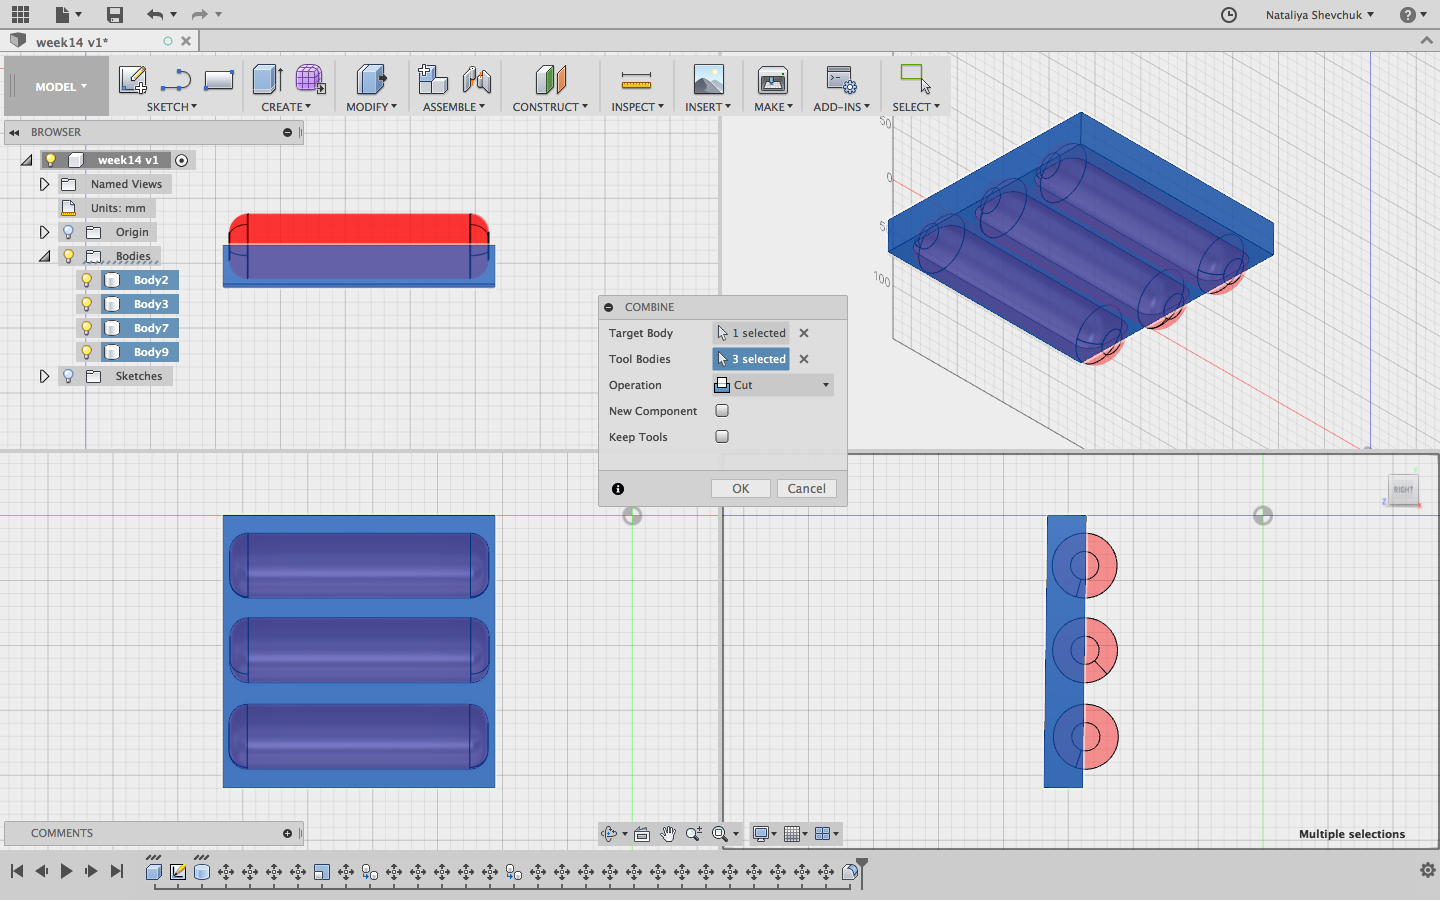
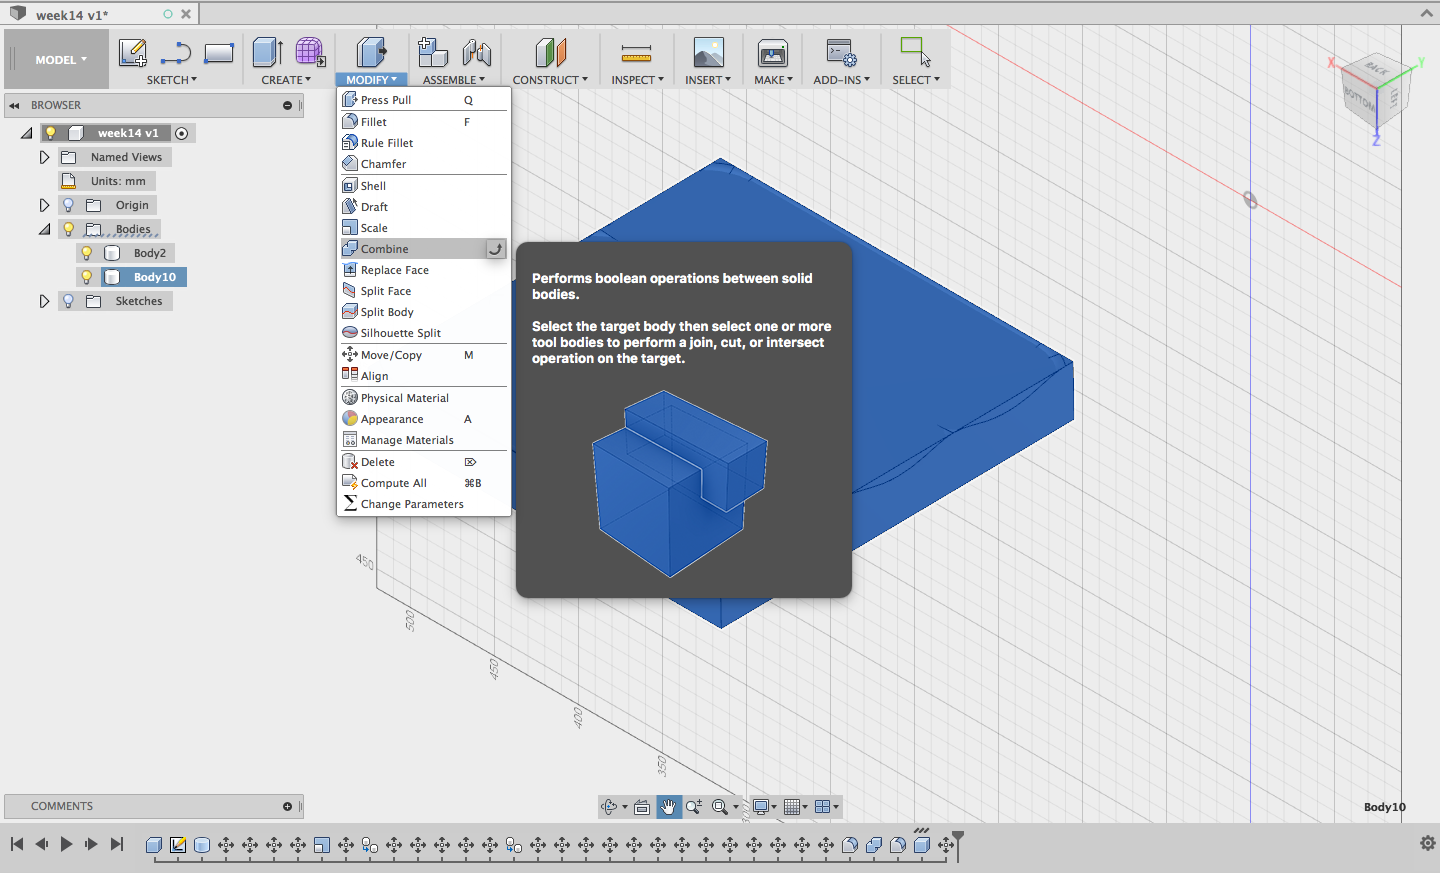
Modify - Combine - Cut to get a desired shape
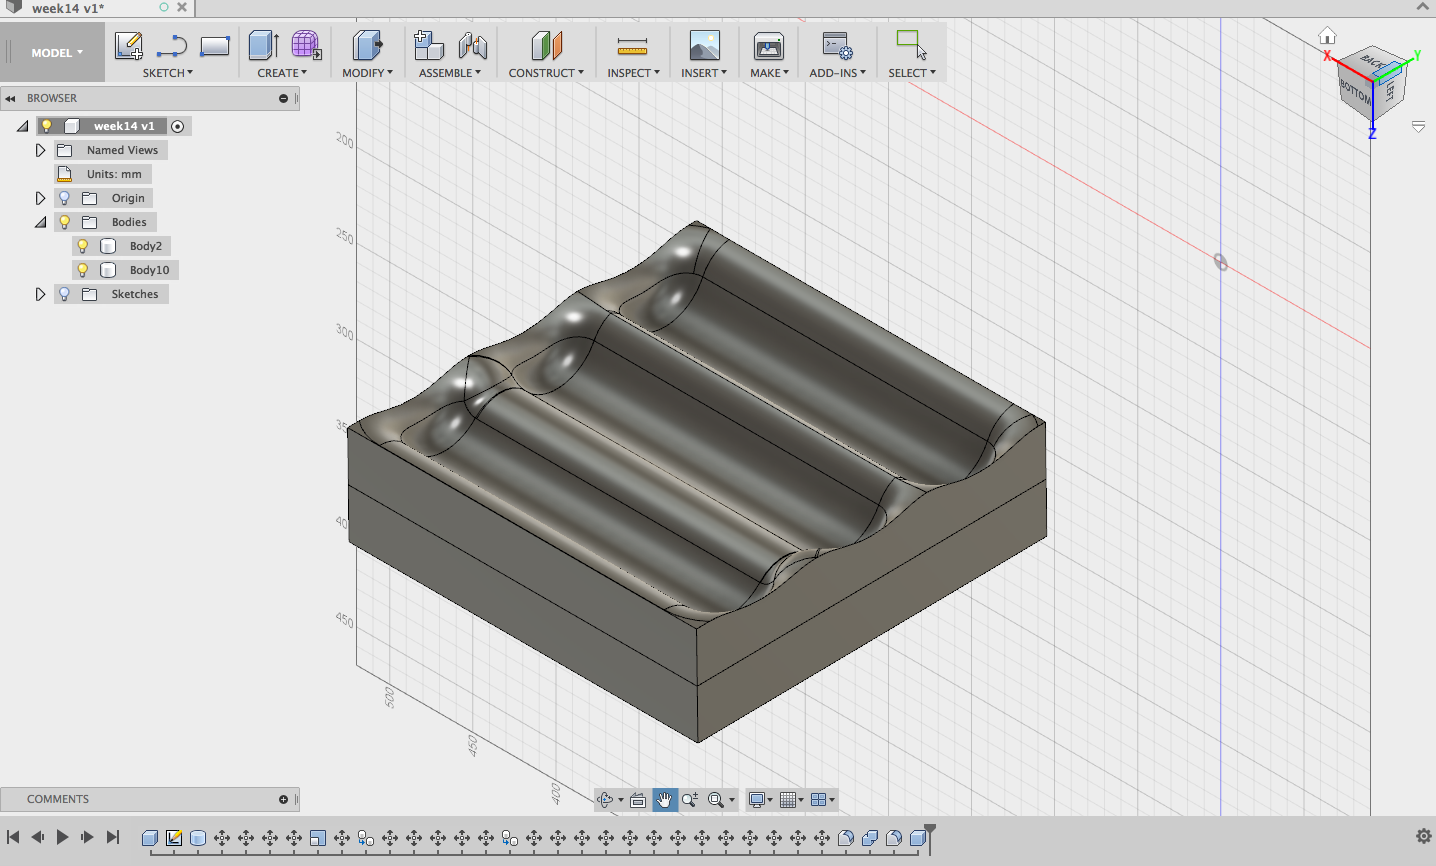
Again applying Modify - Fillet - Chord Length to change the shape of the edges.
One part of the mold is ready. I could try using just this for making a composite, but I decided to have another part as well
To create the second part, I created another 21 cm X 21 cm X 3 cm box.
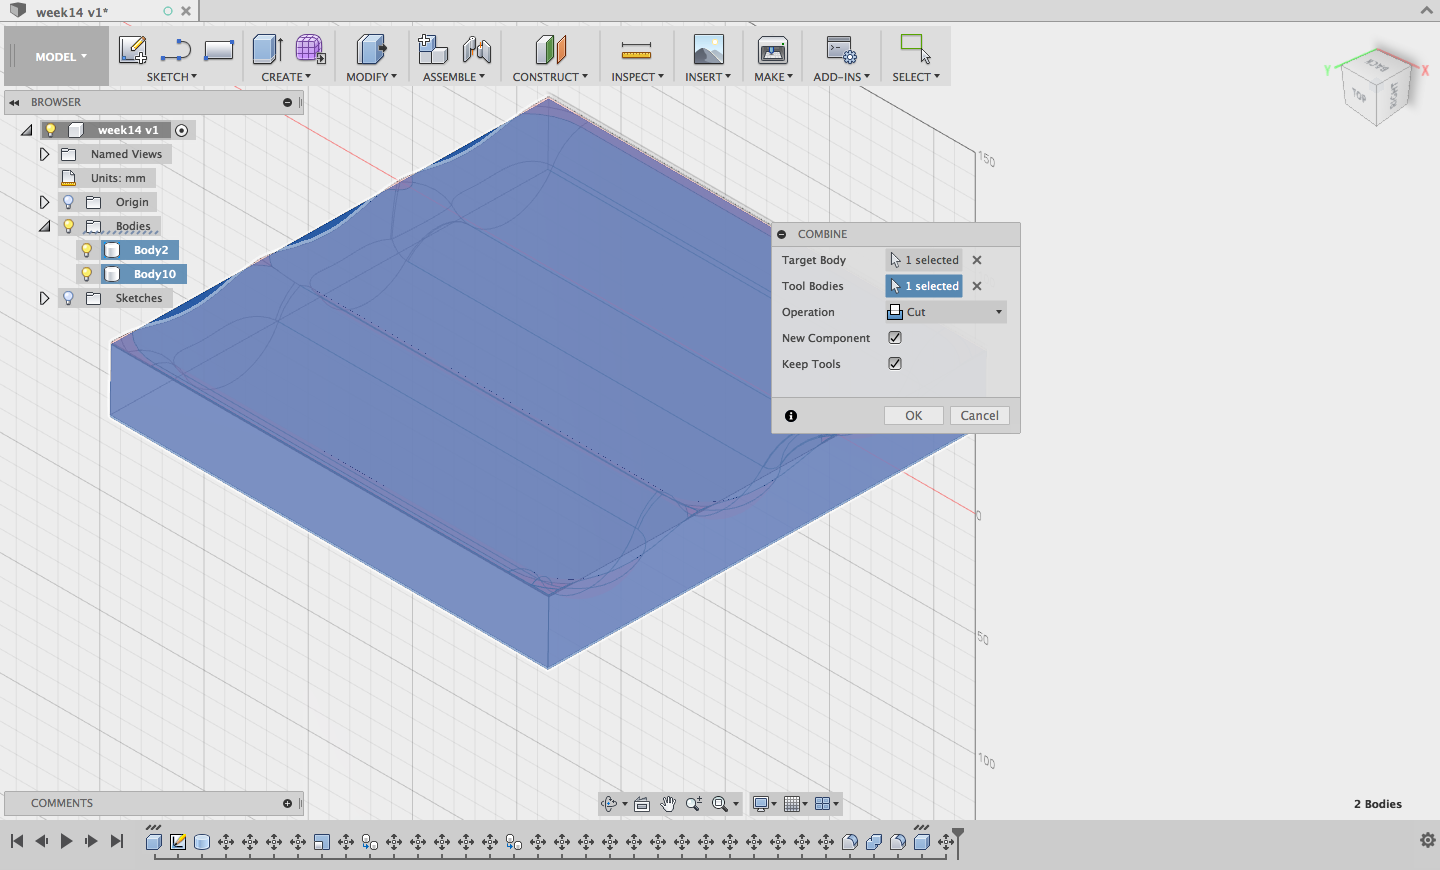
This box was placed to overlap with the first one...
... Modify - Combine - Cut - check New Component - check Keep Tools (to retain both of the shapes)
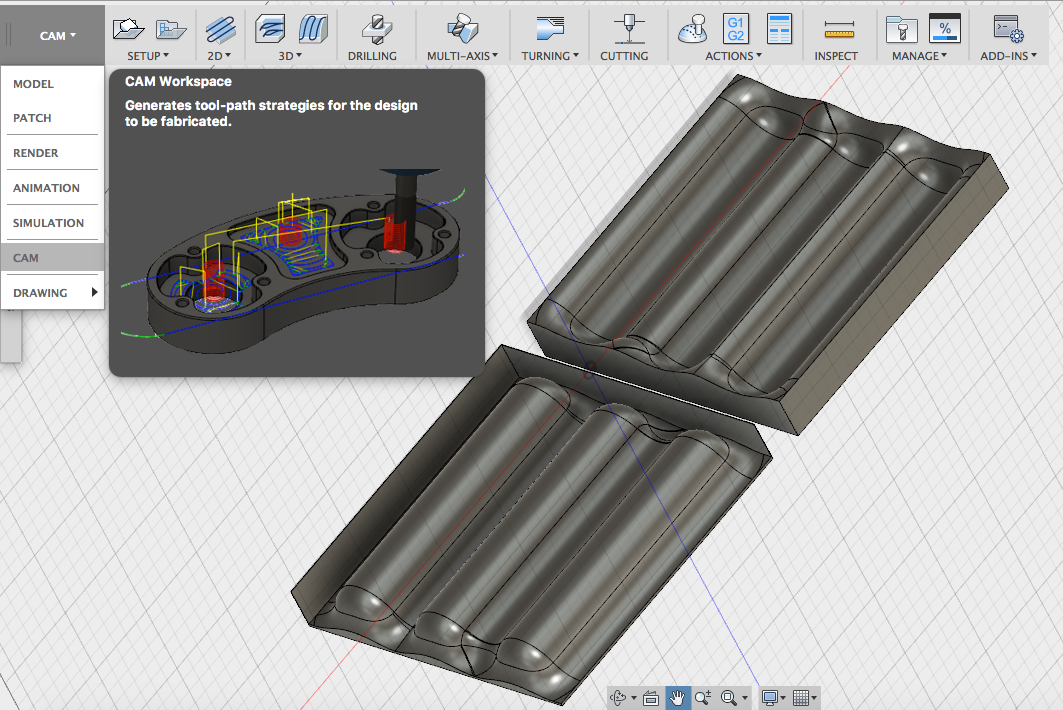
After aligning the two pieces in one plain, the mold is ready for CAM the setup.
Fabricating a 3D mold
Switching to the CAM workspace
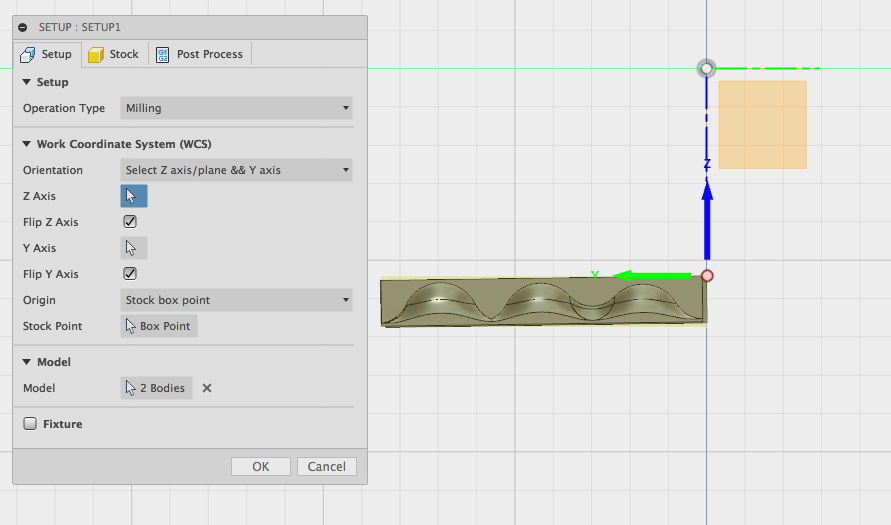
Setup - New Setup to start with milling settings
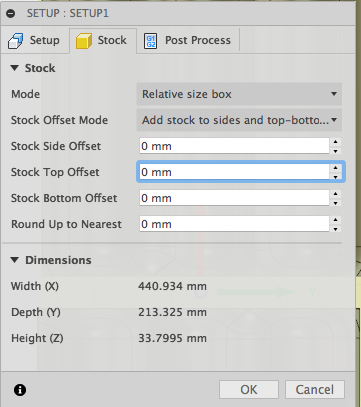
I made changes only to the Setup and Stock and left the Post Process with the default setttings
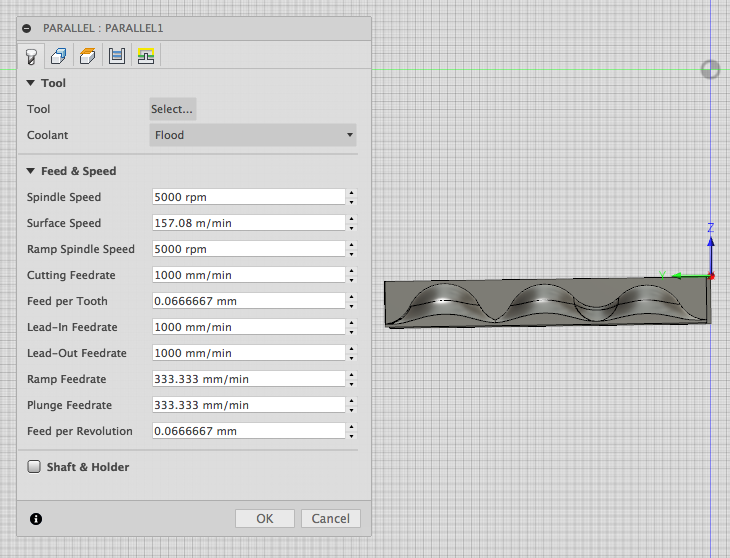
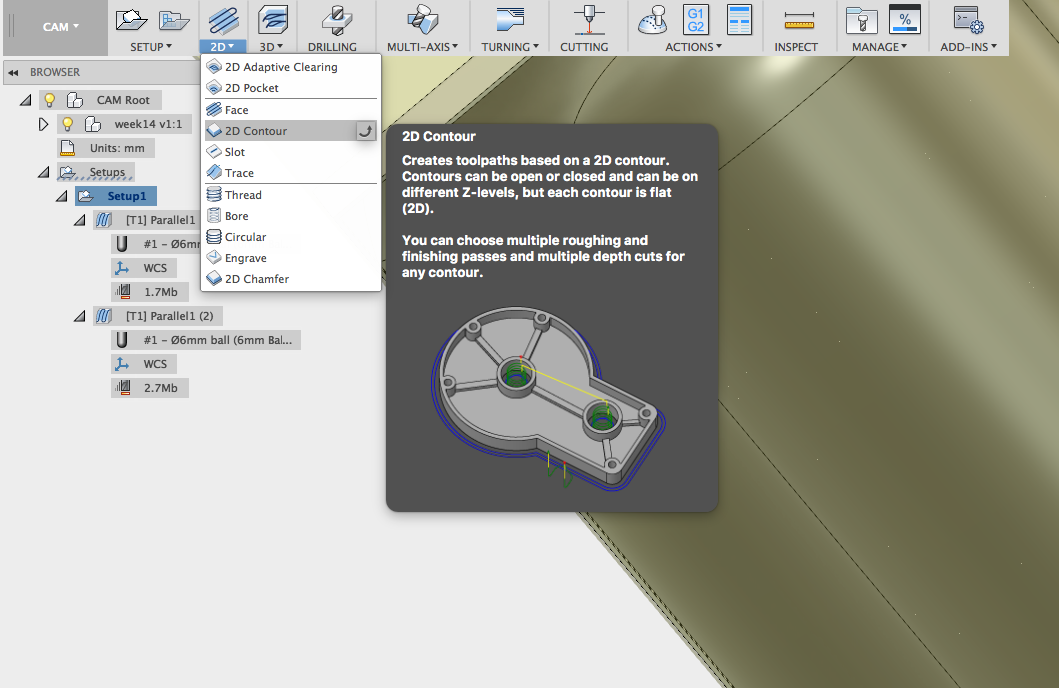
Next I started with the first CAM process: 3D - Parallel. Overall, I used three processes: two 3D Parellel (for roughing and finishing) and one 2D Contour to cut out the mold
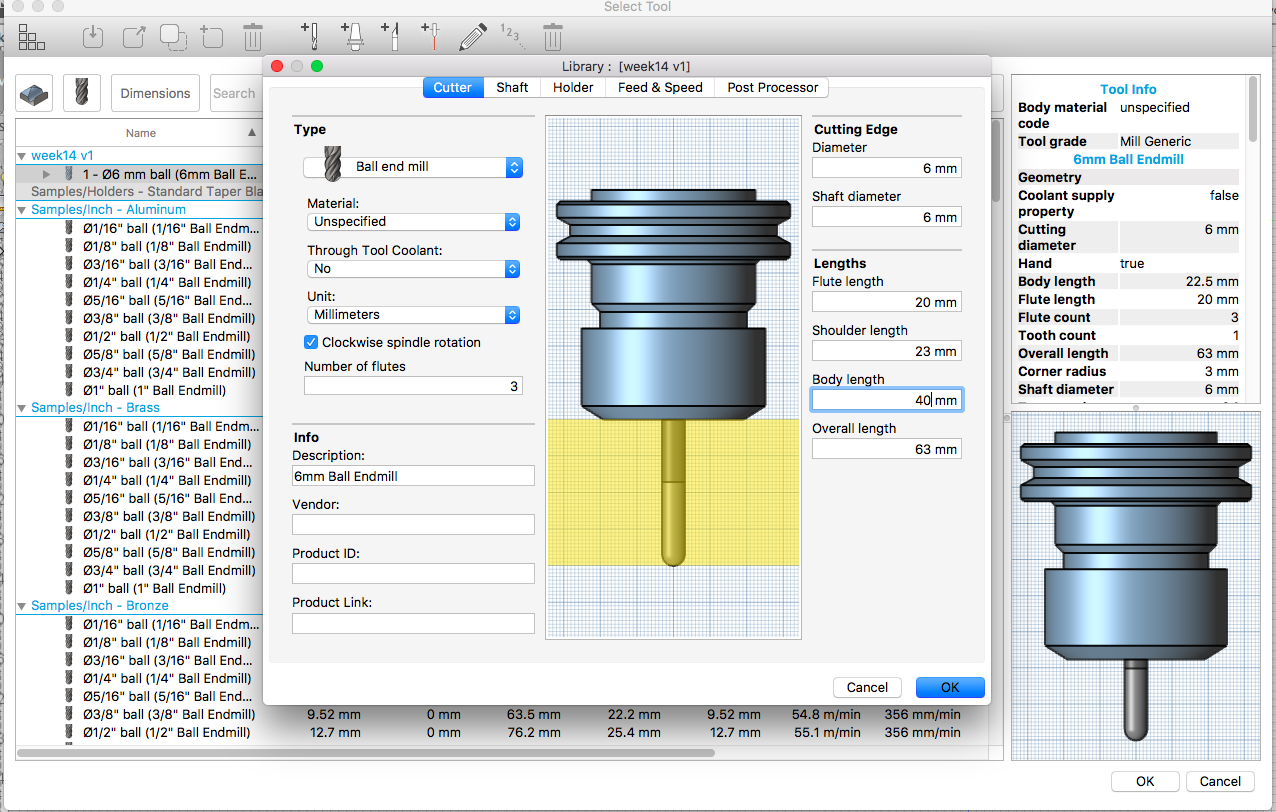
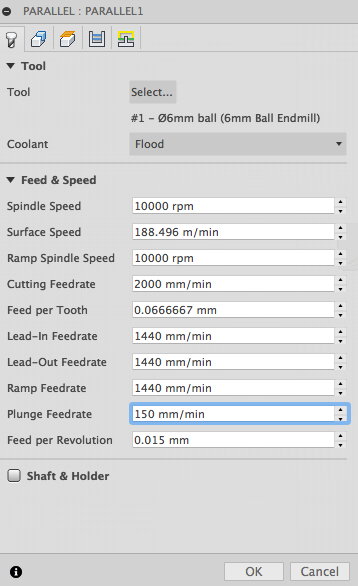
The tool I was using was not available in the library, so I created a new one. I opened the libraty, Manage - Tool Library, copied Ball end mill 6 mm diameter, and changed the body length to 40 mm.
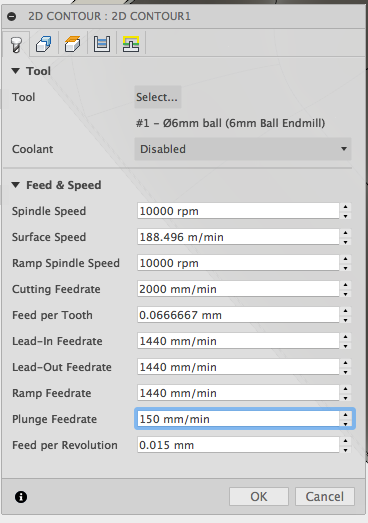
After that, I finished setting up the processes. In tab Tool, Spindle and Ramp Spindle Speeds were set to 10000 rpm, Cutting Feedrate to 2000 mm/min, Plunge Feedrate to 150 mm/min, and Lean-In, Lead-Out and Ramp Feedrates to 1440 mm/min.
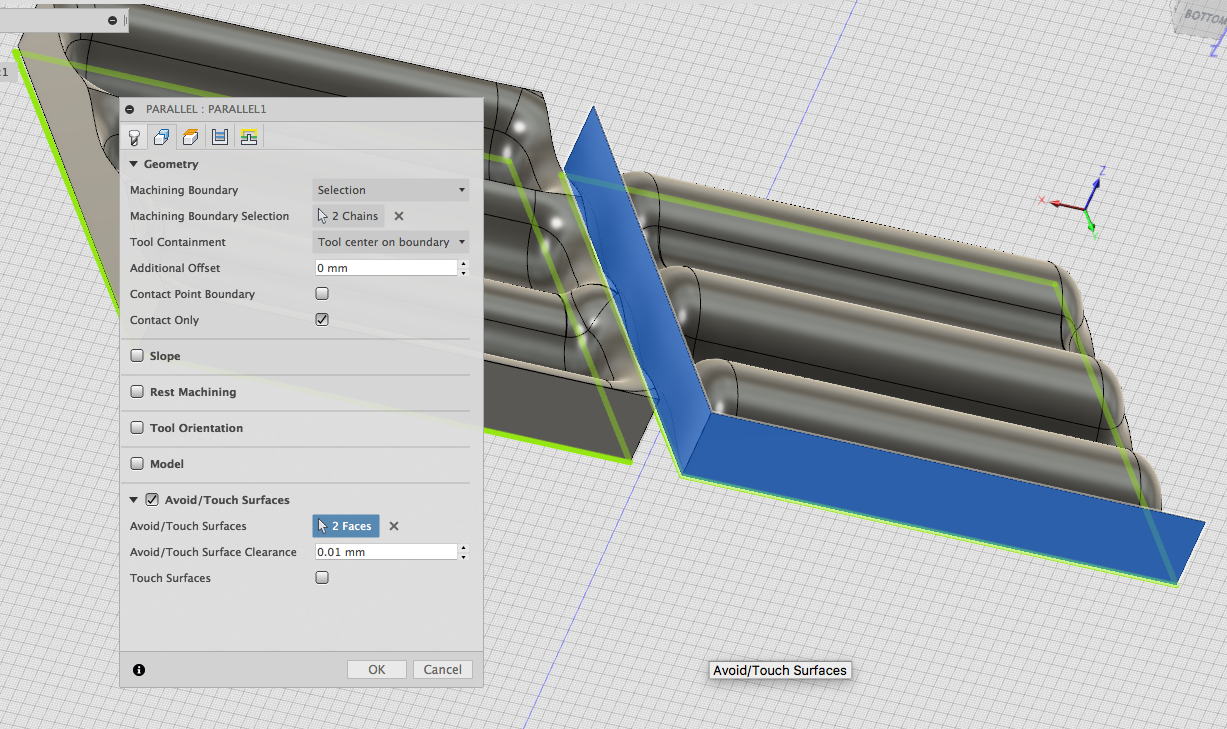
In tab Geometry, I selected 2 Chains (bottom contours) as Machining Boundary with Tool center on boundary as Tool Containment and choosing to generate the boundaries where there is Contact Only. I also set Avoid/Touch Surfaces and selected 2 Faces of the design
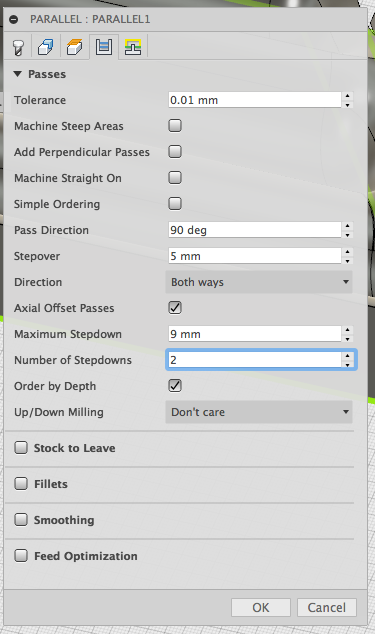
To set the Passes, I chose 90 degree Pass Direction with the 1mm stepover and Direction both ways. I enabled Axial Offset Passes with the maximum Stepdown 9 mm and 2 Stepdowns ordered by depth.
In the second parallel process, set a 1 mm stepover in Passes and did not have Axial Offset Passes enabled.
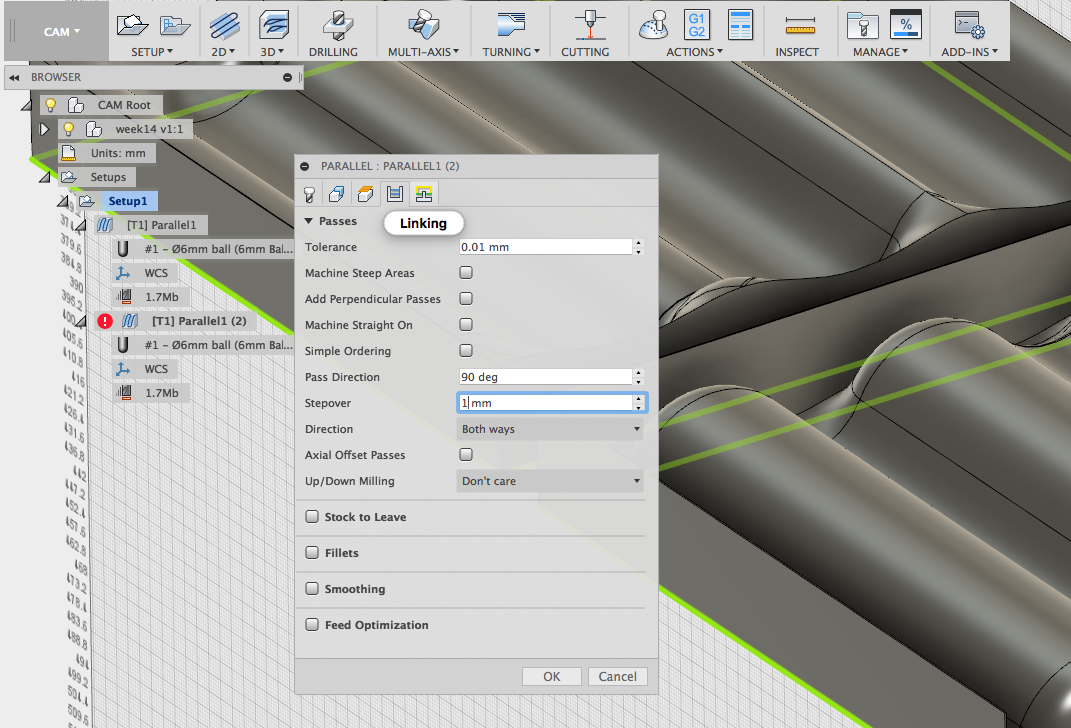
Geometry of the second Parallel process was set up similarly to the first one

Next, I defined a 2D contour.
For Tool, Feed & Speed, the settings were set similar to the settings in the Parallel processes.
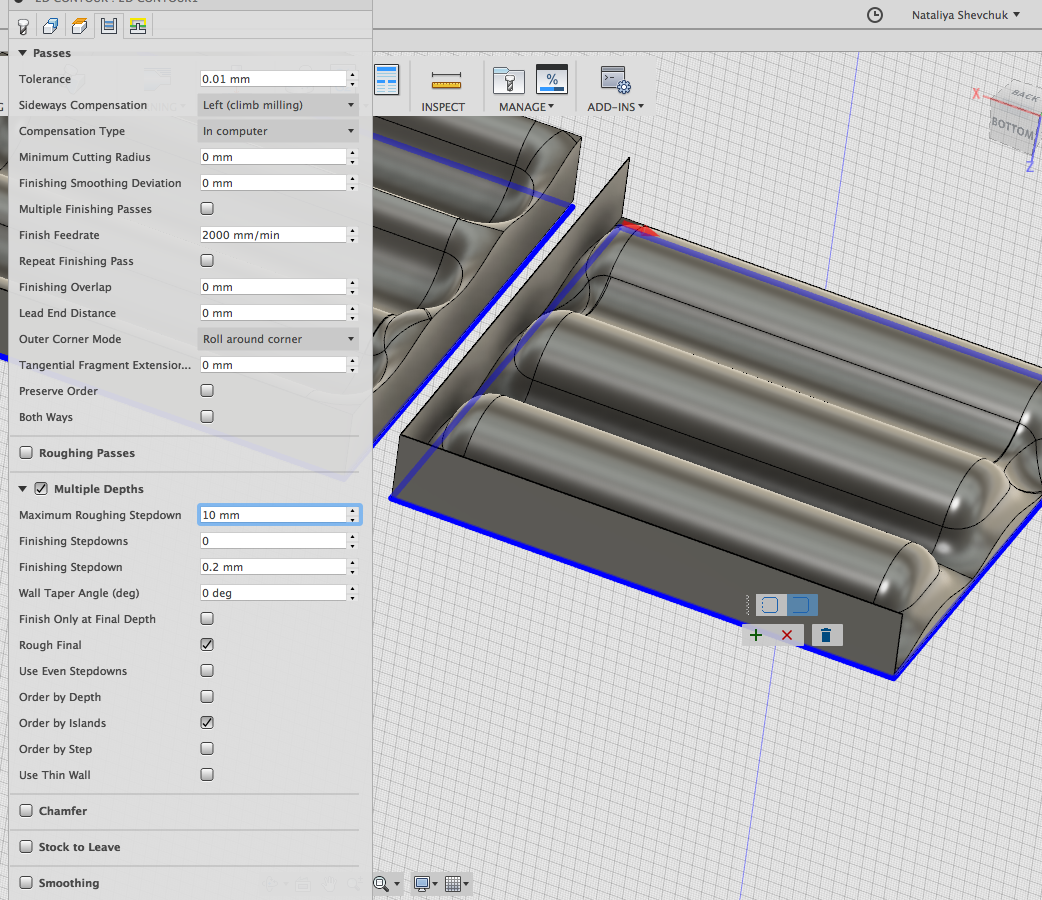
In setting the Passes, I chose 0.01mm Tolerance, Left (climb milling)Sideways Compensation with 2000 mm/min Feedrate and the Roll around corner for the Outer Corner mode.I enabled Multiple Depth with the 10mm Maximnum Roughing Stepdown, 0.2 mm Finishing Stepdown, enabled Rough Final and Order by Islands.
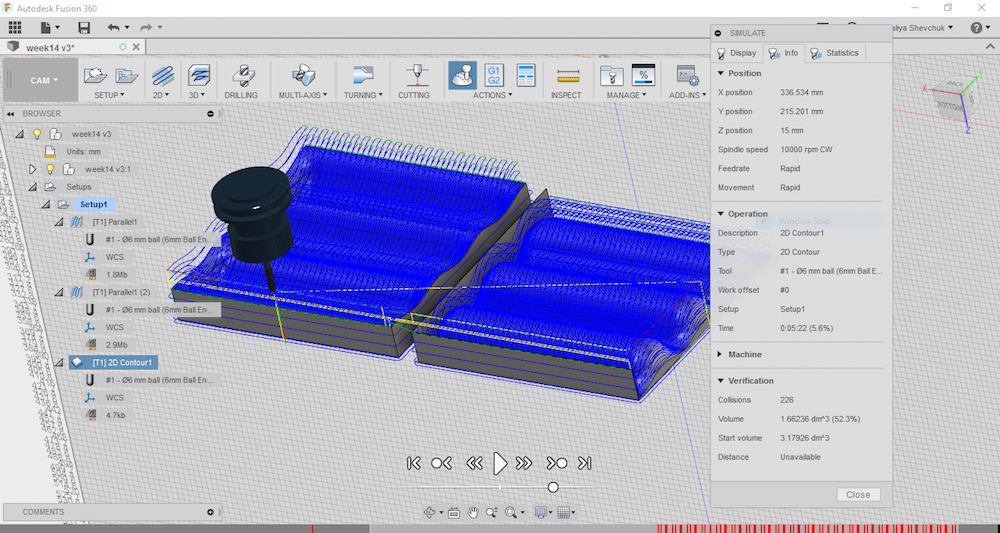
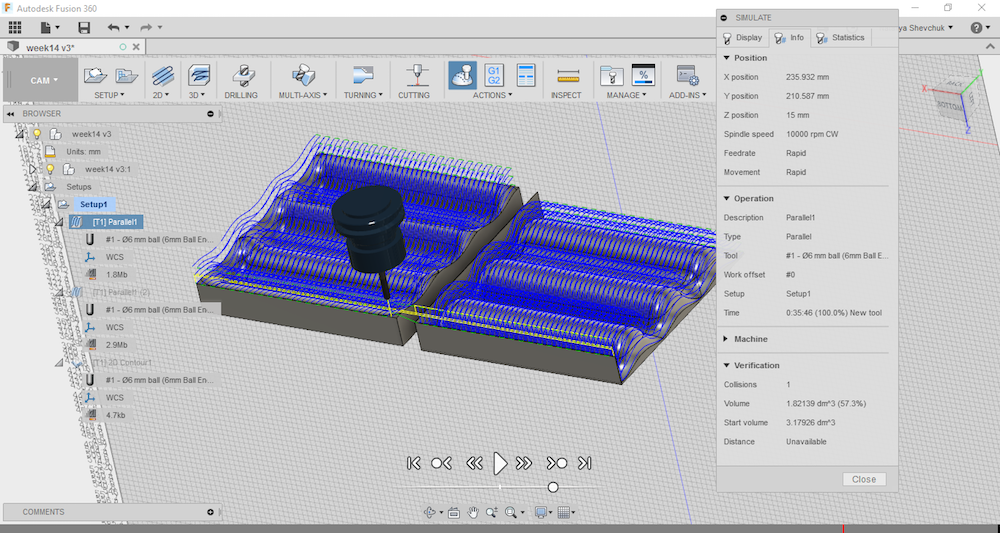
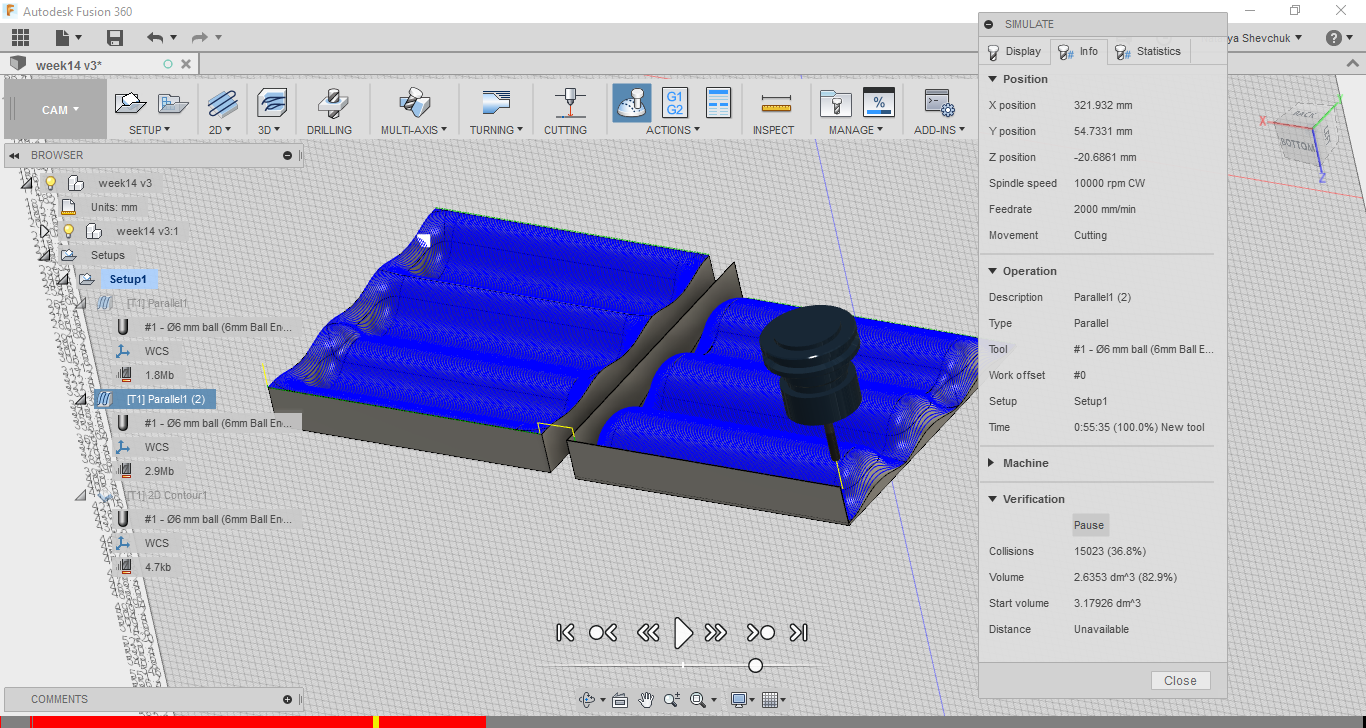
After the CAM processes were defined, I ran simulation (Action - Simulate) to find out how much time the job will take. There were collisions detected in all processes (Parallel1 ~36 min, 1 collison; Parallel2 ~56 min, too many..; Contour ~5 min, 226 collisions), but it seemed like they showed up because each of the processes was considered on its own, so the previous jobs (and the parts that were cut off) were not taken into account.
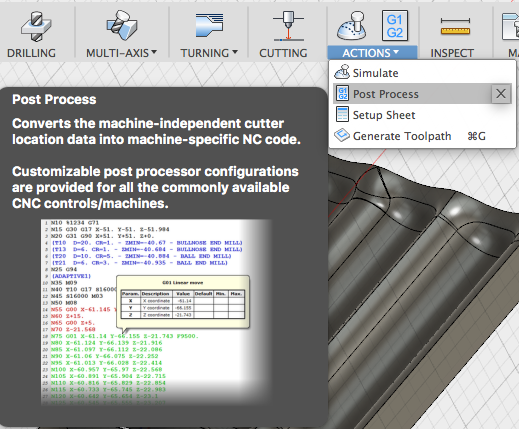
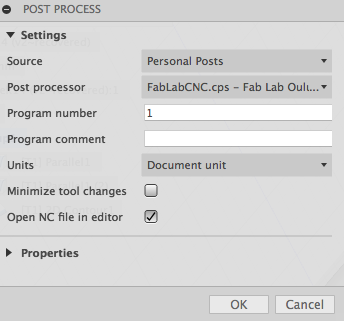
With Actions - Post process, I generated code for the NCstudio software which operates a a CNC router RENSI E2-1325 available in our lab.
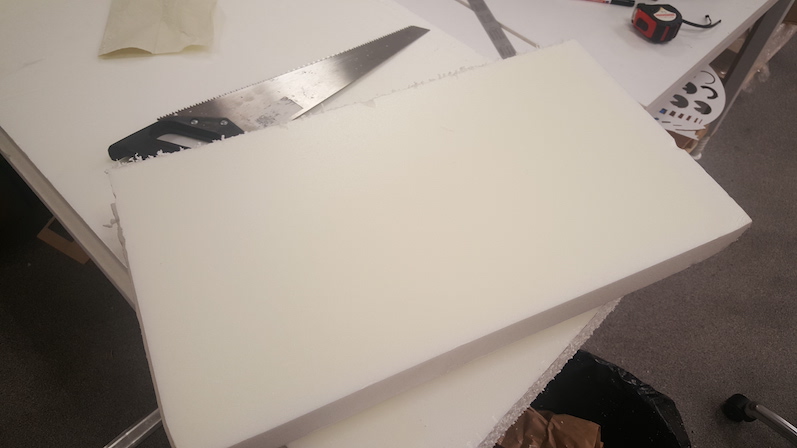
With the saw, I cut off a piece of foam needed for my design
It is important to take care of the safety rules before starting milling. To operate the machine, I followed the same steps for loading the code, setting X, Y, and Z origin, and executing the code as in week 7. I attached the stock with the double-sided tape to the table.


Milling in progress
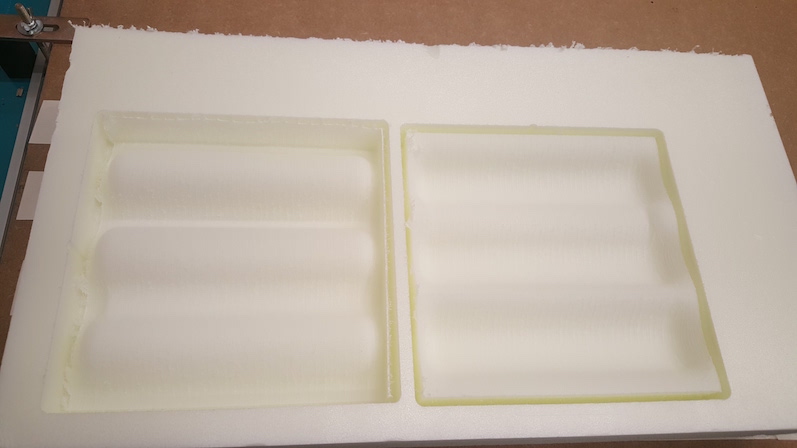
Once the mold was ready, I cut it out with the Makita band saw available in our lab.

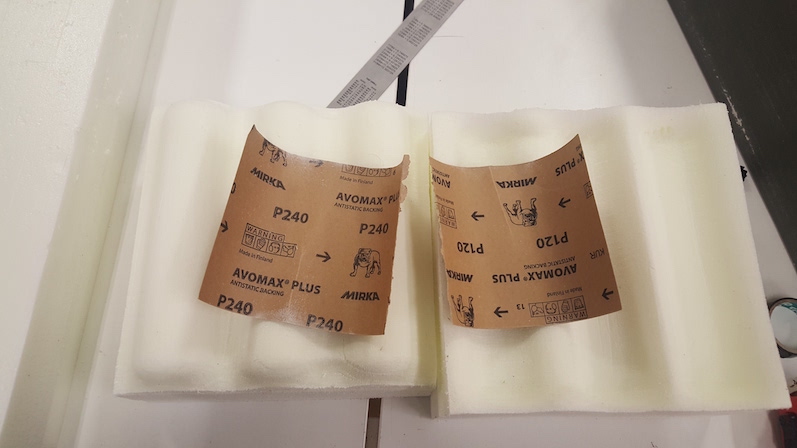
Sanding the mold to refine the surface
Producing a Fiber Composite Part in a 3D Mold
This week we used materials available in our lab: Super Sap One resin and hardner, burlap fabric, polyester cotton, plastic wrap, vacuum bag, We were given instructios on safety precausions to consider during the work. It is required to wear protective gear and to be familiar with the techinical data sheet and safety data sheets for both the epoxy resin and the hardner. Additional information on safety precautions when using epoxy is also provided by the distributor.

The safety data sheets summarize properties of the materials and inform that the materials are toxic to environment and that they cause skin and serious eye irritation and allergic reaction. Therefore, it is required to wear disposable gloves and eye protection when working with epoxy. After use it is necessary to wash hands thoroughly and ensure that the work clothing was not contamined. Any spills of the epoxy can be cleaned using soap and water or vinegar or, better still, an abrasive hand cleaner. If spilled on skin, it is to b washed out with plenty of water and soap. If skin or eye irritation persists, seeking medical attention is required. Also the safety data sheets provides more detailed information on the first aid, fire fighting and accidental release measures, exposure controls and storage, disoisal and transportation considerations. Technical data sheet informs of performance of the Super Sap, reduced environmental impact of the product and of considerations for the environment and the user safety. It is suggestef that the shelf life should be no less than 24 months when stored in closed containers, in a dry place, out of direct sunligh and at stable temperatures between 60 - 95°F. When using measuring pumps with the epoxy (we used 1:1 ratio), they have to be fitted correctly and primed so that they dispense the correct amount of resin and hardner.
Before I started with making my composite, I watched Eino making his (with a one-sided mold) and when making my own, I was following the same steps.

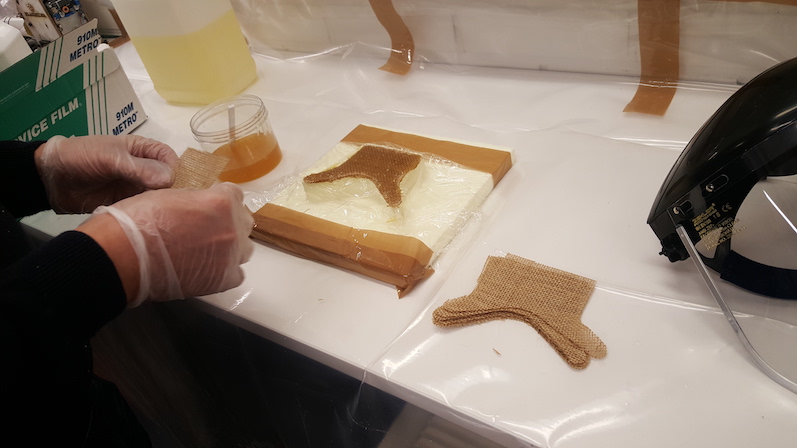
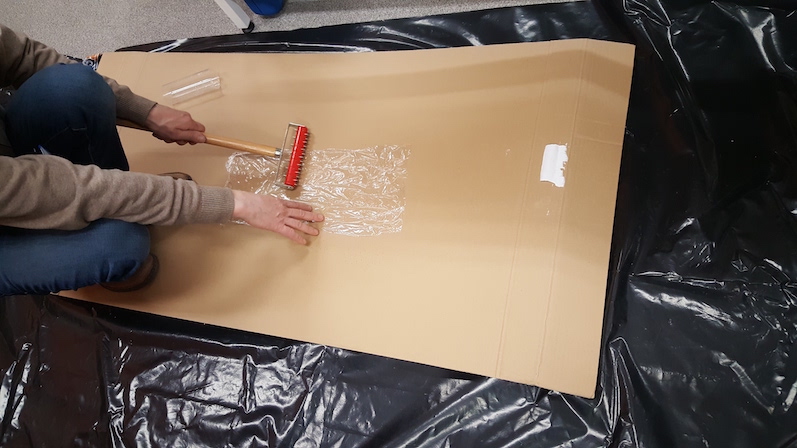
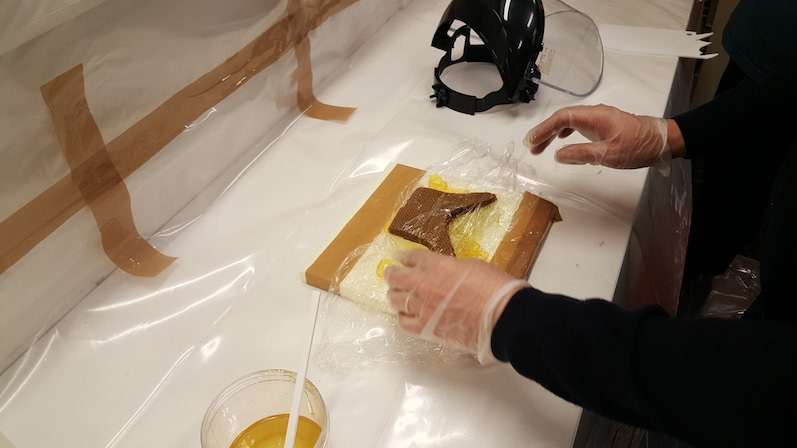
A mold needs to be protected with the plastic wrap. Fabric is placed on top and covered layer by layer with the 1:1 ratio mix of resin and hardner. In my case I covered both parts of the mold with the wrap

After all layers are placed on the mold, they are covered with a punctured layer of plastic wrap.
Then comes a layer of polyester cotton. In my case, I also placed the second half of the mold on top.

And everything is covered again in plastic.
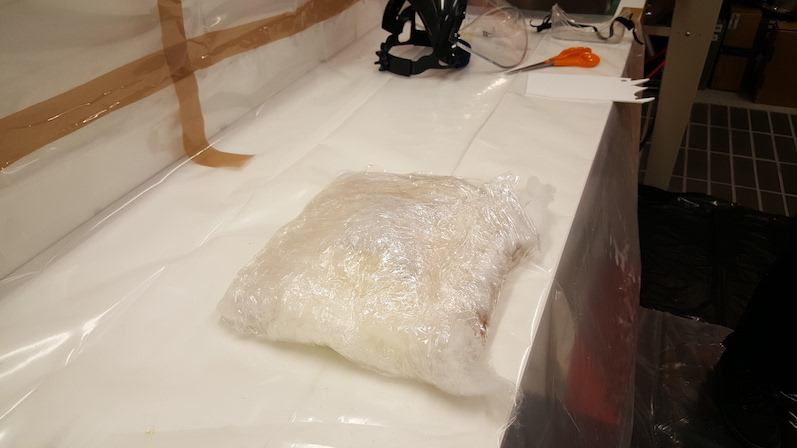
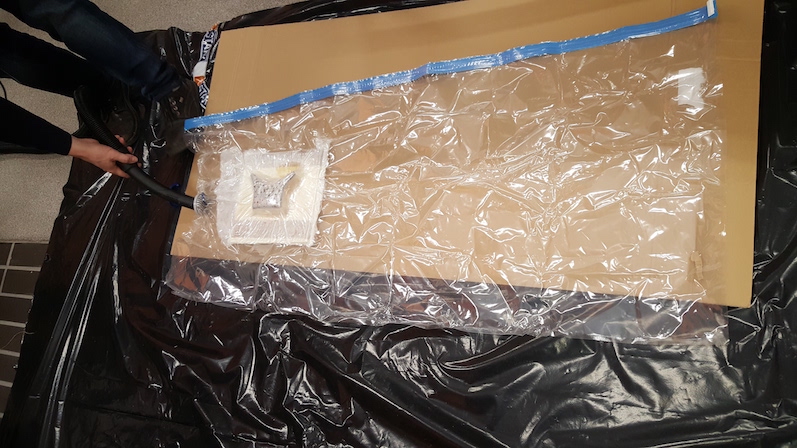
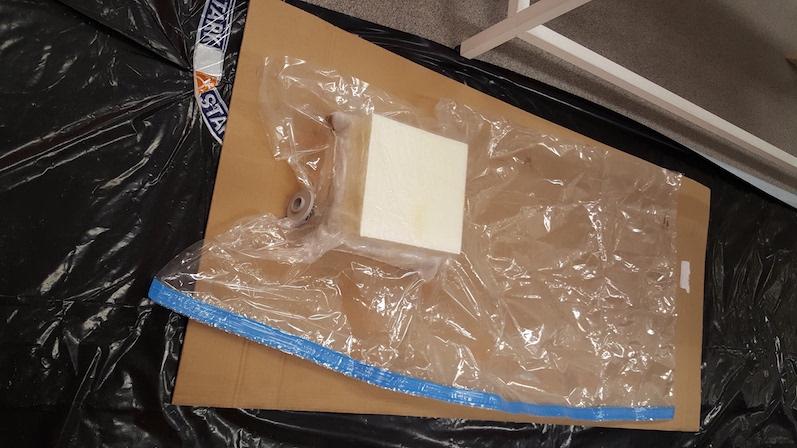
Then the mold is placed in a vacuum bag
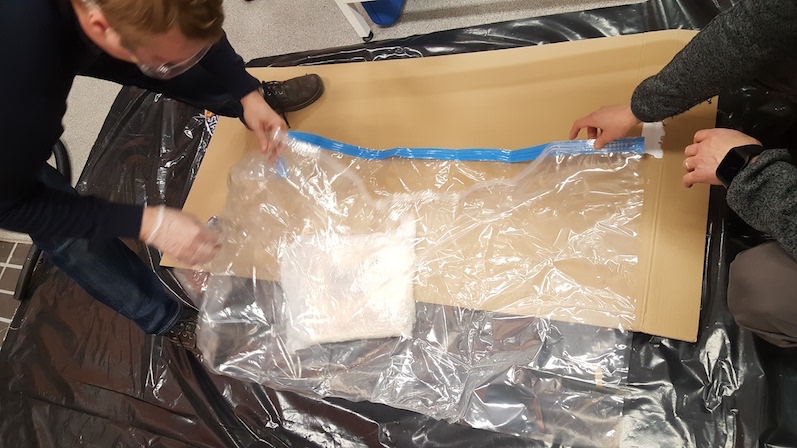
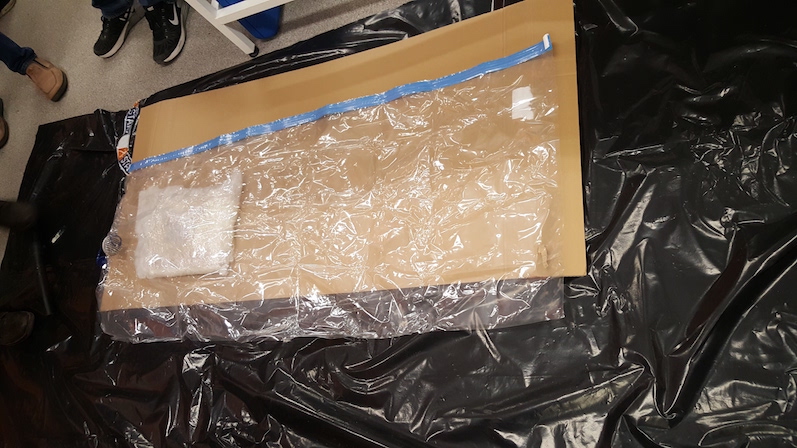
...and vacuumed
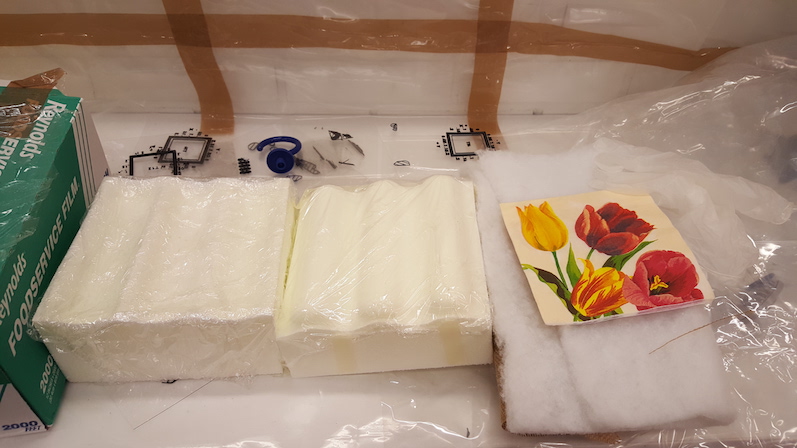
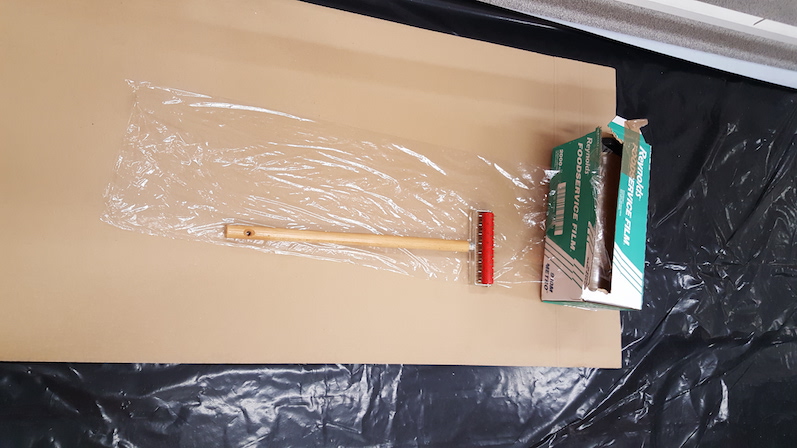
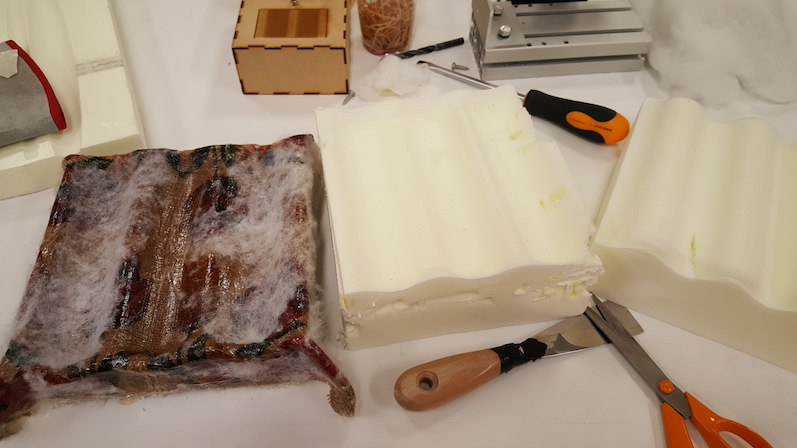
This week is rather difficult to document the process of producing own composite, but here are some snapshots of how the process went. Here are the materials I used. My composite had 4 layers of fabric and 1 napkin for decoration.
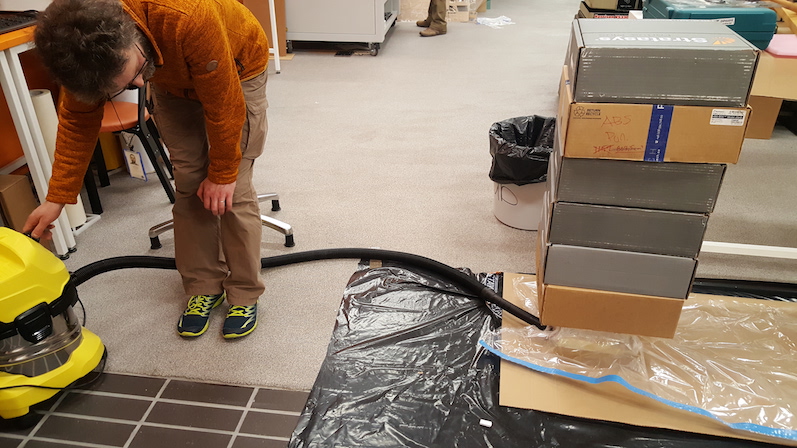
Antti is helping me ensure the two parts of the mold are tight enough
I did my best vacuuming the mold but the bad had been leaking a bit and at that point there was nothing to do to help it
I left the mold (with the weights on) overnight. When I unwrapped it, the mold had some extra "decoration" on it. Aparently, some of the resin mix leaked onto polyester.
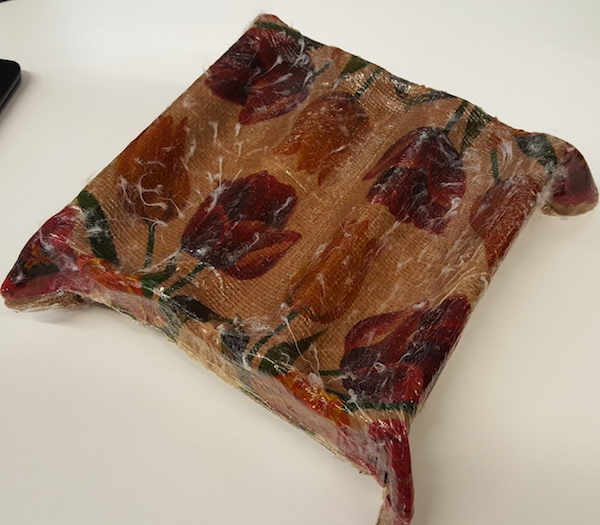
In additon to cleaning, I might cut off the edges of the mold later on
Nevetheless, the mold came out strong, so this could be considered an achievement to some extent.
Files:
Mold original design .f3d file, mold .stl files mold milling .nc file
Remember, remember...
- Refresh memories on how to work with the CNC router.
- Get to know the technical data and safety data sheets of the materials before starting the work.
- Properly prepare the space and tools for working with chemicals.
- Ask someone to be aorund to help when/if needed. They can also document how you are completing the assignment.
- Ensure correct preparation and application of the resin and hardner mixture.
- When makign the composite. try to prevent the cotton polyester layer sticking to the resin layer - it is painful to get it off.