Muhammad Asim Samejo
Embedded Programming
The objectives of this assignment are:
- Read a microcontroller data sheet.
- Program your board to do something, with as many different programming languages and programming environments as possible.
- extra credit: experiment with other architectures.
Reading Data Sheet
For the first task I am spoilt for choice as there is a numerous microcontrollers having similar capabilities and price tag. For this assignment I have opted to study the Texas Instruments Micro Controller MSP-430. This micro-controller has similar capabilities as ATMEGA328P and enjoys wide industrial and academic patronage.

Salient Features
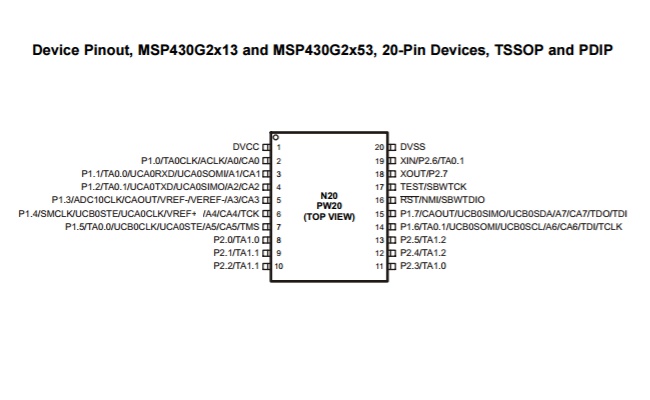
Pin Diagram for 20 pin variant MSP430G2253
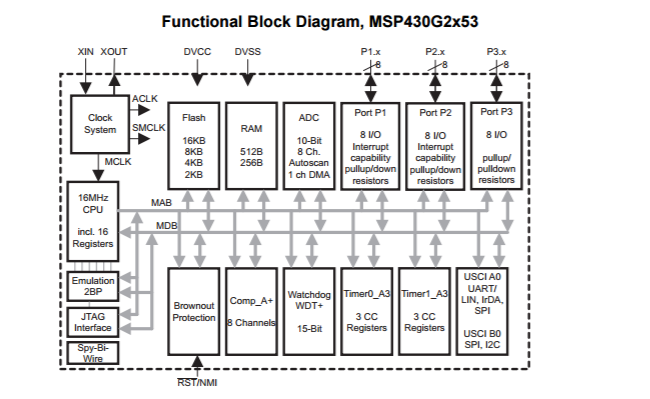
Internal Architecture

Memory Allocation and Internal Registers
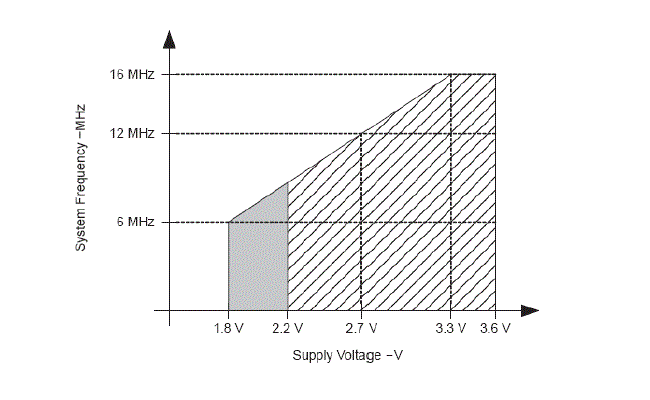
Voltage requirement @ operating frequency

Wide Support and powerful programming tools
MSP-430 can be programmed using Energia (which is based on wiring libraries of Arduino) and thus the codes written for AVR can also be used on MSP-430 chips with a necessary pin assignments. Another advantage of working with MSP-430 is that with a vast variety of other high-end micro-controllers available at TI, it is possible to switch to high performance systems quite easily.
It is not possible to squeeze in the 100 page datasheet into a brief table but knowing where to look for what you need is what matters. The data sheet can be found here here .
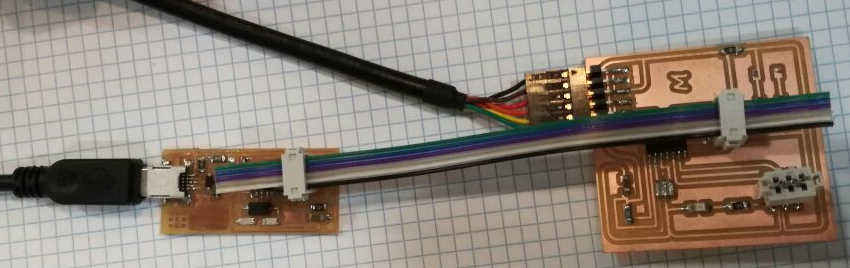
Programming Echo Hello World Board
For this assignment I have performed the tasks:- Programmed my ATTiny44 board using Arduino Platform to toggle the LED using tactile button.
- Programmed my ATTiny44 board using ATMEL Studio 7 Platform to control LED with the switch.
Programming with Arduino
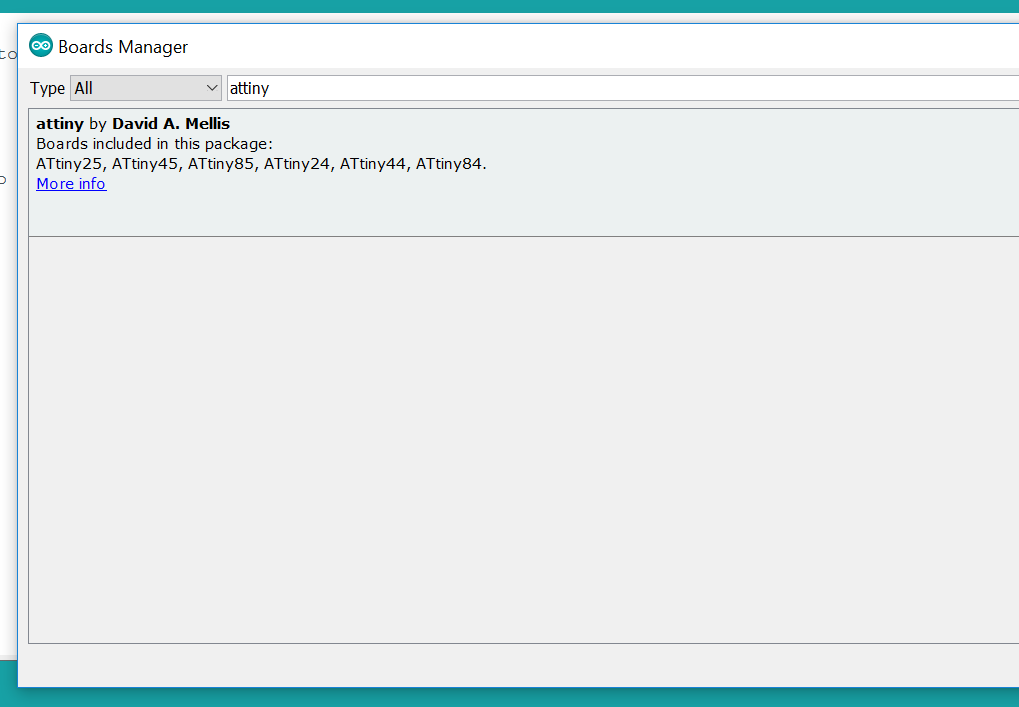
As a part of Assignment 6 I designed the echo hello world PCB. The simplest way to program this board is to use arduino environment. I followed these steps:- For the first time use I had to update the board database available here .
- Updated the board manager to include the ATTiny44 micro-controller.
- Configure information such as board and chip type clock frequency etc.
- Then I burned bootloader onto the chip followed by uploading basic LED blinking example.

Basic and Popular IDE for programming with Arduino.

Board Manager Database updated through External Link.

Update Board Manager First.
Install updates for ATTiny Family.
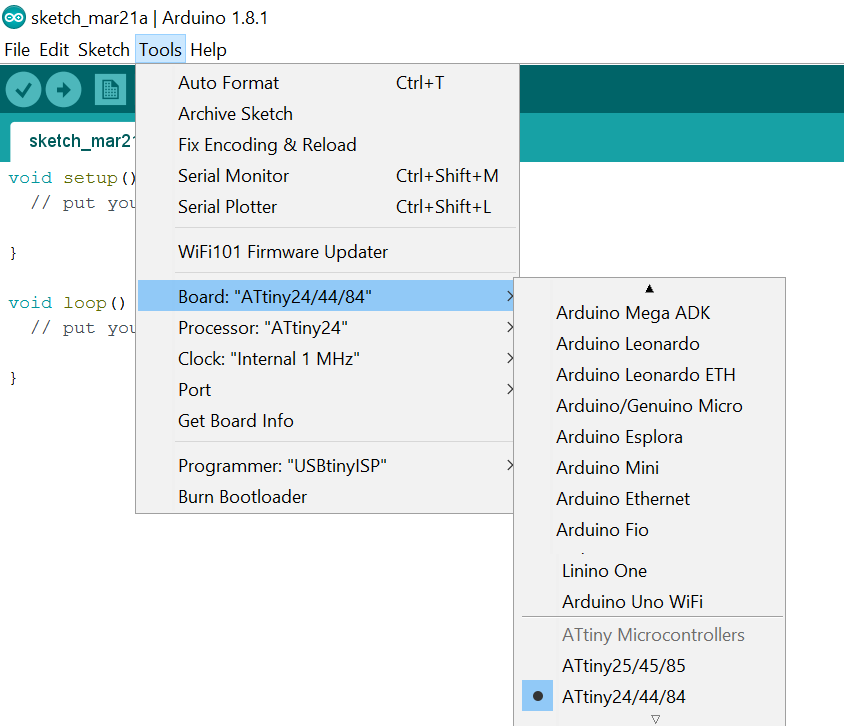
Configure Board Information
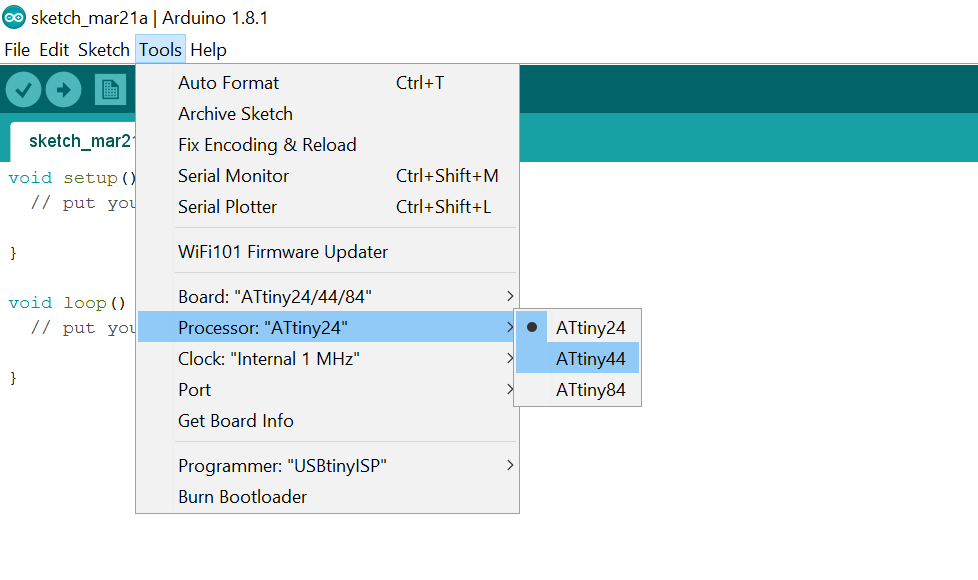
Configure Processor Type
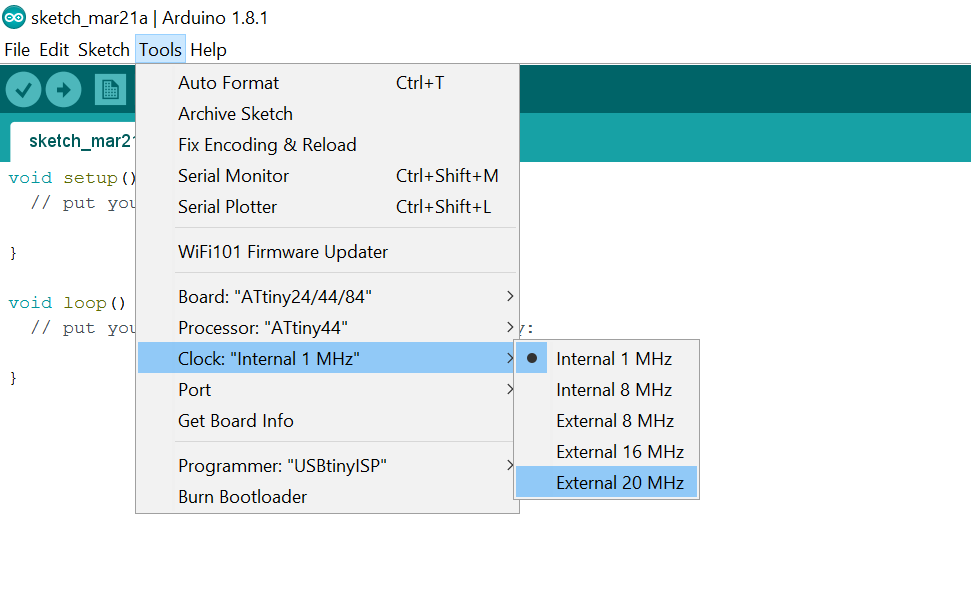
Configure Clock Information
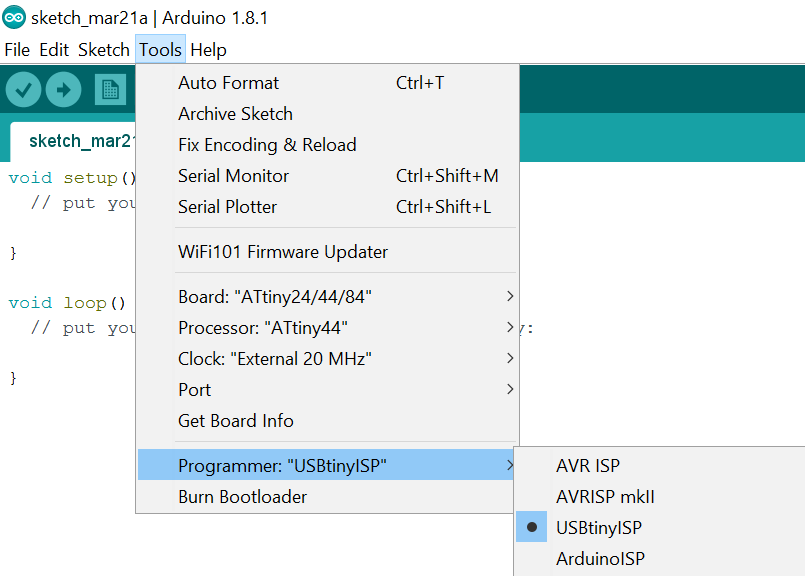
Select the Programmer type.
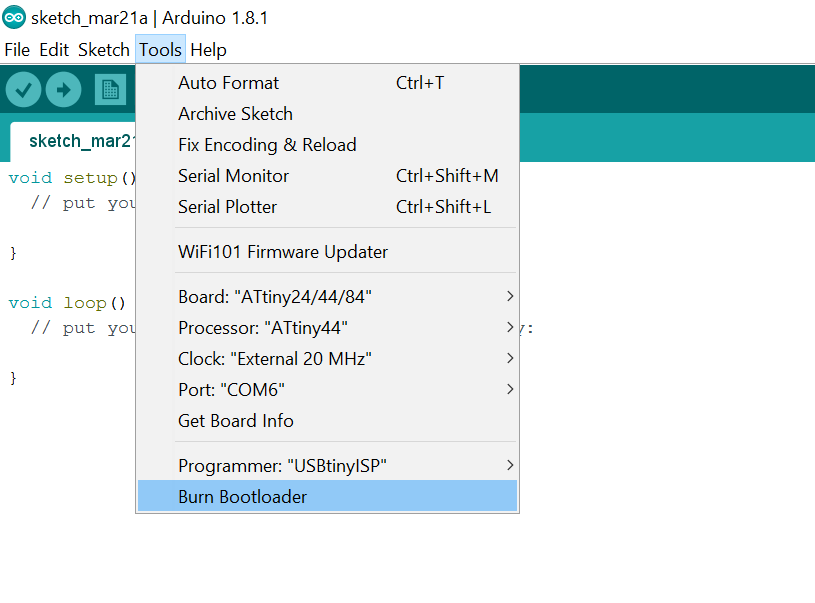
Burn the Bootloader to begin with
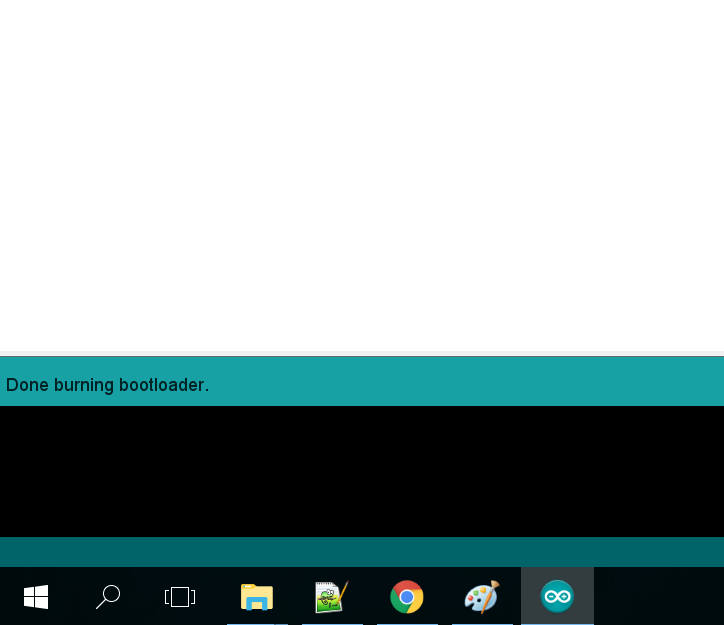
Bootloader burnt successfully!
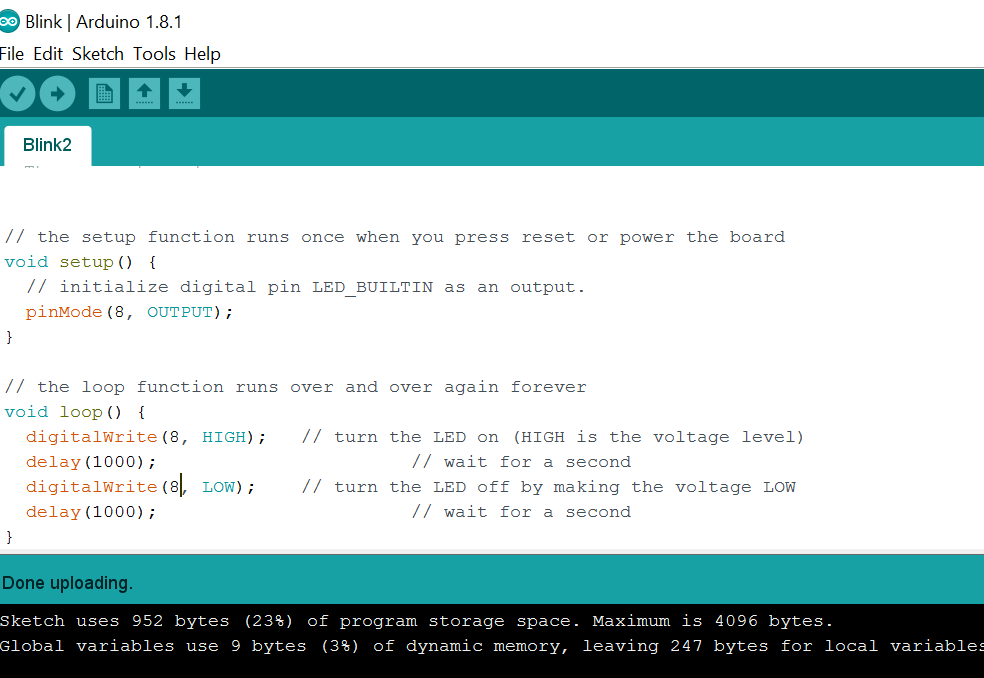
Load the Blink Program with modifications
Finally, there it is!
I also came to find that the successfully compiled code (.hex files) can be directed burnt to arduino board using avrdude . I found some interesting references here and here . This is very useful tool since it allows burning the code directly to a micro-controller and the code is written in any platform and compiled through gcc compiler.
The steps I followed to setup WINAVR and used it to program my Echo Hello World Board (using FabISP) are as follows:

On Cammand line type system variable to get here
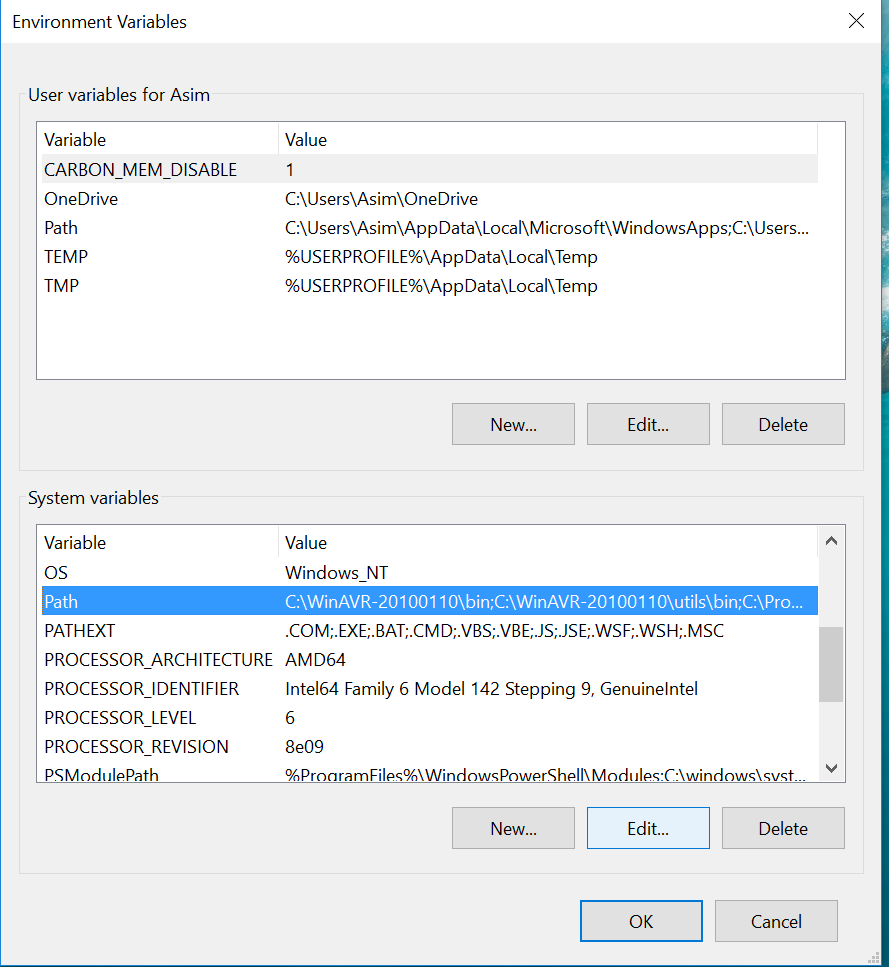
Choose to edit paths variable
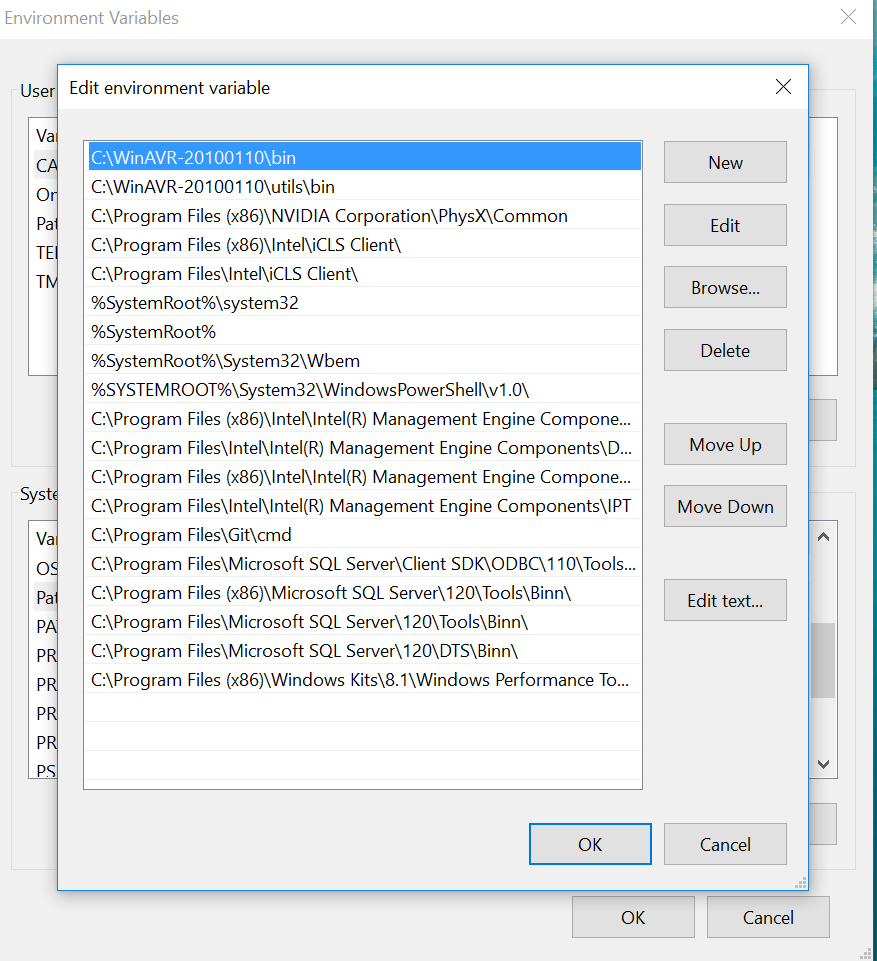
Insert the path of WINAVR location
WinAVR is available throughout the system now
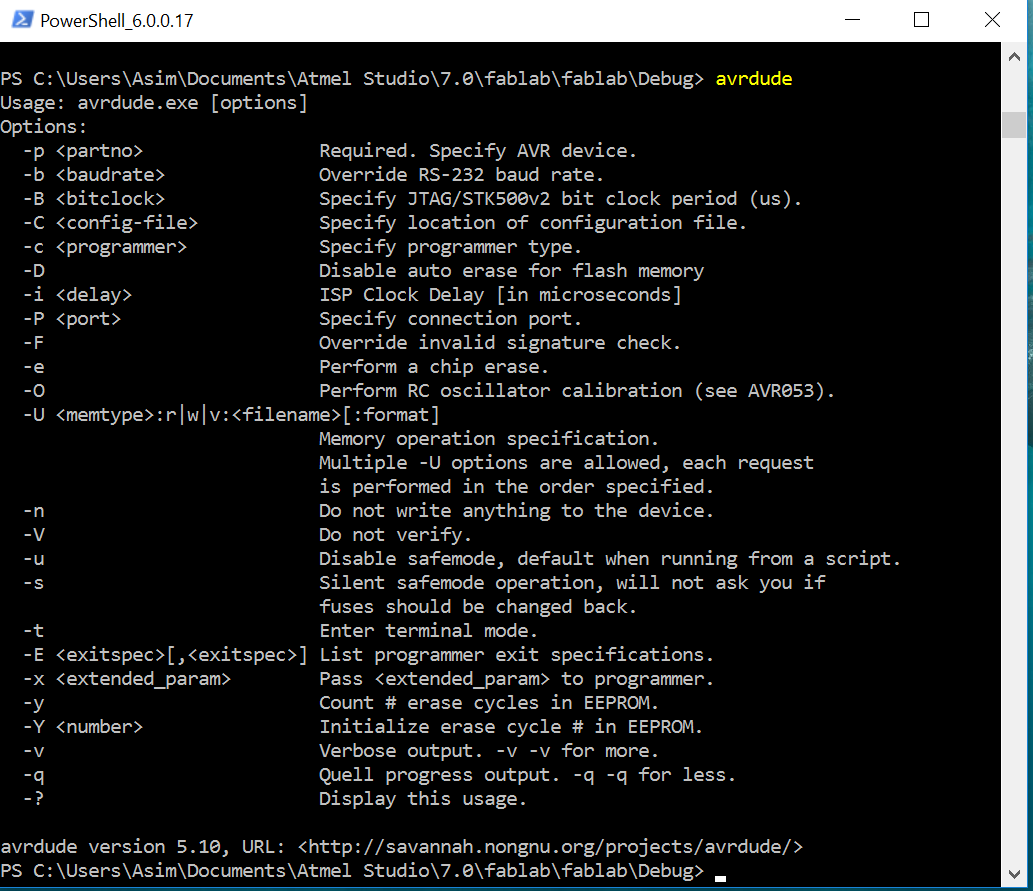
Typical syntax loading hex file to micro-controller
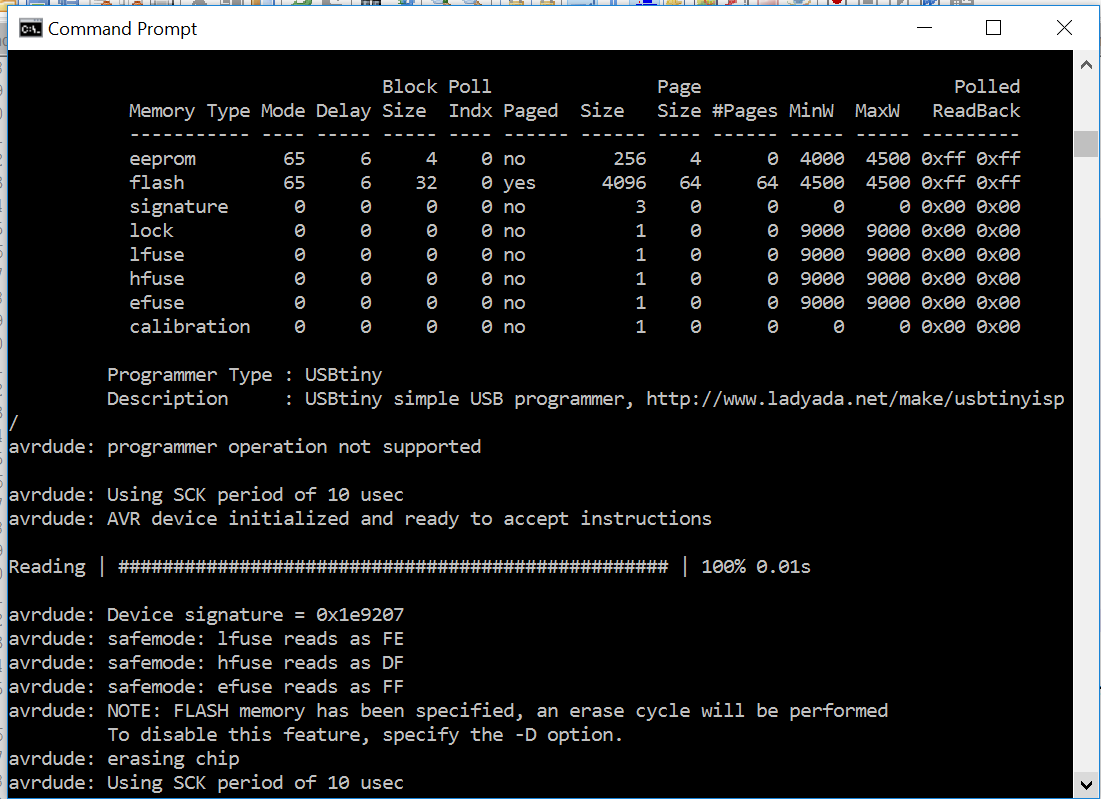
AVRDUDE dumps alot of information on the way

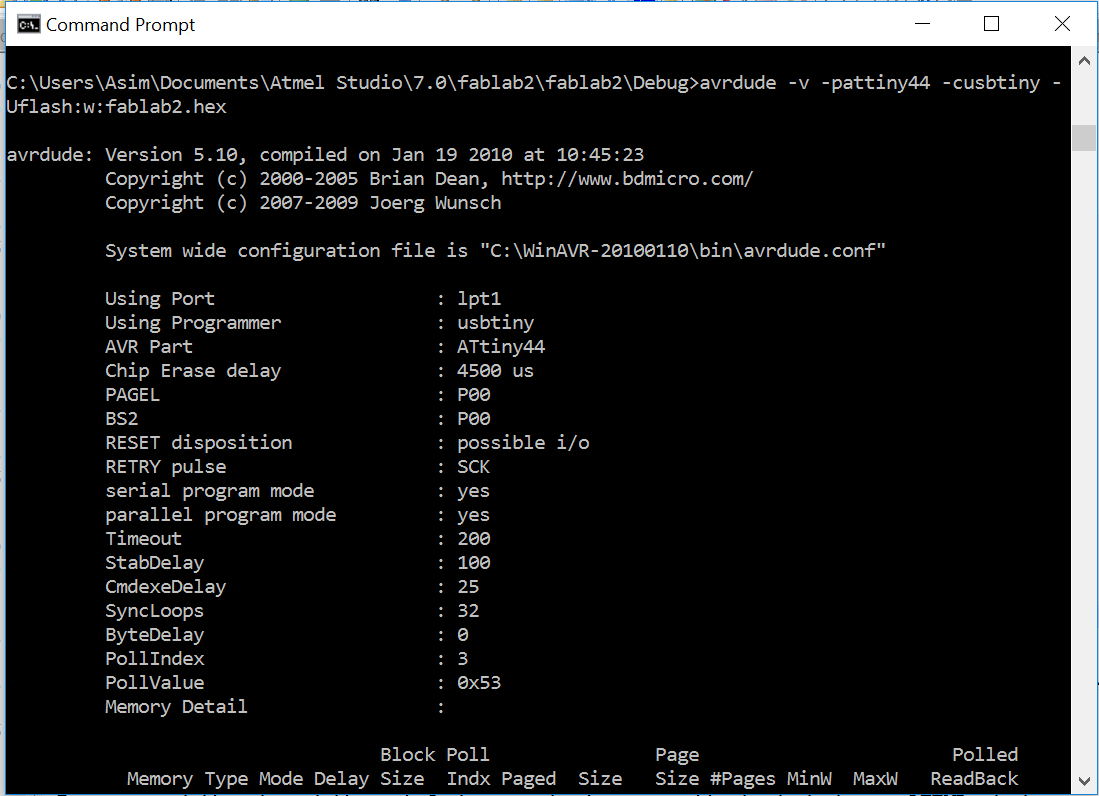
Program successfully loaded to micro-controller
I looked up on internet to find the exact avrdude command used to program the microcontroller avrdude -v -pattiny44 -cusbtiny -Uflash:w:fablab2.hex. This style of passing arguement to avrdude is unconventional and I found out the hard way.
Programming with ATMEL Studio 7 with C
I prorammed this board through Arduino interface as illustrated above. ATEML studio is a fully functional developement platform. Unlike Arduino enviroment this platform provides many functionalities such as debugging, simulation, code organization and most importantly better explanation of coding errors. The learning curve is slightly steep as elementary users would hardly use the wide range of features offered by ATMEL Studio.
A very effective video lecture explaining the how to program a micro-controller using of C .
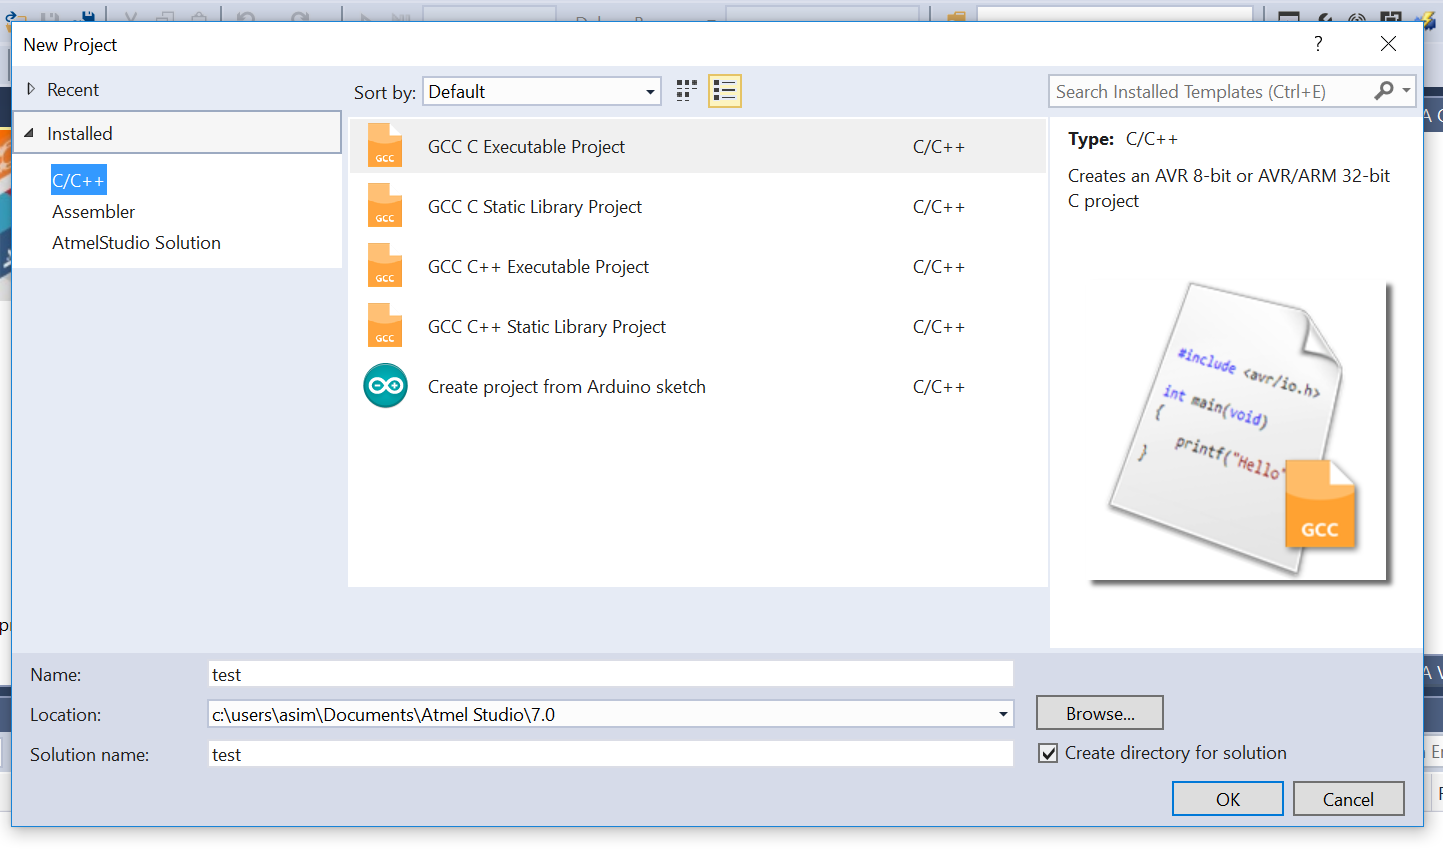
The procedure which I followed to create my project are illustrated below:

The ATMEL Studio 7 Enviroment.

Provides much more control and analysis tools suitable for advanced users.
Select coding platform (Arduino sketches also useable).

Select appropriate micro controller model.

Atmel studio provides better overview of code and management.
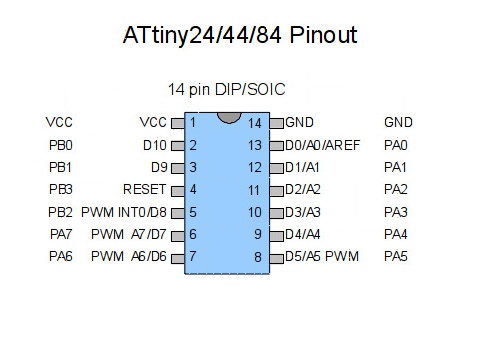
ATTiny44 Pin Diagram used for writing the code.

Simple C code uses LED and Button on the board.

Compiled Successfully, hex file generated.
The code was programmed to ATTiny44 IC using avrdude and the board works as intended.
Learning Outcomes
From this exercise I have come to conclude the following points.- Arduino Platform is a very user friendly interface, but may not be useful when it comes to programming large codes.
- ATMEL Studio is one of the handy programs which provide indepth debugging and simulation capabilities.
- Wiring libraries available in arduino greatly simplify the code however this comes at the cost of significantly reducing execution rate. For better control over clock cycles it makes sence to use C enviroment.
- Programming a micro-controller in C to use peripheries such as timers, interrupts, SFRs may be a steep learning curve but worthit for writing efficient/optimal code.
Downloads
find all source files here.

This work is licensed under a Creative Commons Attribution-ShareAlike 4.0 International License
Copyright © 2017 Muhammad Asim Ali
This work is licensed under a Creative Commons Attribution-ShareAlike 4.0 International License
Copyright © 2017 Muhammad Asim Ali