Muhammad Asim Samejo
Mechine Design
This weeks we continue working on our group assignment. The objecive of this assignment is:
- Design a machine (mechanism+automation), including the end effector.
- Duild the passive parts and operate it manually.
- Document the group project and your individual contribution.
For this assignment our group consists of
| Tomas Martin Agudo | Sohail Ahmed Soomro | Nisar Ahmed Siddiqui | Fida Hussain Memon | Muhammad Asim Ali |
|---|
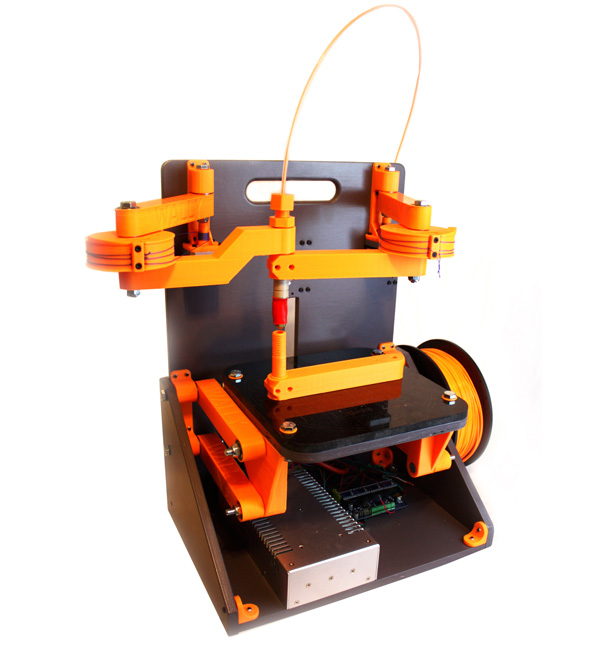
Our objective for Mechanical and Machine Design assignment is to design a Wally style 3D printer illustrated below.
For this group assignment I was responisble for interfacing Wally to Raspberry Pi Computer thus interfacing Wally to the computer network enabling real-time monitoring and control.
Interface to Network:
To improve the usefulness of our system we decided to connect wally with a remote computer using octaprint platform. This platform is webserver application running on Raspberry Pi which is connected to a RepRap printer through USB interface. Through this application we can load jobs to a printer remotely and manage/monitor it's performace from a remote location.
We found very good youtube tutorial here
Network Tutorial
Octoprint:
- The list of stuff required for octoprinter.
- Raspberry Pi
- 8G SD Card
- 1A 5V DC power supply
- USB Cable
- Ethernet cable (Easily Wifi-able)
- Webcam (optional)
- PuTTY
- Octopi 0.13
- Connections
Electrical Connections to Raspberry Pi.
- The step by step procedure to setup octaprint server are as follows
- Download the image file for Octopi 0.13 from here , unzip it and install.
- Insert your SD Card into the computer and format it.
- Download the Win32DiskImager-0.9.5-install.exe , and run the program for install the program.
- Run Win32DiskImager.exe
- Select your SD Card drive letter in Device droplist.
- Select the image file that you download from Octoprint. e.g. 2014-06-20-wheezy-octopi-0.9.0.img
- Click "Write”.
- When the image is successfully written, Do not remove It from the PC.
- Open the SD card drive and find the file “ octopi-network.txt” and open it.
- In "octopi-network.txt" you will find comments, following them and configure it with your internet connection.
- Now remove the SD card from computer and plug it into the Raspberry pi.
- Now make the connections and connect power supply, Ethernet cable or Wi-Fi and Arduino mega with raspberry pi as shown in figure given above.
- Power On the raspberry pi now. And access it from your browser by writing http://octopi.local
Login screen
You can also access the octopi server from "Networks" Option in My PC of your operating system. - After opening the webpage of octoprint, the first thing to do is to set the username and Passward.
Access to Raspberry pi from windows network.
- The last step is to log in to the octoprint webpage and click on the connect button to make connection with the printer. You can set any baud rate from the group of given baud rate. We are using 115200. Octo printer is ready now, just drag and drop your gcode file and hit print to start.
Access to Raspberry pi from windows network.

This work is licensed under a Creative Commons Attribution-ShareAlike 4.0 International License
Copyright © 2017 Muhammad Asim Ali
This work is licensed under a Creative Commons Attribution-ShareAlike 4.0 International License
Copyright © 2017 Muhammad Asim Ali