Bonus 1
Upgrading my page
In this section I'll be explaining a few features that I added to my website to make it more efficient, easier to consult and better adapted to the presentation of my work. First thing you have to know is that Bootstrap is a framework that includes really interesting features, some of which were not at all used in the initial Agency template that we chose as a base for our Fab Academy pages.
1. Subpages vs. modal screns
The main thing I found pretty anoying was the use of modal screens for subpages. It has a nice effect, but the thing is it does not allow you to access a particular page indendently, meaning that the page has no specific URL. The other thing is that, from a given page, you cannot access another one through the navigation menu.
At the beginning of the class, this would not be so big a constraint, but when will reach the 10th week, this could be really time consuming to browse through the pages if we have to go back to the homepage each time...
So I decided to get rid of the modal screen setup, and instead, to work with subpages.
First of all, you need to create a new html file by duplicating the index.html. This way you will keep all the intial settings of your index page. Call the new page "assignment1.html" for example. It is important to keep the new file in the same folder as the index.html.
Don't change anything in the <head> section. Then in the <nav>, make sure to change the links so that they point back to the homepage.
In order to do so, for exemple, change :
                              <li>
                                <a class="page-scroll" href="#portfolio">Assignments</a>
                              </li>
to :
                              <li>
                                <a class="page-scroll" href="index.html#portfolio">Assignments</a>
                              </li>
This way you will go back to the homepage, AND directly in the right section of the page.
Then in the <!--Page content> part, you simply put the content of your page. I chose to keep the exact same classes as for the modal screen, because the style looked OK and because it would save myself some time, but feel free to change it as you like.
Be careful : Make sure you keep all the scripts after the footer in your new page otherwise, some of the effects used by Bootstrap won't work :
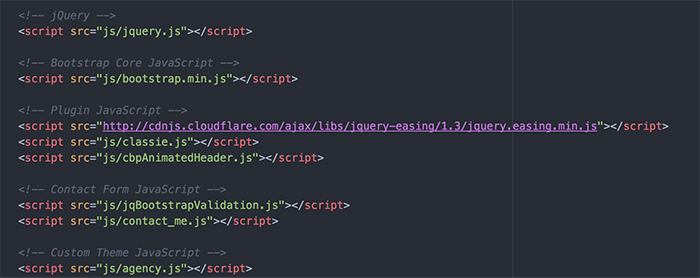 Then simply repeat the same operation each time you want to create a new page. Don't forget as well to change the links in the portfolio grid on the homepage, to open the new pages rather than modal screens. For this, simply change the link in the
 <a href> tag, and remove the data-toggle="modal" part.
2. Dropdown menus
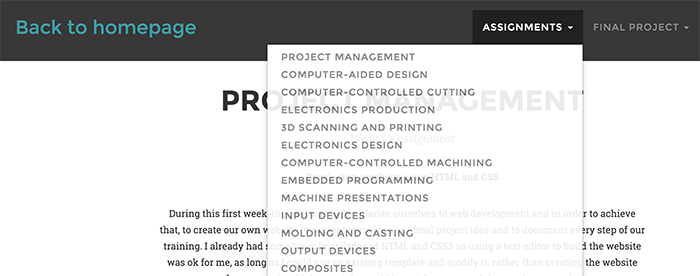
Once I had created subpages for each assignment and for the final project steps, I wanted to add dropdown menus in the navbar to be able to access directly to any assignement's or final project's page.
To do so, I used to dropdown class in Bootstrap. It is quite simple to use. To do add a dropdown menu to a specific link, just add the dropdown class to your list item (<li>), then add the dropdown-toggle class to the link and set the data-toggle as dropdown. Finaly, add a span with the caret class, to display the down arrow icon next to the link. Then you must create a new list inside of your list item, in order to display the links in your dropdown menu :
  <li class="dropdown"><a class="dropdown-toggle" data-toggle="dropdown" href="...">Menu name <span class="caret"></span></a>
    <ul class="dropdown-menu">
      <li><a href="...">Submenu 1</a></li>
      <li><a href="...">Submenu 2</a></li>
      <li><a href="...">Submenu 3</a></li>
    </ul>
  </li>
Of course, this has to be done on every subpage of the website. That is why, to gain some time, I directly created the submenus for all the assignments at the same time :
<li class="dropdown"><a class="dropdown-toggle" data-toggle="dropdown" href="#portfolio">Assignments <span class="caret"></span></a>
  <ul class="dropdown-menu">
    <li><a href="week1.html">Project Management</a></li>
    <li><a href="week2.html">Computer-aided design</a></li>
    <li><a href="week3.html">Computer-controlled cutting</a></li>
    <li><a href="week4.html">Electronics Production</a></li>
    <li><a href="week5.html">3D Scanning and Printing</a></li>
    <li><a href="week6.html">Electronics Design</a></li>
    <li><a href="week7.html">Computer-controlled machining</a></li>
    <li><a href="week8.html">Embedded Programming</a></li>
    <li><a href="week9.html">Mechanical Design</a></li>
    <li><a href="week10.html">Input Devices</a></li>
    <li><a href="week11.html">Molding and Casting</a></li>
    <li><a href="week12.html">Output Devices</a></li>
    <li><a href="week13.html">Composites</a></li>
    <li><a href="week14.html">Networking and Communications</a></li>
    <li><a href="week15.html">Interface and Application Programming</a></li>
    <li><a href="week16.html">Applications and Implications</a></li>
    <li><a href="week17.html">Invention, Intellectual Property and Income</a></li>
    <li><a href="week18.html">Project Development</a></li>
  </ul>
</li>
And here is the final result :
3. Progress bars
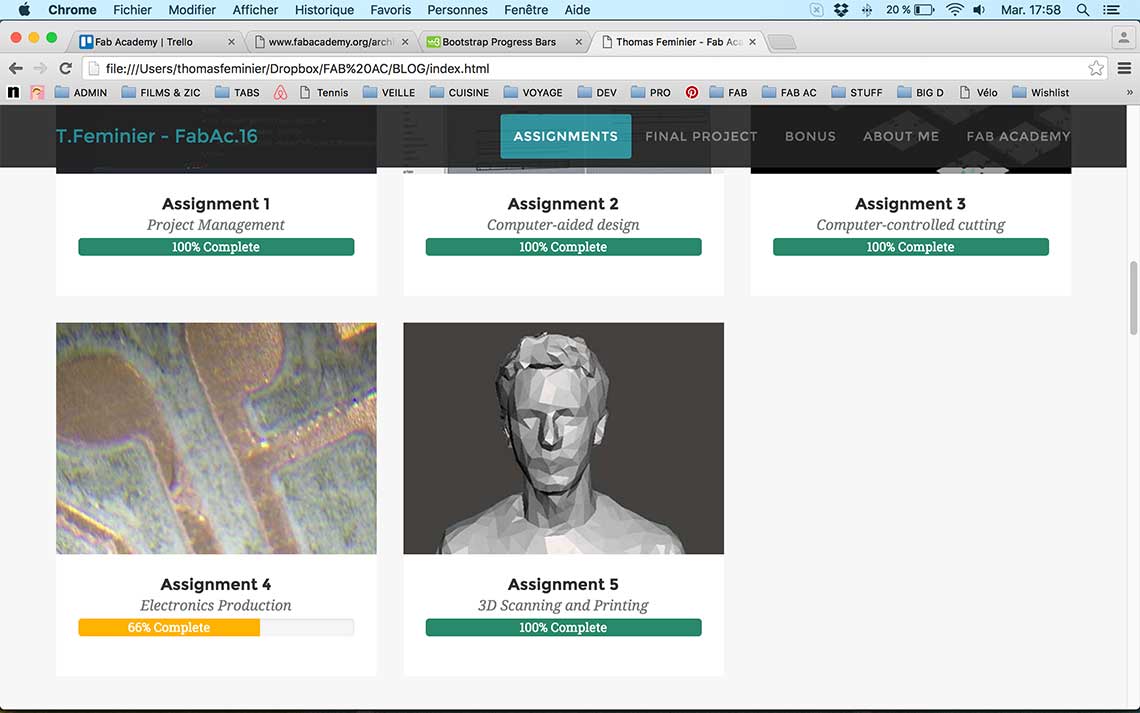
Browsing through Bootstrap's references, I found the Progress Bar item, which I thought could be useful for us, for example to keep track of our progress in each assignment of the Facademy. It is really easy and fast to implement.
To add a progress bar to each portfolio link on the homepage, I simply inserted inside each
"portfolio-caption" div, the following 4 lines :
  <div class="progress">
    <div class="progress-bar-success" role="progressbar" aria-valuenow="100" aria-valuemin="0" aria-valuemax="100" style="width:100%">100% Complete
    </div>
  </div>
The first div,
"progress-bar-success" defines the color of your progress bar. If you don't specify any color and just put "progress-bar", it will appear blue.
The 4 contextual classes for the progress bar are success (green), info (light blue), warning (orange) and danger (red).You can also add
"progress-bar-striped" if you want the bar to be striped, and even add "active" if you want the bar to be striped AND animated. The full code would then be <div class="progress-bar-success progress-bar-striped active">.
Then, simply chose the minimum and maximum values of you bar, the current value, as well as the width of the progress and the associated text.Of course, the style of each contextual class can be changed in the CSS to modify it from the default Bootstrap styles.