For the composites week project I worked on two ideas. Both came up as complementary steps to the Week 7 milling assignment.
Design 1. A Table-Cover.
Starting from the 3d file of the table I had milled, I designed my object. I was really into experimenting with 3d milling processes, so I was willing to design an object with an interesting 3d pattern.
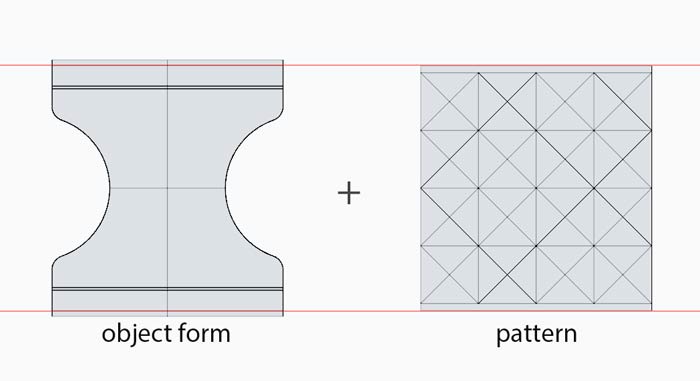
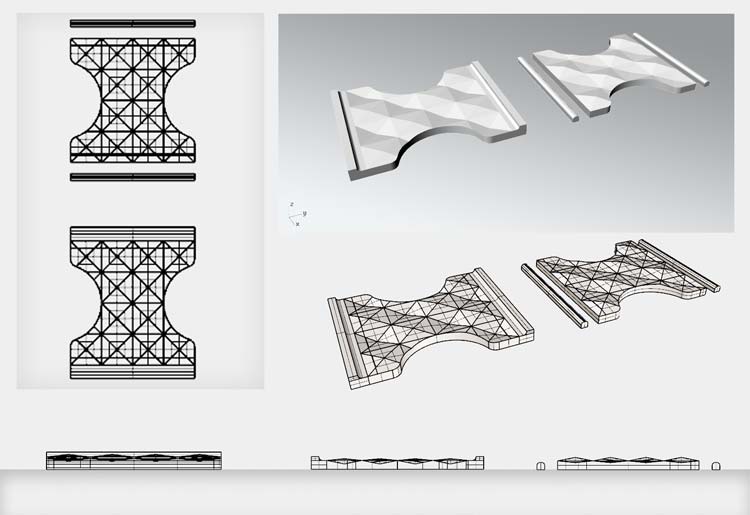
In the three images below you can see the pattern I created as well as the final object. Further down, the design process is explained in more detail, as well as the creation of the molds.
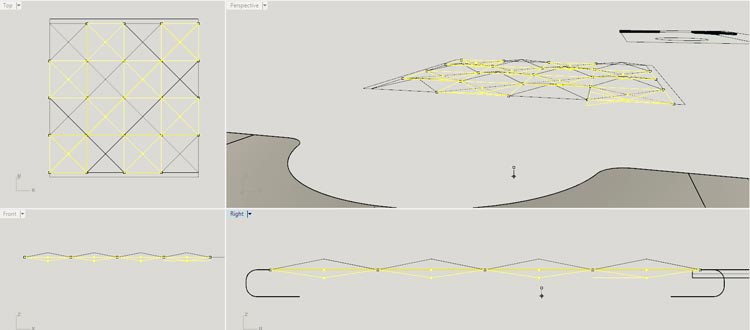
The piece on the left is the based on the table's size. I designed the 2d pattern in order to apply it on its surface:
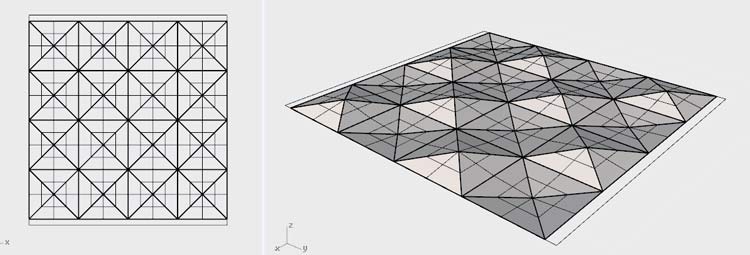
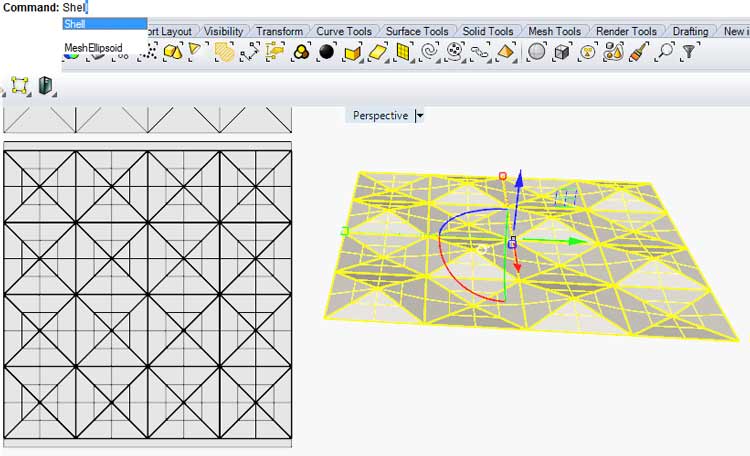
The pattern in 3d:
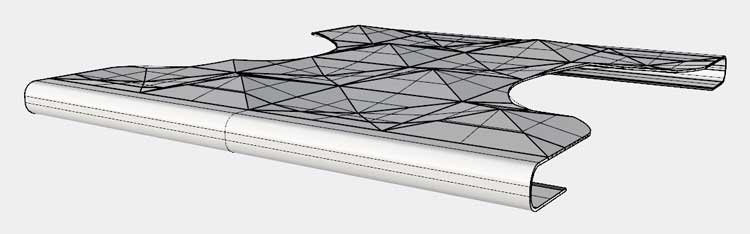
The final object:
-------------------------------------------------------------------------------------------------------------------
[Creating the Pattern. From 2d to 3d:]
-------------------------------------------------------------------------------------------------------------------
Creating the mold.
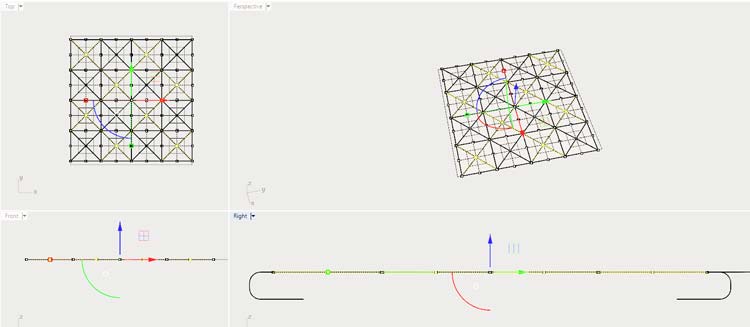
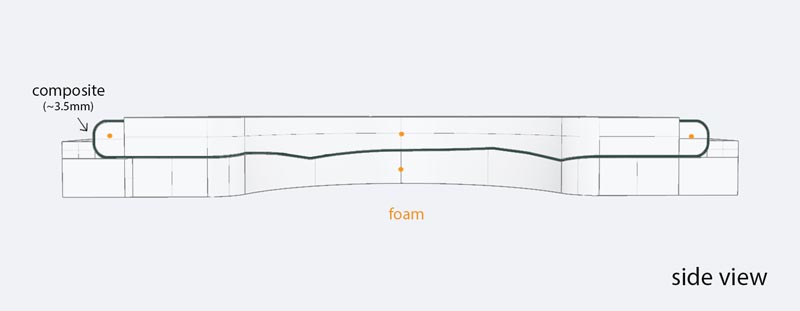
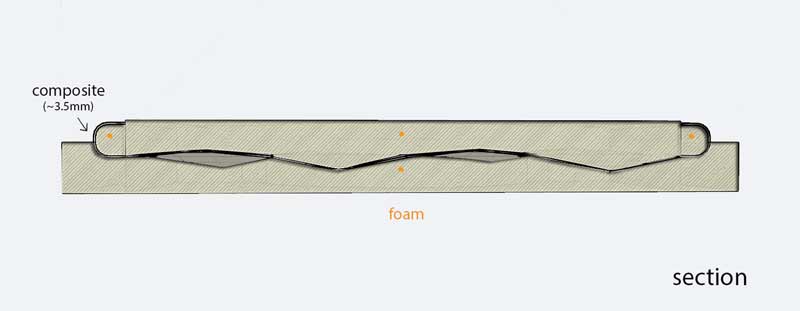
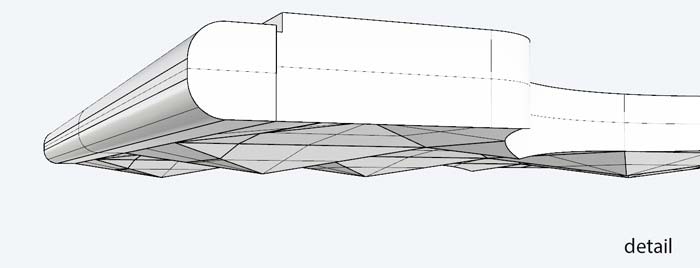
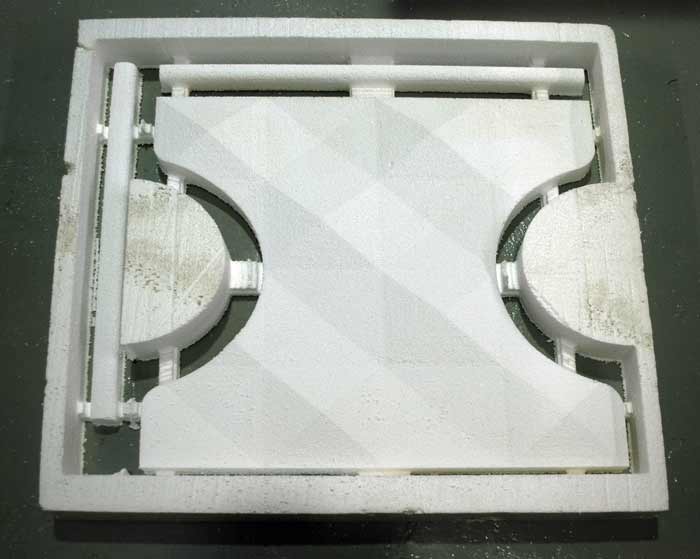
In the following pictures is explained the idea for the 3d mold. I would use 4 pieces, two big ones to allow me to achive a detaied pattern in the vaccuum machine and two small ones, the "ears," which would assure the curvy sides fit over the edges of the table.
Detail from the top parts:
-------------------------------------------------------------------------------------------------------------------
[Creating the volume of the molds, subtracting with the object form.]
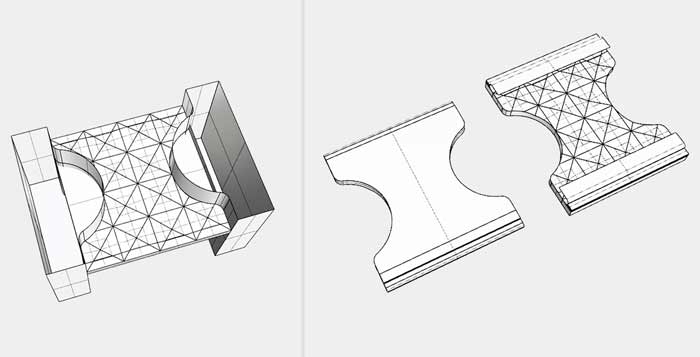
-------------------------------------------------------------------------------------------------------------------
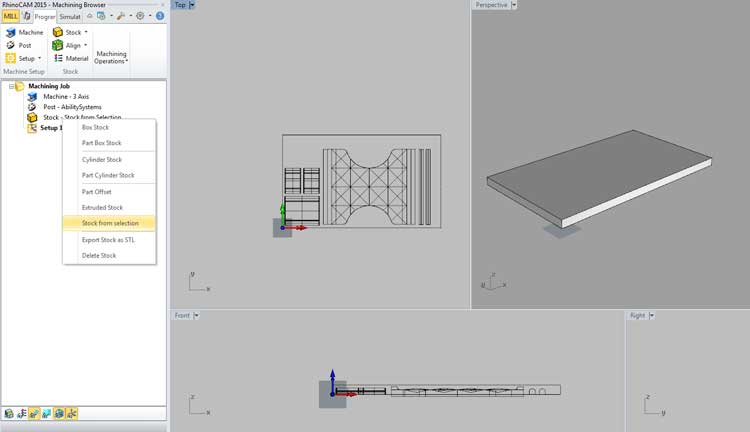
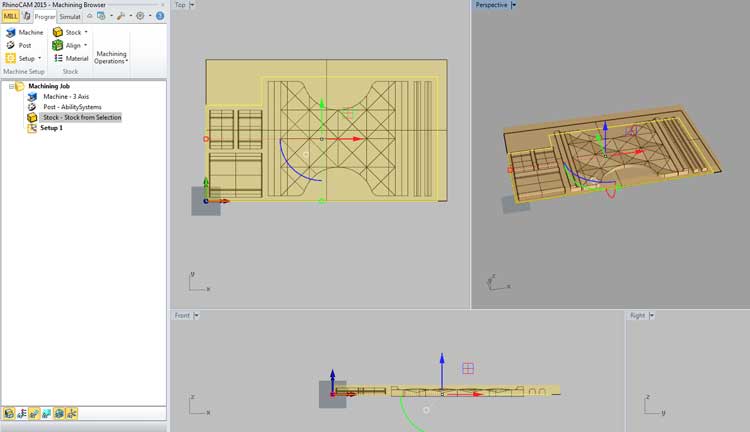
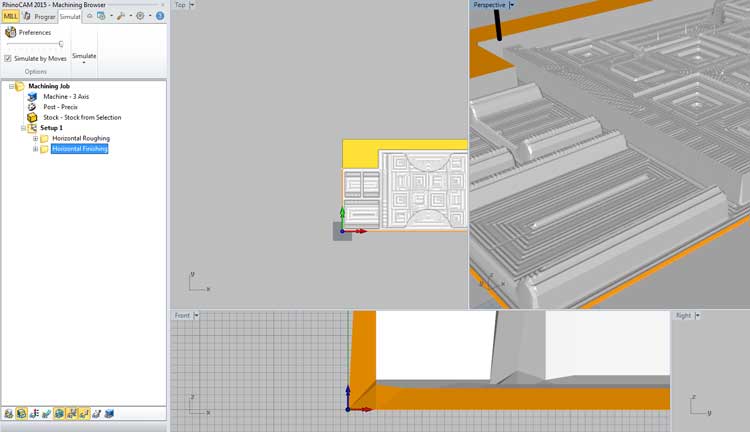
RhinoCam.
Using the RhinoCam plug-in for Rhino allowed me to get the G-code processes in order to 3d-mill on the Precix.
In Precix the "x" is the long direction and the "y" is the short direction.
I had to put booth (.stl file and stock) on the same level.
I right clicke click on create stock --> Extrude
Extrude upwards 70 mm. Make sure everything is on the same level.
Set stock: Right click on stock --> stock from selection.
After this I deleted the stock.
The next step is to make a PlanarSurface from stock because the machine cuts until the Planar Surface.
Stock visibility button.
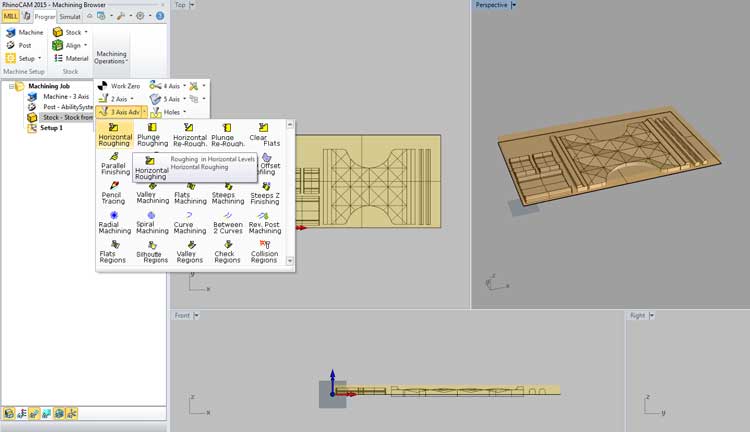
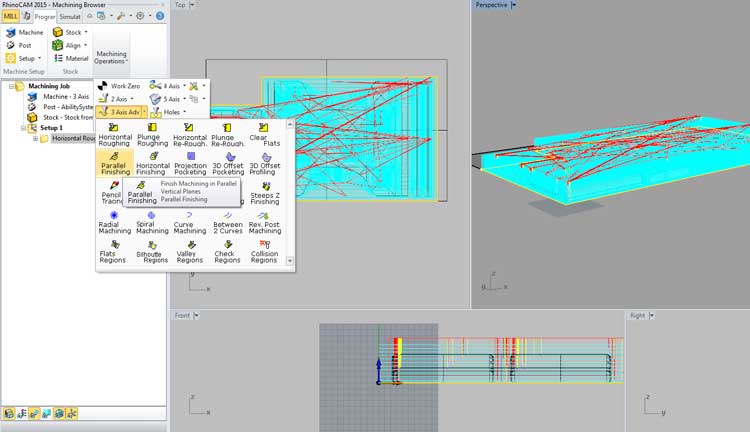
The next step is navigate through th Machine operations menu --> Axis button --> Horizontal Roughing.
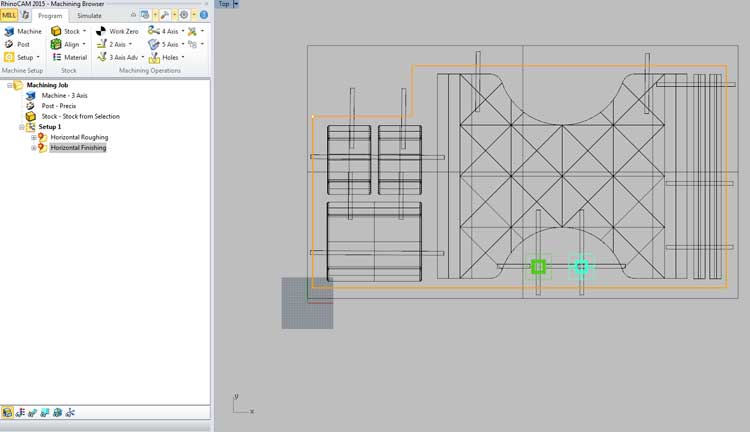
Apply in the area (design), this will not be milled (is for saving time porpouses.
From the Control Geometry Tab I selected containment region.
In the Tools tab --> Click on tools and select the 12 mm ball milling bit.

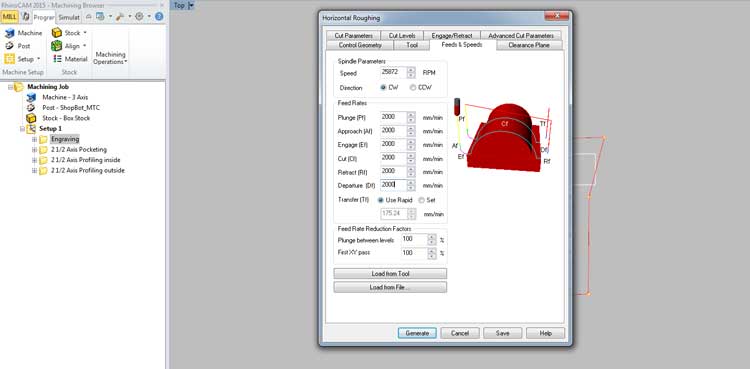
In the tab feeds and speeds I set the RPM (spindle speed)
The feed rates usually are set at 1200 RPM, but for this case we do it at 2000 RPM.
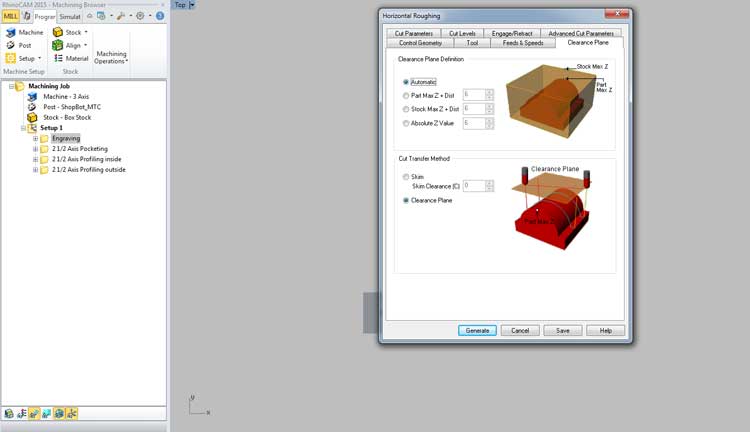
In the clearence tab I used the default default settings.
Set the definition plane and stock to 6 mm (higher). And movement to another position. And movement to another position.
In the tab Cut parameters the stepover control the % tool diameter 25 to 70 so we go fast with the foam.
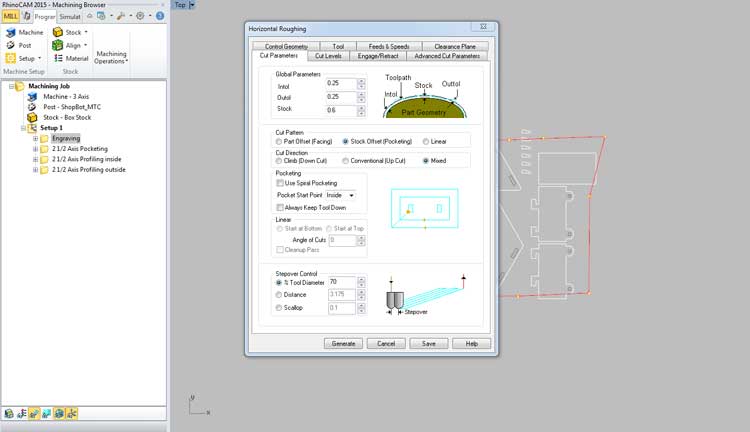
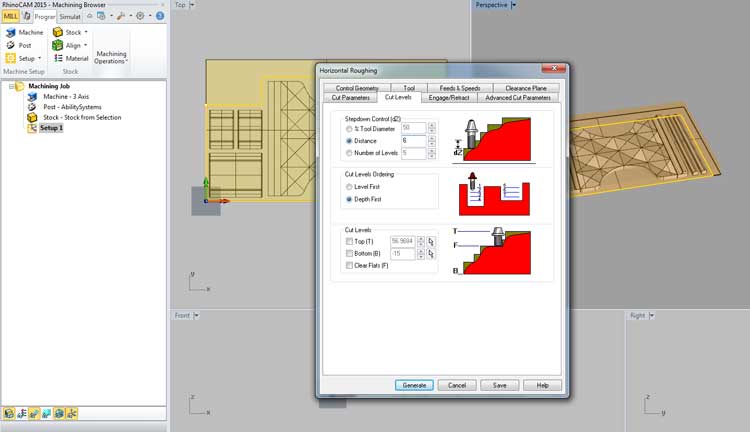
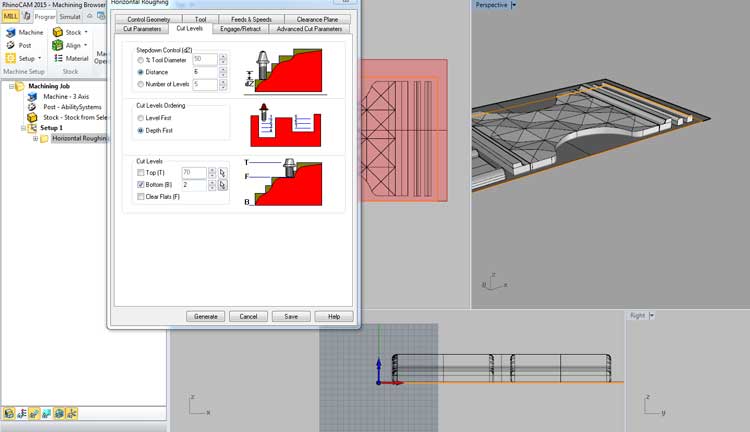
In the tab Cut levels distance down on rough cut.
I set the distance on 6 (half of the diameter), and set bottom to 2
I let the small layer cut bottom with cutter.
The tab Engange/Retract I let it as it was.
In the Advanced Cut parameters the same.
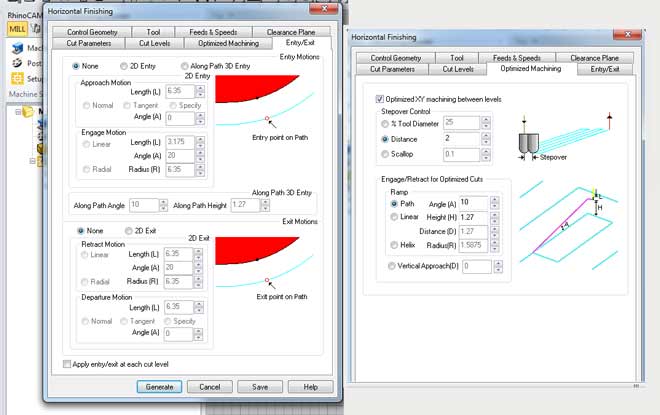
In the Entry/Exit tab I let the defaults
Finally I generated the Gcode and strategies saved in the setup.
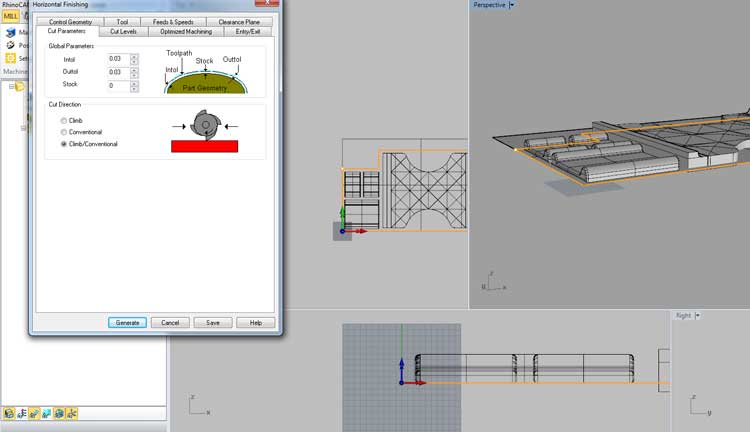
Now is time for the horizontal path setup (we will give more definition to this one)
For the Create stock / Milling / Spindle Speed / Machine operations tab. We use the exact same settings I explained before.
For the Cut Parameters tab I used the presets.
In the Cut Levels tab I used for the bottom 2 (same as before).
For the Optimized Machining I set a distance of 2 mm the less the more definition.
In the Entry/Exit tab I let the defaults
Finally I generated the Gcode and strategies saved in the setup.
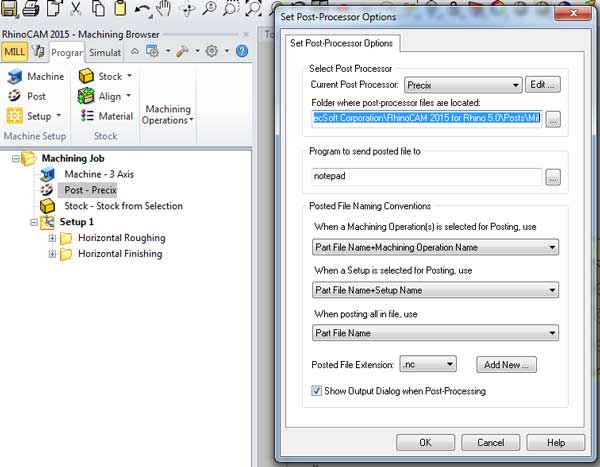
I set the Machine Job and specified the machine: Precix (Mach3 - mm) and export the .nc format
Right click and simulating.
If you add something new you will have to regenrate
Right-click on post processing and save as .nc for Precix.
Here are some pictures from the milling process.
[Note: The RhinoCam screenshots were takes during the first milling attempt, while nesting pieces from other people's projects. After several failed attempts, I run the process for my piece only and I'm posting the pictures below.]
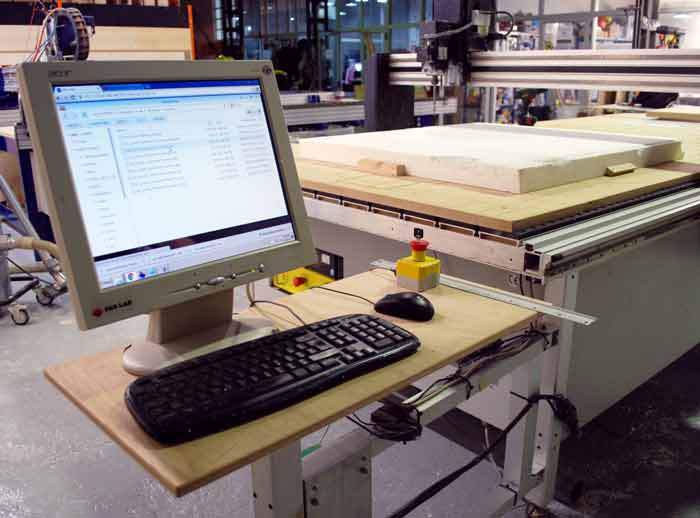
Preparing the foam. Stabilizing it on the sacrificial board by screwing small pieces of wood around it, slightly angled, in order to keep it on place.
The next step is set the 0,0. Click on x and y.
Load the Gcode.
For starting the process I had to low the feed rate (just for the very begining).
Finally click on cycle Start and spindle starts.
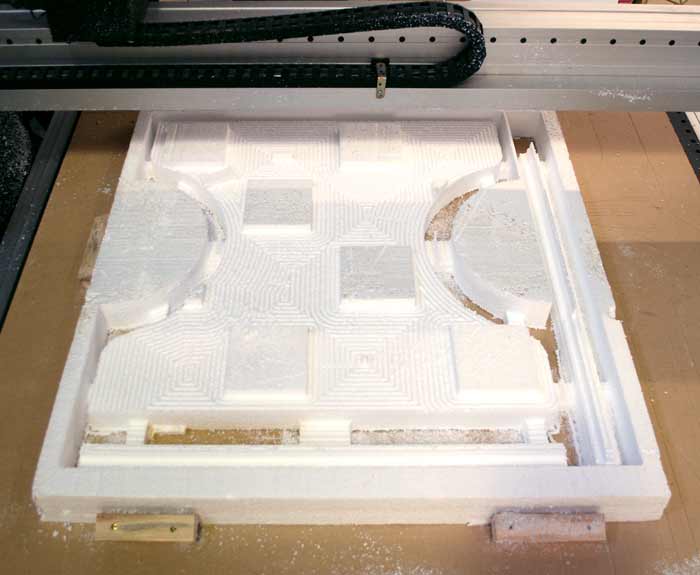
Running the Roughing, in order to take out quickly big parts of the foam:
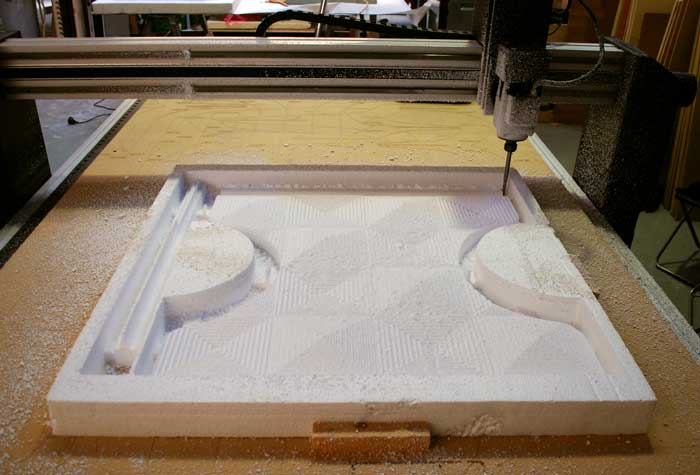
Running the Finishing, in order to give the detail of the form:
After hours and hours spend on the Precix, the first piece was finally milled. You can see the tabs keeping the piece in place while milling.
After removing the three pieces from the foam and following the same process in order to mill the fourth piece, it was time for casting.
The time I spent on trying to mill this big mold, was really inefficient in time-wise. I learned a lot trying different processes on the foam and spending time working with the Precix, but in the end, I was among the last ones finishing the assignment so there were not enough resins in order to produce this really big composite. For this reason, I decided to stick to the concept of working with my table pieces so I made the composites using the stool tops I already had from the previous assignent.
Design 2. A Stool-Cover.
[Using the milled OSB piece from my previous assignment's stools.]
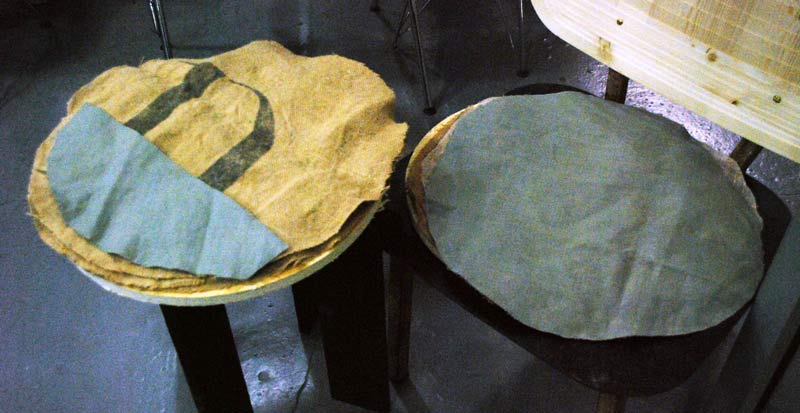
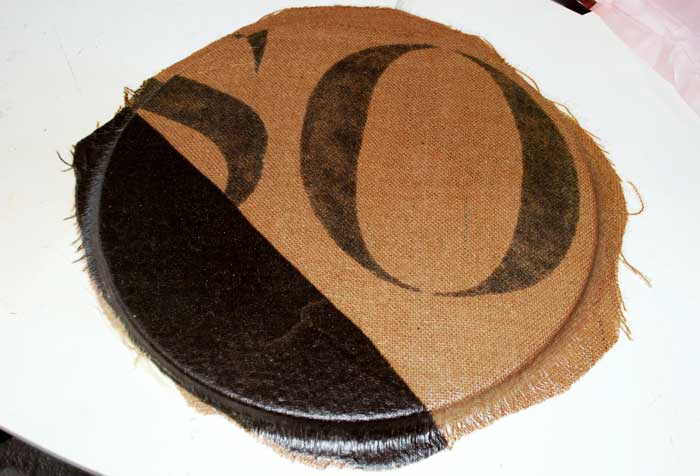
The first step was to choose what favric to use. I used jude, which is very covenient for the doing composites because its thick weave allows the resin to go through it and harden it. For colour varietion and also for experimenting with a different textile, I also used one more piece of textile I found in te textiles lab, slightly thinner and with smaller weave than jude.
I cut the pieces as needed, in order to wrap paround the stool tops.
The second step was to mix the two ingredients, the resin and the hardener. This need to be done very fast and applied on the composite, before the mixture worms up too much and hardens. The percentage of each part to mix should be done following the instructions coming with the materials packaging. Also, after several tries, I managed to optimize the percentage of resin and hardener for soaking my composite effectively.

In this case, I used around 2/3 of resin and 1/3 hardener [ratio 2:1] [1]. I mixted them in a big empty bottle of water from which I cut off the top part, as I needed a big quantity of material. It also allowed me to see better how much material I was pouring inside. I used a wooden stick that wouldn't break in order to stir them [2]. I stirred until I could see a homogenous mixture and very quickly applied it on the textile and the piece I used for a mold [3].
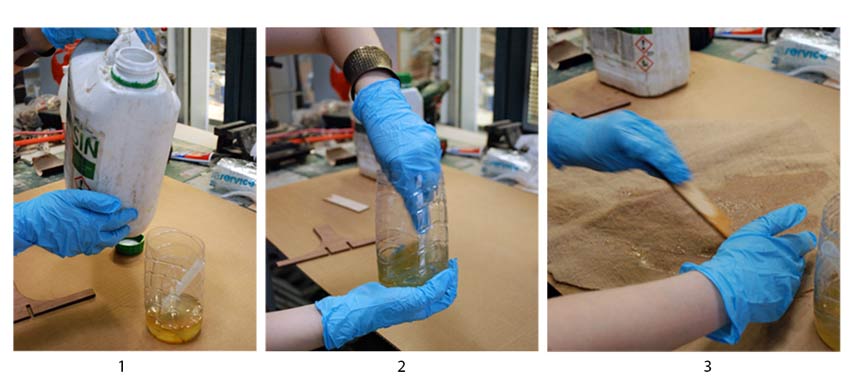
[Note: the mixture cures very fast and starts to warm up to the point that it's impossibel to work with it, so it needs to be applied very fast on the materials.]
Using the Vacuum machine.
The next step was to put it in the vacuum, so that the composite shall stick to the mold and take the exact shape of it while hardening.
For this purpose its important to use different layers of sheets in order to prevent the resins from sticking to the vacuum machine and also to breath in order to dry.
The order of the layers in order to be able to take the composite off the mold is as follows [from the mold towards the composite]:
- the perforated film
- the cotton breather
- the plastic release film
The layers are repeated to protect all sides of the composite. In my case, I wanted the composite to stick on the mold, so I covered both the mold and the composite with the protective sheets as shown below.
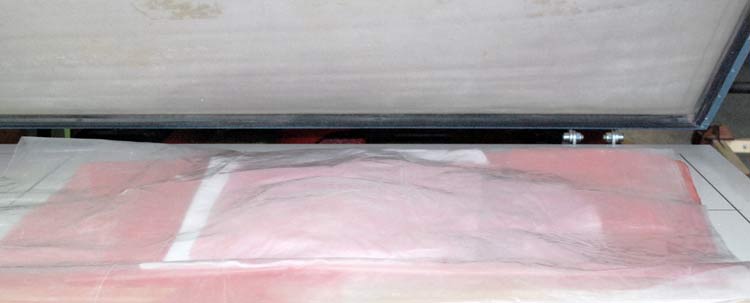
I left the composite overnight inside the vaccuum and the next day it was ready.
I had to cut out the extra material around the circle and sand the edges.
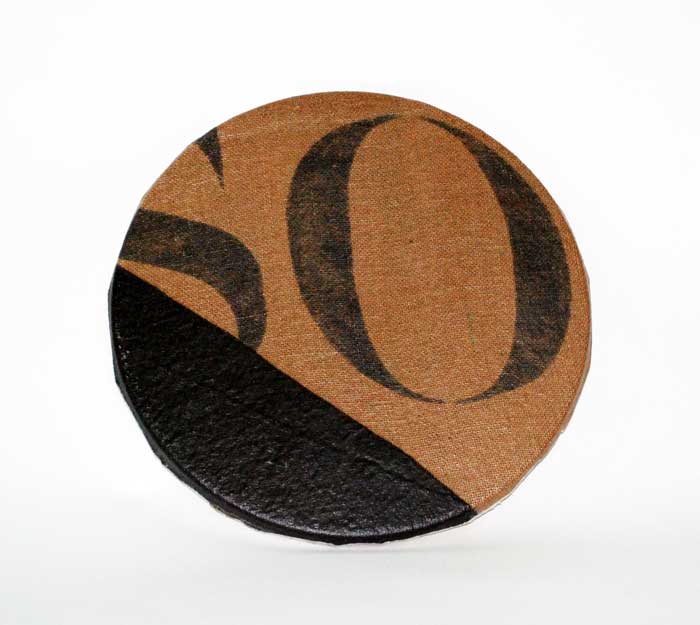
Then I realized I should have milled a base of at least 5cm height, round like my composite mold, so that it's kept higher andI could remove easily the extra cloth from each sides. The main problem now, was that the textile in the periphery was hardened outwards forming a thick layer of resin surrounding the wooden top which I had a hard time removing. I will try this idea wih my second stool top.
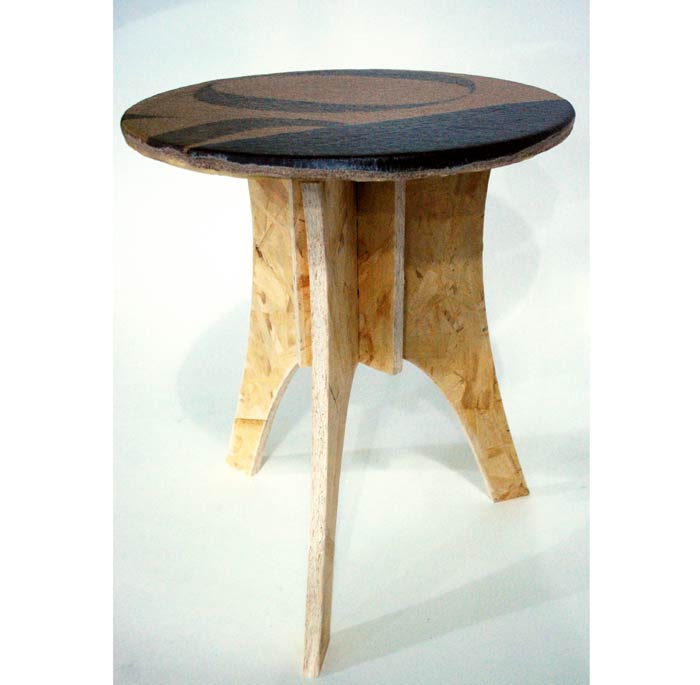
Finally, my stool, "dressed" and assembled.
All files for my Composites week assignment can be found here.