Make the FabISP
1.- Generate RML files for Roland Modela MDX-540
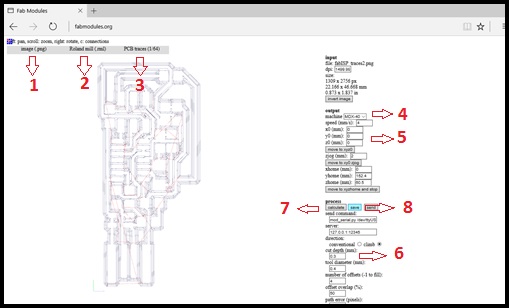
1.1.- Go to fabmodules.org and load a PNG image. I decided to make Valentin's design.
1.2.- On output format select Roland mill (.rml).
1.3.- On process select PCB traces (1/64) for traces or PCB outline (1/32) for cut.
1.4.- On output select the machine (MDX-40).
1.5.- Set starting point for the milling.
1.6.- Set the cut depth. For Roland Modela MDX-540 I assign 0.3mm for traces and 0.6mm for cut.
1.7.- Push claculate button for generate rml file.
1.8.- Finally, download the rml file by pushing the save button.
Note: If you want better milling quality, you must set number of offsets in -1, but the working time is greater.
2.- Milling
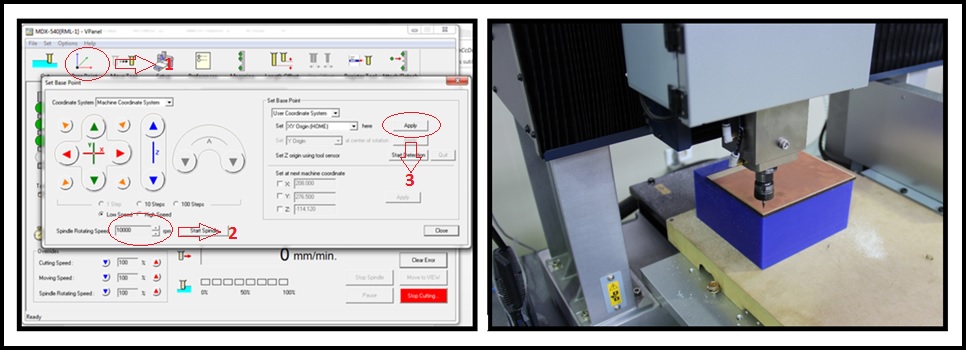
2.1.- After switching on Modela MDX-540, you must open VPanel program of machine and set the RPM value and zero point in the lower left corner of the PCB on Base Point tab.
2.2.- Set the RPM value in 10000.
2.3.- With controls, you must move the machine to the bottomm left corner of the PCB and push Apply button.
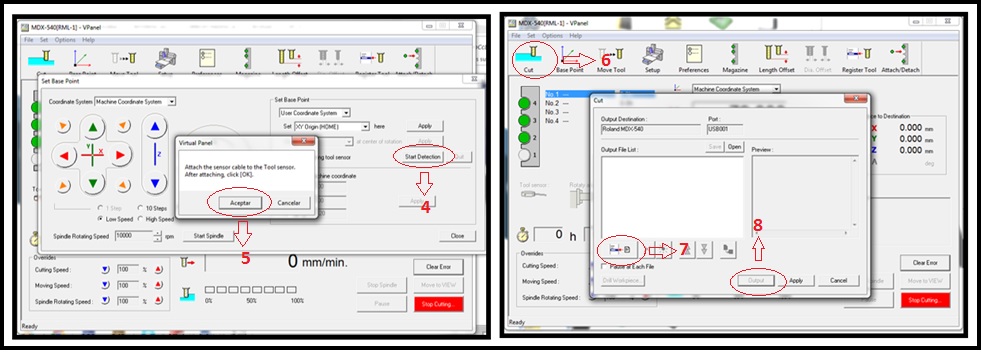
2.4.- Now you must find Z0 value using the pressure sensor. Push Start Detection button.
2.5.- Accept for init calibration. You can see the calibration in this video.
2.6.- Close Base Point tab and go to Cut tab.
2.7.- Import the rml file.
2.8.- Push Output button for init milling.
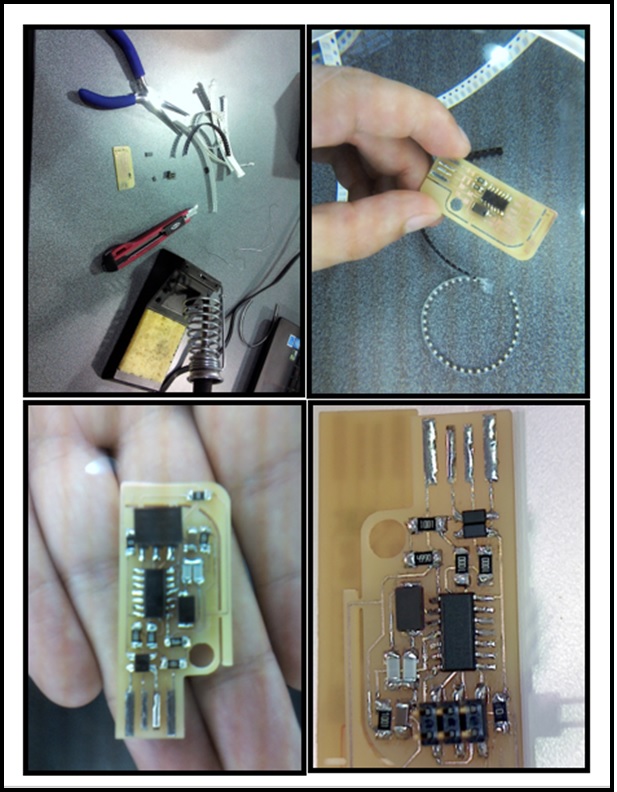
3.- Soldering
- I recommend using the soldering iron at 480 celcius degrees.
- After finishing the solder of electronic components I clean the PCB with alchohol for better appaerience.
Programming FabISP with Arduino UNO
1.- Install WINAVR software and UsbTinyISP drivers for programming the fabISP in Windows 10.
2.- I used Arduino UNO as programmer then I followed the steps suggested by FabAcademy tutorial (Use an Arduino UNO as an ISP to program your first FabISP).
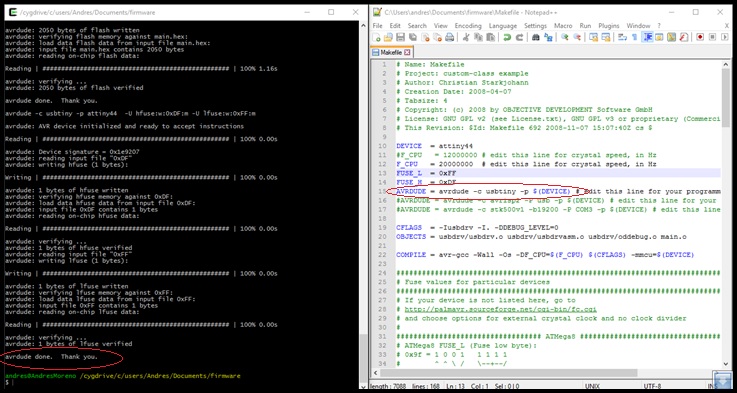
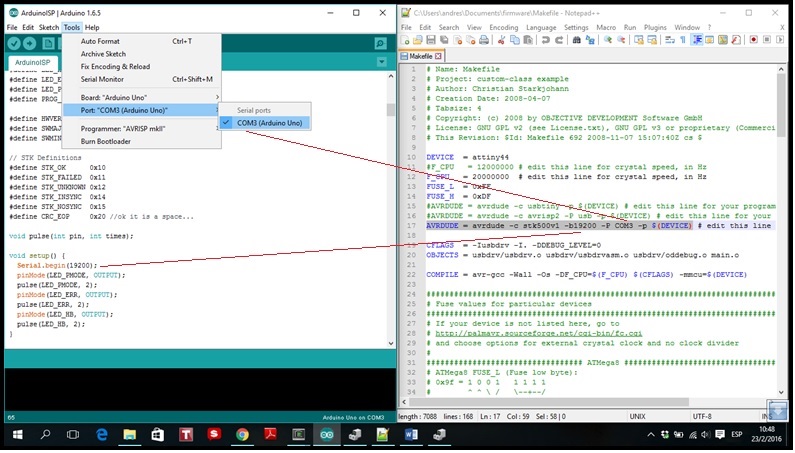
3.- Download FabISP firmware, unzip and modify Makefile for set clock, fuses and programmer.
3.1.- Verify that the clock frequency is 20 MHz (line 12).
3.2.- Set lower byte fuses in 0xFF (line 13) and higher byte fuses in 0xDF (line 14).
3.3.- Comment out the lines 15 (Usbtiny programmer) and 16 (avrISP programmer).
3.4.- Add next line: AVRDUDE = avrdude -c stk500v1 -b19200 -P COM... -p $(DEVICE)
3.5.- Set COM... with the especific port that Arduino UNO is connected.
3.6.- Save and close Makefile.
4.- If you have Windows 7 or lower version you can compiled files with command prompt directly. For higher versions you can download CYGWIN becouse you can't compile files with command prompt. You can see this error in next image.
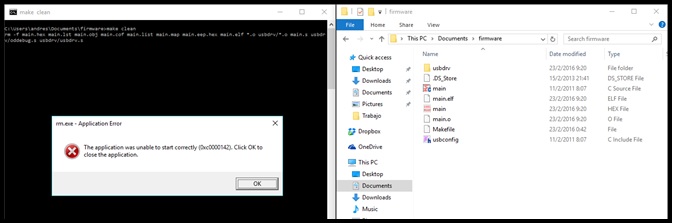
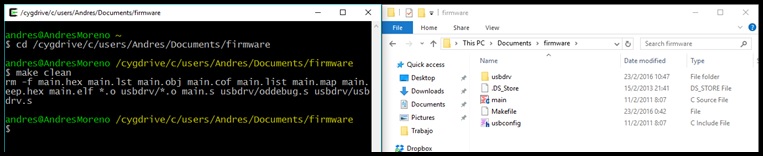
4.1.- Open command prompt (for Windows 7 or lower versions) or CYGWIN (for higher versions) and go to Makefile path.
4.2.- Deleted precompiled files with "make clean".
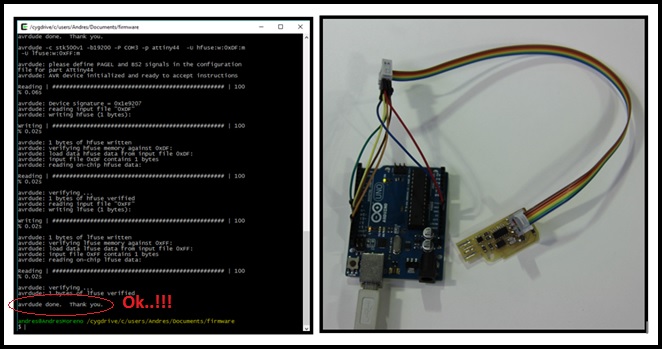
5.- Compiled changes with "make hex". You can see that main.hex is created again.

6.- Check that Arduino UNO is connected correctly with FabISP and encode "make fuse" and "make program" to load the program in FabISP.
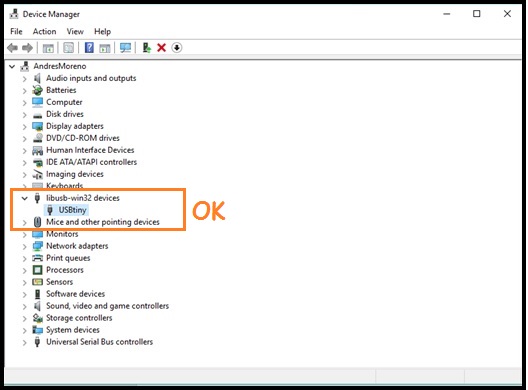
7.- Connect FabISP in the computer and update drivers.
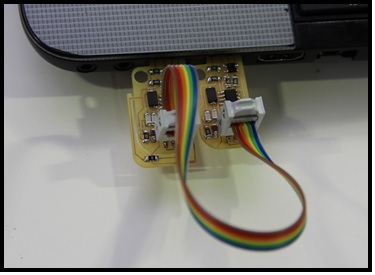
8.- Desolde or cutout jumpers.
Programming FabISP with Usbtiny
1.- Connect Usbtiny (FabISP programmed) with FabISP (not programmed).
2.- Polarizing the FabISP (not programmed).
3.- Open Makefile, edit line 15 (Usbtiny programmer) and comment out lines 16 (AvrISP programmer) and 17 (Arduino UNO programmer).
4.- Save and close Makefile.
5.- Delete precompiled files (make clean), compiled changes (make hex) and load program (make fuse, make program).