
Mechanical Design
In this week we are doing a group project - to build a machine. WE have design and make all the mechanical part of the machine and all the electronics part and automation will be done by next week. In our lab we have two teams and I belong to the Team 2.
Our team Consists of:
We have a separate web page for the machine building week since it is a group project.
Here is the link to the machine building page
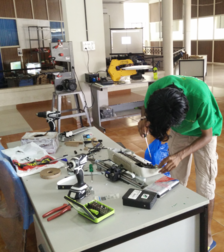
Apart from that I will be documenting my contribution to the team work here. The machine we are making is a chocolate printer, which will print the chocolate cream over the cake. So custom text and designs can be printed using this machine. We are trying to make a 2D printing (like a ploter) and we will extend to 3 axes if we get time. The main problem we faced was the lack of components in our lab. Our lab doesn't have parts to build a machine like, rods, belts, couplers etc. So the first part is to collect all these components. Most of the parts were not available in the local market and also our instructor suggested us not to buy anything. So we decided to savage the parts. We searched for some places like junkyard and for people who sell the damaged printers /scanners .
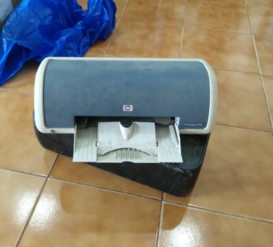
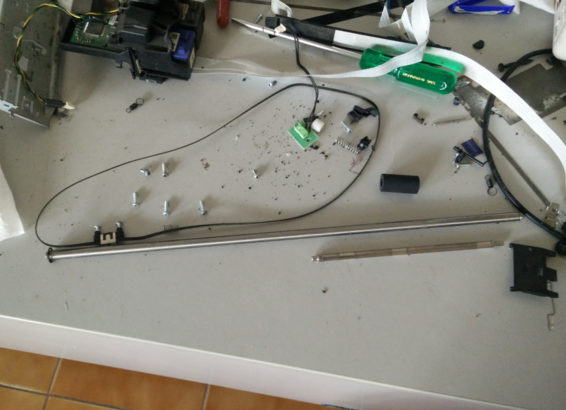
We bought some printers which was not in good condition and savaged it , and got many things like smooth rods, belts, gears, motors etc.
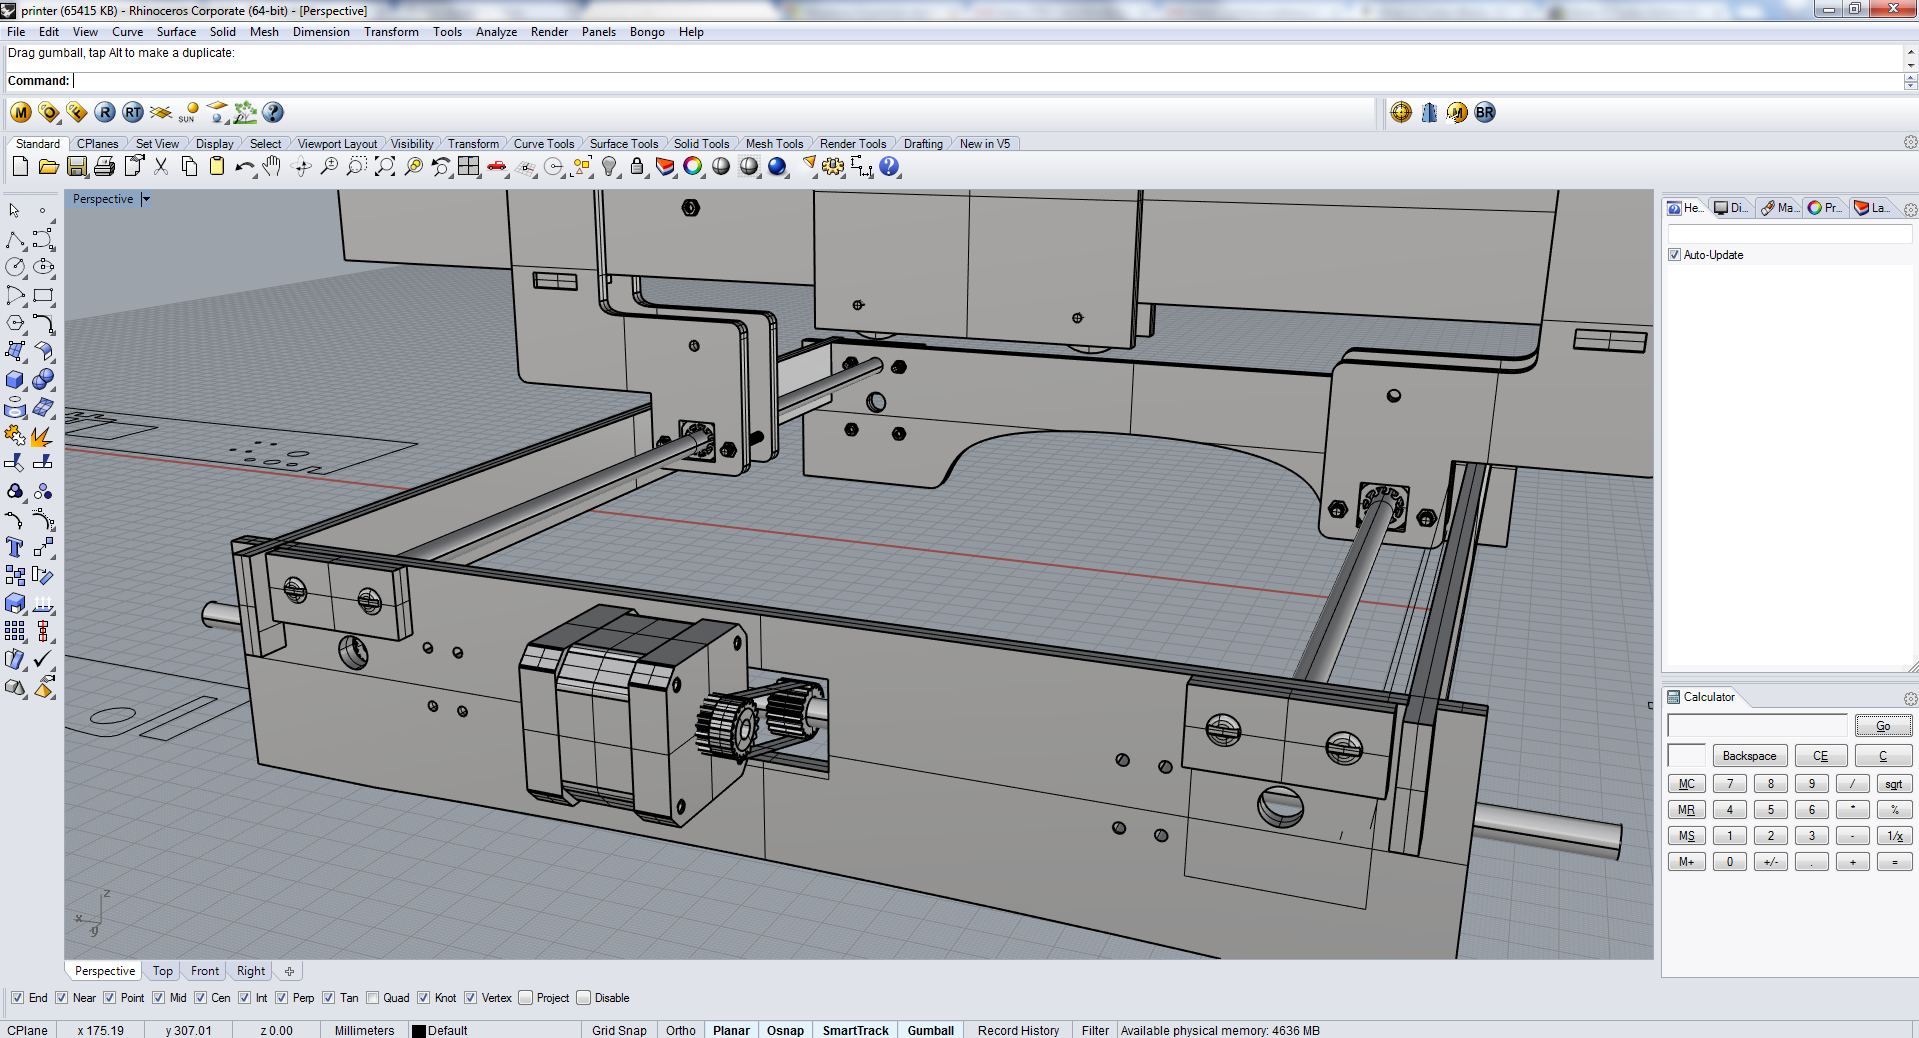
Design
The machine is a 2.5D machine. It has X and Y axis for plotting the chocolate. For this movement we need two stepper motors. For extruding the chocolate we use another mechanism with a syringe which also need another stepper motor. So we have to drive 3 steper motors.
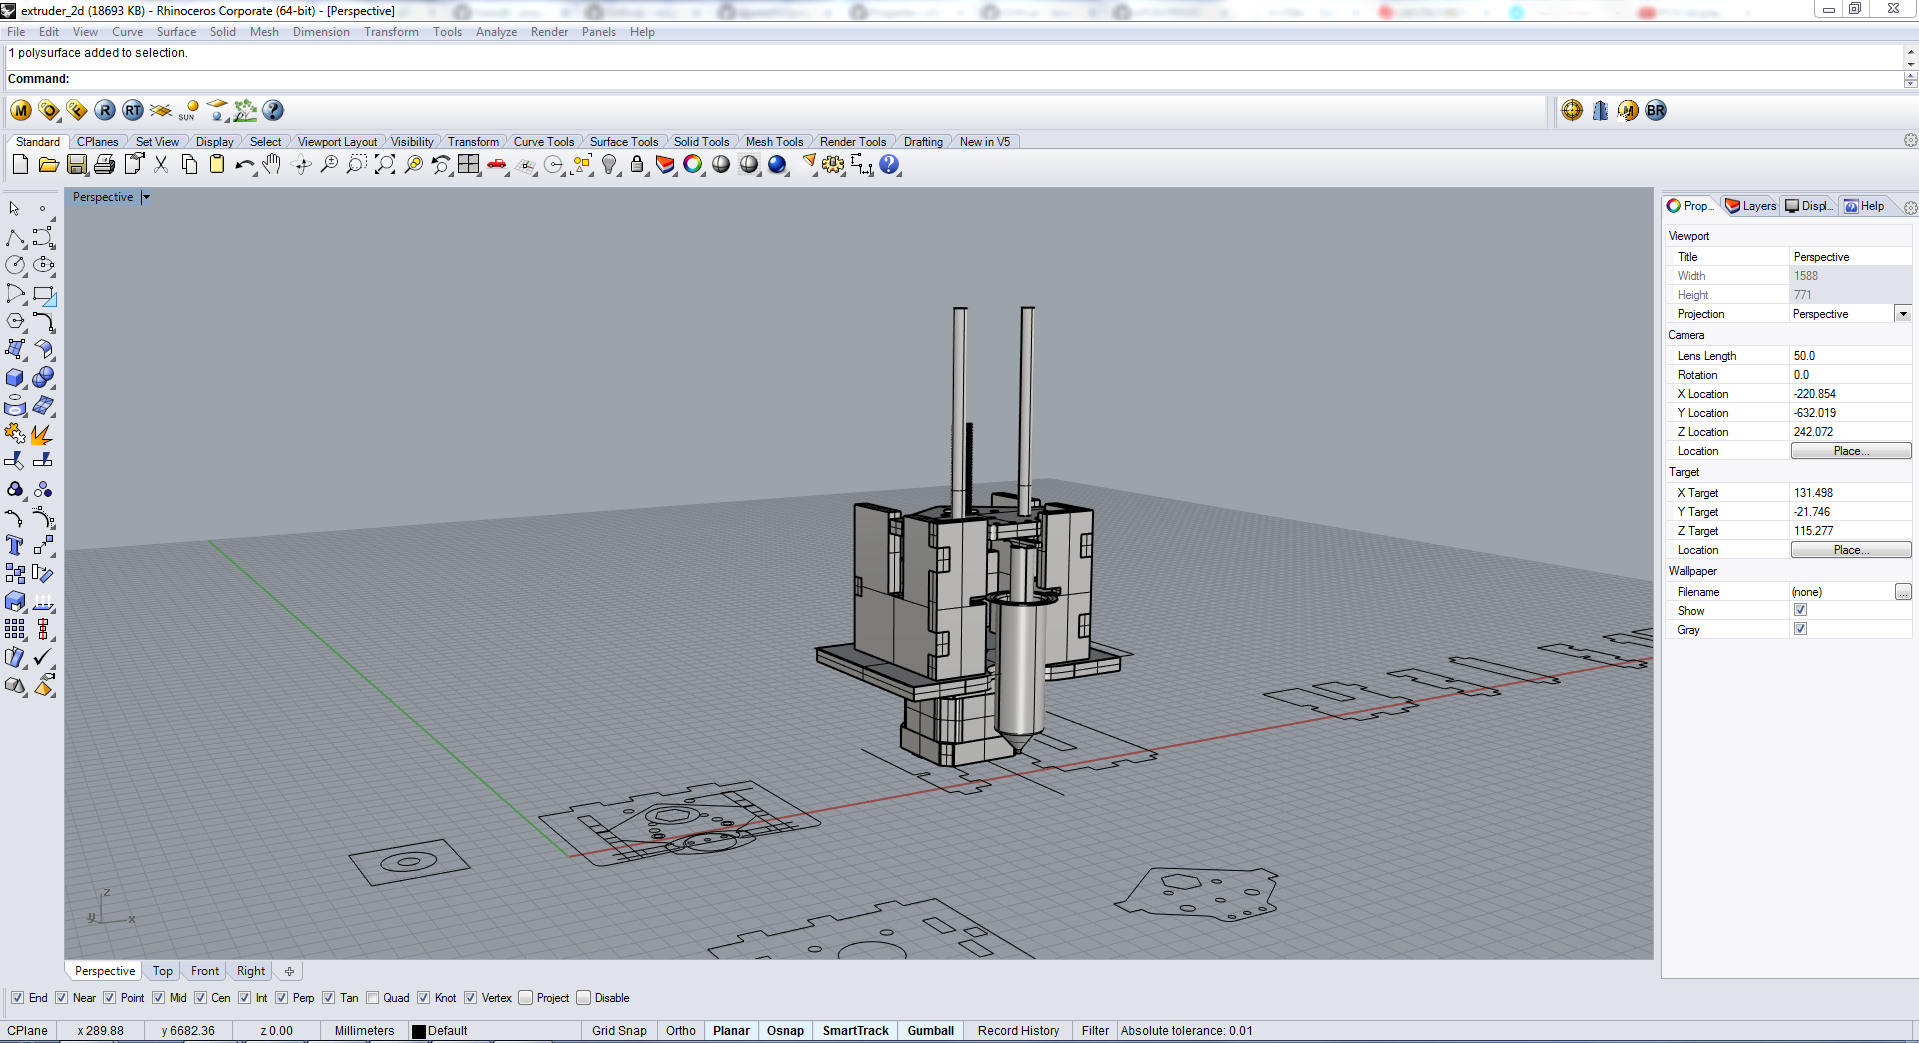
All the design except the X axis was done by me. I designed to so that we can also have he 3D model and also the 2D sketch can be used for laser cutting. Most part of the printer was made b laser cutting and some of the 3D parts was directly used for 3D printing.
In the above picture , the X axis was made bu Puneeth so i disigned the other parts such that it can hold the X axis.
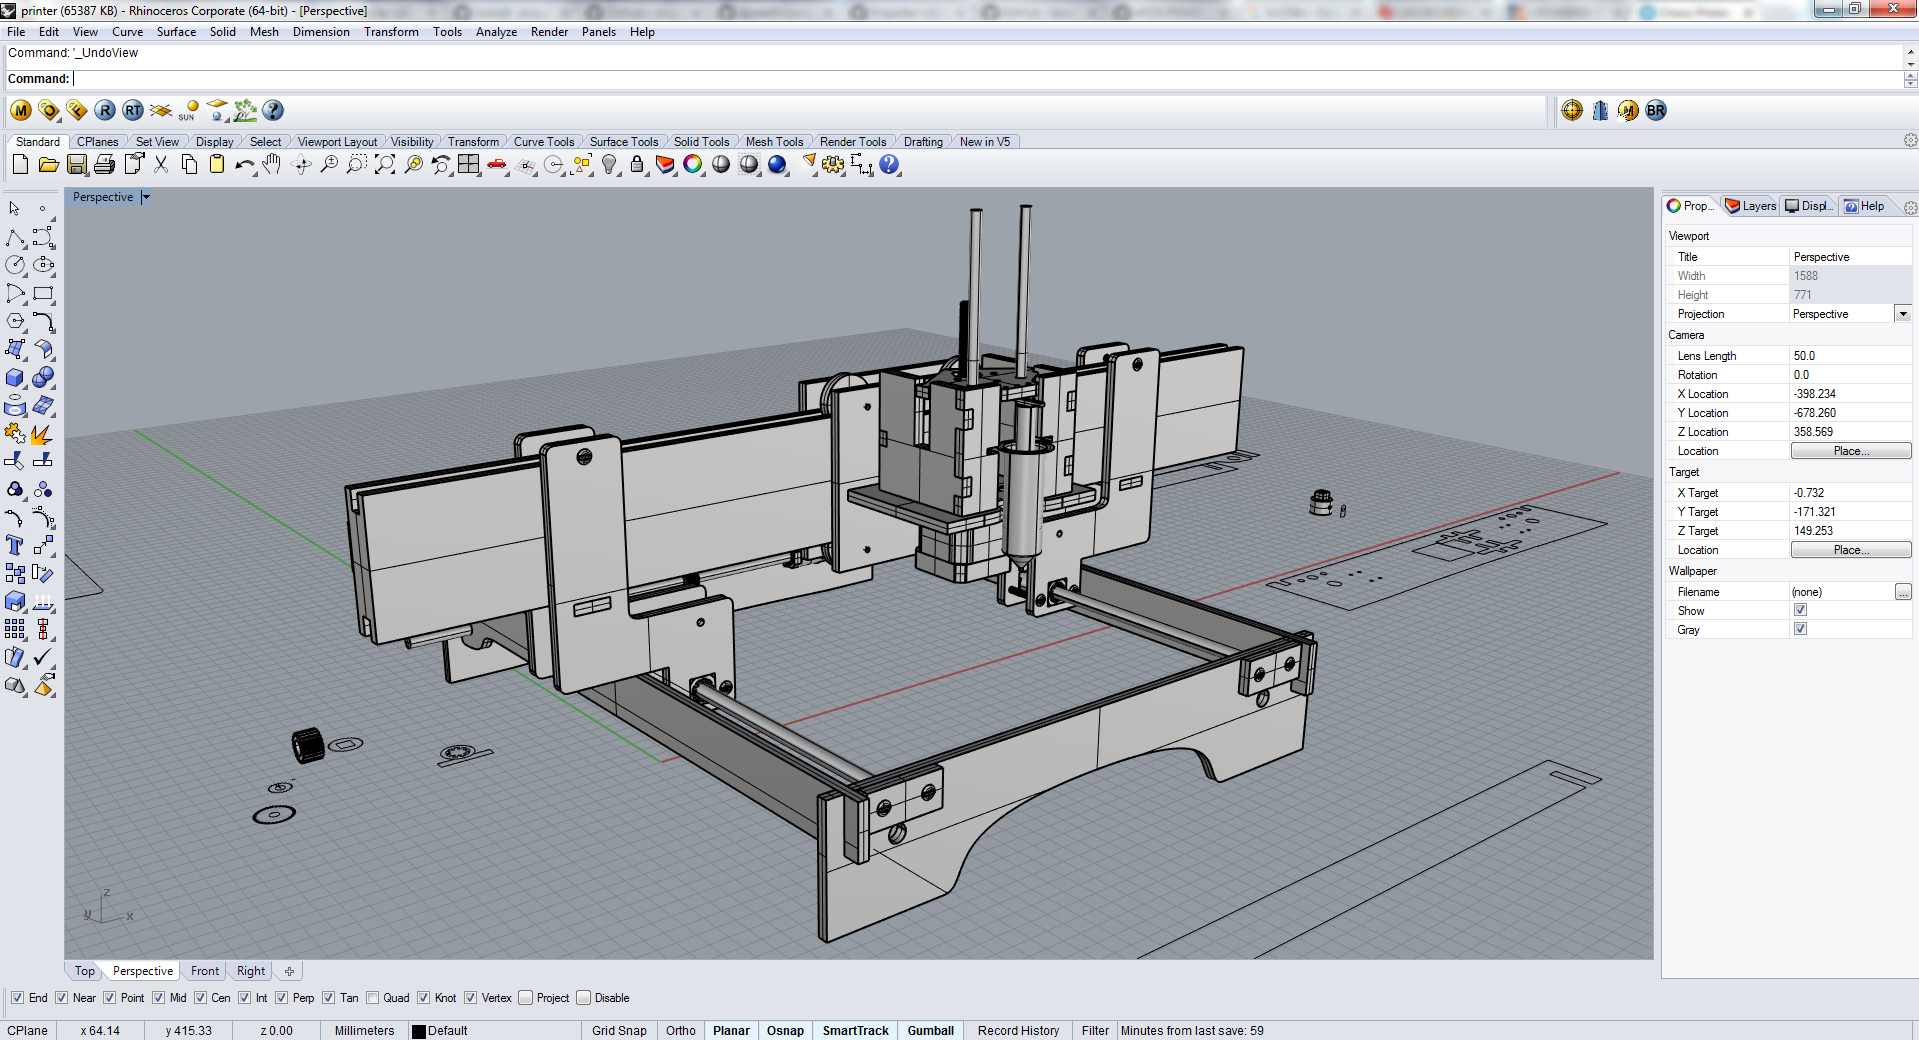
Here is the design of the machine, this is not the final we have made some changes in it .
Choco Printer by yadusharon on Sketchfab
The X axis mechanism was made by Puneeth
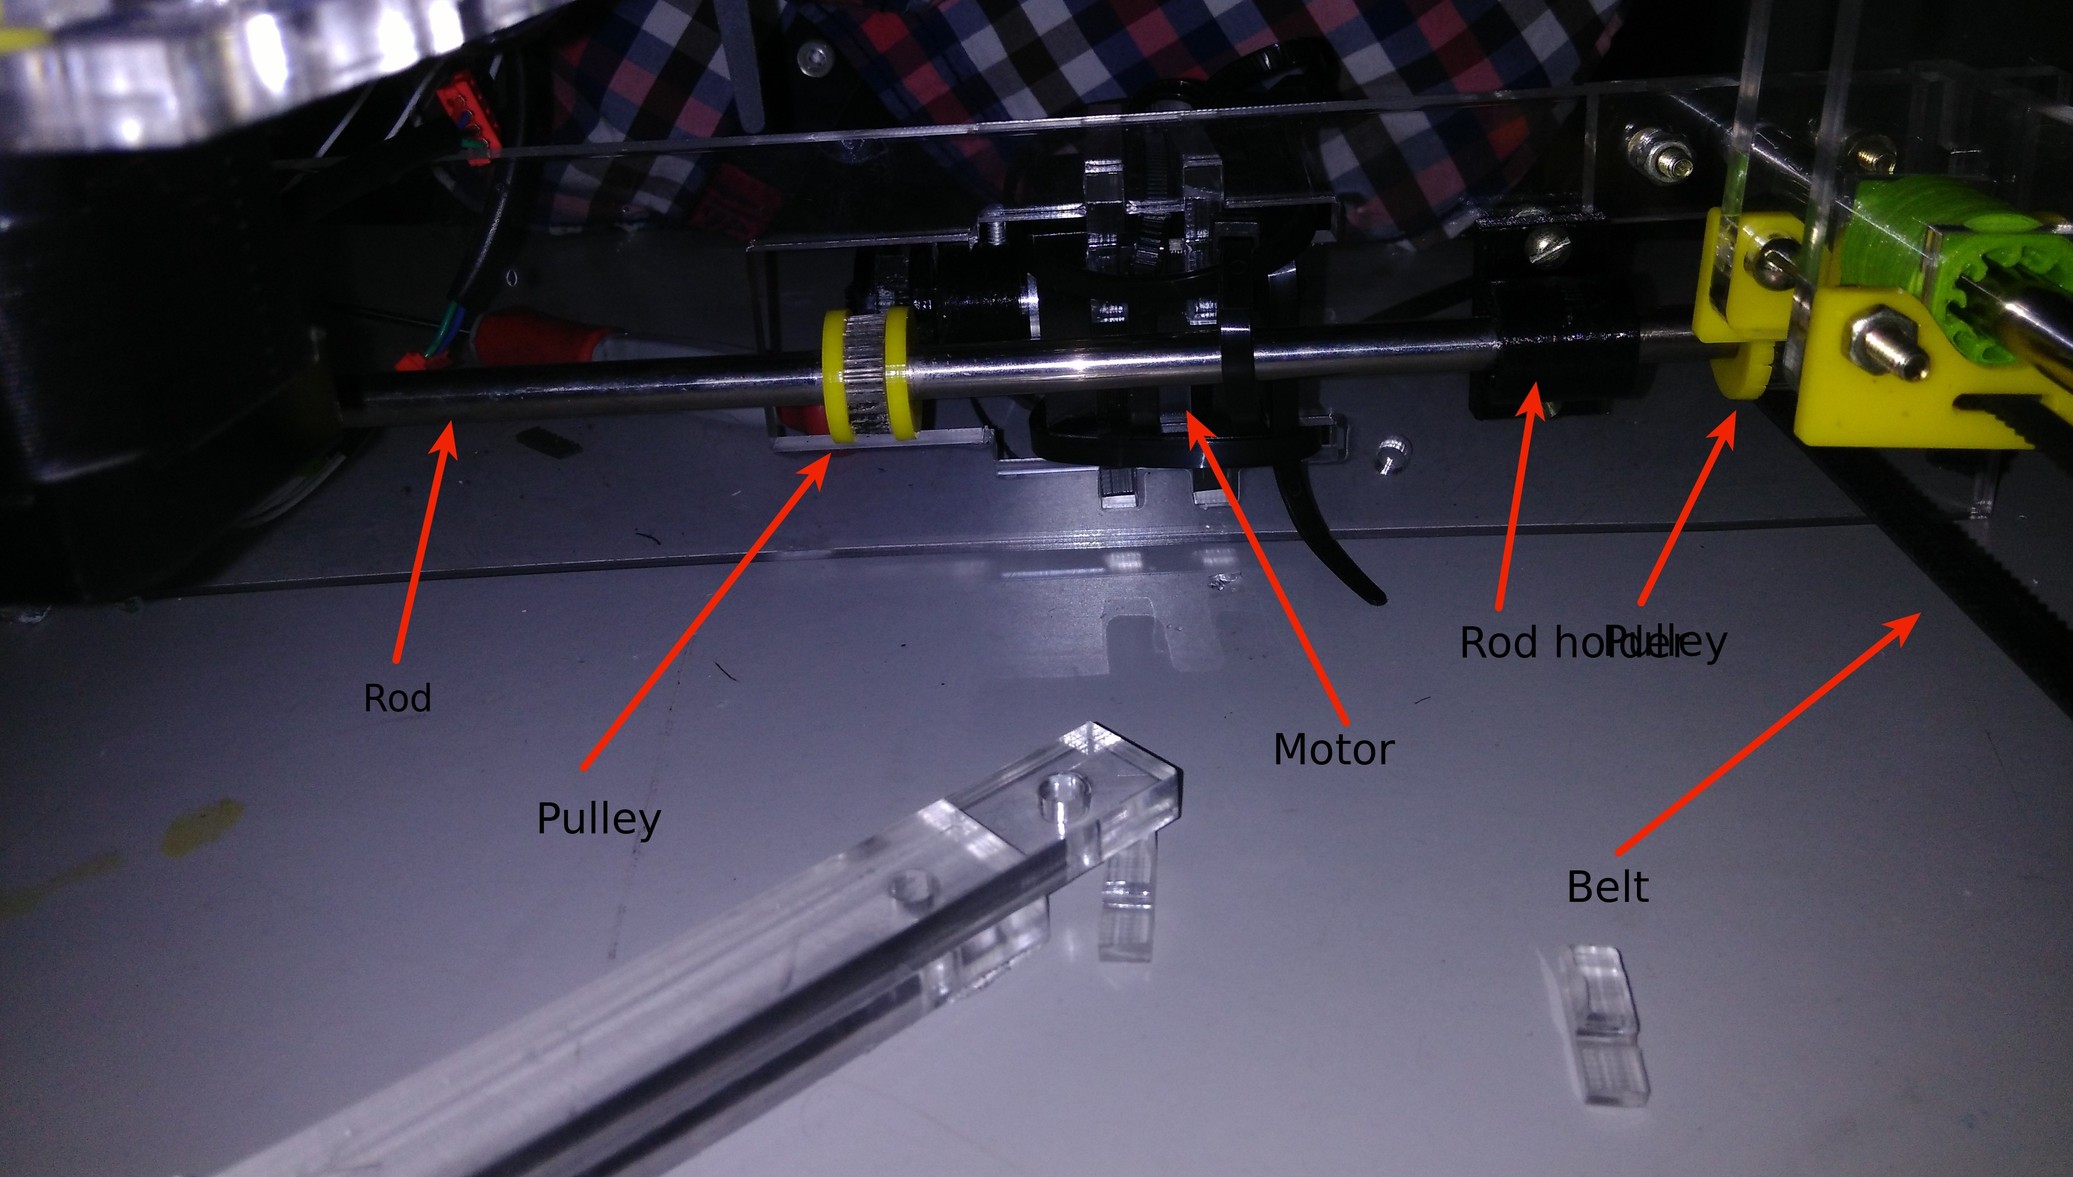
Y Axis
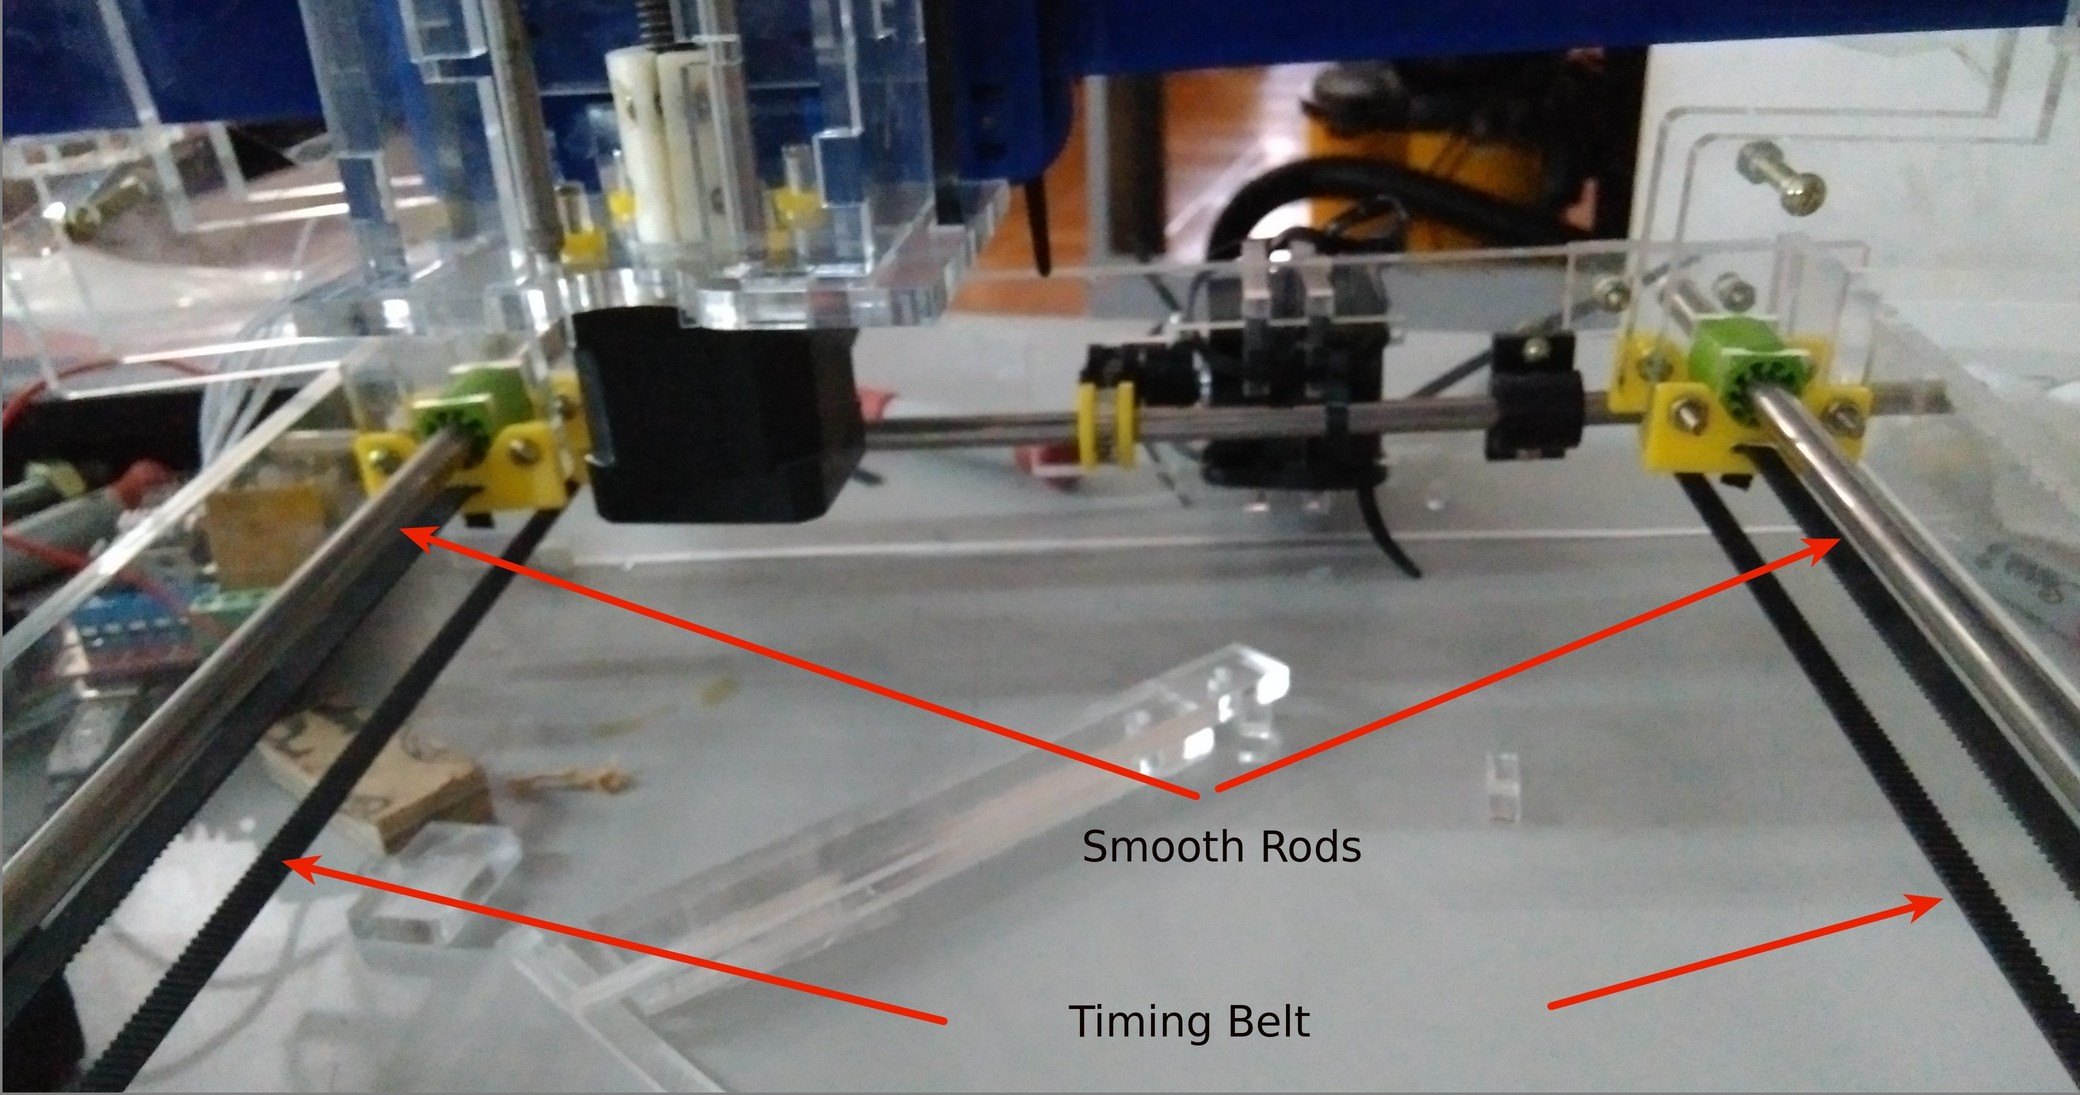
The Y axis movement mechanism need two smooth rods and belts. Its bit dificult to explain in words, but it will be clear from the pictures below.
Tis is the design. There are two smooth rods.at two sides. The X axis was already made. So i had to design something which will hold the entire X axis stages and slide along the smooth rods. For sliding over the smooth rod, i designed a bush(since we dont want to buy anything).
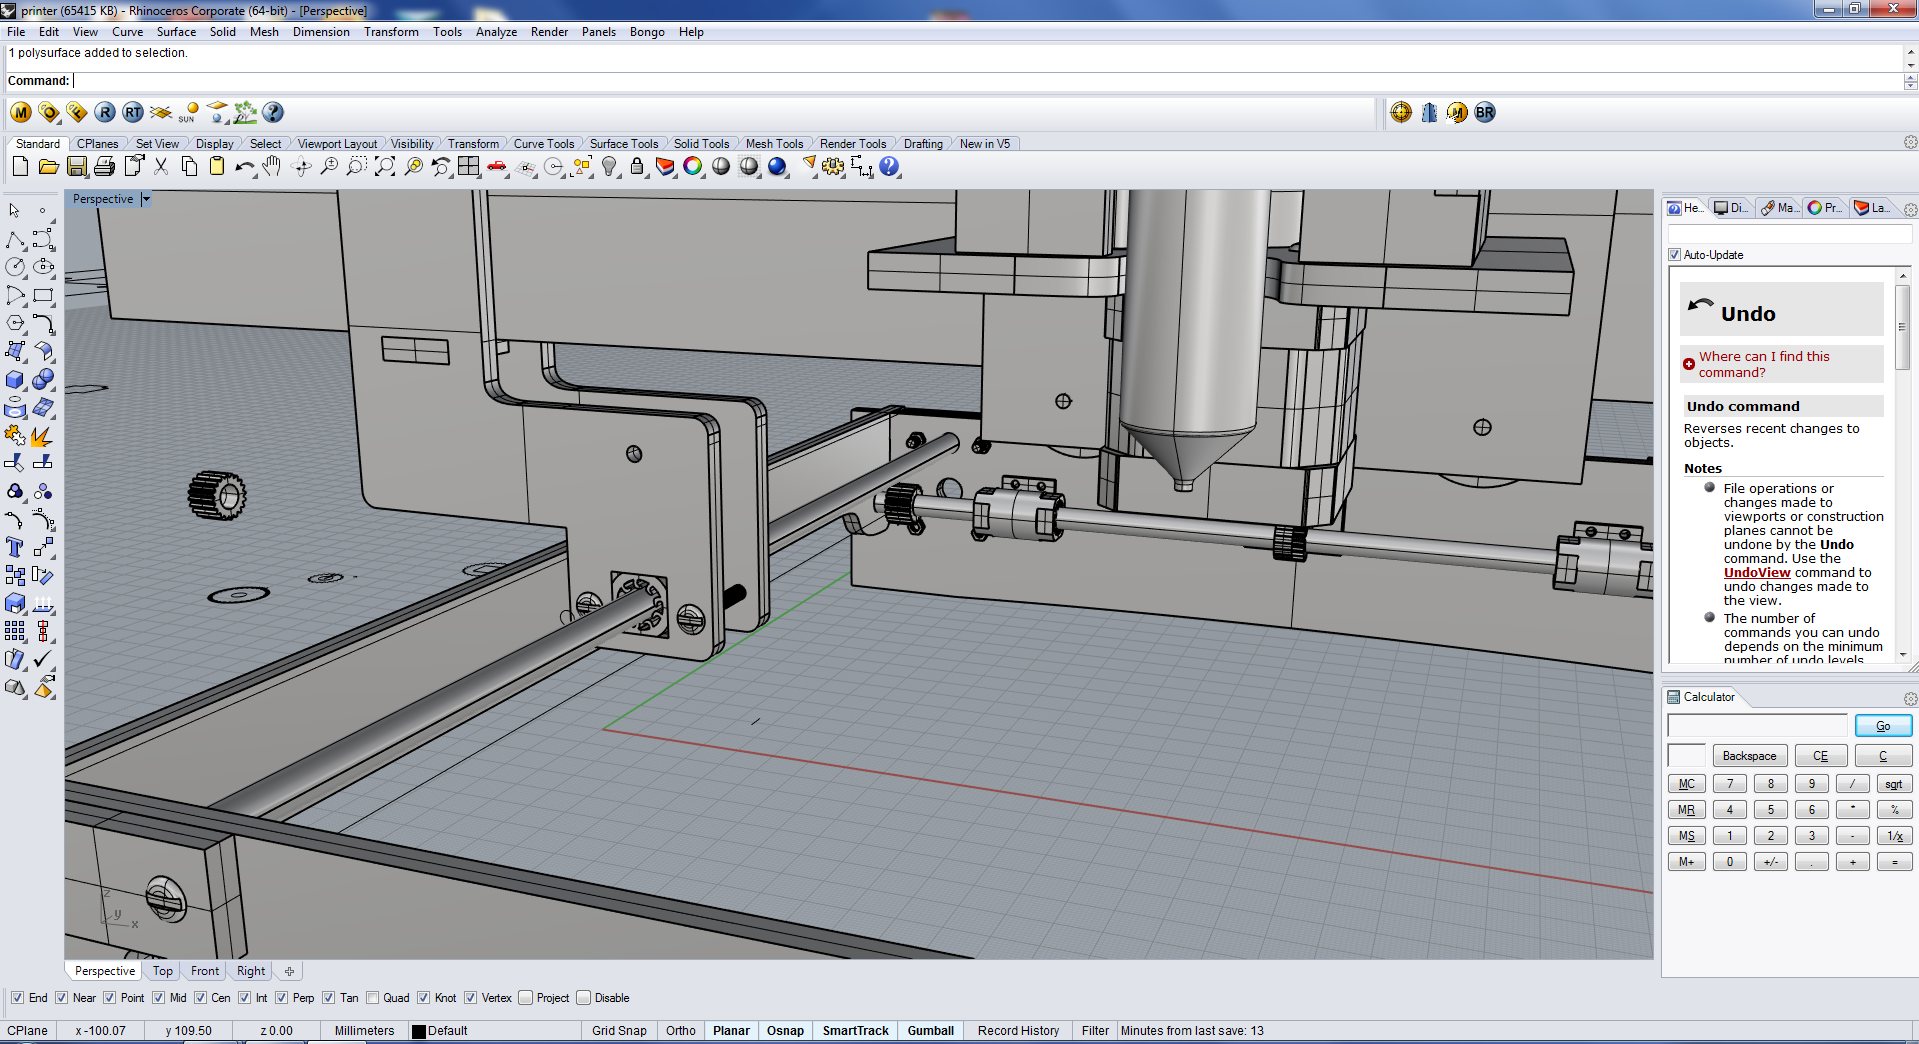
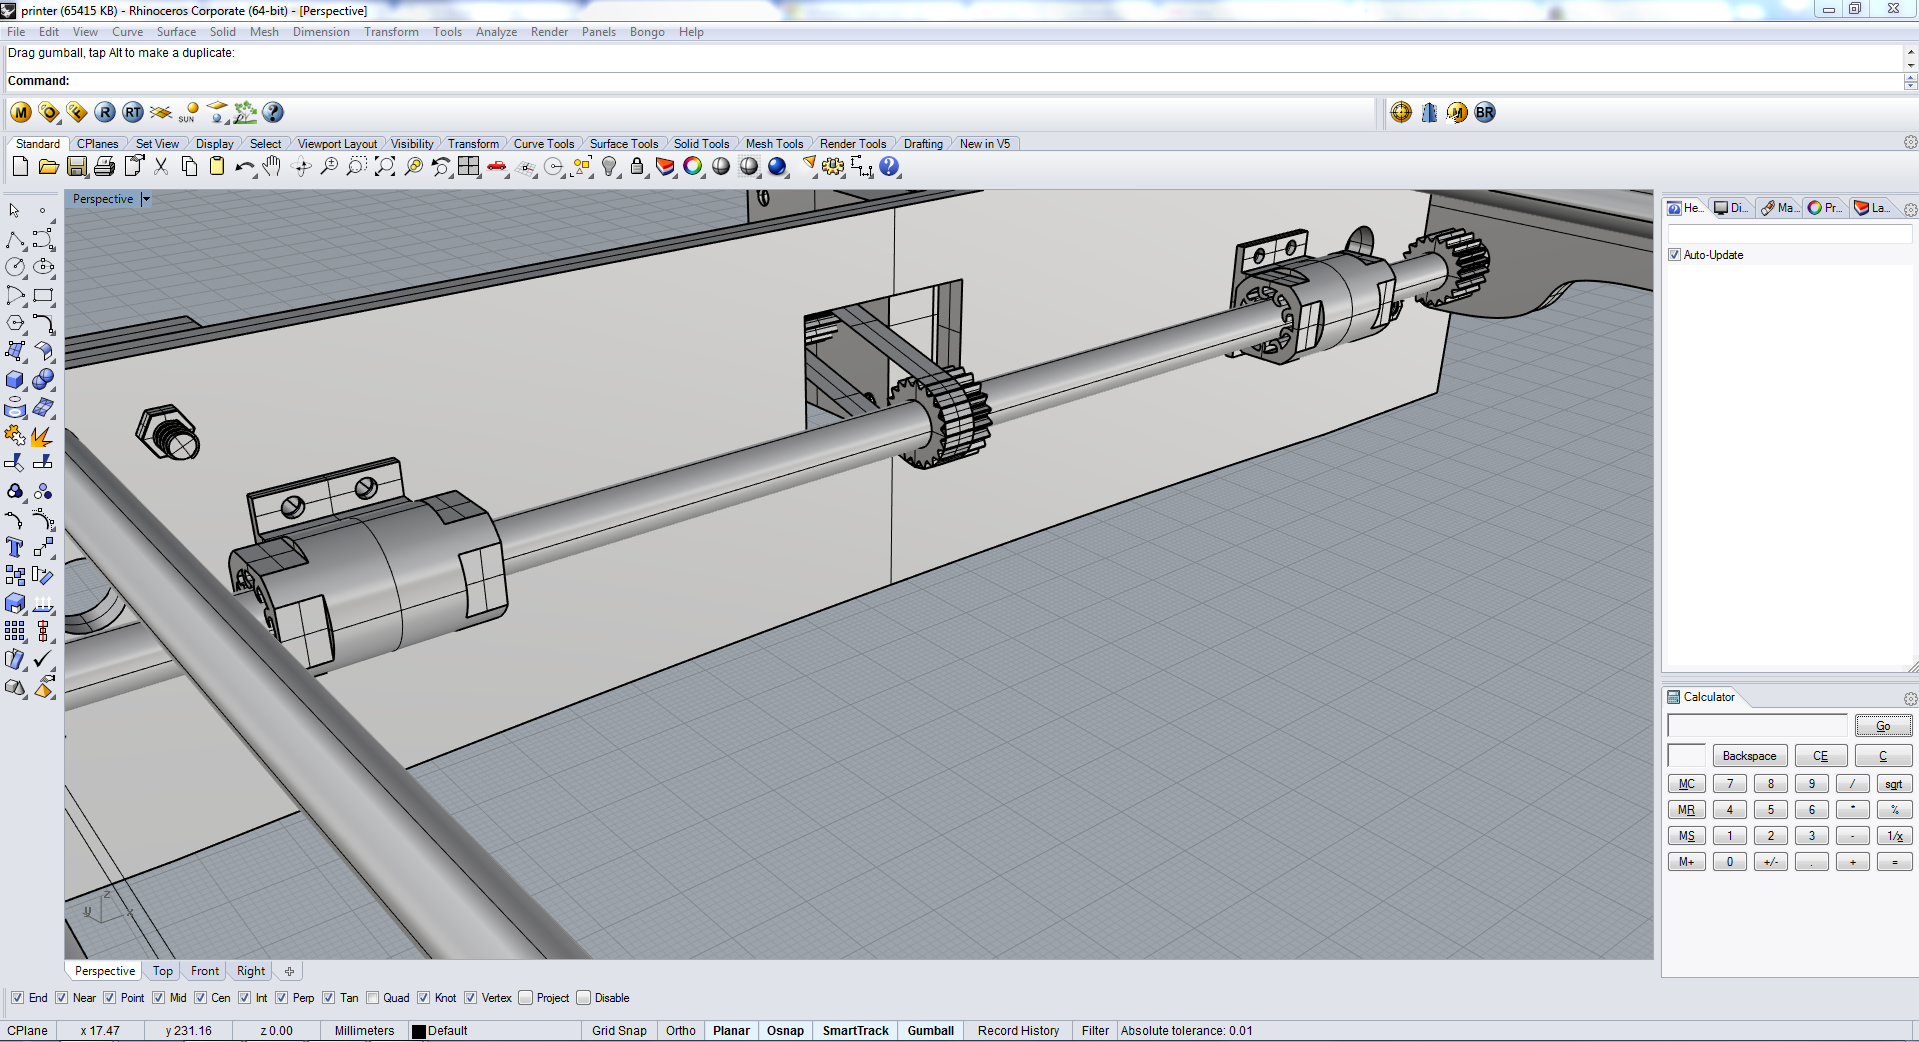
End effector
The end effector is a chocolate extruder using a syringe. The syringe contains chocolate. When the syringe is pressed it squeeze chocolate. We use a moving mechanism which can be moved over two smooth rod using a threaded rod. Since the high precision threaded rod was not available we used a Bolt and nut.
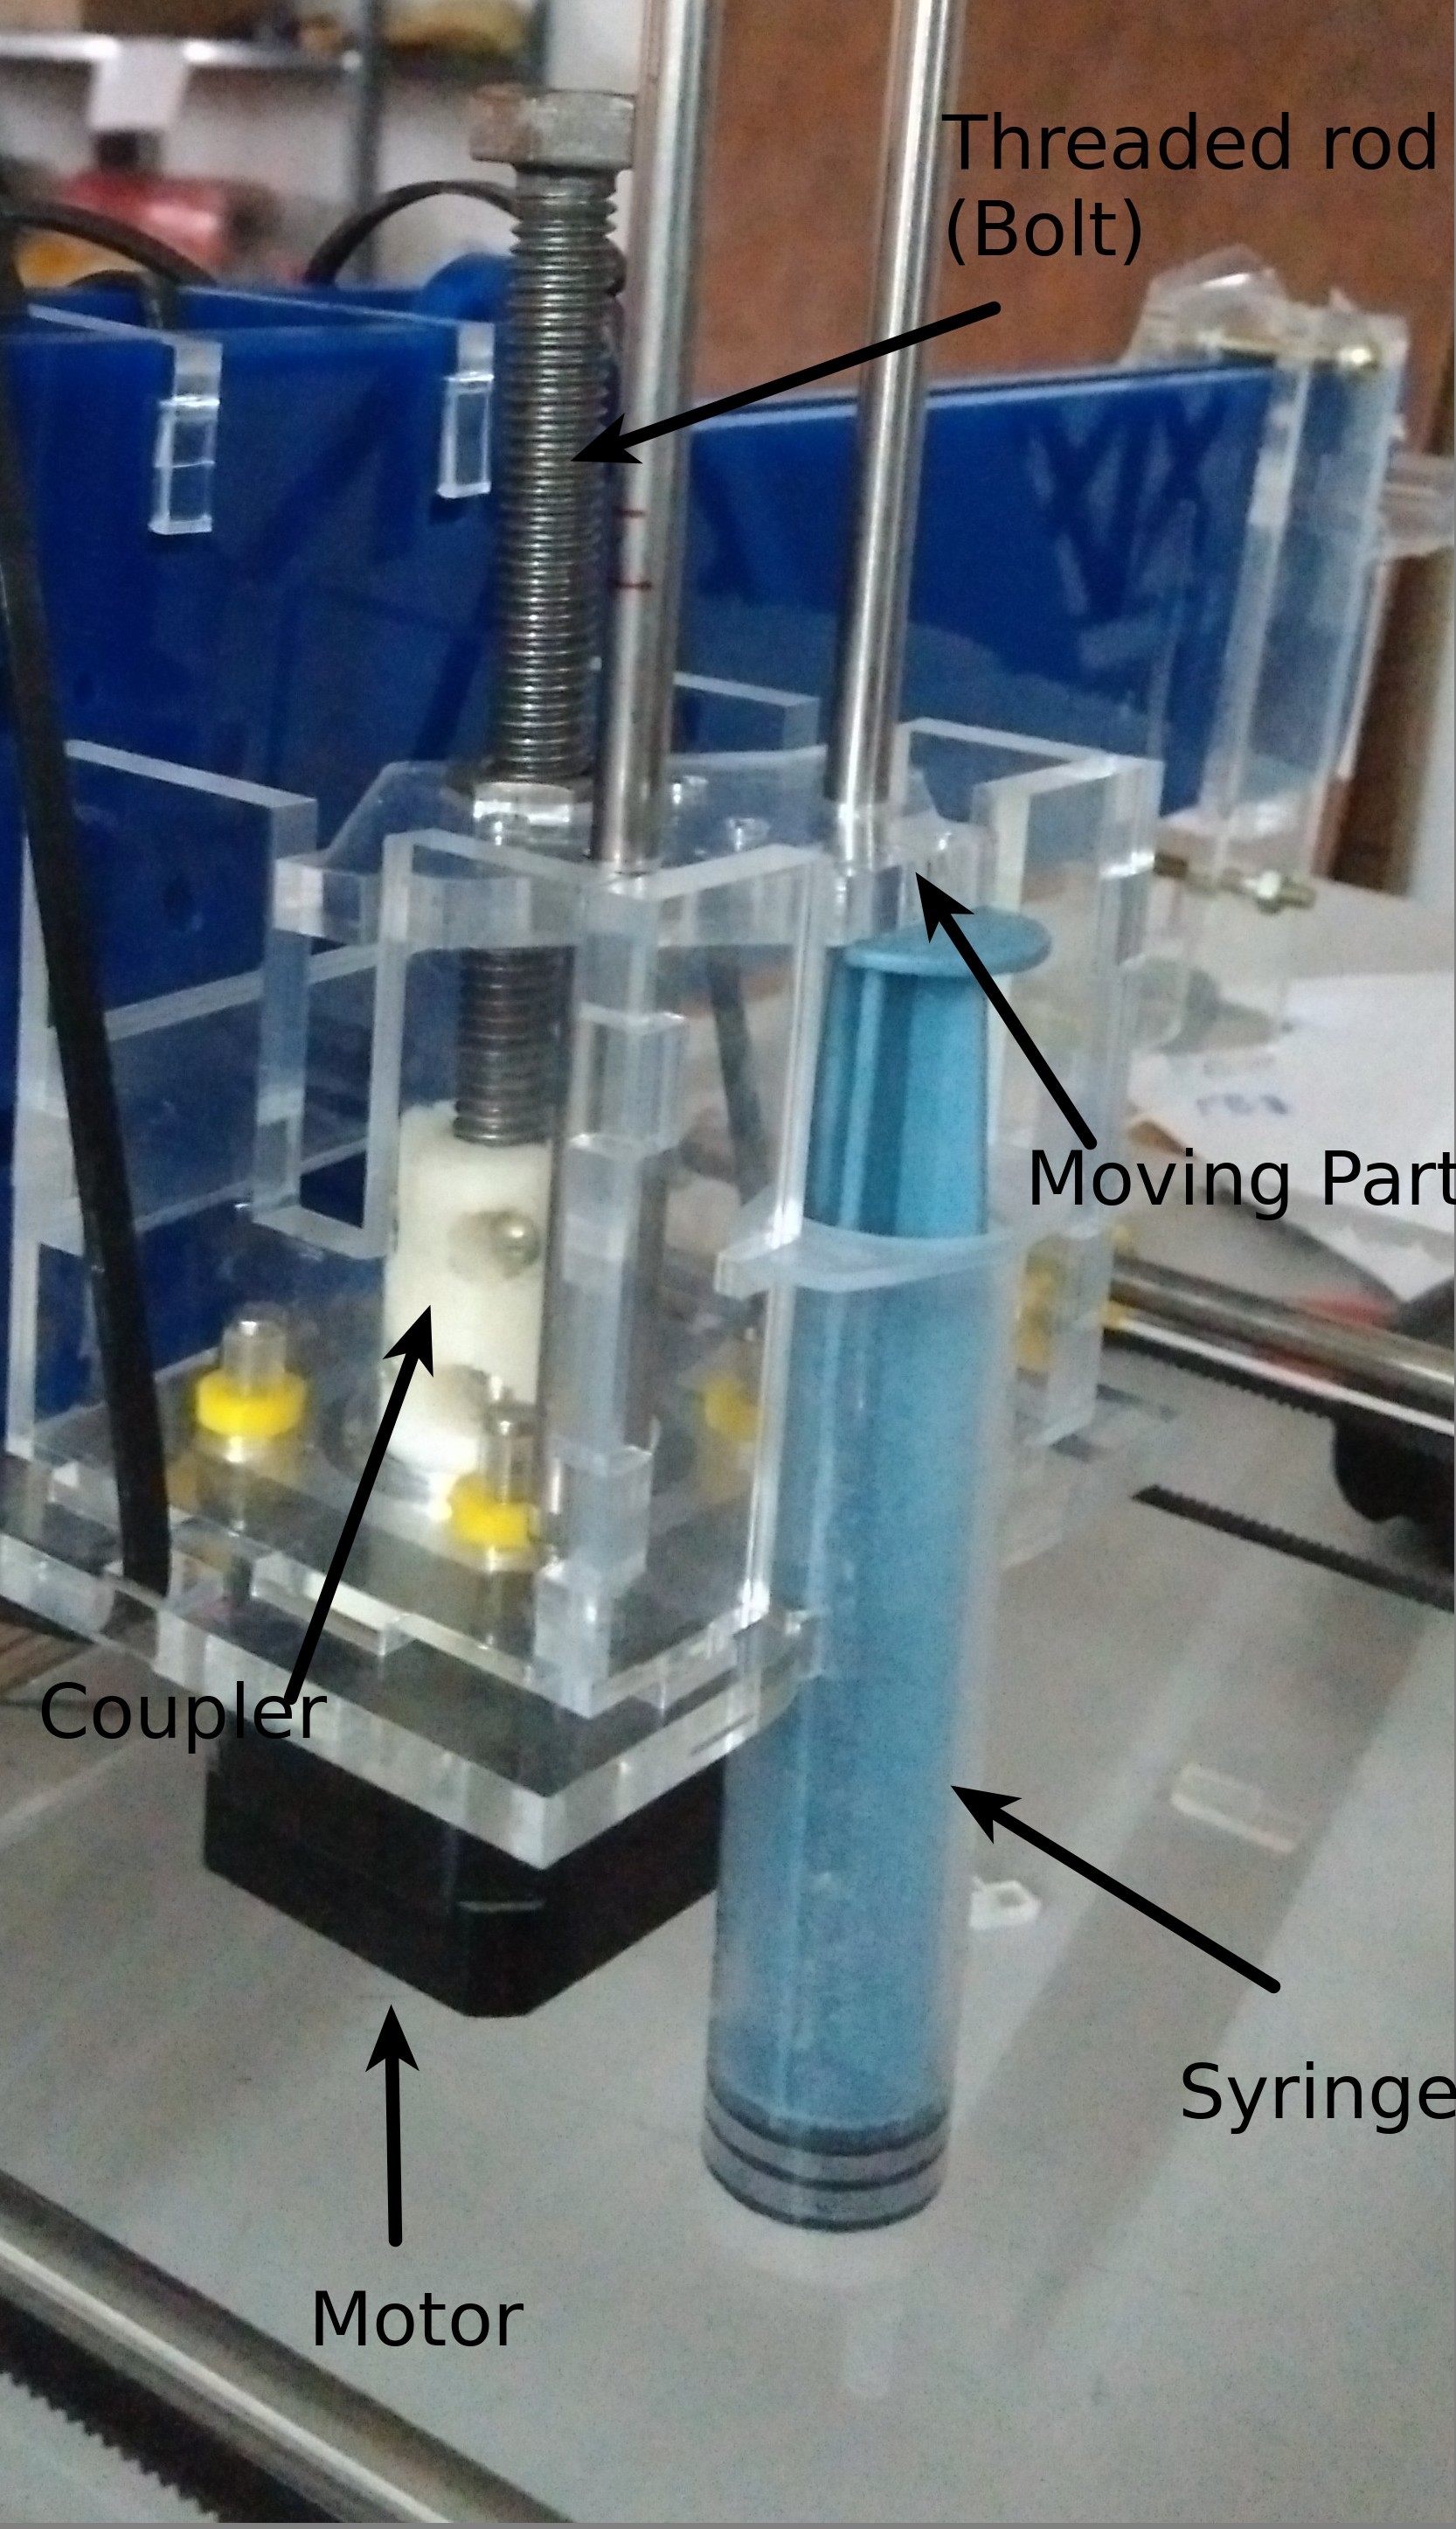
I designed a bush for the smooth rod which is to be slided over the rod.

Here is the original stl file.
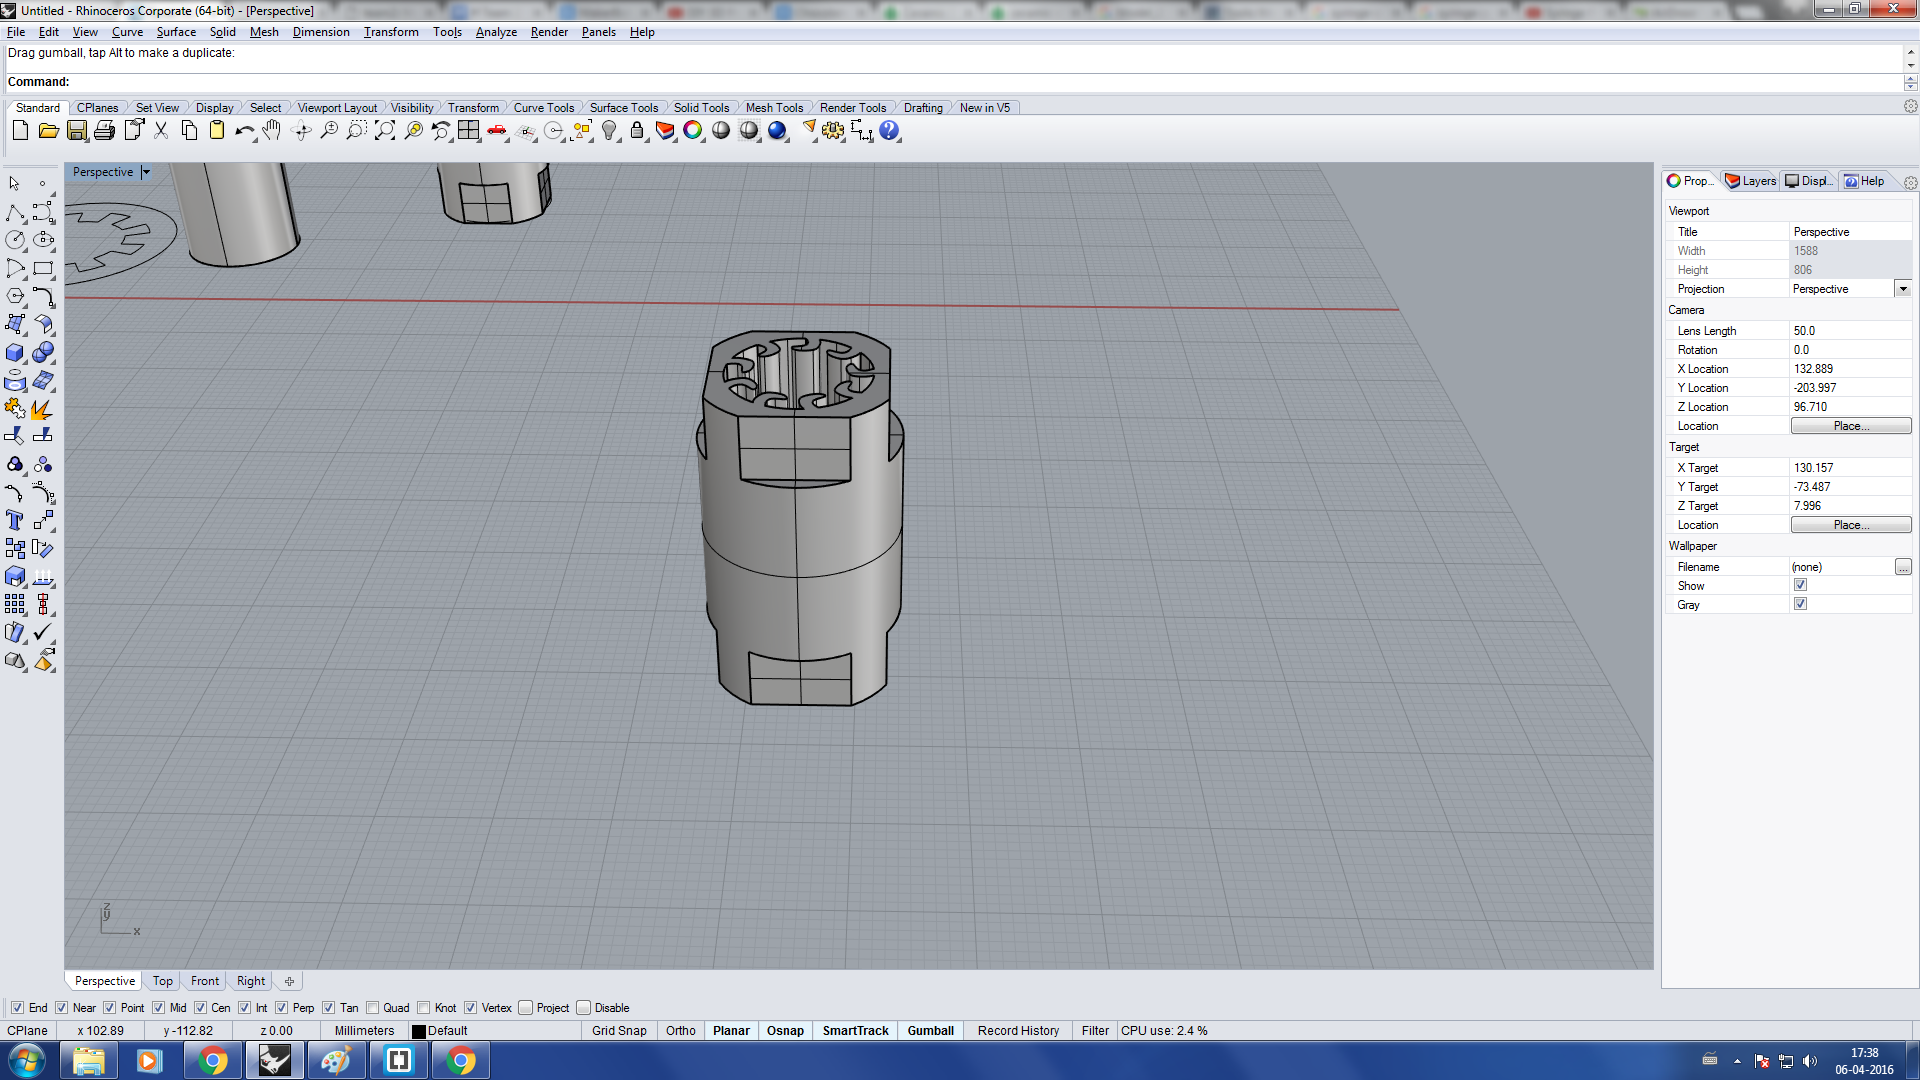
For coupling the threaded rod with steper motor we need a coupler. The coupler was not available here and we decided to print it. We downloaded it from thingiverse. There is option to make coupler with custom measurements.
Download the rhino file which include the entire design.
Machine Design
Now we have to automate the machine using a controller. For the controlling part the recommended board is gestalt board, but we dont have any gestalt board with us.So I tried designing a controller board
Controller Board
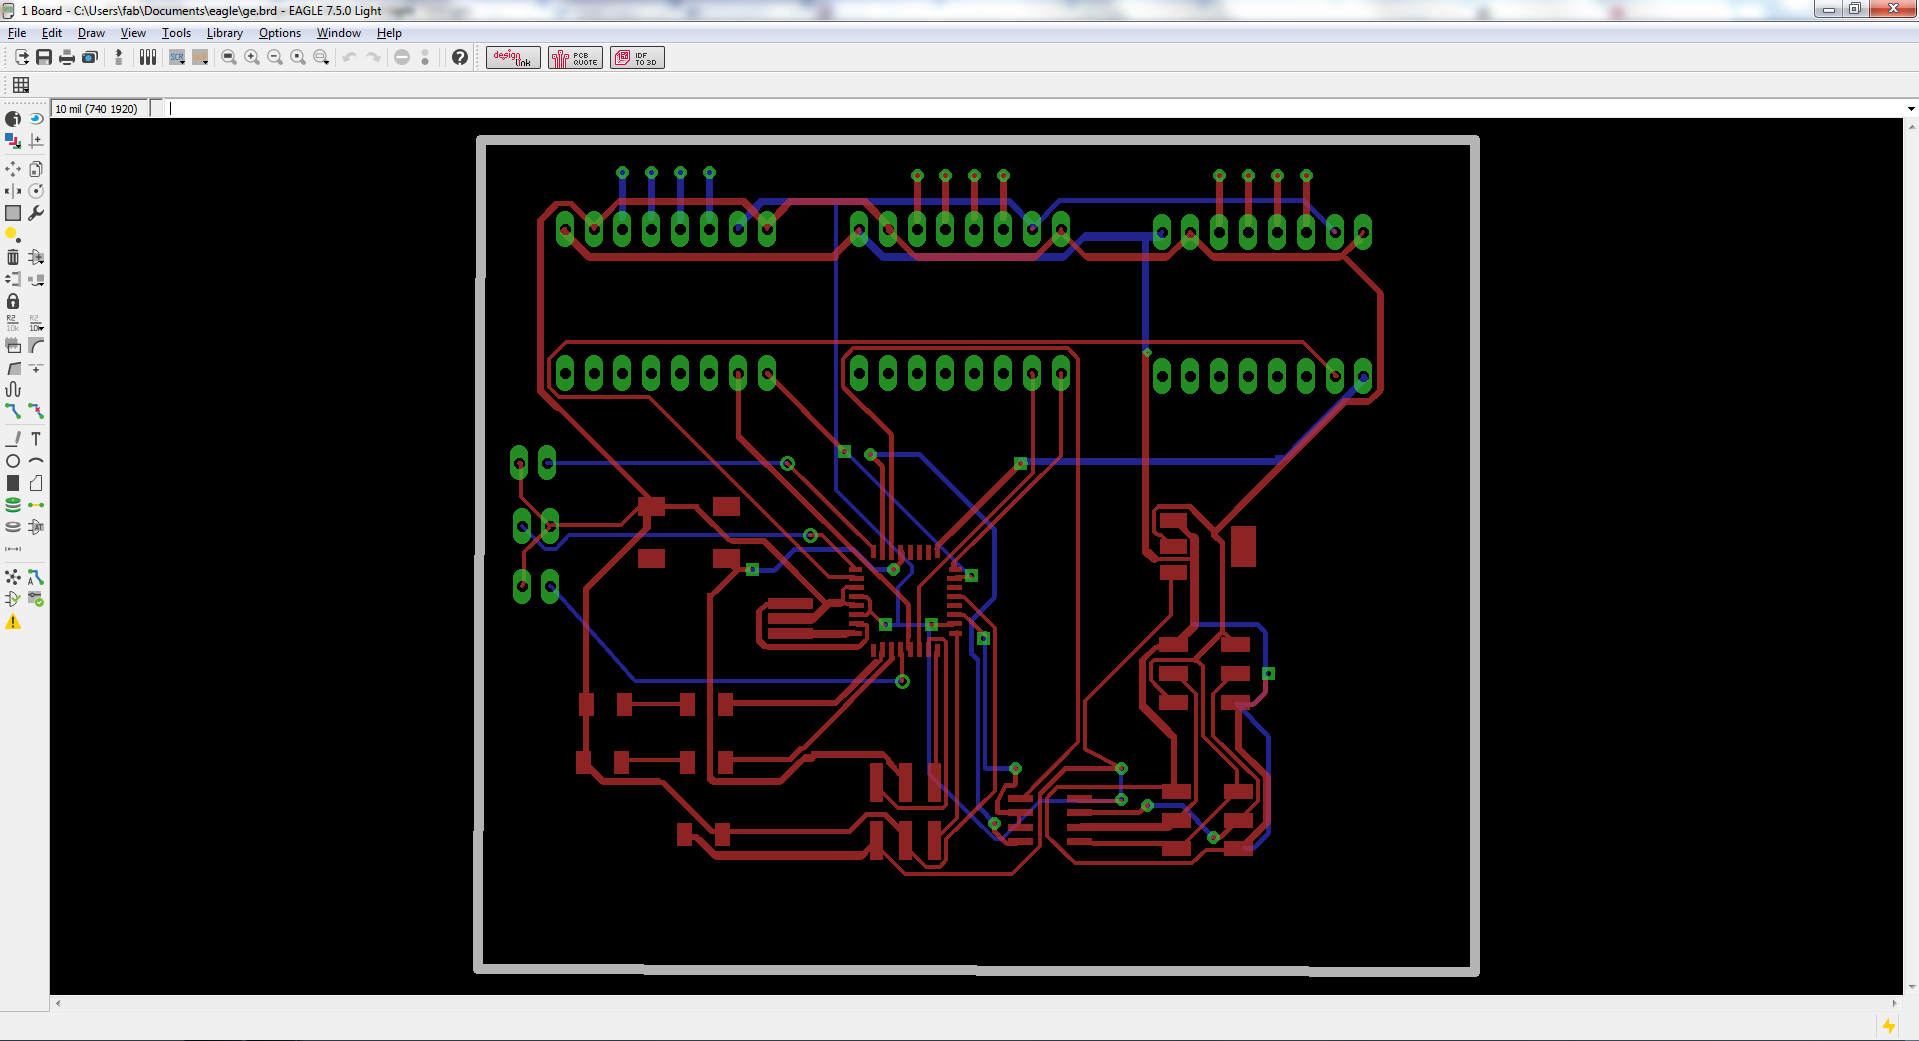
I have a designed a custom board for controlling the steper motor. This is can also be considered as a custom gestalt board or something similar to gestalt board. It has atmega 328 and three A4988 stepper controllers so that we can control three stepper motors in a single board. It has also RS485 interface so that similar board can be connected to this board if we want to control more stepper motors. It has three pins for the limit switches in which two ar connected to INT0 and INT1 and the other is connected PCI0 (Pin change interrupt).Here is the screen shot of schematic and board design. The board i designed is a double side one.
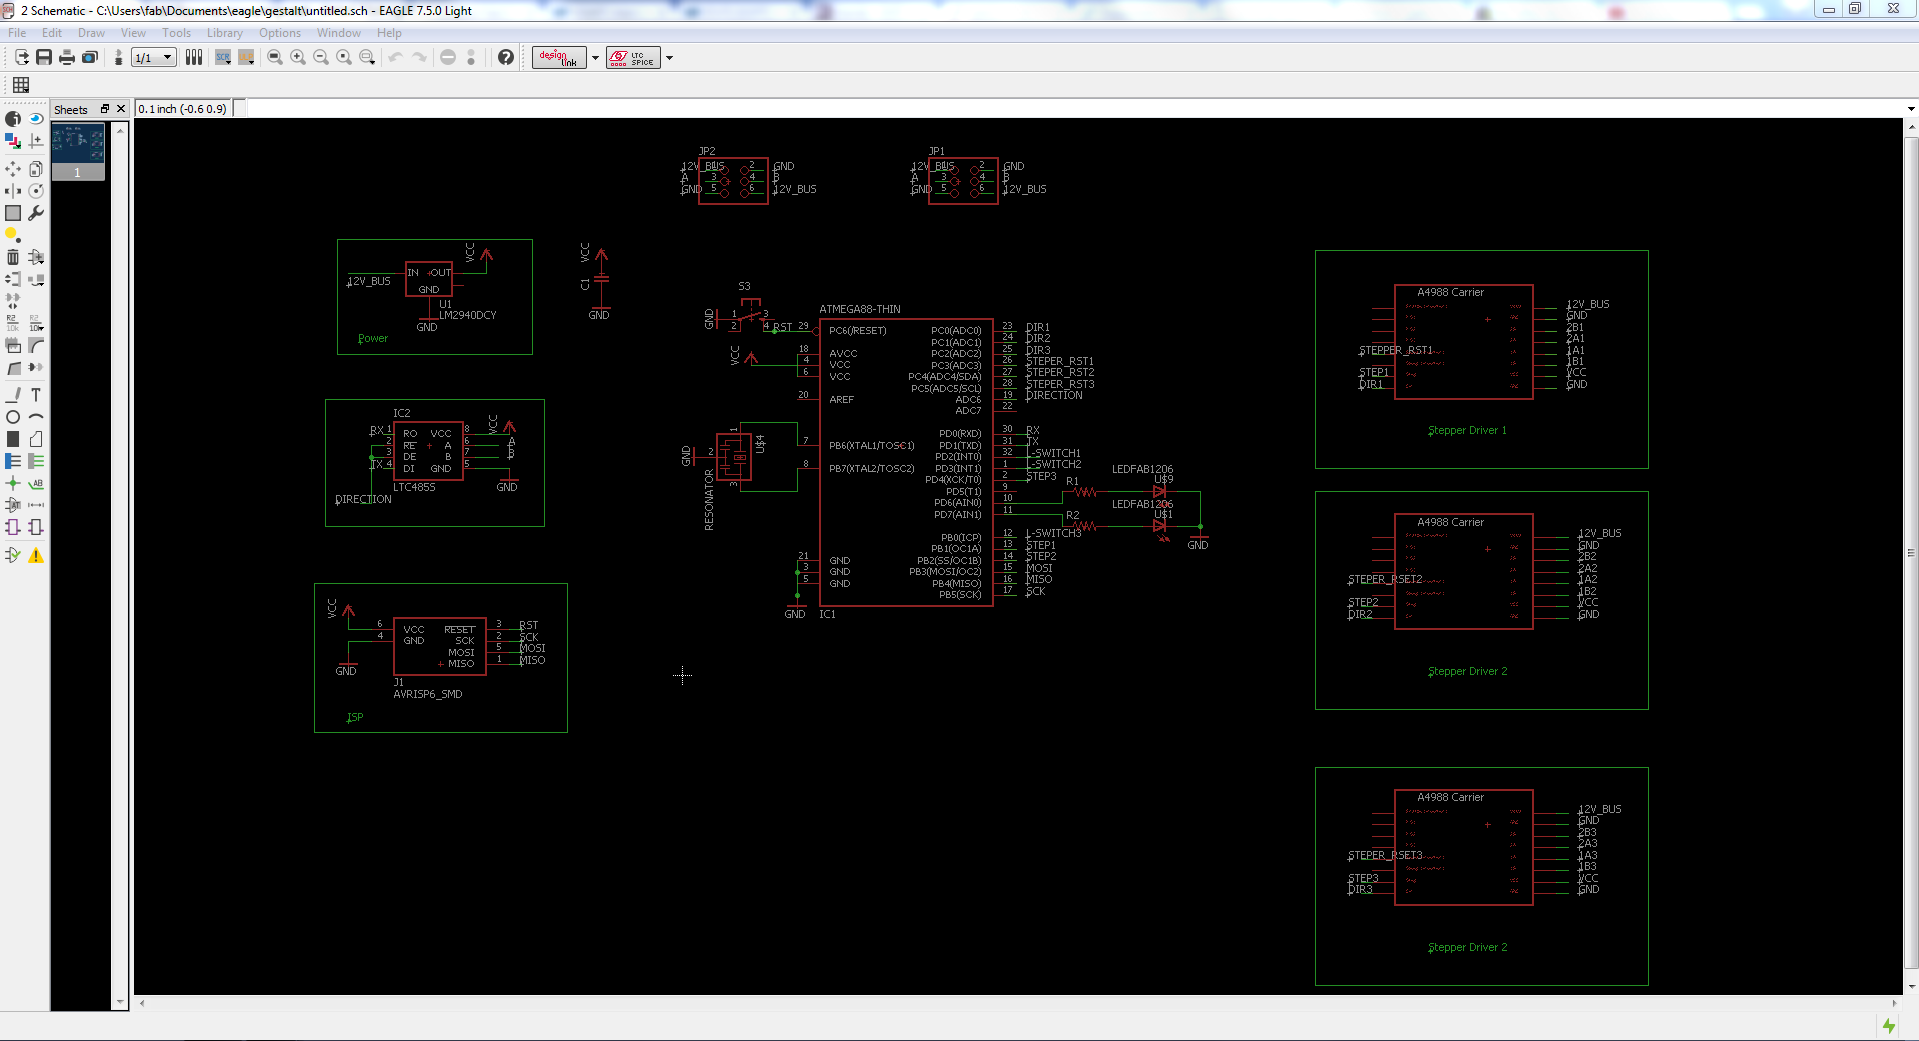
Here in a single board we can connect three stepper motors. I dint add a stepper motor controller but i have added slots for connecting Pololu A4988 stepper motor controller. It can be inserted in the female header pin slots that are added in the board. Since it has RS 485 transceiver we can drive more thaan three motors also by adding one more board (same board).
We tried milling this board but we failed to get a proper double sided PCB. Also we realized that we wont get enough time for preparing our own firmware. Finally we used an Arduino Mega board and Marlin firmware for controlling the machine.
Here are the link to download the schematic and board design of the board.