WEEK 12 - Molding and Casting
TASK:
Objectives:
- Ironman logo design by milling
- Create 2D logo in sketchup
- Import to MasterCAM, set parameters
- Mill mold using high density plastic
- Ironman helmet design by 3D printing
- Download and modify model from thingiverse
- 3D print mold and treat surface
- create mold using silicon rubber
- cast model using silicon mix
Ironman logo design (Milling):
Create 2D logo in sketchup
Ironman logo Sketchup file: Download
Being a fan of ironman technology, the assignment for this week provided opportunity to cast miniature version of Mr. Stark's logo and helmet.
The exercise began by producing simple geometries for molding and casting.
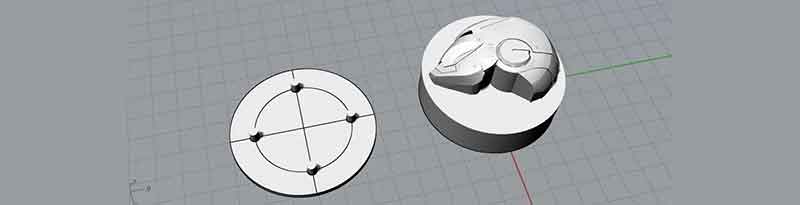
Ironman's logo was chosen for it's simple design.
1) First, the logo was created by tracing over a downloaded image of the logo. This was done in Sketchup and exported as dwg (AutoCAD 2004) to be uploaded to MasterCAM.
After consultation with our FabLab Mastercam guru, some of the details were excluded as the scale of the model might be too small for milling with a 3mm drill bit. The end result of the design consists of a circle, 2 triangles and a square base.
Import to MasterCAM, set parameters
With the help of Tham, our MasterCAM guru, here are the critical steps:
- 1. Import dwg. into the program or draw image from scratch (recommended).
- 2. Create Machine Group (layer): Machine Type> Mill> default.
- 3. Expand toolpaths group 1, under the top menu, select toolpaths>pocket>enter NC name>select line to be chained>click ok> the 2D toolpaths-pocket window pops up.
- 4. Under the 2D toolpaths-pocket window, select tool> adjust the milling parameters> click ok. Detailed tutorial can be found here. Repeat the above process to chain the other lines if required.Next, generate toolpaths for the parts that has lesser depth. Refer to tutorial here.
- 5. Finally to post process the NC files, go to Operations Manager> Toolpaths> click Post selected operations (G1)> Under post processing window, click ok.
- 6. Under post processing window, click ok.
- 7. Next, use the Code editor to amend Z axis to ensure that drill bit moves up when job is done instead of staying at the last toolpath point.
Mill mold using high density plastic
CNC machine tutorial: Week 7
During the milling process, the 3mm drill bit broke due to plunging speed. It was further reduced via the machine control. Spped ratio change from 75% to 35% and Z down speed from 100 to 80.
Ironman helmet design (3D printing):
Download and modify model from thingiverse
Ironman helmet rhino files: Download
To increase another level of experimentation, instead of casting flat 2-dimensional logos or patterns, the project now focused on 3-dimensionality of the object.
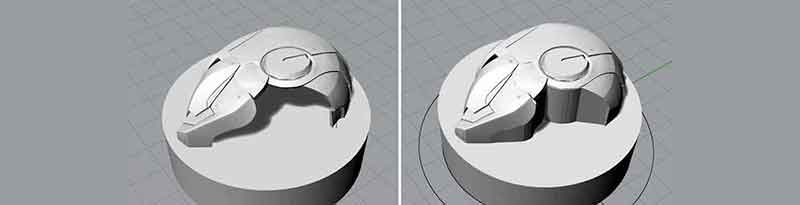
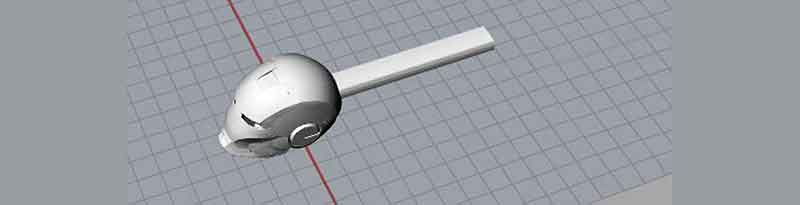
The 3D model of the Ironman helmet was first downloaded from thingiverse and subsequently modified to prepare for making the mold.
1) First, 50% of the helmet was placed over a base and the bottom filled up to make it water tide. The opening where the eye is was left untouched (which later proved to be a big mistake) as the Silicone rubber would be thick enough to roll over it instead of filling up the internal of the helmet.
2) The model was intended to be placed in a tupperware where the silicone rubber will be poured into. With this idea, a connector plate was designed to secure the helmet model under the cover of the tupperware. This way, the 3D printed model can be firmly secured, topside down, submerging into the silicone rubber during the curing period.
3) Another model was created to exercise the silicon mold method similar to what Roy had completed in 2015. This will be done by pressing 2 silicon molds together with the 3D printed model pressed within it. Once the model was removed, the molds were put together again and wax will be injected into the mold using the wax injector. This model didn't get molded as time was taken up to complete the milled model.
Ironman helmet design: 3D print mold and treat surface
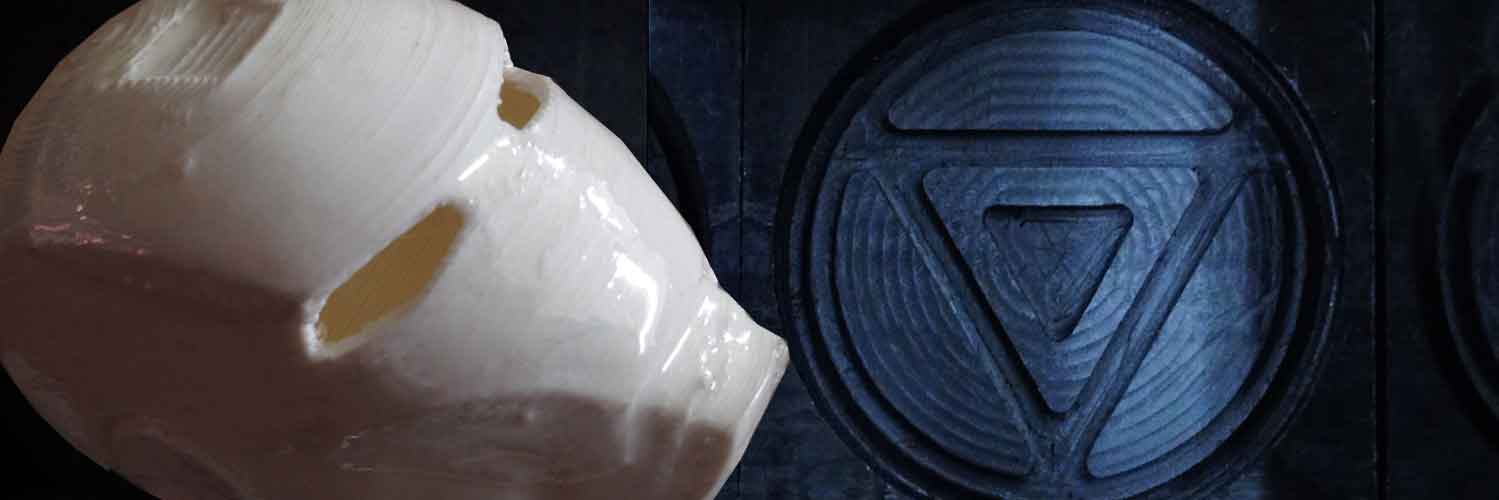
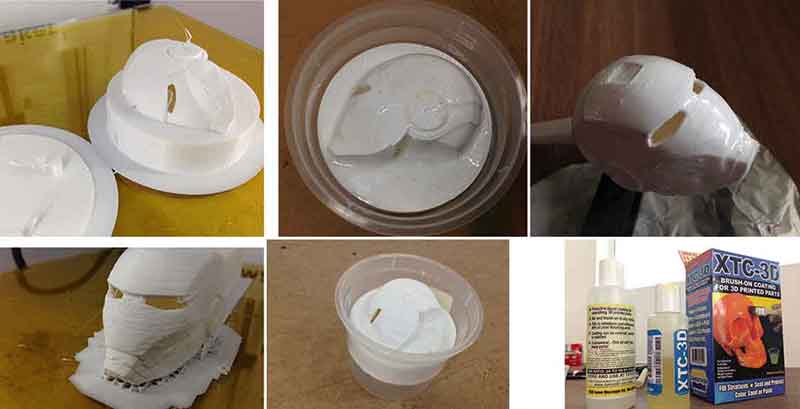
The 3D prints were printed well with 20% density using Cura operating on Ultimaker 2. The prints were then coated with a layer of XTC-3D (shown in image below) to dissolve the rough edges of the print-outs. Mixture ratio was 2:1 with 2 being the larger bottle. The mold was then placed in the tupperware to be ready for the silicon rubber to be poured in. This method adopted differed from what was initially planned as the instructor cautioned that by inserting the model topside down may create wastage of the silicon rubber.

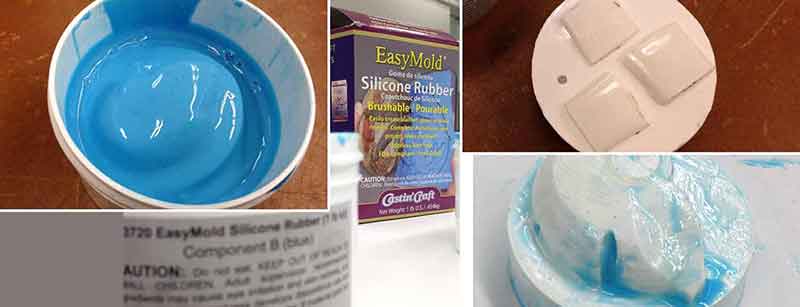
Create mold using silicon rubber
Ironman logo
After mixing the Easy Mold silicon rubber mixture (ratio of 1:1), the mix was poured straight into the acrylic box witht the milled logo attached
at the bottom. The mold was left in the lab overnight to cure.
Ironman helmet
After mixing the Easy Mold silicon rubber mixture (ratio of 1:1), it was decided that the tupperware is too small for the operation as the depth may not be adequate to take into account of forming during the de-bubbling process. The 3D model was then placed into a larger container with the ironman helmet's eye openings sealed up with masking tape and secured using industrial grade double-sided tapes at the bottom. Once ready, the silicon rubber mixture was poured into the container. After that, gentle shakes and knocks at the container was done using hands and giving the bottom gentle knocks on the table. Right after a few knocks, to my horror, the 3d model floated up to the surface. The double-sided tapes gave way due to vibration.
Second attempt was executed by placing model into the acrylic box and using industrial grade double-sided tapes to secure the bottom. The external of the acrylic box was also water sealed by means of masking tapes. Once the rubber mold was poured in, it was placed into the vacuum chamber to de-bubble. The de-bubbling process was halted when it was observed that the silicon rubber mix was sucked into the internal of the model. This was caused by the masking tape, located at the eye opening, that gave way due to vibration and pressure created by the machine.
The mold was left in the lab overnight to cure.
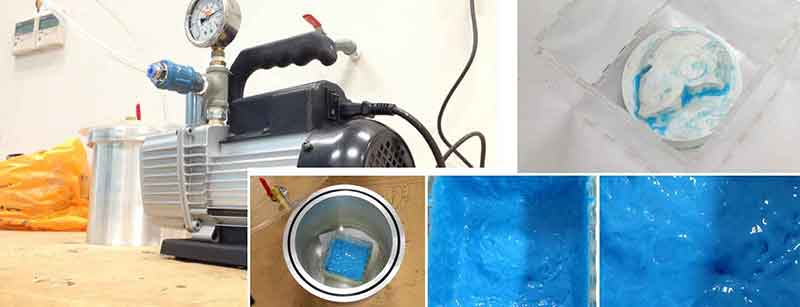
Once the mold was cured and harden, the acrylic box was taken apart. Surprisingly the ironman's eye was not affected badly and the internal volume stayed intact. With a bit of trimming using pen knife, the mold was ready to be casted.
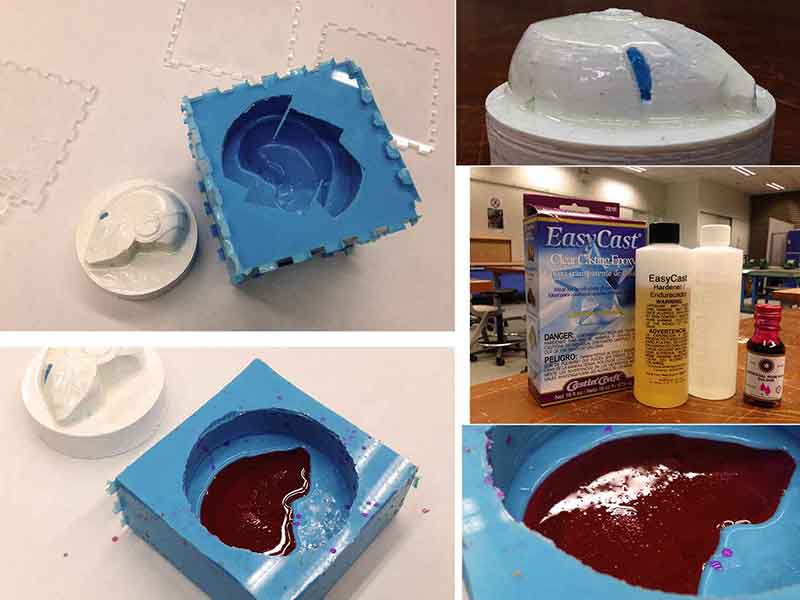
Cast model using silicon mix
To cast the model, silicon solutions (Easy Cast) were mixed at a ratio of 1:1. Next, red dyes were added for colour.
Finally, pour mix into mold and cured at room temperature overnight.
Reflections
It felt great to go back to basics of fabrication, something of which is a familiar territory to the architectural community. Having mentioned that, the assignment turned out to be a little more complex than expected. There are alot more ways to mold and cast but all-in-all the week has been very interesting. One of the most valuable takeaway is knowing how the de-bubbling process works and the amount of torlence required. This should be taken into considerations during the design process.
Check out my video below!

Related Projects