This week's assignment
- 3D Printer test
- 3D Printing
- 3D Scanning & Fix the mesh
This week's assginments are learning and testing 3D scan and 3D print. In Fablab Seoul we have several 3D printers including Makerbot, Almond2, da Vinch and Creatable D2. 3D print got so popular over the past few years. It allows makers to test prototypes way faster than conventional ways.
3D Printer Test
3D printing sounds so cool and seems easy. Before I tried 3d printer, I thought I can print out whatever want and all I have to do is just clicking the 'print' button, just like a normal printer. But in reality, I experienced a lot of printing failues. It is extremely dissapointing when you find the failures after waiting 5hours. I'd like to emphasise that testing and checking the printer before using is important. And it will save the time and materials also!
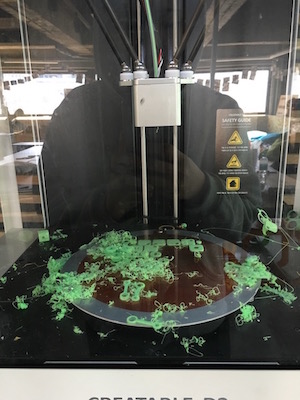
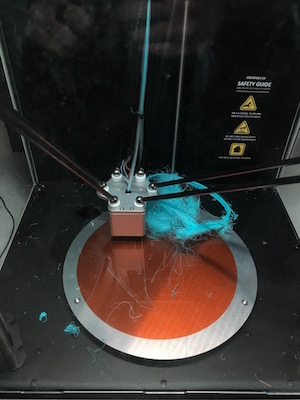
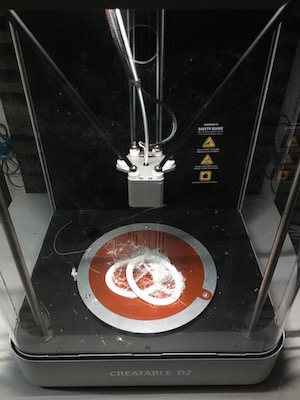
it's waste of time, material and electricity!
Most common mistakes that I made and possible solutions I founds are those.
- 3d printer prints nothing -> Check whether the filament is correctly loaded. I always extrude filaments before start printing.
- 3d printer prints materials in the air (like you can see in photos above) -> I really have no idea what makes this shit happens(it is really annoying). I found that making a brim or raft prevents this problems.
- 3d printed object collapse -> Reposition or make a supports!
Printing time and quality mostly depens on those; infill rate, layer height and speed. It varies from machines to machines, so test out your own printer!
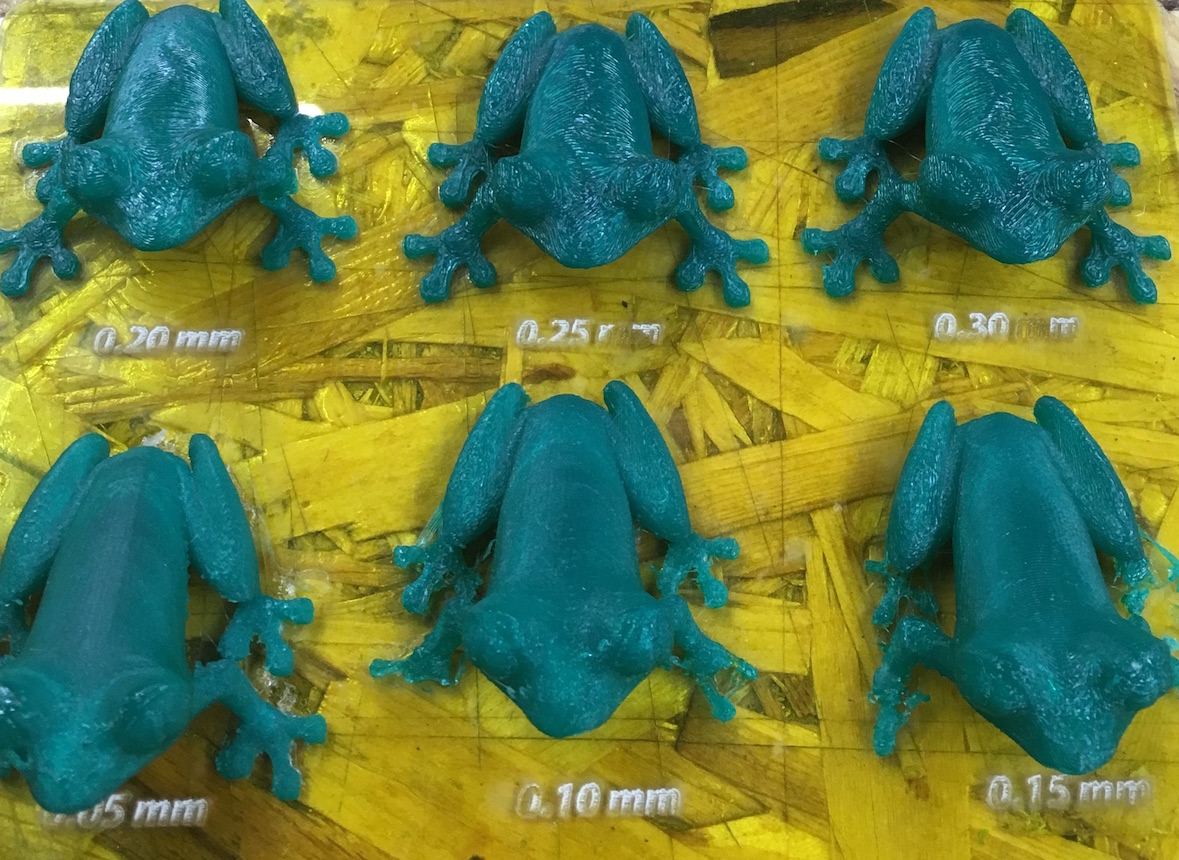
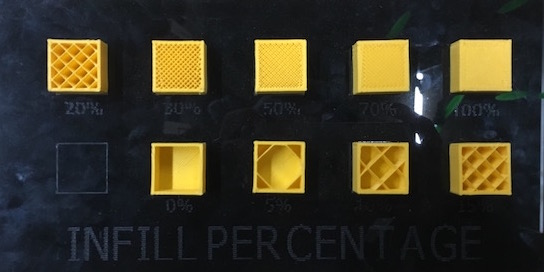
I did calibration on Creatable D2. I used this to test printers.
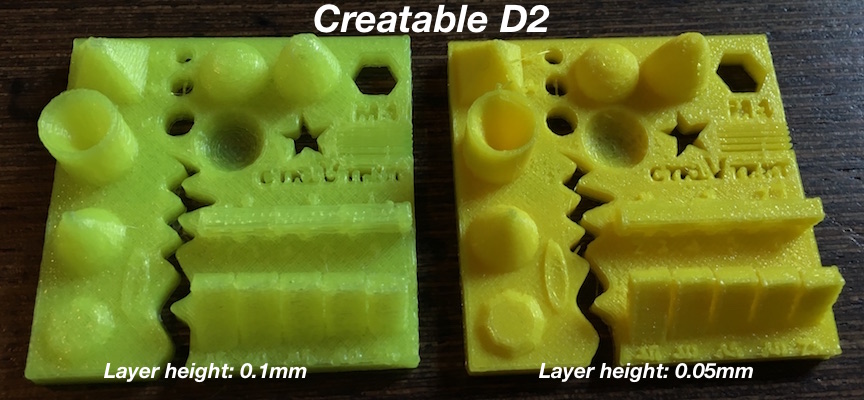 Layer height becomes critical if there is a hole in a design
3D Printing
3d printer actually does not print but laminates layers. That's the reason why it cannot be made subtractively. So, when modelling, you have to keep that in your mind.
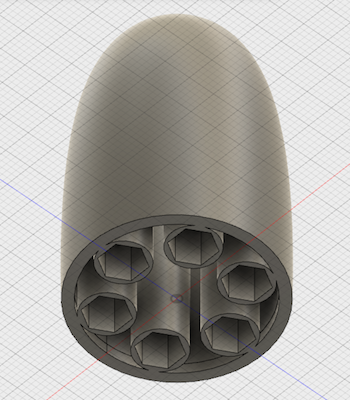
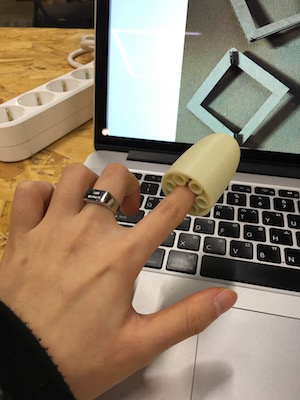
I 3d printed my possible final project. Check what I made previous week. There are minor changes in design but basically process is almost same. Followings are 3d design and 3d printing result.
3D Scanning
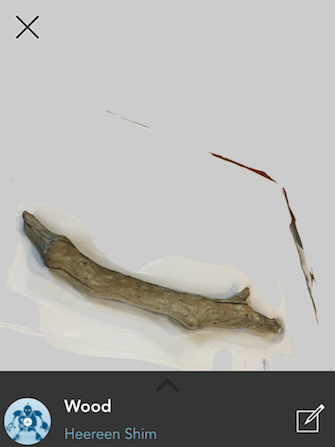
There are several ways to 3D scanning an object. First, I tried 123d catch application made by autodesk. It can be downloaded from app store.
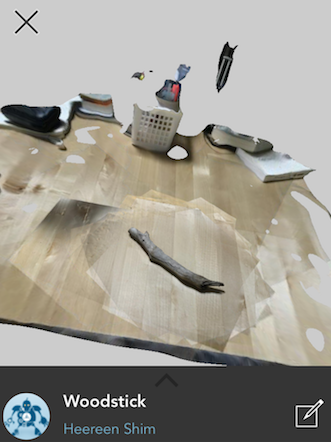
All you have to do is just taking photos of an object. The more photos you take, the more precise 3d model you get. I took a picture of wood stick placed on a table. As you can see, the table also shown in 3d model. So I put the wood stick on white paper. It looks better than first try.
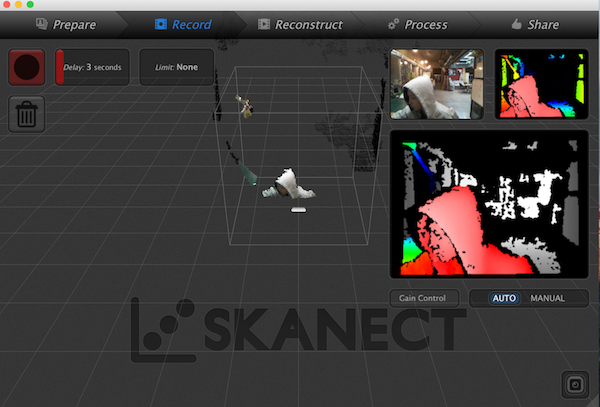
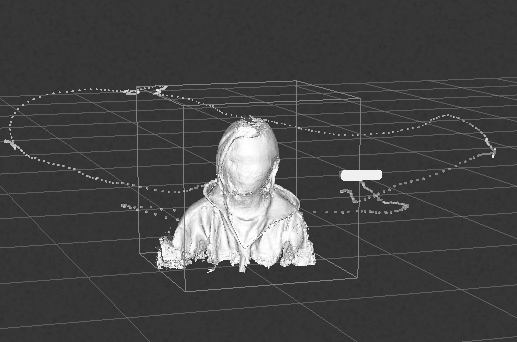
For more detailed 3d scanning, I used Microsoft's Kinect. Kinect is the camera which has a depth sensor. With software, it can be used as a 3D scanner. Here, I used Skanect.
3d scanning process was easy.
- Prepare: Select what kind of scanning you will do. Here, I chose 'body' to scan myself.
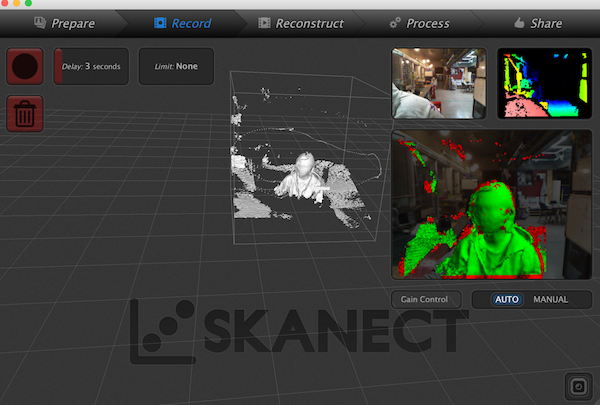
- Record: During this phase, you actually scan the object. Since, I'll scan myself, I placed the kinect stable. If you gonna scan other people or other thing, hold the kinect and 'scan' the object. It is also important to take more pictures for detailed result.
- Reconstruct: Here, you can see the result
- Process: 3d scanned result can de modified here
My first scannd model had undesiable parts. I constrained the bounding box to remove those parts. Also Simply function remove small parts.
Because I counldn't scan the top of my head, I had a huge hole in my scanned model. Fill hole function solved this problem.After finished fixing mesh, export it as a stl file for printing.
Result


HAPPY 3D PRINTING!
Design Files
downloadConclusion
What I succeeded
- 3D printing
- 3D scanning
- Become even more narcissistic
What I didn't do yet
- Detailed 3d scanning
- Post-processing 3d printed object
| ← week4 | electronics production | week6 | electronics design → |
|---|