Testing the printer
As a group project my class ran a series of tests for our Makerbot replicator 2, We found the test files from Make magazine here on: Thingyverse.com and split them between us. It was upon me to test the printer for Z-resonance disturbances. The test file is a rectangular column that runs almost as high as the printer can move. This suited me well as I plan on printing an Organpipe so its good to see if there would be defects.
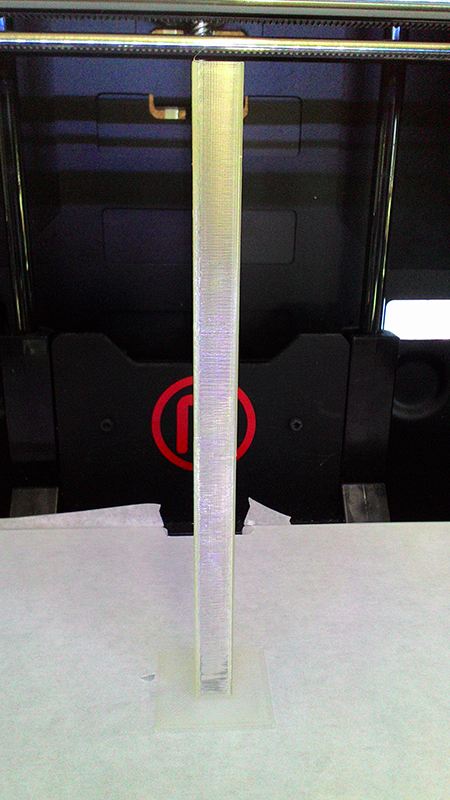
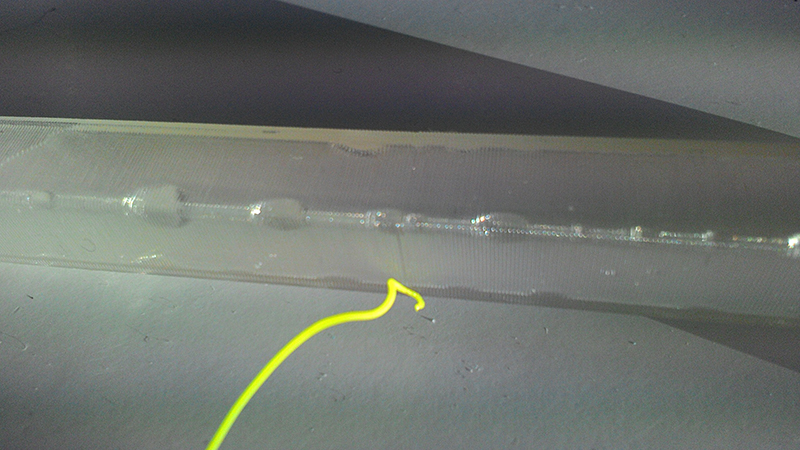
The test file came out good, there was one defect but it was not where it should be expected, if there is resonance it should accumulate the higher the column goes, but the defect I noticed was about in the middle of the column. This might have resulted from the printer beying slightly moved during the process of printing.
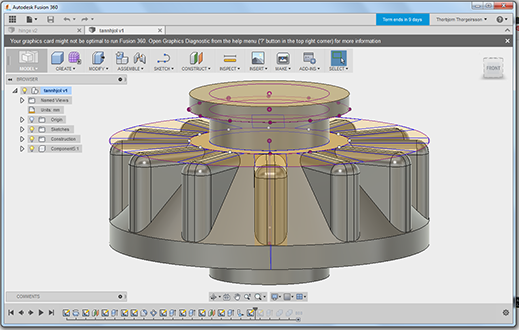
Modeling for 3d printing
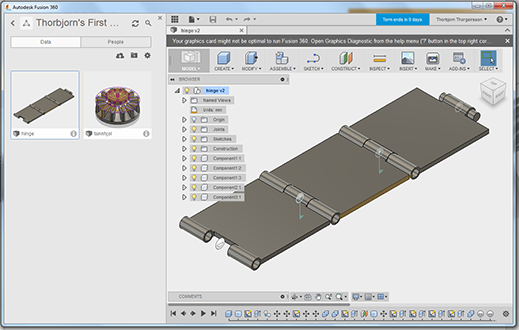
I tried modeling a gearbox where a wheel would turn another adjacent wheel, but I soon found out that my CAD skills weren't all that good. So I spent a good amount of time watching tutorials on Fusion 360 and then modeled a simple hinge without to much trouble. This type of design could only be fabricated using 3d printing as not only where the connectors hollow on one side but the other side extended into that hollow So that the design would come assembled straight from the printer.
I tried 3D printing the Hinge but I guess the design was way to thin, not to mention that the spacings between moving parts were to narrow. Half of the hinge did not show up in the printers preview, they did print but the design would not stick to the print plate and warped, I canceled the print. As Fusion 360 is parametric, I could go back to it and change the hinge dimensions. Of course I did not wait to explore the tests that my fellow fabacademy students did to know exacly the minimal wall thickness.


Photogrammetry
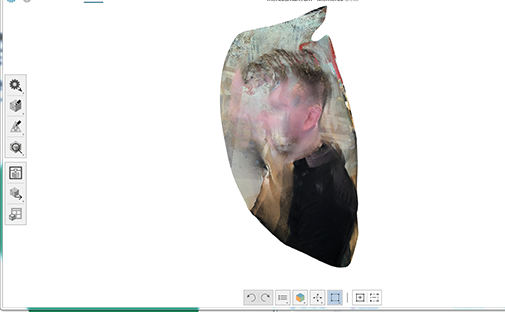
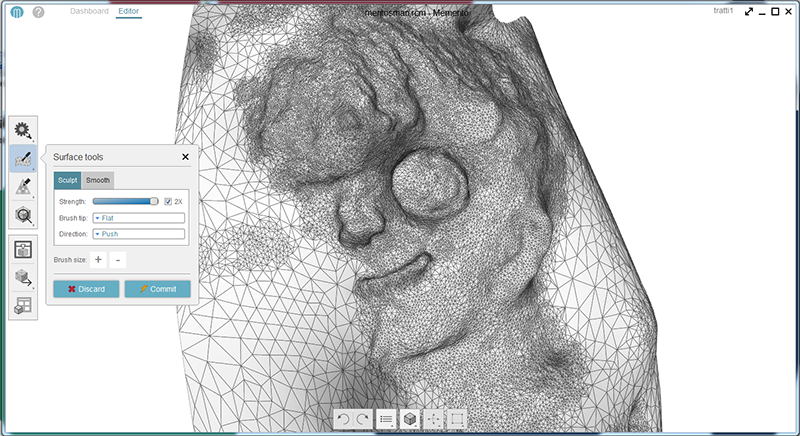
For scannning I started out with photogrammetry and took a series of photos on a cheap smartphone of my fellow classmate. The photos were uploaded to Autodesk Memento wich attemted to generate a 3d mesh from them. The resaults were not good. I only got about a half of a model and that was all scewed and meshed up. The reason was quite obvious, poor image quality, the images where inconsistently lit and the subject was silhuetted when shot from one side. The mesh was a falure but I rather like the outcome.
Just for fun I tried pushing around some vertexes within Memento just to get an idea of how mesh editing worked.
Second attempt at photogrammetry
I Took 32 images of a fake flower and uploaded them to Memento. The resaults where better than last time but there was still a whole on the top of the model, I was supprised because I photographed that quite well. I guess the fluorscent lighting I was under didnt do the trick.
Kinect
Next up I got my picture taken with a kinect, I spun around on a chair while ReconstructMe assebled data into a mesh. The mesh came out alright although it wasn't high resolution and parts under my chin ontop of my head and under my nose seemed to lack data. The mesh was had a color texture and parts such as my hood came out nicely detailed.
I did not save the colored file, but took an stl file and tried editing it in Autodesk Meshmixer. Again I just wanted a feel of how it pushed around vertices.

I tried opening the same mesh in blender but its origin gave me a hard time to navigate around the model. I tried changing the mesh origin in various ways but the pivot point stayed the same. It finaly got a bit better after I scrubbed the rotation values in the properties panel to align my mesh to the view and then I applied these values as zero. Then the mesh behaved a bit better.