Composits
I had various ideas for a composits asignment, such as fixing the rims of my car or making a fabable snowboard, but It was suggested I started out making a test slab and thats about as far as I got, but I managed to make it a bit interresting.
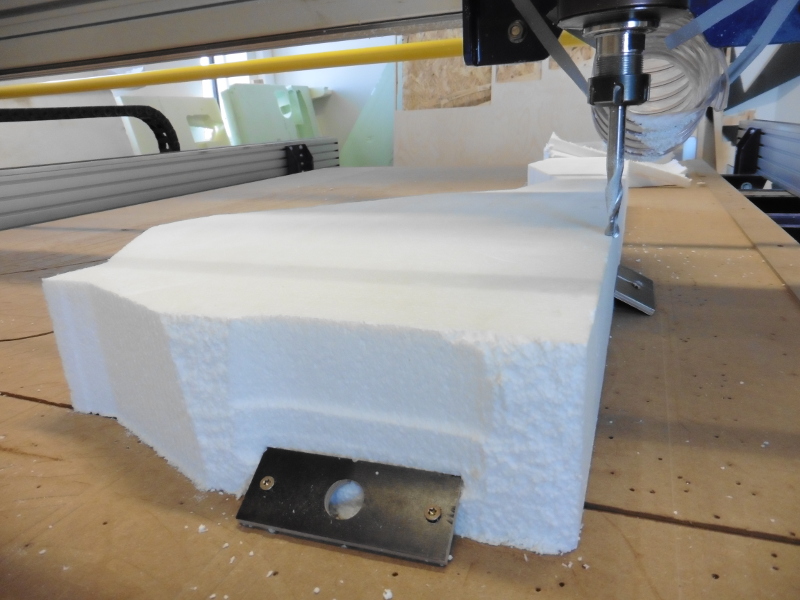
I figured it would be a good idea to have some curvature in my slab just to get an idea about how this materials behaved, what detail it would grab and how steep it would bend. So I came up with making a facemask in Blender. I had the nose exagerated to stretch the fabrik to its limits.
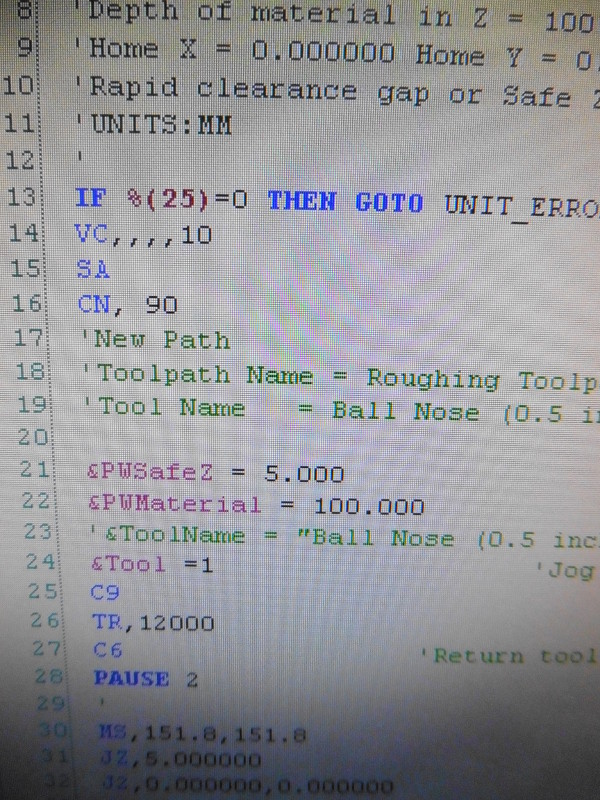
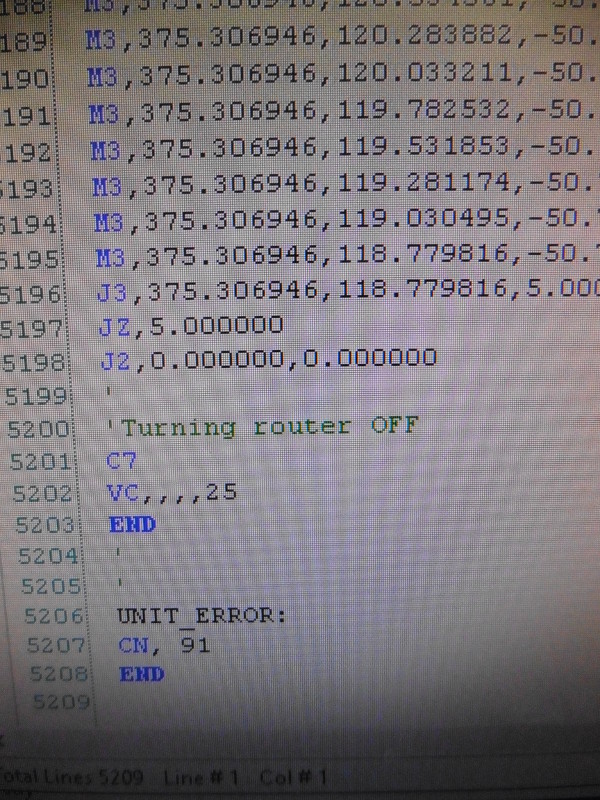
I routed the material out of compressed styrofome. My instructor was not around so I was not to shure about all af the settings but I managed to copy most of them from Hafliði who just finished a similar job on the shopbot.
The Cut plane setting I set to be in the middle of the material but it should be in the bottom as it doesn't calculate toolpaths that are lower than that. But that didnt matter as I could cut through the material with a utility knife. I had the margins rather big just to be sure I stayed clear of any clamps. I used a large 1/2" Ballnose endmill that barely fit in the spindle over the 10cm styrofome and I had to remove the vacume shield to make space, If the spindle would retract to its standard safe-height of 25mm it would hit its limits and reset the job, so I had to edit the G-code as Hafliði did before me, so that before the job it would limit the safe height so the Z-zero would not offset when Z-axis went between limits. I added a line: VC,,,,10 before the job and anotherone: VC,,,,25 after the job to change back to the default of 25mm.
 I didnt have a cut-out path for my item and this compact styrofome was harded to cut than I thougt, but it was alright.
 I made a list of Items needed at handsreach before starting mixing composits.
- Aluminum foil
- Scale
- gloves
- resin and hardener
- Cups for mixing in
- Mixing sticks for stirring
- Scale
- Burlab
- Mold
- Sellophane film
- Spatula
- Breather(loft padding)
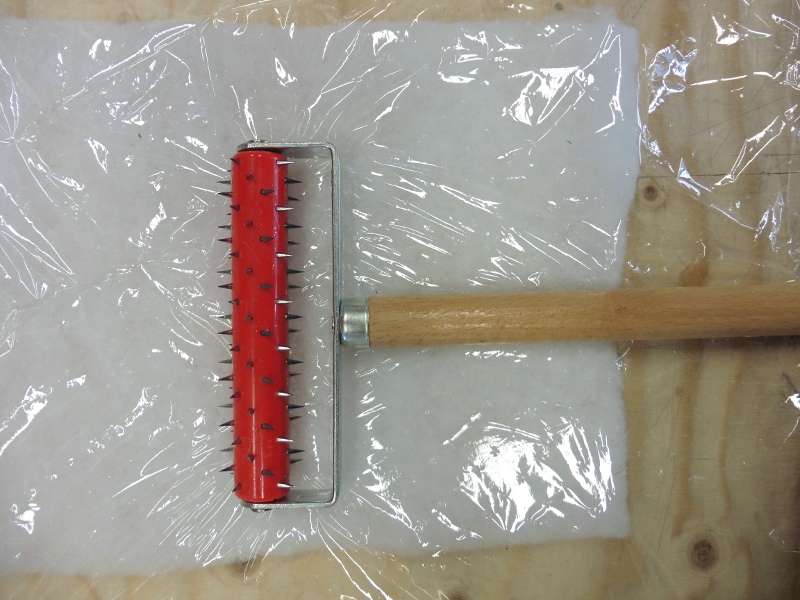
- funny piercer tool
- Vacume bag
- Gloves
- Apron
- Vacume bag and vacume cleaner
- Garbage bin
- Paper towels
Lets make another list of conduct.
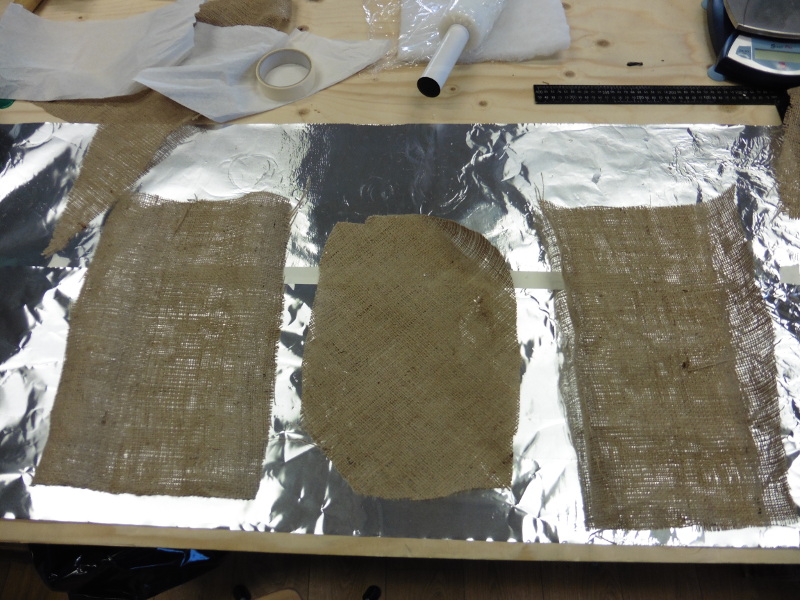
- Prepare work area, have everything I need, cover table with aluminum foil.
- Cut 3x burlab, 1x breathermaterial and 2x sellophane, pierce one of the sellophanes.
- Cover mold with sellophane
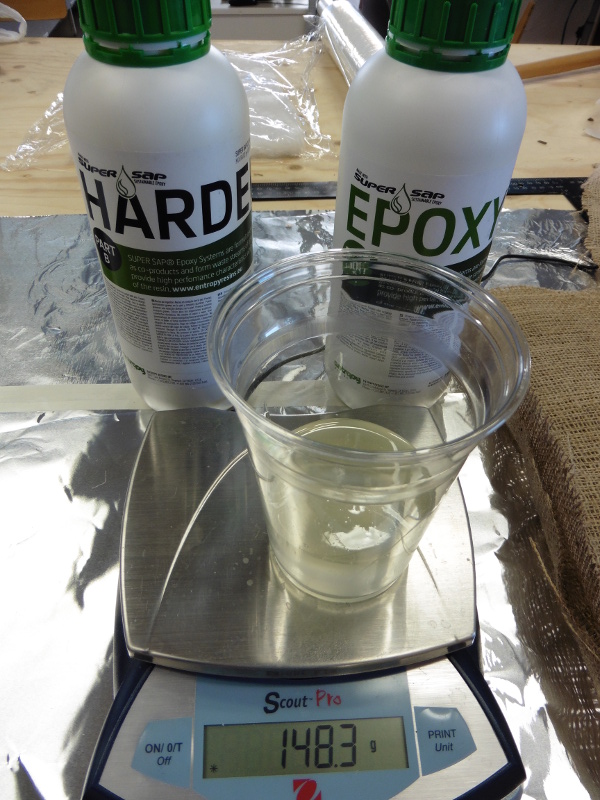
- Mix resin
- Pour mixed resin on burlab, even out and push out excess resin, for now it should be 50% fibers 50% resin.
- lay burlab on top of sellophane on mold. 3 layers, on the middlelayer the layers are oriented in 45° angle
- place pierced sellophane on top of burlab
- Place breather material ontop of Sellophane
- another piece of sellophane?
- Place in vacum bag and vacum pack
The resin is mixed as prescribed on the bottles, its is a different ratio for weight or volume. I weighted 100g resin to 47g hardener, wich was not enought so I mixed a bit more on the fly. When I first placed the mold in the vacum bag I forgott about the breather layer and sellophane so I added that. The tab on the vacum bag needs some space and is best placed on the breather, I was going to leave a platform for the tab on the styrophome when cutting it out of the stock material but forgot about it so I just placed it ontop of the breather above the forhead on the mask. The vacume did not manage to follow the contours of the nose and eyes properly. The tab of the bag came off and Im affraid I never got it to fit right when I replaced it and the air slowly leaked in, so to be safe and in a bit of a hurry, I placed everything in the kitchen sink with a bag filled with water ontop and left it there.

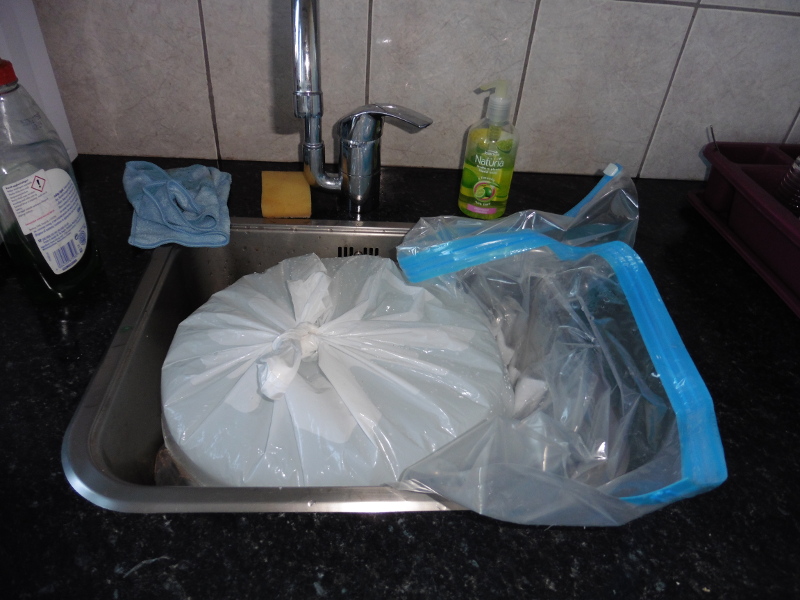
The day after the water had already leaked out of the bag. The first thing I noticed was that I had forgotten to place a plastic film over the styrofoam mold so it was completly stuck to the inside of the composite, I guess it could be evaporated by pouring asington on it but I didnt go that far. The plastic film obviosly didnt cover the corners of front side as well so the loft padding stuck to it there. The composite seemed to be rather unevenly distributed on the burlab, wich suprised me, but there were parts that were completely smooth and glossy but other places the texture of the burlab was completely exposed. The detail would've shown better if I had been more compitent in the vaccuming process but still I felt that I could take from it an idea of the amount of dedail this method gives me. the eyes were almost cought to its comlete depth, the nose contourse were good exept where they were to steep, there the burlab folded and made bulges. the mouth was visible but maybe not individual lips.
