Design
Images and links to be added.
This week we Routed a mold in Machinable Wax, poured smooth-on PMC 121/30 silicon in that to cast a mold. And then we casted a plaster like material called Hydrostone into that.
I decided to cast a tap that I could taper for a threaded rod and possibly use as a moveable tap in an closed end 3d printed organpipe. it is basicly a cylender with two half cylenders on each side that prevent the tap from turning when traveling up and down the rod, I extended one of those half cylenders to use as a straw when pouring the casting resin in, I extended a cylender up from the middle to leave space in the mold for the threaded rod, and I extended a small pipe from the otherhalf cylender to work as an air duct.
Modeling a base for the mold.
Drawing the base for the mold in CAD was confusing as the objective was to get a functional negative space around my model, that could hold the resin that would shape the negative space of my mold and have thick enough walls to hold it. And I needed to consider the size of the endmill used for the routing.
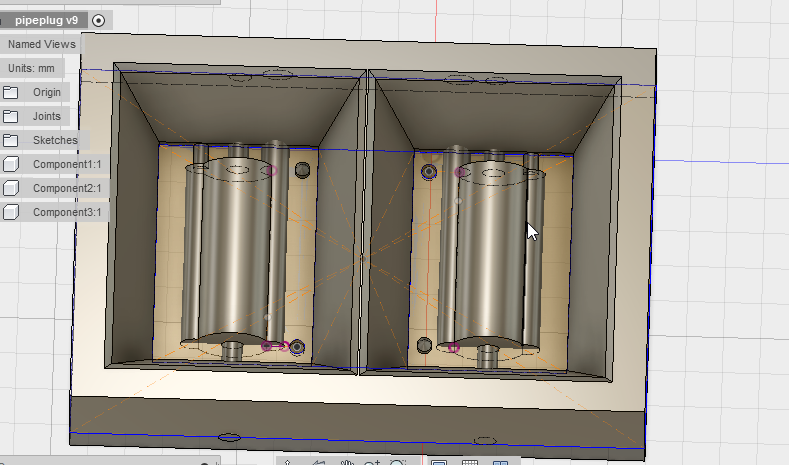 Coming back to Fusion 360 after a short amount of time wasnt as easy as I thought it would be, The modeling process seemed rather complex and I felt like I had to go to the beginners tutorials all over again to get going again, and allthough it is fully parametric I didnt feel comfortable doing "freestyle" modeling or scaling my parts when needed. Most of my problems arose when making the base around my "positive" shape, the size of wich was determined after modeling the "positive" components it was to surround. Getting it positioned and scaled right was a bore. And placing symmetrical guide holes and taps on a sketch that was already scaled down wasnt straight forward. Then when exporting the model could only be done as seperate components, until I made a new document and draged the old document into that from the filebrowser, then I could export that linked component.
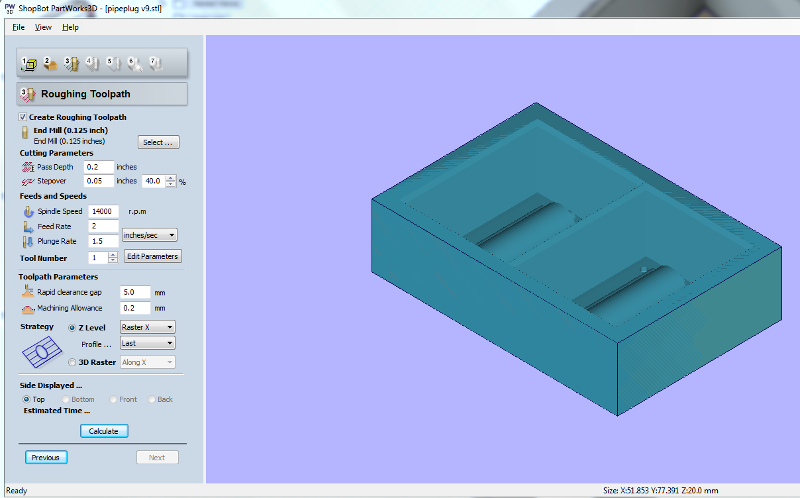
Before I figured that out I took a look at Fusion's CAM functions wich looked promising but I still went on to export a file to Partworks wich was a more familiar workflow to my instructor and it was already set up with the pc connected to the shopbot.
I exported the toolpaths from partworkds with the settings as shown in these photos... There are two toolpaths one for roughing and the other is a finishing path. The Z zero was set ontop of the stock material. Saw that there would be a defect in the mold as I didn't have a small enough endmill to fit between one of the guiding tabs and the part itself, but avoided going back to Fusion360 lest I messed anything else up in the process, so I just decided to fix it afterwads with a knive.
The Machinable wax was fastened with doublesided tape on the bottom and woodblocks on the sides around it. I was a bit confused with the orientation off the woodblock but eventualy figured out where the zero point should be located. The Z was Zeroed ontop of the Stock material and that was repeated after changing the endmill. The roughing toolpath went as expected but the finishing went realy slow, Bas changed the "3d sensitivity" and "distance to check" in the settings for the Shopbot. We stopped the job while it was running to change these. When resuming the job something went wrong and the shopbot milled through the wall of the mold. So we stopped again and to be safe we restarted the job from the beginning.
 s
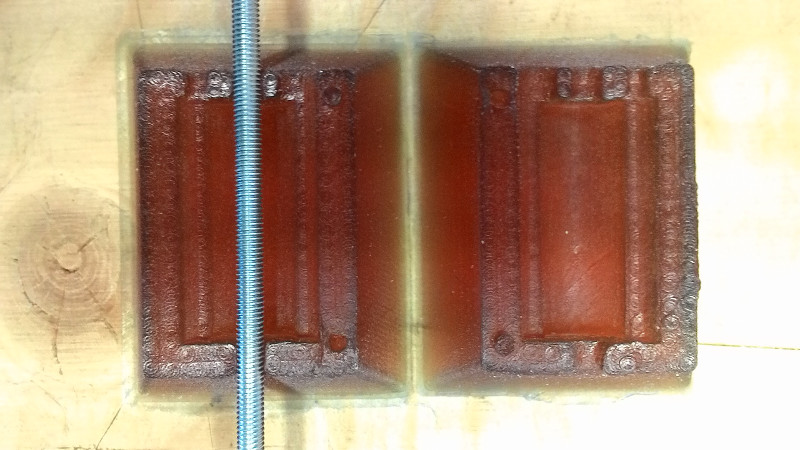
This resulted in an alright mold with a smooth finish, I used a utility knife to scrape away what litle wax was left behind that the endmill could not reach. And I melted a bit of Machineable Wax into the wall where the endmill had charged through. And was I now ready for casting the mold.
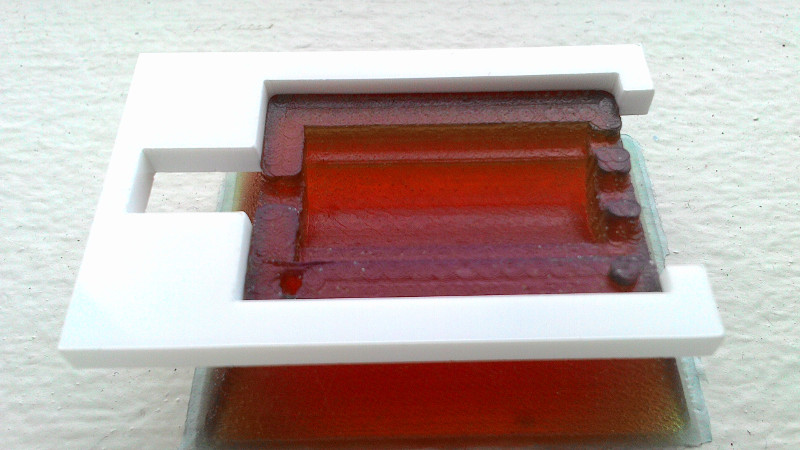
As I realized I wouldn't have very good guides for the mold to fit together I chamfered the edges so that a 1,5mm verical wall was left by the bottom of both sides, this way I was able to laser cut a C shaped clamp out of plexy glass that fitted around the mold.
I then mixed the smooth-on and poured it into the Mold and left it for the night
s
This resulted in an alright mold with a smooth finish, I used a utility knife to scrape away what litle wax was left behind that the endmill could not reach. And I melted a bit of Machineable Wax into the wall where the endmill had charged through. And was I now ready for casting the mold.
As I realized I wouldn't have very good guides for the mold to fit together I chamfered the edges so that a 1,5mm verical wall was left by the bottom of both sides, this way I was able to laser cut a C shaped clamp out of plexy glass that fitted around the mold.
I then mixed the smooth-on and poured it into the Mold and left it for the night
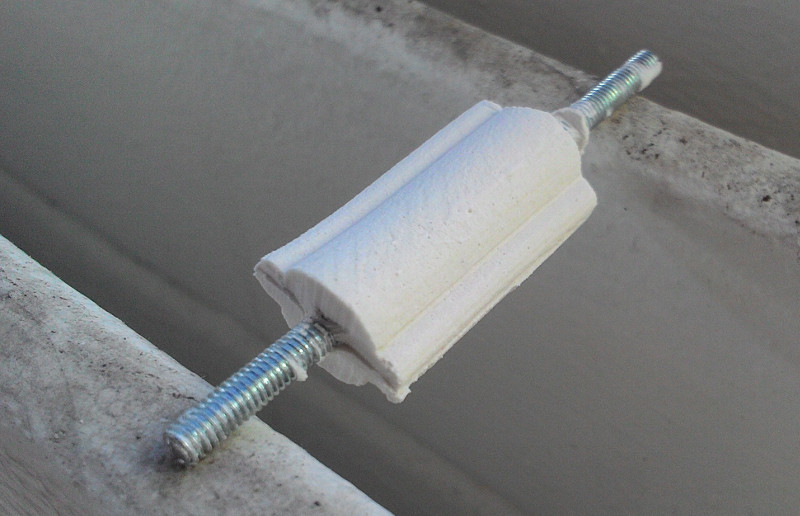
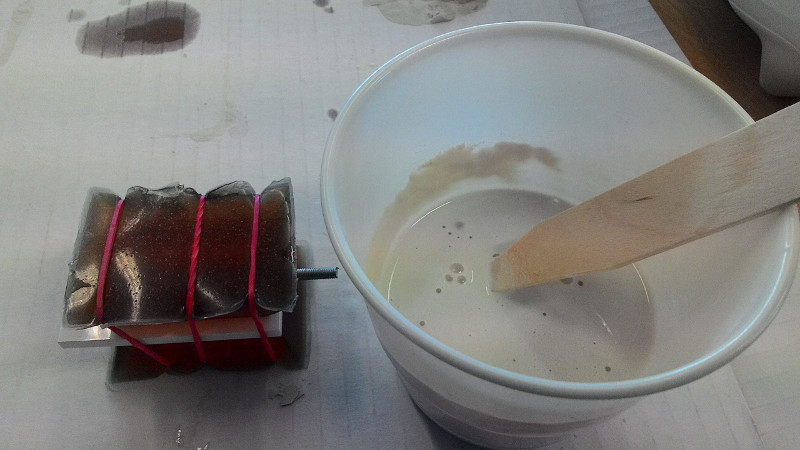
 When I put the mold together I placed a 3mm threaded rod inside of it.
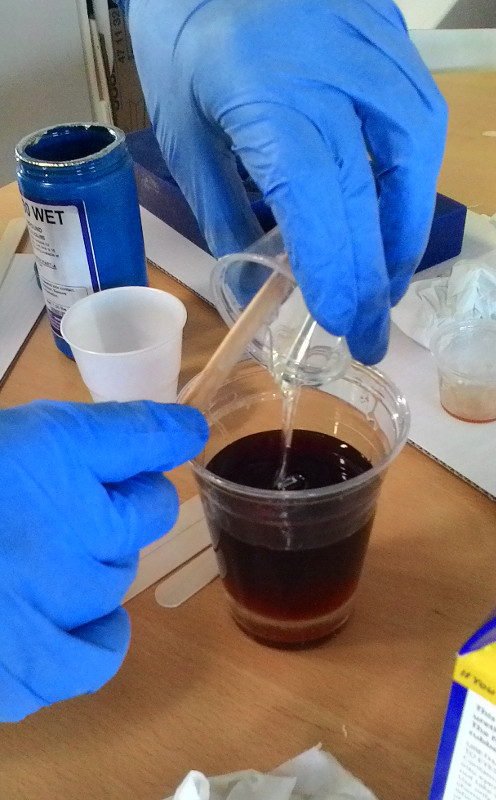
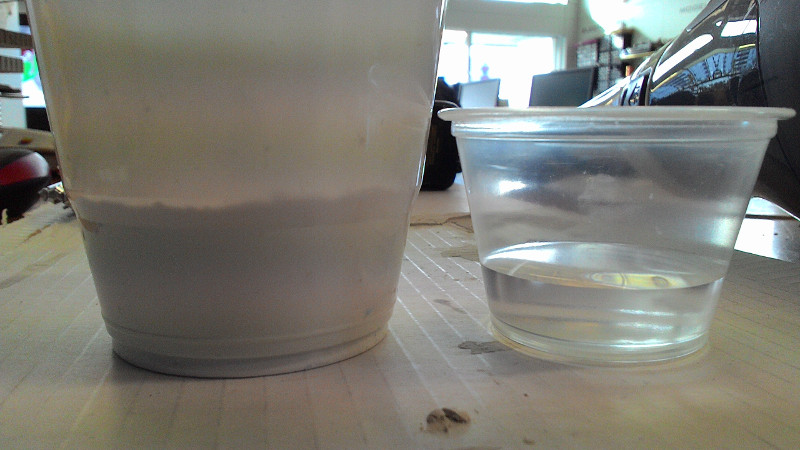
 Before casting the mold I made shure I had my table covered, had enough tissues around, had gloves, containers for mixing the resins and wooden sticks to stir.
I stired the drystone resin in exacly the ratio 20g water to 80g drystone, the holes on my mold for pouring was quite small so I thinned the resin a bit more but I guess I added a bit to much water. Because a bit of resin excaped from the mold, pouring was a bit hard as resin leaked over the airhole, I poked the holes with a thin stick to extract bubbles from it. I then left the mold for 4 hours to dry.
Before casting the mold I made shure I had my table covered, had enough tissues around, had gloves, containers for mixing the resins and wooden sticks to stir.
I stired the drystone resin in exacly the ratio 20g water to 80g drystone, the holes on my mold for pouring was quite small so I thinned the resin a bit more but I guess I added a bit to much water. Because a bit of resin excaped from the mold, pouring was a bit hard as resin leaked over the airhole, I poked the holes with a thin stick to extract bubbles from it. I then left the mold for 4 hours to dry.
 When I opened the mold the it was not completely dry, but I could see that the item was deformed, problably from the mold beying pressured to hard together. I left the casted item on an oven to dry over night and the day after I tried to twist the threaded rod out of it, I was not sure this would work but the piece crumbled to pieces, I guess the best way to make threads would be to to have an smooth rod with somekind of lubricant so it could be removed and then taper the threads afterwards.