Edward Octavio Muñoz Sandoval Contact: edw_ard0@hotmail.com
Week 8 Assignment: Embedded Programming
1.- Read a microcontroller data sheet and program your board to do something, with as
many different programming languages and programming environments as possible
Attiny84A
For this assignment I programed the Attiny84A microcontroller fabricated previously.
I used the Arduino software to program my microcontroller, so the first step was to add the Attiny library.
Click file/preferences and is going to open the window shown in the image, in the text box pointed by the arrow write the URL of the Arduino page:
http://playground.arduino.cc/Main/ArduinoOnOtherAtmelChips
and click OK

Then Click tools/board/board manager and is going to open the window shown in the next image, just install the library added and clicl OK

Before start programming the Attiny I read the datasheet in order to know some features like input voltage or how to measure analog signals and wich pins can do it.
ATtiny24A/44A/84A are low-power CMOS 8-bit microcontrollers based on the AVR enhanced RISC architecture. By executing powerful instructions in a single clock cycle, the ATtiny24A/44A/84A achieves throughputs approaching 1 MIPS per MHz allowing the system designer to optimize power consumption versus processing speed.

The next diagram show the way the Attiny process the information to send and receive electrical signals.

You can download the attiny84A datasheet in the files link of this assigment, there is other information like:
-Pin Descriptions
-Register Summary
-Instruction Set Summary
-Ordering Information
-Packaging Information
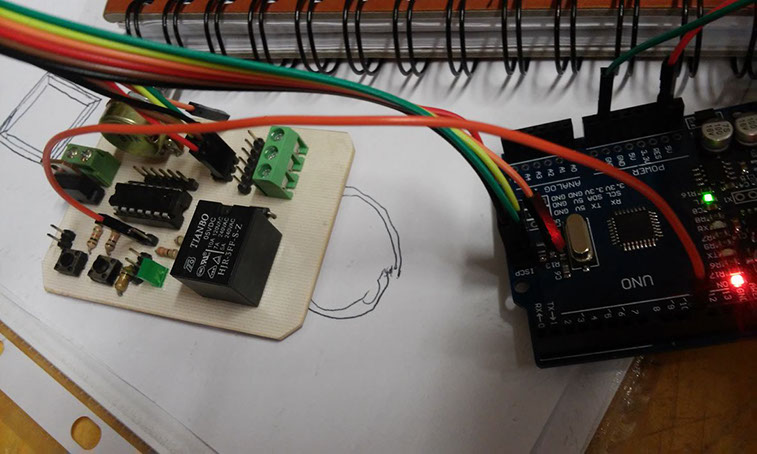
I used an Arduino ONE as a programmer, so I load the code ArduinoISP and then connected it to my board through the ISP protocol, with the diference of the reset pin, I had to search for the correct pin in the code wich in my case was the 10.


The code I loaded into the Attiny is shown in the next picture:

Then I test the connection with an easy code "blink" integrated in the Arduino examples. The reference I used for identify the attiny pins was the information of this image:
http://orig06.deviantart.net/82c9/f/2013/038/3/7/attiny_web_by_pighixxx-d5u4aur.png
Also, reading the Attiny 84A datasheet helped me to analyze the function of every pin with all the considerations of each one.
You can download the Attiny 84A datasheet from this link:
http://html.alldatasheet.com/html-pdf/533498/ATMEL/ATTINY84A-CCU/480/3/ATTINY84A-CCU.html
I matched the programming pin and the attiny pin using the image below as a reference, for example, my led is in the pin 7 in Attiny datasheet, so the programming pin is the 6.

It worked, =)
I wanted to test a button to activate the relay an the led at the same time and it worked to =)