The first week started out with a bang. Neil did a good job letting us know what we are in for. The task ahead is long, hard and difficult. I will need to keep myself on track, but the rewards are worth it.
Here is a list of tasks as I see them for the first week. (Not necessarily in this order)
I went on the w3schools site to use their tutorials. I made it through the first 10 lessons. I tried making my own changes to the tutorials and printed the ones I thought would help me at a later time.
Those printouts became the beginnings of my HTML binder. I like to have my information in a nice neat package for reference.
I used the same process to learn GIT. I found a few tuturials online and picked up a few tips. I also read some of the extra readings suggested by Neil. Anything I thought might be useful later went into my new GIT binder.
Next I tackled the job of using my newfound HTML knowledge. Looking at quite a few files from other students I started to grasp the meaning of all the new symbols. I created 4 files this first week.
Here is a copy of "tim.html" This sets up my personal bio page. I had some trouble imputting graphics into my files at first. I eventually discovered that *.PDF files are not considered a graphic file for HTML programming.
Looking at the code below you can see there are quite a lot of characters and words that you need to learn.
In order to input test you need to start with a "p" between less than or equal to signs. You must then end the test with "/p" between the same symbols.
I cannot put the exact examples into my description because the html package I am using will they are for real.
Other symbols used are: "br" between the same symbols stands for a break or space. "h3" and "/h3" turn larger text on and off.
An indented list begins with "ul" then each line begins with "l" and ends with "/l" The "/" forward bracket turns off the commands.
<!DOCTYPE
HTML PUBLIC "-//W3C//DTD HTML 4.01 Transitional//EN">
<html>
<head>
<title>About
Me - Tim Bruening - Fab
Academy 2014</title>
<style>
h1
{font-family:arial;font-size:200%;text-align:center;}
h2
{font-family:arial;font-size:150%;text-align:center;}
h3
{font-family:arial;font-size:125%;text-align:center;}
p
{font-family:arial;font-size:100%;}
a
{font-family:arial;font-size:100%;}
</style>
</head>
<body>
<h1>Tim
Bruening - Fab Academy 2016</h1>
<h2>About
me</h2>
<p>
I
am an
Instructor at Lorain County Community College. I started at
LCCC
as a
student at the age of 30 in 1981. Working as a maintenance
machinist
at
a large iron ore unloading facility on the Cleveland, Ohio
lakefront
did not seem like a career that would last me to retirement
and
I needed
to upgrade my skills. In 1989 LCCC hired me to teach
industrial
classes for their many apprentice programs and I have been
here
ever
since. I kept up with my education and eventually earned a
Masters
in
Industrial Engineering from Cleveland State University in
1998.
</p>
<p>
I
teach all
types of mechanical related courses including Manufacturing
Processes
I
& II, Introduction to Fluid Power, Alternative
Energy
Mechanical Systems, Technical Problem Solving, etc.
</p>
<hr
style="width: 80%;">
<p>
My
hobbies
include woodworking and that led to my getting involved with
LCCC's
FABlab around 2007. It is amazing what can be added to a project
when
you can
personalize it. In 2014 when our lead FABlab faculty Scott
Zitek
participated in Fab Academy 2014 I filled in for him as
instructor
for our "Introduction to Personal Fabrication" course. This
semester
I
will teach my fourth section of the course to free up Scott
for
FAB
academy 2016.
</p>
<hr
style="width: 80%;">
<p></p>
<a
href="index.html">Back to index</a>
</body>
</html>
Did you know that there are only three basic types of graphic files used in html code? I do now. .jpg .png .gif It took me two hours last night to figure out why my .pdf files would not appear.
I found out that a .pdf is not a graphic file.
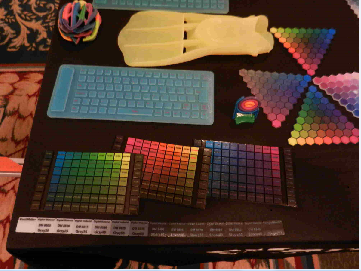
Here is the main background graphic for my web page. This is a picture of an assortment of 3D printed projects on view at a Stratasys seminar.
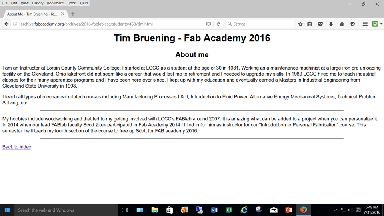
Here is a screen shot of my bio page. It looks much better from the FAB site.
Here is a screen shot of my original project idea, a vacuum form machine.

Git was also a lesson of the sheltered life i've led. I read quite a bit of the tutorials and will need to practice and study a lot more.
Our mentor, Scott Zitek gave us a great tutorial on how to setup our websites. He strongly advised us to not recreate the wheel. I looked at many examples to create my files.
I think the best piece of advice from both Neil and Scott was to try littlebits at a time and check to see what they looked like. I know that helped quite a bit for me.
I learned a long time ago when troubleshooting you shold not make too many changes at a time. You may have difficulty know which solution did the trick. One small change at a time and you see an immediate reaction.
I downloaded Git4windows to one of my laptops so I can push files to the GIThub. I was able to configure an account with my SSH key, my name and my email address.
I have another computer that I will setup as a dual boot machine with Windows and Ubuntu.
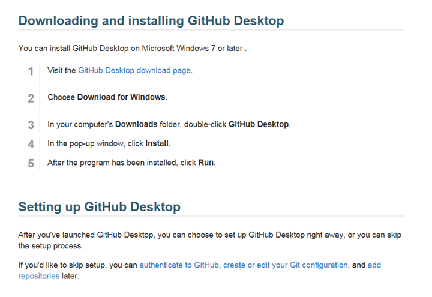
Here are two images of the web site you can download GIT from.

In order for me to push files to the Git Hub I need to use Ubuntu. I purchased a new Asus laptop that I will use exclusely for the FAB Academy. When FAB academy is over I can use the computer for "Grandpa's FABlab.
The computer came loaded with Windows 7. I went onto the Ubuntu site and downloaded Ubuntu and used the option of a dual boot system. If no choices are made at start up the system will default to Ubuntu.
Here are the steps I used to upload or push files to my account.