hola soy un mensaje secreto wiwiwi wawawa
WEEK 15: NETWORKING & COMMUNICATIONS
Assignment:
| | | | | | | | | | | | | | | | | | | | | | | | | | | | | | | | | | | | | | | | | | | | | | | | | | | | | | | | | | | | | | | | | | | | | | | | | | | | | | | | | | | | | | | | | | | | | | | | | | | | | | | | | | | | | | | | | | | | | | | | | || | | | |
// INFORMATION & RECOMMENDATIONS
- This is a big big big world to understand, try to keep it simple.
- You cand read a I nice summary about the different communication protocols in Ismael Velo's Fabacademy website.
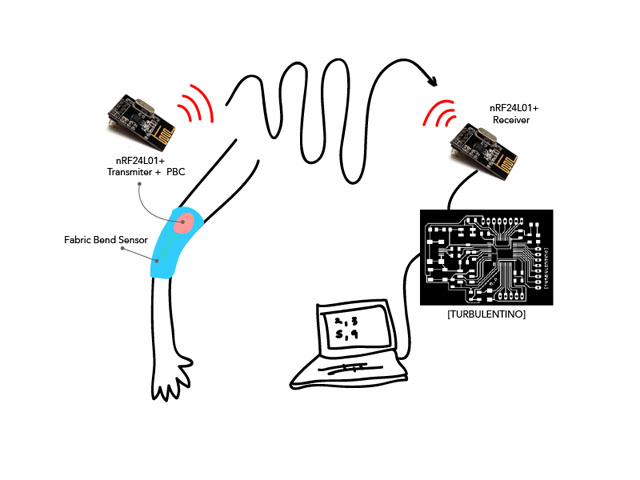
- As my final project is about several modules sending data from sensors attached to the human body in movement, I made a research about the possibilities of the radio chips and modules. As I'm not an engineer it has been hard to understand. I finally opted to use the nRF2401+ radio module, because I found a lot of documentation/information about it, and also because it has a small built in antenna and it works also with SPI communication protocol.
>>>NRF4201+
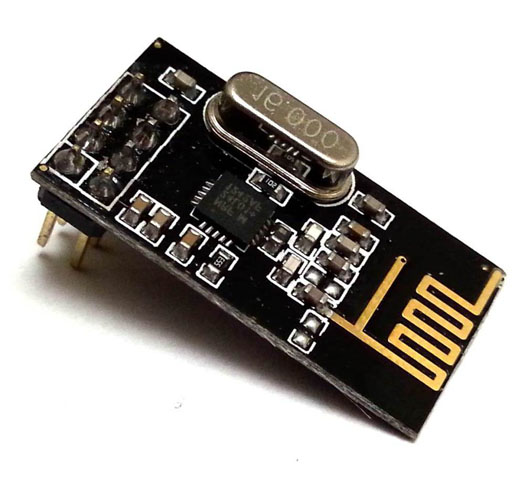
- NRF4201+ is a radio module with a a built in antenna, on chip voltage regulator and can tolerate 5v inputs (so the microcontroler can still work at 5 volts!). These modules are very cheap and they include all the elements that the radio needs to function: oscillator, mixer, power amplifiers, low noise amplifiers, filters, antenna. It
-Take a look at Learn! Do! useful site with eeverything you want to know about this module.
-The Nordic nRF24L01+ integrates a complete 2.4GHz RF transceiver, RF synthesizer, and baseband logic including the Enhanced ShockBurst™ hardware protocol accelerator supporting a high-speed SPI interface for the application controller. The low-power short-range (50-200 feet or so)Transceiver is available on a board with Arduino interface and built-in Antenna.
- Take look a look also at these Fabacademy project - documentation from Ismael Velo.
About the pins and connections of the module:

I followed connections from this "Starter Kit" site. Code is also very well documented.
>>>>Libraries:
| | | | | | | | | | | | | | | | | | | | | | | | | | | | | | | | | | | | | | | | | | | | | | | | | | | | | | | | | | | | | | | | | | | | | | | | | | | | | | | | | | | | | | | | | | | | | | | | | | | | | | | | | | | | | | | | | | | | | | | | | | | | | | | | |
// GOALS
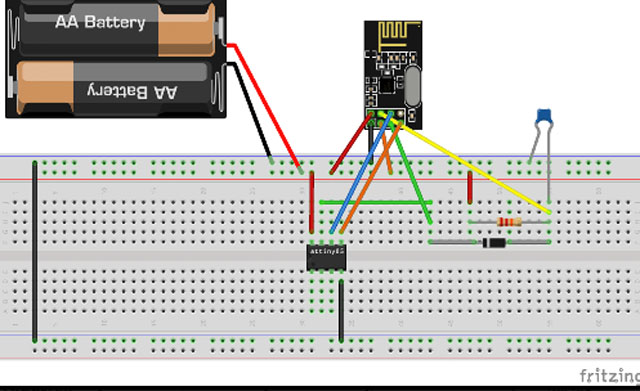
nRF4201 Modules weren't available at the lab. I bought from ebay 4 of them, so I decided to take the chance to work on my "fabduino".
His fritzing image:
| | | | | | | | | | | | | | | | | | | | | | | | | | | | | | | | | | | | | | | | | | | | | | | | | | | | | | | | | | | | | | | | | | | | | | | | | | | | | | | | | | | | | | | | | | | | | | | | | | | | | | | | | | | | | | | | | | | | | | | | | | | | | | | | |
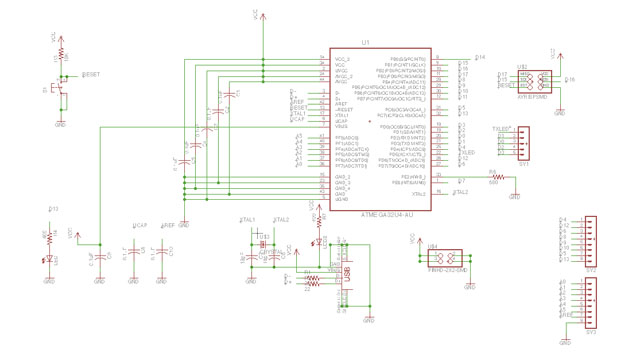
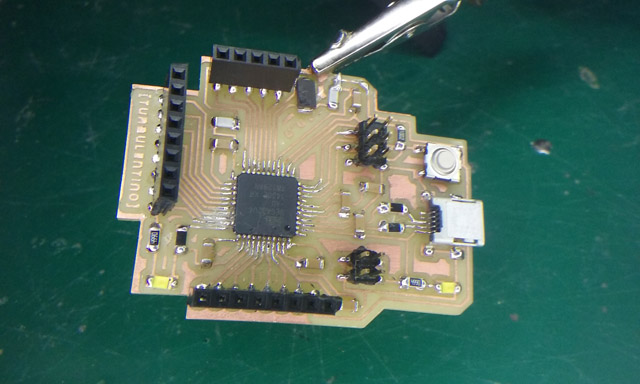
// [ TURBULENTINO ]
- I based my design in Fableo's design, and also watching constantly at ATMega32U4 datasheet to understand the possibilities of this microcontroler.
I decided to make this one, as it includes USB communication. Once you upload the Burnloader, you can get rid of FabISP.
Jalapino's design was super useful to follow already ordered connections ( thanks, thanks, thanks Luiz! ).
I kept with FabLeo's RESET button + 2 leds (one to confirm your board is receiving power, and the other (pin 13) to see when your program is being uploaded into it other.
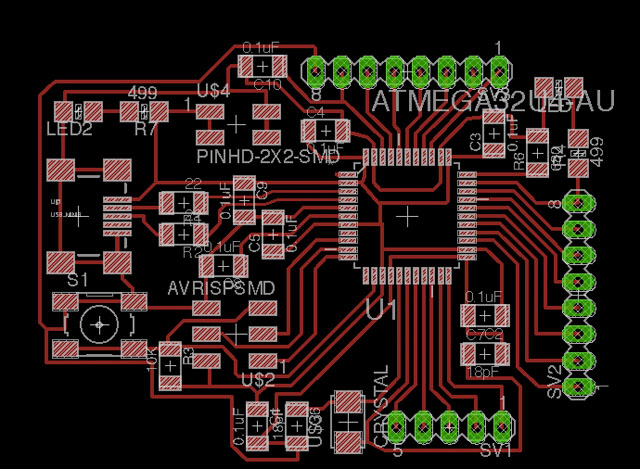
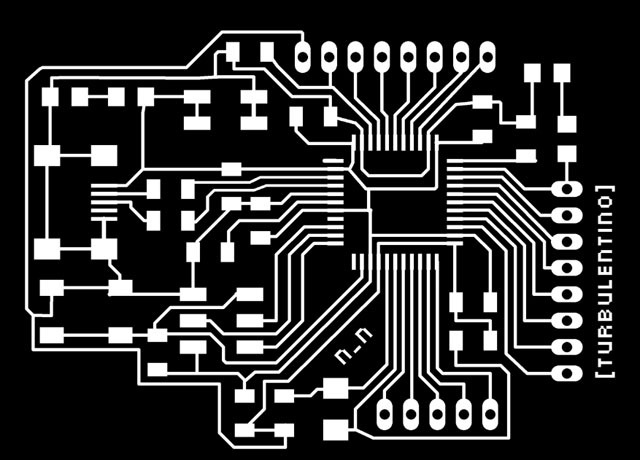
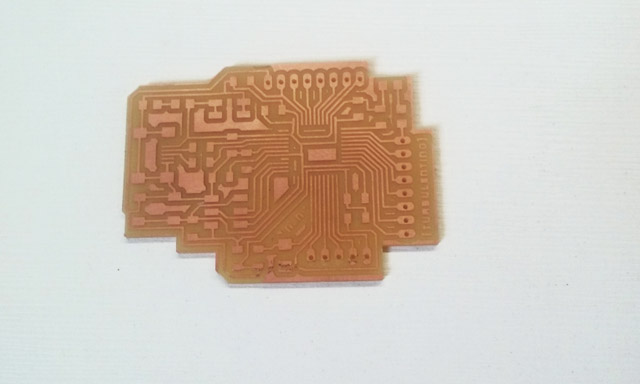
>>Milling Turbulentino
Make a separate file for milling the holes and use 1/32 bit. Holes should be in black and the rest of the image in white. This is because the milling bit will move only inside black color. If you invert it you will have bigger holes that will not work.


>>>TURBULENTINO BOM
| Units | Name In Eagle Board | Component | Value | Comments |
|---|---|---|---|---|
| 8 | C1, C2, C3, C4, C5, C8, C9, C10 | Capacitor | 0.1uF | |
| 2 | C6 , C7 | Capacitor | 18pF | |
| 2 | LED, LED2 | LED | NA | Avoid White Led, it's too bright. |
| 2 | R1, R2 | Resistor | 22 Ohm | |
| 2 | R4, R7 | Resistor | 499 Ohm | |
| 1 | R3 | Resistor | 10 K | |
| 1 | R6 | Resistor | 680 | |
| 2 | SV2 | Female Pin Header | 8x1 | |
| 1 | U$1 | USB Mini B connector | NA | |
| 1 | U$2 | Male Pin Header | 2x3 | |
| 1 | U$3 | Crystal | 16 MHz | |
| 1 | U1 | ATMEGA32U4-AU | 8-bit Microcontroller with ISP Flash and USB Controller - AMTEL | |
| 1 | S1 | Switch | 6mm | http://www.digikey.com/product-detail/es/omron-electronics-inc-emc-div/B3SN-3112P/SW262CT-ND/60835 |
| 1 | SV1 | Female Pin Header | 5x1 | |
| 1 | U$4 | Male Pin Header | 2x2 |
| | | | | | | | | | | | | | | | | | | | | | | | | | | | | | | | | | | | | | | | | | | | | | | | | | | | | | | | | | | | | | | | | | | | | | | | | | | | | | | | | | | | | | | | | | | | | | | | | | | | | | | | | | | | | | | | | | | | | | | | | | | | | | | | |
// PROGRAMMING [TURBULENTINO]
| | | | | | | | | | | | | | | | | | | | | | | | | | | | | | | | | | | | | | | | | | | | | | | | | | | | | | | | | | | | | | | | | | | | | | | | | | | | | | | | | | | | | | | | | | | | | | | | | | | | | | | | | | | | | | | | | | | | | | | | | | | | | | | | |
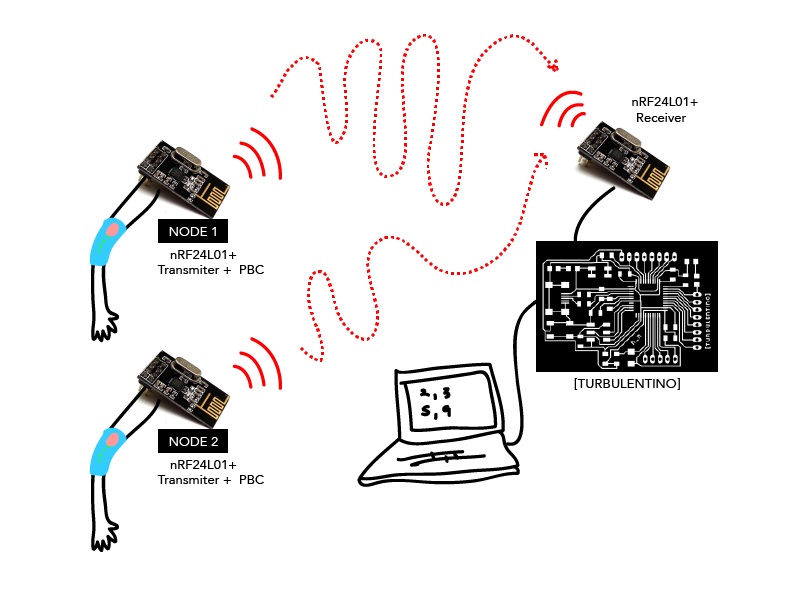
// PROGRAMMING RECEIVER & TRANSMITTER 1,2
CONNECTIONS:
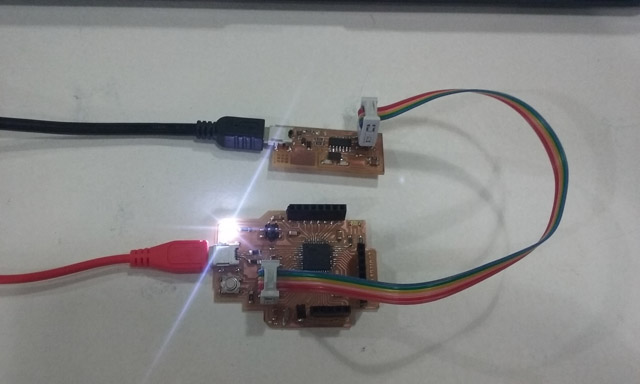
So finally, my modules arrived!
A) Arduino UNO: As I mentioned before, after reading a ot of documentation, I decided to follow examples from starter kit site.

A) [Turbulentino]
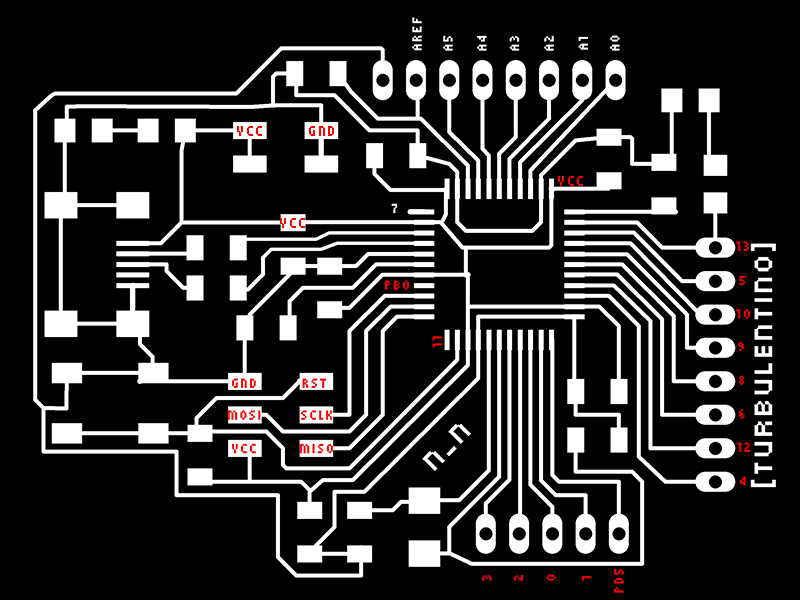
For my custom "fabduino" - [turbulentino] I connected CE to pin 2, CSN to pin 3, and MISO, SCK and MOSI to the correspondant ISCP connections. If you are really using my custom PCB, then you might look at this labeled diagram that I made:
Labeled Turbuentino:
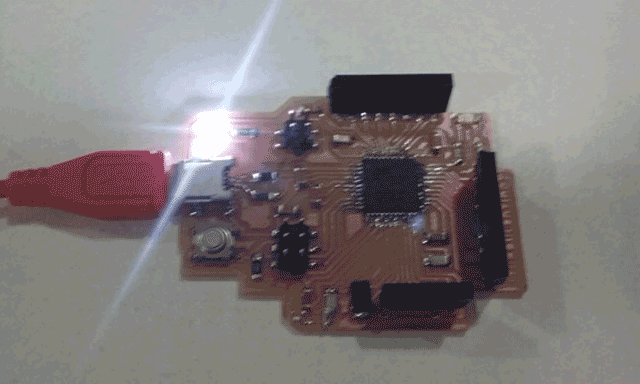
//Test 1: Getting Started
Sending messages + nrf24L01+ from Citlali Limonada on Vimeo.
// Test 2: Hello radiocomunicación!
// Test 3: Hello potentiometer!
For this I have to thank Thomas Sanchez Lengueling who answered to my desperate message in facebook, looking for some recommendations about using this modules.
He nicely appeared and helped me solve the problem about sending sensor values as bytes. We created created an array of bytes, and then filled it with the values from the potentiometer.
This work was done after week 15 thinking on applying it on my final project using my input bend sensor.
This is the code that we generated, and you can watch the video of it working on my final project documentation.
| | | | | | | | | | | | | | | | | | | | | | | | | | | | | | | | | | | | | | | | | | | | | | | | | | | | | | | | | | | | | | | | | | | | | | | | | | | | | | | | | | | | | | | | | | | | | | | | | | | | | | | | | | | | | | | | | | | | | | | | | | | | | | | | |
>>FILES
[TURBULENTINO]:
Eagle files (schematic + board): :D
PNGS: @_@
RMLS: *_*
CODE:
Click over the GIST frames and you'll be directed to my site account with links to download .ino files.
Citlali Hernández - Fab Academy - 2016