hola soy un mensaje secreto wiwiwi wawawa
WEEK 14: COMPOSITES
Assignment:
| | | | | | | | | | | | | | | | | | | | | | | | | | | | | | | | | | | | | | | | | | | | | | | | | | | | | | | | | | | | | | | | | | | | | | | | | | | | | | | | | | | | | | | | | | | | | | | | | | | | | | | | | | | | | | | | | | | | | | | | | | | | | | | | | | | | | |
// RECOMMENDATIONS
- MAKE SOMETHING SMALL! MAKE SOMETHING SMALL! MAKE SOMETHING SMALL!
As you should already know, using the CNC milling machines is not the fastest thing to do, so don't think too much about it, and force yourself to design something easy and small. You can make nice things sing the "Modela" or the "Roland SRM-20".
Design thinking on the material that you are going to use to mill. This will hep you determine the maximum height of you object.
| | | | | | | | | | | | | | | | | | | | | | | | | | | | | | | | | | | | | | | | | | | | | | | | | | | | | | | | | | | | | | | | | | | | | | | | | | | | | | | | | | | | | | | | | | | | | | | | | | | | | | | | | | | | | | | | | | | | | | | | | | | | | | |
// DESIGN + 3D MODELING
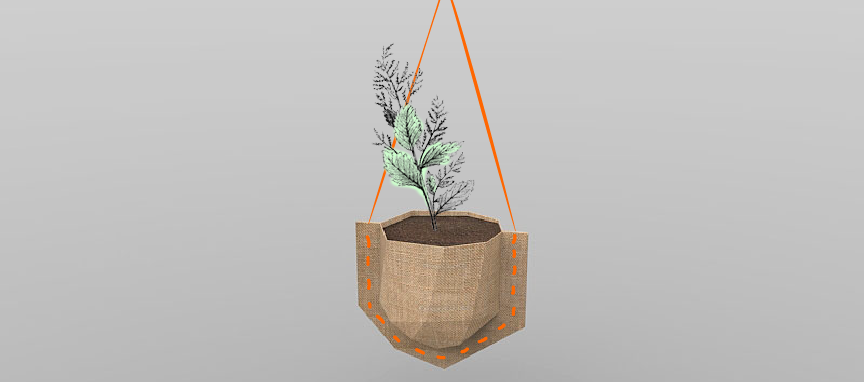
For this assignment we were suggested to use "Burlap", a woven fabric usually made from jute plant and may be combined with other organic fibres. It's physycal characteristics made me think about designing something related to nature/plants so I finished designing a two parts "Hanging Flower Pot".
Render generated with KeyShot + Photoshop of hanging pot design!
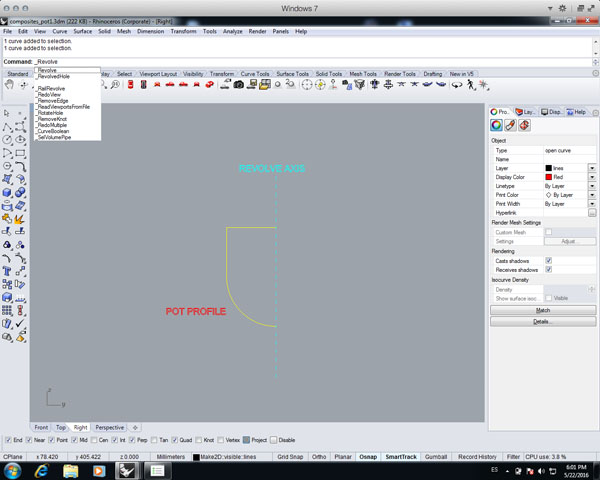
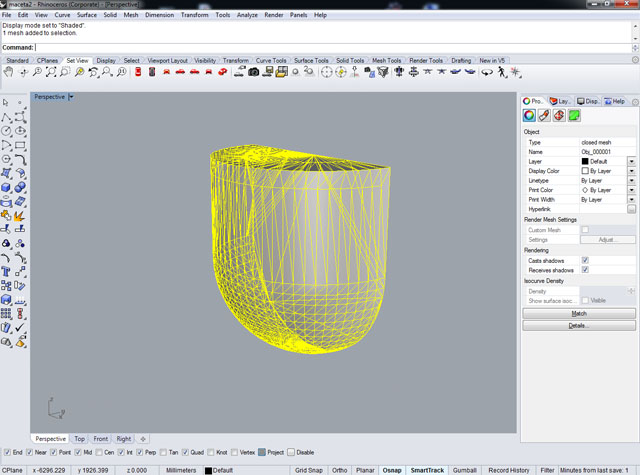
- Used "revolve" command in Rhinoceros to model this shape:
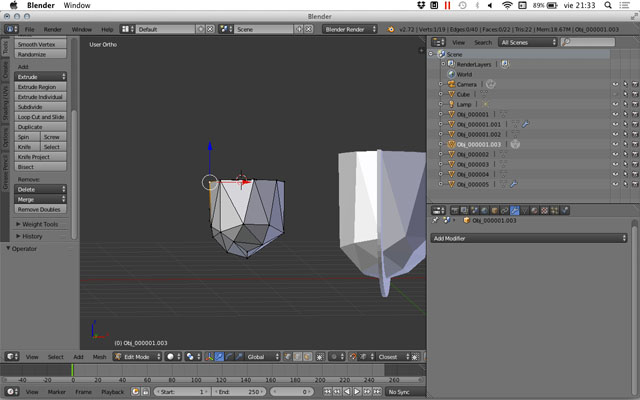
- Used Decimate option in Blender to get some funny polygons.
- Created an offset material in Rhinoceros and extruded it. (3mm).

-Exported model as an .STL and created a single file with Caro and Andreas, so we could mill at the same time.
When putting burlap layers over the mold, there are always some material leftovers around the main shape that you will have to cut. I took advantage of this and include it as part of my design: the leftover material will be perforated to put a coloured cotton thread that will join the two parts of the pot, and at the same time will be used to hang the object.
| | | | | | | | | | | | | | | | | | | | | | | | | | | | | | | | | | | | | | | | | | | | | | | | | | | | | | | | | | | | | | | | | | | | | | | | | | | | | | | | | | | | | | | | | | | | | | | | | | | | | | | | | | | | | | | | | | | | | | | | | | | | | | |
// PREPARING FILE: PARTWORKS3D -> SHOPBOT

Super important! In our case, the size of our model had a thickness of 61 Mm., and the material was 80 Mm. This is why we put in the size of the "Cut Plane" a 65 Mm. value. If we didn't, the machine would have milled untill the end of the material and we would have to wait longer for nothing.
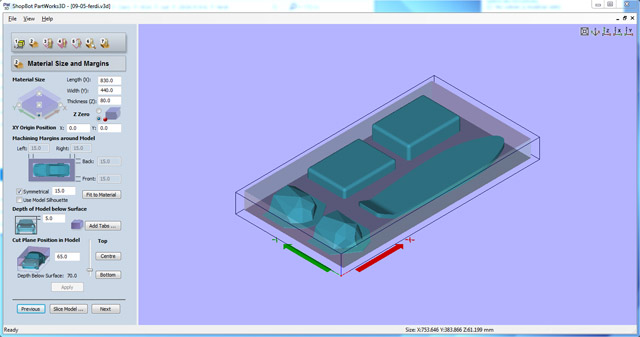

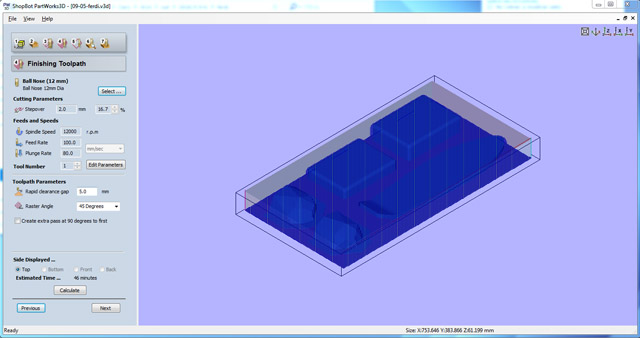

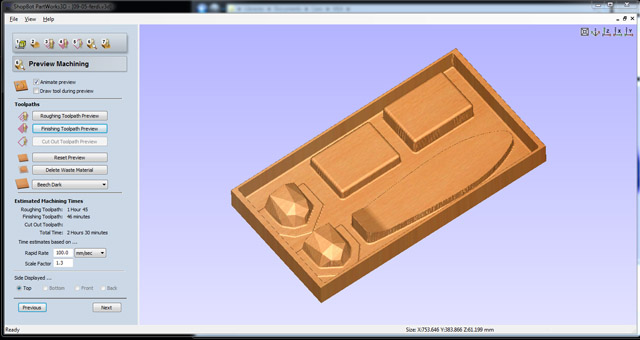
You'll see that Partworks3d tells you an estimated machining time. Our case was supposed to take 2 hours and 30 minutes.

| | | | | | | | | | | | | | | | | | | | | | | | | | | | | | | | | | | | | | | | | | | | | | | | | | | | | | | | | | | | | | | | | | | | | | | | | | | | | | | | | | | | | | | | | | | | | | | | | | | | | | | | | | | | | | | | | | | | | | | | | | | | | | | | |
// MILLING WITH THE SHOPBOT

Notes: For this task we were assisted by Ricardo Valbuena.

After waiting for at least 20 minutes, Ricardo notices our roughing file was milled in a 10%. This meant that we had to wait for a long long time and probably that the estimated time that we saw on Partworks3D wasn't so accurate.
As we had to finish in less than an hour because a lecture had to start at 19:30 and we have to turn all the machines off by that time, Ricardo suggested to stop and skip the roughing process and go directly to the finishing one. He said that as we were using super soft foam, it wouldn't be a problem for the milling bit to work this way.
Shopbot going super fast with the finishing g-code:

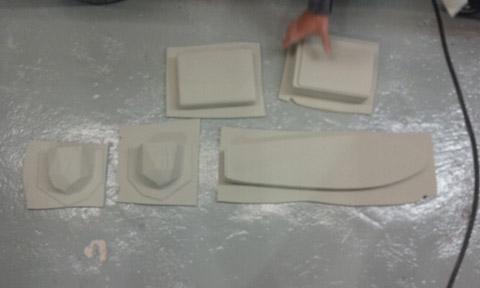
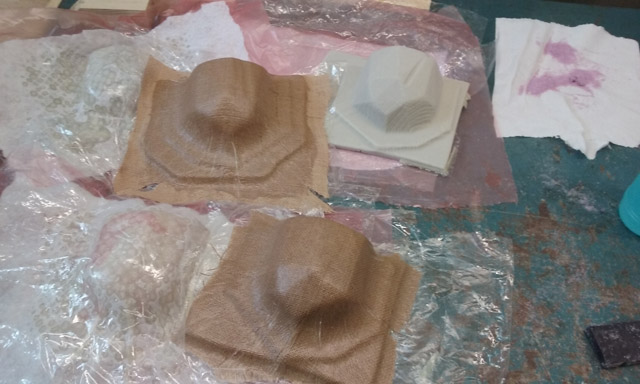
Caro's little suitcase molds, Andrea's skateboard mold and my flower pot molds:

One simple and not super severe problem appeared: when stoping the machine, the home of the Shopbot was lost. We put it again, but when the machine finished milling we saw a gap of about 30 mm. Because of this, my pieces had undesired low reliefs. :(
| | | | | | | | | | | | | | | | | | | | | | | | | | | | | | | | | | | | | | | | | | | | | | | | | | | | | | | | | | | | | | | | | | | | | | | | | | | | | | | | | | | | | | | | | | | | | | | | | | | | | | | | | | | | | | | | | | | | | | | | | | | | | | | | |
// COMPOSITES
- Cut all the materials that you will need to use in thsi order:

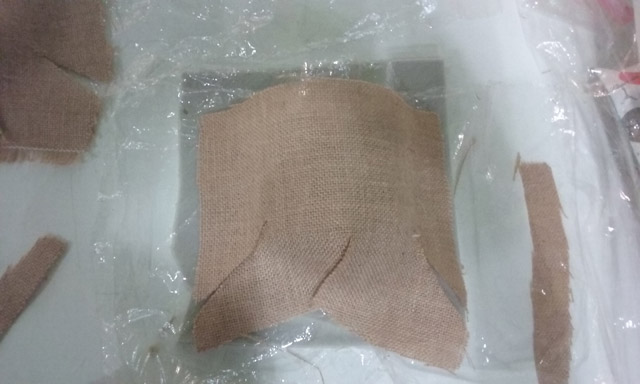
- Be sure that all the layers are big enough to cover your mold, take into consideration that upper layers will be super compressed in the vaccum machine.
- Wear gloves and glasses. Prepare the place were you are going to work by covering it with some plastic or
- Mix epoxy resin with a proportion of Mix A= 10, Mix B=6.

- Consider preparing all composite layers on one side of your molding area, order everything and keep in mind the order of the layers.
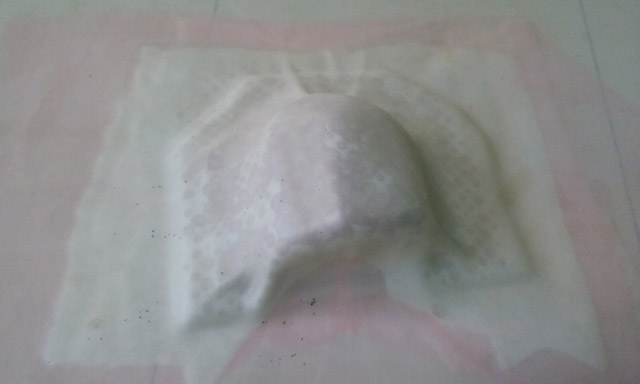
- Put resine over the burlap in a separated area, then put it over your mold ( with the plastic release film protecting it )
- Put as much as layers that you need. Each layer has a thickness of about 1 mm. I put 2, but it o would have been more resistant with another one.


- When finished, put everything in the vaccum machine and wait for at least 24 hours.
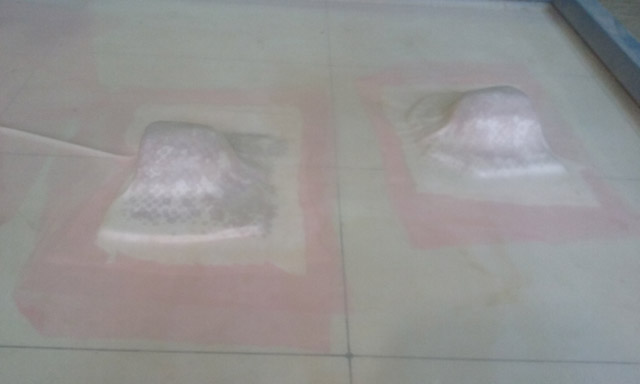
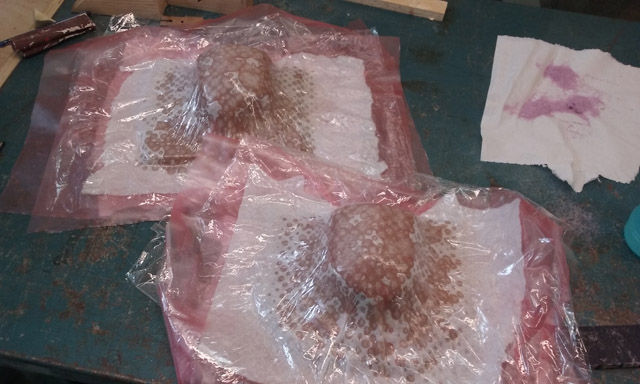
My pieces when just being removed from the vaccum machine:
>>>RESULTS:
One more layer of burlap would made my future fower pot stronger.
Not all of the shapes/polygons of my mold were so visible. I think that using a less thick material would help for better finishes.
The "undesired low reliefs" that I mentioned before are visible, but they are not completely horrible.
Composites are done! But I still have to finish cutting the pieces and putting them together. Will post a picture soon!
| | | | | | | | | | | | | | | | | | | | | | | | | | | | | | | | | | | | | | | | | | | | | | | | | | | | | | | | | | | | | | | | | | | | | | | | | | | | | | | | | | | | | | | | | | | | | | | | | | | | | | | | | | | | | | | | | | | | | | | | | | | | | | | | |
>>FILES
Design STLCitlali Hernández - Fab Academy - 2016