hola soy un mensaje secreto wiwiwi wawawa
WEEK 16: INTERFACE AND APPLICATION PROGRAMMING
Assignment:
| | | | | | | | | | | | | | | | | | | | | | | | | | | | | | | | | | | | | | | | | | | | | | | | | | | | | | | | | | | | | | | | | | | | | | | | | | | | | | | | | | | | | | | | | | | | | | | | | | | | | | | | | | | | | | | | | | | | | | | | | || | | | |
// INFORMATION & RECOMMENDATIONS
I used my first bend sensor made with conductive thread and velostat, for the Input Devices Assignment.
Different from week 11, I programmed the board with Python 3.5 (with a lot of help from Xavi)
Downloaded PySerial Module for python and installed following Learn Adafruit Website
Downloaded Tkinter Module and installed it.
I used Processing 2 to generate a visualization of two different applications for the sensor.
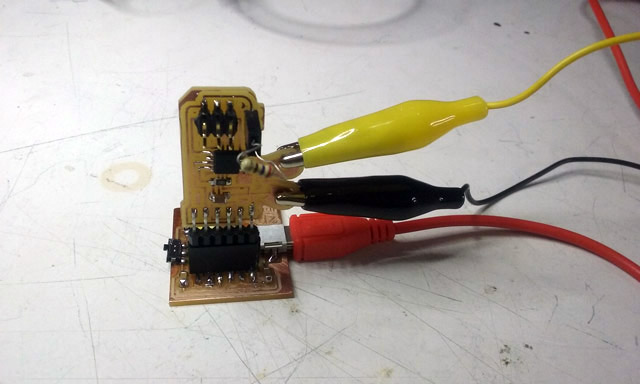
I used my recently made FTDI board! ( Files and documentation at the end of the website )
| | | | | | | | | | | | | | | | | | | | | | | | | | | | | | | | | | | | | | | | | | | | | | | | | | | | | | | | | | | | | | | | | | | | | | | | | | | | | | | | | | | | | | | | | | | | | | | | | | | | | | | | | | | | | | | | | | | | | | | | | | | | | | | | |
// GOALS
IMMEDIATE: - Create an interface that shows how much my conductive and piezoresistive fabric made sensor is being preassured or bent.
FOR THE FINAL PROJECT: - Create an interface that recognizes when a radio module is being connected and values from the sensors.
| | | | | | | | | | | | | | | | | | | | | | | | | | | | | | | | | | | | | | | | | | | | | | | | | | | | | | | | | | | | | | | | | | | | | | | | | | | | | | | | | | | | | | | | | | | | | | | | | | | | | | | | | | | | | | | | | | | | | | | | | | | | | | | | |
// PROGRAMMING ATtiny 45 & PYTHON CODE
It works!
FTDI Board + PCB with bend sensor:
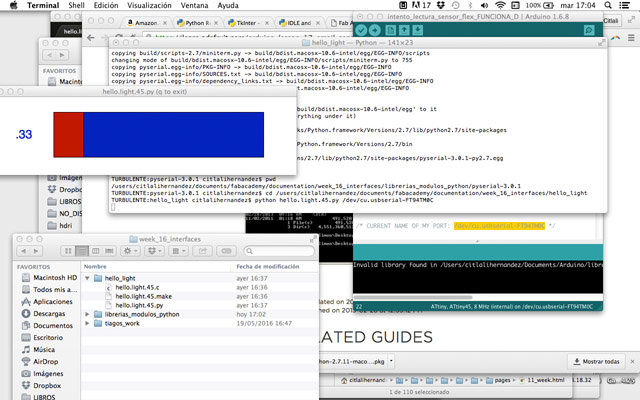
Visualization of hello.light.45.py code with GUI Tkinter library:
hello.light.45.py test for bending sensor. from Citlali Limonada on Vimeo.
| | | | | | | | | | | | | | | | | | | | | | | | | | | | | | | | | | | | | | | | | | | | | | | | | | | | | | | | | | | | | | | | | | | | | | | | | | | | | | | | | | | | | | | | | | | | | | | | | | | | | | | | | | | | | | | | | | | | | | | | | | | | | | | | |
// INTERFACE PROGRAMMING - PROCESSING 2
Note: If you programmed your board with Arduino, and you want to use Processing for visualization you will need to program the board again using Python but in my case it only worked like this.
I based my code from Tiago Figueiredo's 2014 processing code: HERE
To communicate through the serial , you'll need to import processing.serial library. It reads and writes data to and from external devices one byte at a time and it has the flexibility to communicate with custom microcontroller devices and to use them as the input or output. The serial port is a nine pin I/O port and can be emulated through USB.
Ferdi gave us a nice explanation of this process, which is the same calculations done in Neil's code in Python ( hello.light.45.py ).
I wanted to make an experiment looking to understand how to use my sensor, so I did a divided screen showing on the left side a circle that increases or decreases it's size depending on how much preassure the sensor receives. On the other side, I made a simple trigger visualization: whenever the sensor receives a value which is less or more than "x", a circle changes it's rotating direction.
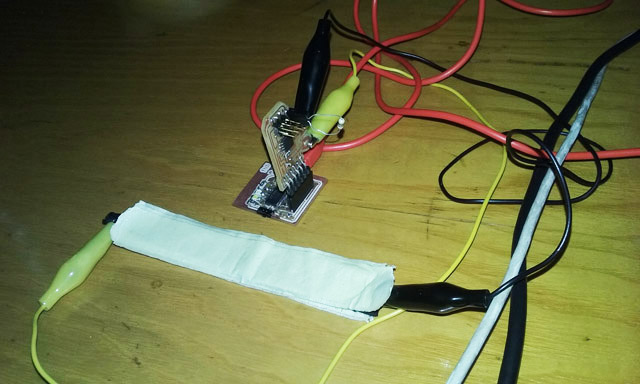
In this messy wiring picture you can see that I added paper tape to the sensor. This worked to receive better results from the sensor.
test_bend_sensor_processing from Citlali Limonada on Vimeo.
Complete code: ( You can also download it at the end of the page. )
| | | | | | | | | | | | | | | | | | | | | | | | | | | | | | | | | | | | | | | | | | | | | | | | | | | | | | | | | | | | | | | | | | | | | | | | | | | | | | | | | | | | | | | | | | | | | | | | | | | | | | | | | | | | | | | | | | | | | | | | | | | | | | | | |
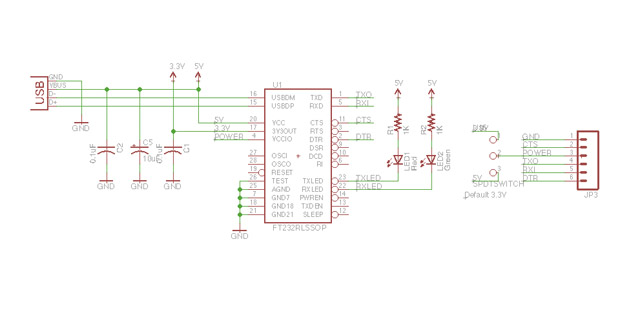
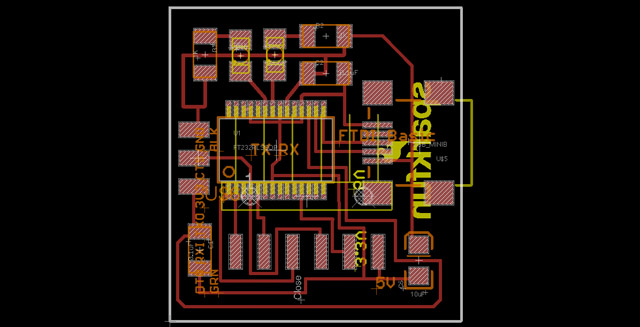
>>EXTRA, EXTRA! FTDI BOARD
This week I also made my FTDI board! Finally!
I have to thank Cansu, who saw I was completely running out of time and helped me to do the board. The design was based on what Gabriel Tanner and Ferdi made for last year. They used Sparkfun's eagle files, but using only one layer and inventory components. Full Documentation about it.
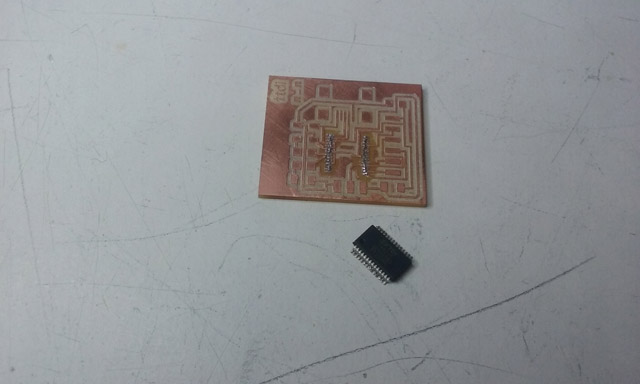
BEWARE littly tinny FTDI chip small legs! Be patient and use Flux.
I used soldering paste but I just made a mess. Evidence:
I had to use the heat gun to remove the FTDI and the USB which were completely shorted. Ferdi helped me to save the board, and finally it worked!
| | | | | | | | | | | | | | | | | | | | | | | | | | | | | | | | | | | | | | | | | | | | | | | | | | | | | | | | | | | | | | | | | | | | | | | | | | | | | | | | | | | | | | | | | | | | | | | | | | | | | | | | | | | | | | | | | | | | | | | | | | | | | | | | |
>>FILES
Processing code: (~˘▾˘)~
FTDI Eagle files ~(˘▾˘~)
Citlali Hernández - Fab Academy - 2016