Assignment
group assignment
- actuate and automate your machine
- document the group project and your individual contribution
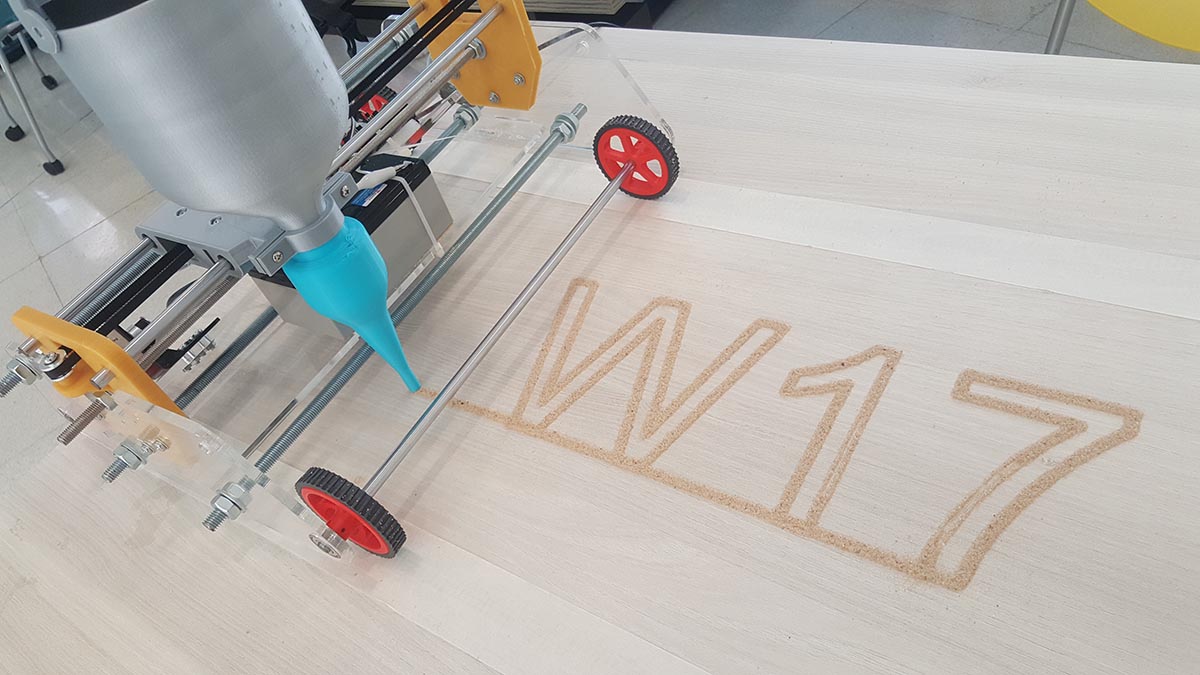
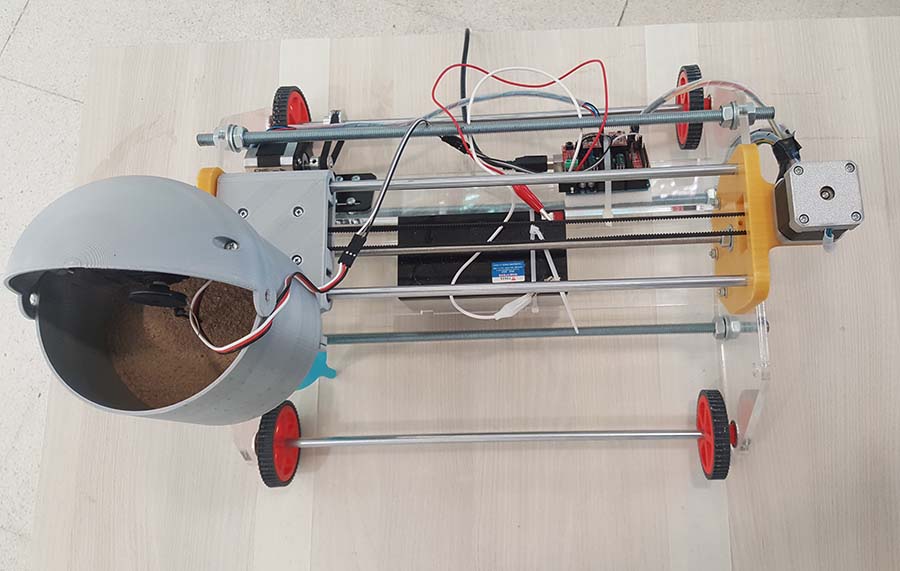
Our sand plotter machine , has 2 axis with 2 stepper motors , the x axis is on wheels and it has no limitation in length as for the Y axis it is on rods and it is limited to the rod lenght( 40cm )
The sand tank is controlled by a servo motor. The srevo motor is connected to a ball with a string inside the sand tank ; when the ball goes down it opens the sand tank nozzle and releases the sand and when it goes up it closes the nozzle and the sand stop going down.
We used a grbl-Servo library to control the Arduino and the motors.
The arduino is than connected to a gcode sender. In our case we used Source Rabbit gcode sender. We had to modify some settings to match our machine gears and wheels dimensions.
The gcode was generated in fabmodules and we had to modify it in brackets in order to adjust the Z values to work with the grbl-Servo we used.
And the different steps done are detailed below:
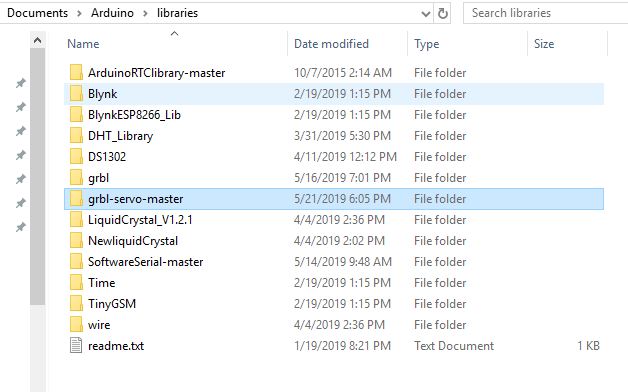
1-Download the grbl and installation
First we need to download the grbl library and include it in the Arduino IDE libraries folder. We will use the grbl-servo library since we have a servo motor in our machine and to be able to control it through the gcode.
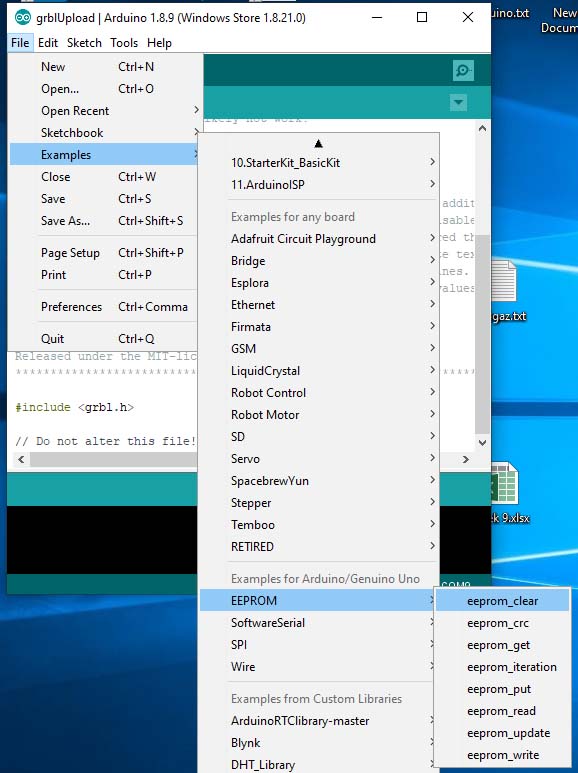
Than we have to clear the eprom
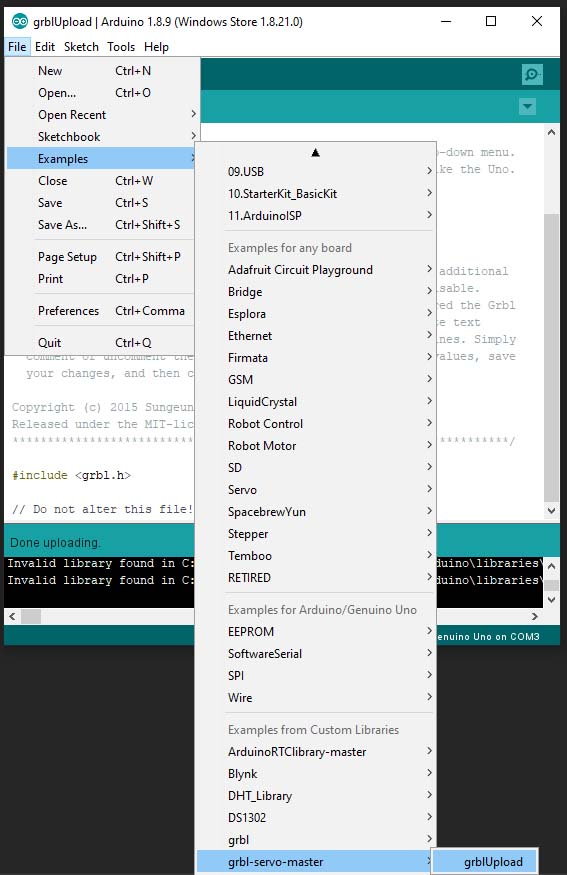
And upload the grbl from the examples folder
2-Installing the GCODE Sender and setup
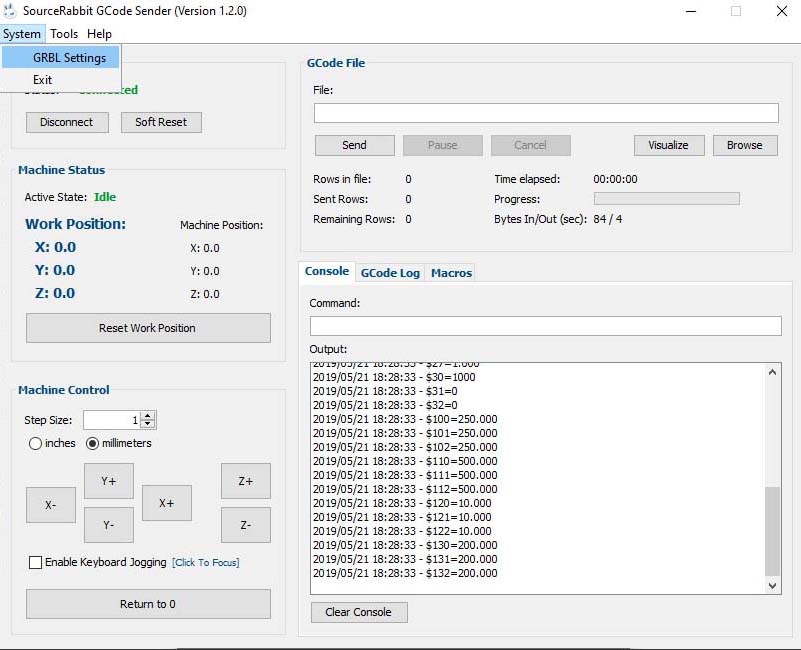
We will download the SourceRabbit gcode sender and install it.
And than we will connect to the port COM3 and Baud 115200 to match the connected Arduino port.

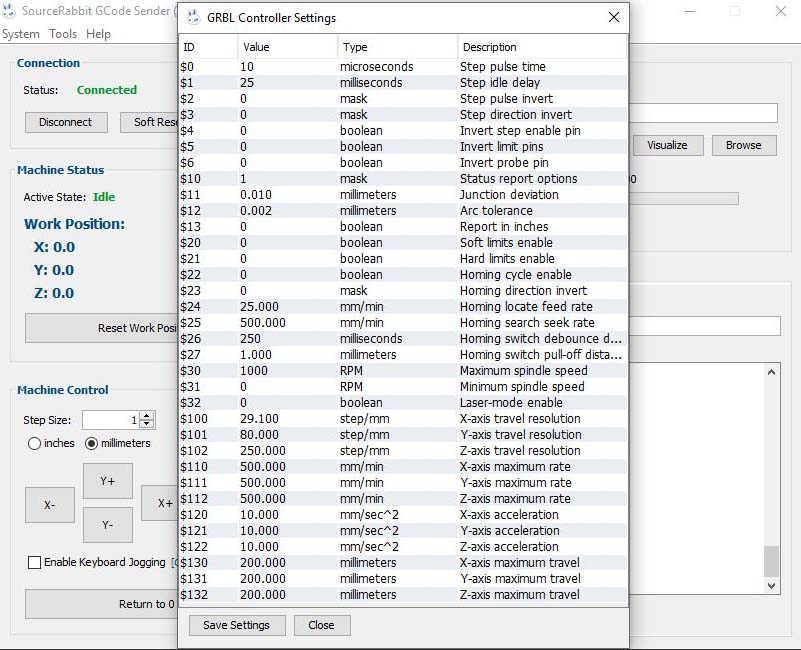
Now we need to modify the grbl settings to match our machine gears and dimensions
X-axis resolution = 29.1
y-axis resolution = 80
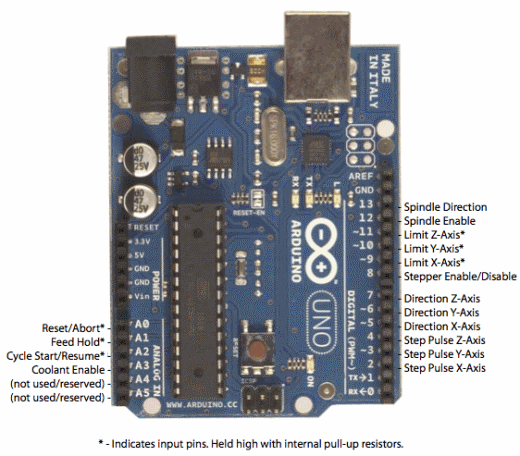
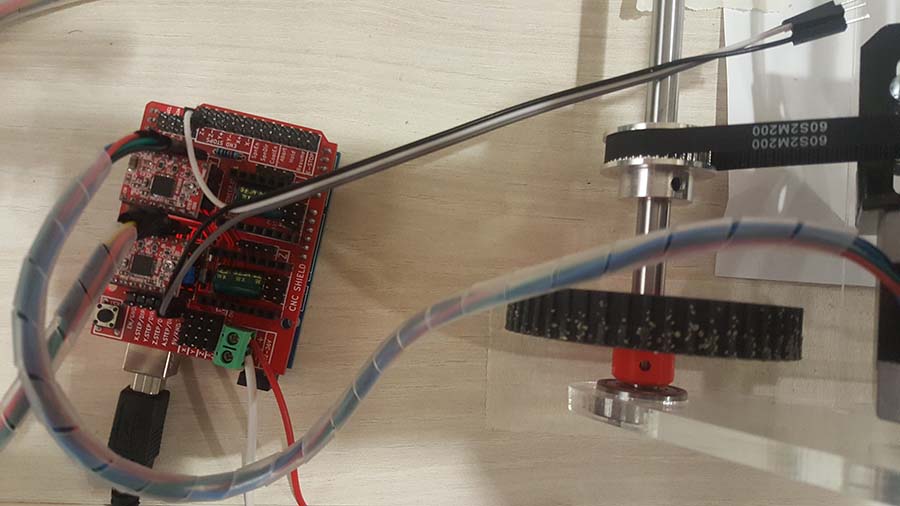
3-The Arduino / CNC shield / motors connections
We will be using an Arduino with CNC Shield

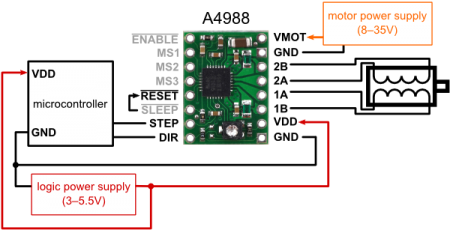
On the CNC shield we will plug a Stepper motor driver A4988 and place jumpers for micro stepping

Now we will connect the 2 stepper motors on the X & Y axis and the servo motor on pin 11 (SIGNAL on the Z+ END STOPS)
And this is the final machine assembled
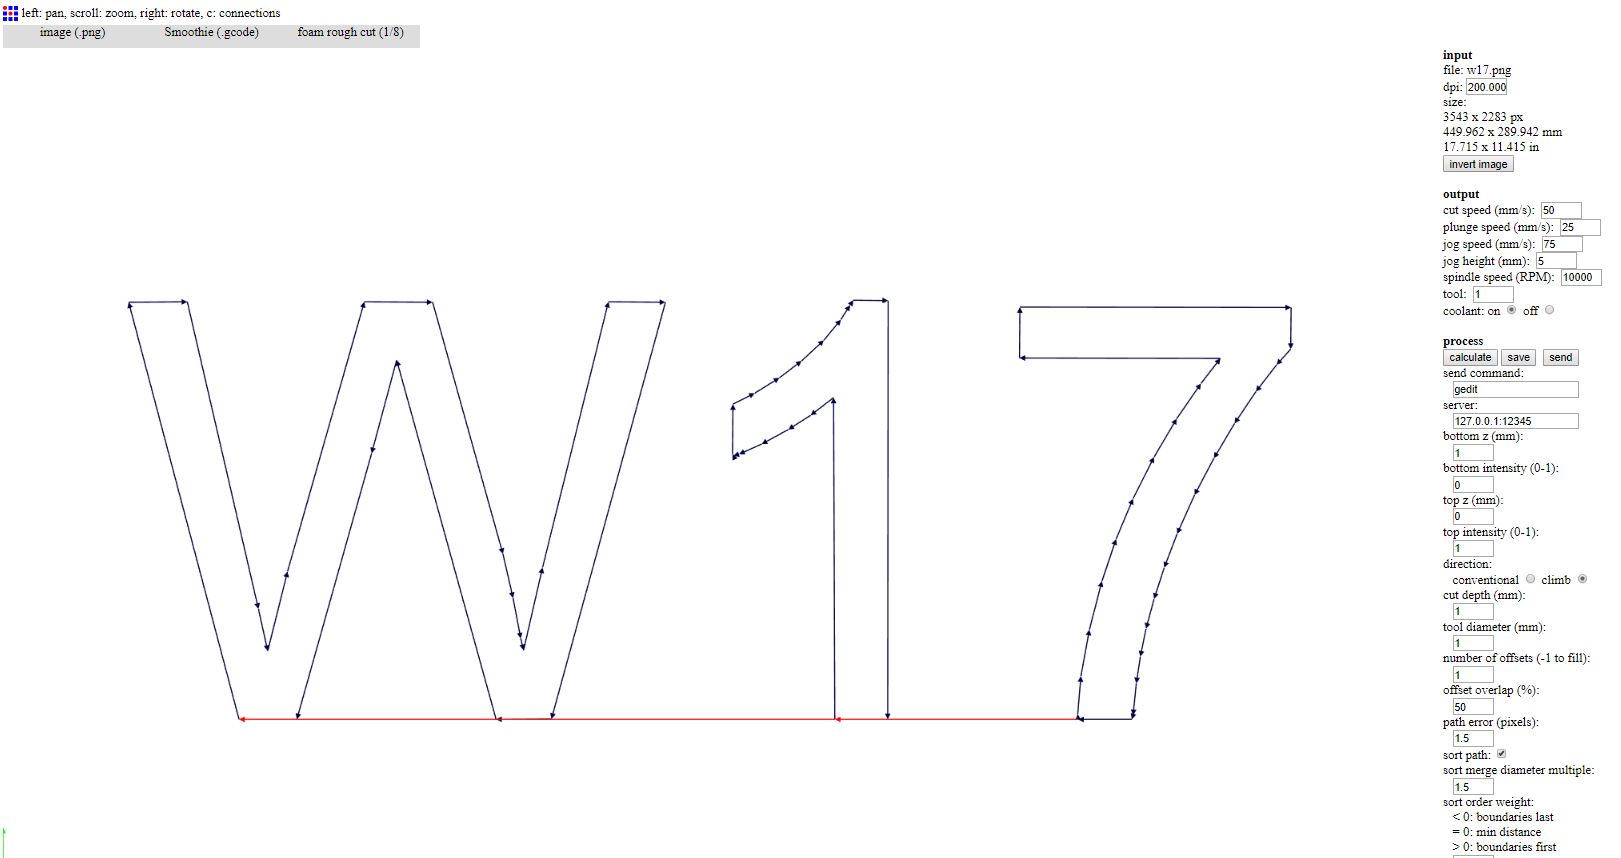
4-The gcode
We will use the fabmodules to generate the gcode with the below settings
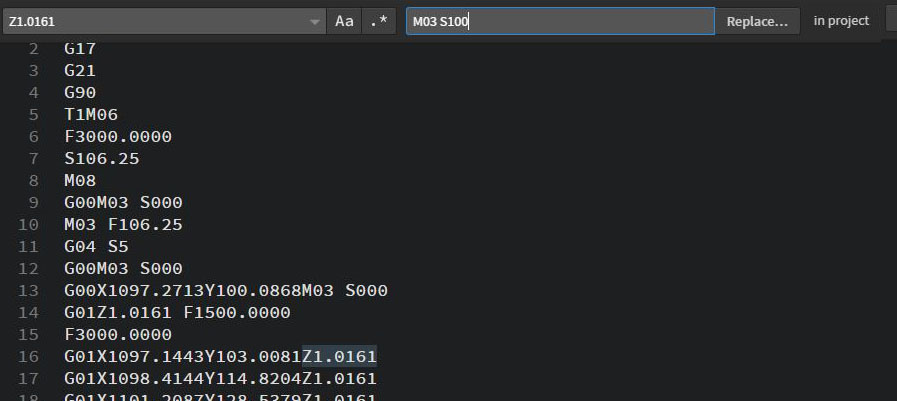
Now we will modify the gcode on brackets in order to control the servo and change the below values
- Z5.000 will be replaced by M03 S000 to rotate the servo up and close the sand nozzle
- Z1.0161 will be replaced by M03 S100 to rotate the servo down and open the sand nozzle

Click Here to download the original gcode
Click Here to download the modified gcode
5-Sending the gcode
We will connect to the board through Source Rabbit Gcode Sender , load the modified gcode and press send

6-Final Test Result