WEEK 5
3D Printing and Scanning
3D printing, also known as additive manufacturing (AM), refers to processes used to synthesize a three-dimensional object.
[1] in which successive layers of material are formed under computer control to create an object.
[2] Objects can be of almost any shape or geometry and are produced using digital model data from a 3D model.
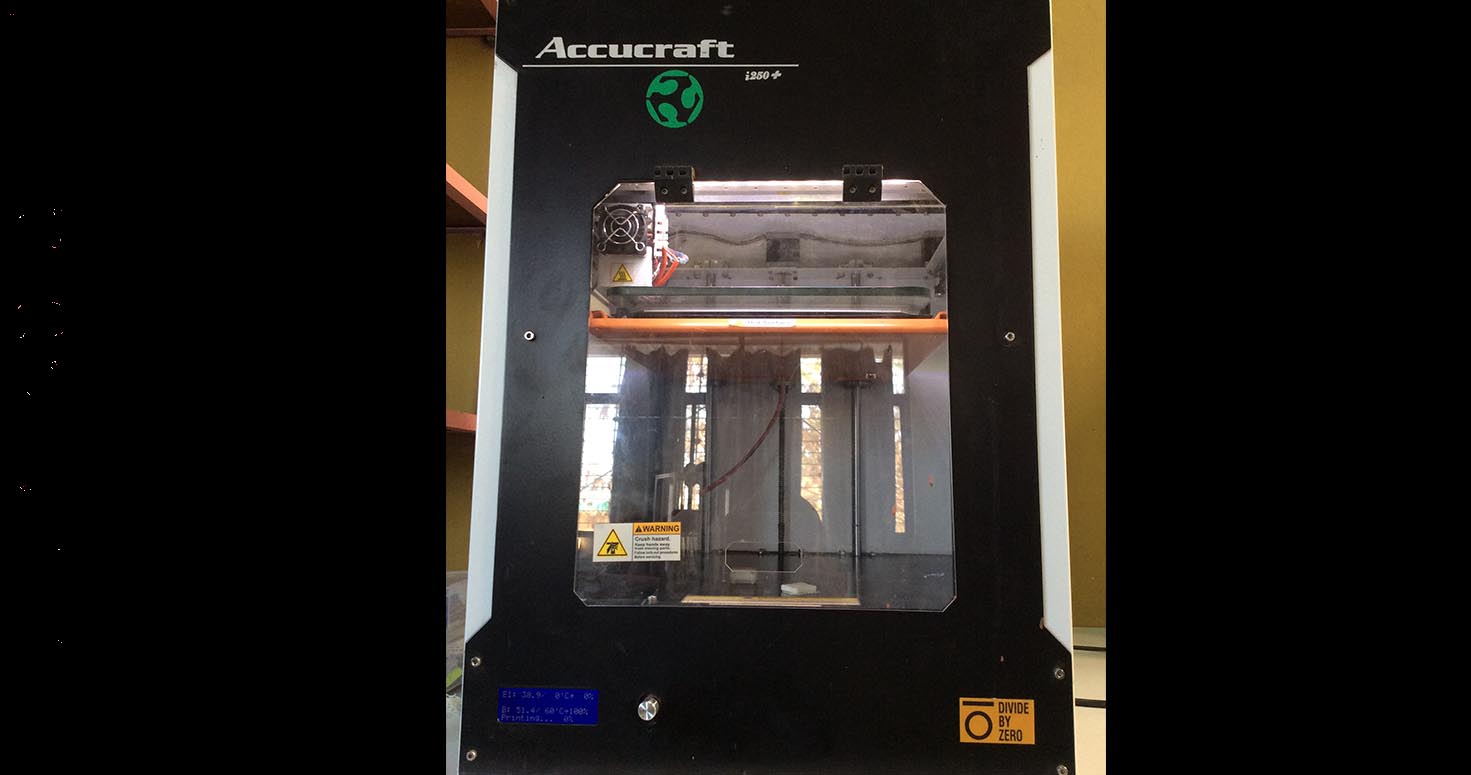
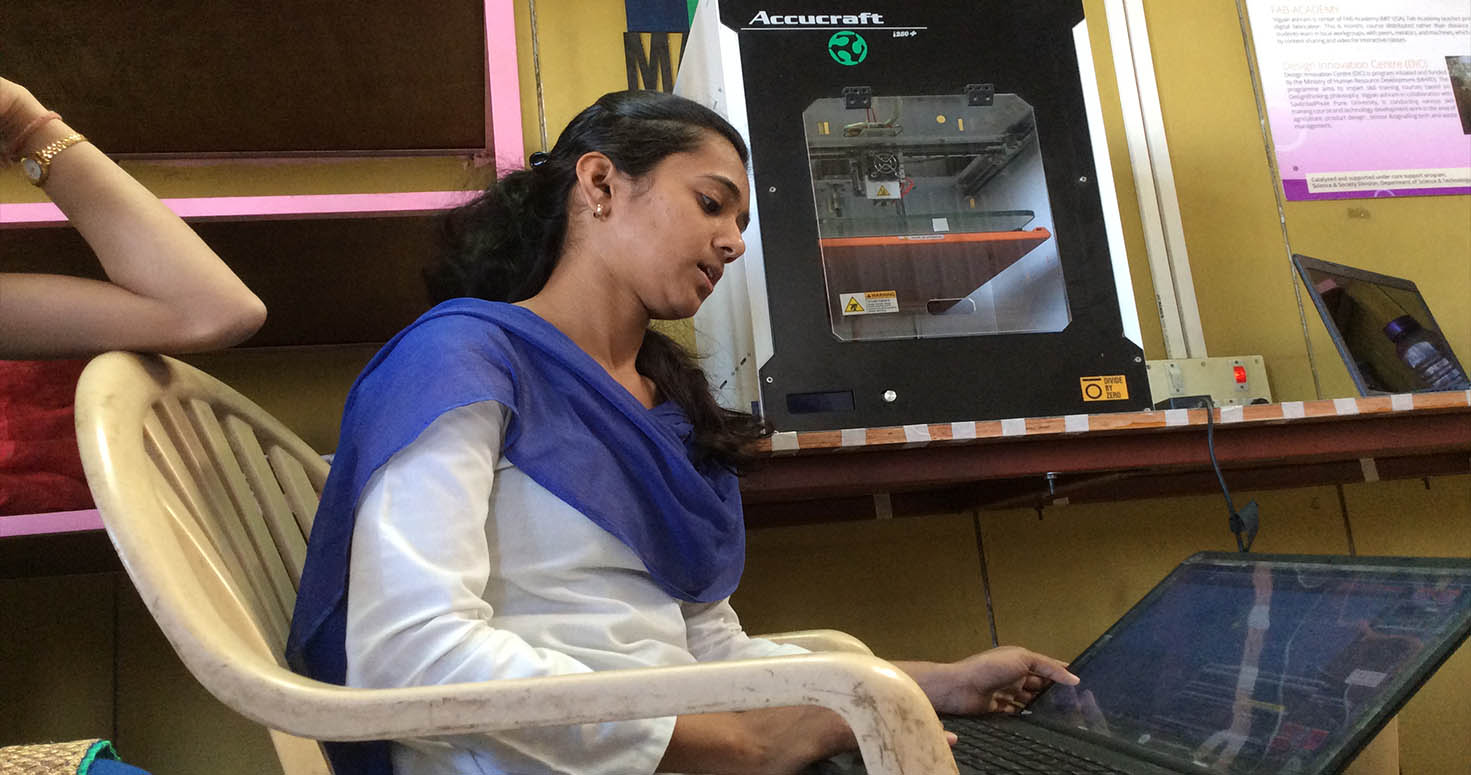
USING : Accucraft i250+ (FDM)
3D printers bed size (In mm) 190-190-240
This Week:
This week started with a visit to College of Enginnering Pune's Fablab, where we were introduced to Shopbot, we were given a very nice orientation by Ms.Apeksha (fab academy alumni). Then we were given some time to explore its software and its settings. As we had to travel around 200 kms in total and be back the same day, whole day went like that. Then Next day I went through resources given in Fab Academy. Read about different techniques, different materials, different uses.
1. Introduction to 3D printing
When we think of fabrication, first thing comes to our mind is 3D printing. So i got very relaxed thinking that printer will do the job but well its not exactly that.
Our instructor Supriya, gave us a nice introduction to 3D printing, how to start, clean, set and maintain this particular printer because of her past experiences.
We took a random file and printed it.
STEPS Followed for 3D Printing:
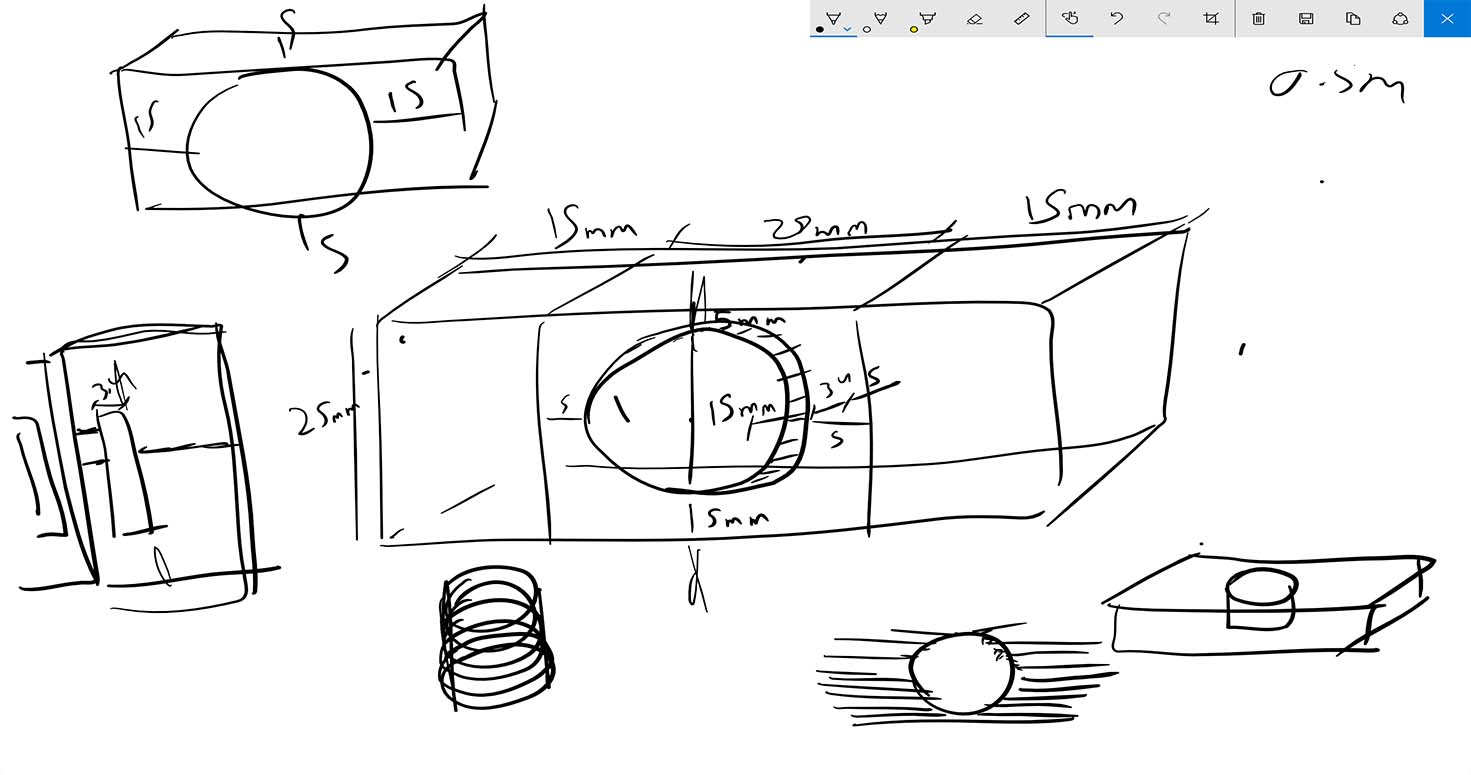
1. Designed file in 3D. After calculating length, height, thickness
I basically designed in Sketchup, where i designed this shoe clip exploring that complex things are not the only option when we want to make sure that its not subtractive, it can be simple functional item too. Therefore, it seems simple but it took me lot of time bringing that curve/bent to the right dimension that it hold my lace in the right positon and pressure.

2. Export in STL
I used a plugin called STL from extension warehouse of Sketchup.
3. I used KissSlicer first to convert my file to Gcode, it basically slices the design and even tells error if any. ALso , you can set what style, quality you want. There is a feature called infill which means how many layers i want it to use to make it .
Lastly other important option is On/Off support, which ill explain later below.

4. Then used RepetierHost to convert from gcode to gc.
5. Cleaned Bed
7. Putting Acetone and ABs mixture on the bed
8. Print file
9. Make sure to take away the material extruder extrudes in beginning before it starts printing.
Understanding 3D Printer:
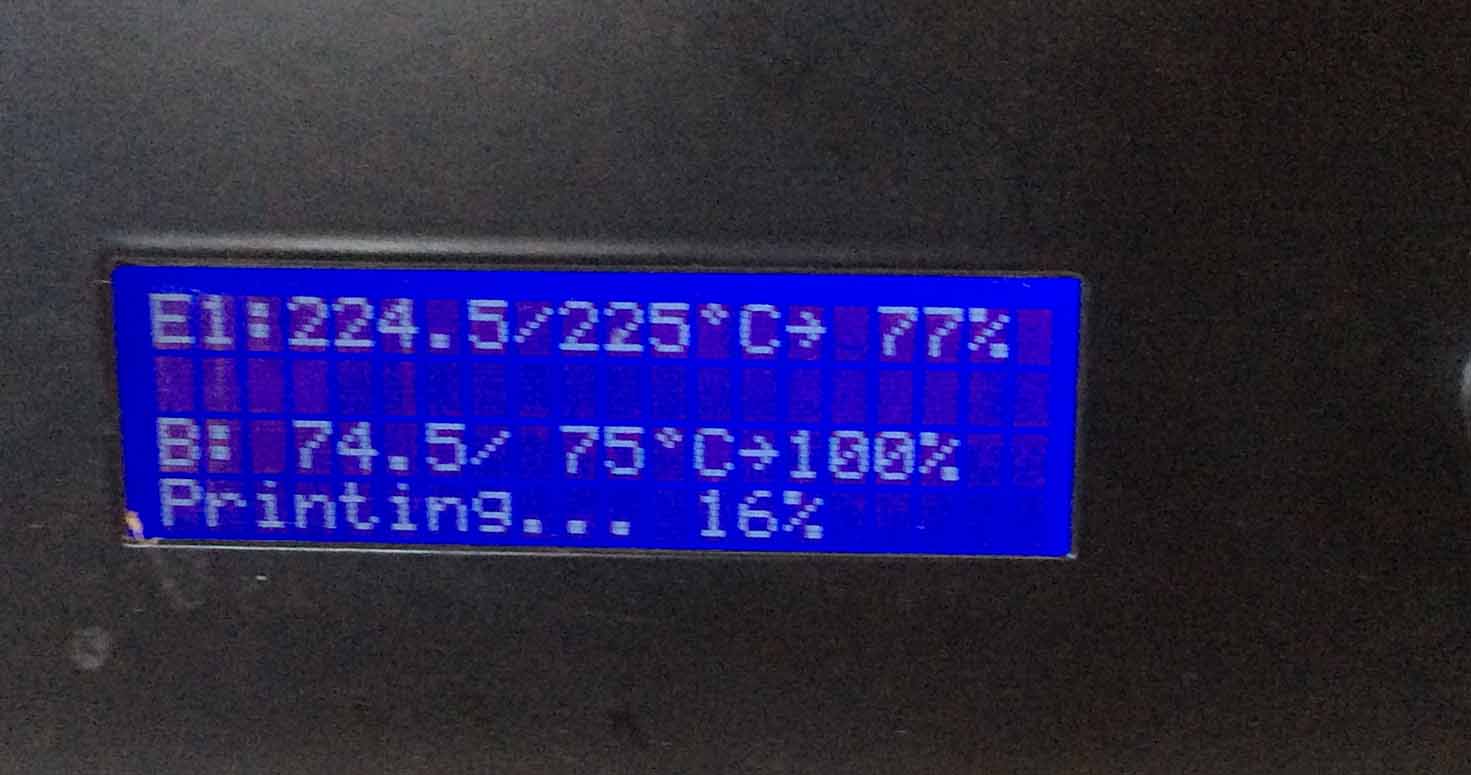
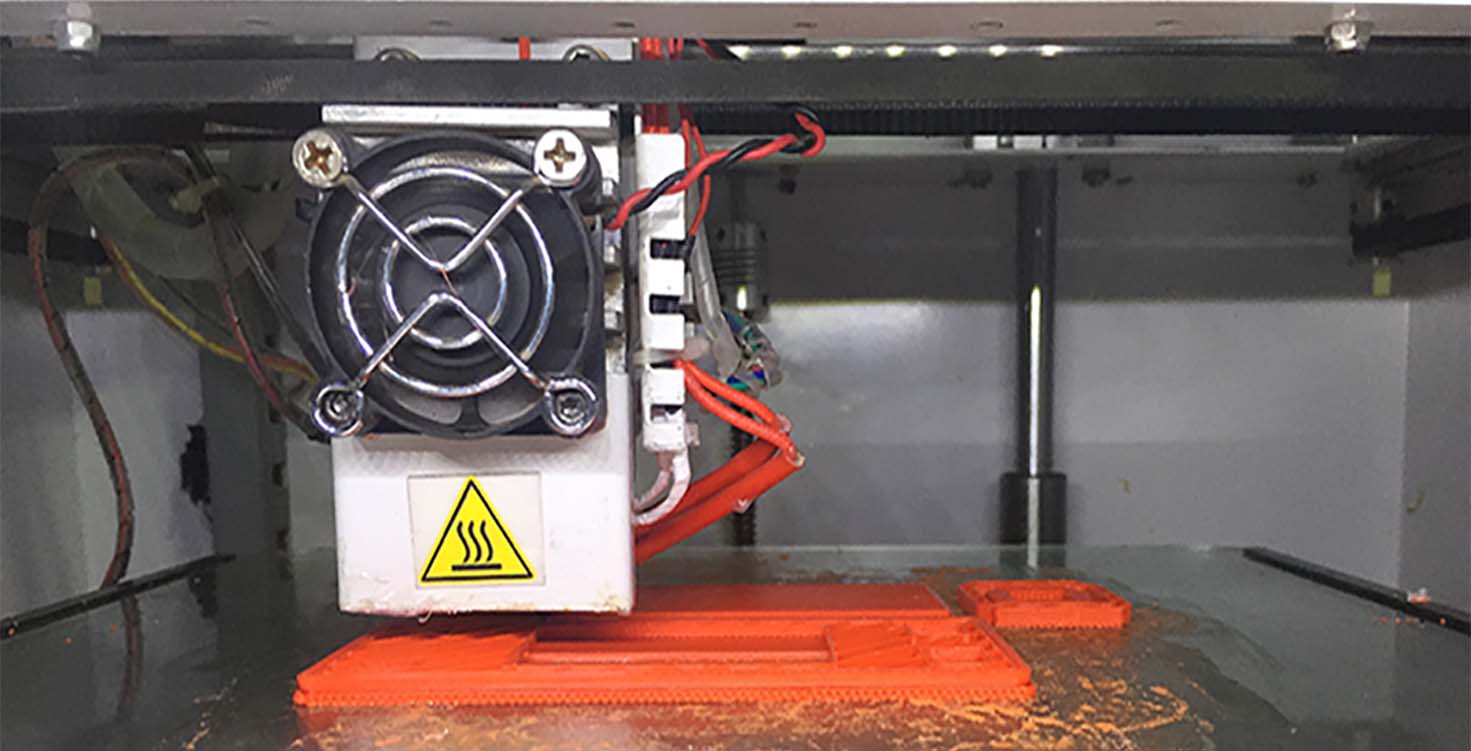
Well, every Printer is different, this printer is basically controlled with one button to go back home, to select or to change. The Tempertaure of the bed should remain between 60-65 and Temperature of the Extruder between 220-225 but even if you keep it 0 degree, it will start heating after bed is ready.
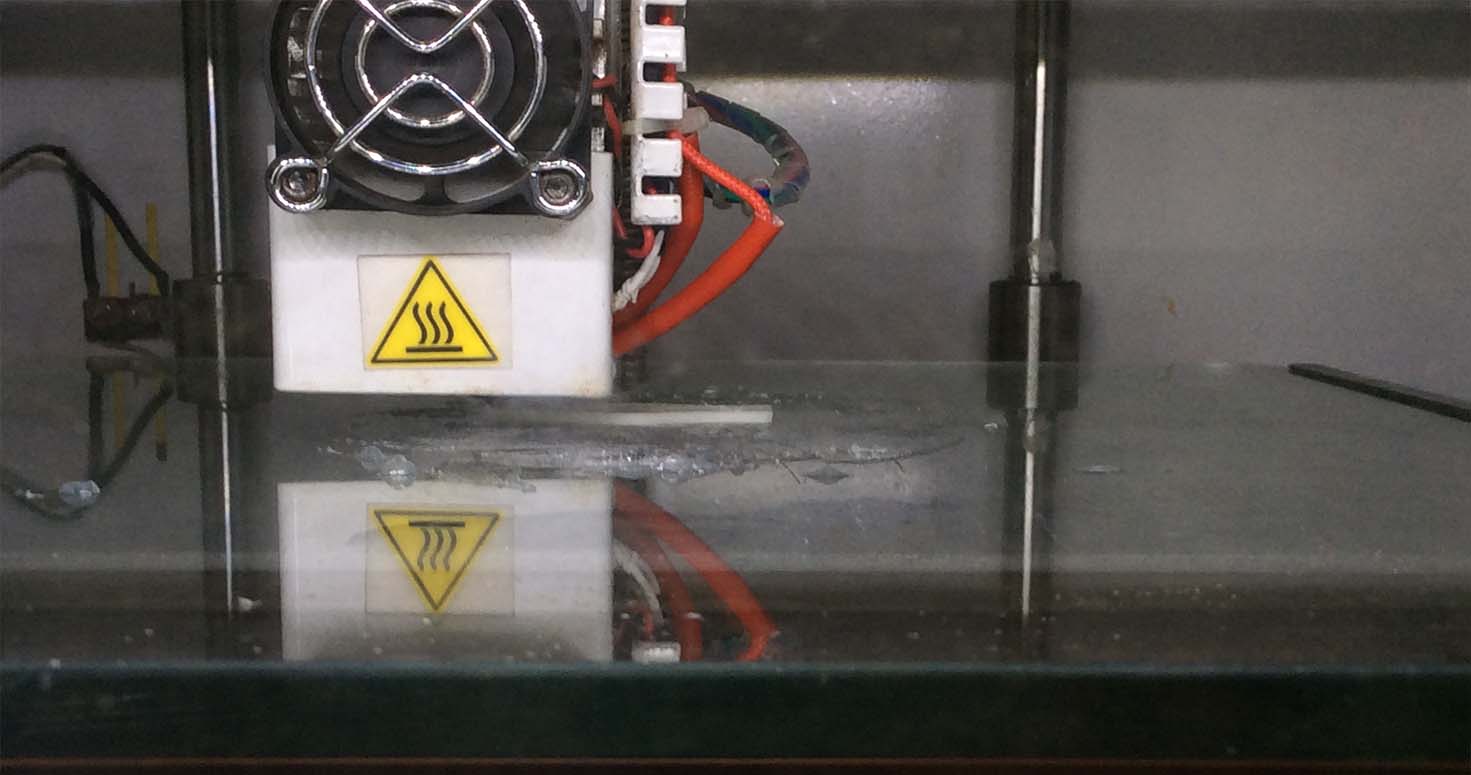
Also, Dont forget to check the bed size with the help of a paper chit which is folded to check the distance between the nozzle and the bed. While one of my classmates was printing, the nozzle wasnt extruding the material well.
so problem basically was that material behind the machine was heavy so to pull so we lighted it up and now it was all set.

I designed two things, i plan to do more later.
1. Shoe clip According to my peers, i dont know how to tie laces, but i feel is i tie it double to make sure it doesnt open and i dont fall. Well, to sort the issue, i designed this clip which has two holes in left and right through which lace will go and i push clip and tighten my lace. Now the holes inside my clip i designed are not straight holes, they are curvy inside so that my laces doesnt find a straight way to move out.
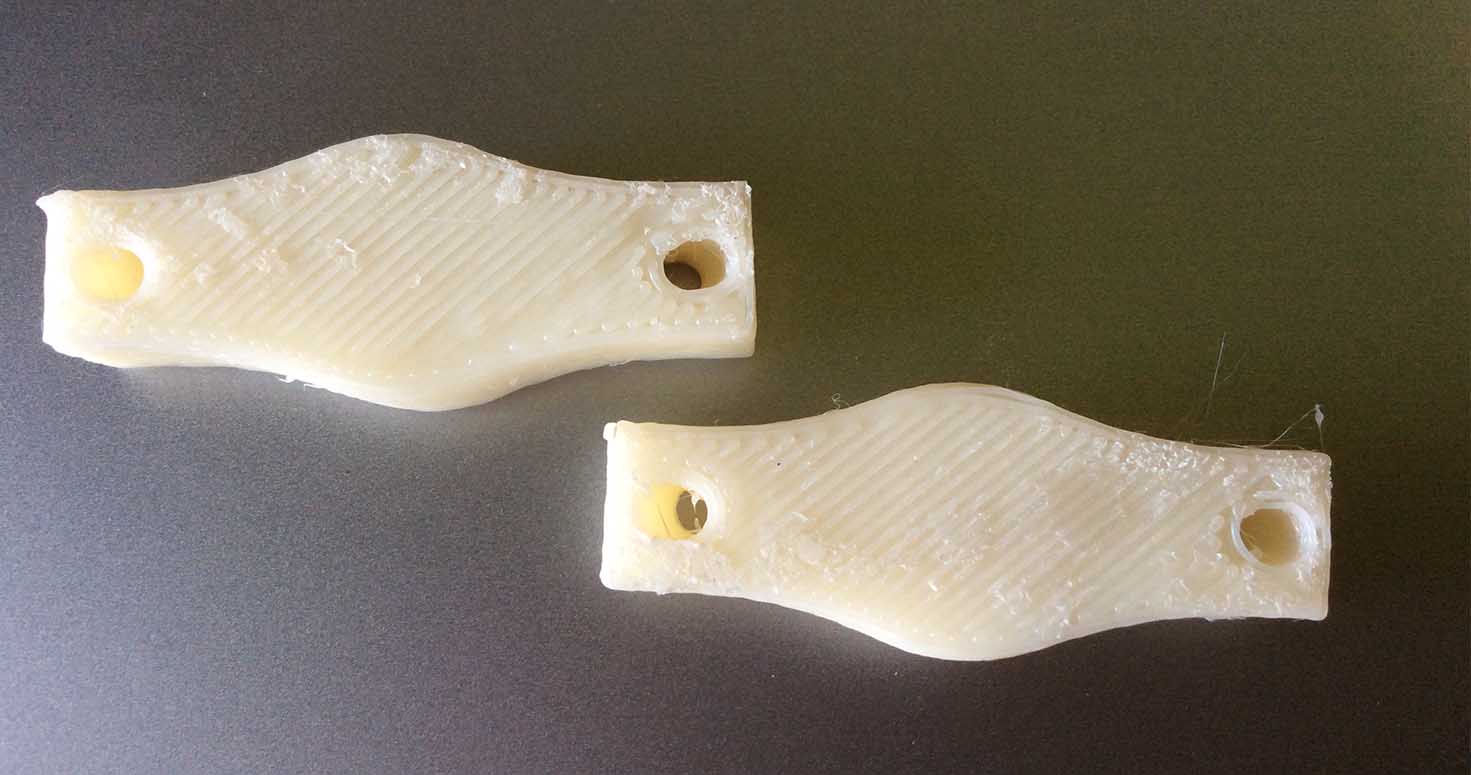
I loved it, because i tried it first and changed my design accordingly. So i designed the clip by myself with no other product reference, so it was definitely a hurray moment. I used acetone to clean and smooth it, it works amazing.
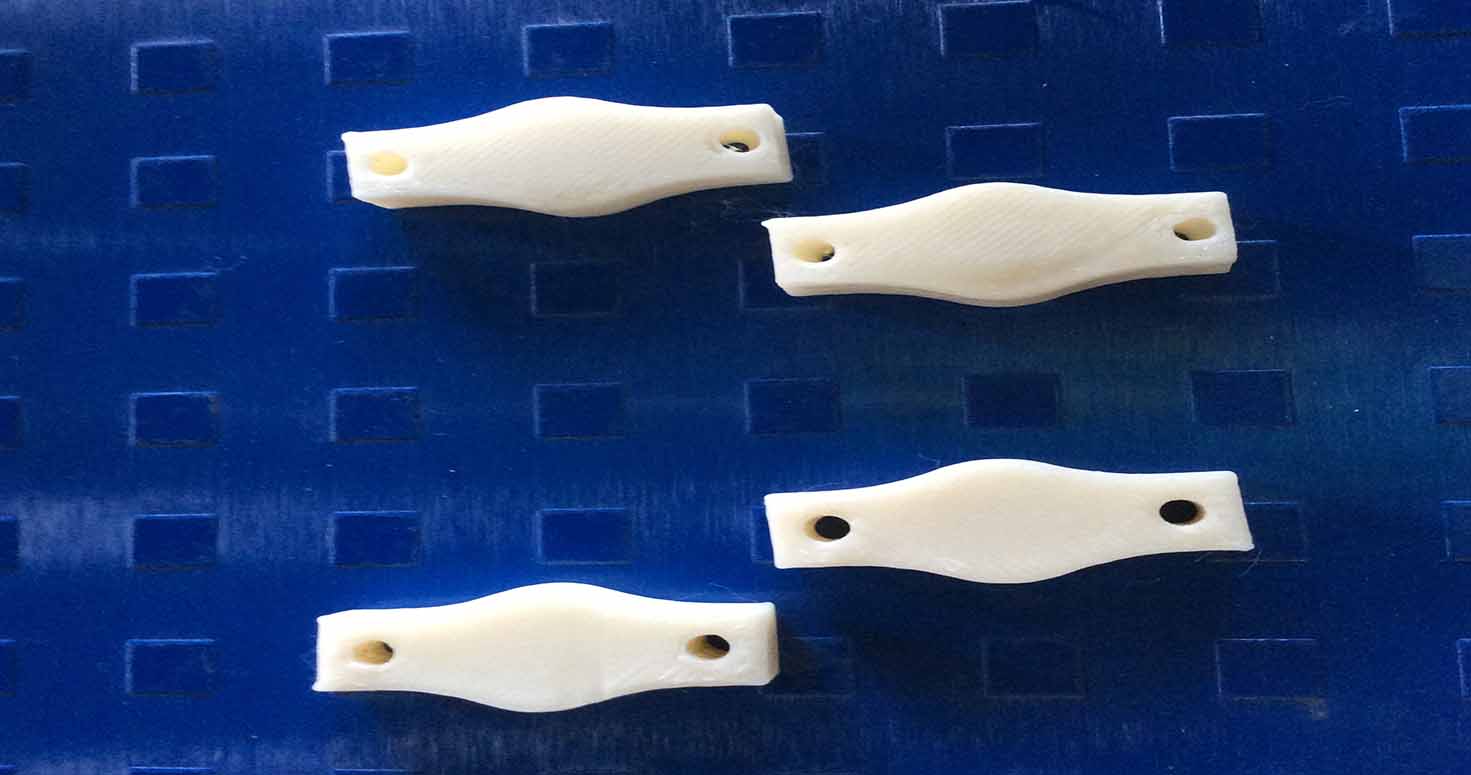
I got someone who needed it too , so i end up printing two pairs.
Thats how we wear it:
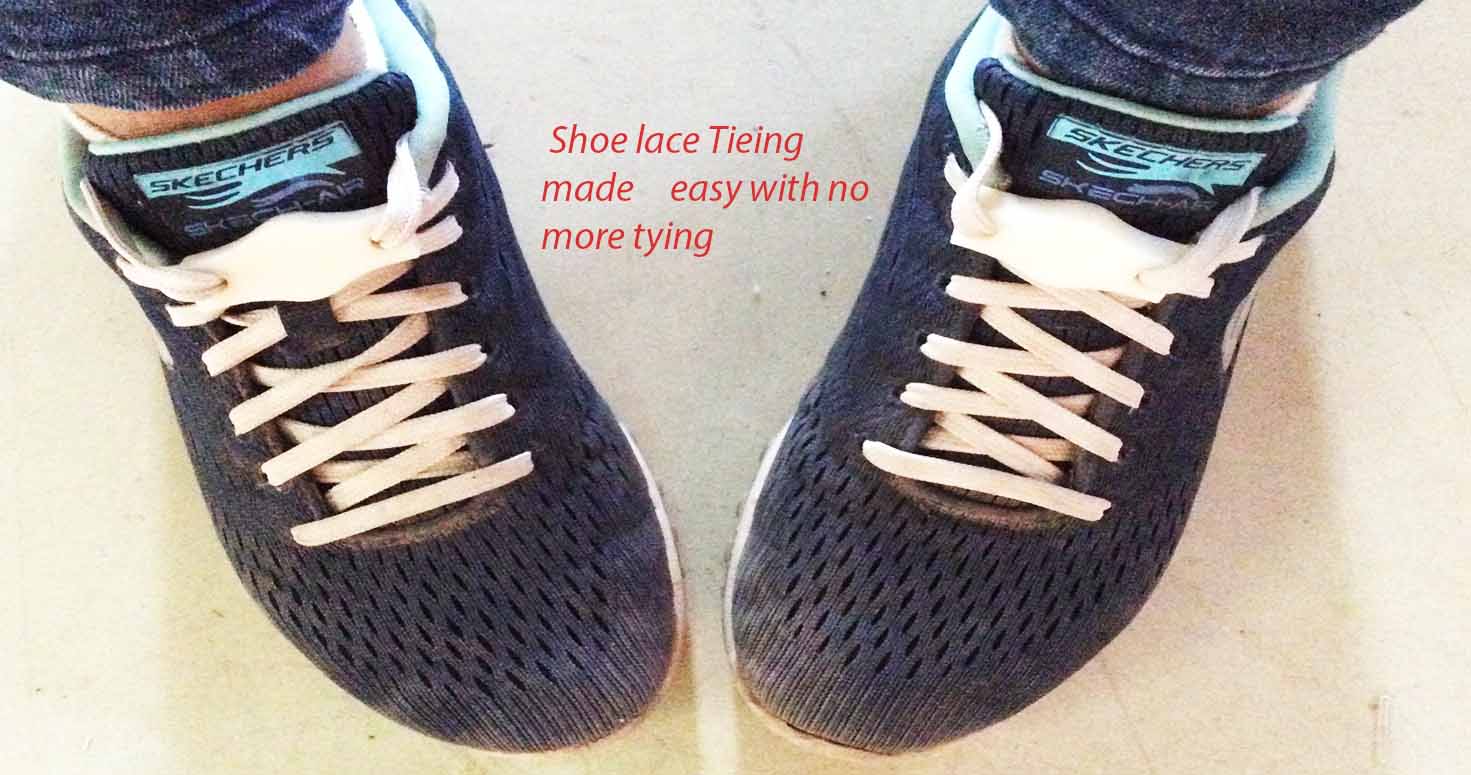
Download Shoeclip design
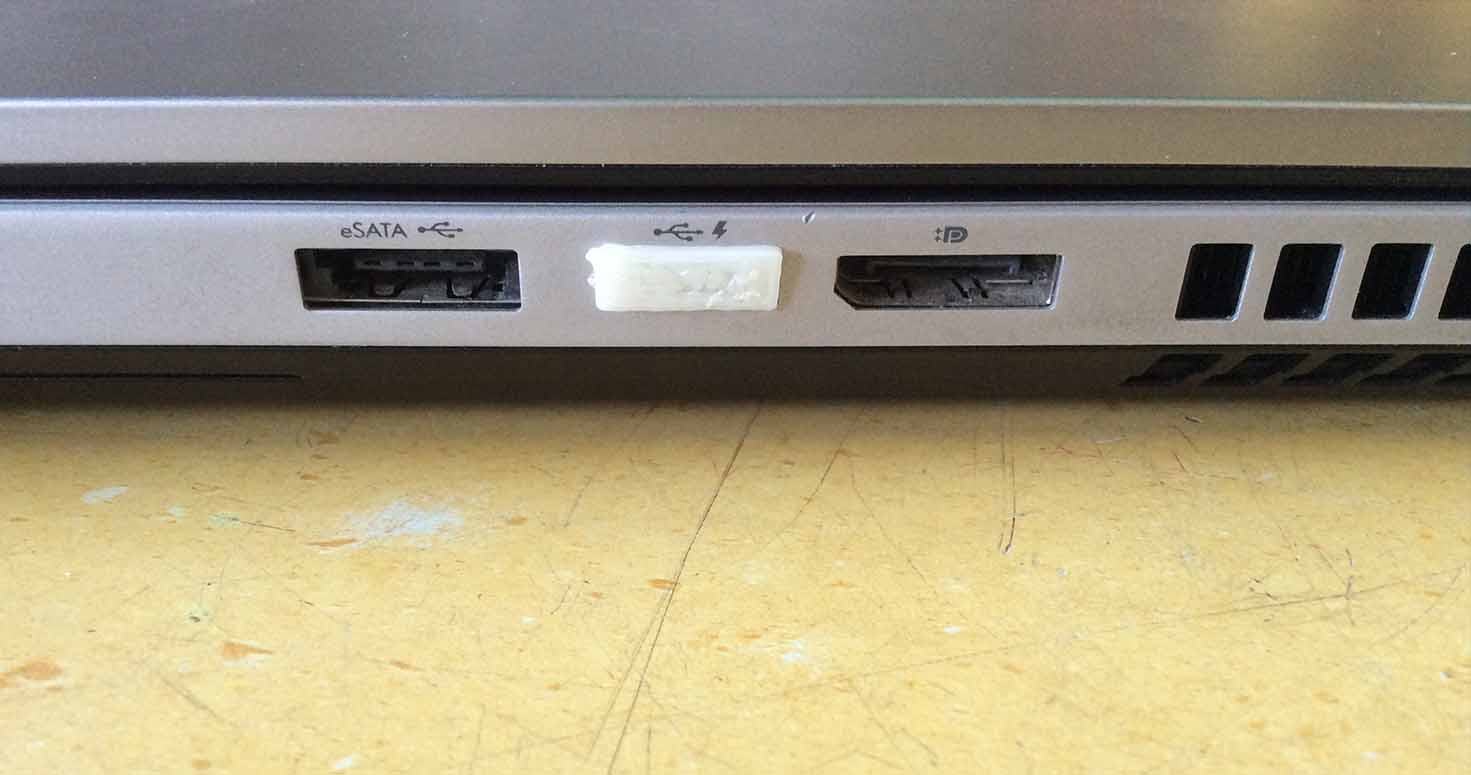
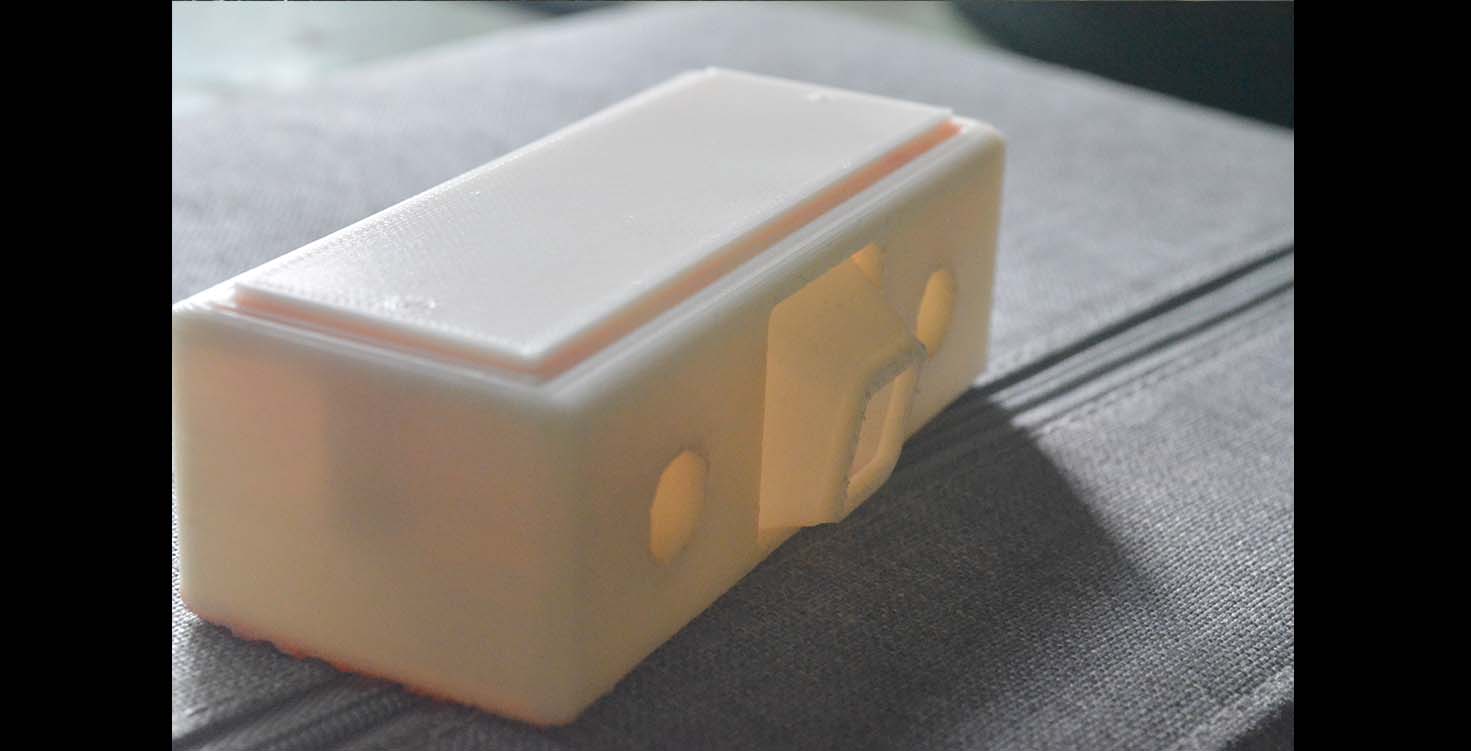
2. USB cover:
So I wanted to print things which are useful and functional. I designed and printed this usb cover which will protect my USB outputs from dust as its very dusty here and my laptop suffers so this was my first try to save it.
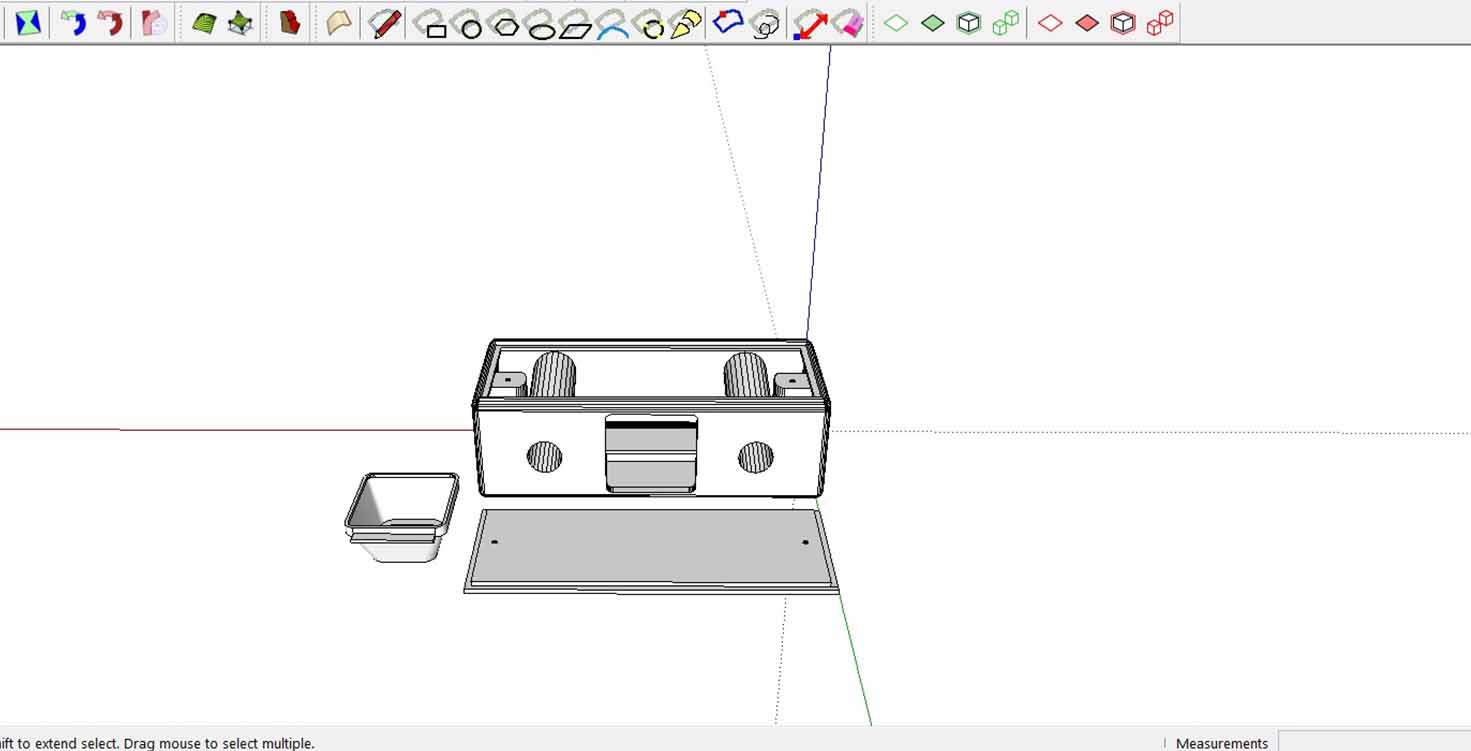
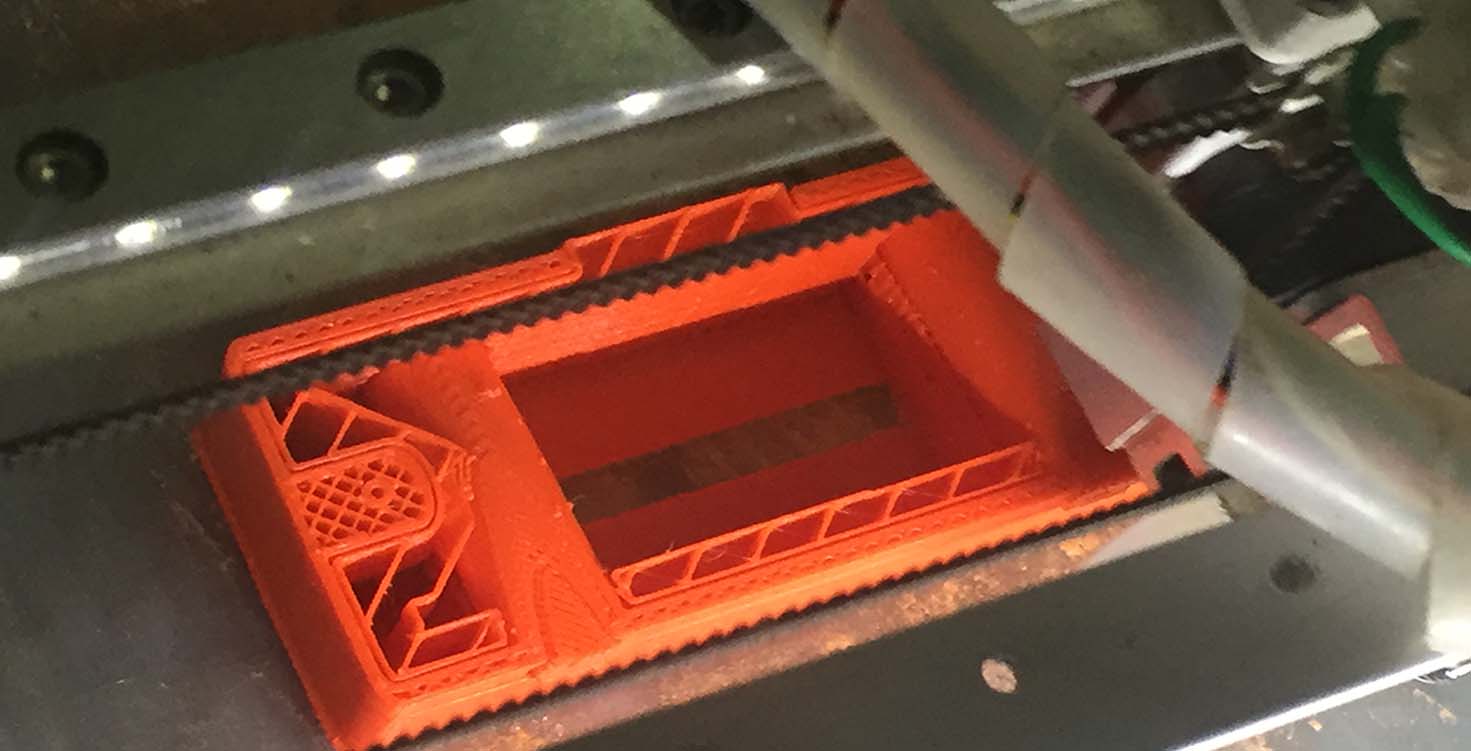
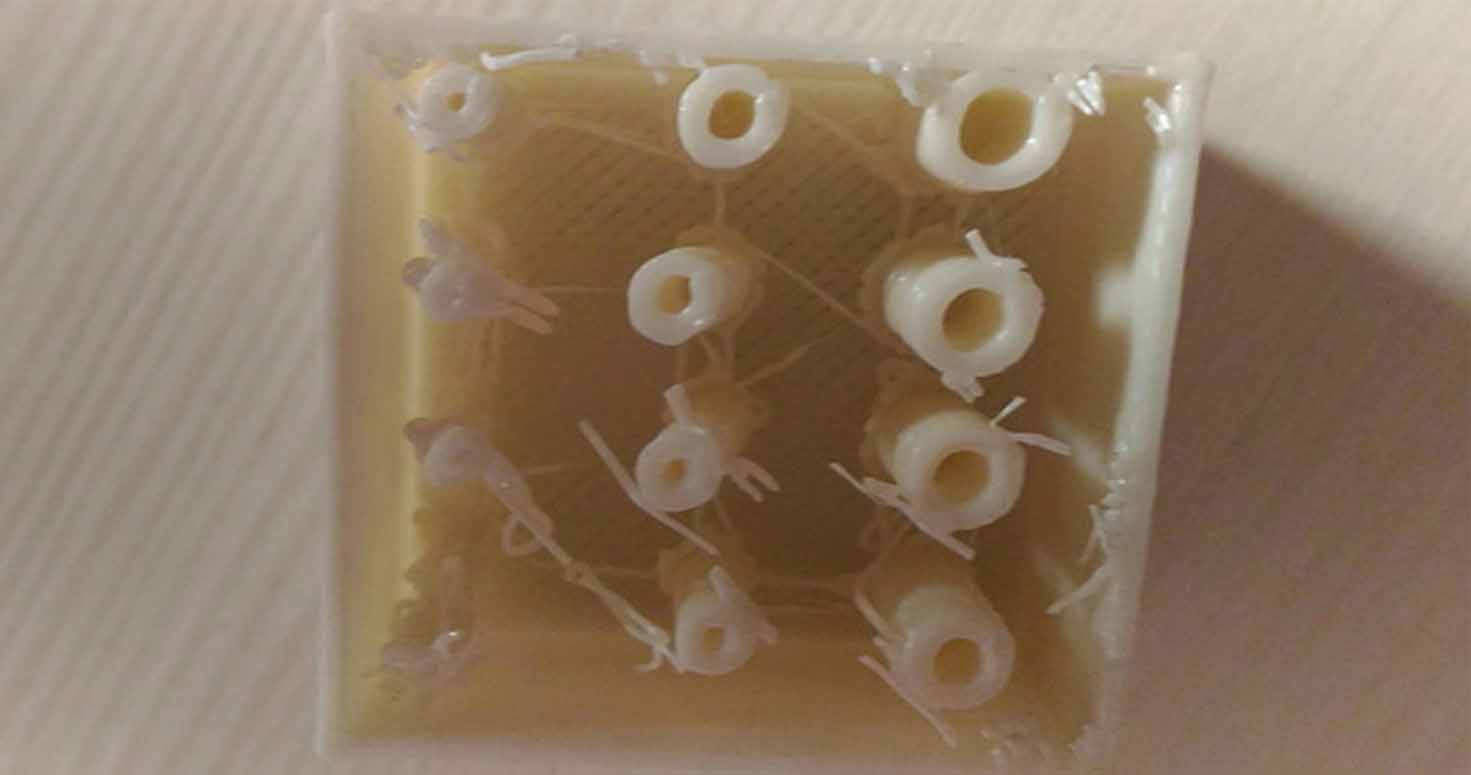
3. Tool Holder
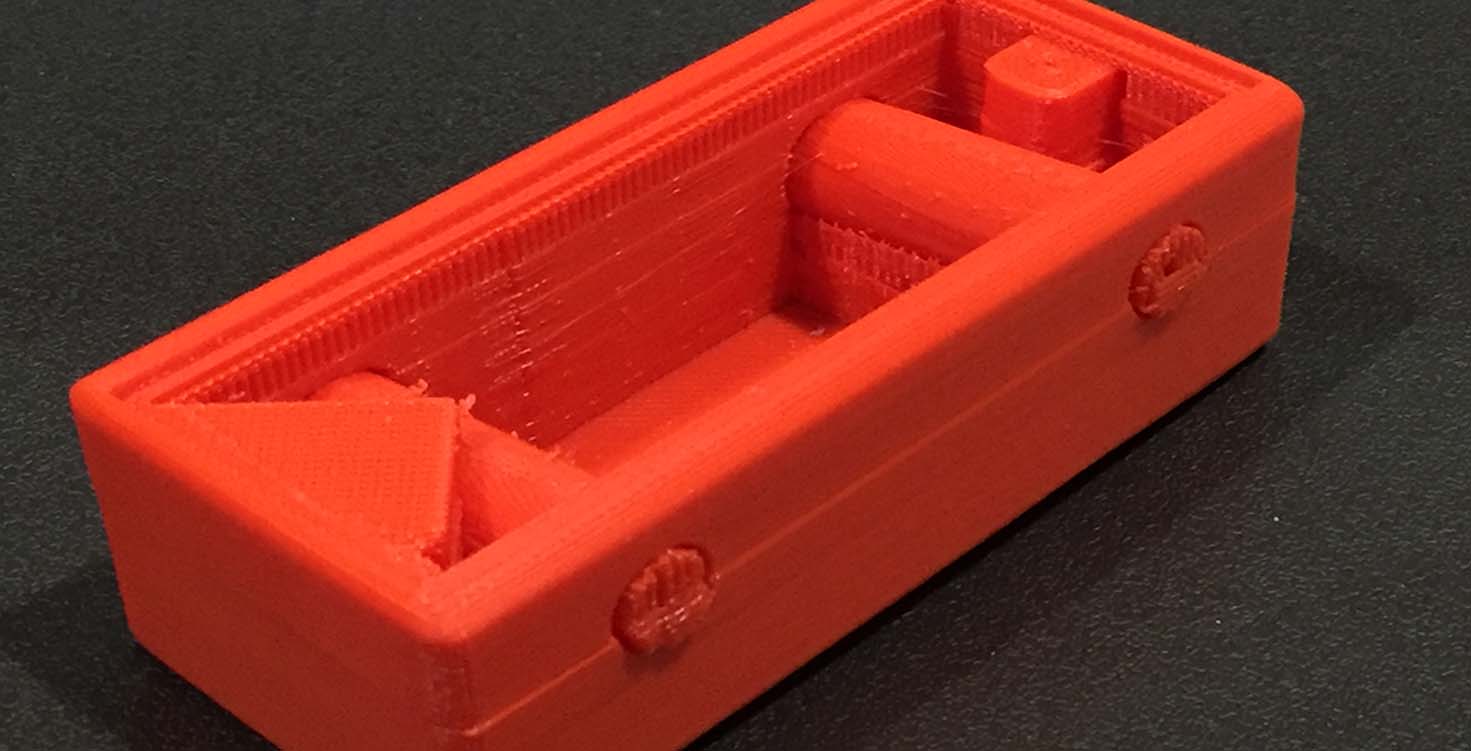
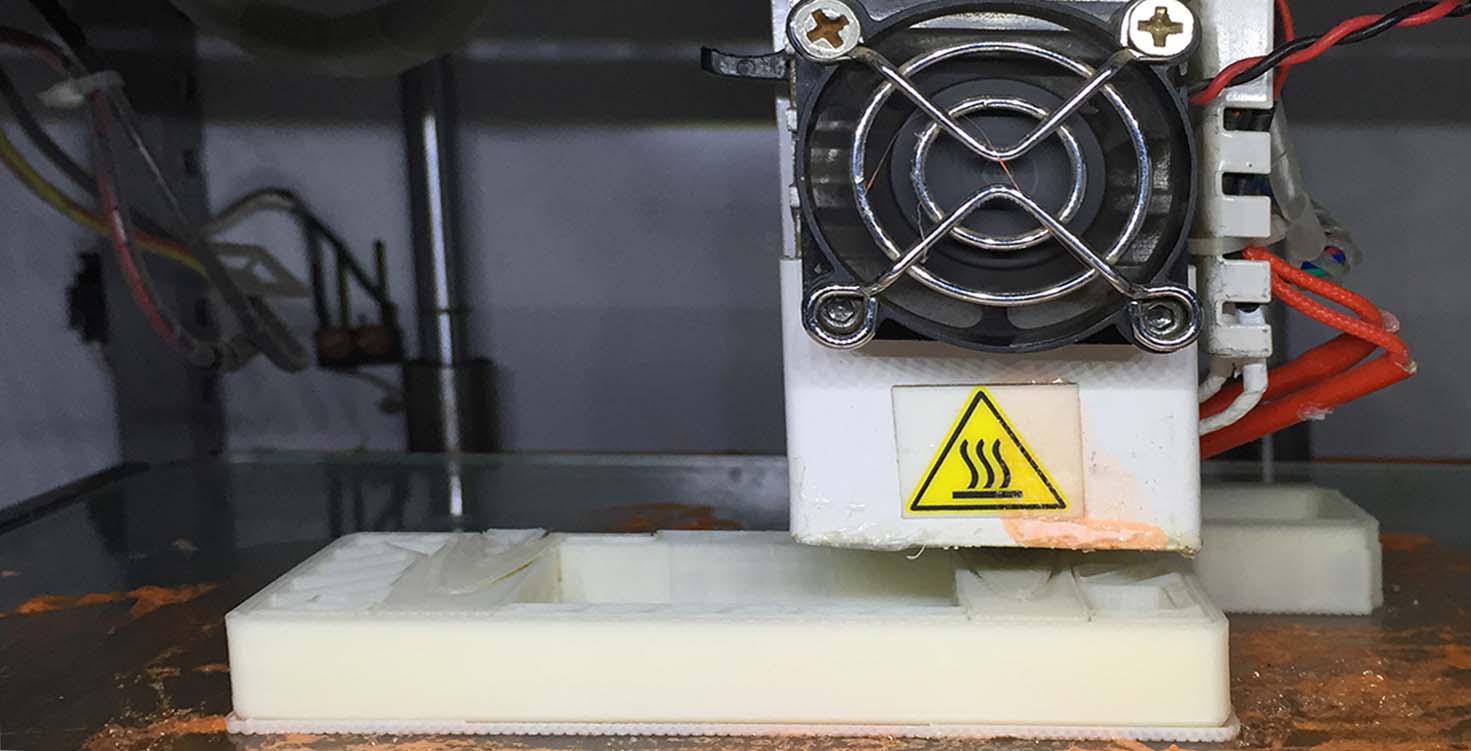
I have Designed a Tool holder in Sketchup, wherein in you will see a rectangle cap, cylinderical space for screws and gap for fixing IR sensor, To direct IR sensor to the object, designed a conical element.
After designing, I basically created its gcode in Kisslicer and then gcode to g file in Repetier, by this time i was able to understand the 3D printer so i started using Infill , support and i was able to control the support strength so that i can easily take it off. Then following are few features of the tool holder:
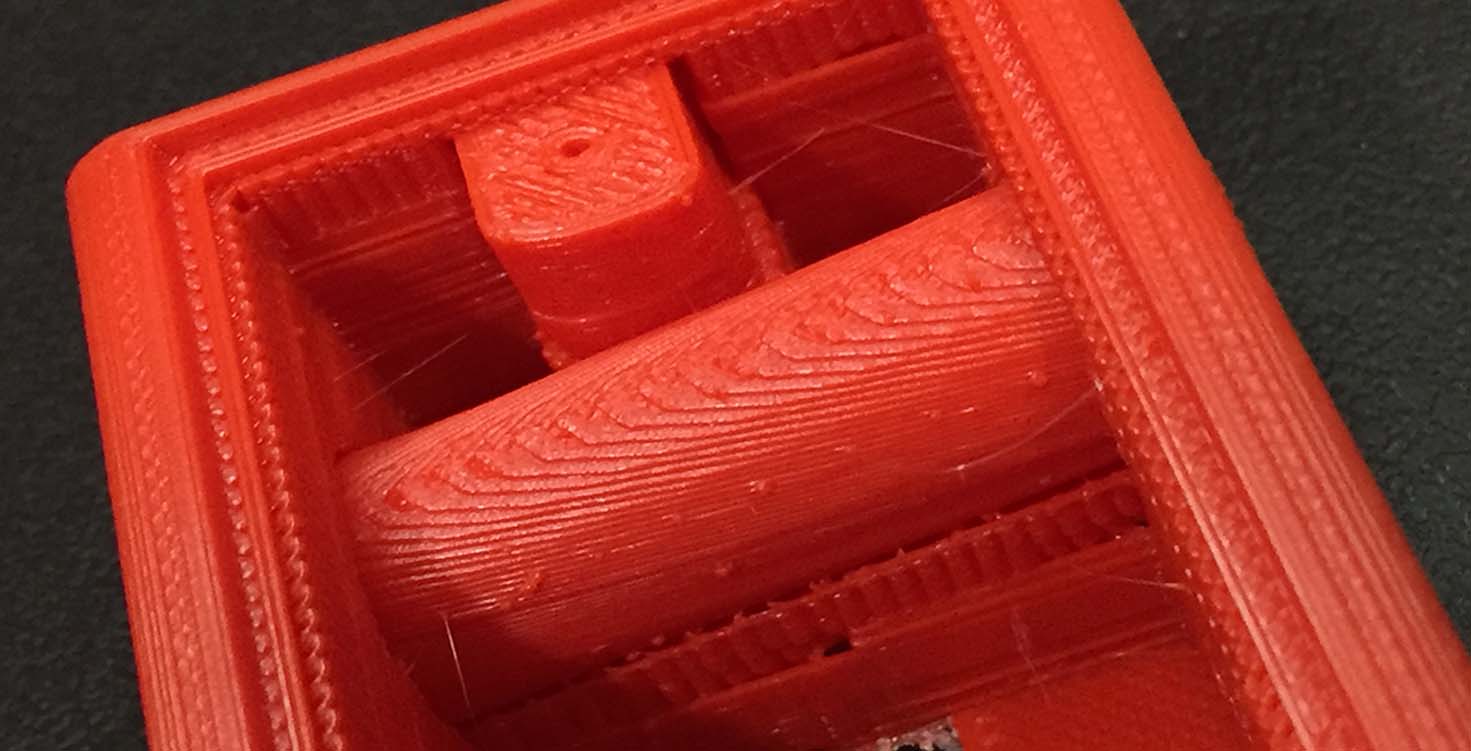
I have designed internal cylinders for putting bolts to mount it on walls or any place.
If you notice on extreme left below, you will notice a small hole, well thats for crewing up the cap onto the holder after assembling elements inside the tool holder.
I was able to control the settings of the support system in Kisslicer in option "SUPPORT"
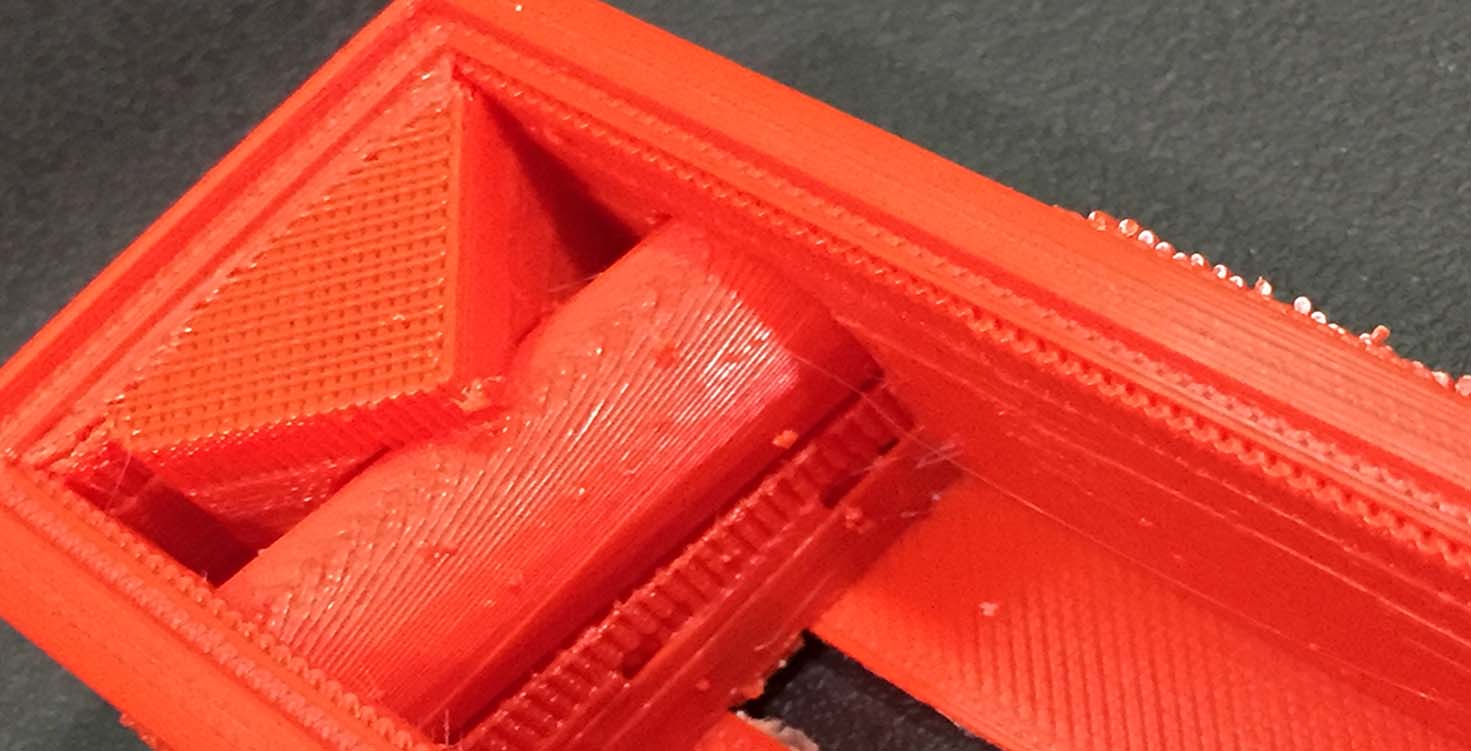
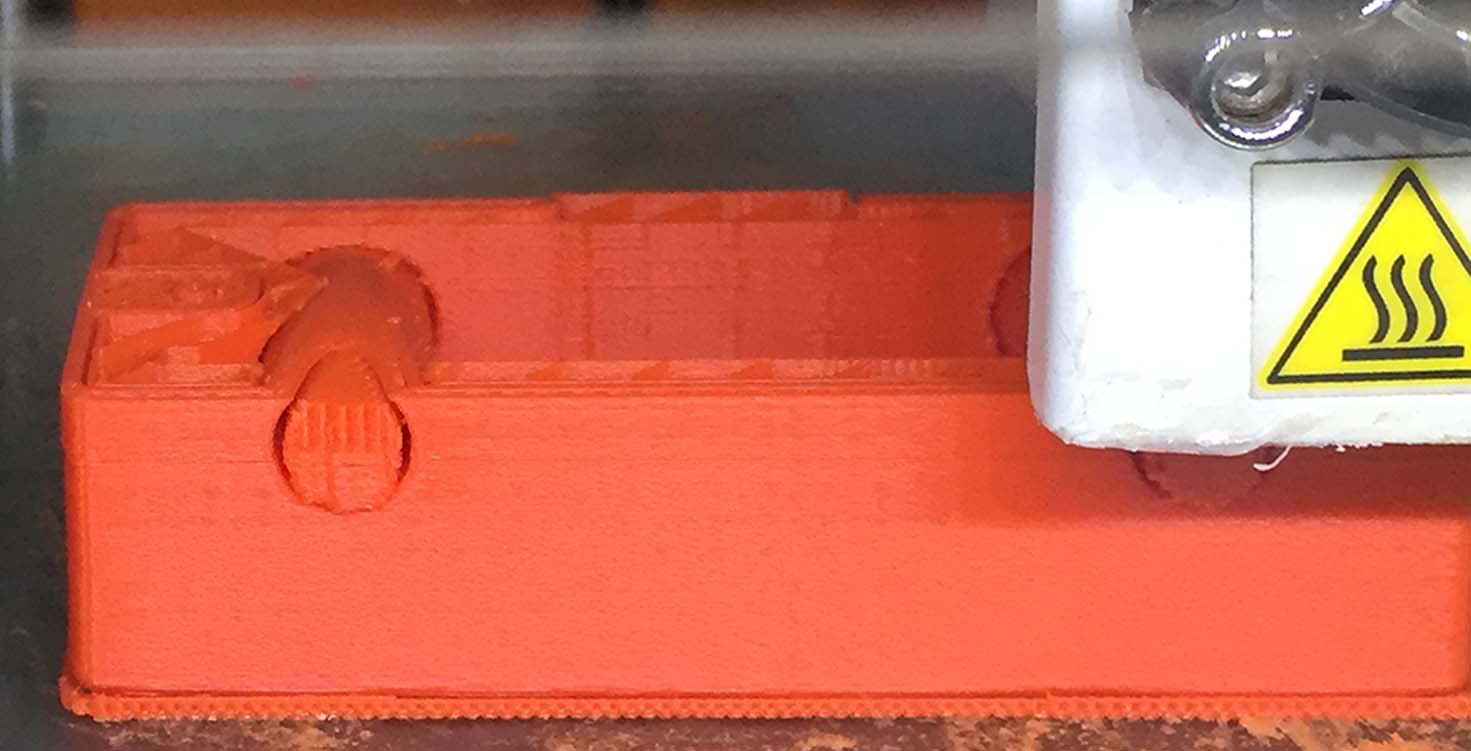
After removing support, it looked like this:
Similarly with the conical IR element,

thats the whole product together.
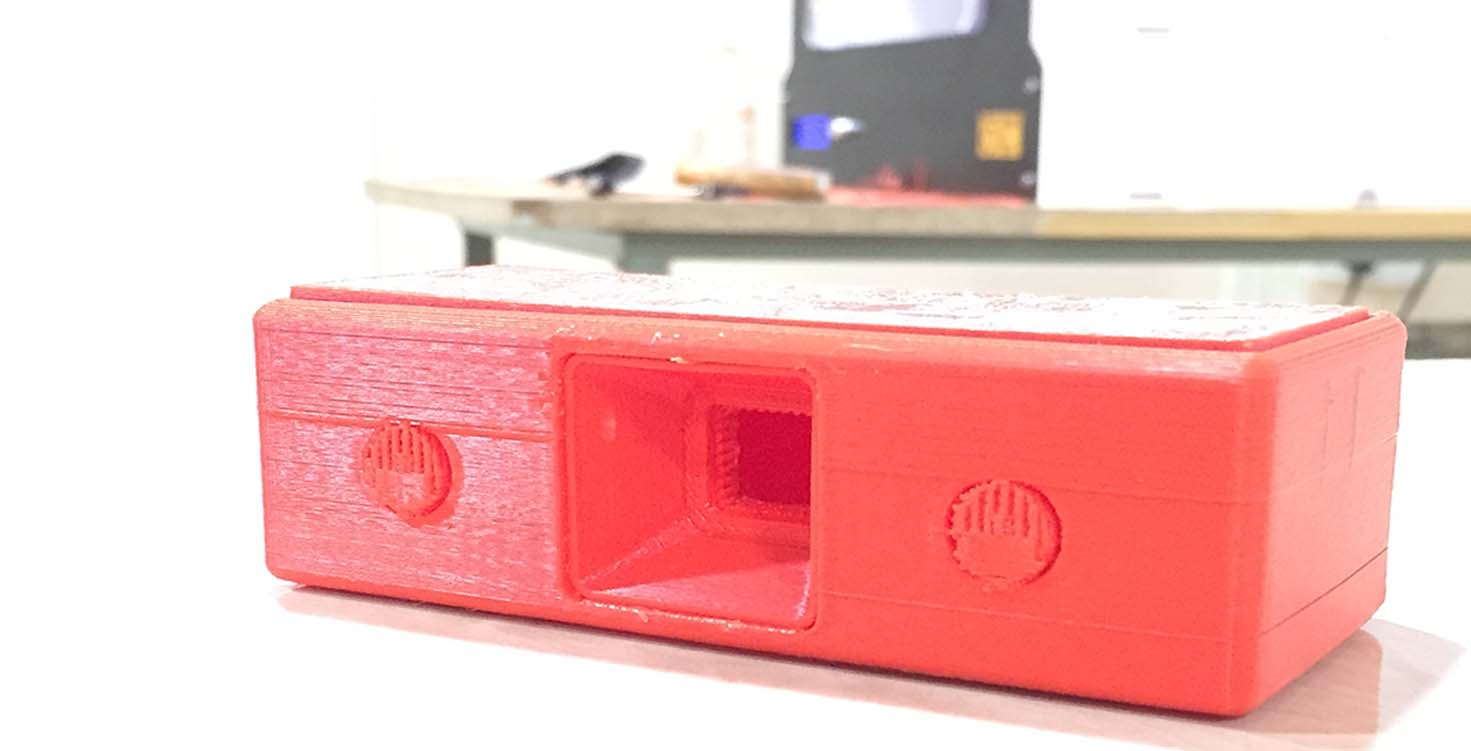
I faced difficiculty while designing because i wasnt sure how this 3D printer will actually print this because i kept so many features to this like space for screws, IR space which i designed after measuring the IR sensor and even kept rectangle space in the base of the holder so that i could pressfit my products name and could highlight with LED.
Similarly, i build my second product , I loved this one because i was able to explore better with the settings and bring in the best in this.
Download Toolholder design
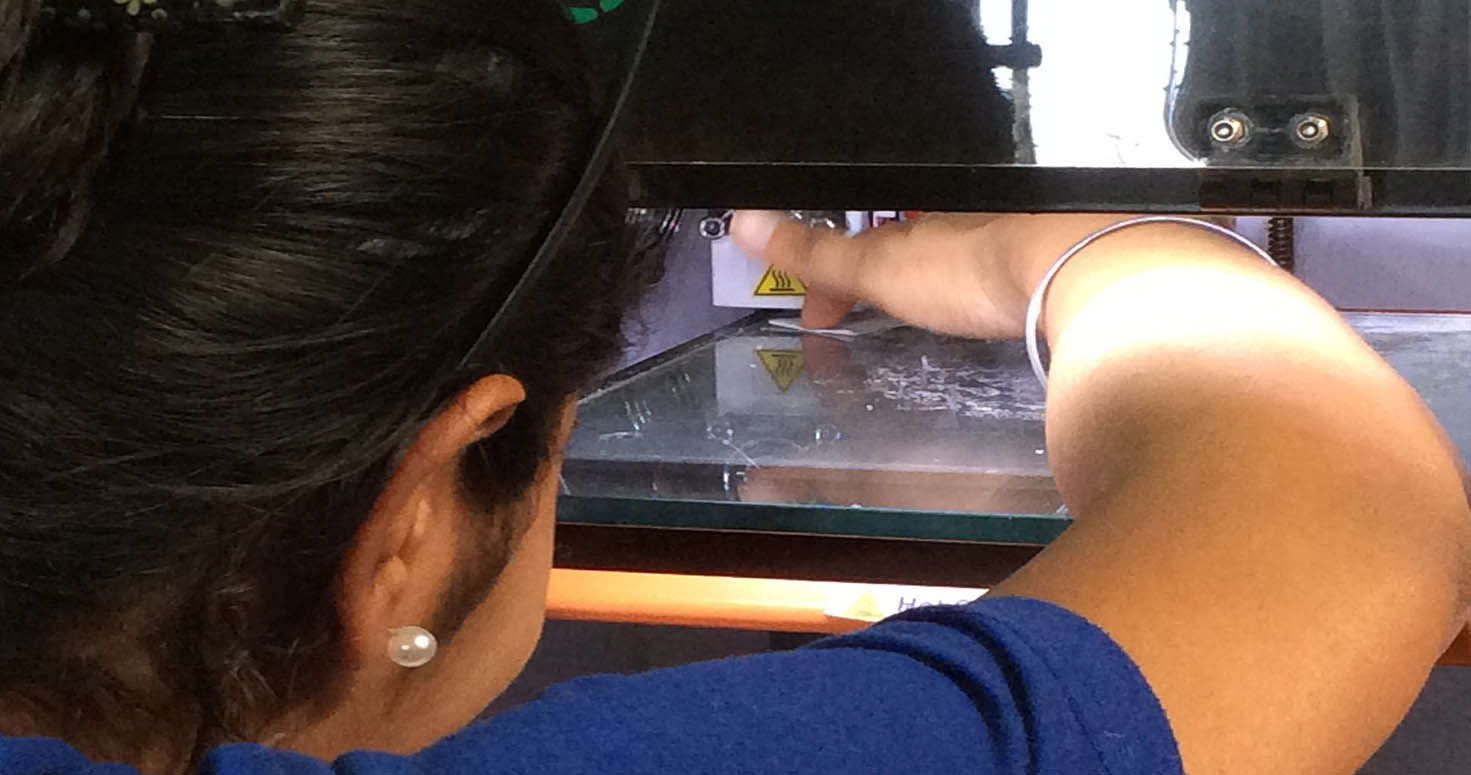
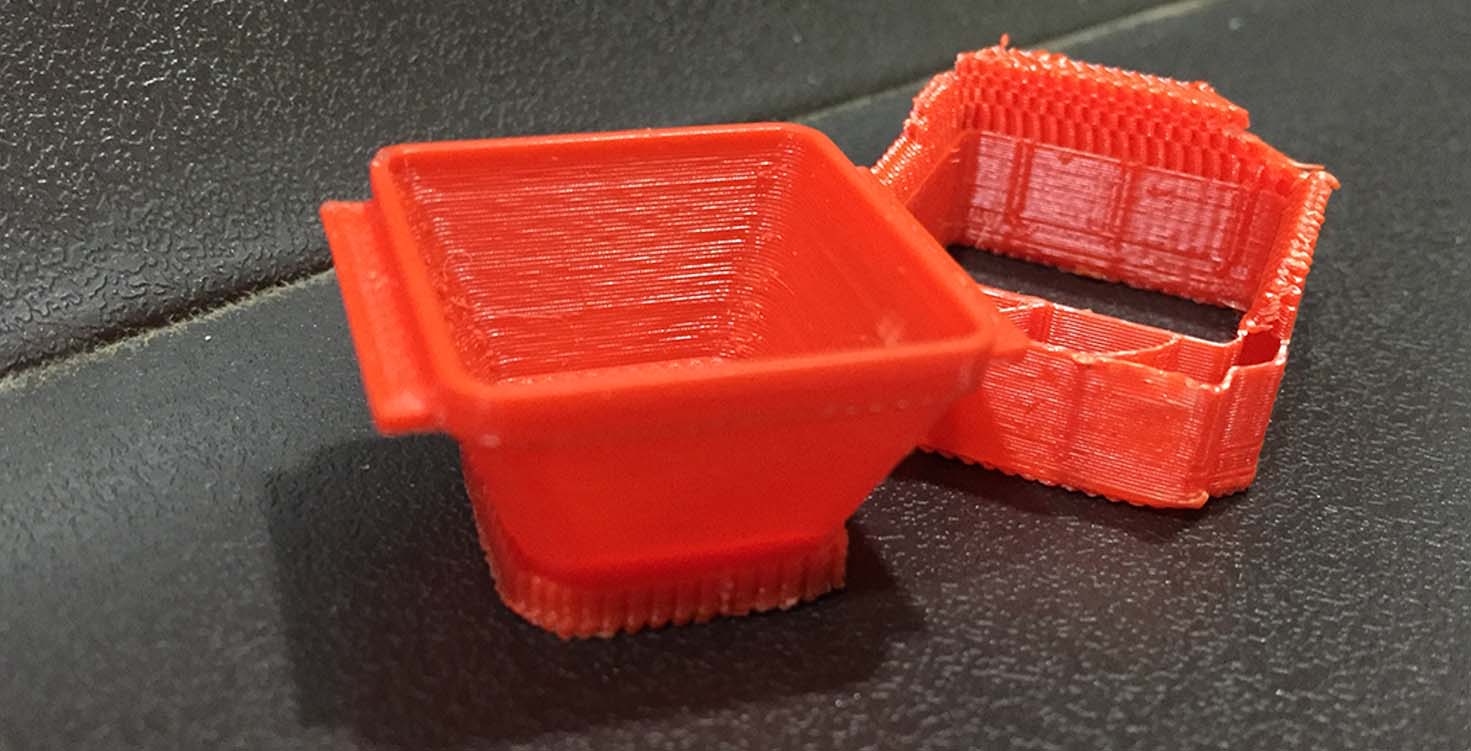
3. Group Assignment: In group, we wanted to explore the potential of our 3D printer i.e Accucraft i250.
Therefore, we did the following tests :
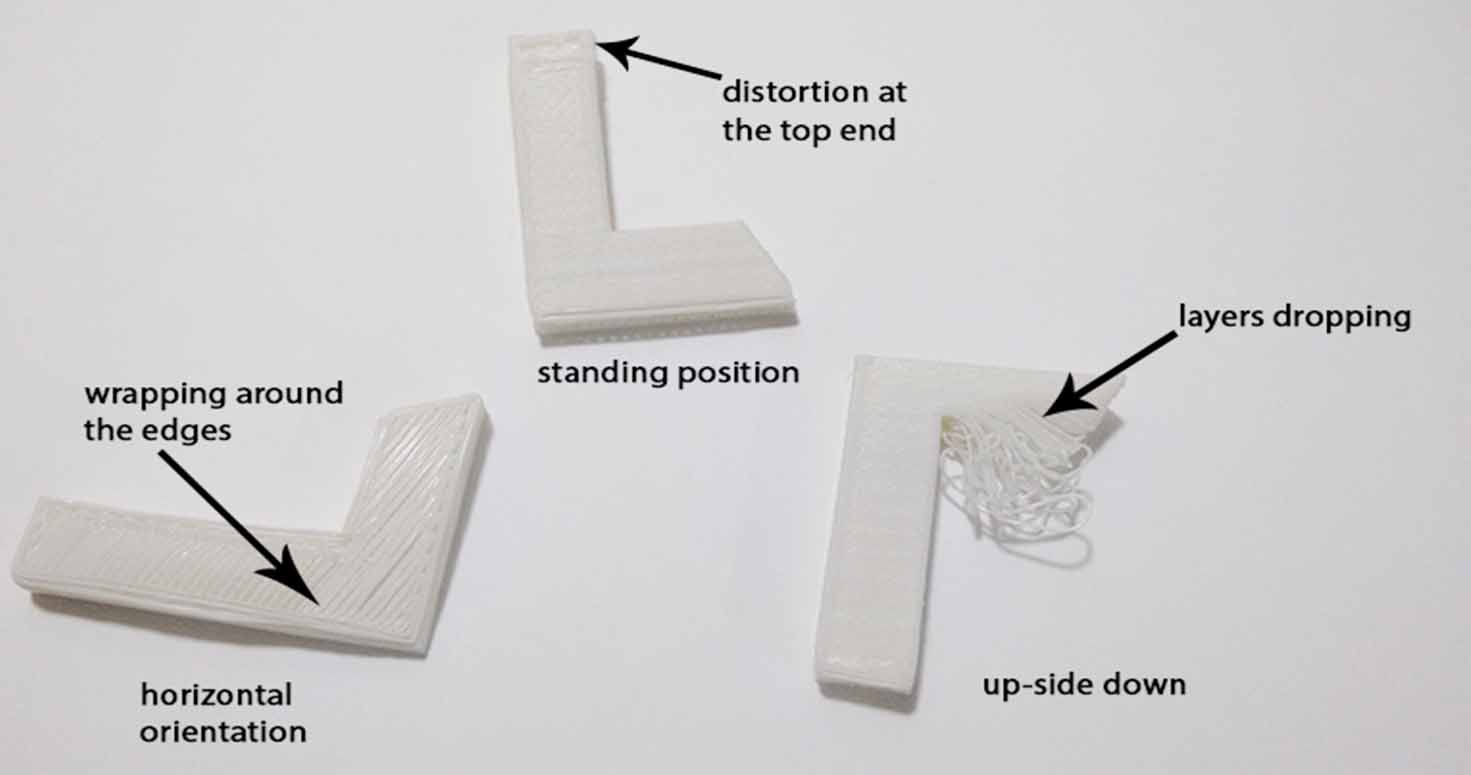
a) Orientation Test
In this we put design in different angles and checked which position was stable.
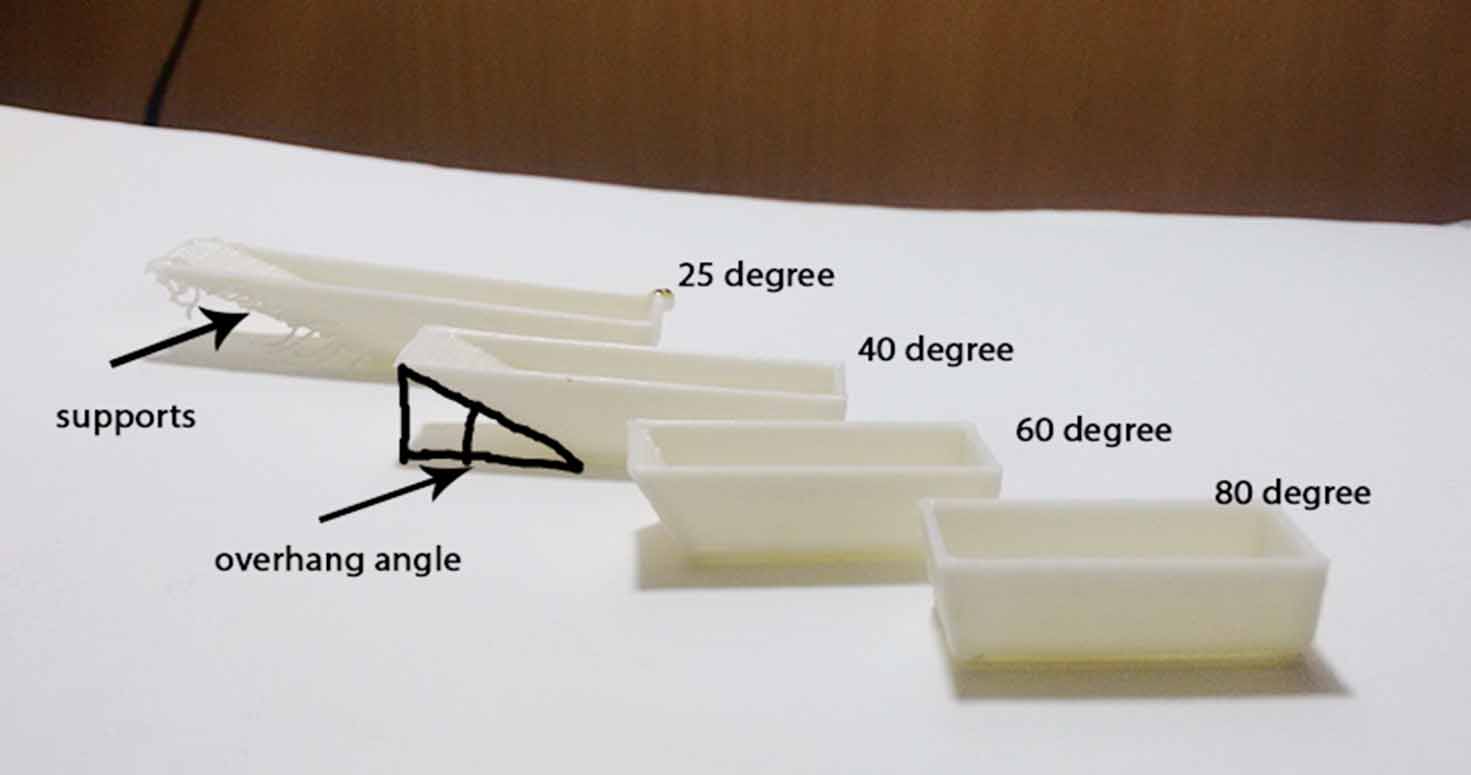
b) Overhang test
We wanted to test at which angle the 3d printer can print overhang without supports.
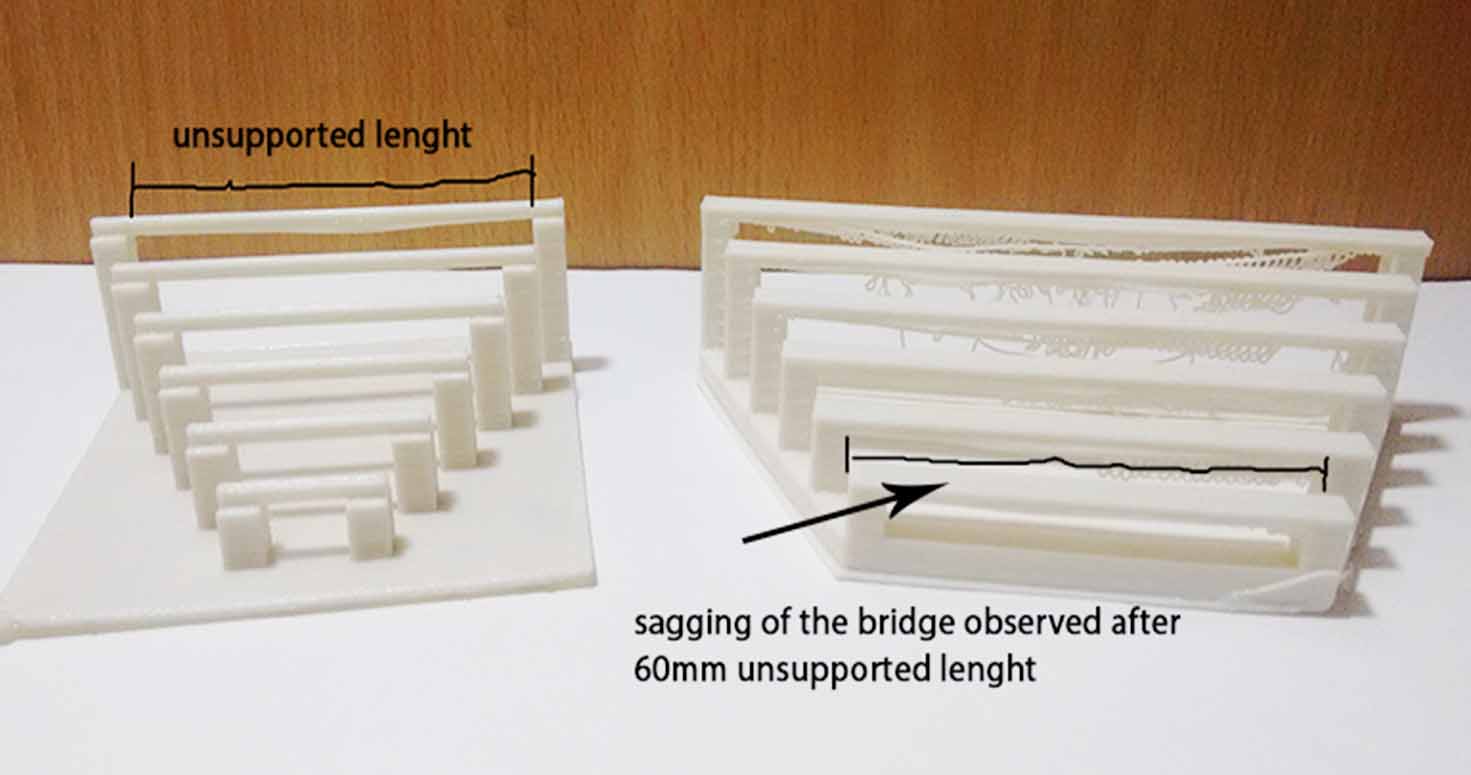
c) Bridge test
We tested the object by varying the unsupported length
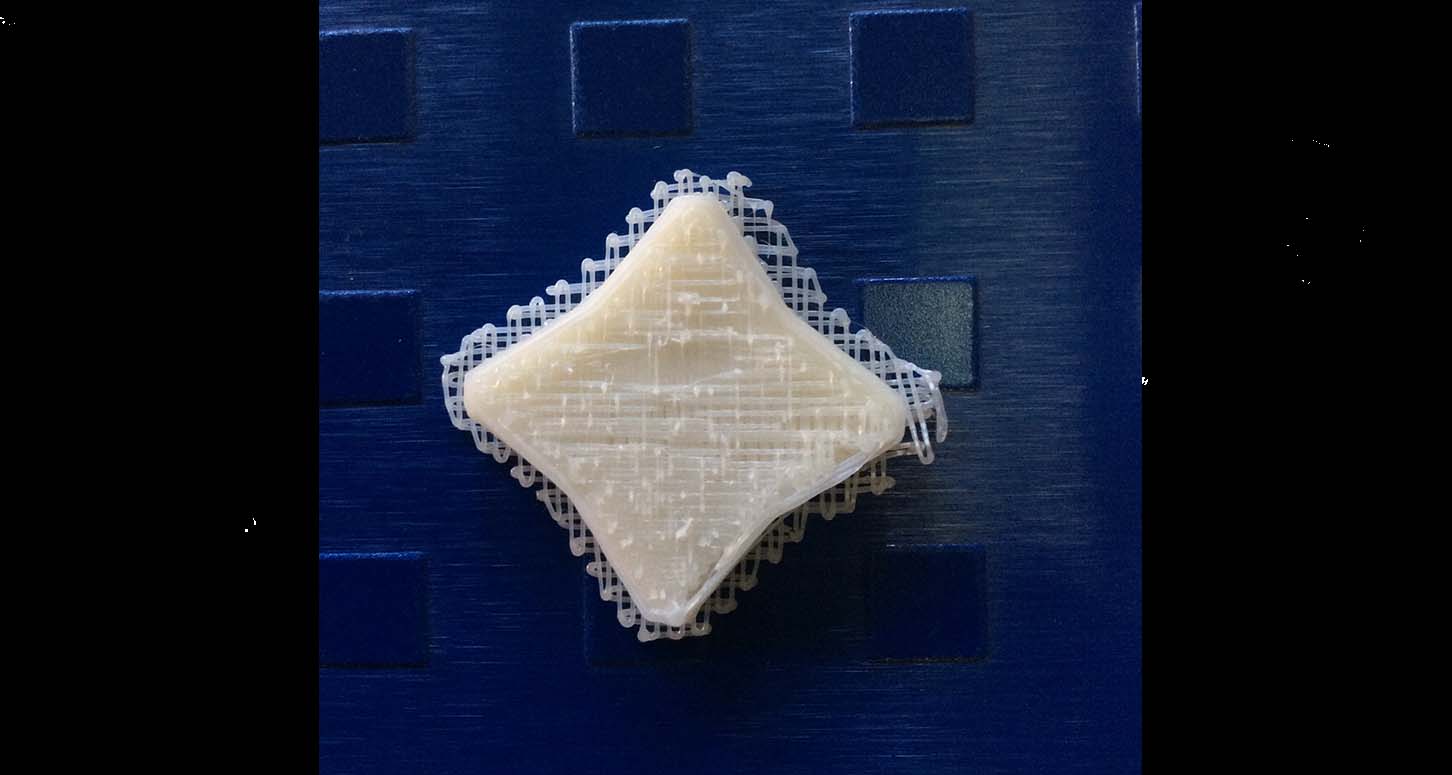
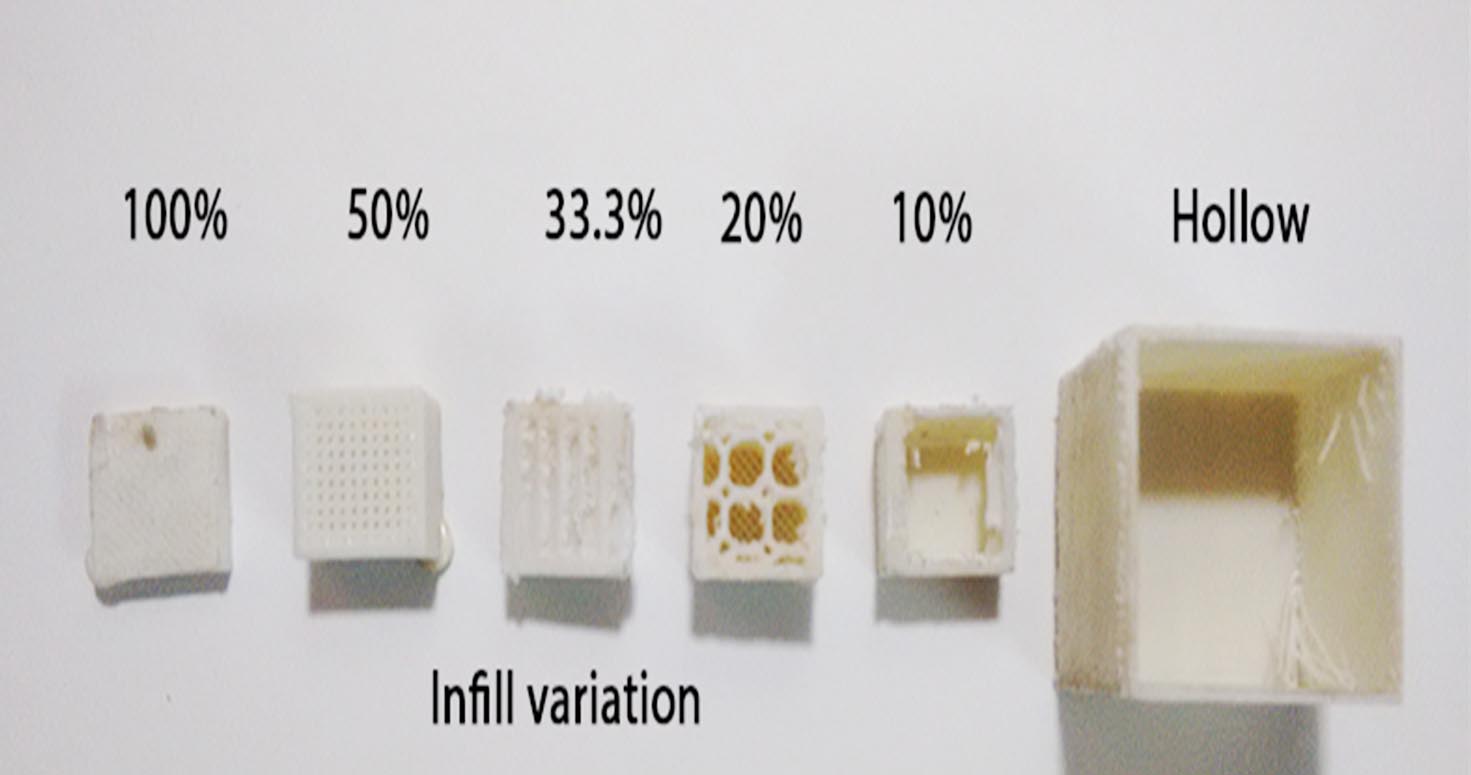
d) Infill test
In this we did varied infills and also increased the thickness.
e) Hole Diameter test
In this , we explored what minimum dimensions printer can print.
Download Test design
While i printed my shoe clip, i explored these settings in it too where i came across infills , extruders size and distance. But i would like to thank Arundhati and Abhijeet, my classmates to come up with amazing idea of exploring the machine.
But i would like to thank Arundhati and Abhijeet, my classmates to come up with amazing idea of exploring the machine.
2. Interesting 3D Scanning
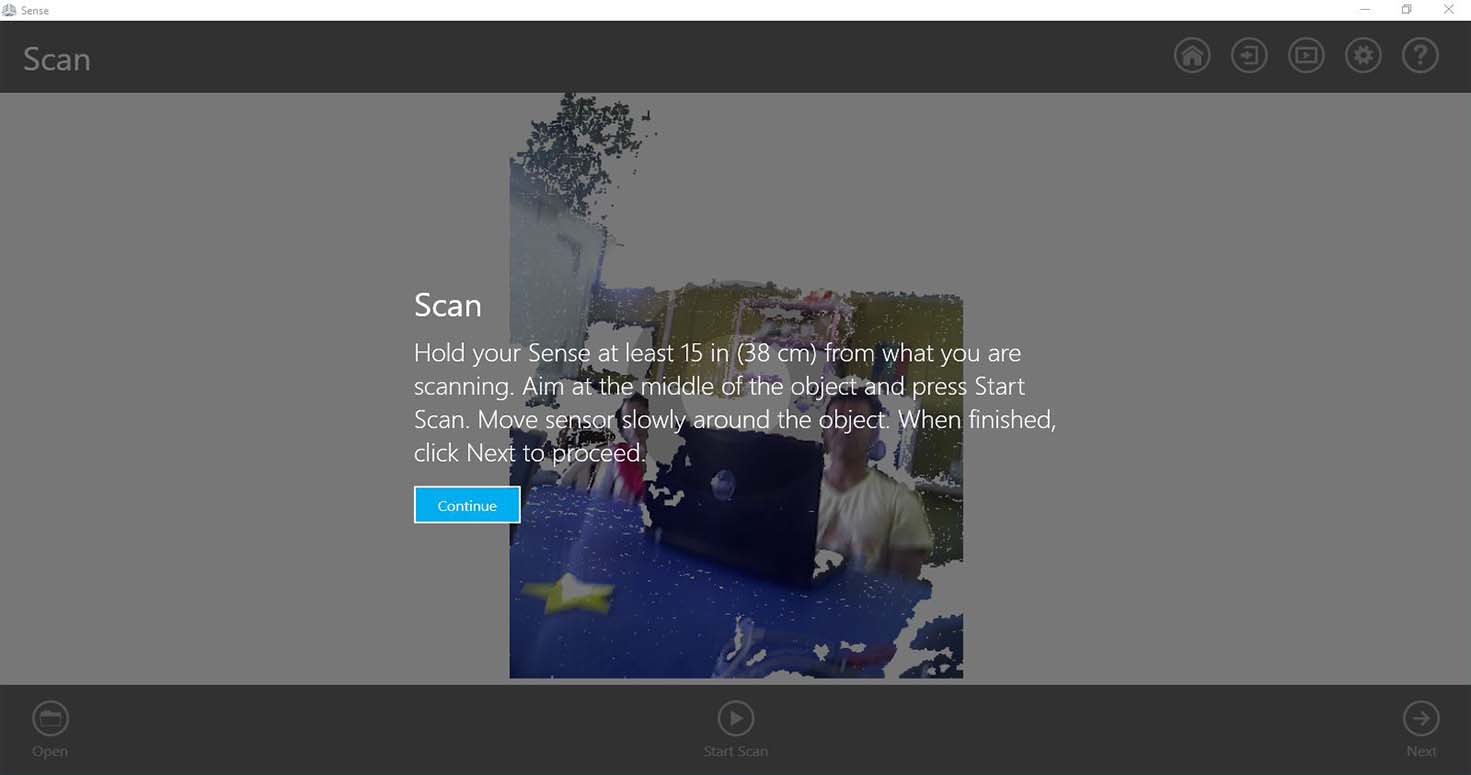
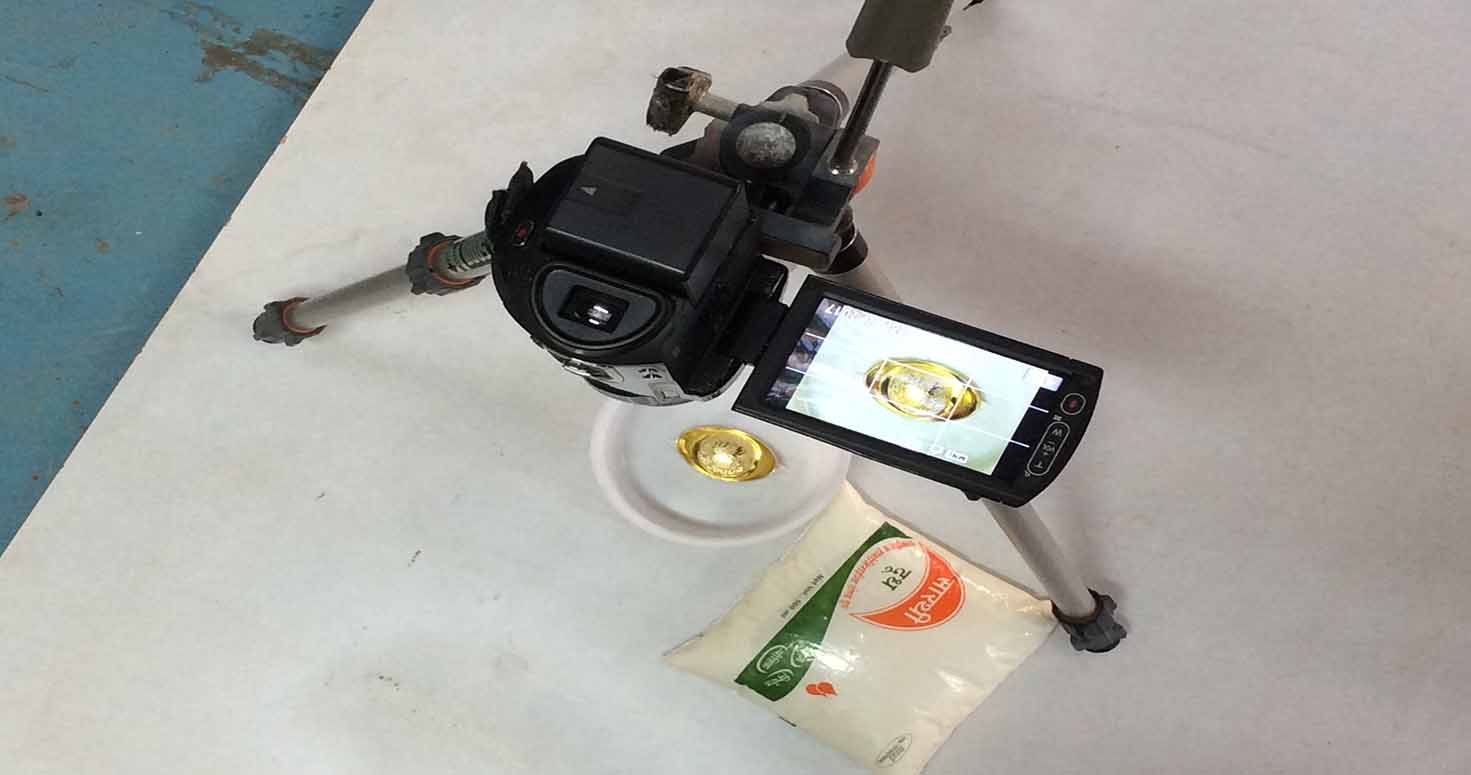
Using: 3D Sense
I first installed the setup of 3D sense from their official website.

It will give info on distance between the object and scanner.
Further select what you want to scan and what size it.
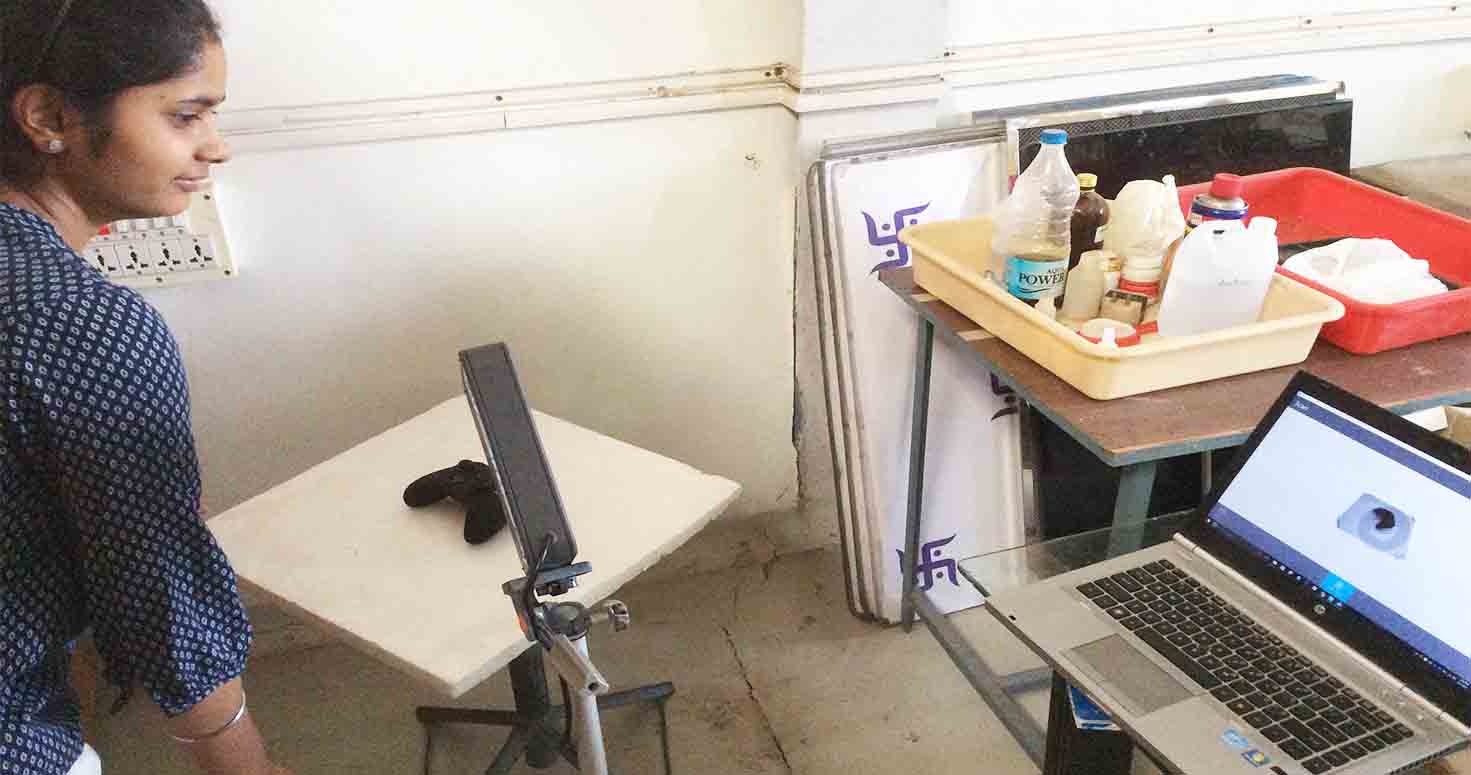
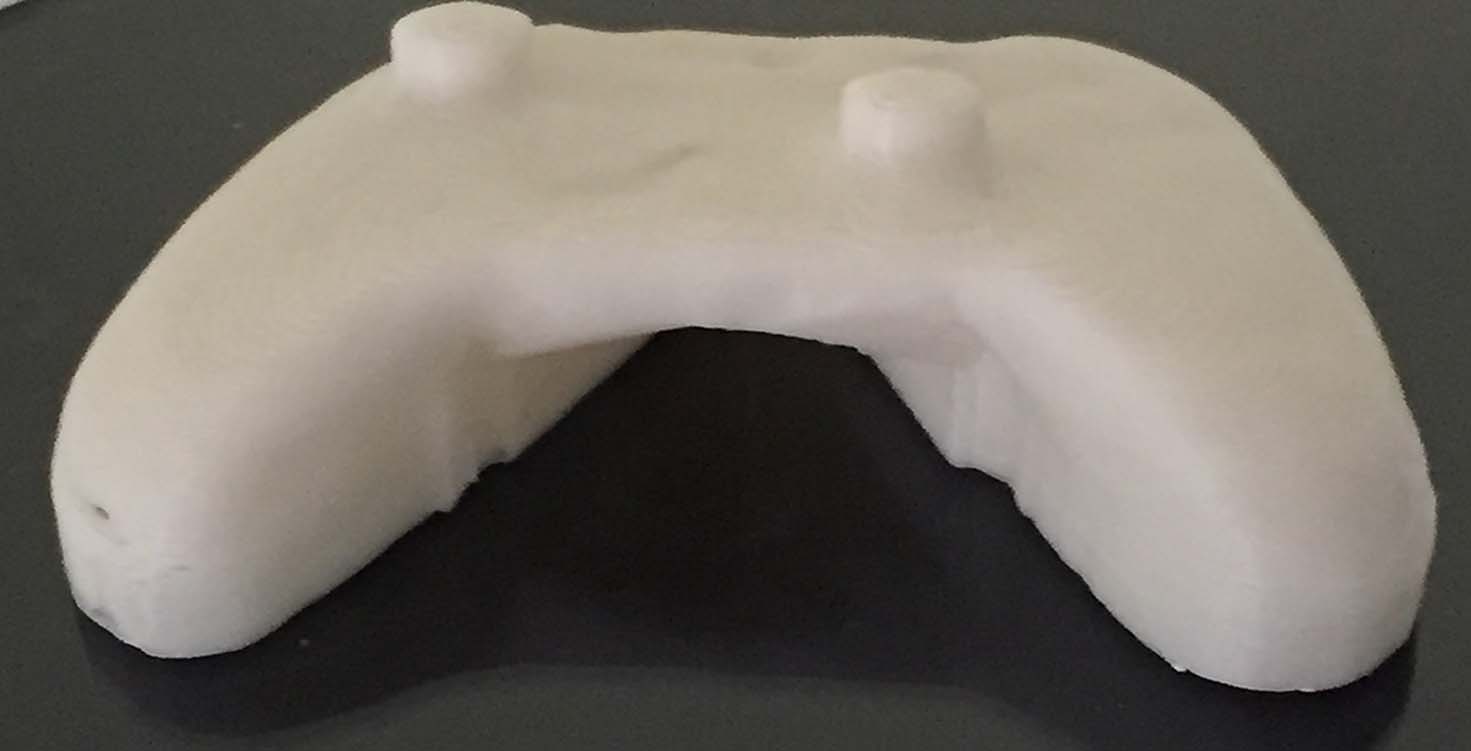
Then After installing, I scanned my Game console with 3D sense, taking pictures from different angles but with same distance and height.
I scanned my game console on a white surface on a rotating table because we tride moving the scanner it was dificult to stabilise, so we thought of keeping scanner at one point and rotate the table slowly to scan.
Also, after scannong , I exported it into collada format in Rhino. Thats how it looked.
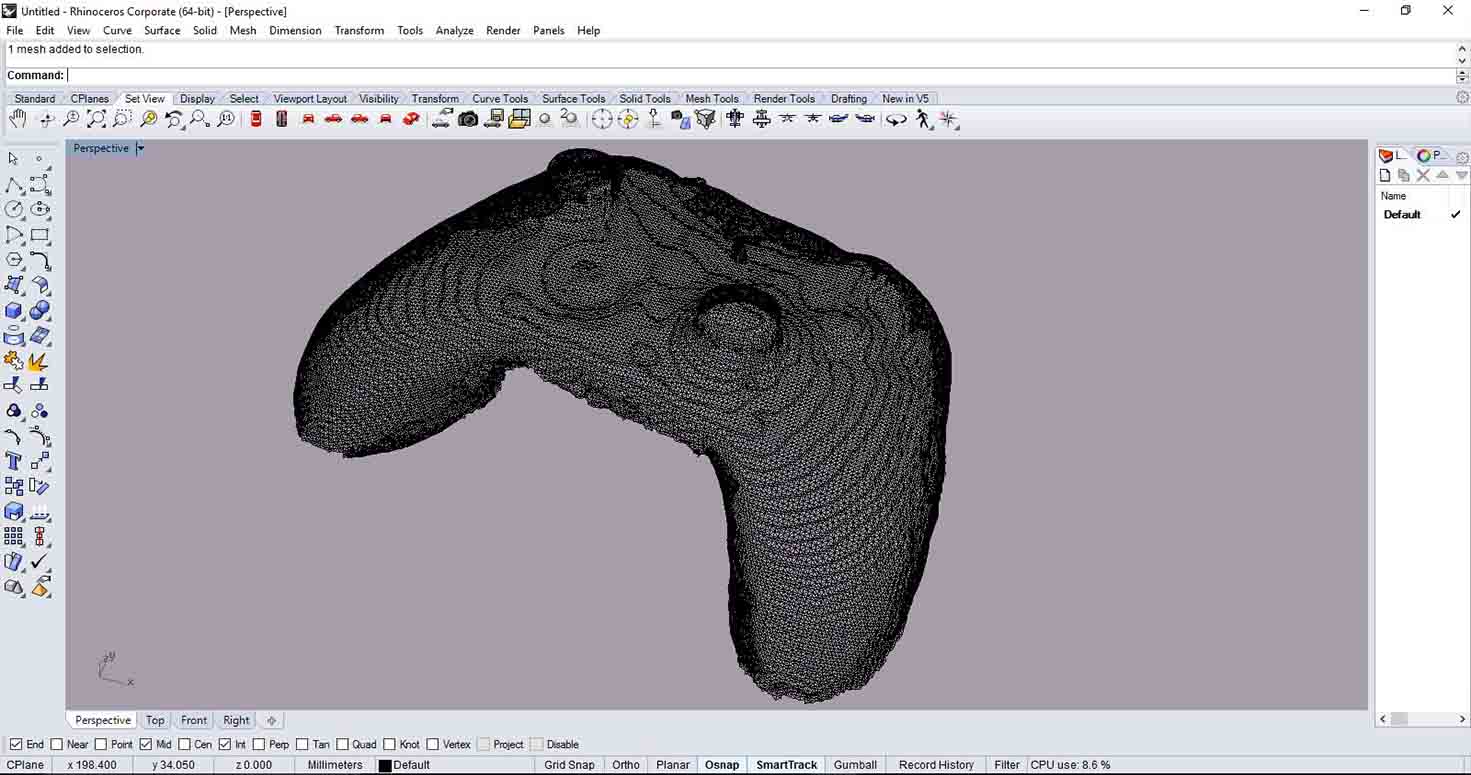
Game console, came out beautifully.
3D printed my GAME CONSOLE:

3.Trying my own scanner
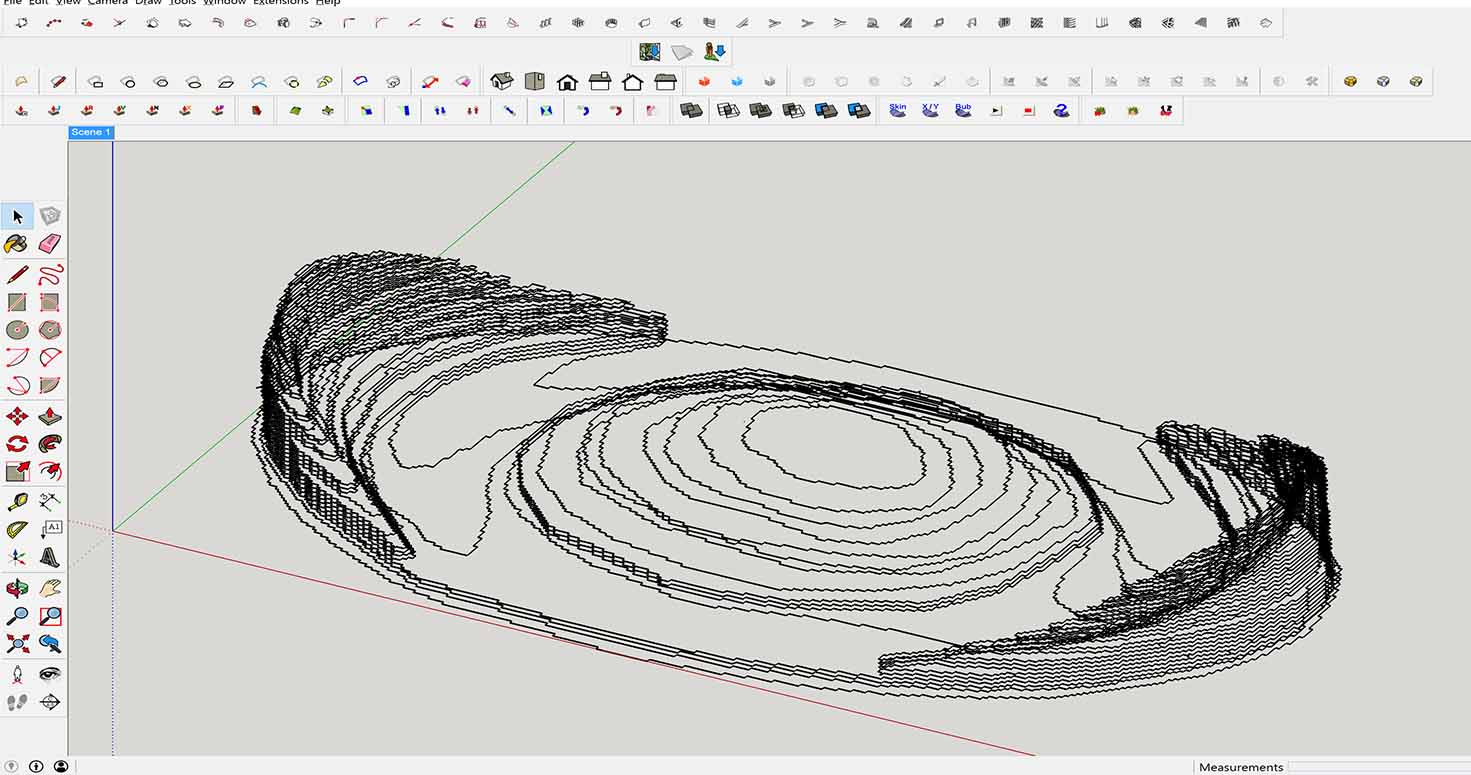
Well, I basically used Milk scanning but with the help of Sketchup and Photoshop, i was able to make my 3D from 2D images.
Here are the following steps:
1. Take pictures by dropping milk, filling the bowl and click it as many you can to cover the minute changes. Thanks to Ashram's kids (Bipin, Sanjay and Prasad) to show so much of curiosity in doing such new stuff. they are doing a course in ashram on basics of technology. I chose this japanese toy i found in ashram.
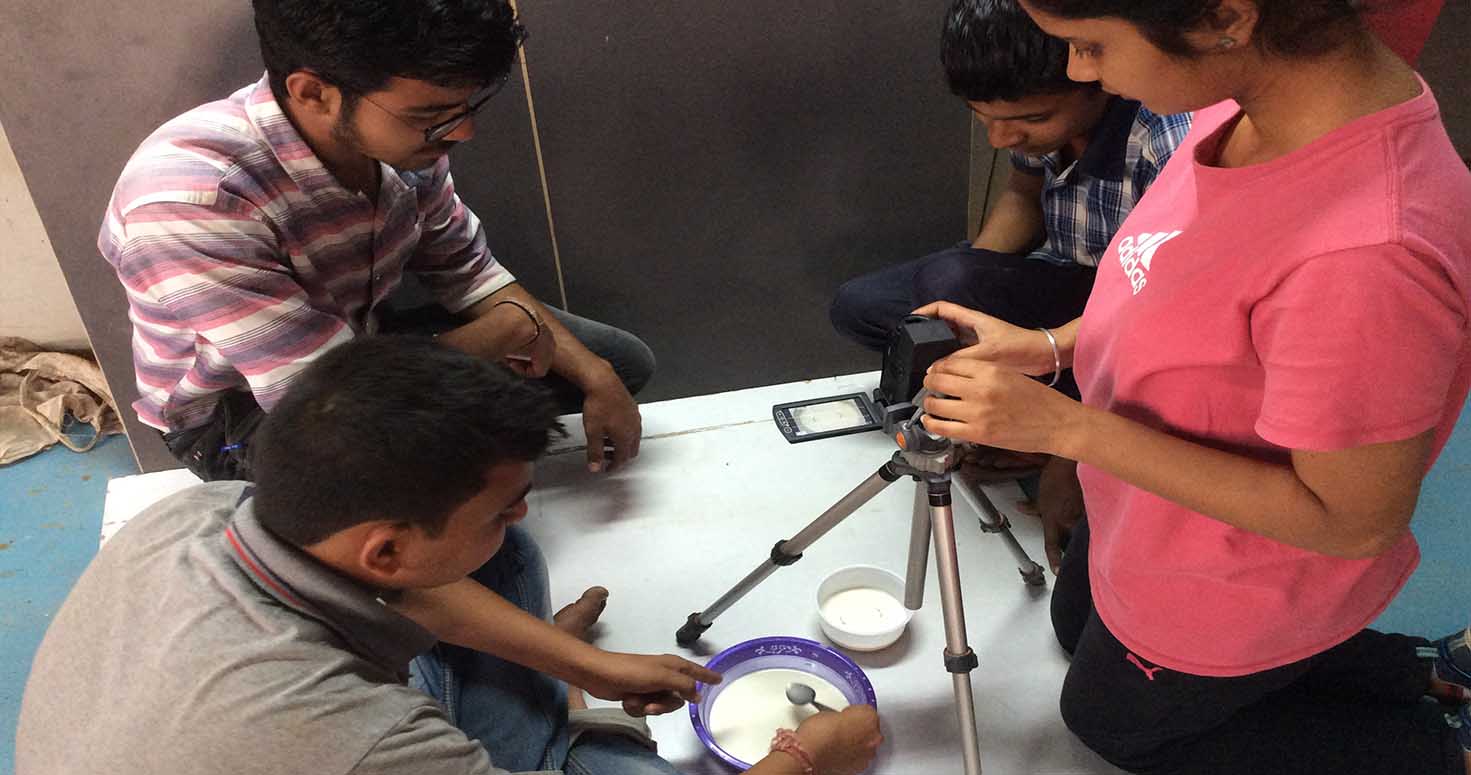
Then After taking Pictures, I opened photoshop and edited my images to black and white tone.
Later, I transefered my images to Trimble's Sketch up and stacked them through a reference line i put before in photoshop so im able to stack them in form of contour.
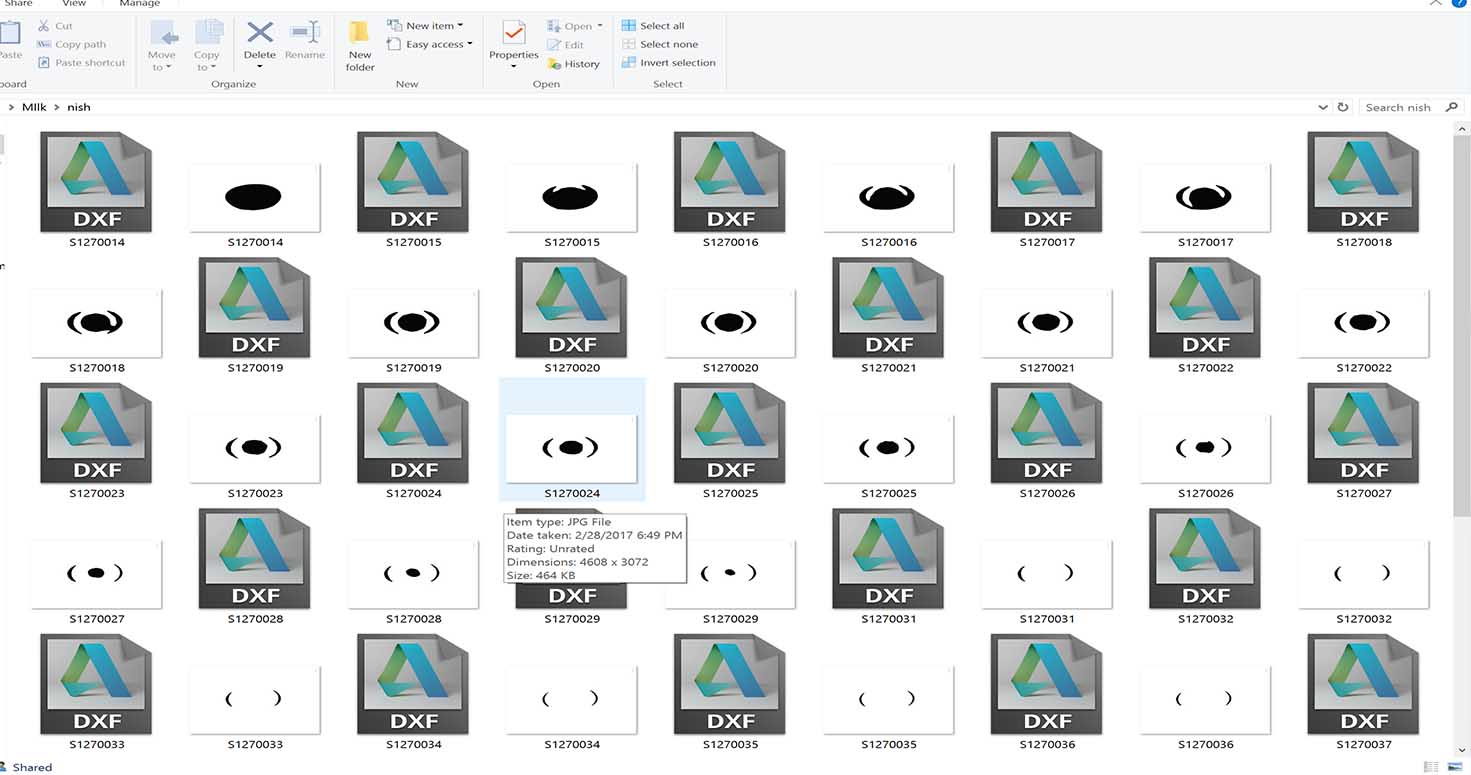
Thats how it looked in my folder.
After increasing the distance between each image of 10 mm , I adjusted the dimensions of my file to the dimensions of the original item i used for scanning. So i compressed further.