NOTE: Vigyan Ashram is known as "Fablab 0" , it is one of the remotest labs with very minimal internet access , therefore, we have been using old version of Fab module which is an offline version.
WEEK 12
MOLDING AND CASTING
Neil's Appreciation for my band in my final presentation on 16/06/2017 @ 9 minutes and 34 seconds
WEEK ASSIGNMENT: Design, moulds with Machine, Casting
Using: Rolland Modella
1. Understanding moulding and Casting & Materials
This week we started by discussing possibilities of moulding and casting in fablab vigyan ashram. Then we went ahead where we took one material each and decided to discuss the properties and usage of them among us.
I took Rubber solution but also read about other materials after my classmates discussed , tried them and came up with the following details:
Properties for each of them:
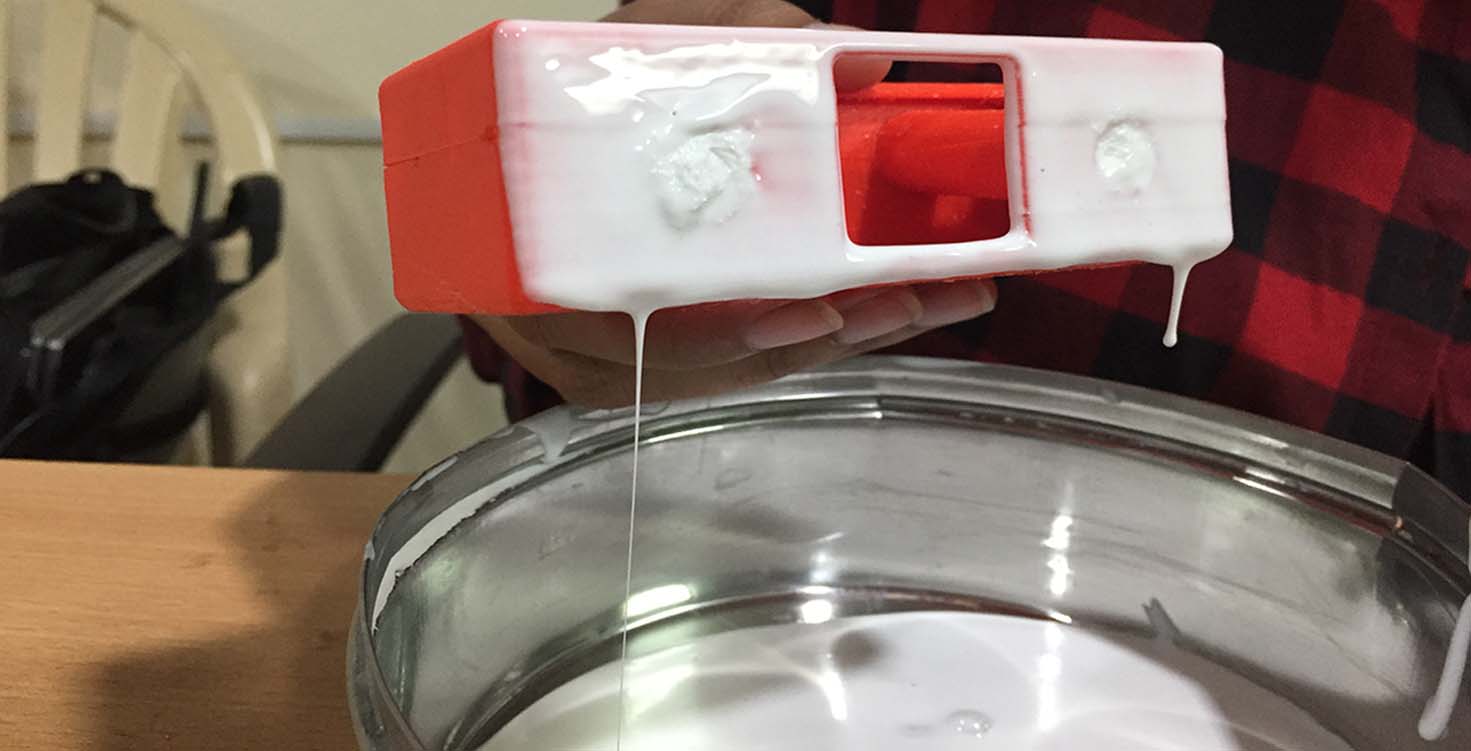
1. Rubber Solution: It was stored in a white Can so we didnt know anything about it, after inquiring about it from instructors we got to know its a rubber soltuion, and it can be of various kinds but this particular had the following properties:
It doesnt require mixing of any other element along, it has to be poured from a very low point. To make sure no air bubbles come, I used injection in which i pulled the rubber material and then did the following where i am pressing the injection plus putting pressure from top and releasing the material after 1 min which takes all the air bubbles out.

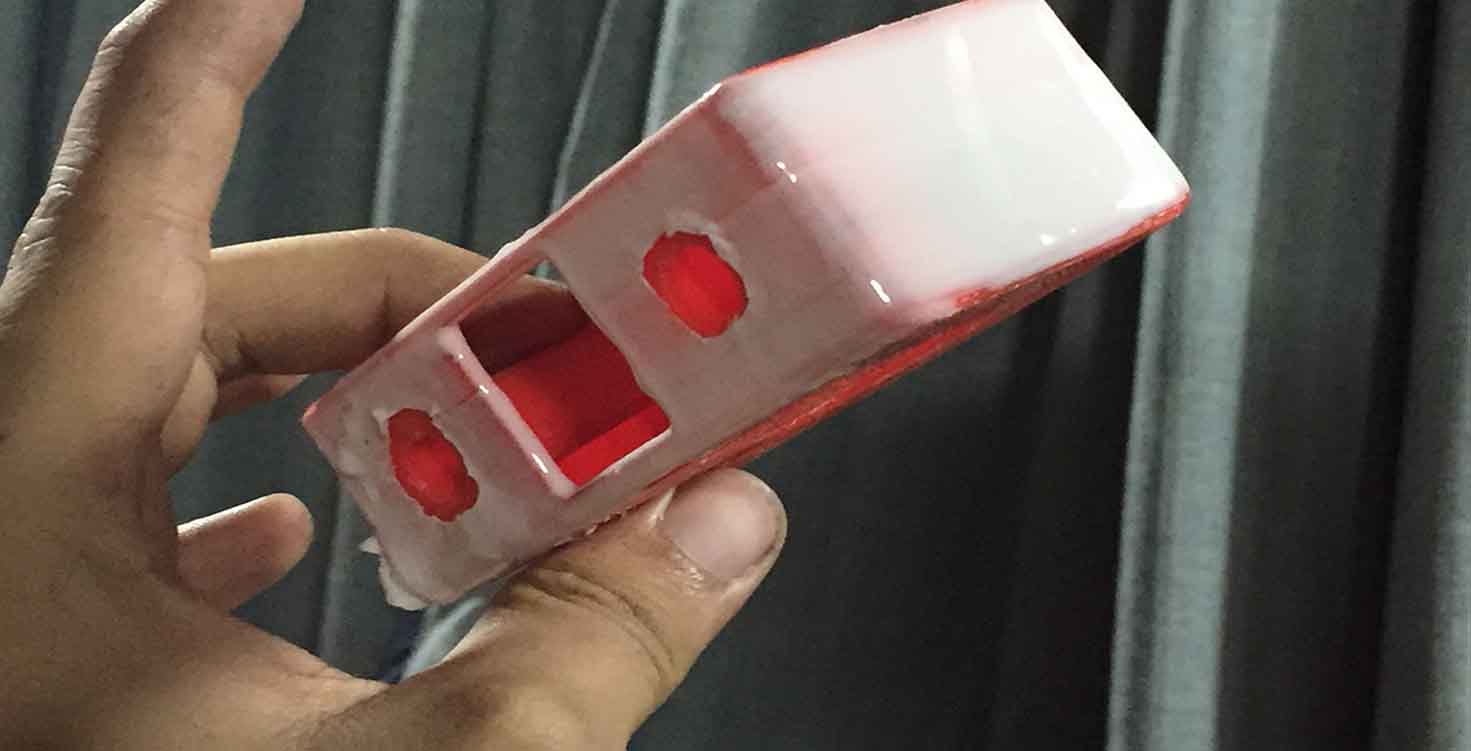
here , we picked an old mold from the lab and tried the solution with the help of injection and filled it.

Result:
2. Wax (Machine Wax, Candle Wax, Flexi Wax)
My classmate studied the candle wax but i also found machine wax and flexi wax in our inventory where Candle wax is very soft plus can be used for casting.
Flexi wax is very low and captures very fine details and can be used as the casting material.Also, its melting point is near to room temperature so was easy to melt.
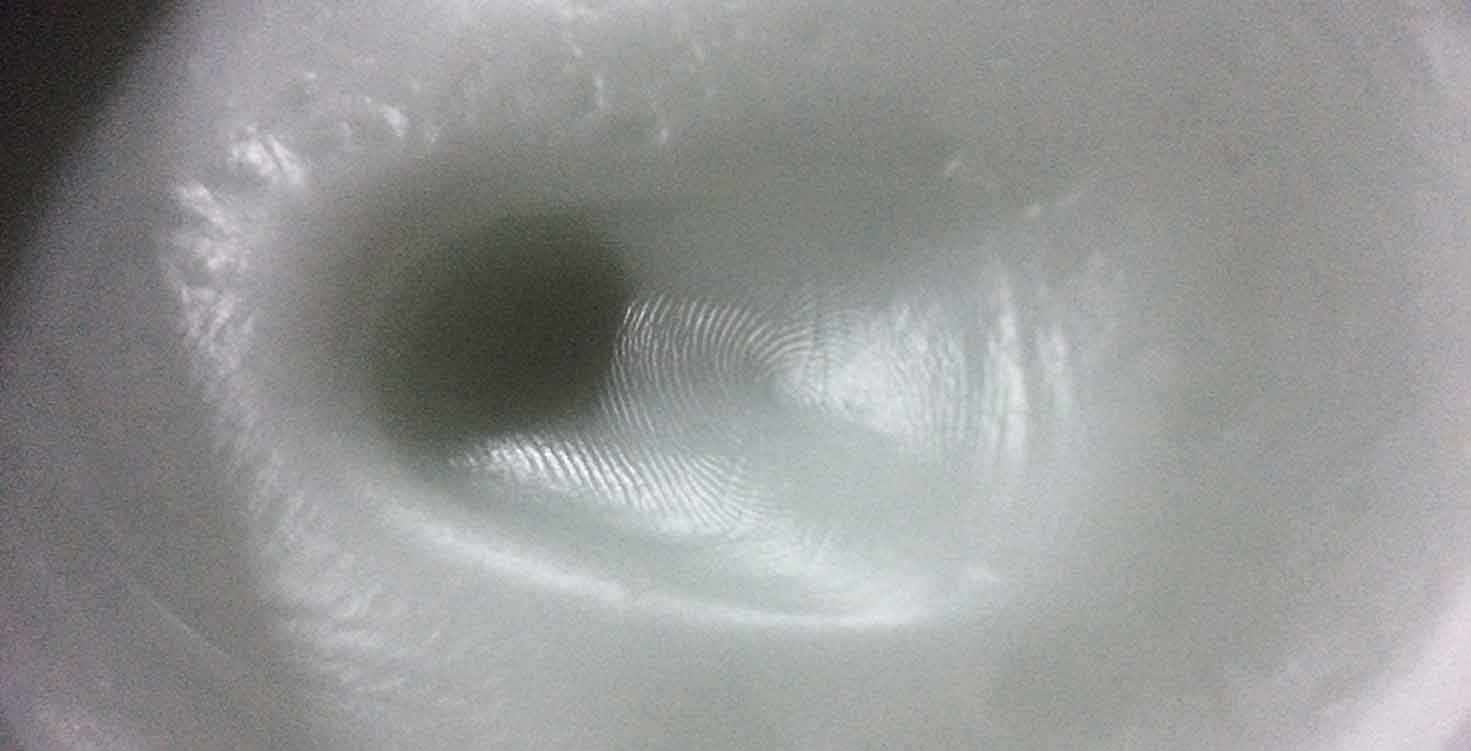
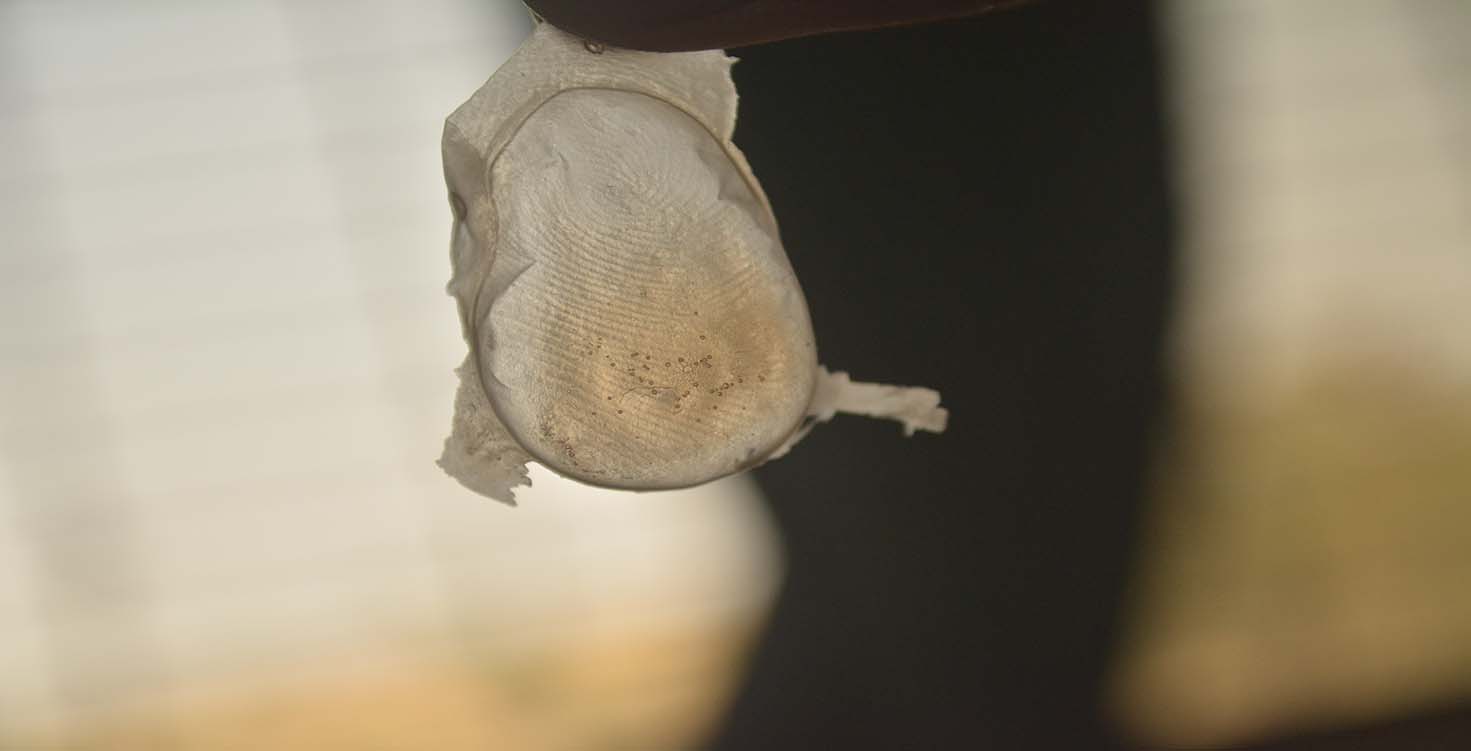
I have used it for preparing a mould of my thumb impression which i wanted to try for cracking touch ID feature of Iphone and i casted it with rubber.
I had to pour rubber with injection. First i moved the material immediately by shaking very slowly to get very light material on my impression but flexi wax didnt hold any material. So i kept it for 10 mins and then moved the left over material by shaking.
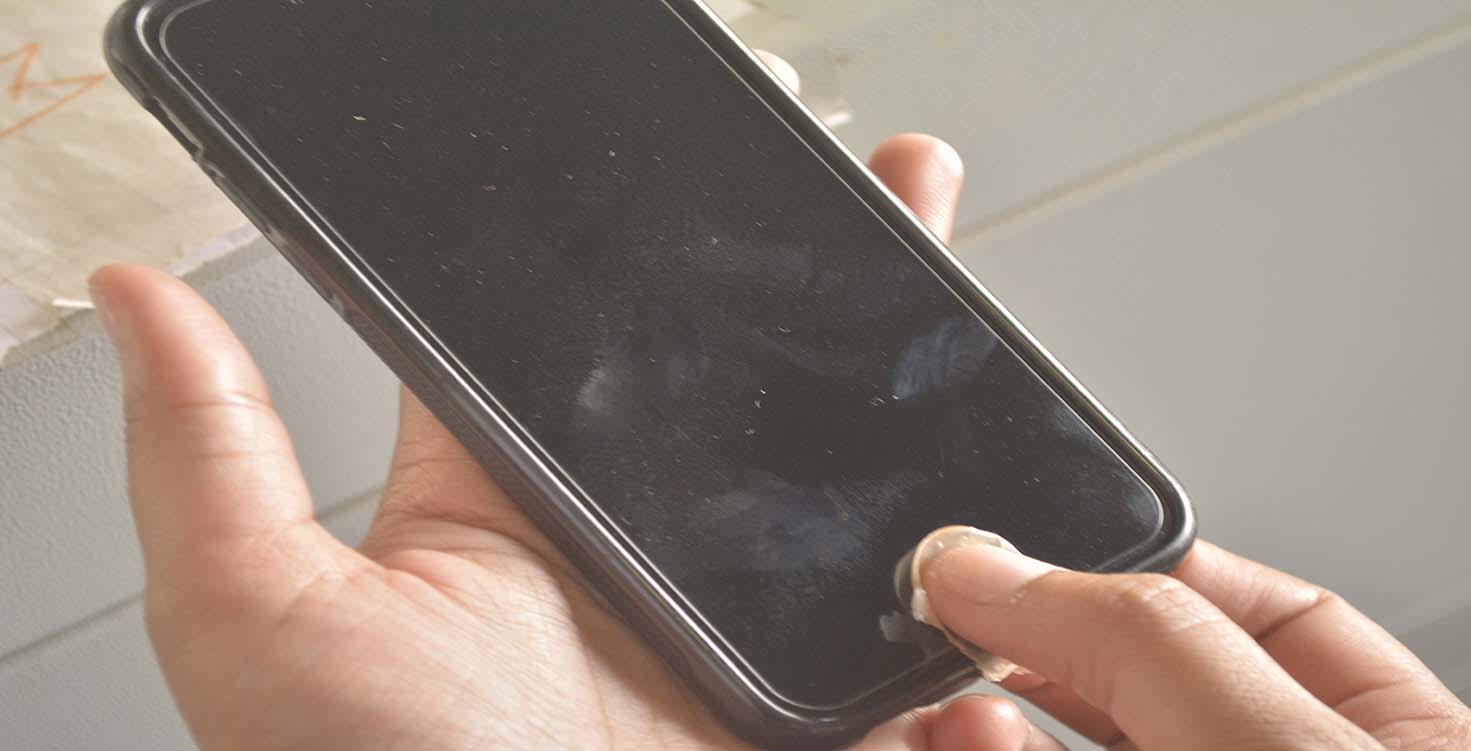
After it was dry, i peeled off and got my impression very clearly. Well, I was curious to use it on my iphone but iphone didnt respond :-P, but when i kept my finger and typed the material was not at all an obstruction between my finger and iphone screen. Iphone responded by typing the passcode but thumb impression touch id didnt work. Well , Iphone is safe then.
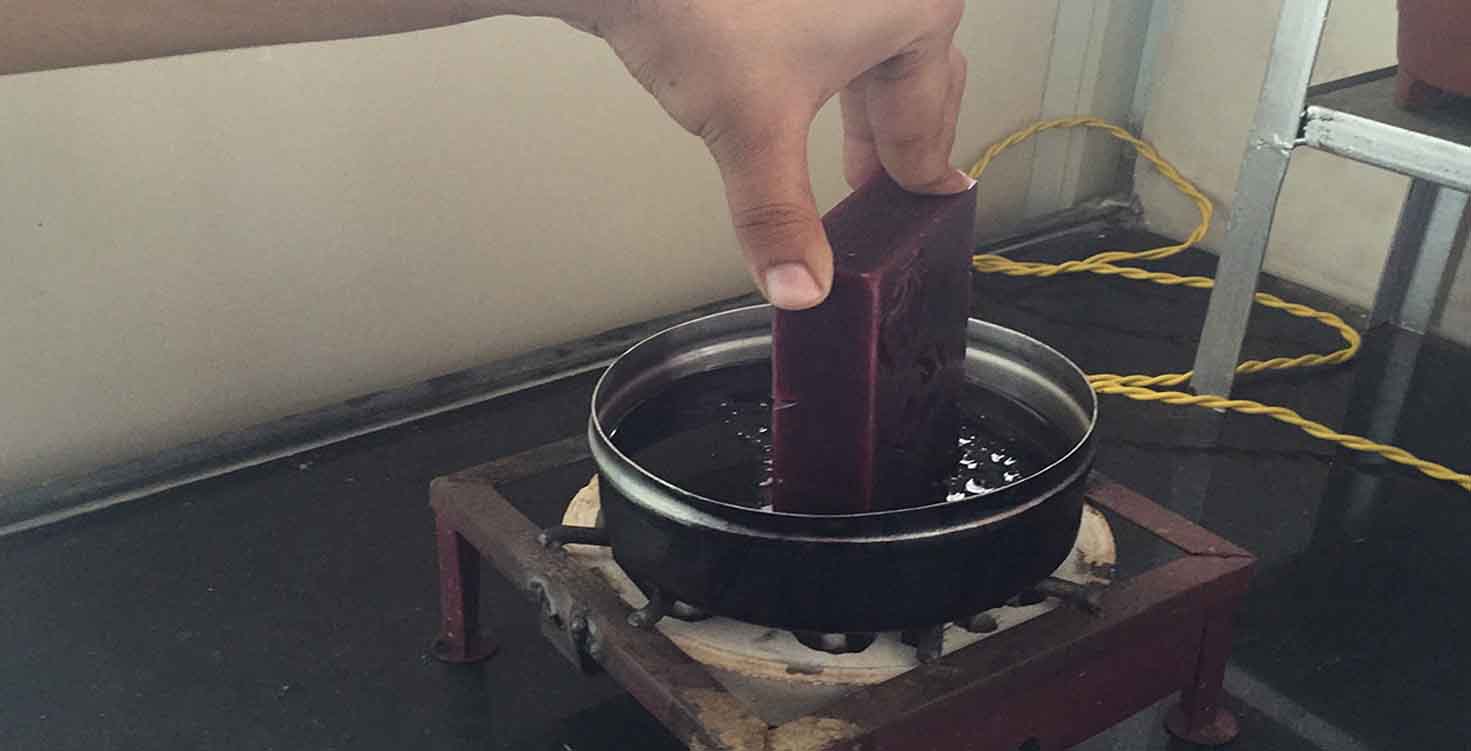
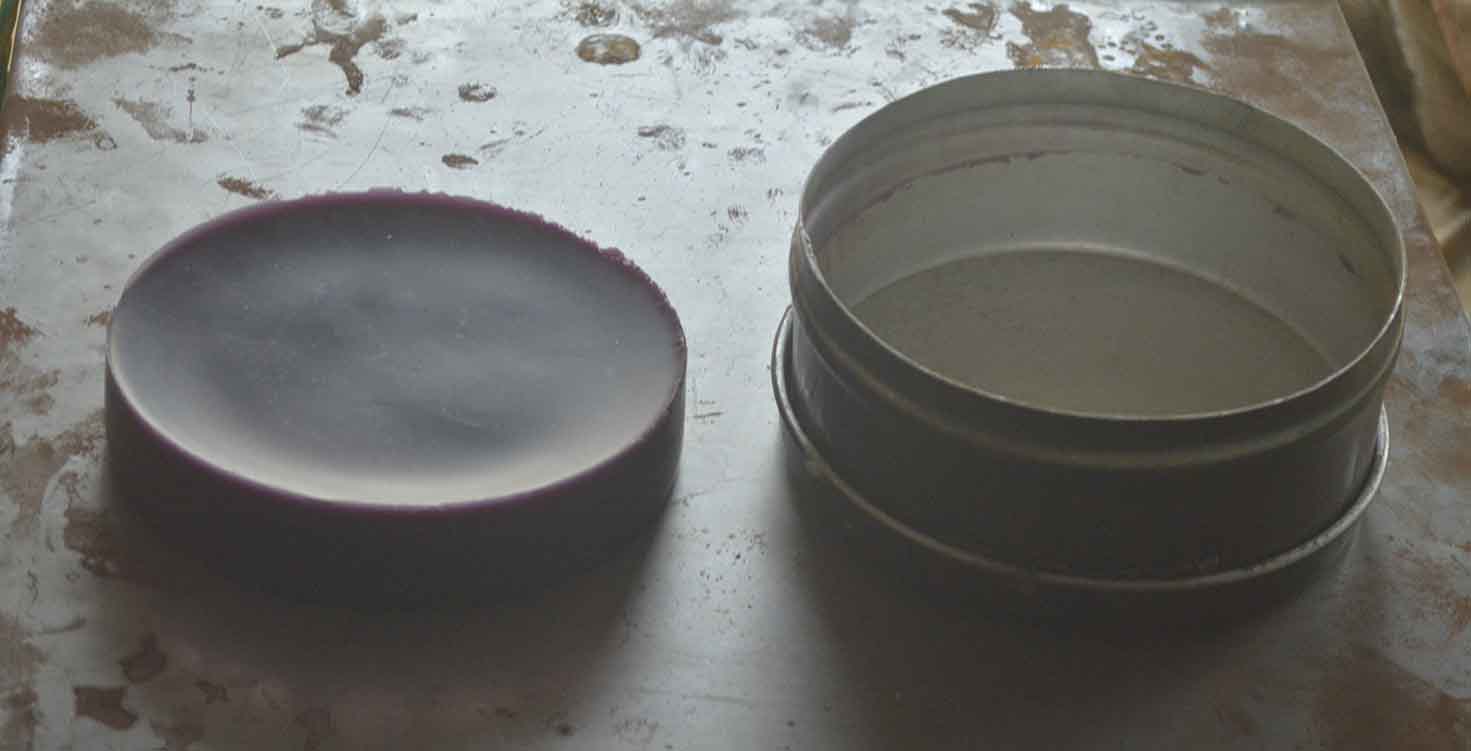
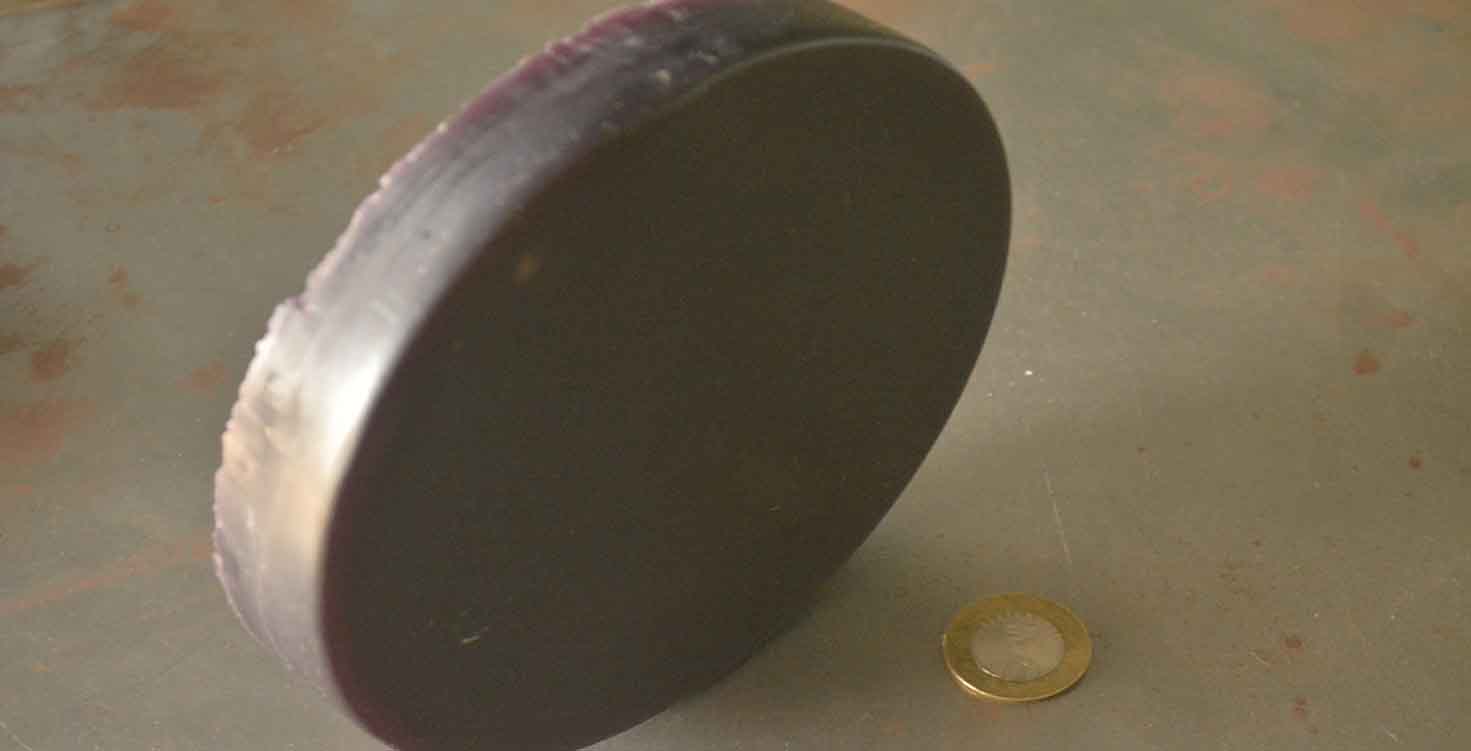
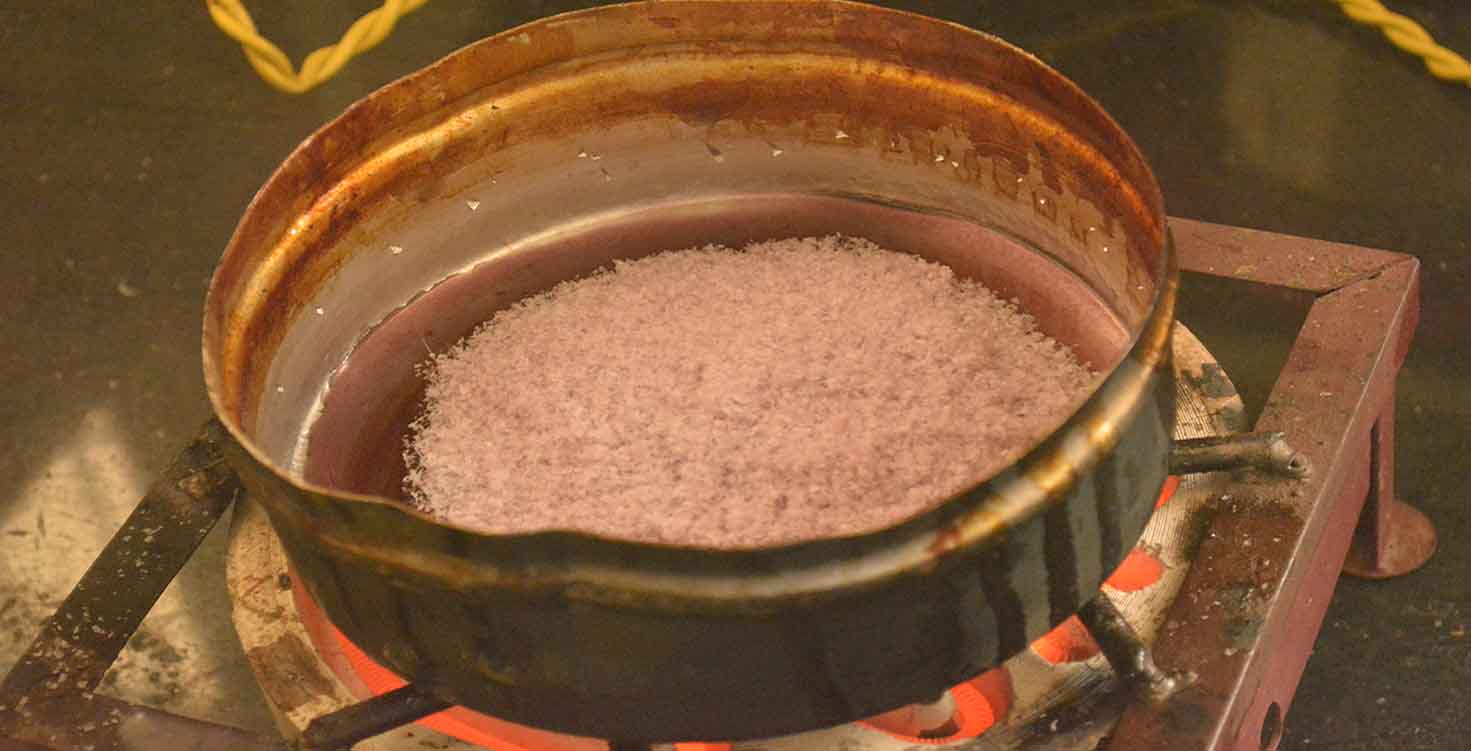
Machine Wax , that is the perfect material to make our moulds and i loved it because i was able to melt all leftover pieces, used and discarded ones and make my own shape, thickness of the Wax brick to make my mould. As i needed little bigger size for my asssignment. So i did Melt all of them in coil heater by putting pieces in the bowl which is used in solar cooking. Machine wax after melting contracts so it also comes out of the container easily.
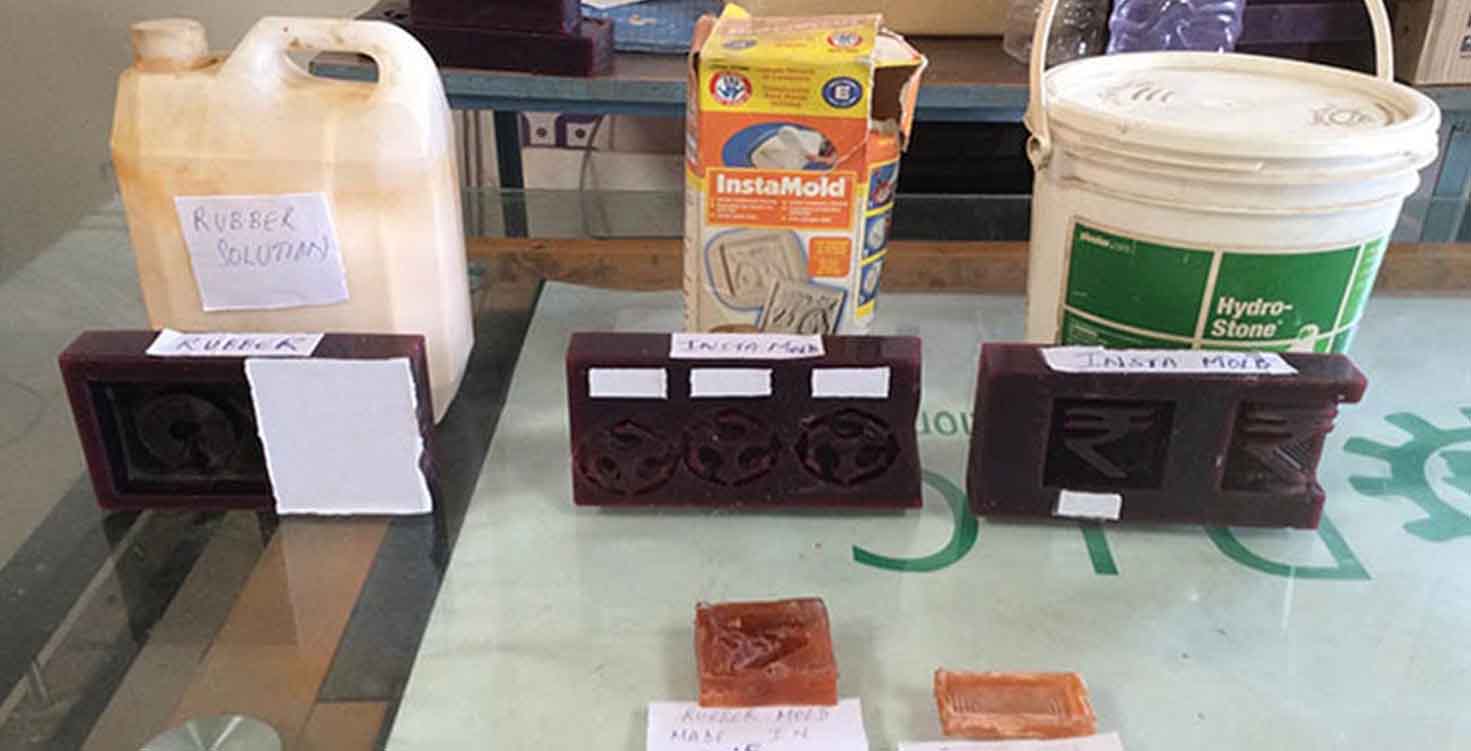
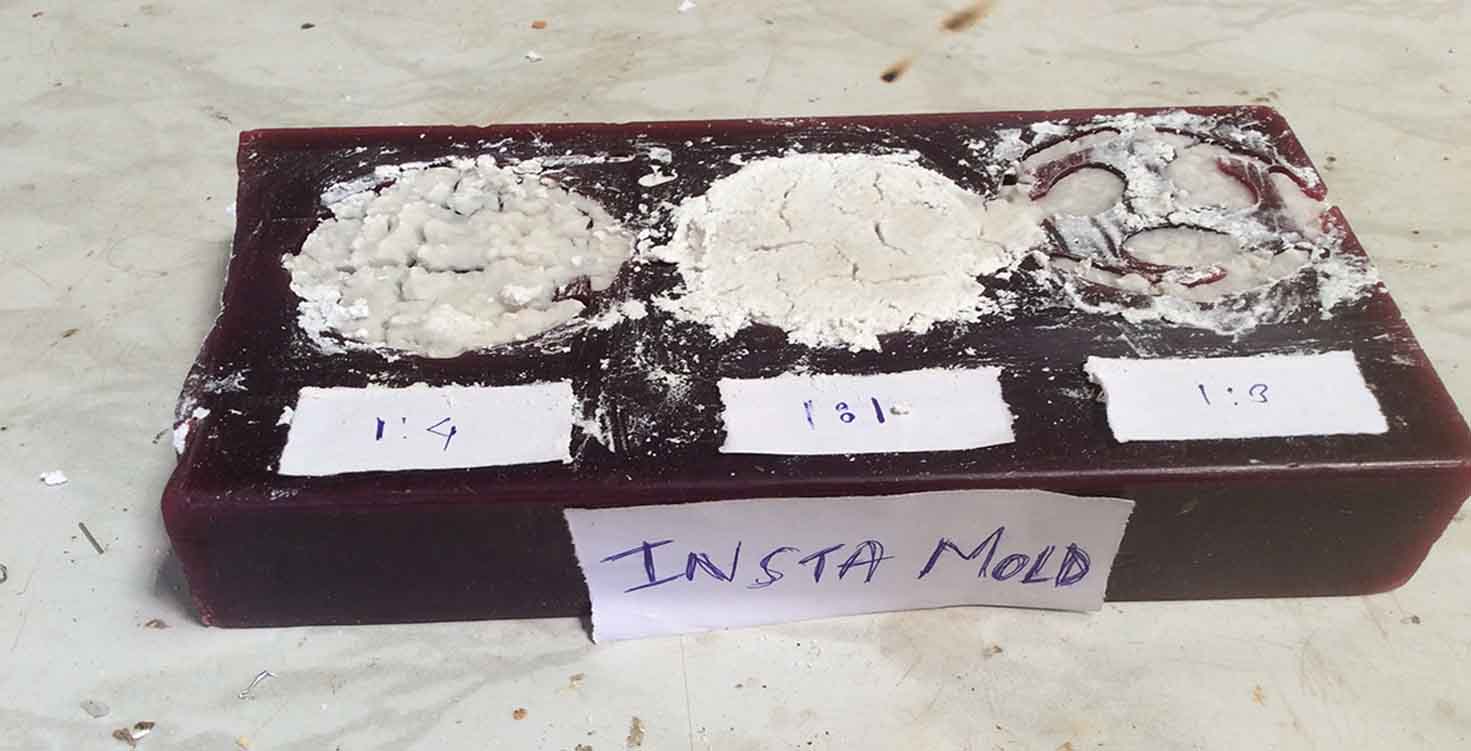
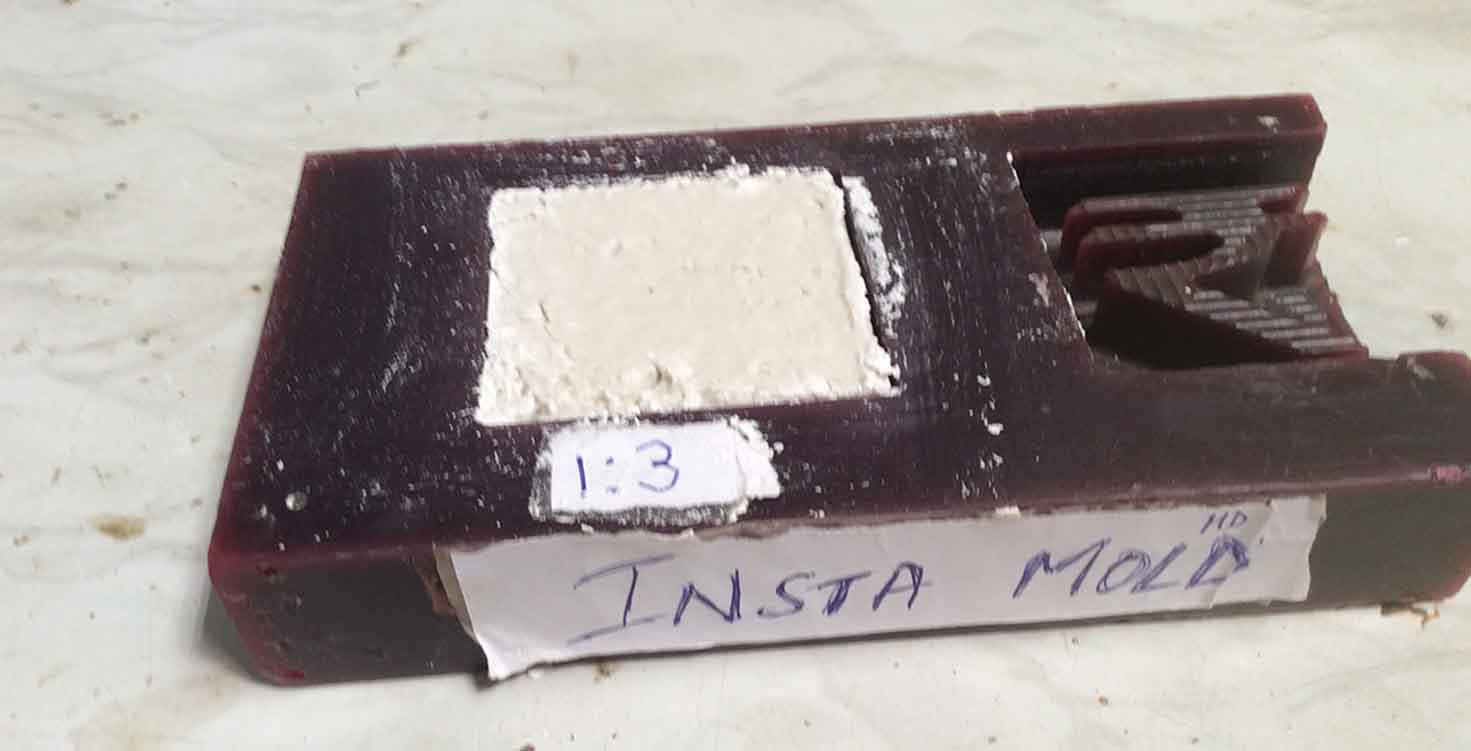
3. Insta mold
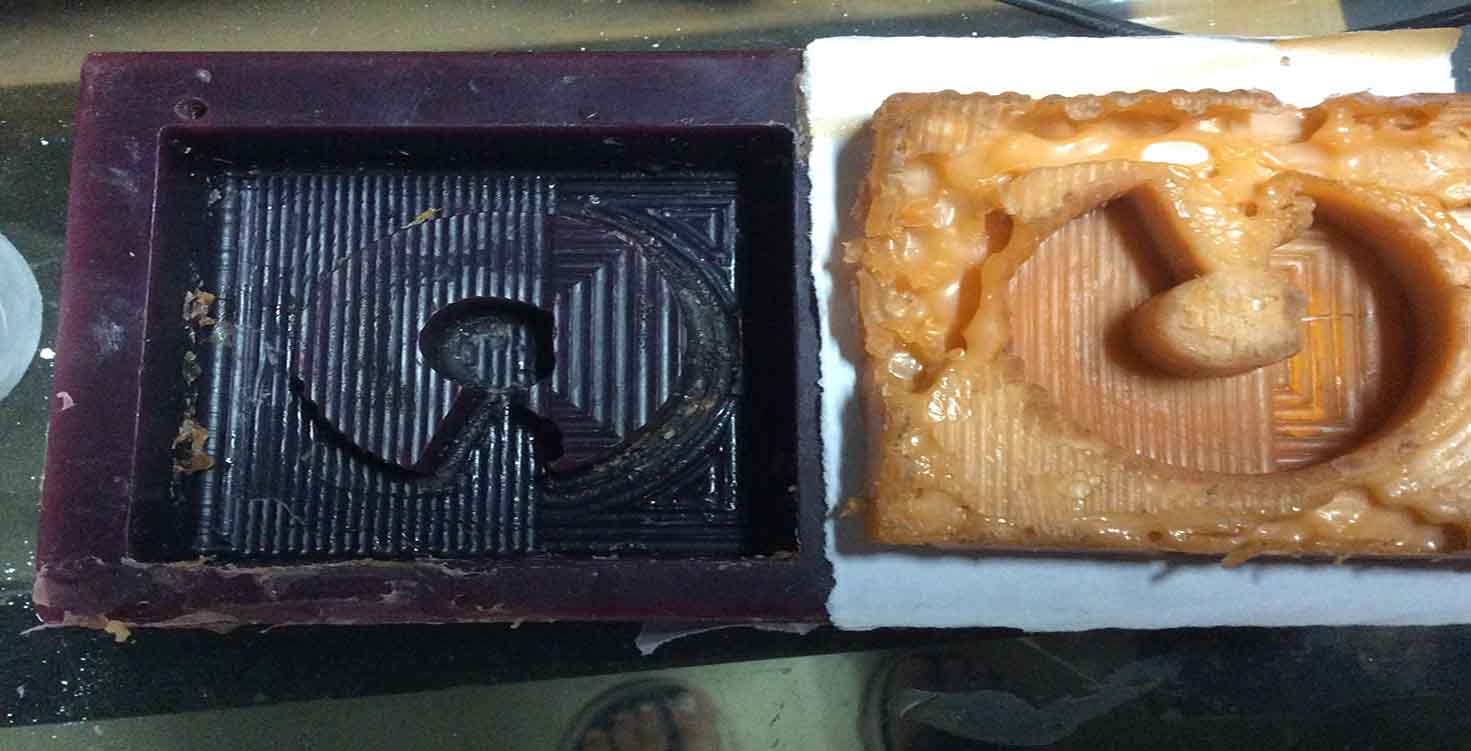
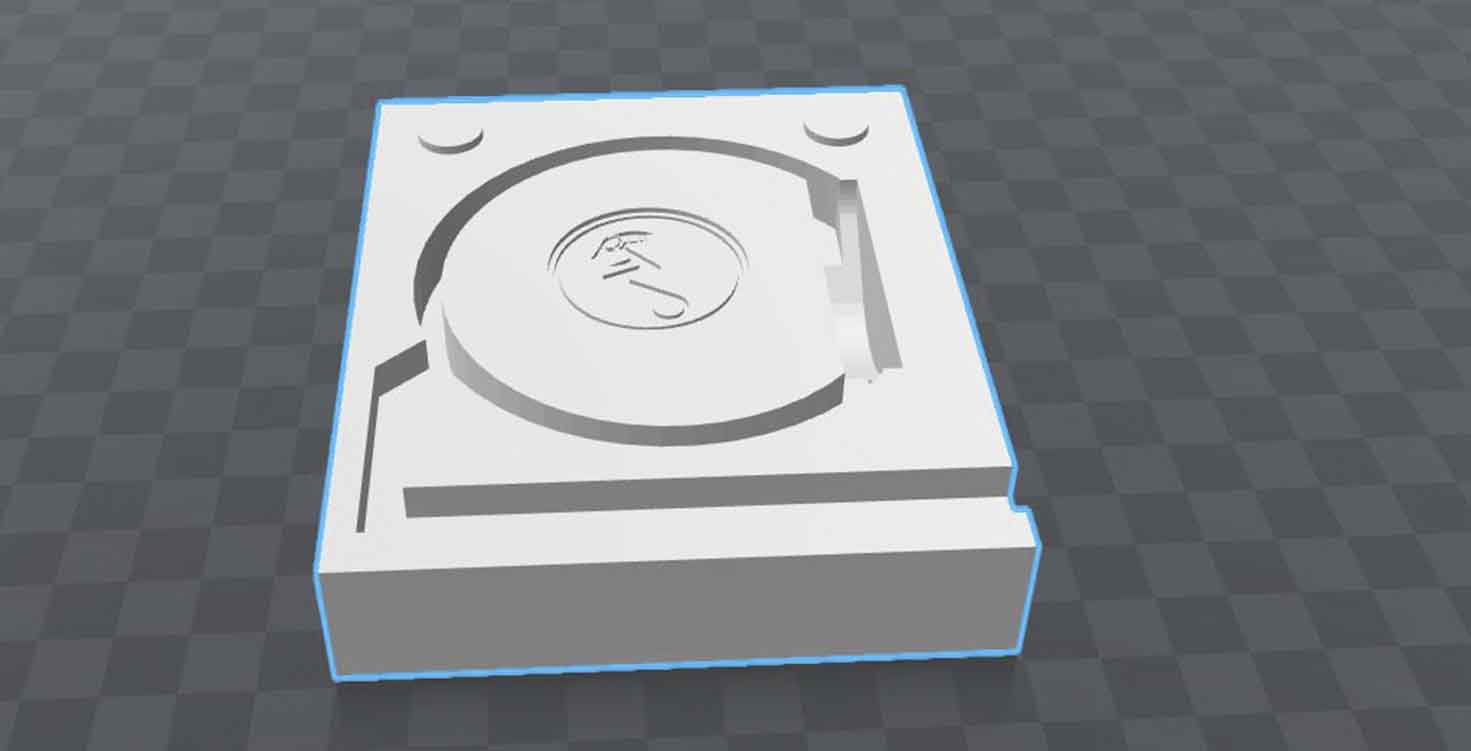
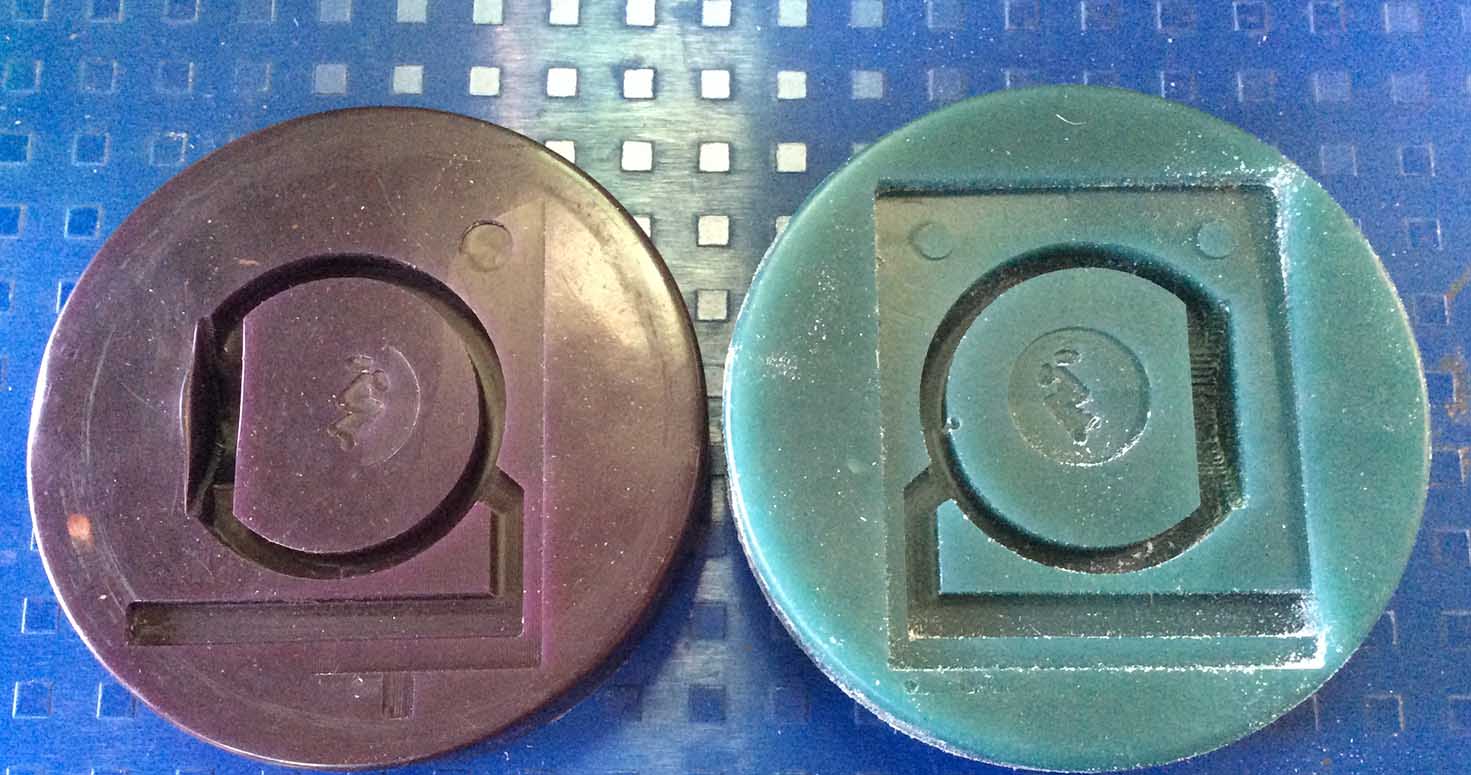
Our lab had 2-3 moulds of last year so we used those to test our materials but we also milled a rupee sign wherein we learnt and experimented with the settings of this new Mesh at Rolland Modella with stl file.
As instructions given, I tried 1:1, 1:2, 1:3 where 1 is insta mould and 3 is Water.
But the result was not at all as mentioned or expected.
after checking, I realised that the material has expired long back. the usage of such material should be within 6 months of manufacturing.
But when we all tried 1:4, 1:5 , it wasnt that bad for moulds.
We used weighing machine to weigh the right quantity which is very essential i believe when you make moulds.
The best material was made when we took a plastic ziplock, poured insta mould and water in it and mixed it with pressing , it gave a very good result.
4. Hydrostone
Which is used for casting.
We read the instrcutions on the box which explained how much quantity and time required for the material and for what result.
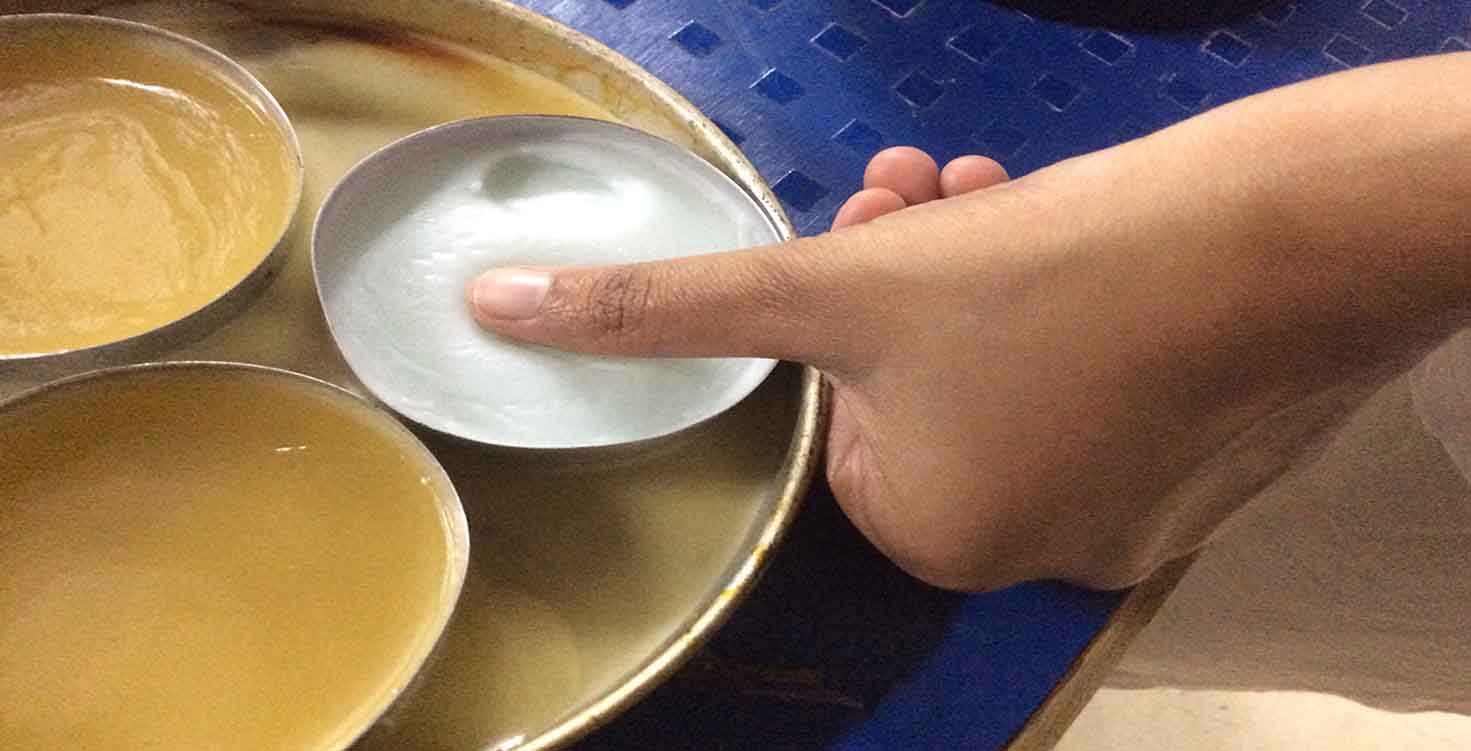
First we started by putting 10gms of water and 30gms of hydrostone, but while mixxing it got very hot and hard then we read the instructions again, we had to mix hydrostone to the water and not vice versa. plus we refined the material before using. It came out well.
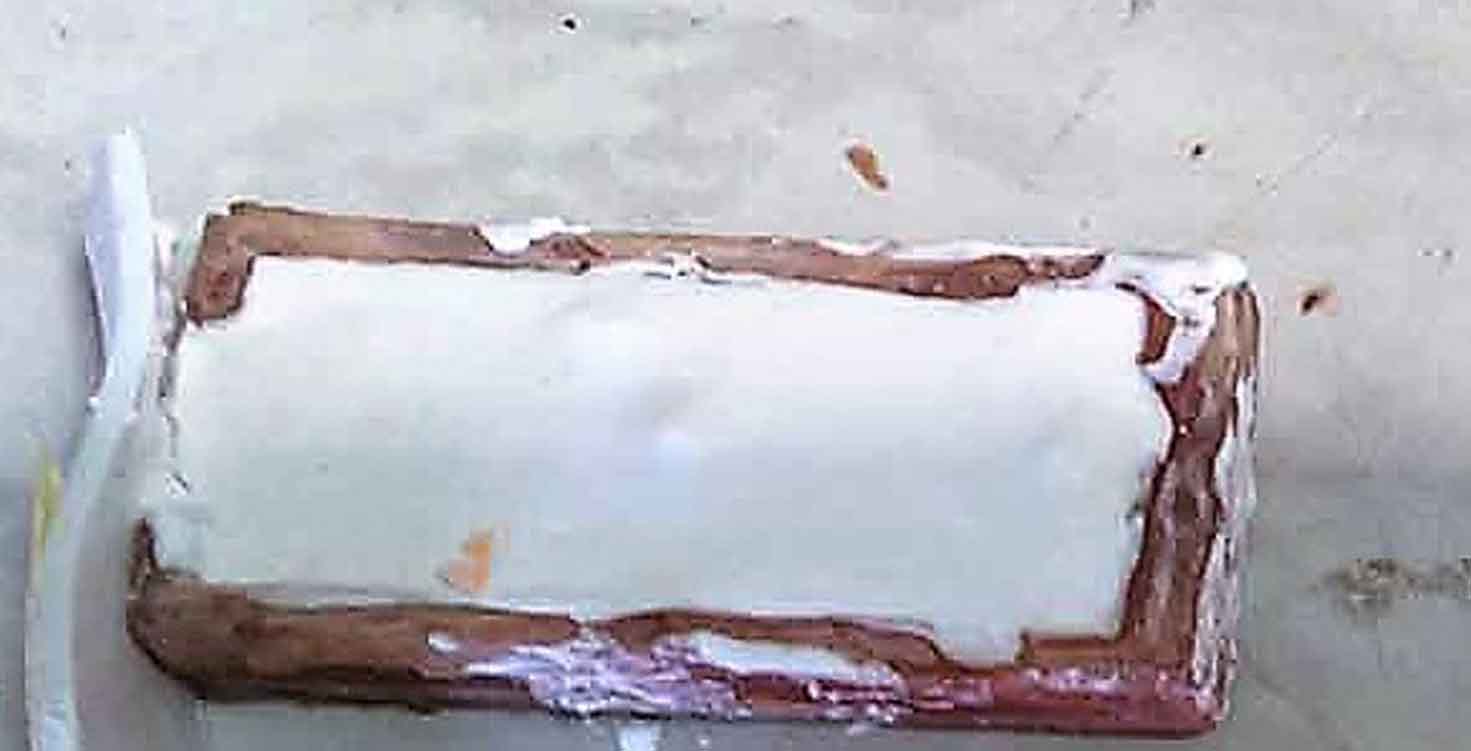
Result:
Its good if you looking for hard cast because it dries in seconds plus is hard but very brittle too so make sure you are very firm about the quantity and steps for mixing it. It needs around 1740 rpm of vibration.
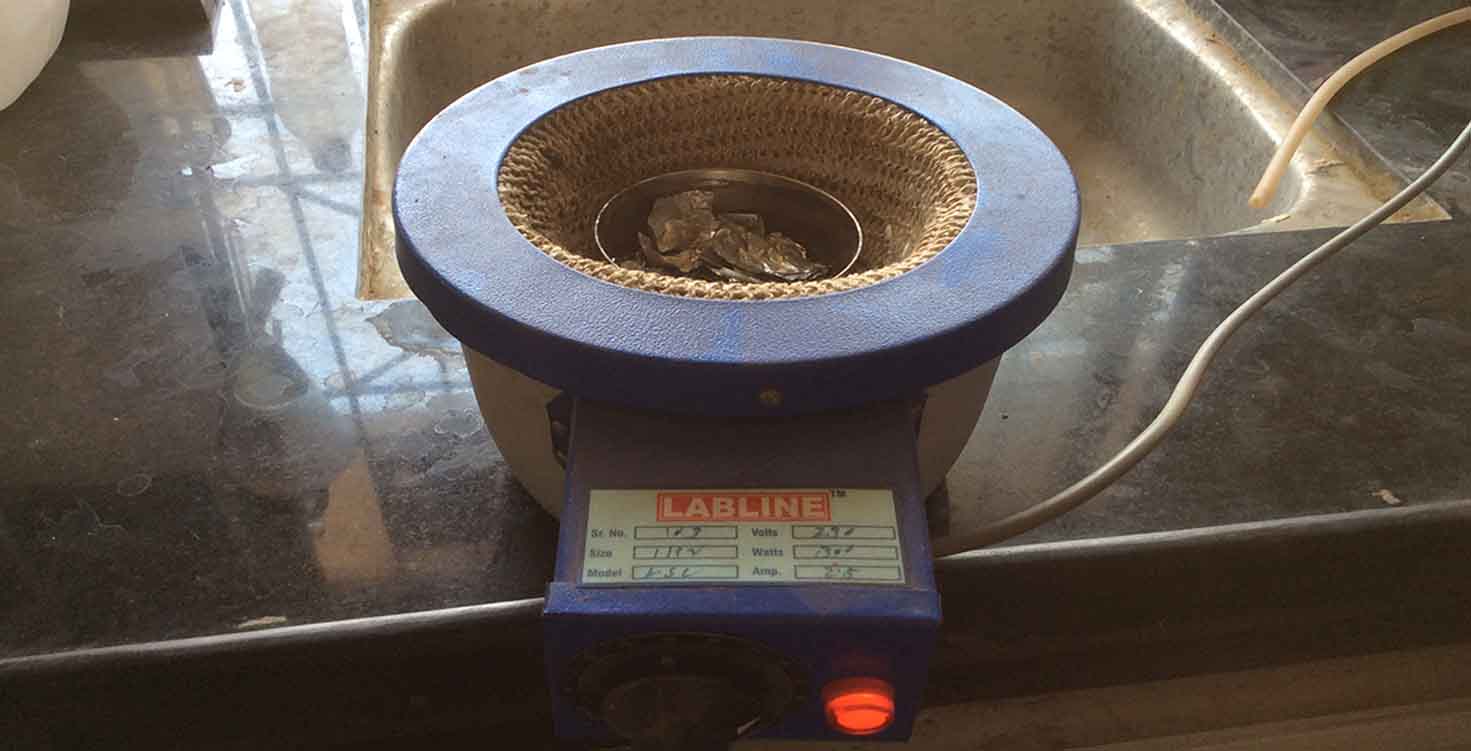
5. Metal
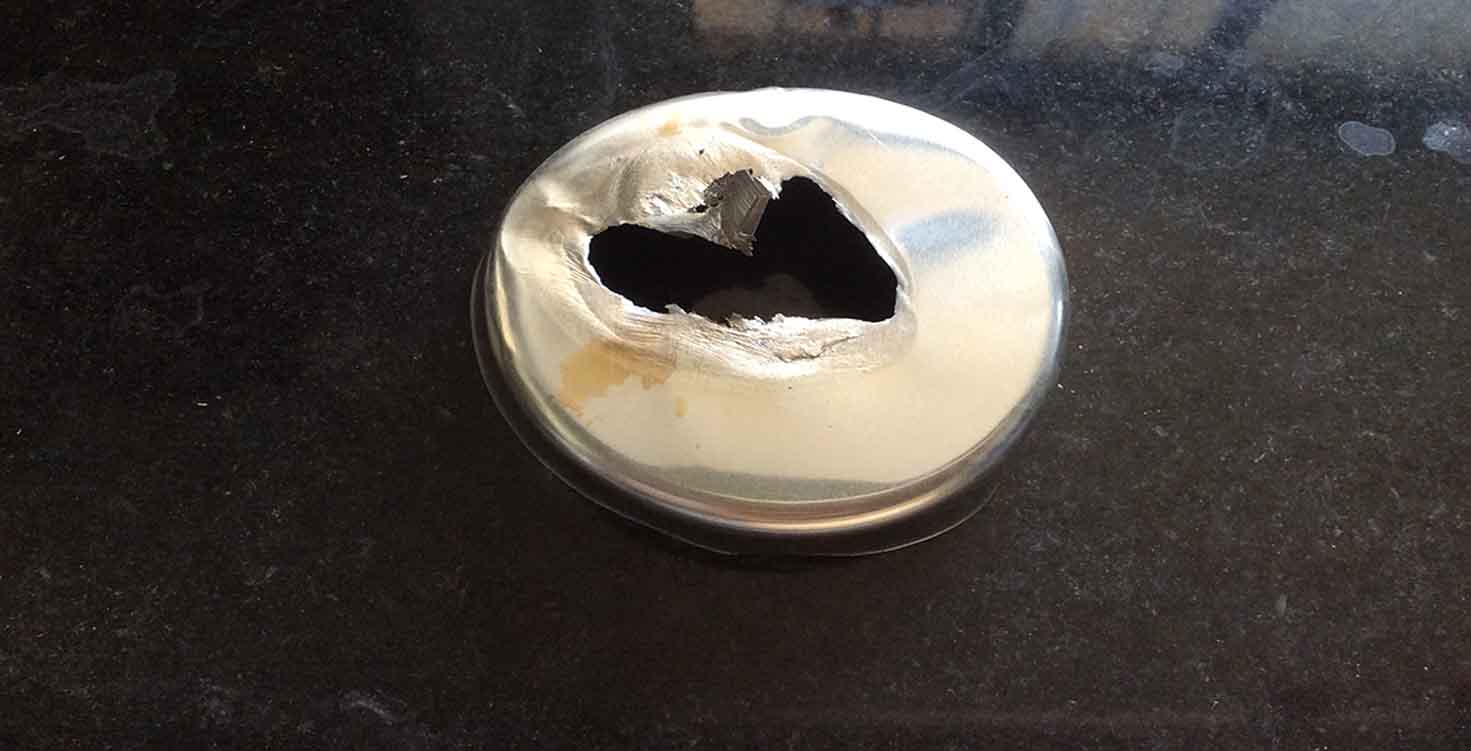
Well, we tried melting aluminium foil , we also tried melting crucible for metal casting. It needed around 3300 degree of temperature to melt.
But it didnt melt:
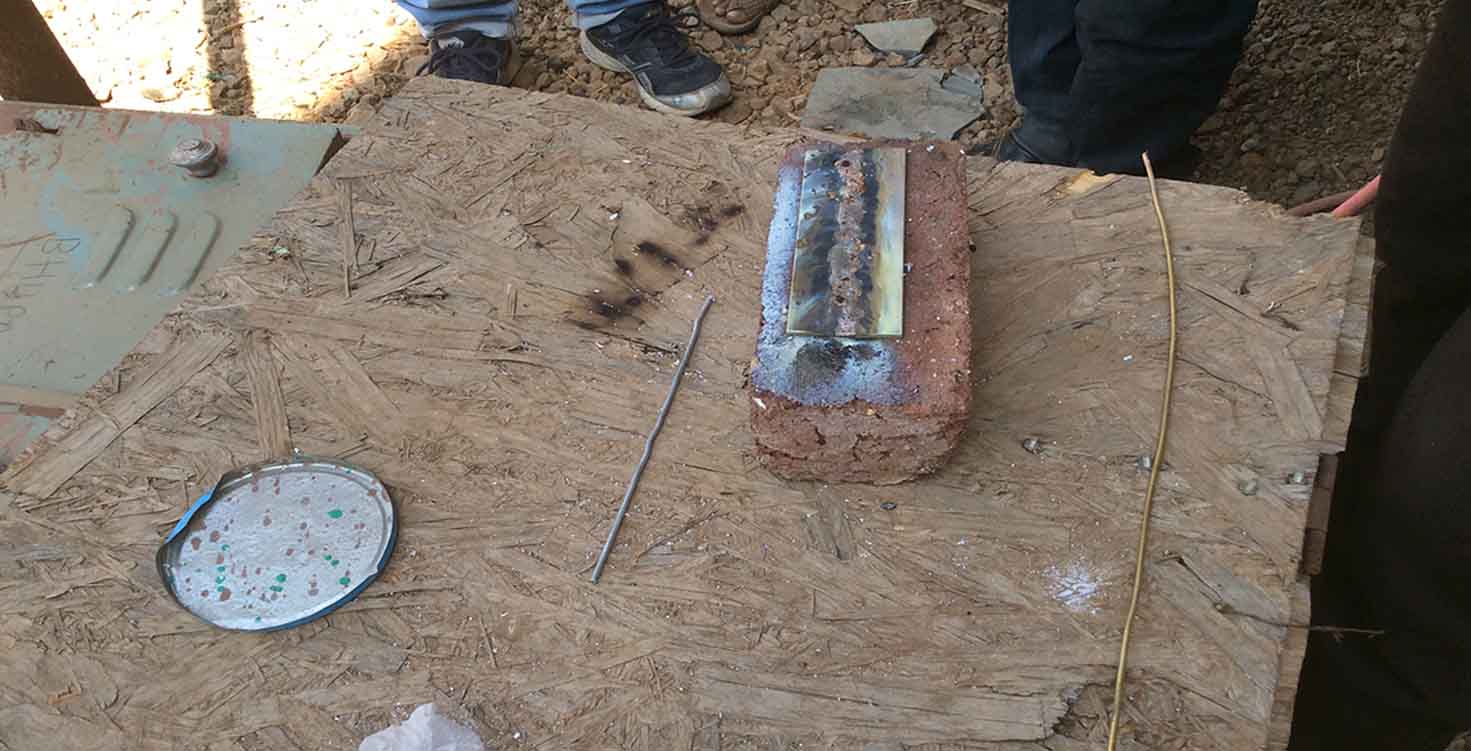
So we had someone practicing welding at ashram so he used gas welding to weld two metals or alluminiums togerther. We made a key mould in which we wanted to pour alumnium which he tried melting but we figured out its not purely aluminium so it burnt but didnt melt.
2. Designing, Machine , Making
This week I planned to make a band with embedded RFId tag which is also part of my final project.
I designed my band on sketchup as a two mould design that would later be joined to form one mould into which I plan to pour the silicon rubber solution.
Download Band file
Download Band 1 mold stl file
Download Band 2 mold stl file
This would give me an elastic rubber wrist band with an embedded RFID tag. I also used a plugin named solid inspector to check my model for any modelling errors, make it solid (water tight) and check its face orientation.
The wax i used was basically the waste wax left overs which i melted and reused for my molds as they didnt had a good shape to mill on.
I also tried melting the wax shreds which were on the bed while milling.
It looked beautiful and good when reused old wax.
MILLING
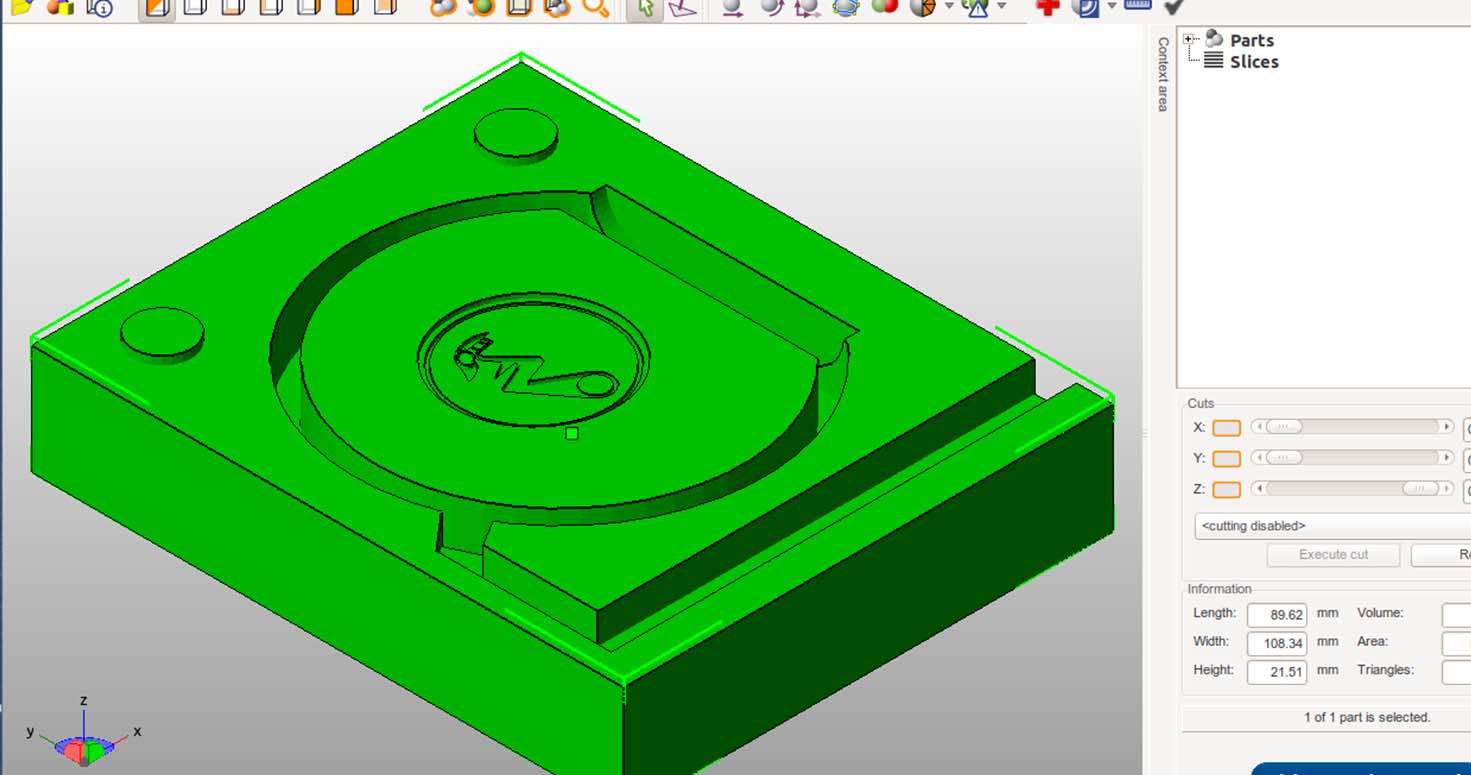
sudo fab
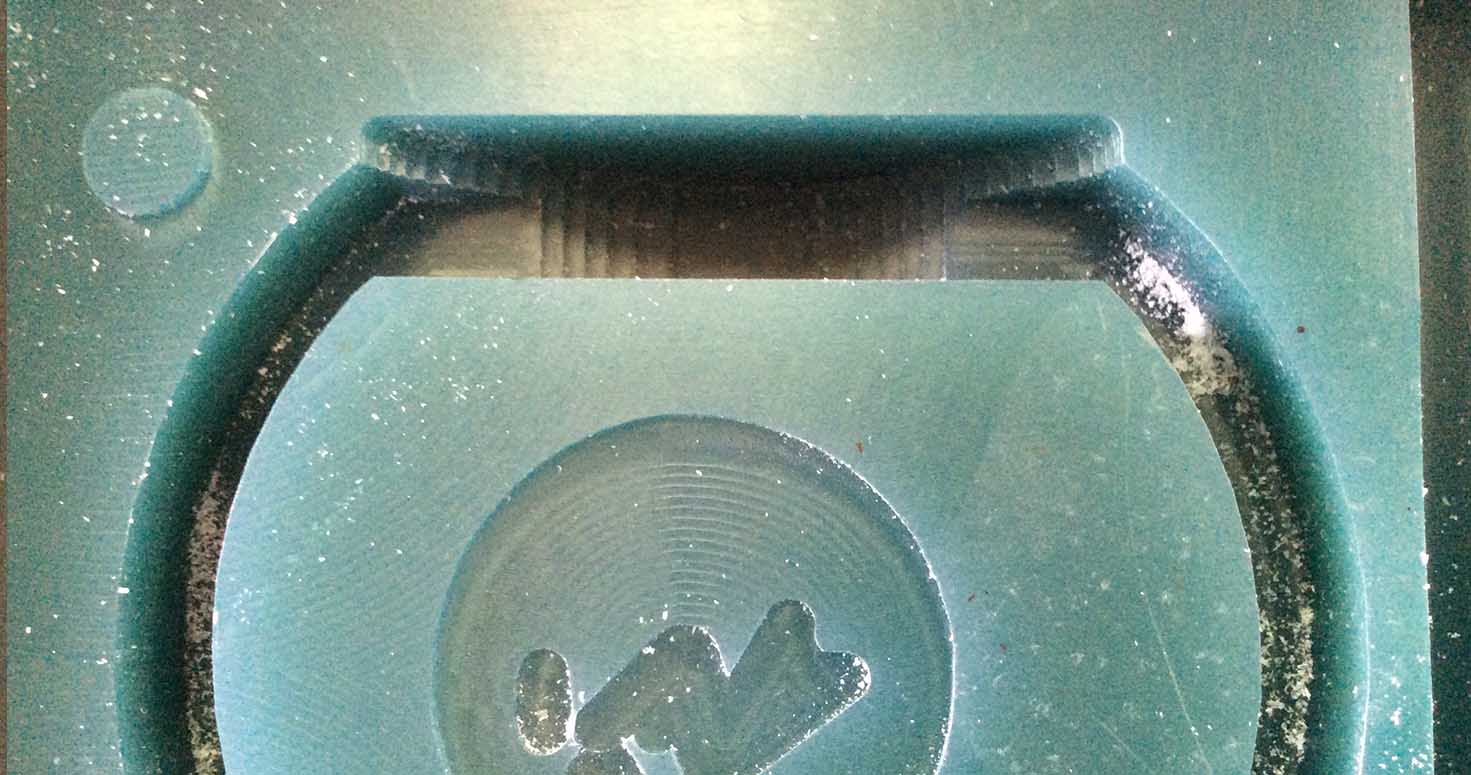
wherein I uploaded my file in mesh(stl) format , after converting it to png, i have changed the diameter to get a very clean milling.
Default Diameter was 3 and i changed it to 0.9 as my design had spaces that were lesser than 3mm, which was preventing the fab module from making a tool path. I understand it will introduce an error in m design's dimensions since its an elastic rubber band it shouldnt be a problem.
since i changed the tool diameter the resultant toolpath in a way gave me an overlap more than the 0.25 mm default overlap as set in the fab module
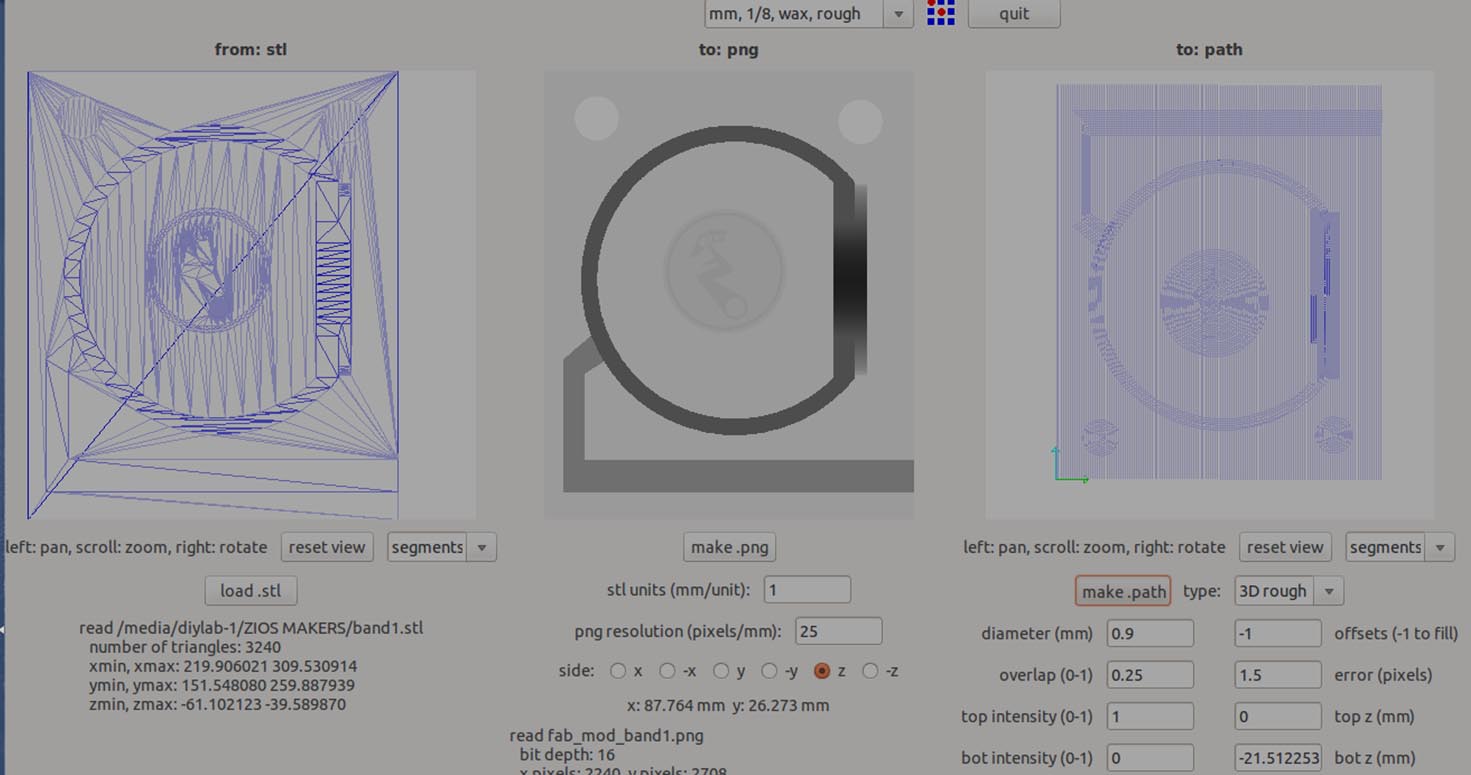
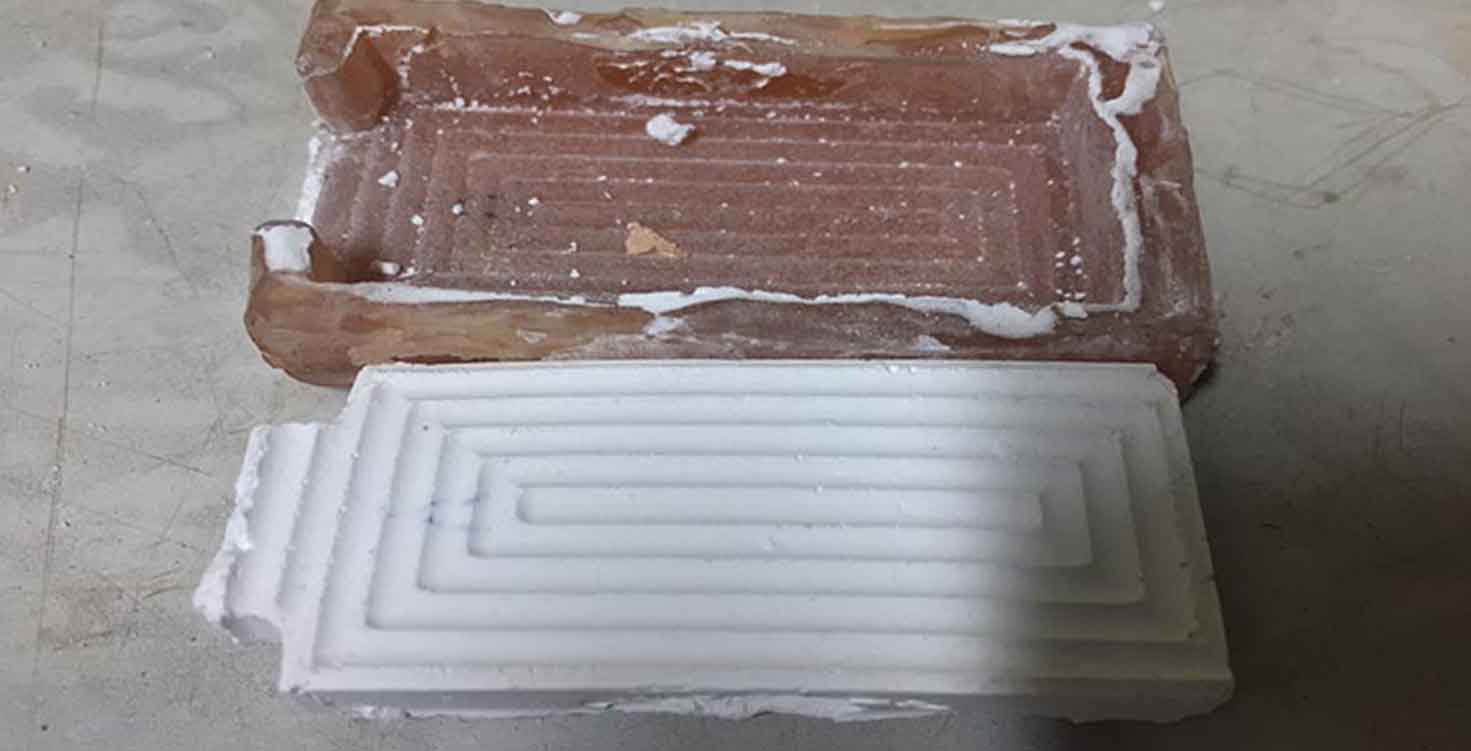
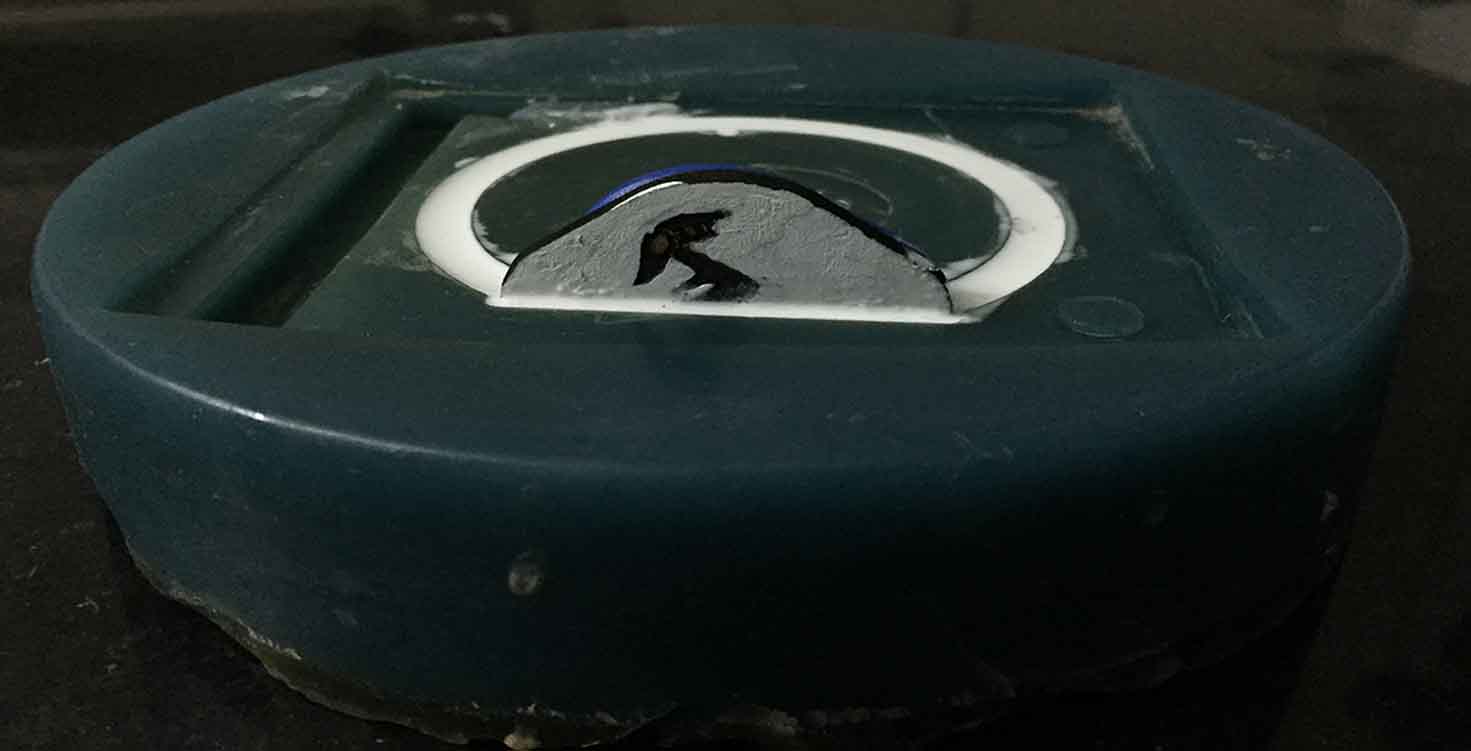
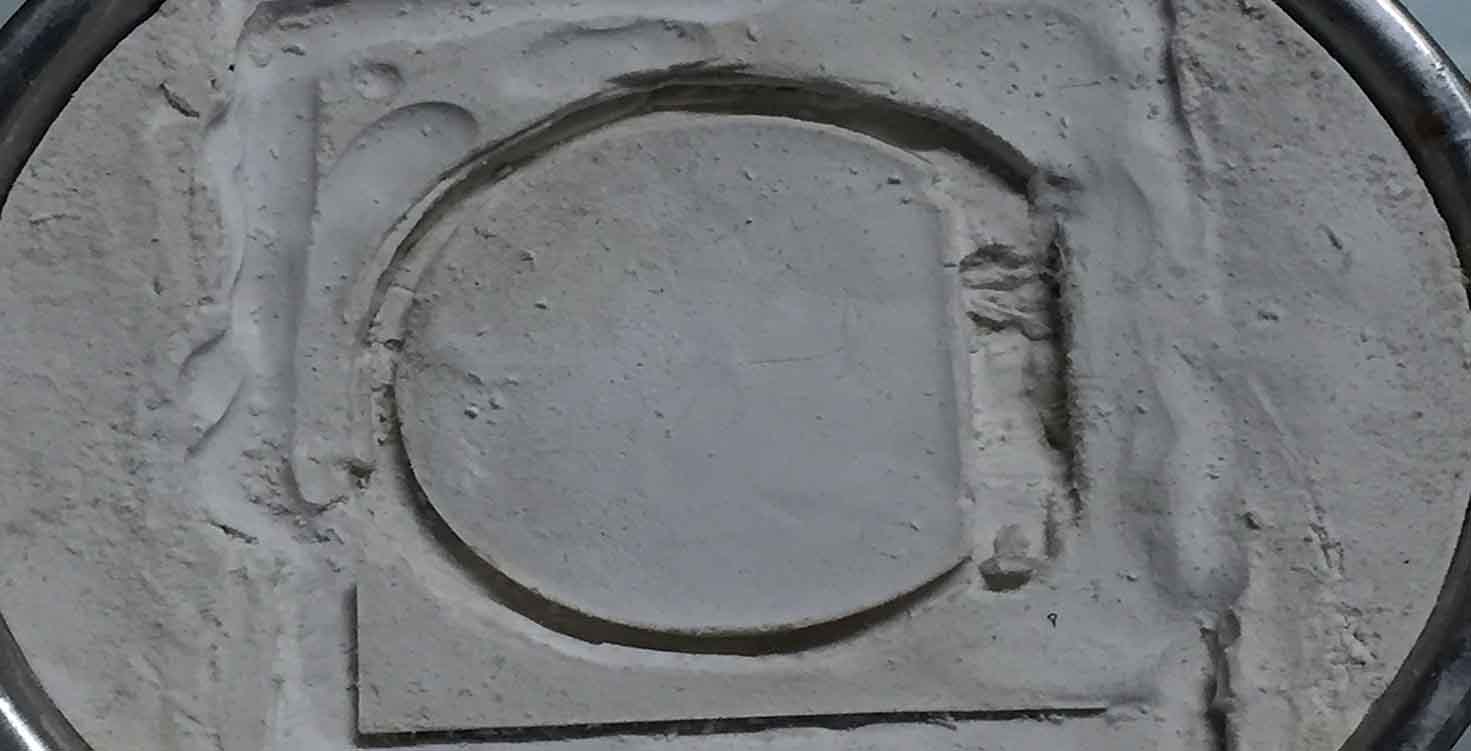
in above picture, its visible that i have kept a mark (circle) so that its easier for me to align my two pieces in the right direction.
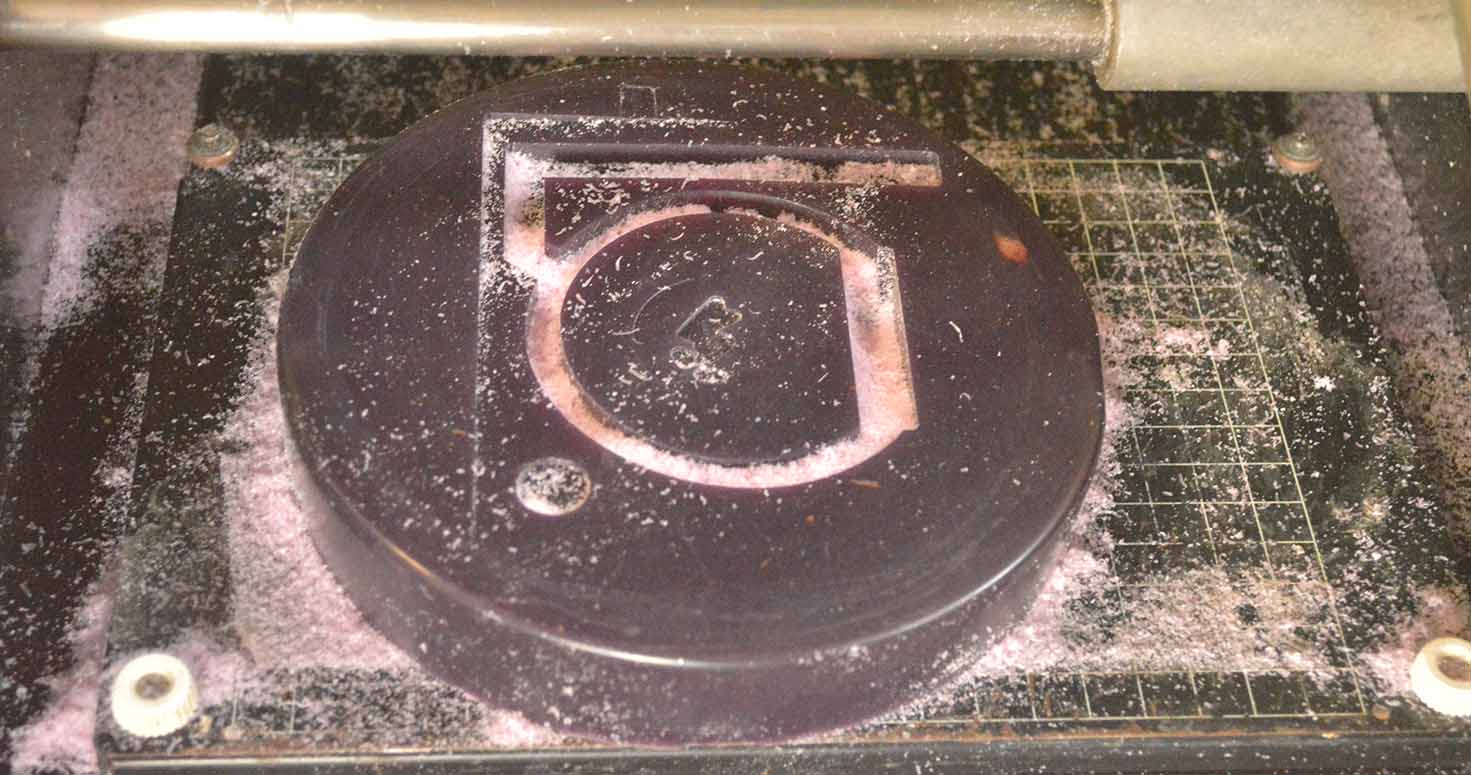
I melted waste waxes for both my molds, therefore there was in change in colour in the first one (with same material as first), probably due to materials used in them before.
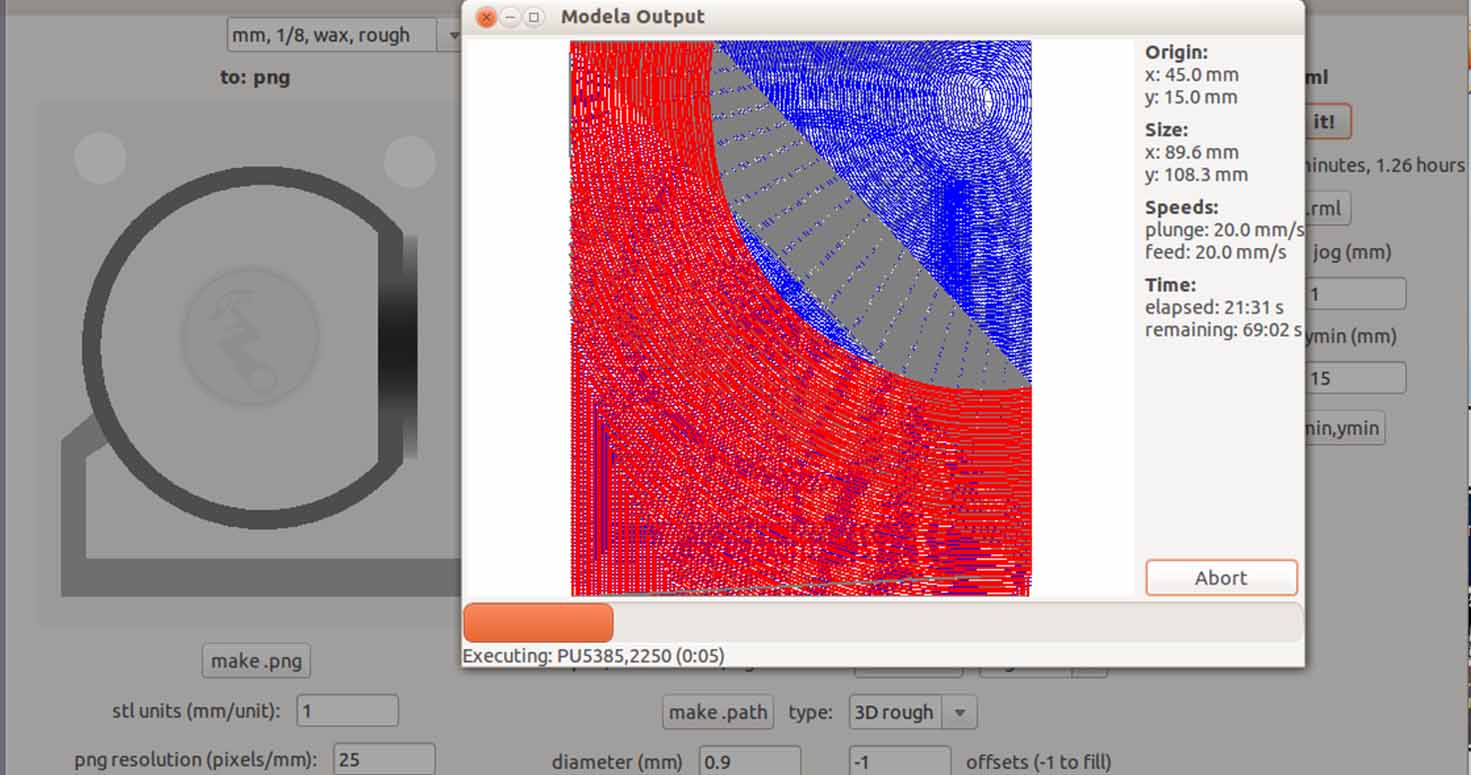
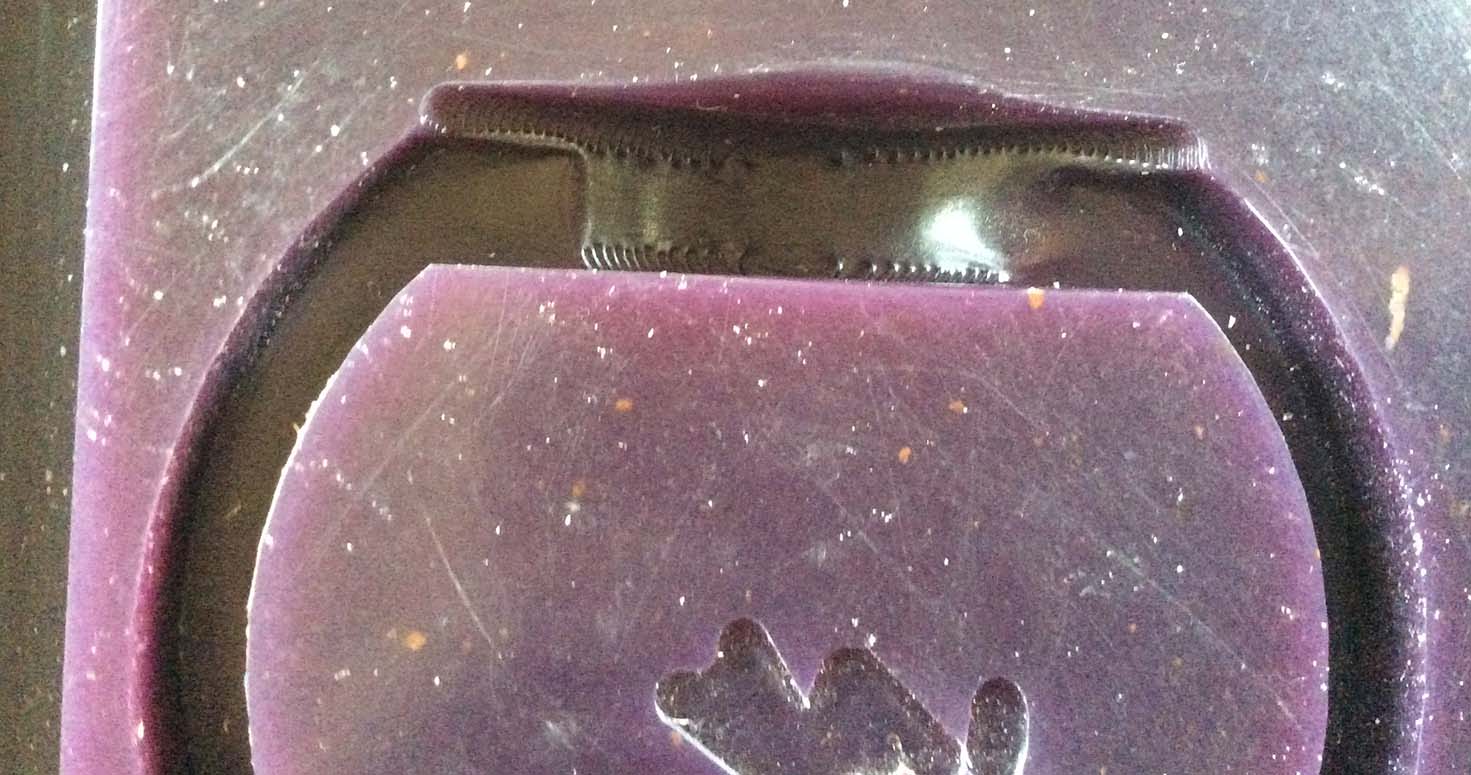
In below pictures, modella created steps at these point where i used hot air gun for mleting it a little and smoothening the surface. As i did only rough cut because everyone had to use machine plus there was no need for fine milling because my overlap increased automatically due to change in diameter.
MAKING
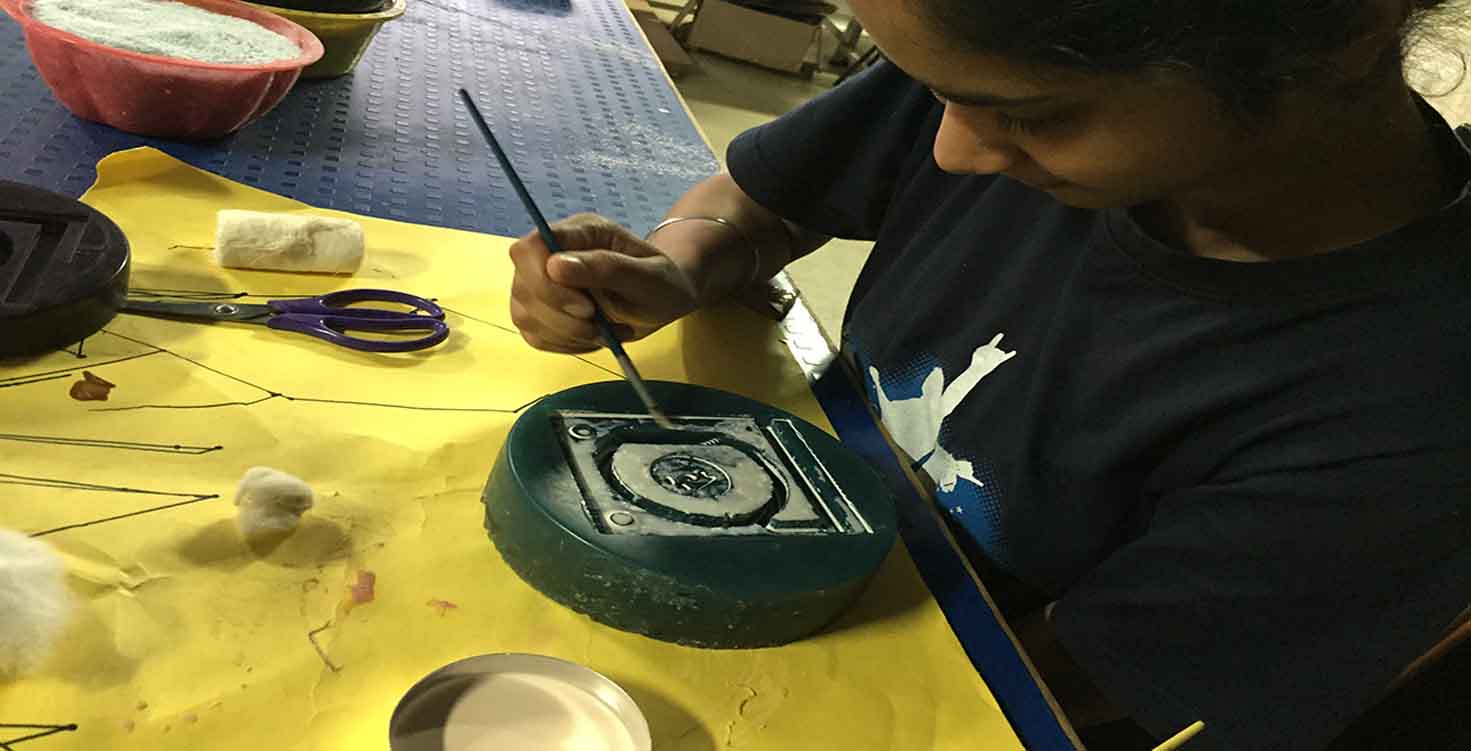
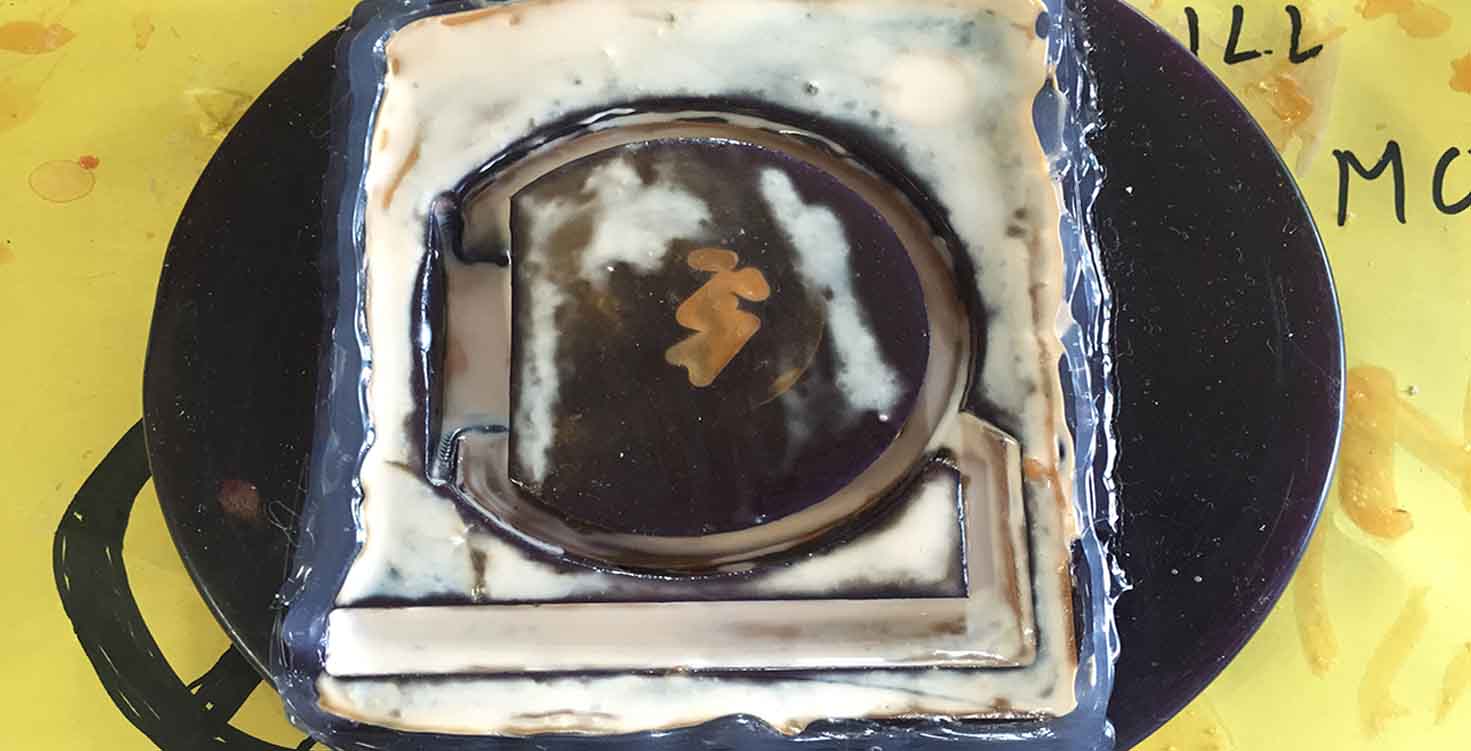
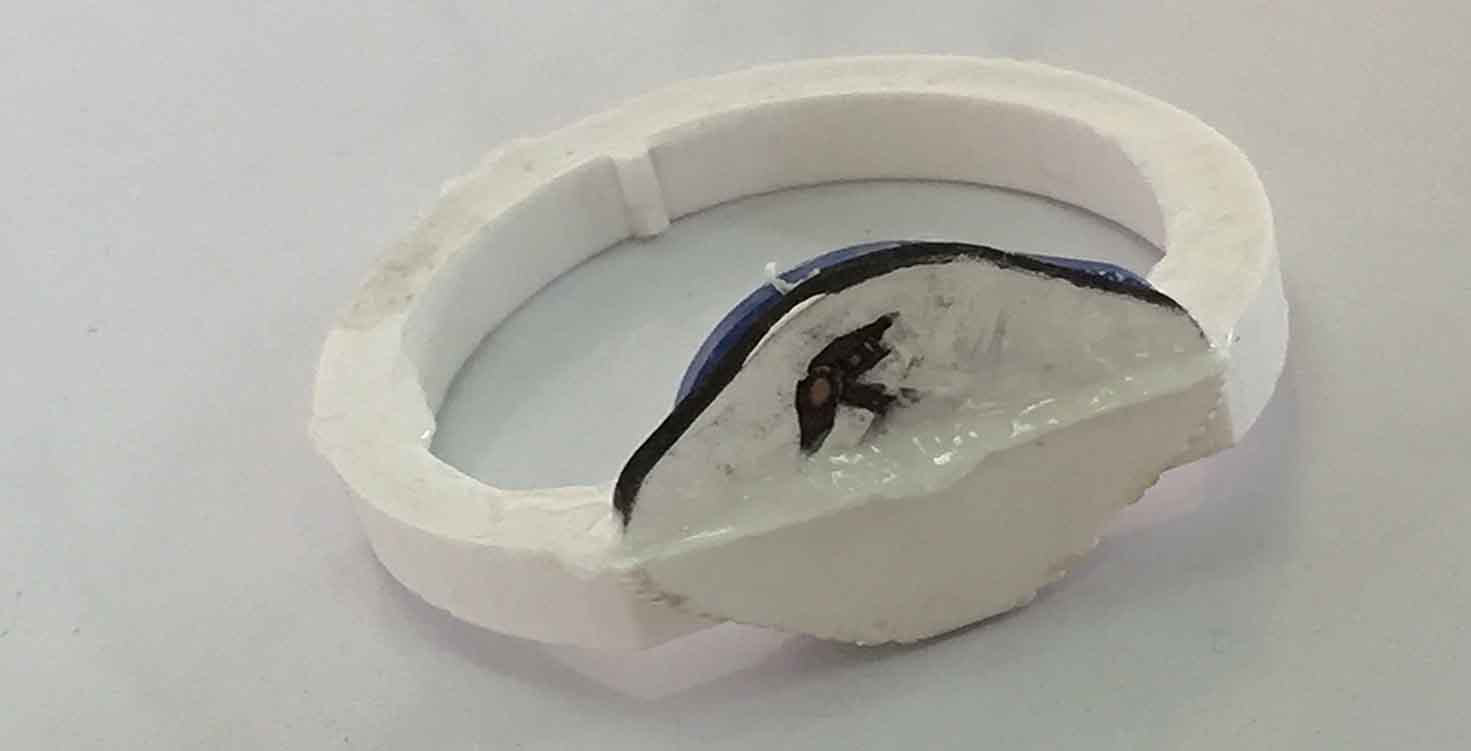
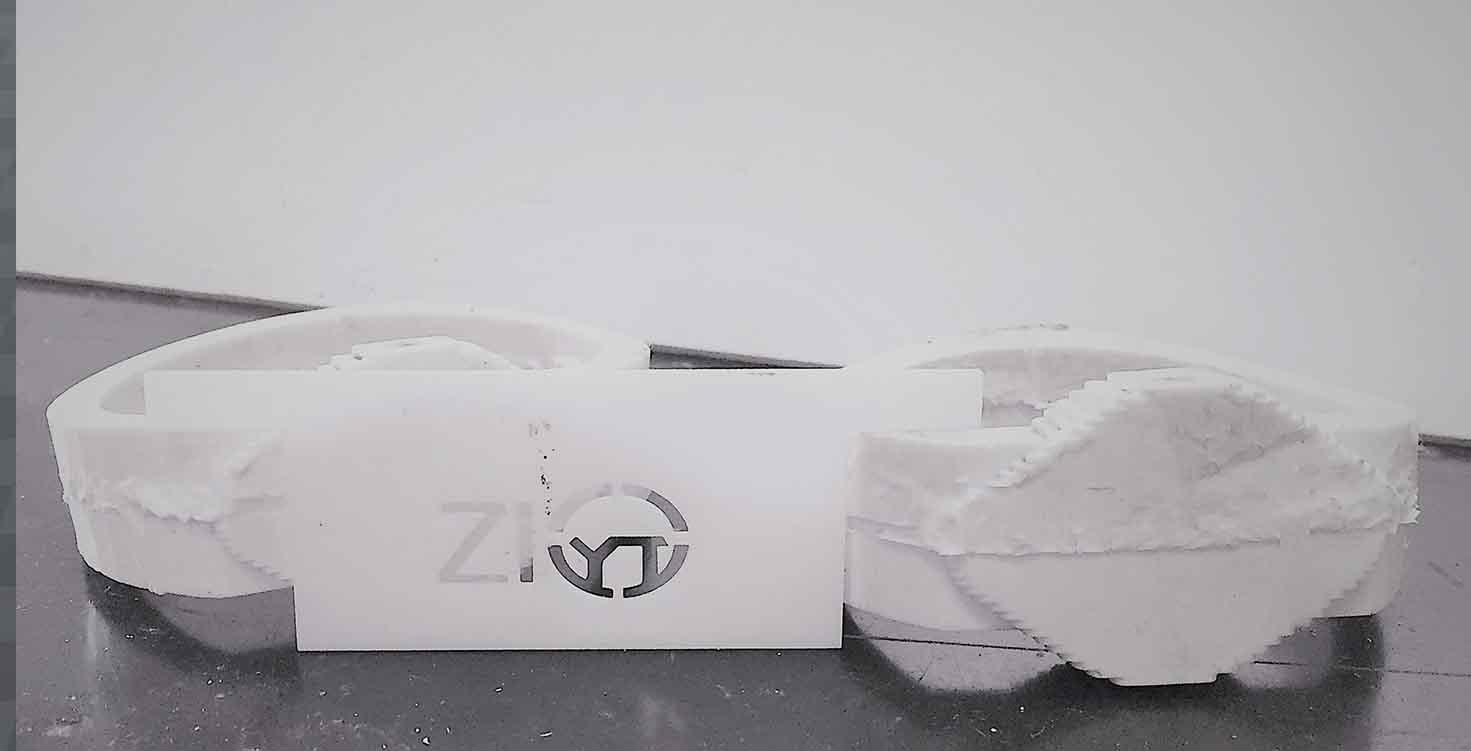
I did 10 layers of rubber solution with brush. I was patient because i new the end product would come out good. I did this because i felt if every layer gets enough time to dry up it will not give any bubbles or break.
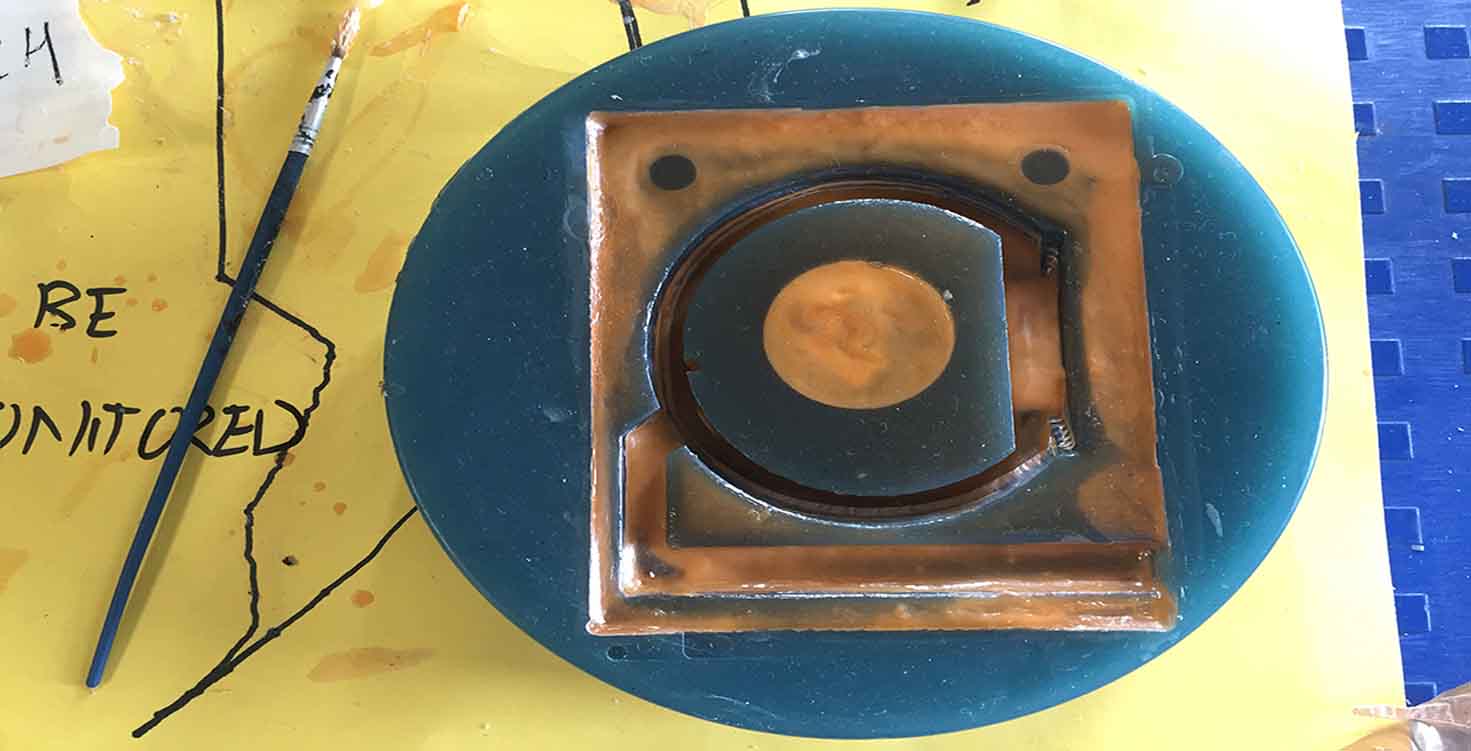
Then after 10 layers, i filled it completely
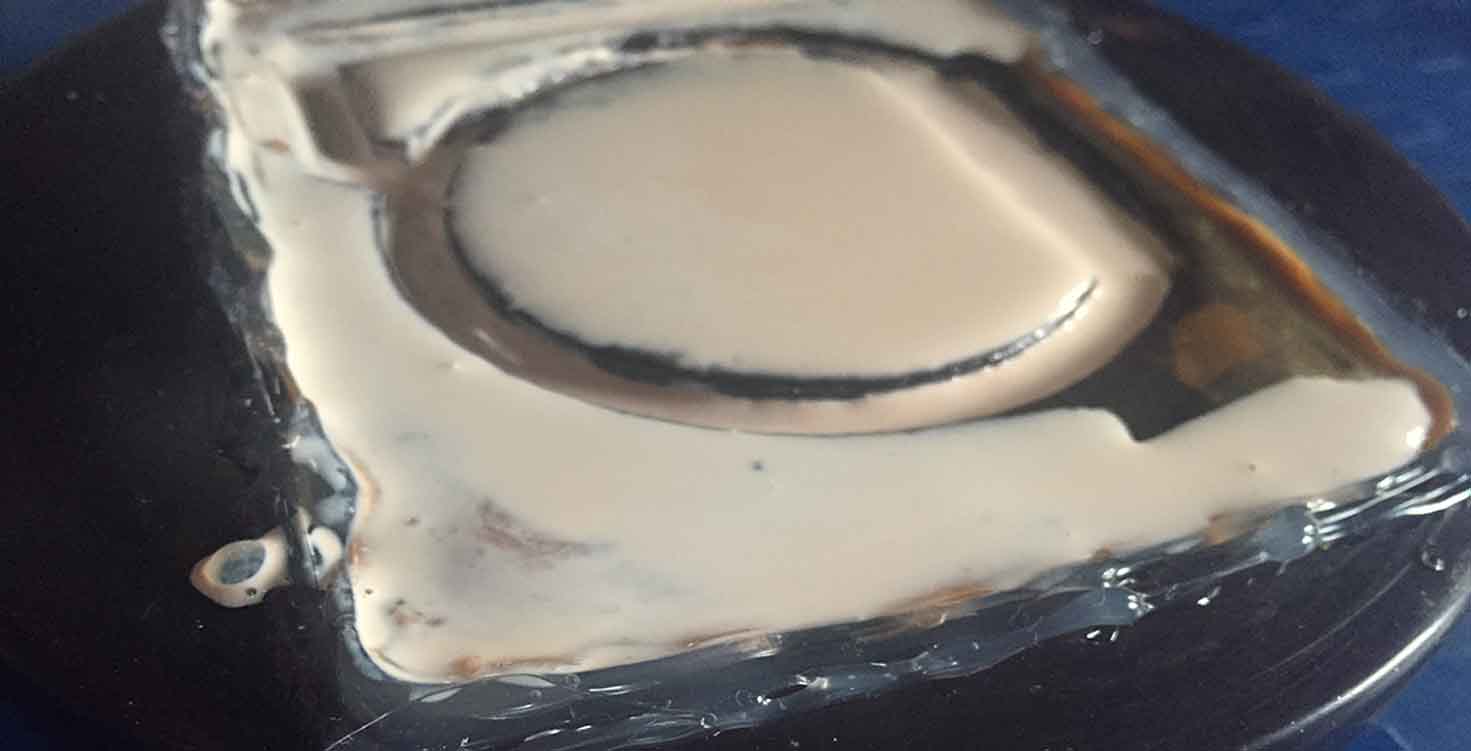
Next step, I put a layer of gauze to give it a good base to easily pull it out.
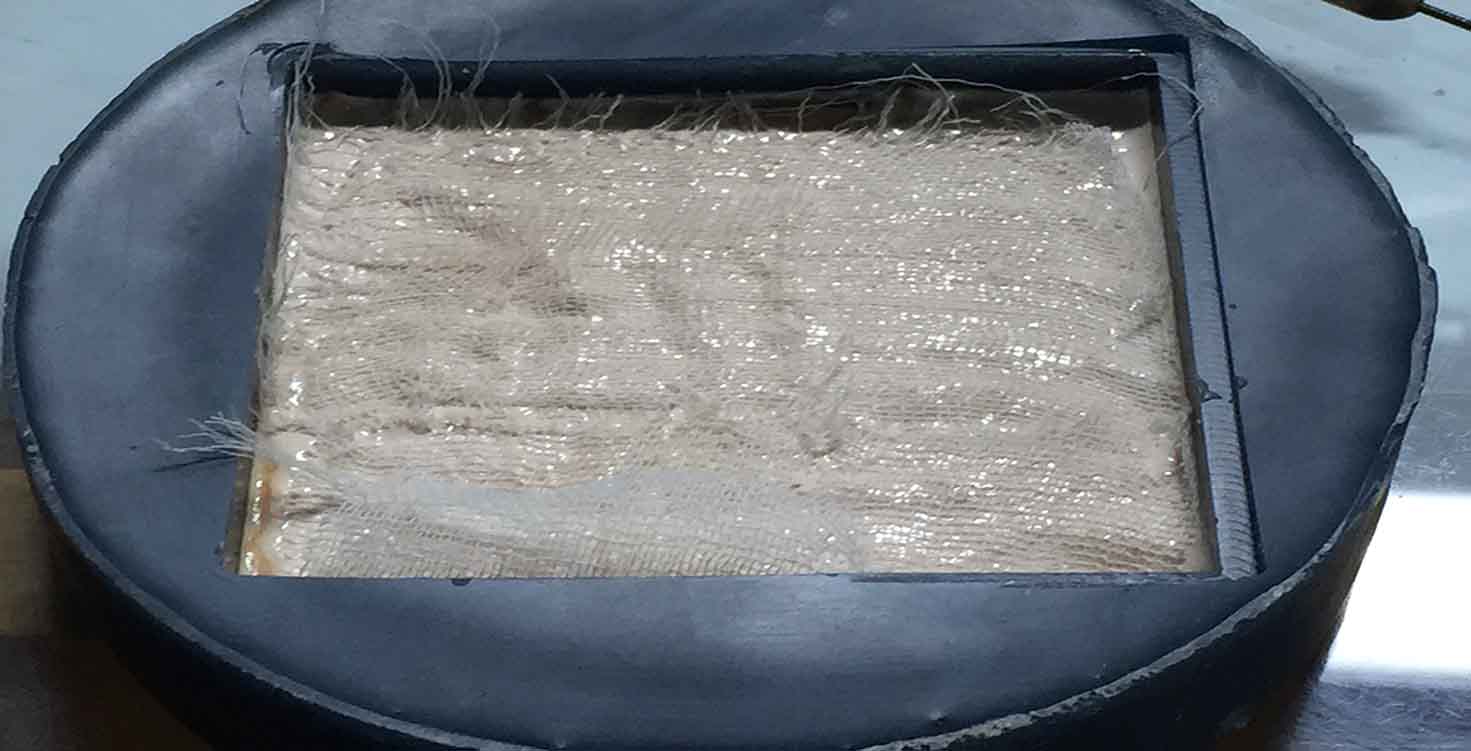
I did for both the molds:
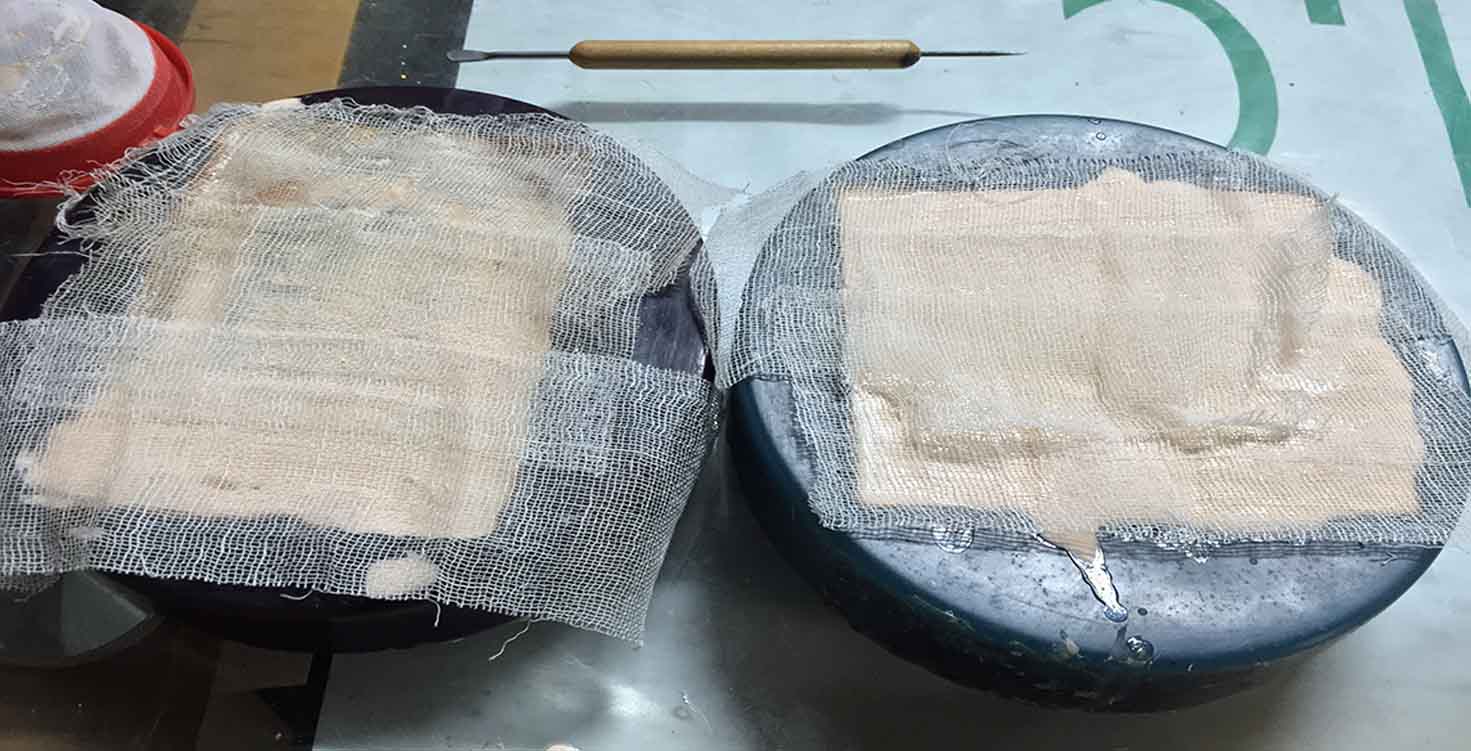
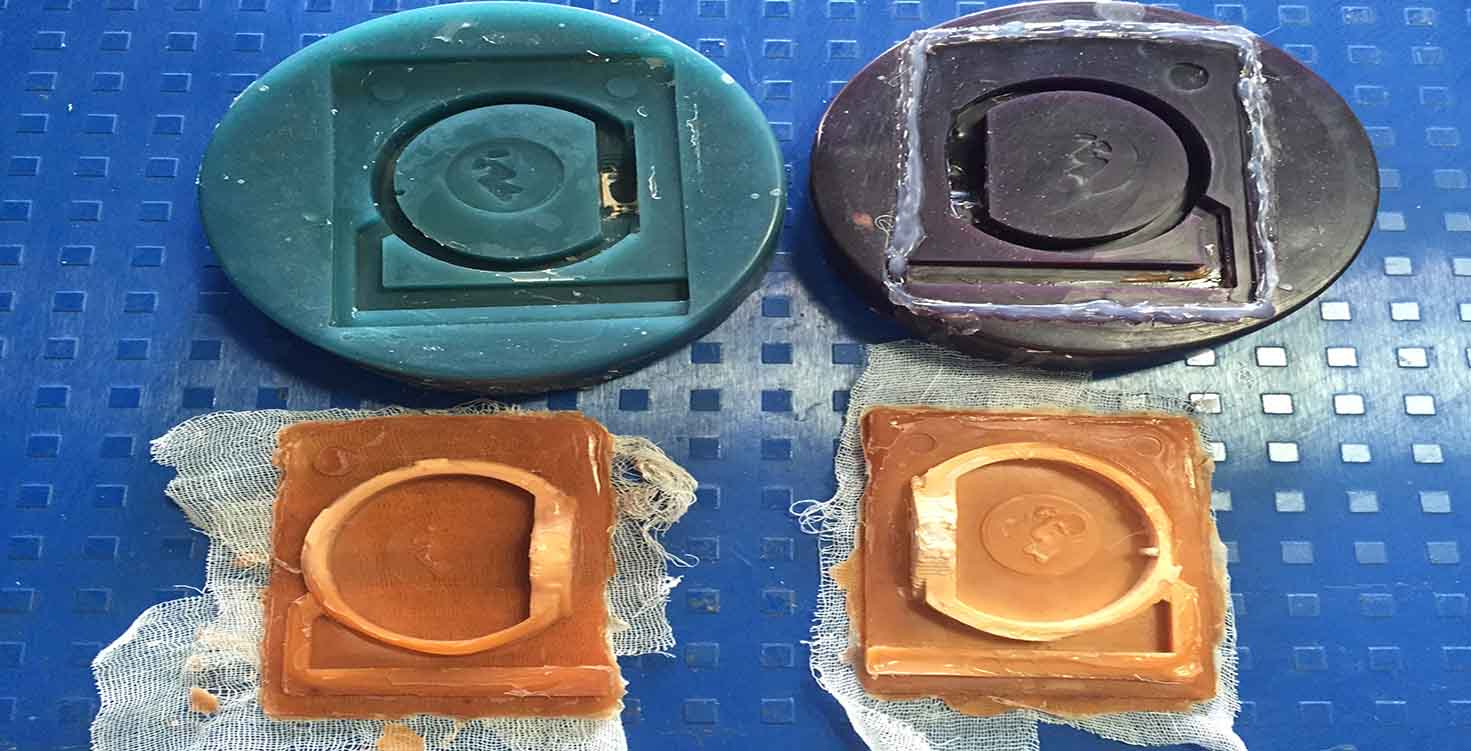
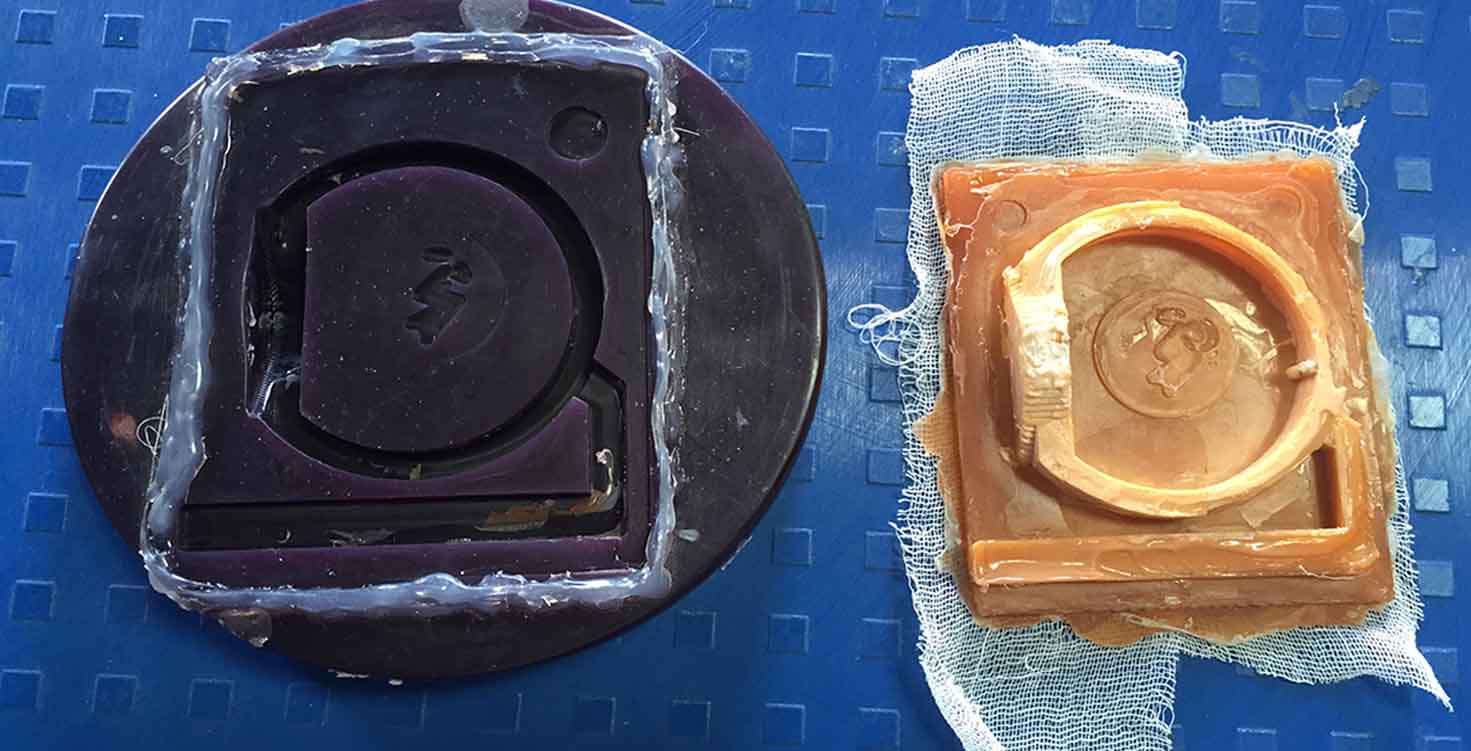
CLOSE up MOLD 1

CLOSE up MOLD 2
CLOSE up MOLD 1
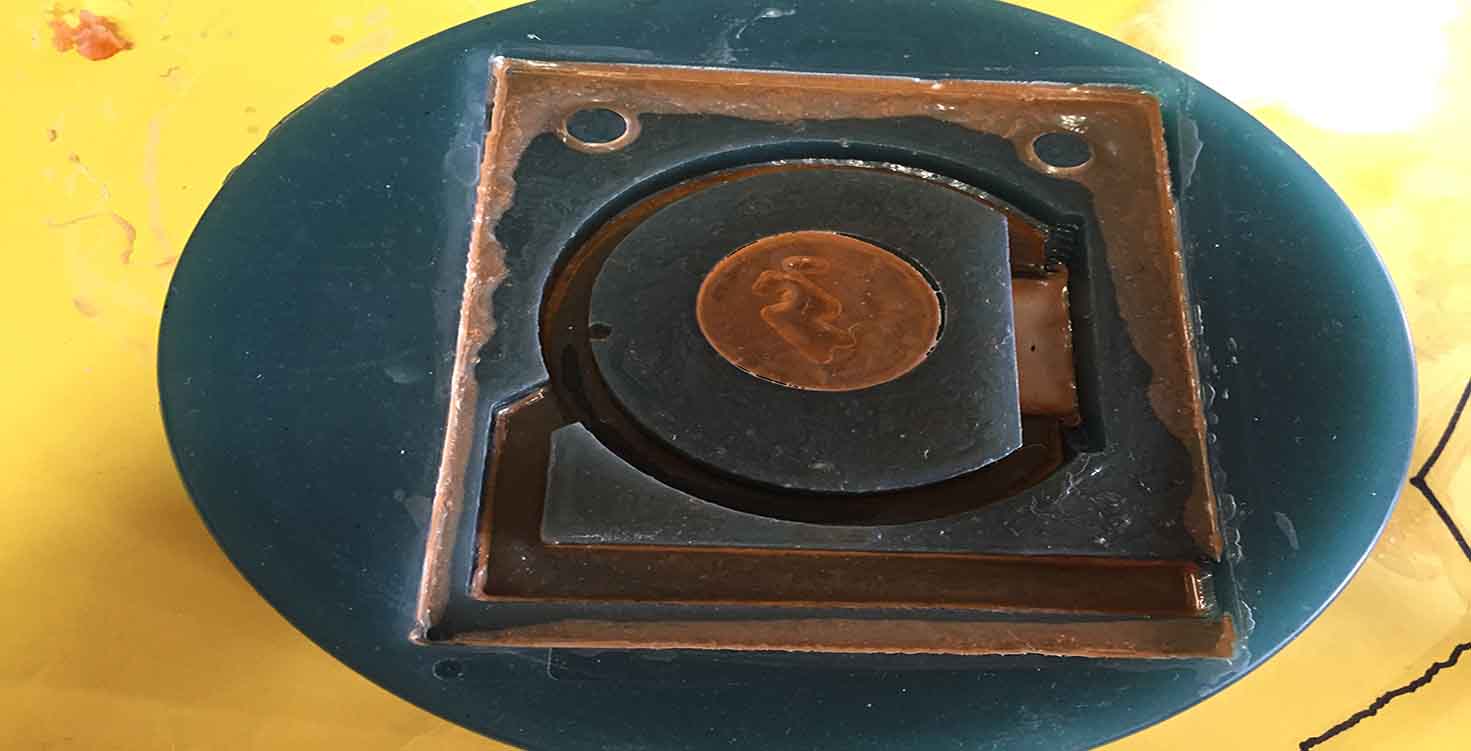
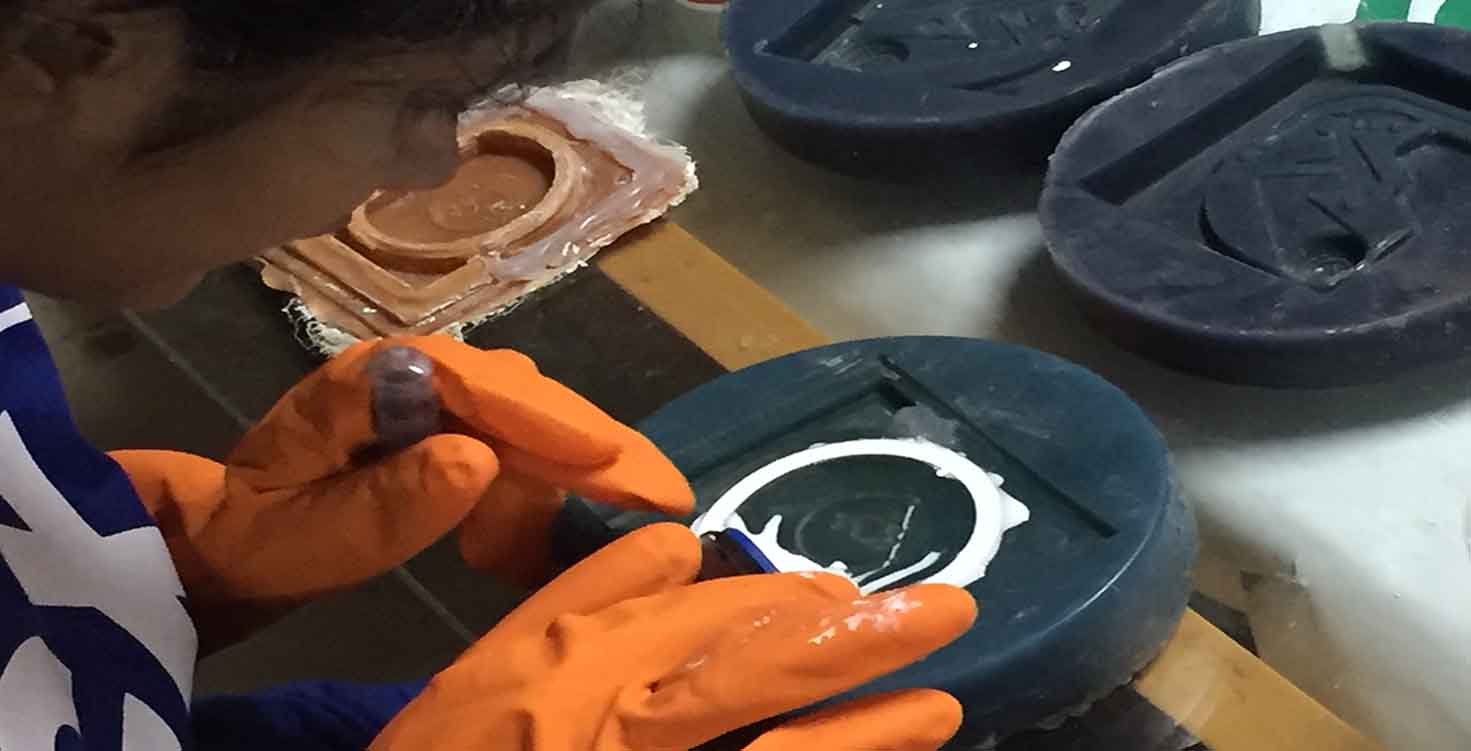
SILICON RUBBER
Then i did two things,
One was to directly pour silicon rubber to my mold.
Which came out like this.
So basically there were two parts:
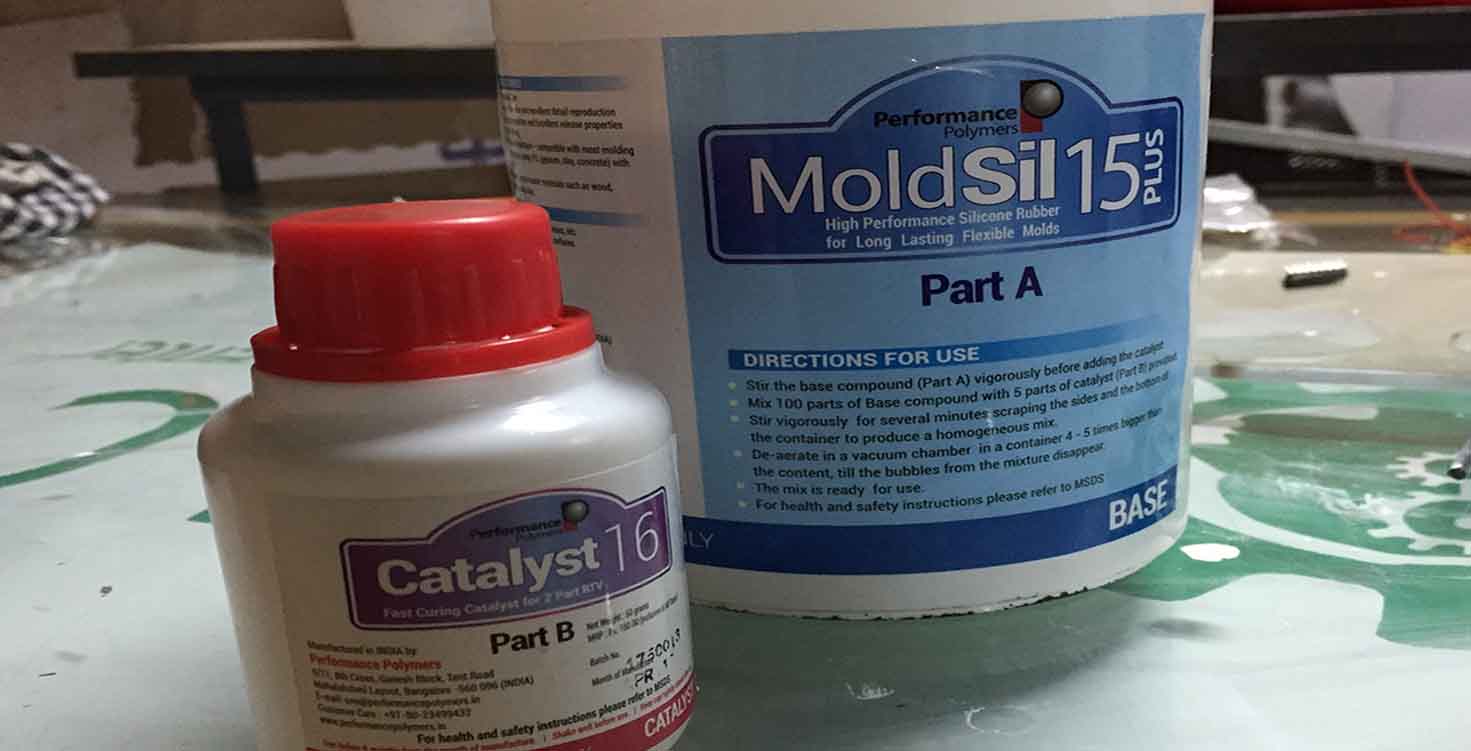
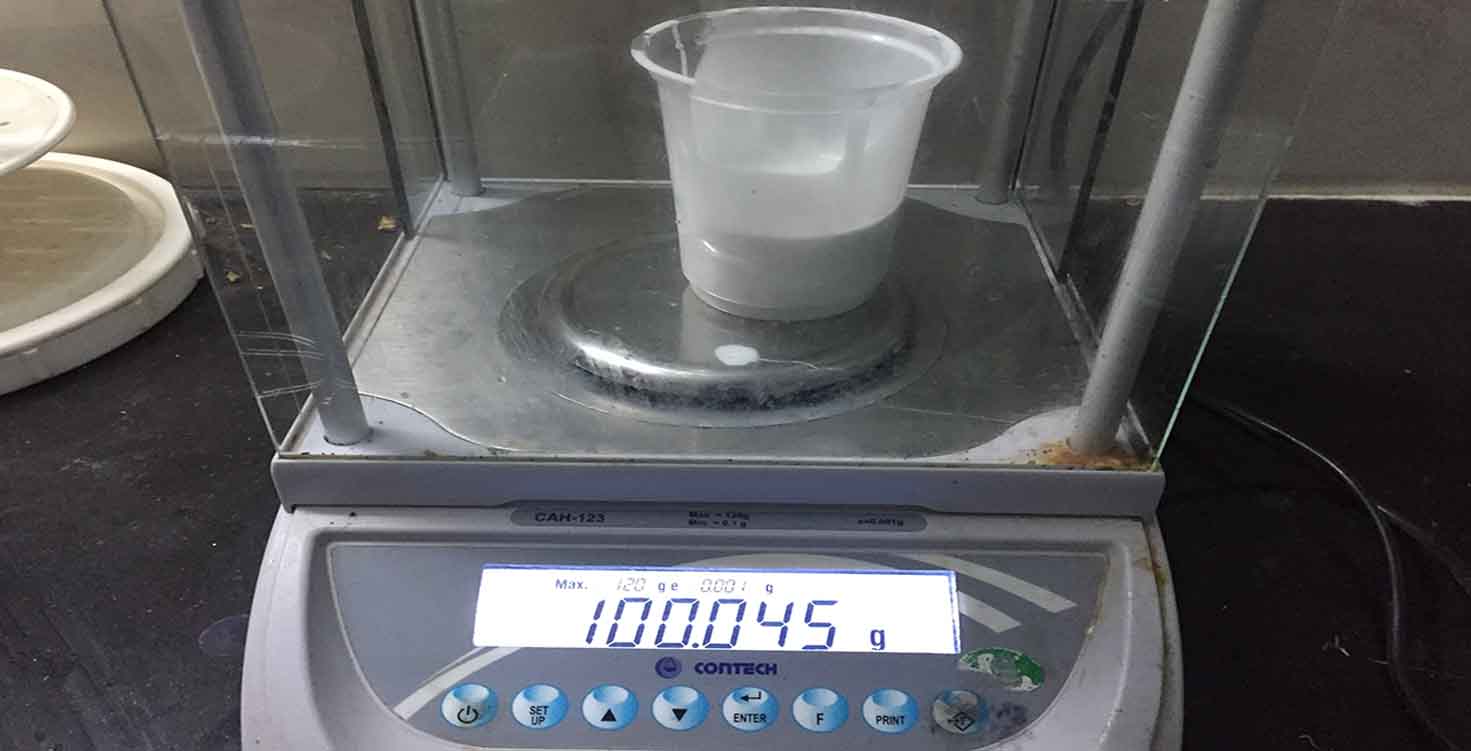
You can download its MSDS and TDS from here: TDS MSDS The mixture for this has to be 5 parts of catalyst for 100 parts of Silicon Rubber.
Catalyst is basically the Hardener

The Silicon Rubber
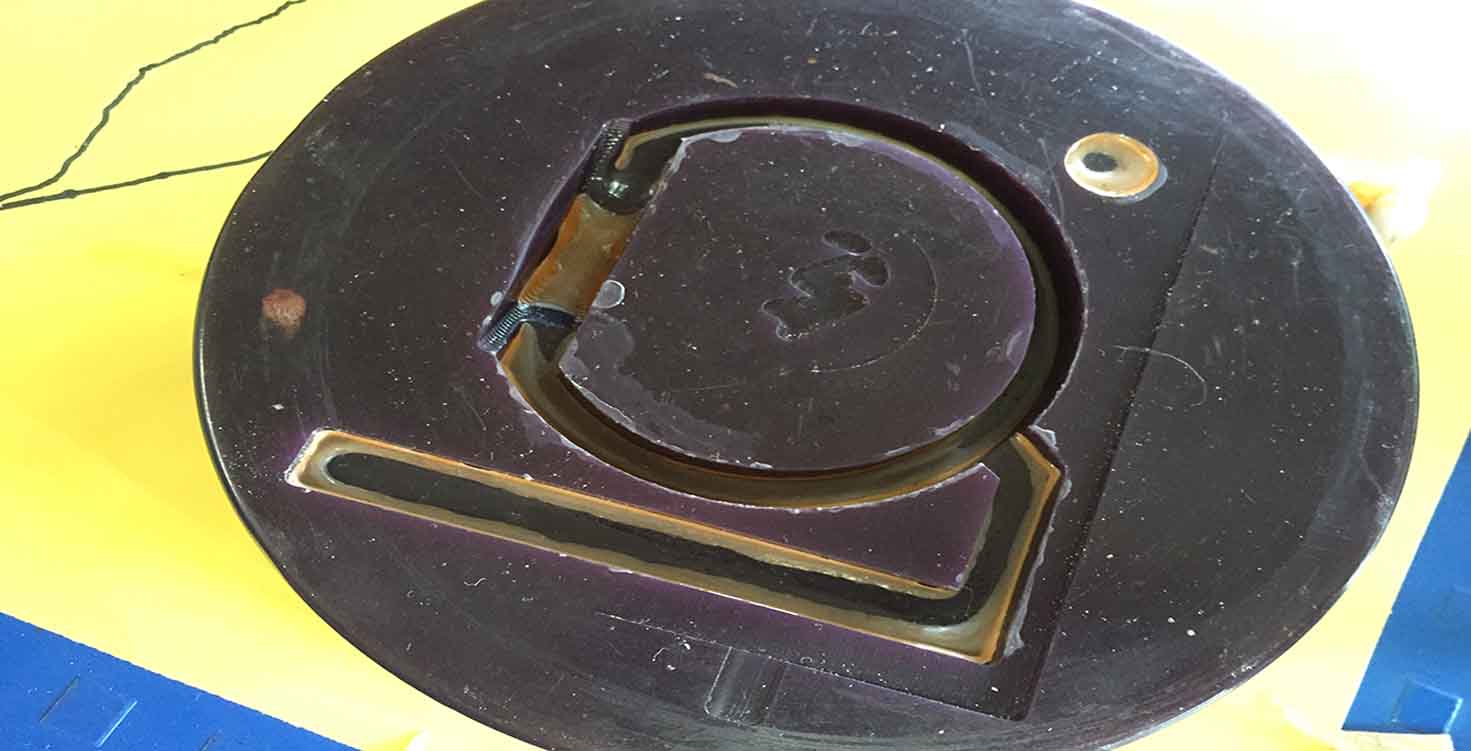
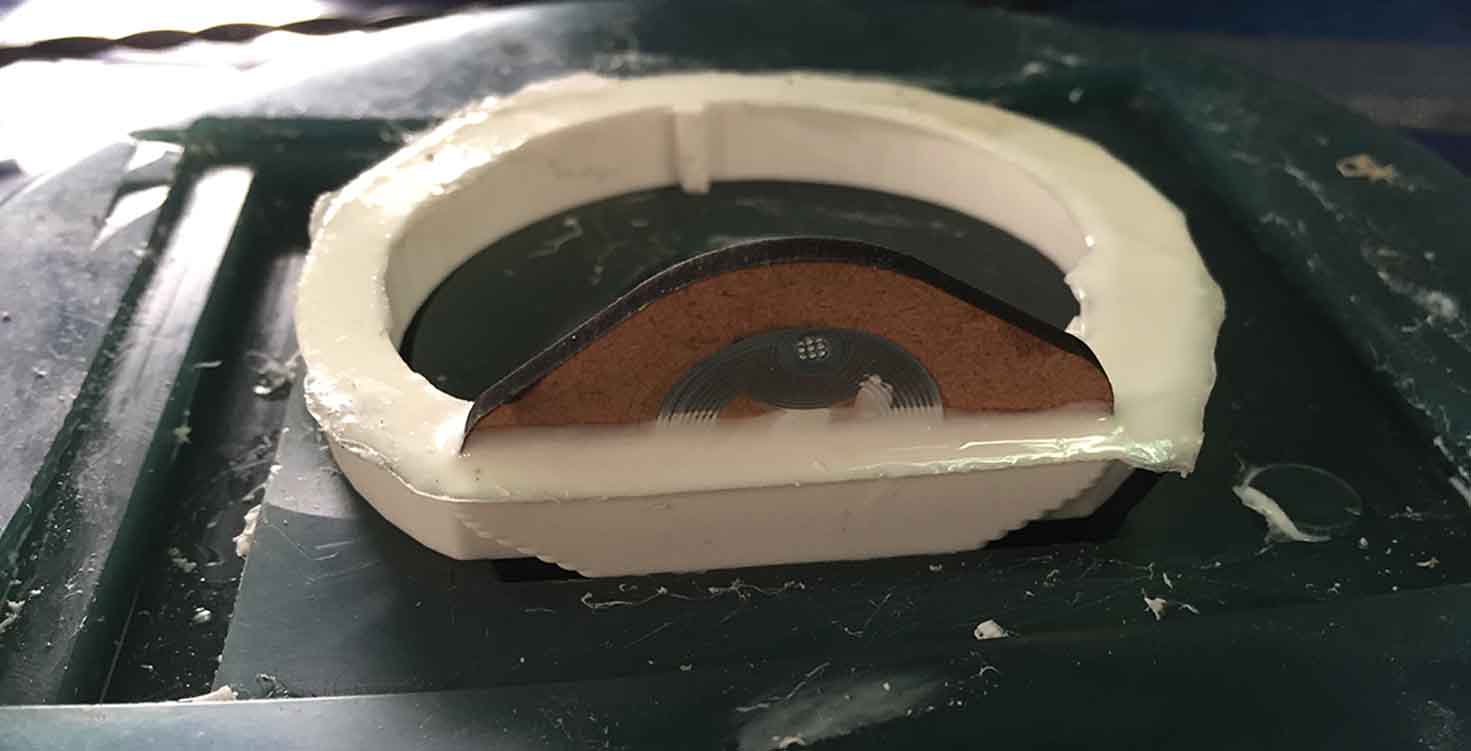
I wanted to embed my rfid in it so to keep it static and well positioned i laser cut a piece of same shape of my RFID tag and checked if RFID can still scan with so much of material over it lie MDF, Plastic on tagg, Then rubber. So below im checking the materials on tag:
Embedding it:
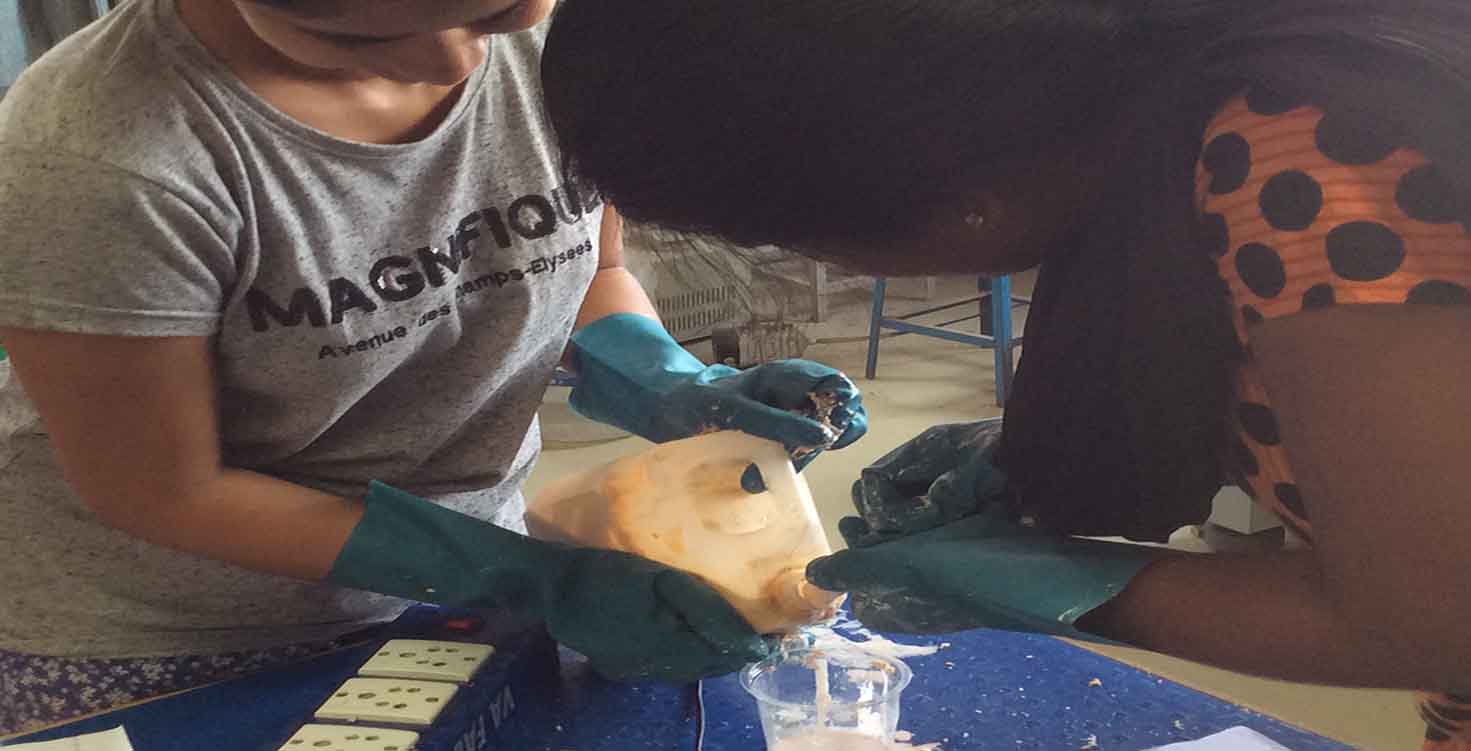
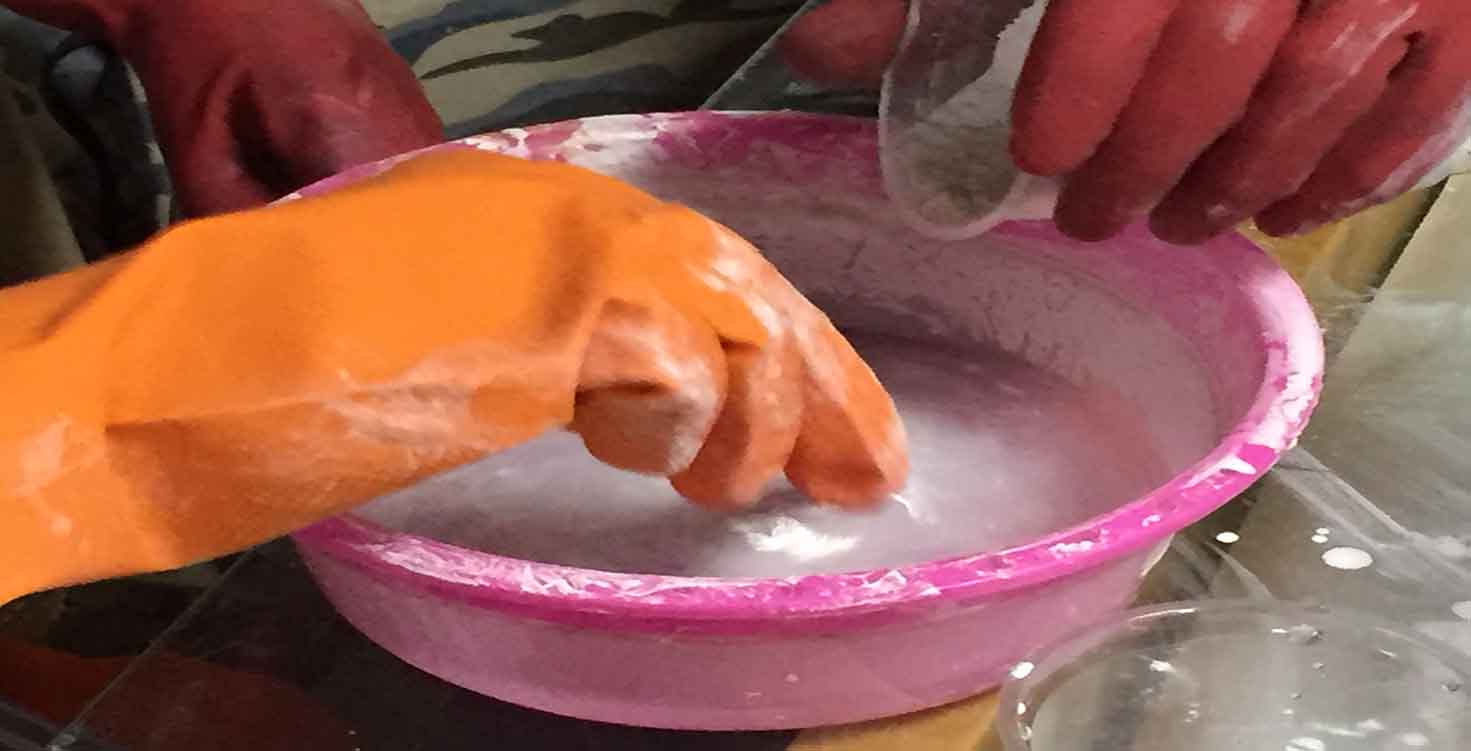
Make sure we are wearing gloves when dealing with any kind of chemicals.
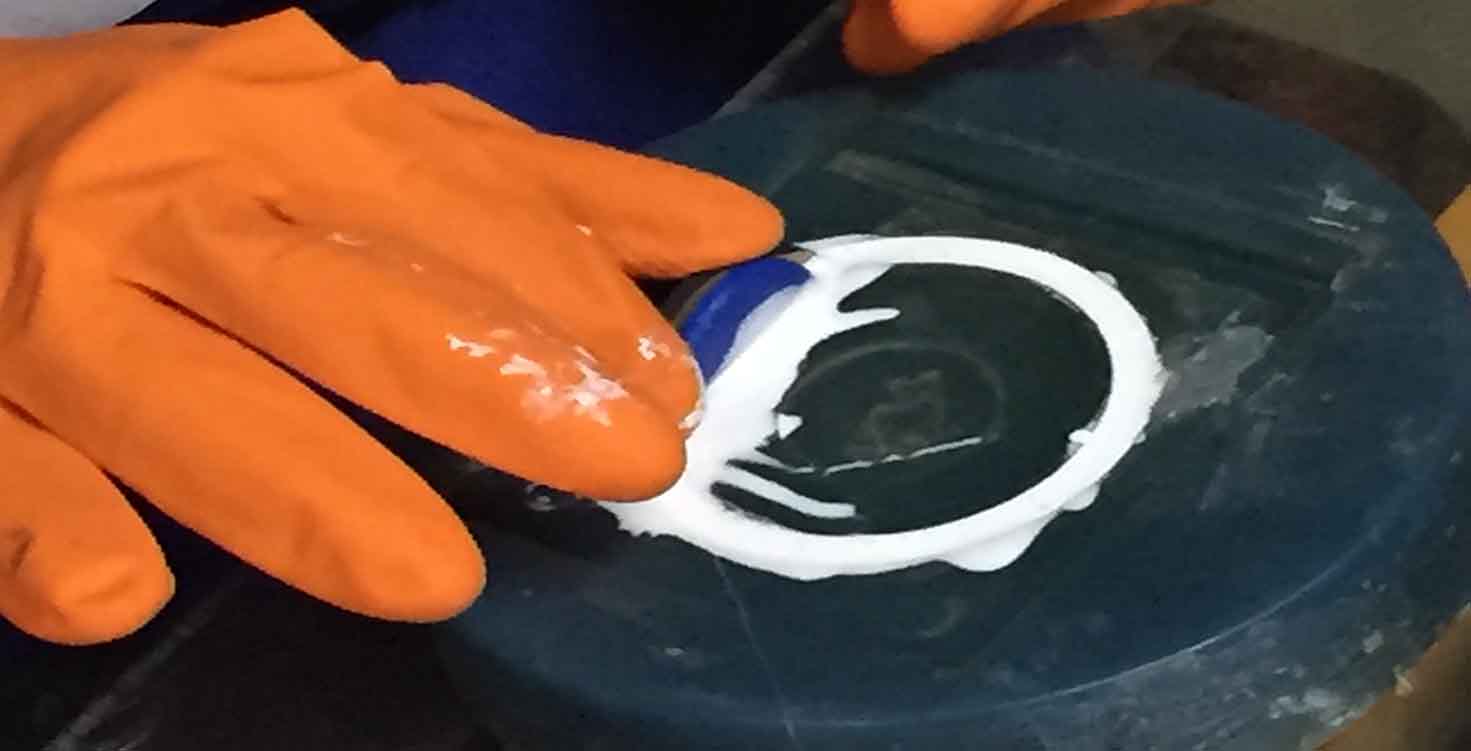
Setting it up:
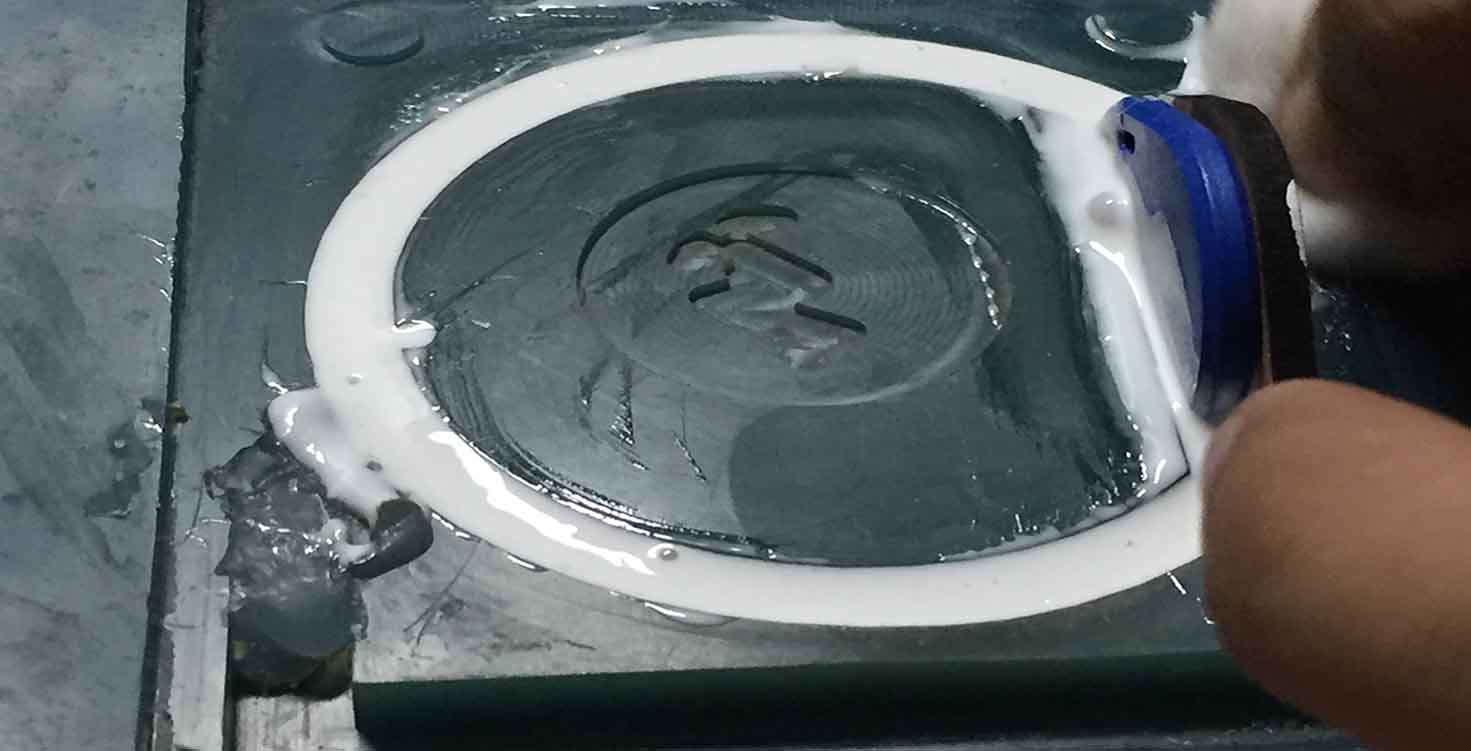
Front view:
Before pouring in the solution, I mixed it well on vibrator.
Final result:
The image is of my first part, then comes the second part. So i basically poured one more time in other mold and kept the one i made over it.
Tadaa..!
I did same by using NFC tag
Finally both of them:
FINAL PRODUCT:
RFID Embedded Band:
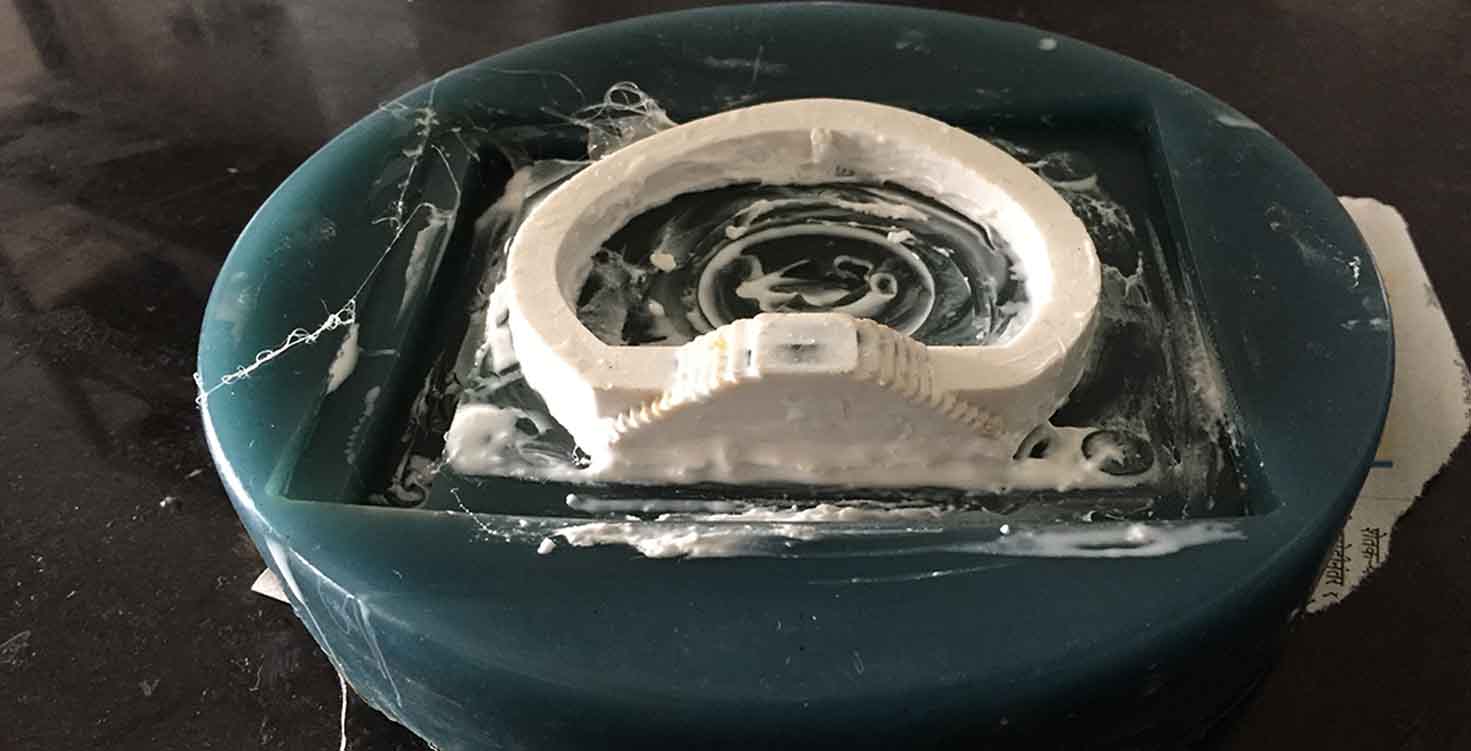
Well, its not over, i further made a mold of Hydrostone
Measuring with marks: 1:3 of ratio where 1 is hydrostone and 3 is water

Compression on molds.

Result of both the rubber molds:

Other stuff done in this week:
Fingerprints with soft wax:
Trying on my IPHONE:
it didnt work :-P
Making silicon rubber cover for my holder
Came out good but got dirty as it was white so removed