WEEK 1
Principles and Practices & Project Management
Learning Outcomes:
1. BUILDING A WEBSITE:
USING:
Windows 10 , hp LaptopThis is the first week of Fab Academy and it starts from understanding what do we plan to do in our whole Fab academy journal, to understand how do we update our experiences through GIT and also to develop our personal website and Final project plan.
1. CONCEPTS
I first went through the WEEK 1 of Fab academy module properly to go through the concepts mentioned and which are required to learn for this week.
2. TOOLS
There are many tools you can use for making your website.
As simple as Notepad in your system, in which after typing HTML code , you have to save it in .html format.
Other Tools which i explored are as follow:
FUNCTIONS: Live view, helps you view changes immediately, Quick edits( well you will never remember the tags used in HTML like br for bracket etc etc while you code. So when you type br, it gives you options what it stands for and also shows other tags starting with b giving you exposure to new tags like it did to me.)
I got to know about this tool much later but when i did i liked it and may be i will be using this one in future.
3. HOW I DID IT?
After several tries I Changed my template because it had some coding suggestions with codes, which confused me further as im new to website making. and it was 2am at night so i decided to start fresh the next morning.
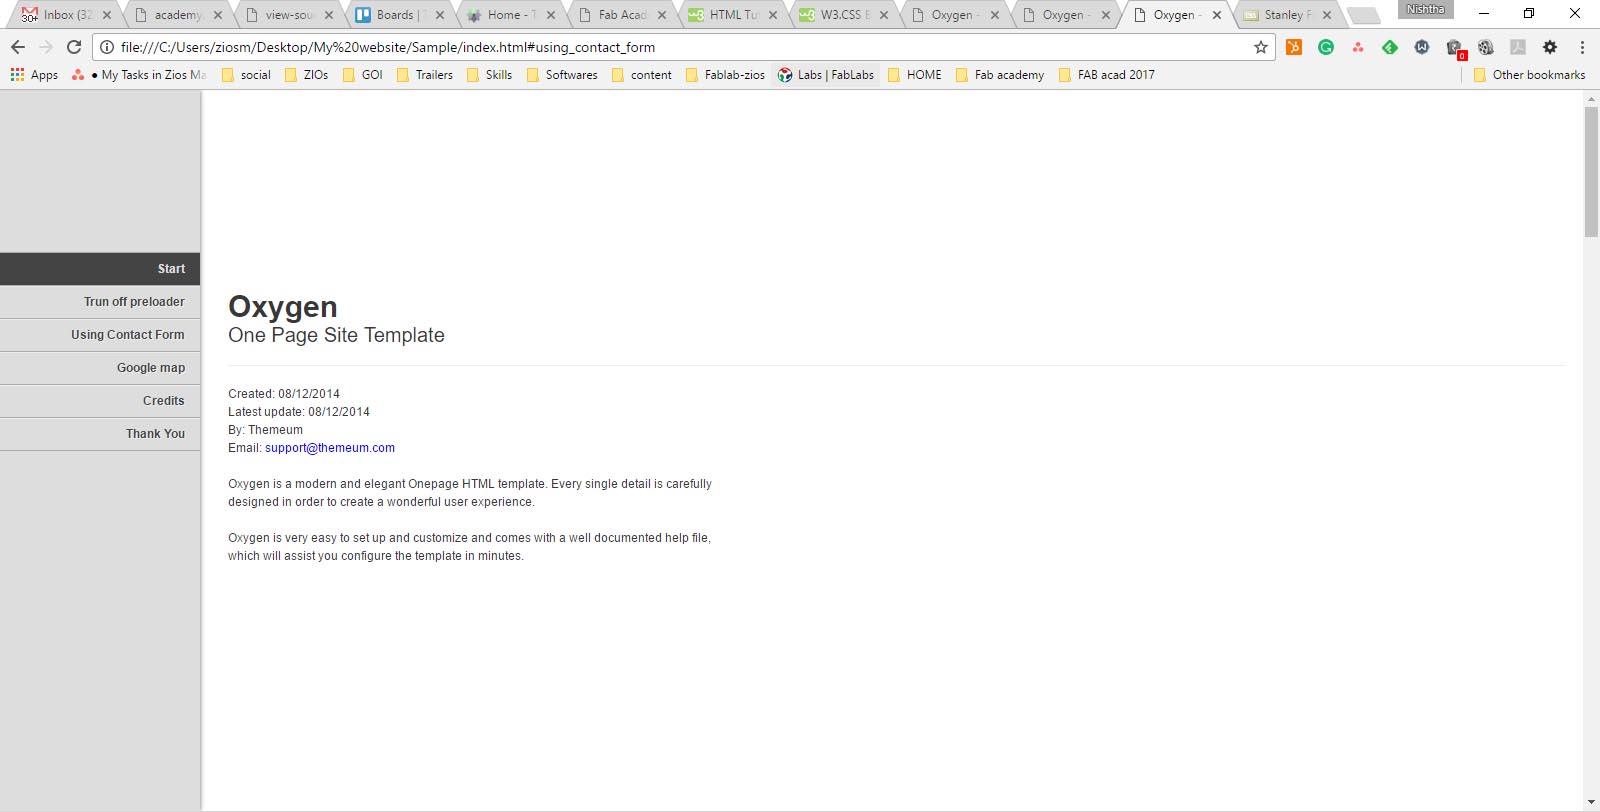
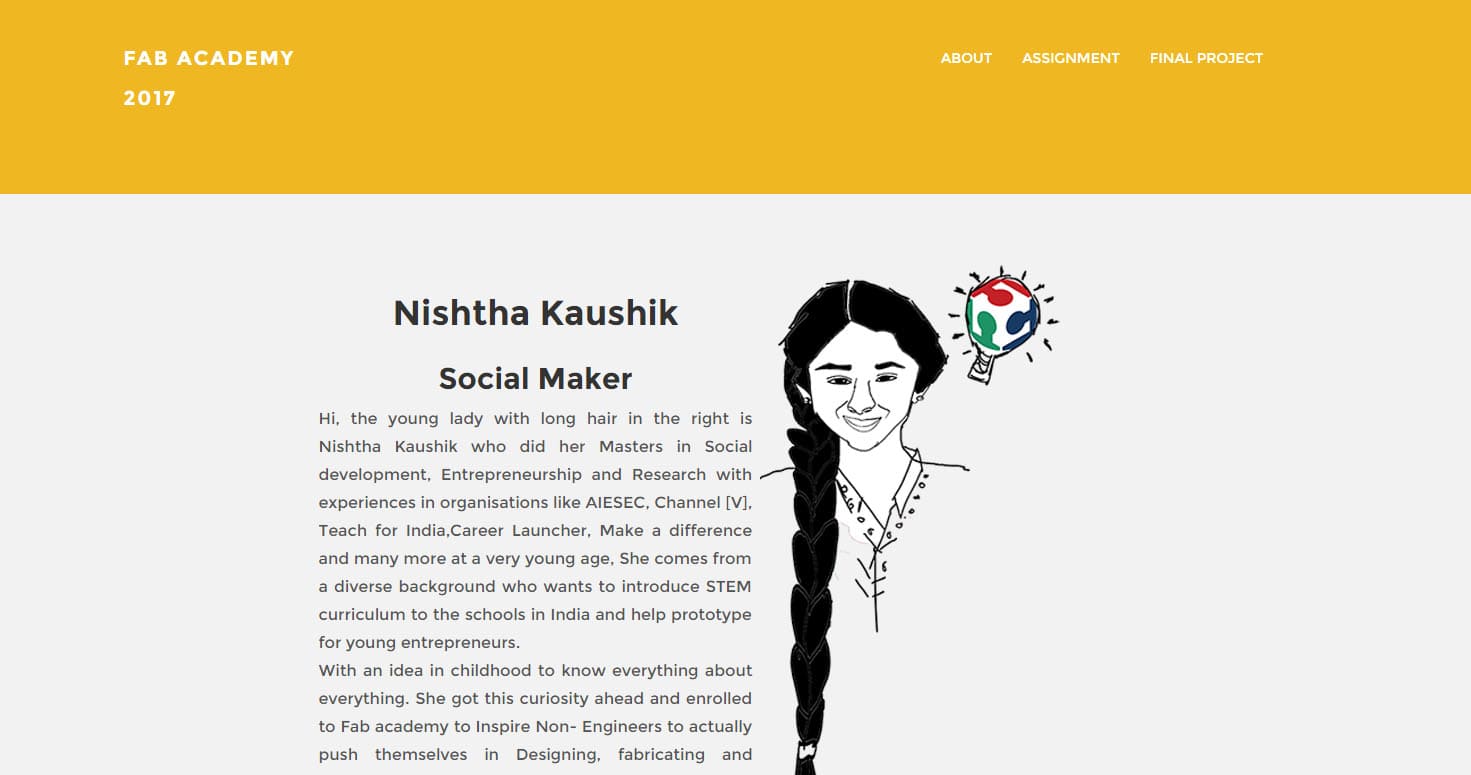
I started html, took boostrap codes and Css from my previous editings and started coded. I made my own sketches and photoshoped them to make my website look personalised.

Finally Thats how it looked.
I. Text edit
II. Image Insert and resizing
III. Tabs
IV. Navigation bar
V. Linking my text to other pages
VI. Header and Footer
VII. Progress bar
VIII. Fonts
IX. Background
X. Margins
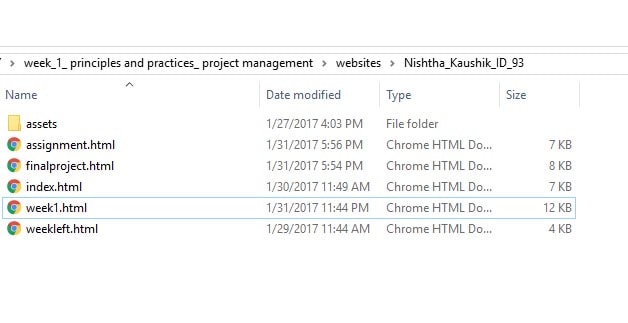
XI. Folder Management because I ended up making multiple copies every time I improved or edited.
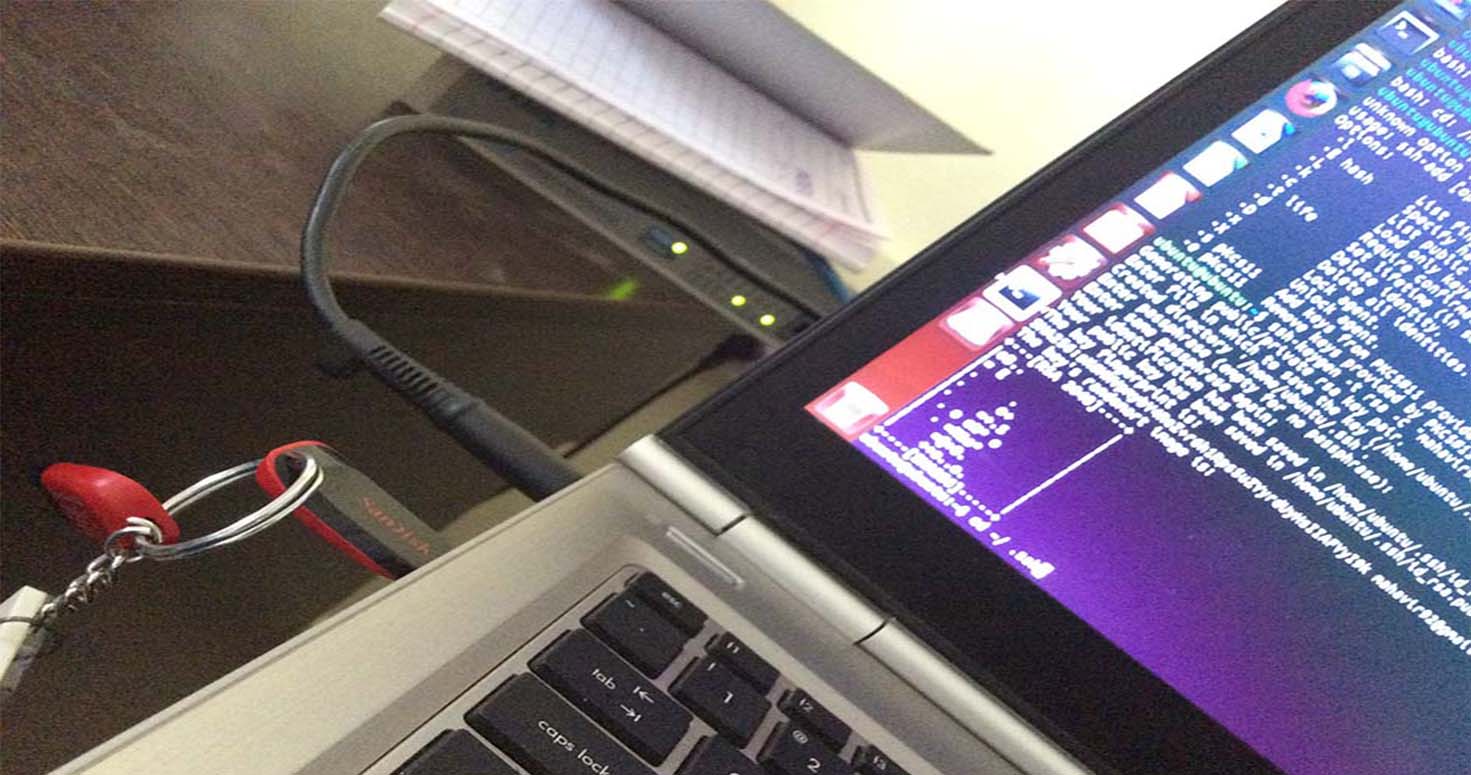
2. First Date with GIT
USING:
HP laptop, Bootable Ubuntu 16.4 version 8 GB USBWhat is GIT?
Git is a free and open source distributed version control system designed to handle everything from small to very large projects with speed and efficiency.
If you plan to maintain parallel, largely shared but permanently somewhat different lines of the same product, use Git. Many VC software exist, the most popular are Subversion, Mercurial and GIT. Each has his strength and weaknesses. The most used worldwide is GIT and even we in Fab academy will be using GIT.
GIT vs MERCURIAL
Fab Academy was earlier Mercurial. But we will be using GIT.
So it makes it essential to study the difference between the two. I have gathered some information over it by interacting with earler fab academy students like our instructors and by searching online.
Why GIT
This is the main thing to remember about Git if you want the rest of your learning process to go smoothly. Git has three main states that your files can reside in: committed, modified, and staged. Committed means that the data is safely stored in your local database. Modified means that you have changed the file but have not committed it to your database yet. Staged means that you have marked a modified file in its current version to go into your next commit snapshot.This leads us to the three main sections of a Git project: the Git directory, the working tree, and the staging area.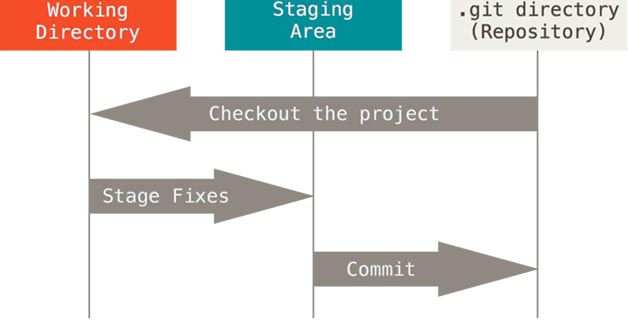
The basic Git workflow goes something like this:
-You modify files in your working tree.
-You stage the files, adding snapshots of them to your staging area.
-You do a commit, which takes the files as they are in the staging area and stores that snapshot permanently to your Git directory.
Source: READ MORE ABOUT GIT
Installing GIT
Our instructor suhasji explained us the Ubuntu's Interface. After that, I tried installing GIT. Following steps were taken for the same:STEP 1 : Attach USB with Ubuntu
STEP 2: Click try Ubuntu
STEP 3: First open your account on fablab.io
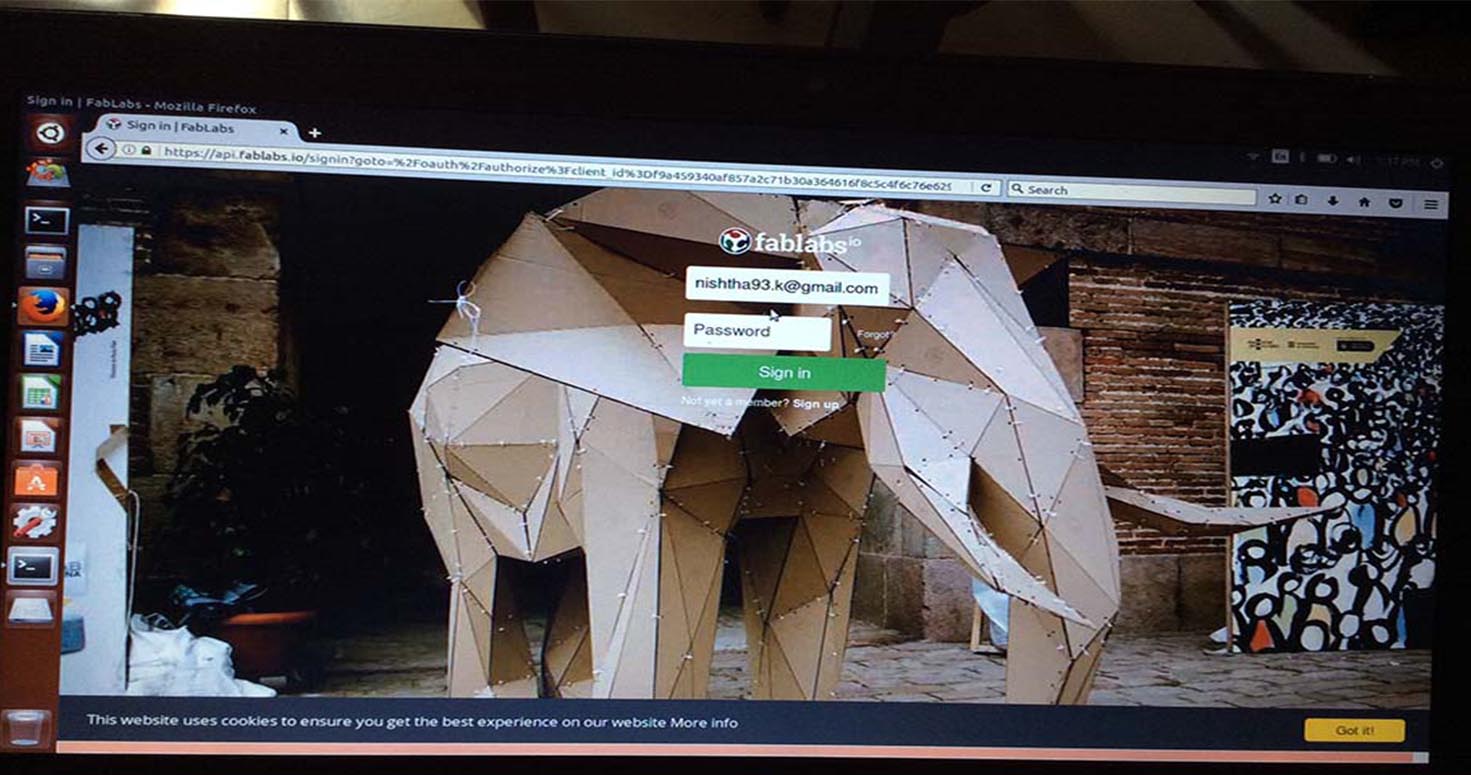
Make sure about username, email ID and password.
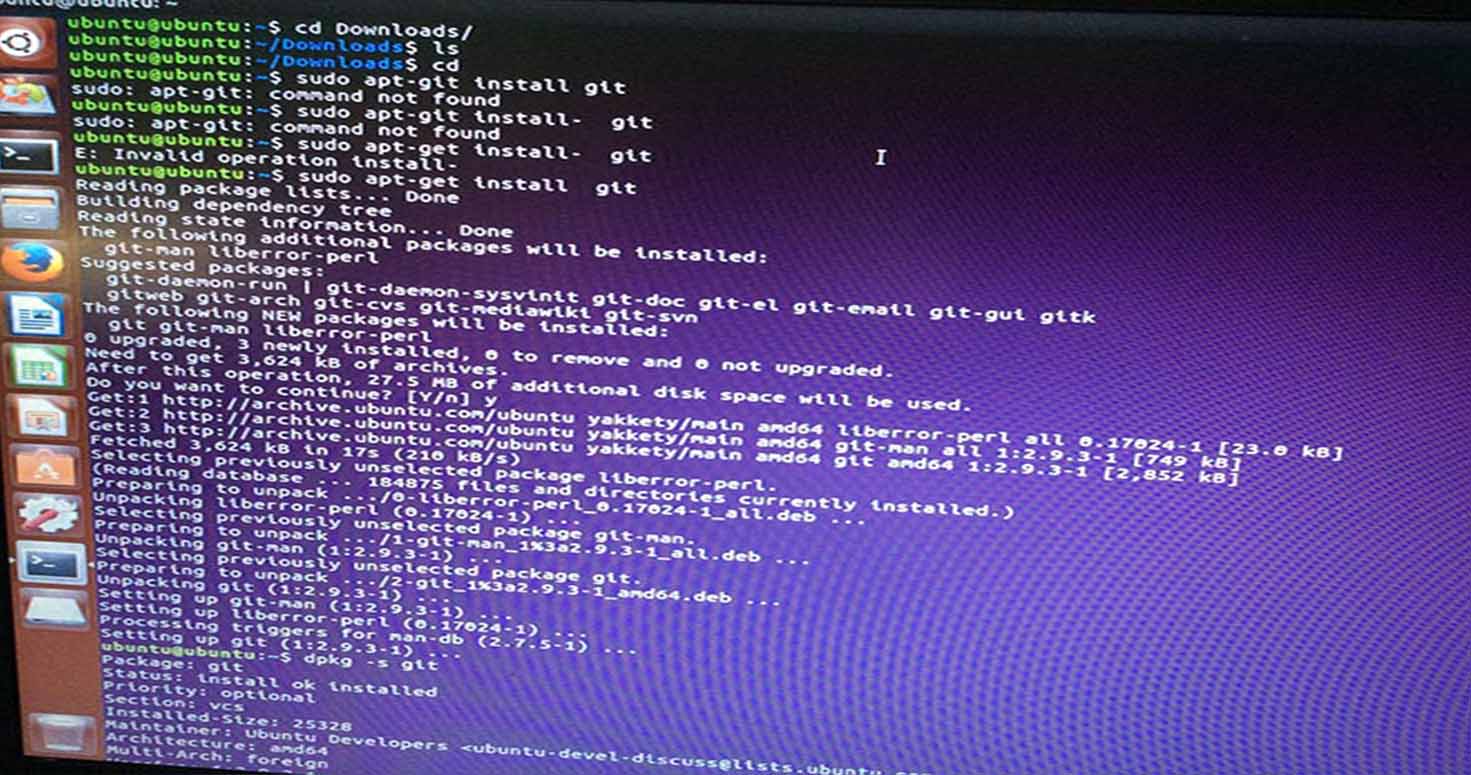
STEP 4: Open Terminal and follow the following steps to install GIT in your Linux system with following commands:
sudo apt-get install git –y
STEP 5: Check whether its installed or not with command:
dpkg -s git
STEP 6: Generation of new SSH key ( First to flush out all ssh keys from ssh folder. For this use command )
cd ~/.ssh #navigate to .ssh folder
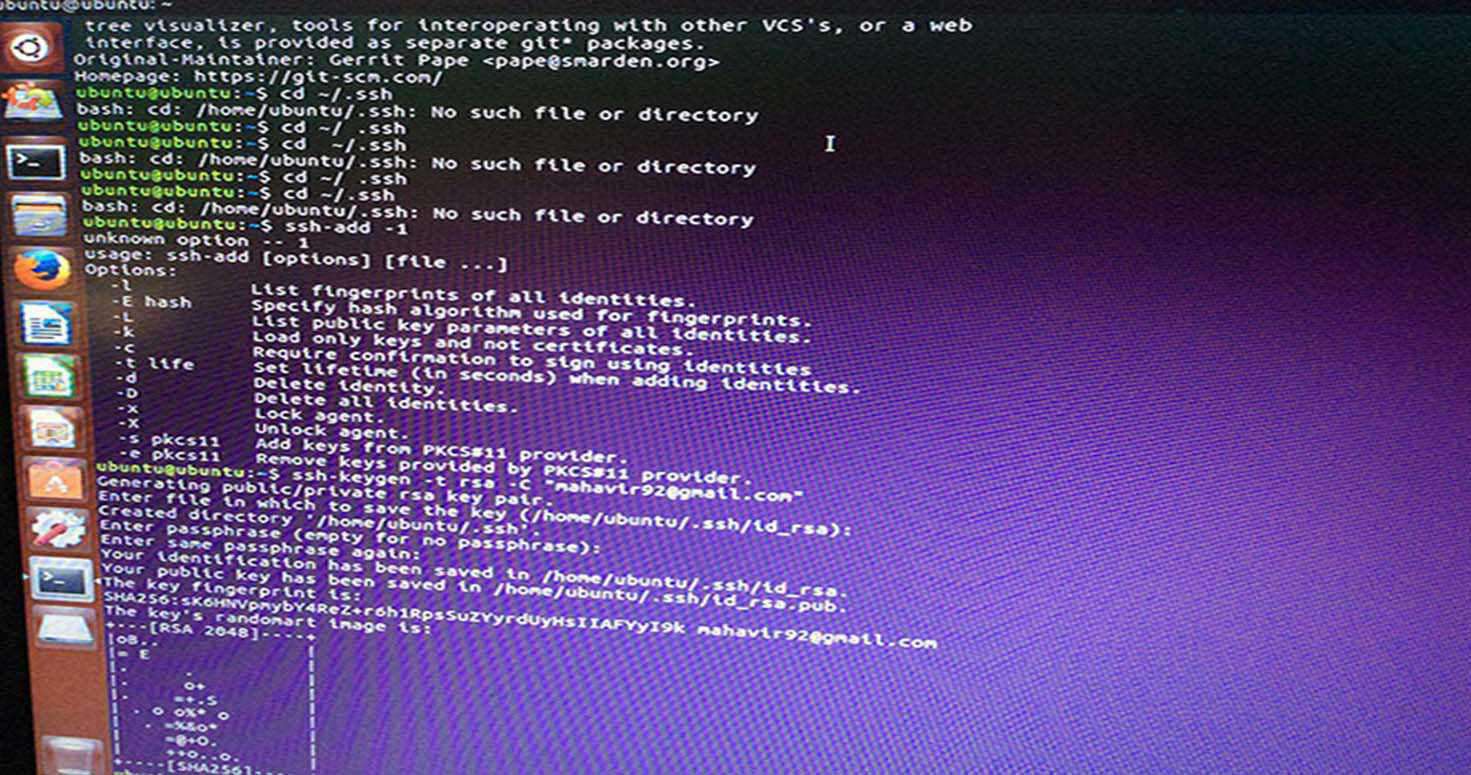
rm * #delete everything present
STEP 7: If not present, Proceed with this
ssh-add -l #list out all the keys installed currently
STEP 8: Generate the new ssh key as follows:
  ssh-keygen -t rsa -C "youremail@domain.com"

#replace with your email id, when prompted press enter to accept the defaults
  ssh-add ~/.ssh/id_rsa

#this will add the key into ssh-agent
  xclip -sel clip < ~/.ssh/id_rsa.pub

#by-default it creates id_rsa file. If you have changed the defaults then replace that with this
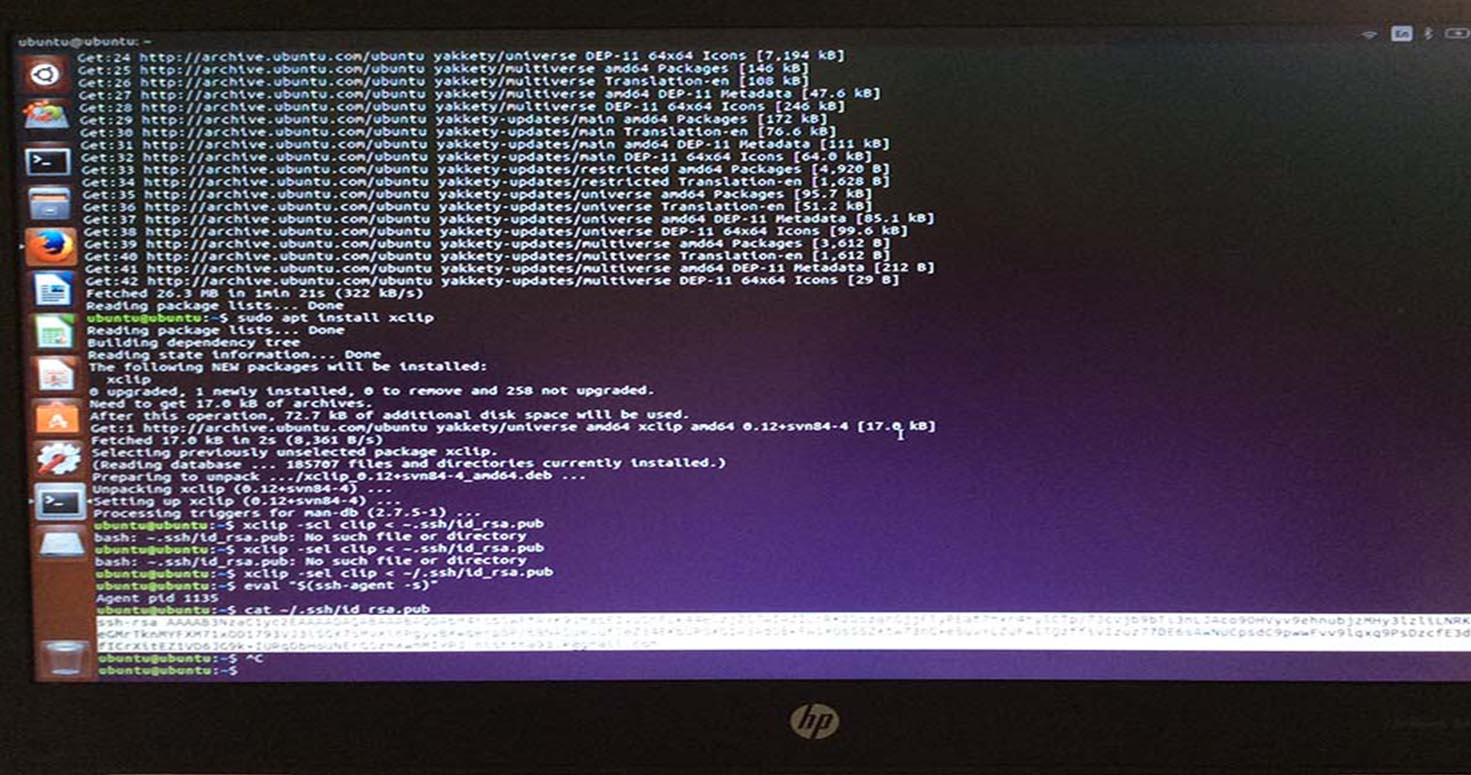
STEP 8: Now if you are setting up Ubuntu first time, it will prompt XCLIP- package not found.
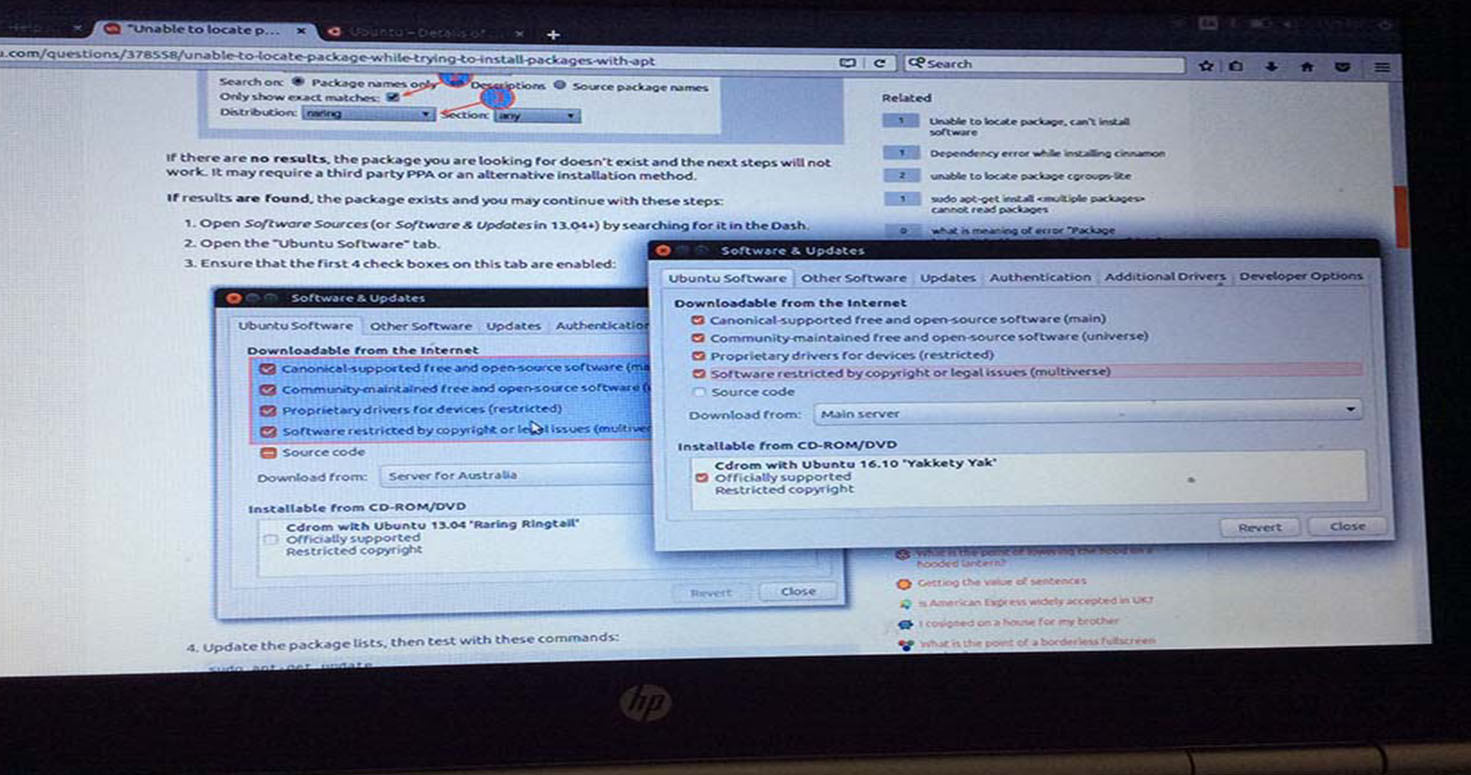
sudo apt install xclip
xclip -sel clip ~/.ssh/id_rsa.pub

sudo apt-getupdate
eval $(ssh-agent -s) #It will show the agent pid (four digit)
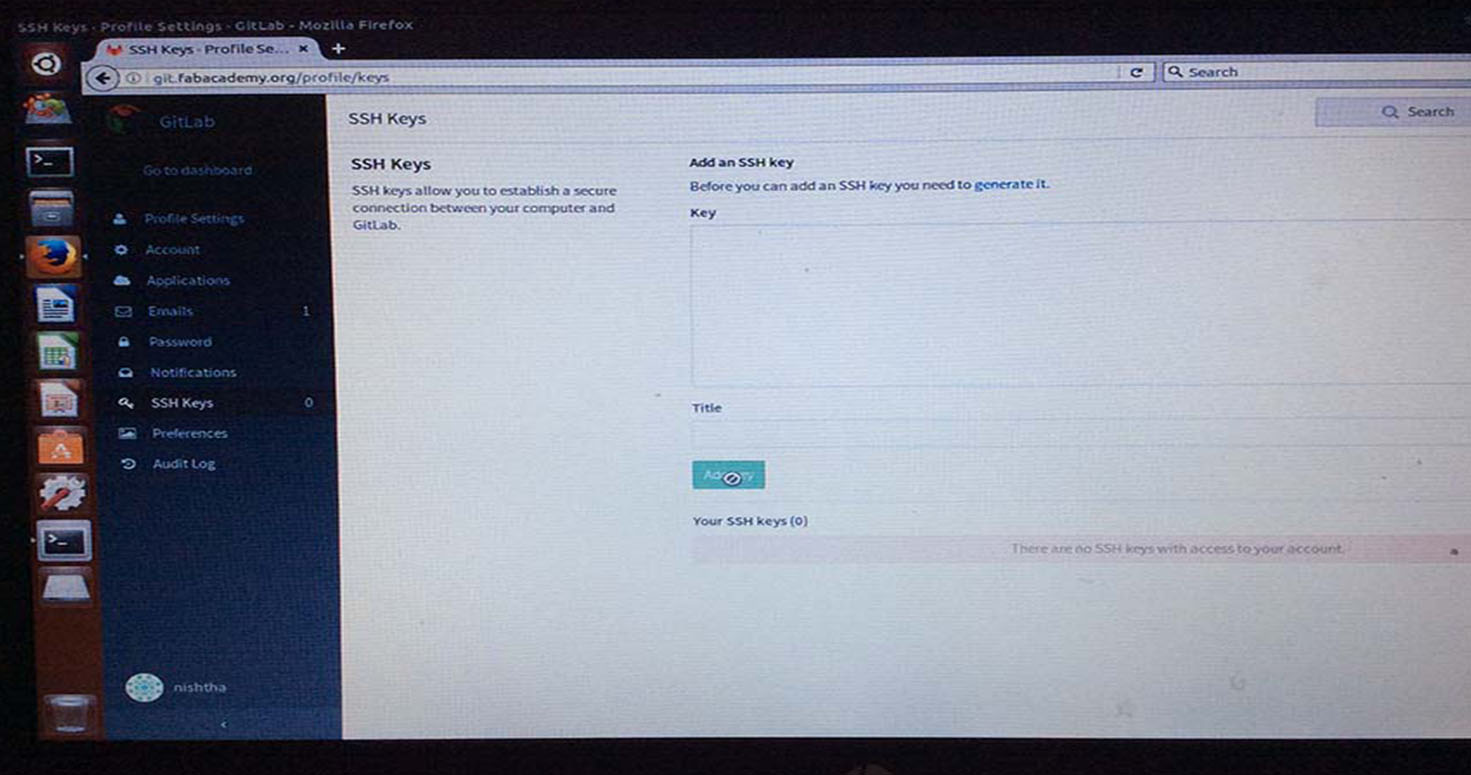
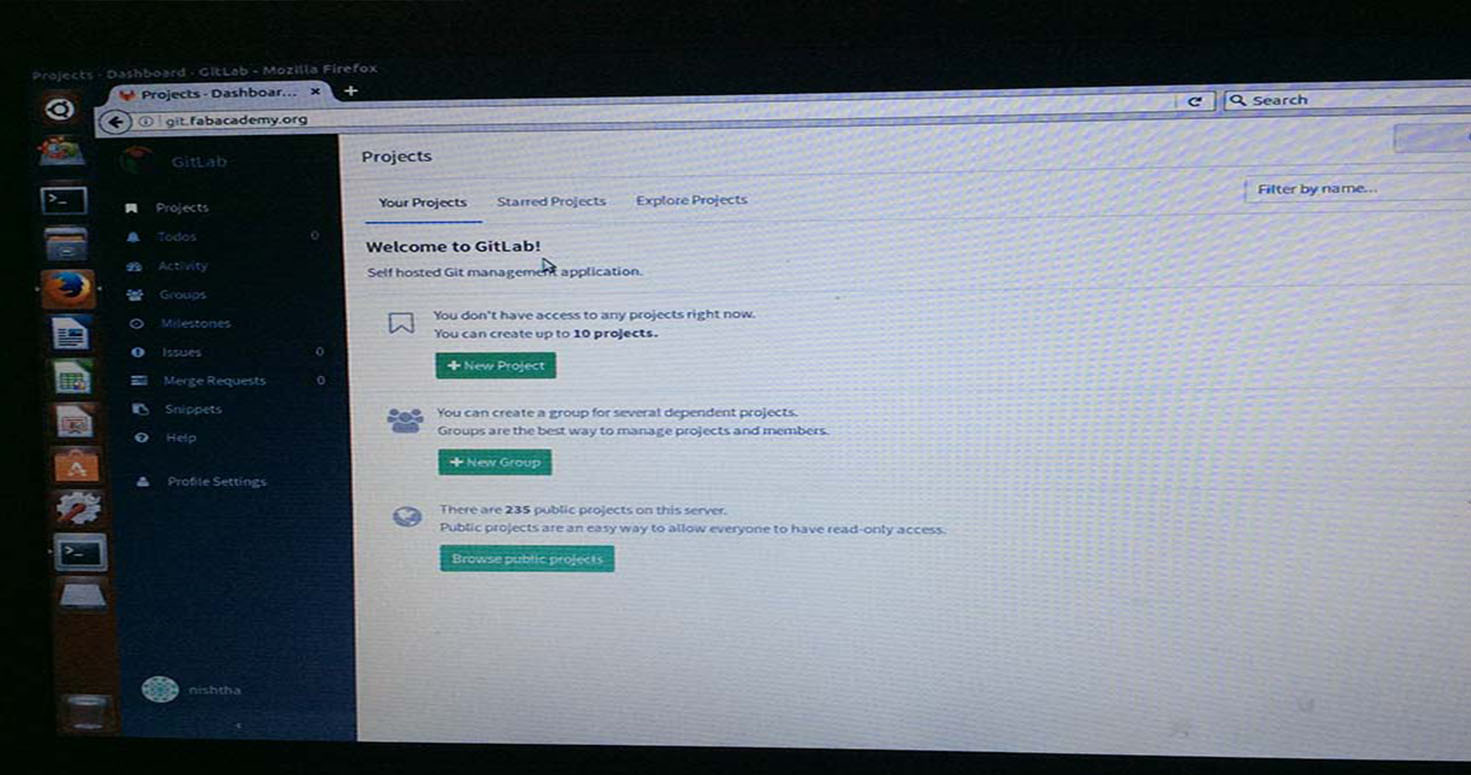
STEP 9: Go to git.fabacademy.org -> Sign in user credentials.
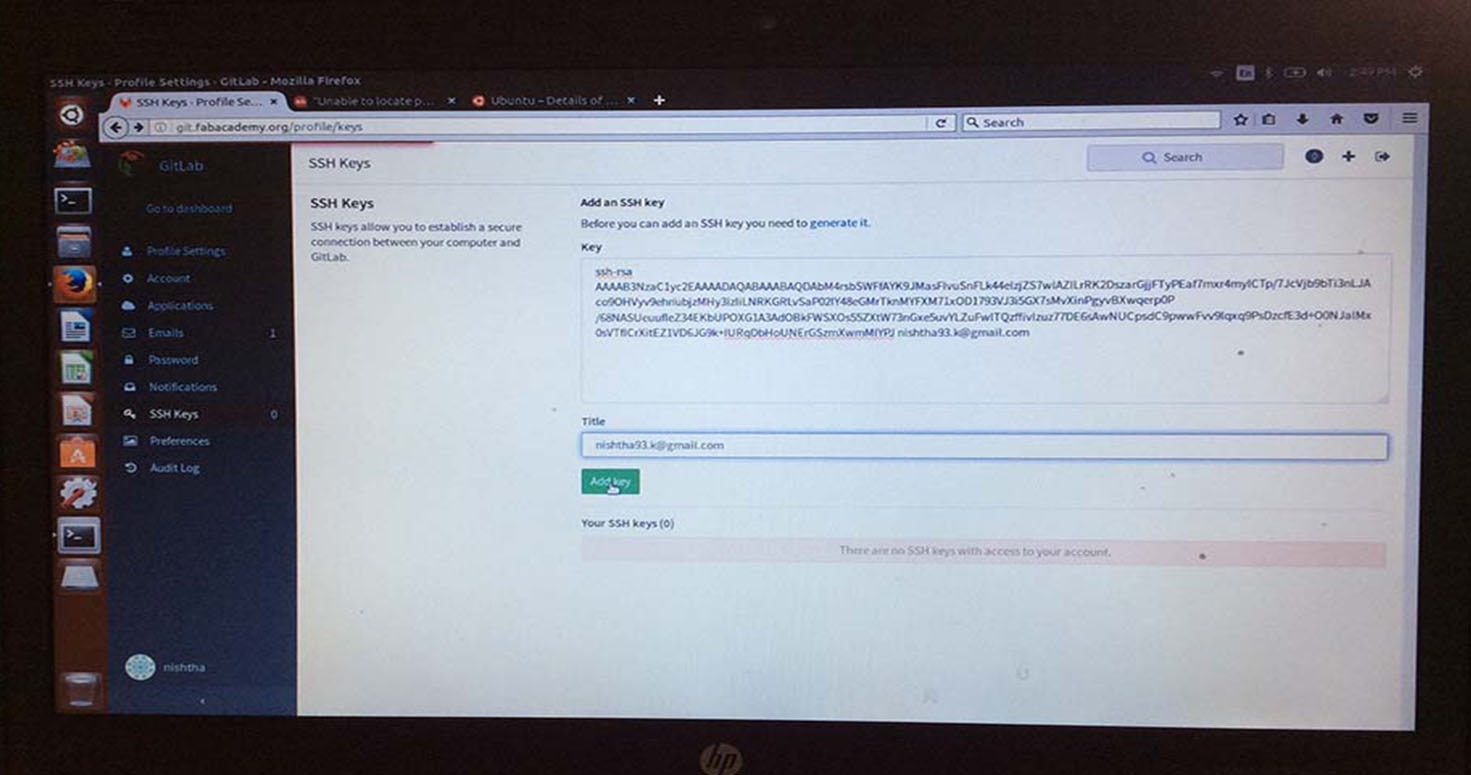
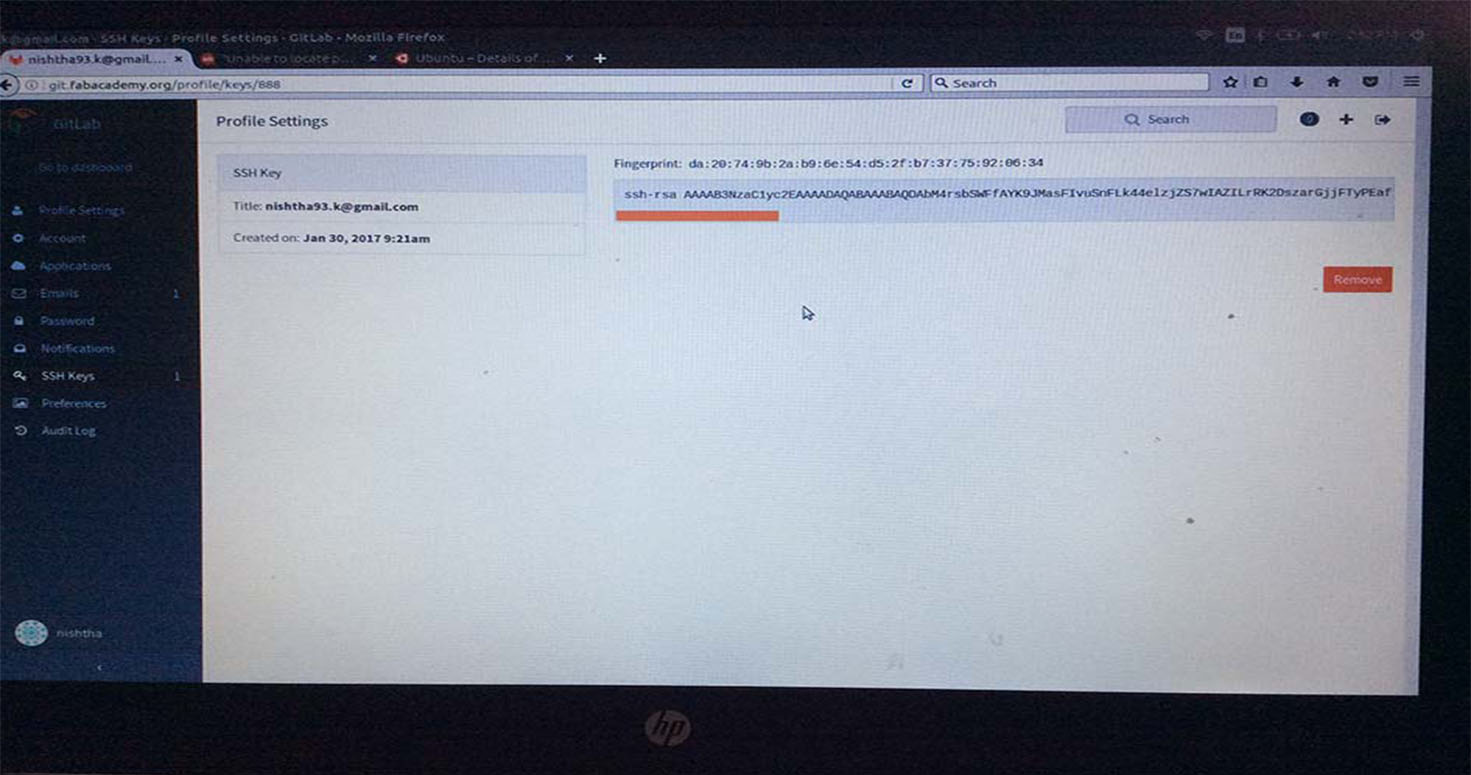
Half Red bar in above picture is not a processing bar, it scrolls to show whole code, Please dont mistake it as if its processing the key.
STEP 9: Go back to the terminal.
cat ~/.ssh/id_rsa.pub #Paste the ssh key from your account
eval "$(ssh-agent -s)
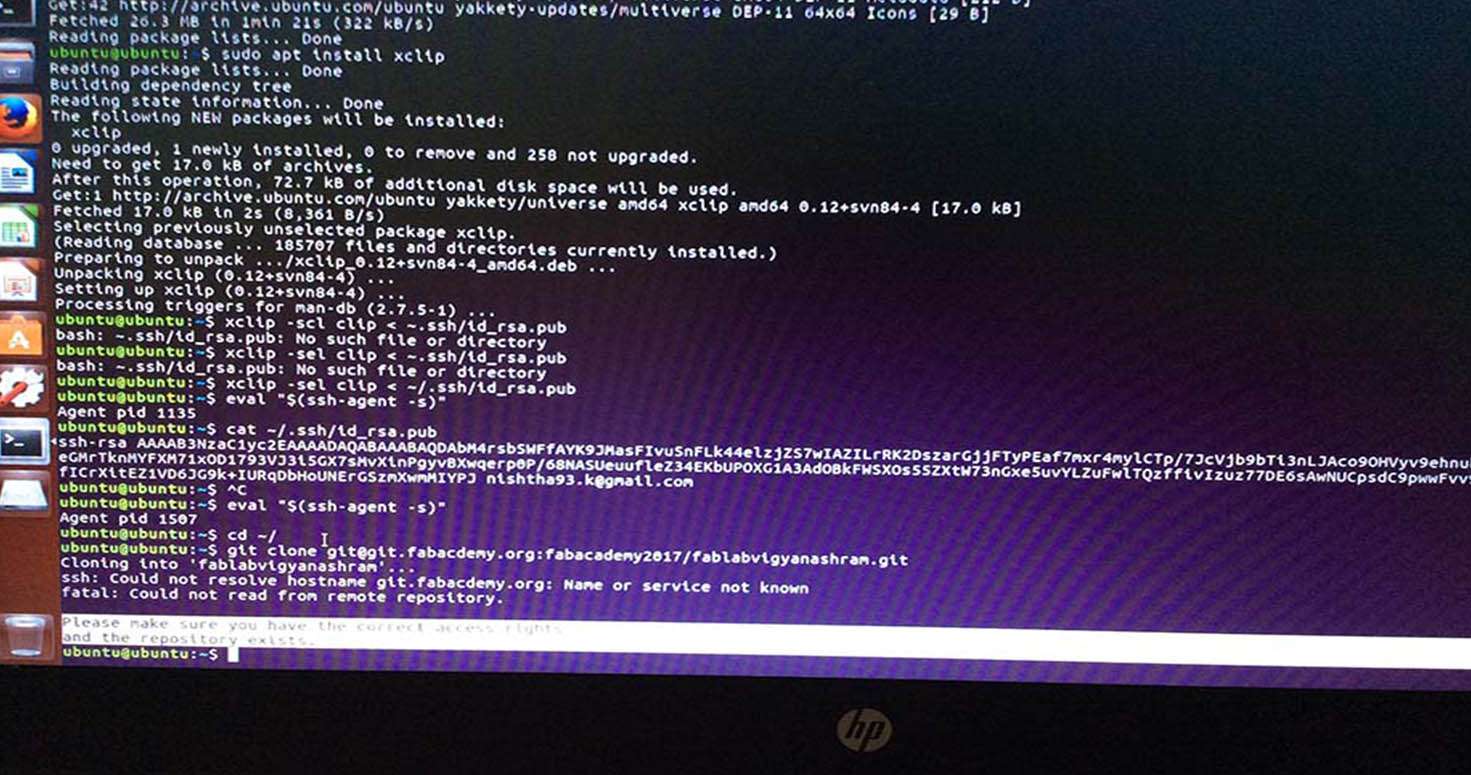
STEP 10: Let's try to get the data from our repository. To clone the repository you can choose your favorite folder, I'll be using my home folder to clone the repository
cd ~/ #this will take terminal to your Home directory
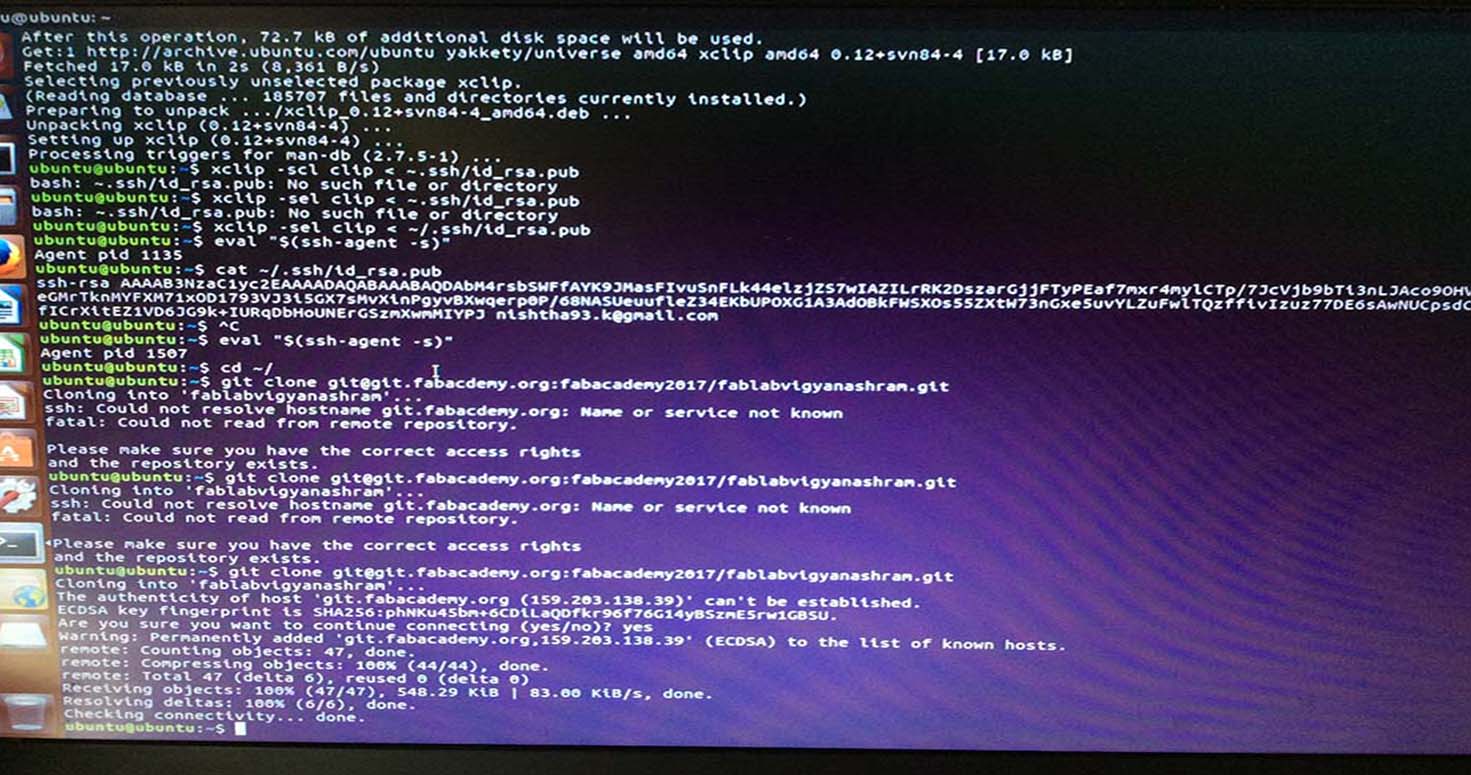
git clone git@git.fabacademy.org:fabacademy2017/fablabvigyanashram.git
cd ~/fablabvigyanashram #replace this with your repository folder
  NOW TYPE THE FOLLOWING:

git config --global user.name "yourname"
    #press enter
git config --global user.email "youremail"
    #press enter
git config --global push.default simple
    #press enter
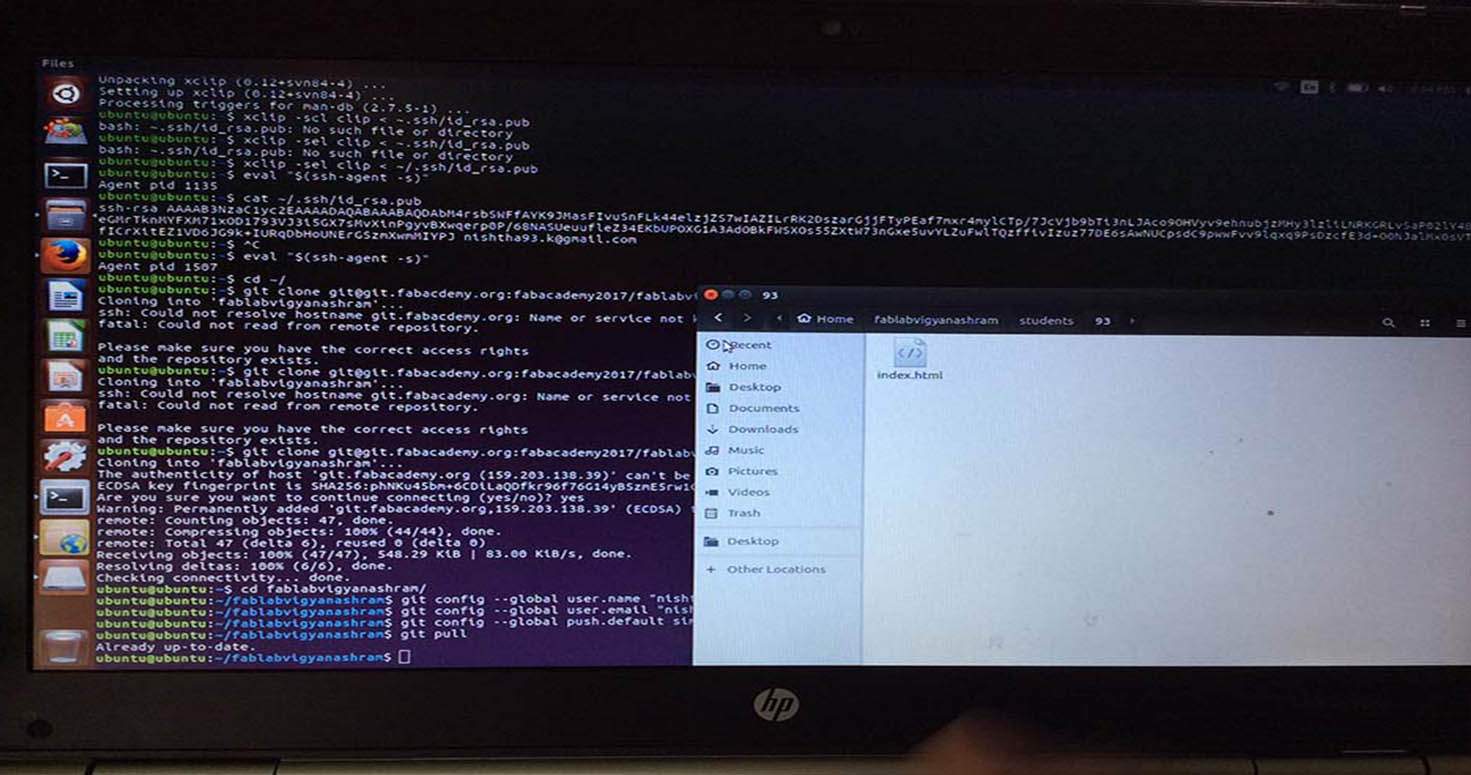
cd ~/fablabvigyanashram   #change directory to folder fablabvigyan ashram

Git pull                  #pull from the repository


Before typing next command, open your fablabvigyan ashram folder manually, copy paste your files in your folder , i did in students, folder of my student id.

Then type in the command line, after pasting

Git add --all             #add your changes

Git commit -m "message    #message which will identify user and purpose of commit

Git push                  #to push your work to the repository
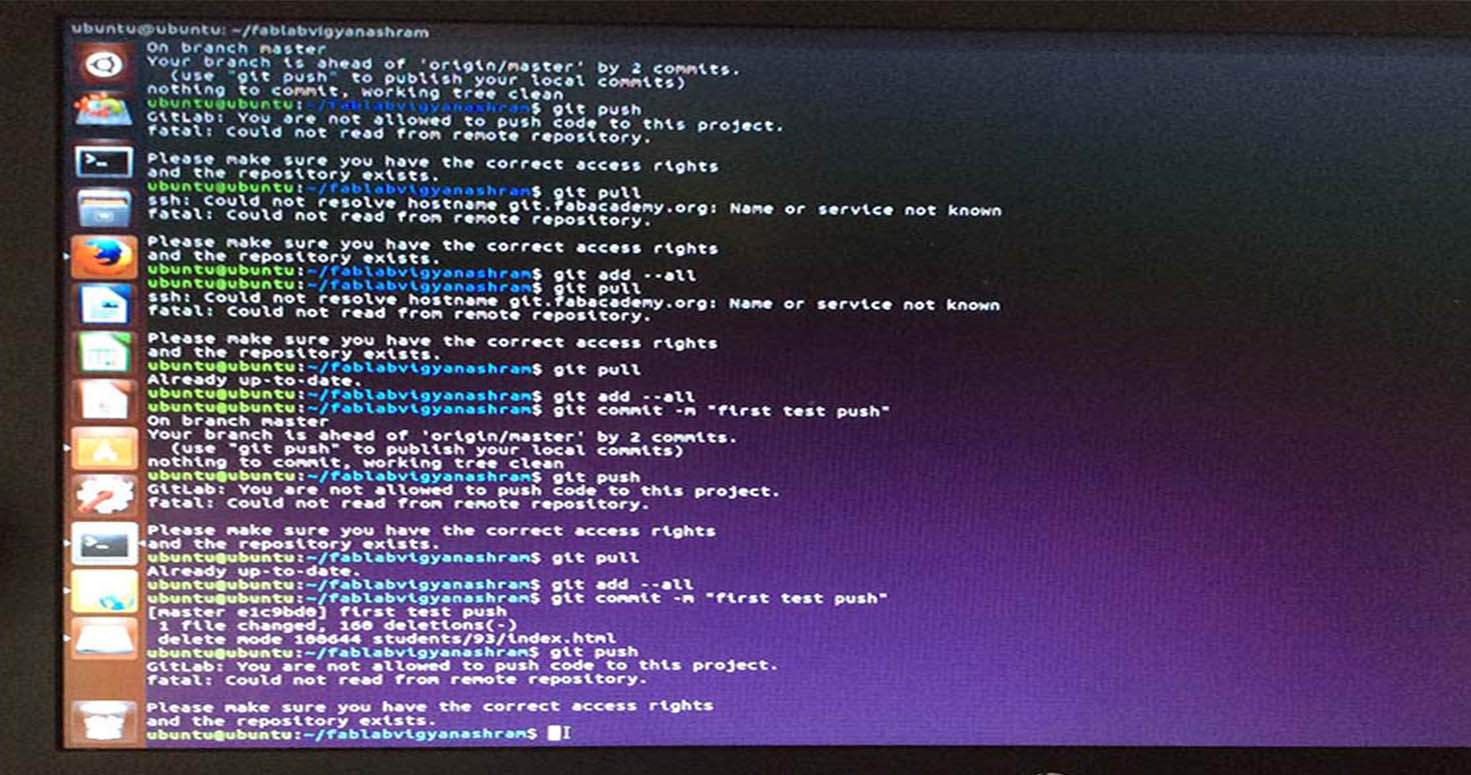
We were unable to do because of slow internet in Pabal. We rebooted to see the changes, and we realised that we have to do all again from starting.So we pushed our websites from Suhas desktop for time being but we will try pushing assignment once again from bootable UBUNTU.
Installationing GIT again on 1/02/2017
We tried bootable UBUNTU again and we were getting errors, probably because I was missing some step while givng commands. Even my classmate Mahavir, tried Bootable ubuntu but we failed to do so. So while we both were figuring out, we ended up installing UBUNTU and keeping partition as default, we ended up my laptop running only when 2 pendrives were used together. This means that installation of ubuntu was divided into both pendrives. But we were not able to run Windows, after lot of efforts by making changes in Boot setup , we got grut rescue as the option.
Later on, after reinstalling Ubuntu and changing USB as first bootable priority, we were able to recover my windows and have UBUNTU and Windows both together in my laptop.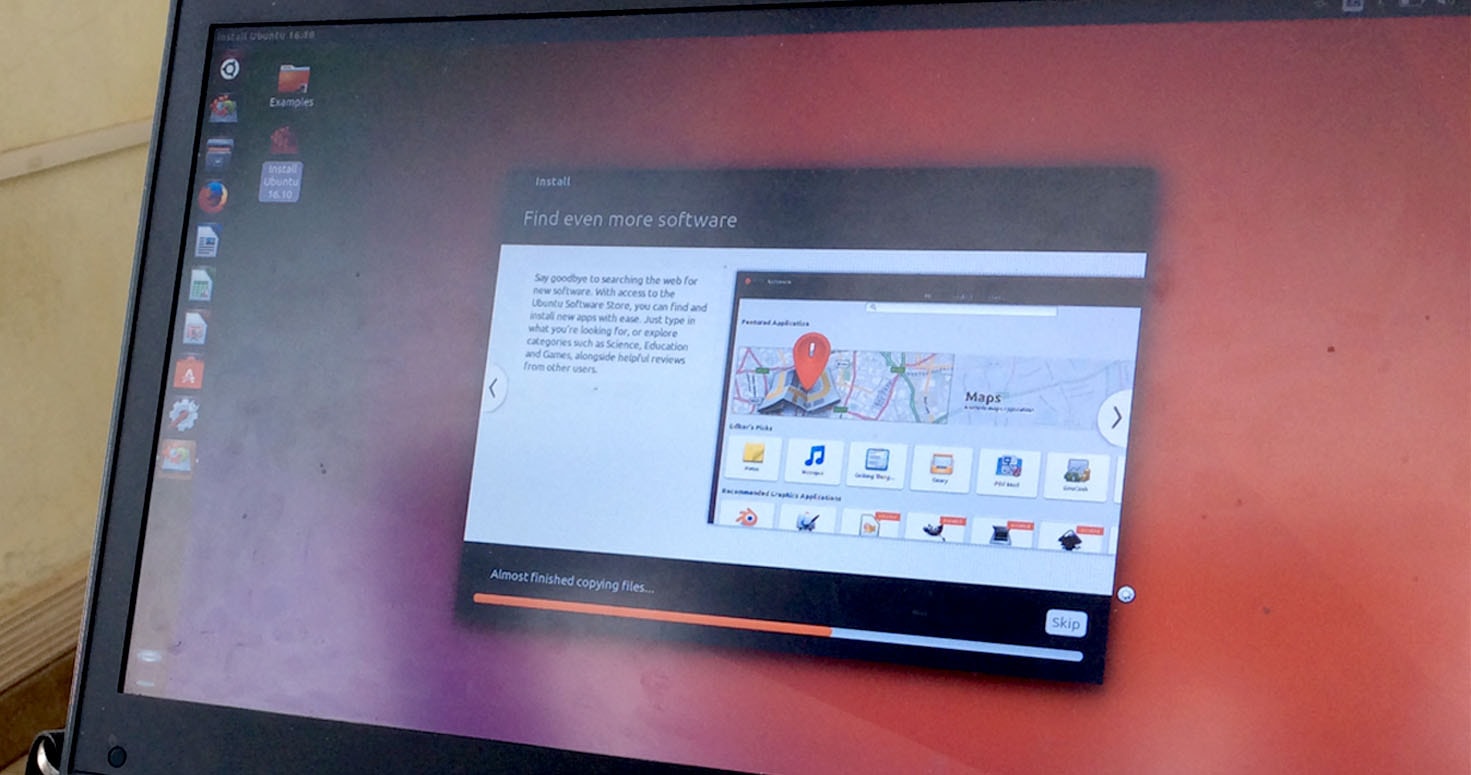
About the pendrives, we havent tried them yet if they both put together, do they help having Windows and UBUNTU together. We tried installing GIT, again we got few errors. So, I again pushed my assignment from my instructors laptop. So we preffered seeking our instructors help later on.
Installationing GIT again on 08/02/2017
Today, I was able to get GIT on my system with the same steps i mentioned in the beginning and ready to push my assignment tomorrow.
Finally GIT
I was able to push my folder on GIT and also pushed assignments of my classmates, its great feeling to learn commands and I even asked our instructor to explain me the meaning of commands like why we use ~/ or cd etc. I have started to like UBUNTU.
3. Video Conferencing
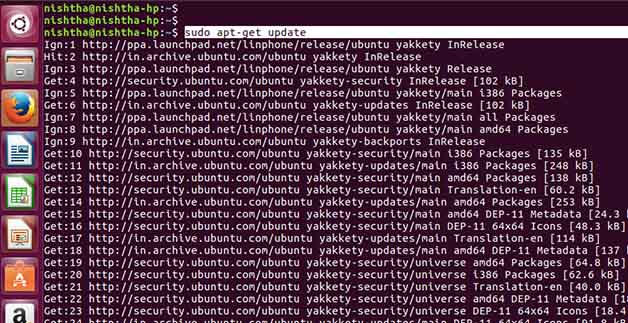
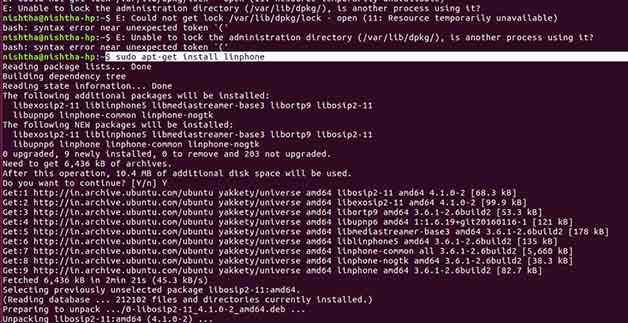
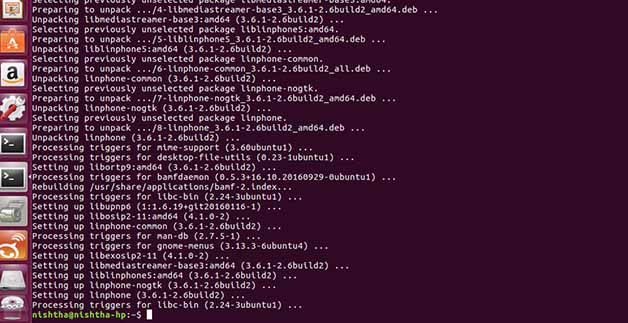
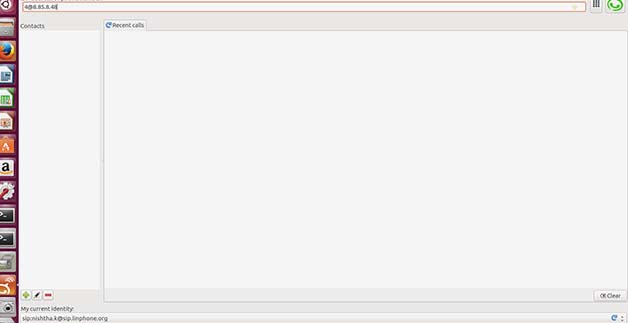
We did our first Video Conferencing on 30.01.2017 with Dr.Neil Gershenfeld (Director of Massachusetts Institute of Technology's Center of Bits and Atoms) through MCU with the help of CISCO SPARK, as I have windows 10 and Cisco Spark was not allowing me to make calls and join the channel so I downloaded BLUE STACK, an emulator which helped me use CISCO SPARK, I also installed Ekiga but I prefer Cisco Spark now. You can also use Ekiga , Linphone, Polycom system. I installed Linphone on my linux, in my Ipad and my Iphone 6.
Using it on Iphone is very handy and useful on the go.
Installing Linphone:
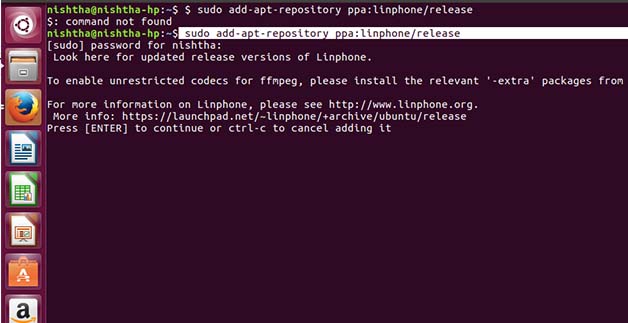

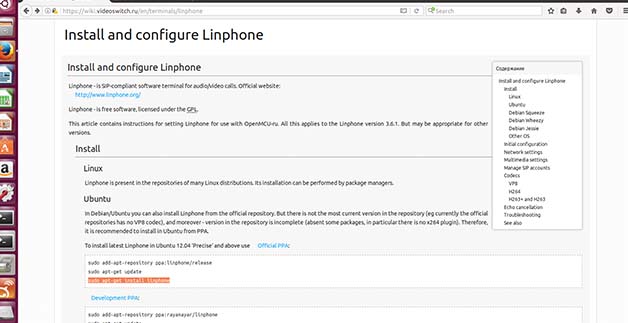
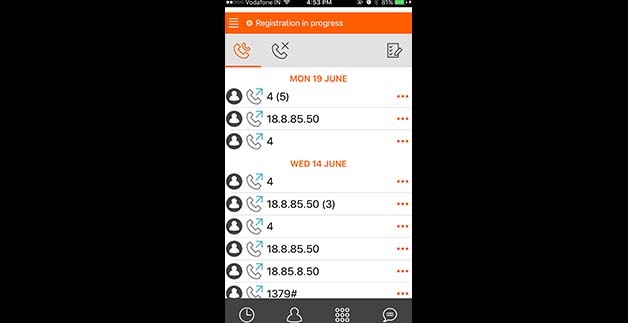
Linphone on IPHONE 6:
Now, we use MCU through Polycom device in ashram.
4.Project Development:
 Be it home, office, makerspace or a fablab or any lab with tools, If you are a user of tools you will always end up losing those hammers under your stuff or forget where you kept your drill or not even keep it back to its place and as a owner or management of such place you will always want to keep track of such expensive and necessary tools in your lab or workplace. Also, it would be wonderful to even know who took it and when.
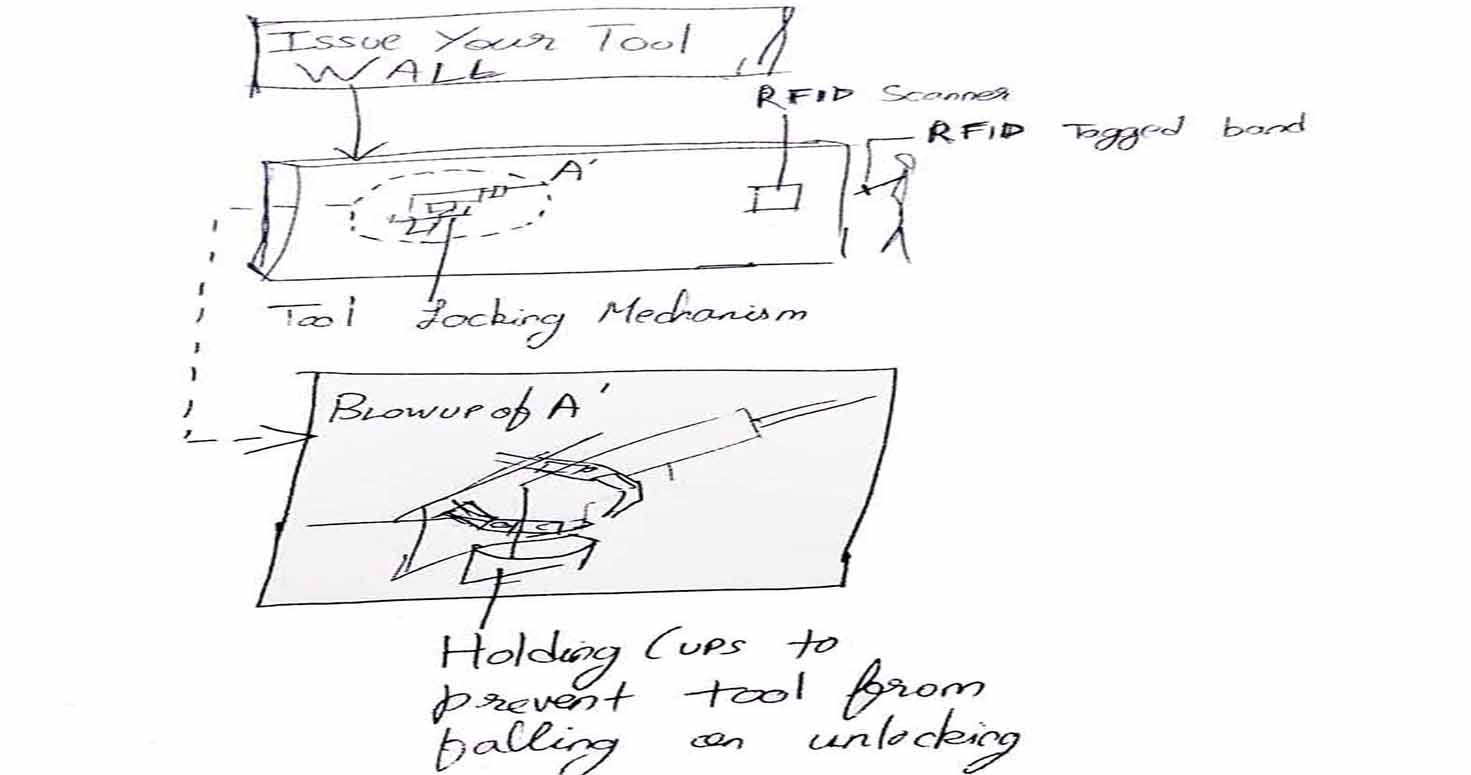
My project is called "Issue your tool"- its a tool managment system which is RFID enabled. So typically any person in a fablab/makerspace wears an elastic band which contains a rfid tag with all the information of that person within. In order to have him get issued a tool-he walks to a RFID scanner-scans his wrist and chooses the tools he needs from the screen. On checking out-the locks holding the tools open up and allows the person to remove it from the tool holder. The tool holder opens again-once the person comes to return it and approaches the rfid reader. He returns the tools and the tool holders lock in to the tool. Helps in inventory management and revenue model for makerspaces and fablabs.
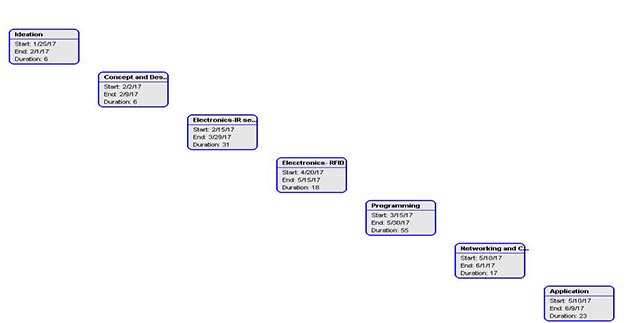
My project Plan is the following:
I tried various tools like Trello , Taiga, Gant chart, Ganttology etc, but they all being online, it was difficult to use as we have inconsistent internet here.
So i switched to offline Gant chart.

But i was not following it , so i thought trying trello.
I then used Trello, You can find the link here of MY PROJECT PLAN
but it couldnt find the graph feature of trello , so wasnt able to mark my tasks completed.
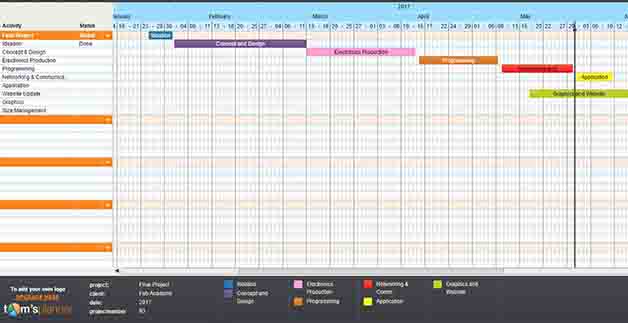
So after searching more i found these two, Tom's Planner and Gantpro, gant pro covers very less in free account so you dont even get to experience enough to understand if i should buy it or not.
Finally i switched to Tom Planner.
Hope its helpful for you.
It looks something like this:
IMPROVISATIONS IN THE PROJECT can be discovered on FINAL PROJECT PAGE
•ADDITIONAL STORIES
-We are in Vigyan Ashram for fab academy from Chandigarh. Its a very new and unique experience to stay here for fab academy, know new people, learn from each one of them and understand a community so deeply. Understand the culture of this community, observe the values and beliefs they have acquired from none other than this ashram and people who visit it.
-Have great team of people which brings positive energy to me and my Company's co-Partner Mahavir Singh.
- We also had our first Regional review which was really supportive experience , taken by Pradanya with all Indian fabbers.
