What is Interface and Application Programming ?
An application program (sometimes shortened to application) is any program designed to perform a specific function directly for the user or, in some cases, for another application program. Examples of application programs include word processors; database programs; Web browsers; development tools; drawing, paint, and image editing programs; and communication programs. Application programs use the services of the computer's operating system and other supporting programs. The formal requests for services and means of communicating with other programs that a programmer uses in writing an application program is called the application program interface (API).
An application programming interface (API) is a set of subroutine definitions, protocols, and tools for building application software. In general terms, it is a set of clearly defined methods of communication between various software components. A good API makes it easier to develop a computer program by providing all the building blocks, which are then put together by the programmer. An API may be for a web-based system, operating system, database system, computer hardware or software library. An API specification can take many forms, but often includes specifications for routines, data structures, object classes, variables or remote calls. POSIX, Microsoft Windows API, the C++ Standard Template Library and Java APIs are examples of different forms of APIs. Documentation for the API is usually provided to facilitate usage.
Workflow of making Interface and Application Programming
i have decided to build a application which reads data from the buletooth and sends the values of Temperature to screen, My plan is to make an android app to interface DHT11 sensor and the board designed in the week15 and Bluetooth module HC05 using MIT's app inventor.
App inventor
App inventor is a cloud based software provided by Google and maintained by MIT to create applications for Android systems. First i have gone throuh the documentations and tutorials on how to make the app in appinventor.There is a colection of tutorials are available in mitappsinventorblog. You can follow this documentation on how to start designing apps using app inventor.
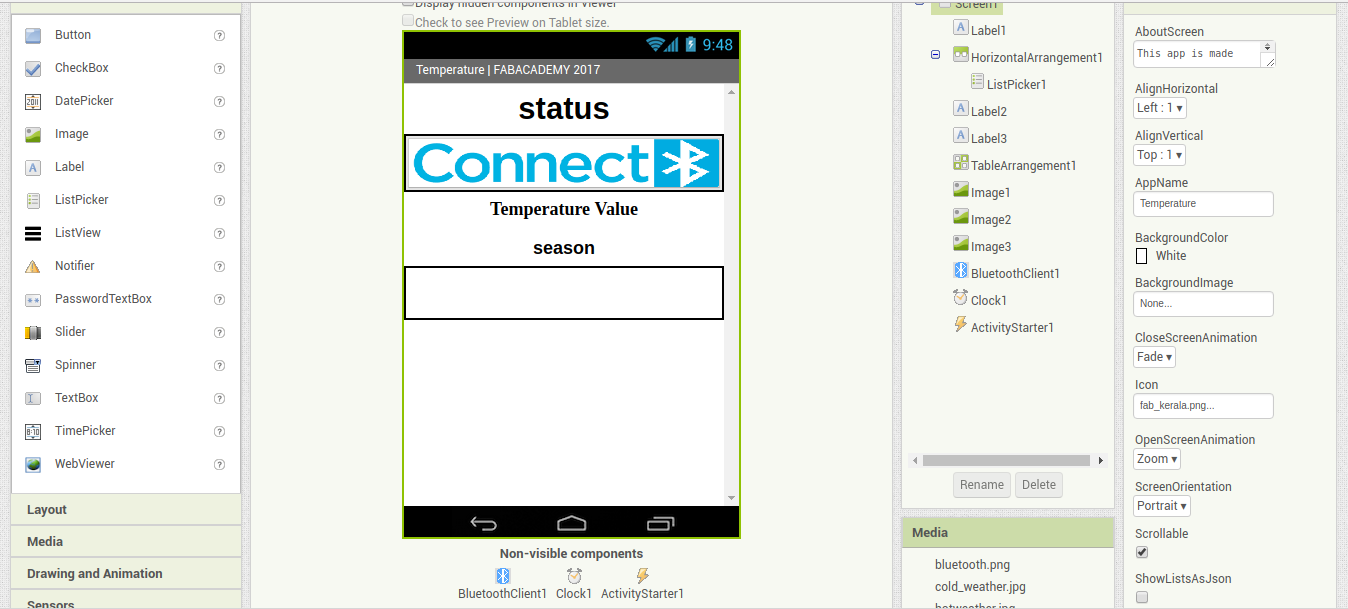
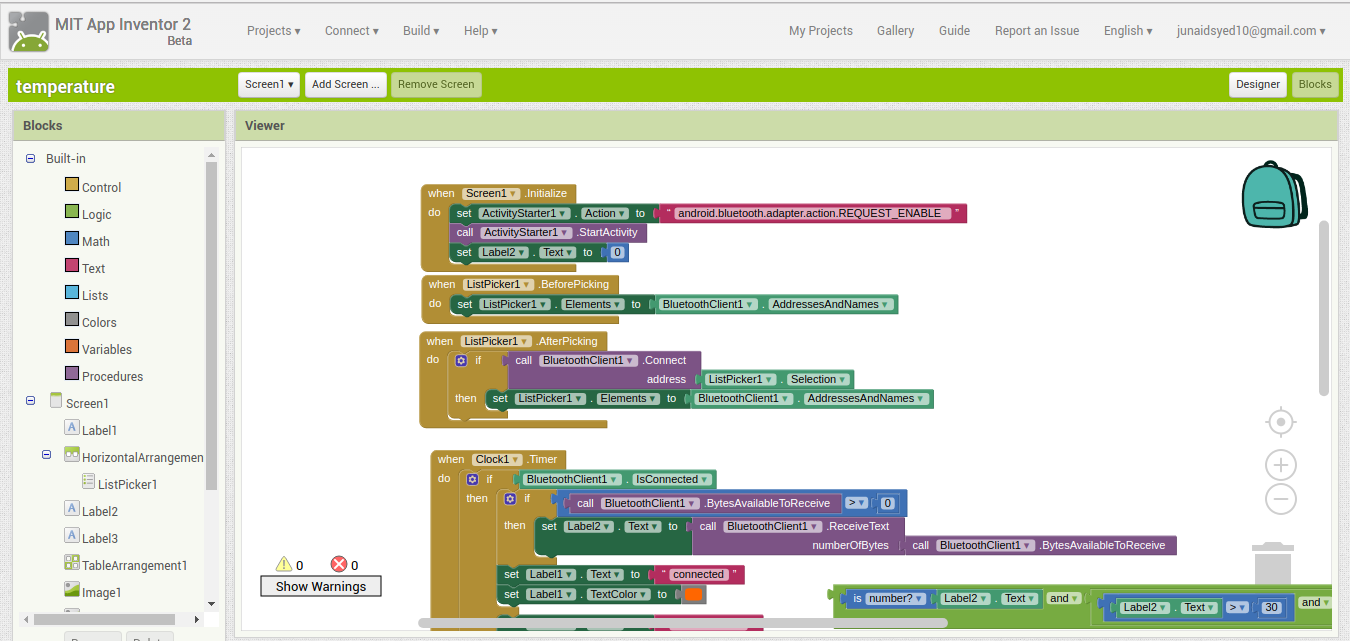
First i registered in the app inventor site app inventor. Start a New project ,then you will be directed to the designer window from here we can add the user interfaces like buttons, labels, textboxes, text to speetch etc. Next is the Blocks section after adding the user interfaces into the designer part we can move to blocks section. In the blocks editor the user interfaces we added from designer section can be connected to perform the tasks, for each user interfaces number of palettes will be available. The palettes can be picked and placed in the block design area and connected with other palettes.
Building the Temperature App
i have learned through couple of books and i have made the app using the MIT App inventor can seen here
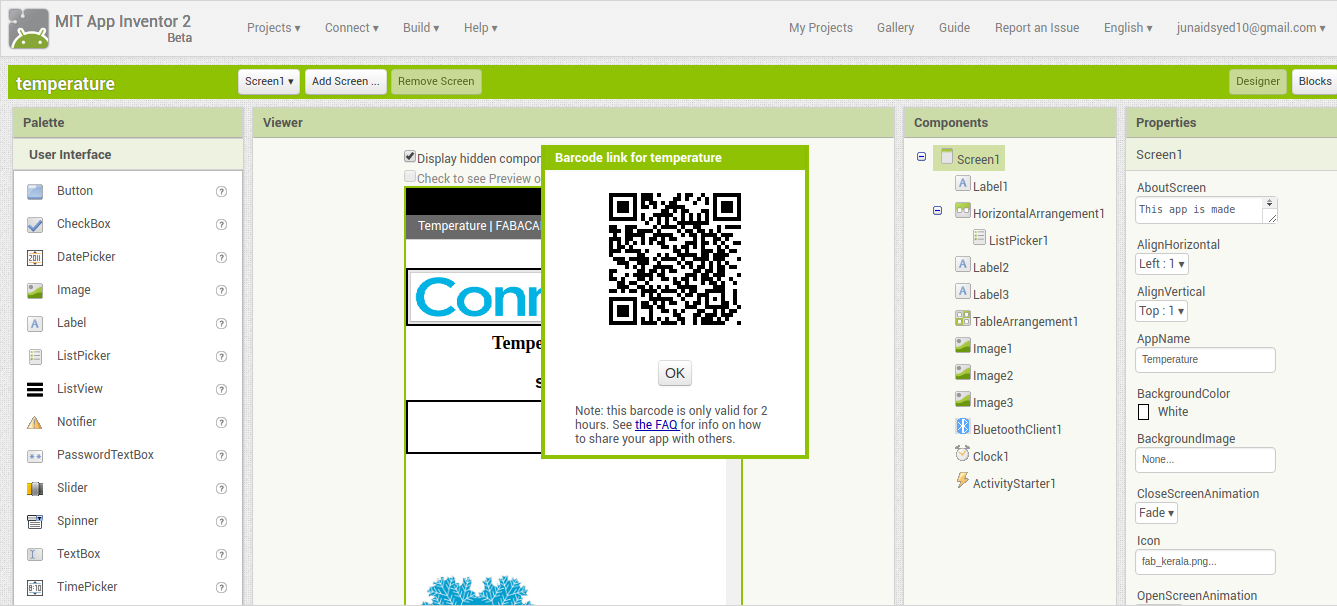
now finally download the app and upload the designed arduino code for the app
code for app
- #include<SoftwareSerial.h>
- #include "DHT.h" //include DHT library
- #define DHTPIN 2 //define as DHTPIN the Pin 2 used to connect the Sensor
- #define DHTTYPE DHT11 //define the sensor used(DHT11)
- int bluetoothTx = 10; // connect tx of bluetooth to 10th pin
- int bluetoothRx = 11; // connect rx of bluetooth to 11th pin
- SoftwareSerial bluetooth(bluetoothTx, bluetoothRx);
- DHT dht(DHTPIN, DHTTYPE);//create an instance of DHT
- void setup() {
- pinMode(3,OUTPUT);//blue pin of rgb led
- pinMode(4,OUTPUT);// green pin of rgb led
- pinMode(5,OUTPUT);//red pin of rgb led
- Serial.begin(9600);// serial communication begins
- delay(6000); //wait 6 seconds
- dht.begin(); //initialize the Serial communication
- bluetooth.begin(9600);// bluetooth communication begins
- }
- void loop() {
- float temp = dht.readTemperature(); // read Temperature as Celsius (the default)
- Serial.println(" "); //
- Serial.println(temp); // watch the current temperature in serial monitor
- bluetooth.print(" ");
- bluetooth.println(temp); // send temperature to bluetooth device
- delay(2000);
- if (temp <= 30){ // if temperature is below 30 turn on blue light
- digitalWrite(3,LOW);
- digitalWrite(4,LOW);
- digitalWrite(5,HIGH);
- }
- else if (temp >30 && temp <=34){ // if temp is above 30 and below 34 turn on green light
- digitalWrite(3,LOW);
- digitalWrite(4,HIGH);
- digitalWrite(5,LOW);
- }
- else if(temp >36){ // if temperature is above 36 turn on red light
- digitalWrite(3,HIGH);
- digitalWrite(4,LOW);
- digitalWrite(5,LOW);
- }
- }
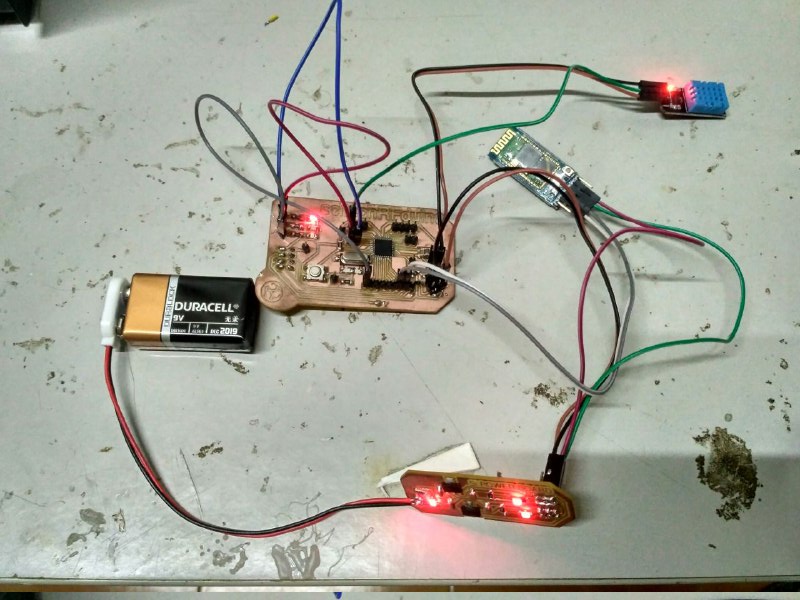
Error Faced
i have made a seperate power board for the week15 so i has lacking vcc and ground in the base board to supply the power to the sensor,so i have connected the sensor board with the power source and the power source of the board is seprate i was getting random weired value in app "nan" then i was able to find it kept the both one the same power source my app started reciving the correct data

Output working video and the download application below
Hero Shot
Now here we comes to the Hero Shot of this Week
Implimentation of Interface and Application Programming final Output
