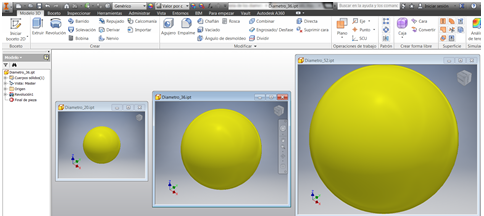
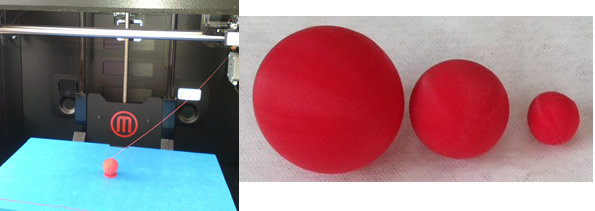
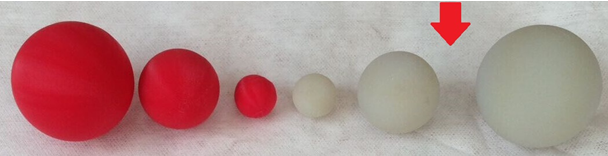
- Fabricate spheres with 20, 36, and 52 mm diameter
- Identify advantages and limitations of 3d printing tecnology
- Compare differences between Tecsup 3D printers
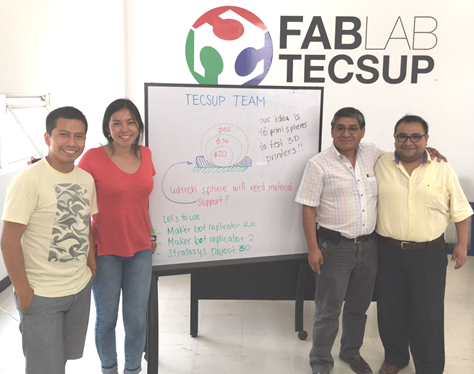
Tecsup Team:
* Jhon Lozano
* Ingrid Nunez
* David Maita
* Armando Sarco
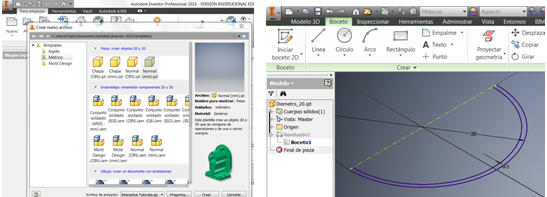
1 We choose together to manufacture the spheres we design and simulate with the software Inventor
2 We save and send with the extension you have in .stl
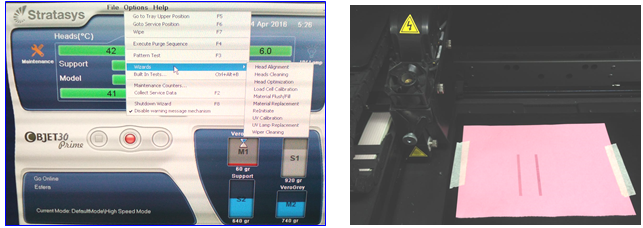
3 I sent Stratasys Objet prime 30 printer to the printer and the material we used was liquid resin
Vero Gray RGD850 before printing should be tested before printing.
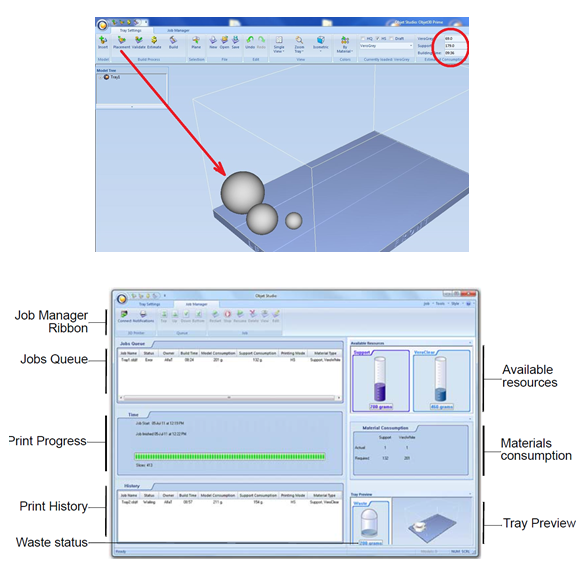
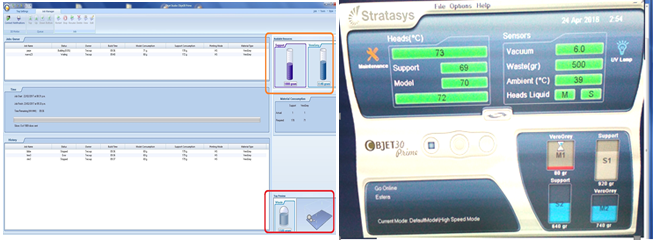
4 Visualize which is the distribution that generates the printer and also verify if the raw material if the volume is possible that it can print the spheres.
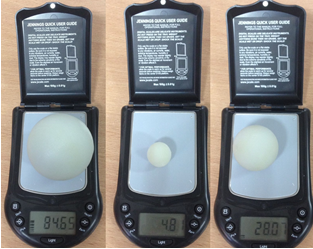
5 Then according to the temperature and speed, we insert the spheres, optimize the space, validate (Consumption of material, consumption of support and the time of printing)
After sending for printing I only wait 10 hours
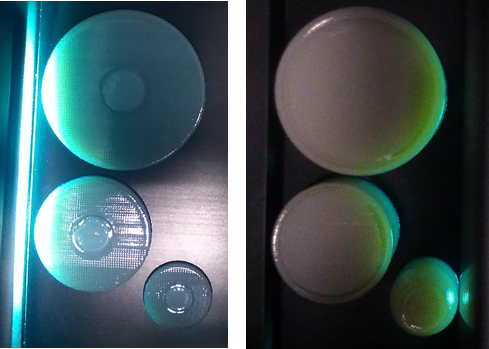
6 During printing, observe the following, after 50 minutes and after
4 hours.
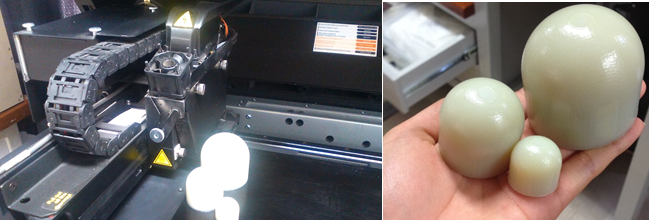
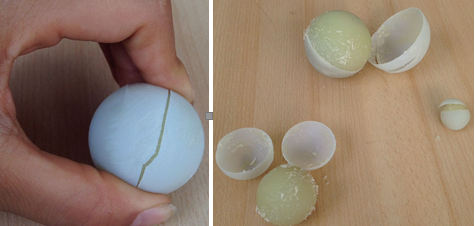
7 Printing completed after 10 hours, the media should now be removed from the printer.
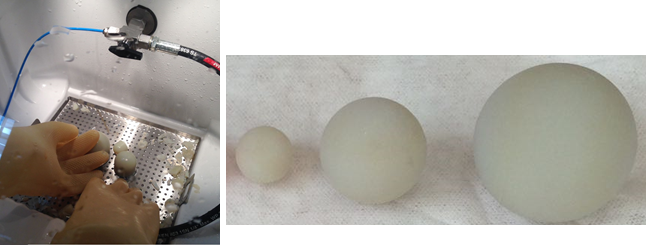
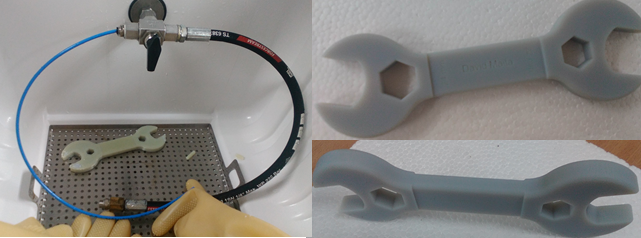
8 Use the laundry to remove the material from the stand and after manual drying we have our test spheres in the Statasys printer.
Watch the video: https://youtu.be/c-1qK3vpsgI
Important:
The support in compatible with the water then does not generate any contamination to the environment.
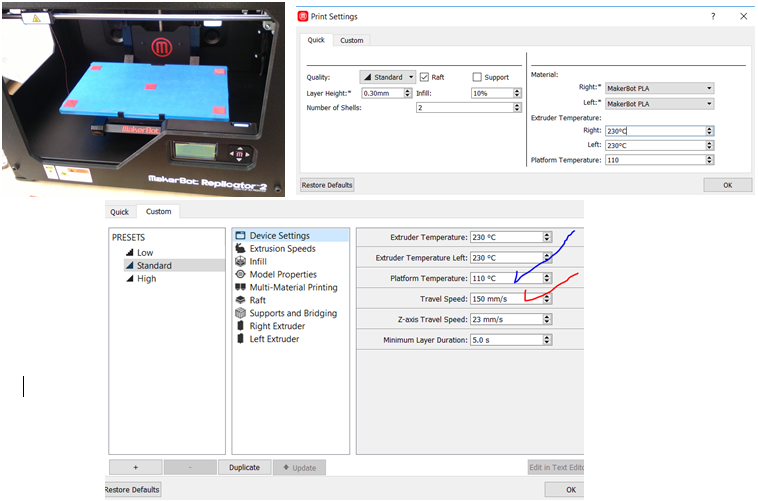
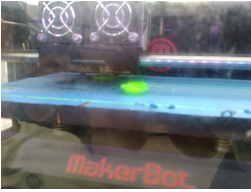
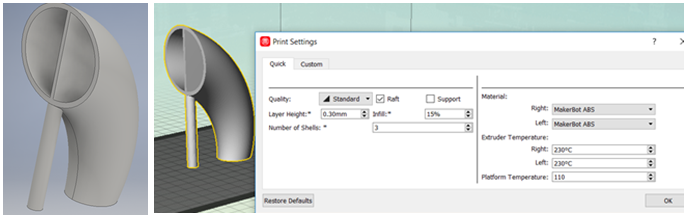
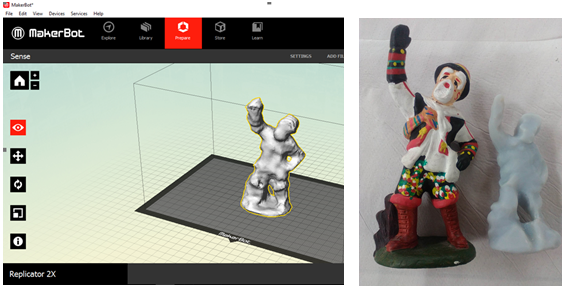
9 Taking the same file with the extension .STL, configure the printer MAKERBOT, having its raw material PLA, with the following parameters: Quality = Standard, Requires = raft, layer Height = 0.3 mm, infill: 10% and Number Of Shells = 2.
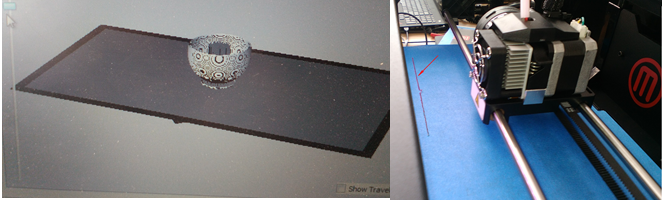
10 Your own printer software simulates printing, immediately sends it for printing and the first thing the printer does is remove the material left in the nozzles.
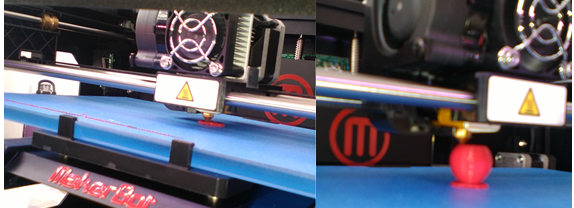
11 Inicia la impresión colocando el raft para imprimir sobre ella, y se observa el avance de la impresión.
12 The print advance and the test spheres made with the 2x Replicator Maker printer
Watch the video: https://youtu.be/uXWOyY-SHMQ
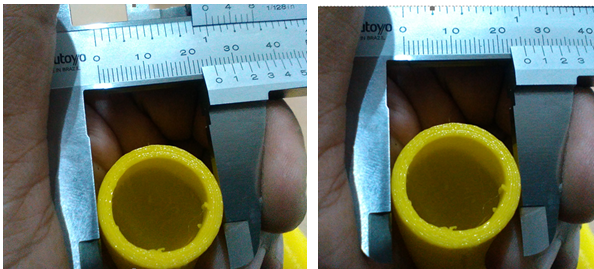
13 Check the density of raw material printed on each sphere with the stratasys Objet 30 Prime printer
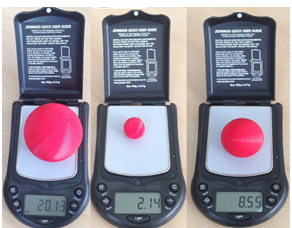
14 Check the density of the raw material for printing with the raw material PLA of each sphere with the printer Markebot Replicator 2X
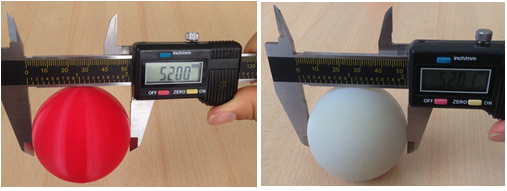
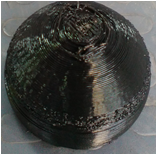
15 The greatest approximation of the diameters are equal (0.02mm) but the surface finish and surface roughness is much better with the Stratasys printer.
16 As a comparative result of the 2 printers, the spheres printed with the Stratasys printer are better in their pressure, tolerance and surface finish.
Watch the video: https://youtu.be/R_SvSGelHnA
Important:
The spheres if it is possible to machine always when the 4 axis machine is available, since this machine is not possible to machine.
The activity was to test with printers that are available in the Fab Lab.
Printing Errors
Machine: MakerBot Replicator 2
For thickness the manufacturer recommends:
Minimum thickness when elements maintain a complex arc 0.8 mm.
Minimum thickness when element is flat 0.4 mm
Any risk of printing 0.1 or 0.2 mm retracts 1 millimeter of synthetic.
If it does not have the raft it does not have stability or fast fixes the printing is interrupted.
The material stored more than 6 months becomes very brittle.
To finish fast printing add speed (Excess speed)
PLA synthetic materials of green and purple colors must work with greater speed and their working temperature must be increased between 235 to 240 °
Any risk of printing 0.1 or 0.2 mm retracts 1 millimeter of synthetic.
In complex curves its resolution of 0.1 increases the possibility of failure
0.2 to 0.15 (Tolerance)
For printing it is better to use your card and not the computer directly.
Watch the video: https://youtu.be/Uj27mTYHy94
Machine: Stratasys Objet 30 Prime
Machine: Stratasys + Laundry
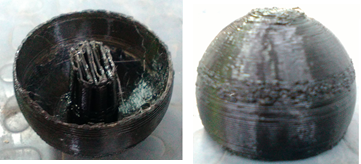
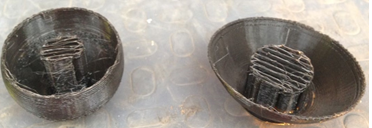
By placing a wall thickness of 0.5 mm too thin (Do not follow the manufacturer's recommendation) only when washed it fracture observing inside the support.
WORKING PROCEDURE WITH THE STRATASYS PRINTER
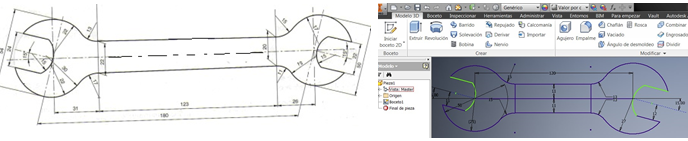
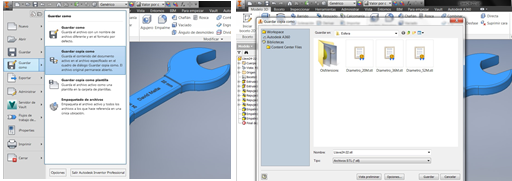
1 Have the tool with your dimensions to make the drawing and use the Inventor software to model and create your sketch
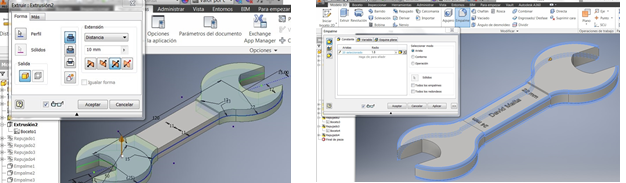
2 Extrude the modeling of the wrench, added the thickness of the wrench also the spokes and chamfers and also the text.
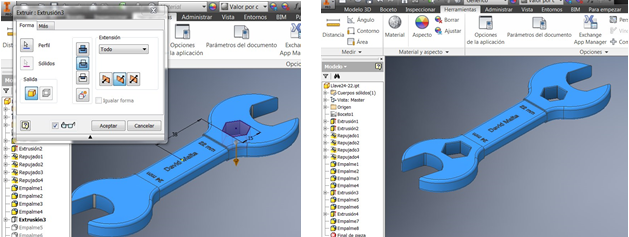
3 Then add the inner hexagons and the end of the modeling of the wrench.
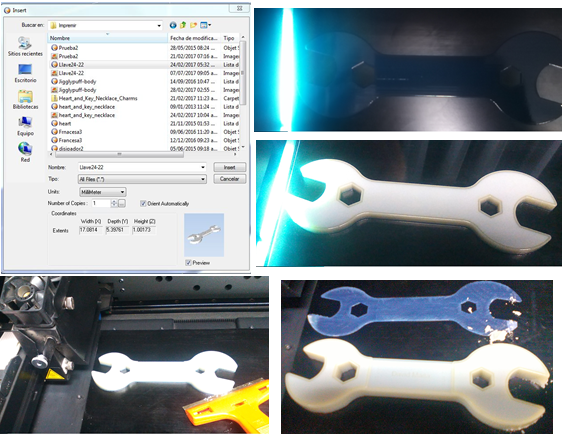
4 Save with .stl extension to send to the printer.
5 I sent the printer with the .stl extension left about 4 hours for printing.
Watch the video: https://youtu.be/VsdaAm-AXMo
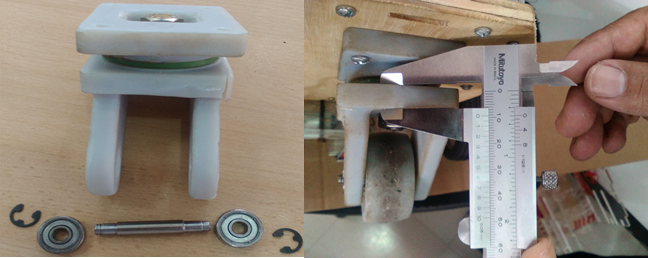
7 Take full advantage of the crazy wheel for my final project with the Stratasys printer
NEW PRINTING TASK ON MAKERBOT REPLICATOR 2X
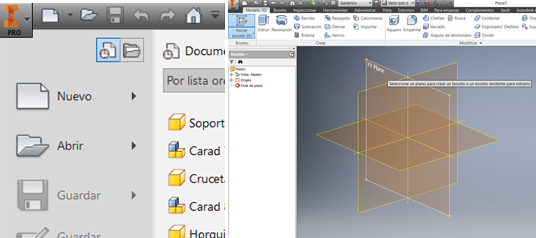
1 Start with the design with the inventor software, selecting the unit of measurement in millimeters, then choose the working plane.
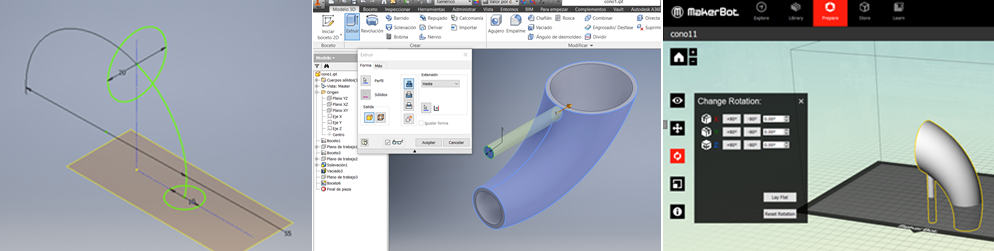
2 Generate the sketches starting with the route (Arc 27, 5mm), then generate the new work planes, use command solevación selecting previous the two circumference and then the route or arc
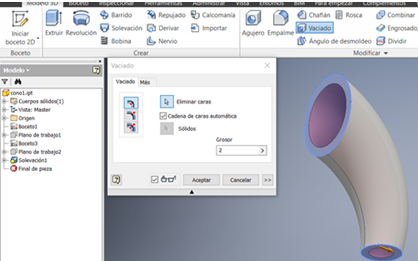
3 A solid is generated to consider a pipe, use the emptied command and
Choosing from 2 mm thick tube.
Then consider placing a support so that the printer does not generate, when the printer generates many times they get more rough.
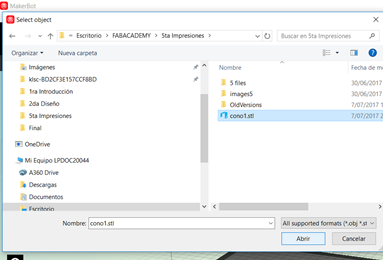
4 Save the design with the .STL extension for printing
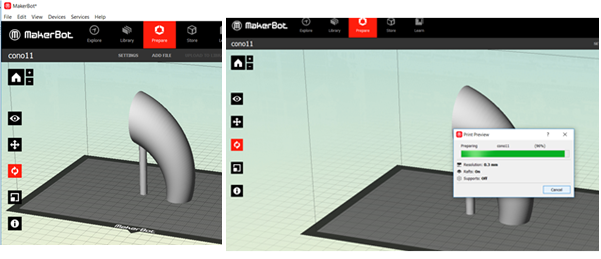
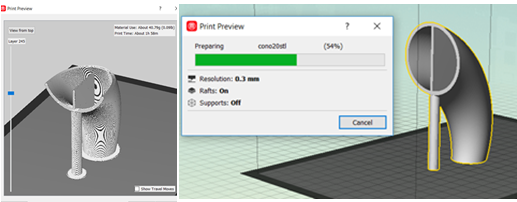
5 Activate the printer shortcut Makerbot Replicator 2X asks us to import the .STL, then its position is set inside the workbench.
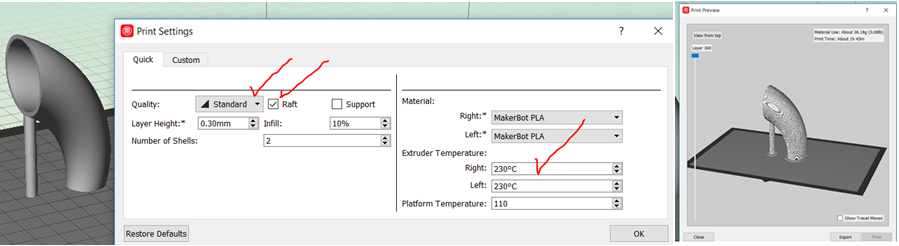
5 Then simulate printing also to know approximately the printing time, select the printing parameters.
6 Configure the raft to prevent it from being flushed from its base and then sent to the printer.
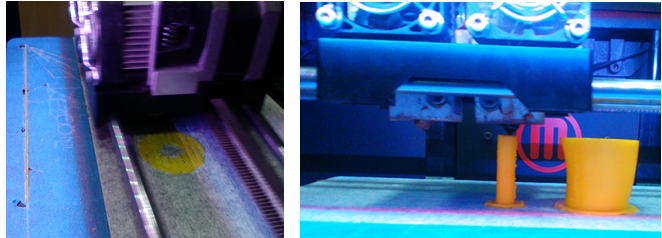
7 Printing begins, ejecting the residual material left in the injector, verifying the temperature of the extruders.
8 After about 2 hours I have the printed solids.
2D PRINTING TEST
9 It is the same tube but now has a reinforcement that I added to prevent the machine from adding it, taking the same configurations because the diujo and the material are the same
10 Before the simulated printing to determine how it will stay and the approximate time of printing, and ready for printing.
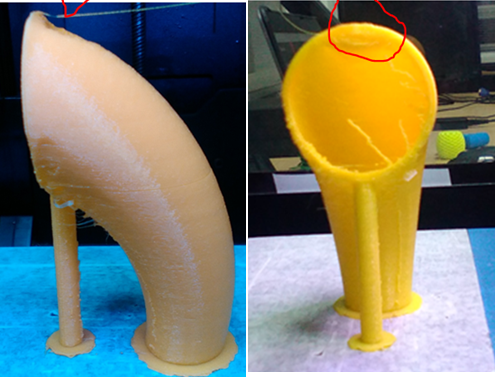
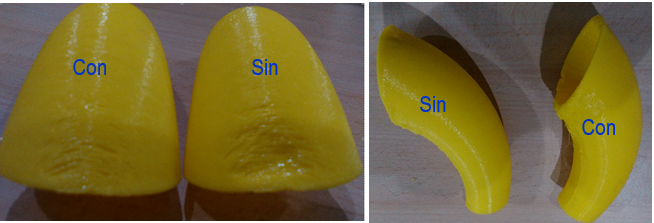
COMPARING THE TWO CONNECTED TUBES
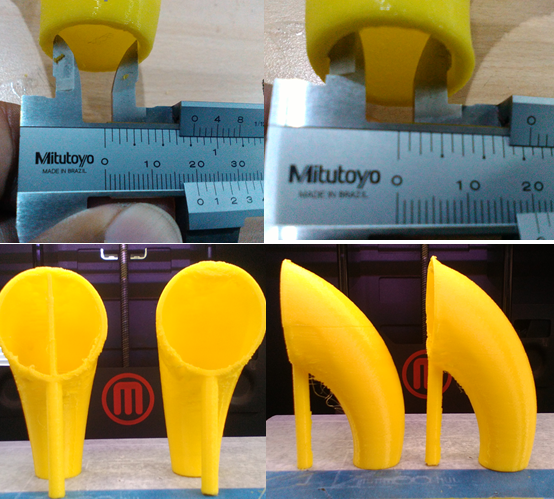
It presents less deformation at the top is the one that has reinforcement on the inside, outside its appearance does not present any particular novelty.
B Checking the outer dimensions the diameters have an ovality of 0.04 mm.
C Checking the inner diameters has a difference of 0.5 mm
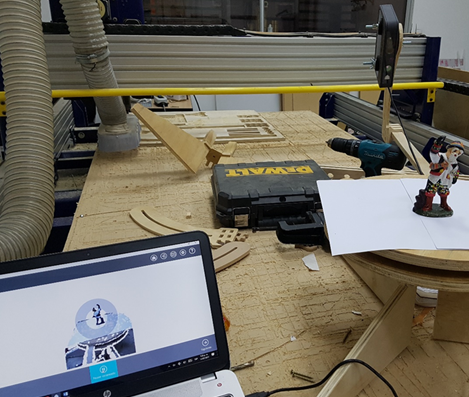
Working procedure with Sense Software (3D SYSTEM).
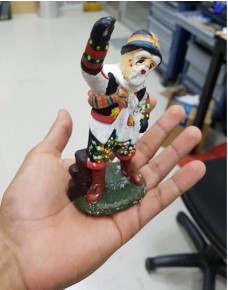
1 Select the model to be scanned as follows:
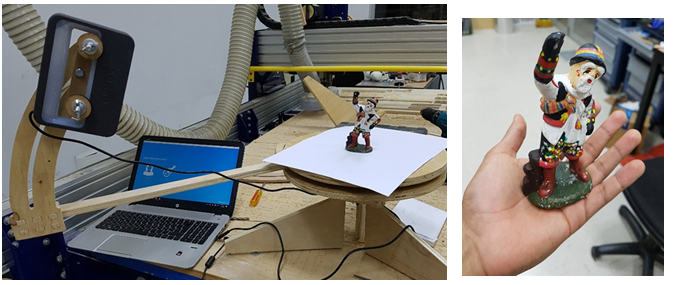
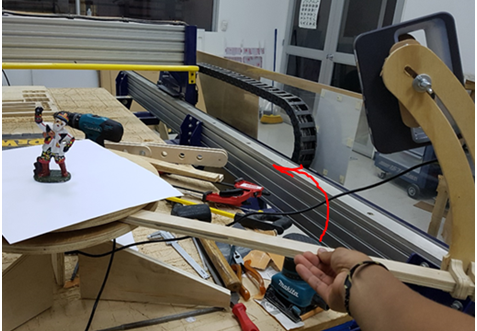
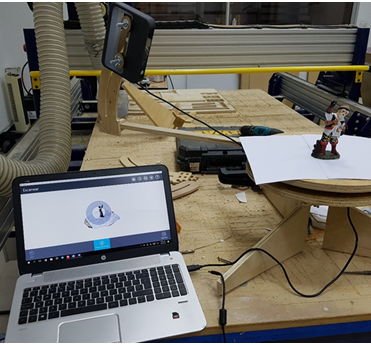
2 Make the scanning turntable and install the sense of the 3DSYSTEMS brand.
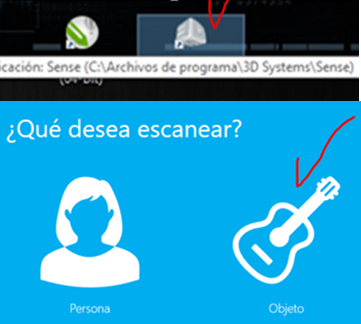
3 Activate the "Sense" scanning software.
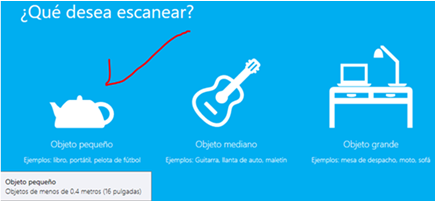
4 Once the interface is opened, select "Object"
5 I chose the option to scan "Small object"
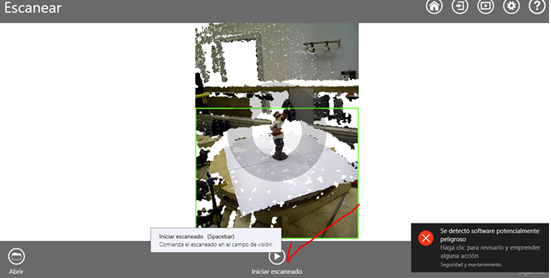
6 The scanning interface was opened:
7 Then start the scanning process by clicking "Start scanning".
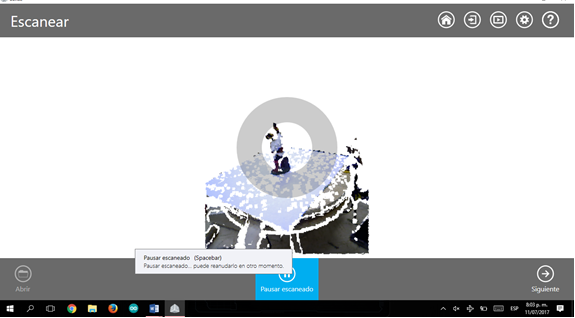
8 You started to scan and turn the scanner around 360 degrees
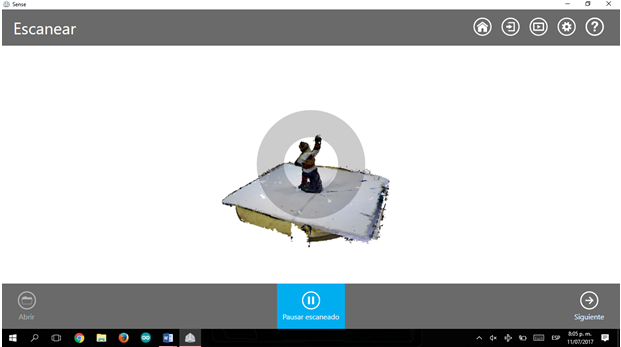
9 Avoid sudden movements and / or vibrations; As they can stop and malfunction the scanning operation as well as generate defects in the 3D model.
10 At all times we must pay attention to the scanning interface in case of an error; Since if we ignore the error and continue to turn the scanner it will be impossible to go back and immediately correct the error point.
11 The scan operation will be finalized when we finish surrounding the object in its 360 °, and for this we will click on the option "Pause scanning"
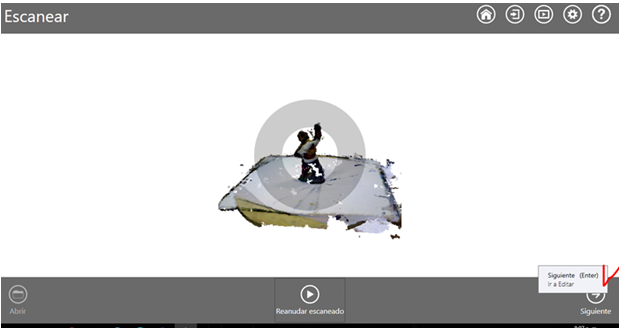
12 Once the scan is finished, click on "next"
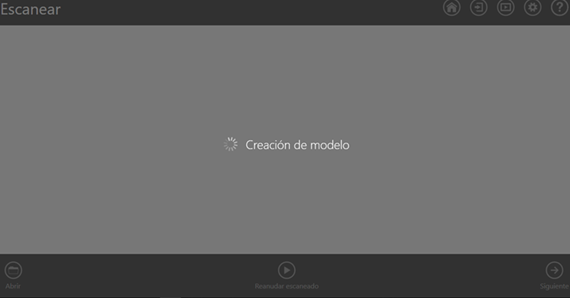
13 Wait a moment while creating the model
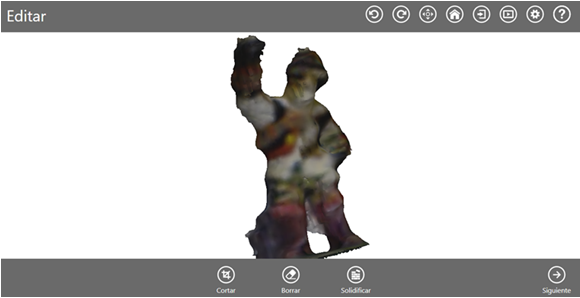
14 The resulting model will be the following
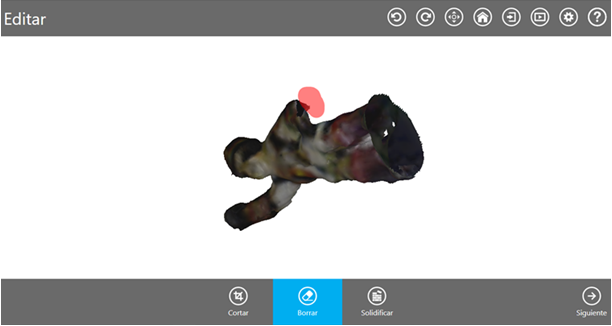
15 After rotating the model some imperfections in the contours are observed.
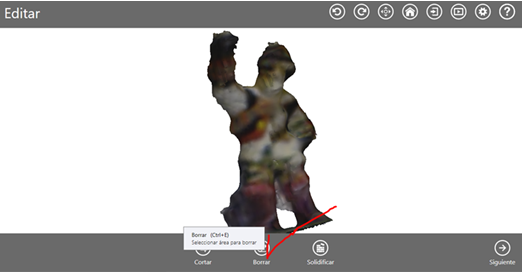
16 With the option "Delete" we can remove these imperfections
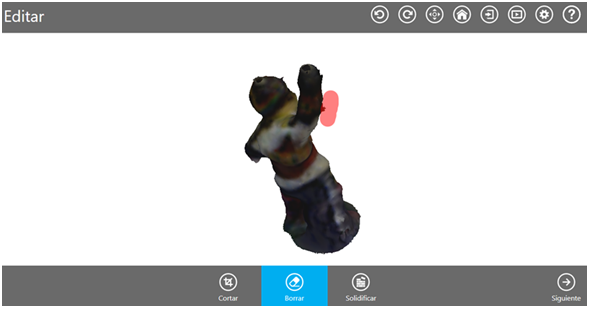
17 Clicking and dragging select what we want to delete.
18 Try to eliminate all possible imperfections for a better result.
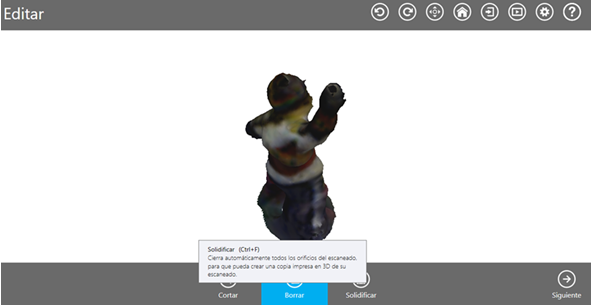
19 Then click "solidify" to fill in the imperfections and close the contours; Then click Next.
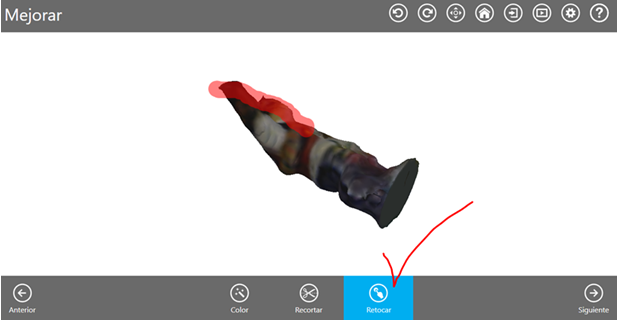
20 New color tools are presented, trimmed and retouched.
21 With the touch-up option, we smooth surfaces and colors. The way to use it is similar to the one of the erase tool.
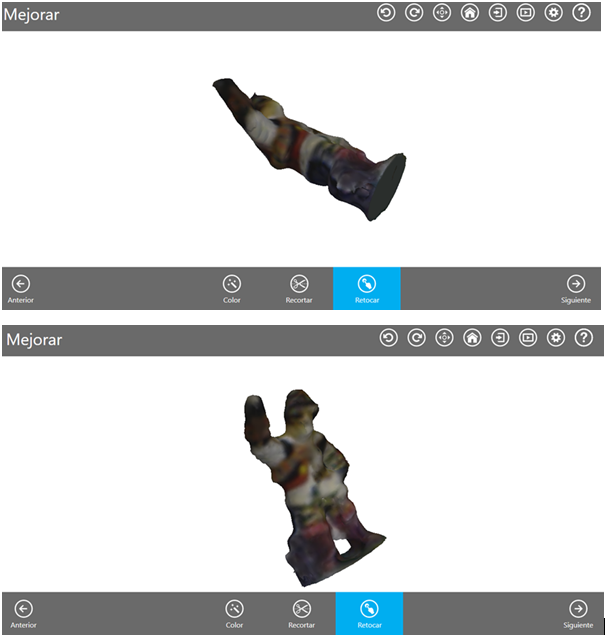
22 This has further improved the quality of our model.
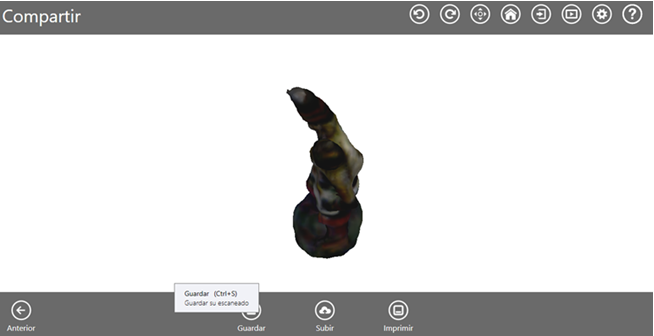
22 After completing these procedures click on "next"
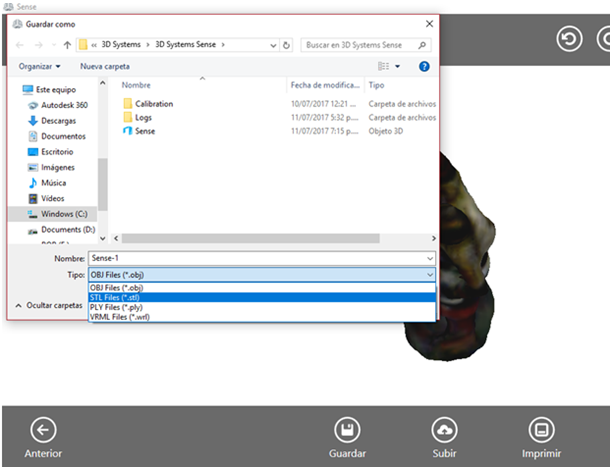
23 We will be presented with three save, upload and print tools again
24 then run save and proceed to save the file in one of the formats shown (.STL) and have other
25 We have a 3D model ready in .STL format to print it on one of our Makerbot printers or the Stratasys printer.
Here you can find the files


 1 We choose together to manufacture the spheres we design and simulate with the software Inventor