Assignment 16. Interface and Application Programming
I will make in this week an application that would comunicate with a PCB that has and input and output..
Week 16 checklist:
Designing the Board:
I have started this week by deciding which components will I be using for my application,, and I decided to go with 2 components that I had never used ( UltraSonic as Input & RGB as Output) ..
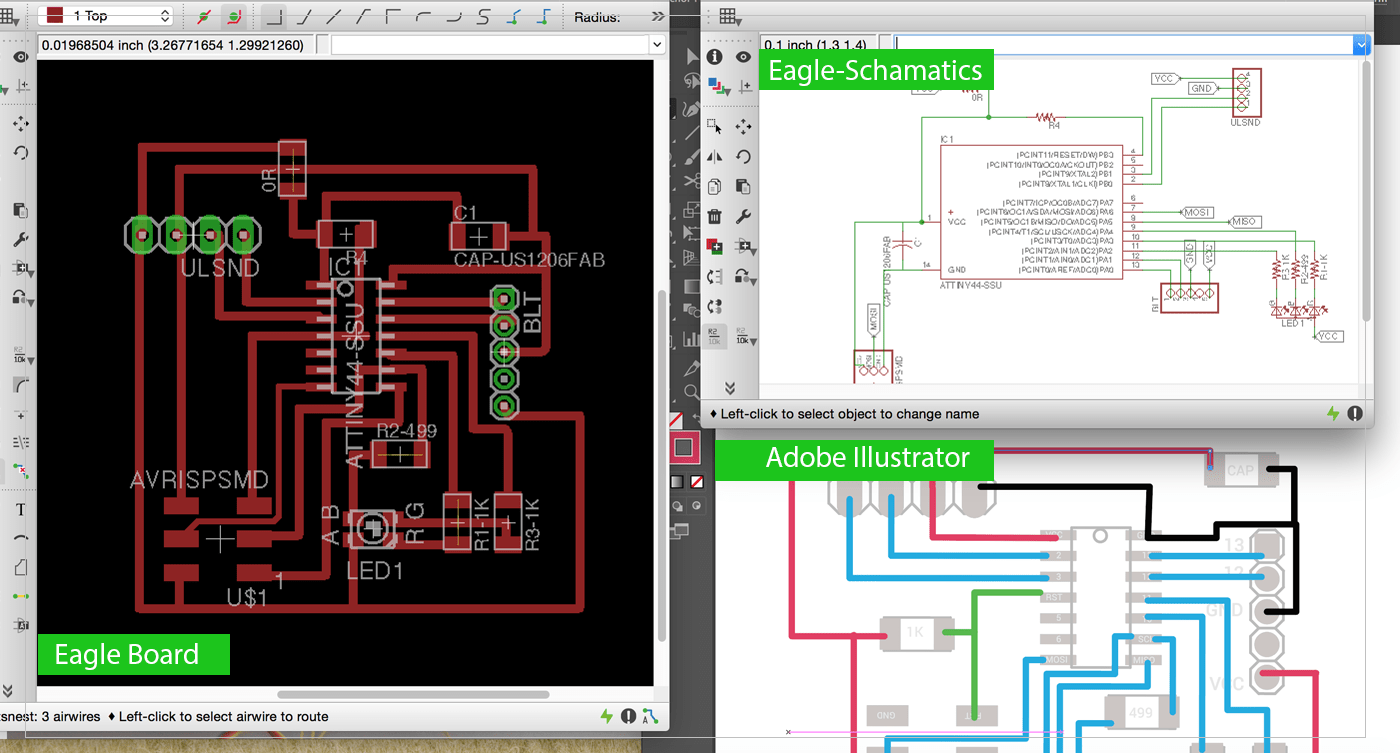
Desiging this board was a challenge, as I did not have any refercance to get back to espically when making the routes in the board window ! so I started to to restudy the design method again ..
The biggest problem I was facing was that the drawing of the components in the schamatics was very different that the one on the board window!! I could not decide on the best ports to connect my sensors to,, so I exported the components as dxf from the boards window, and opened it in Adobe Illustartor and try to connect the components manually until I have reached the best solution ..
Moreover, after deciding on the best route, I was missing one connection, and I could not figure out any way to connect it! so I have added 0 ohms resistor to work as a jumper and slove this problem ..
Designing the Application:
After Milling and Soldering the PCB, I started the design process for my application, I have never programmed any application before, so I decided to learn the Professional way of designing applications, and I have downloaded Andriod Studio to do so,, then I have joined an online course that teaches the process of desiging applications for Andriod,, but Unforunatly, I was not able to complete the course on time,as it was little complicated, and for that reason I decided start with an easier approch that would let me get my feet into the first step of application design path..
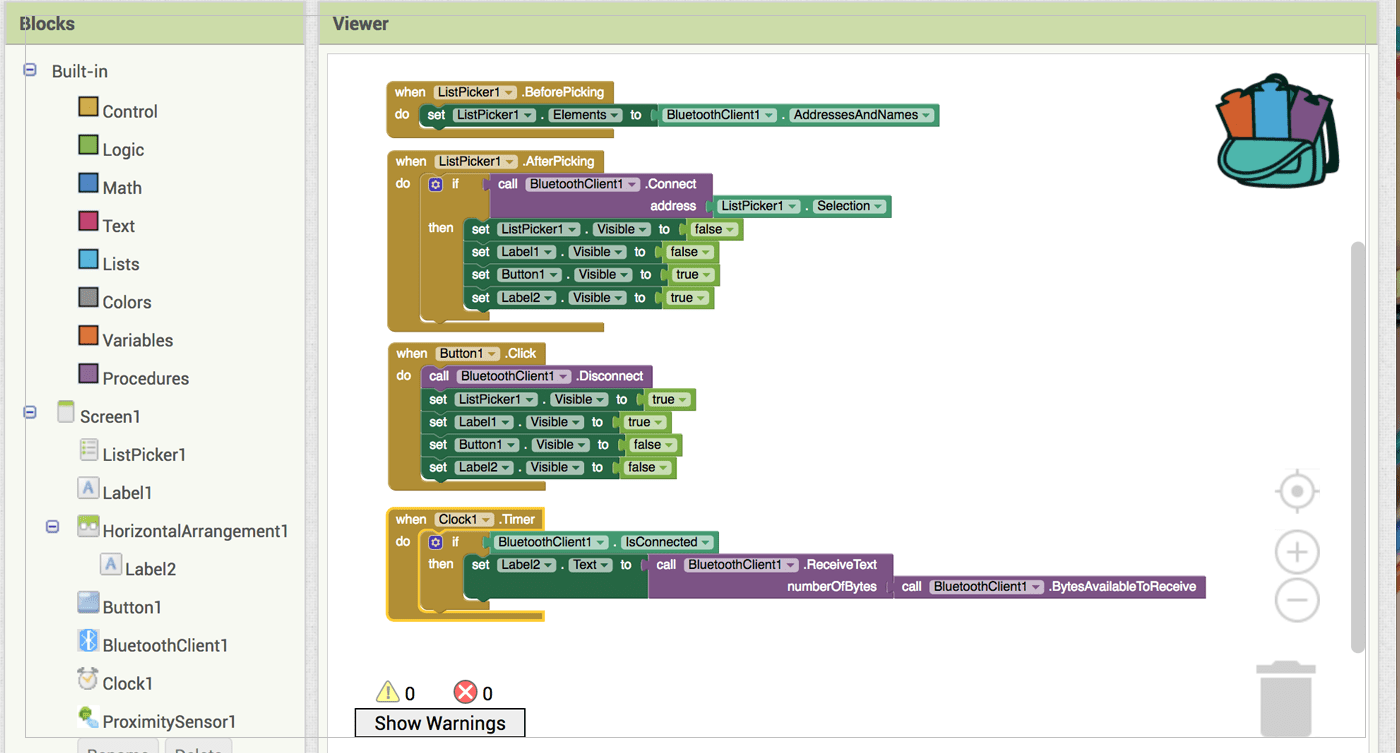
MIT App Inventor
MIT App inventor was the platform I choose to do my application on, as it uses Blockly environment, and it has an easy drag and drop Graphical interface.. My original plan was to design an application that would mesure the distcance using the Ultrasonic sensor, then on Arduino I would program the RGB to light up different colors when certain ranges are reached..
 After I have created MIT App, & write the code on Arduino, then upload it to my board and test it with my phone I was able to connect scuessfully to the Blutooth module, but I was receiving weird charcters! after many tests and debugging our insturcutor noticed that I have connected my sensor to the wrong ports! I should have used the Analog ports rather than the Digital once! and that was the cause of the problem I was facing!!
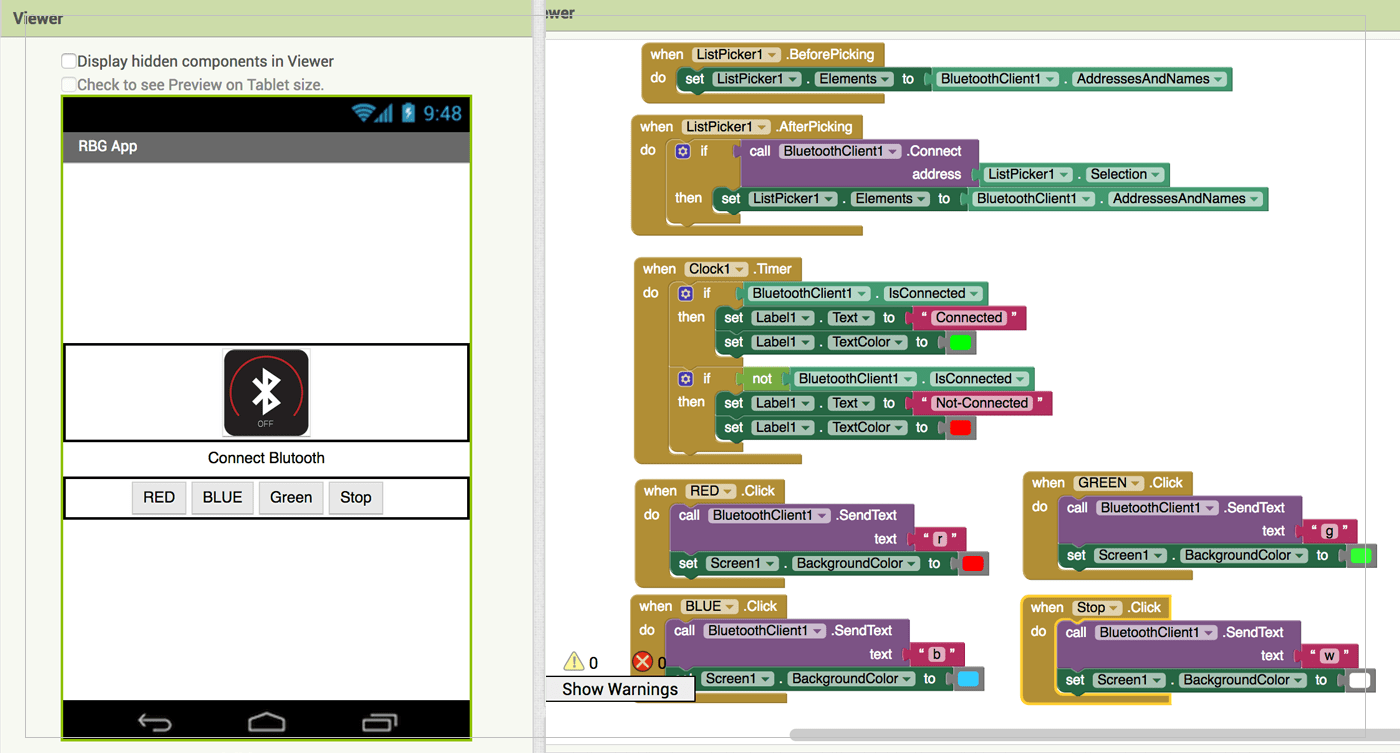
for that reason I have decided to change my plan, and make an app that would light up different colors depending on the button I am pressing,,
Connecting Blutooth Module HC-06:
It was obviousally that I would connect similar ports to each other ( RX to RX - Tx to Tx .. ) but when I did that the blutooth did not work properally,, So after asking our instrcutors I have learned that when programming the Blutooth module we have to cross the connection between RX & TX.. So RX to TX..
 After completing my App design and code on App Inventor,writing the code on Arduino, and connecting the blutooth,, I have uploded the code to my board, and downloded my App into my Mobile phone,, I have tested it .. and here are the results ..
RGB - Bluthooth Code
#include
SoftwareSerial mySerial(10, 9); // Blutooth (RX,TX)
int redPin = 3;
int greenPin = 2;
int bluePin = 4;
#define COMMON_ANODE

void setColor(int red, int green, int blue)
{
#ifdef COMMON_ANODE
  red = 255 - red;
  green = 255 - green;
  blue = 255 - blue;
#endif
  analogWrite(redPin, red);
  analogWrite(greenPin, green);
  analogWrite(bluePin, blue);
}

void setup() {
  mySerial.begin(9600);

  pinMode(redPin, OUTPUT);
  pinMode(greenPin, OUTPUT);
  pinMode(bluePin, OUTPUT);

  setColor(255, 255, 255); // For checking if the board is working & comunicating
  mySerial.println("Started");
  delay(500);
  setColor(0, 0, 0);
}

void loop() {
  while (mySerial.available() <= 0){
    //mySerial.println("."); // Serial Comunication Checking
    //delay(200);
  }
  char c = mySerial.read();
  if (c == 'r')
    setColor(255, 0 , 0); // RED
  else if (c == 'g')
    setColor(0, 255, 0); // Green
  else if (c == 'b')
    setColor(0, 0, 255); // Blue
  else if (c == 'y')
    setColor(255, 255, 0);
  else if (c == 'w')
    setColor(255, 255, 255); // White

}
[ Source File - Board ]
[ Source File - APK ]
Previous Week Home Next Week