Assignment 7. Computer-Controlled Machining
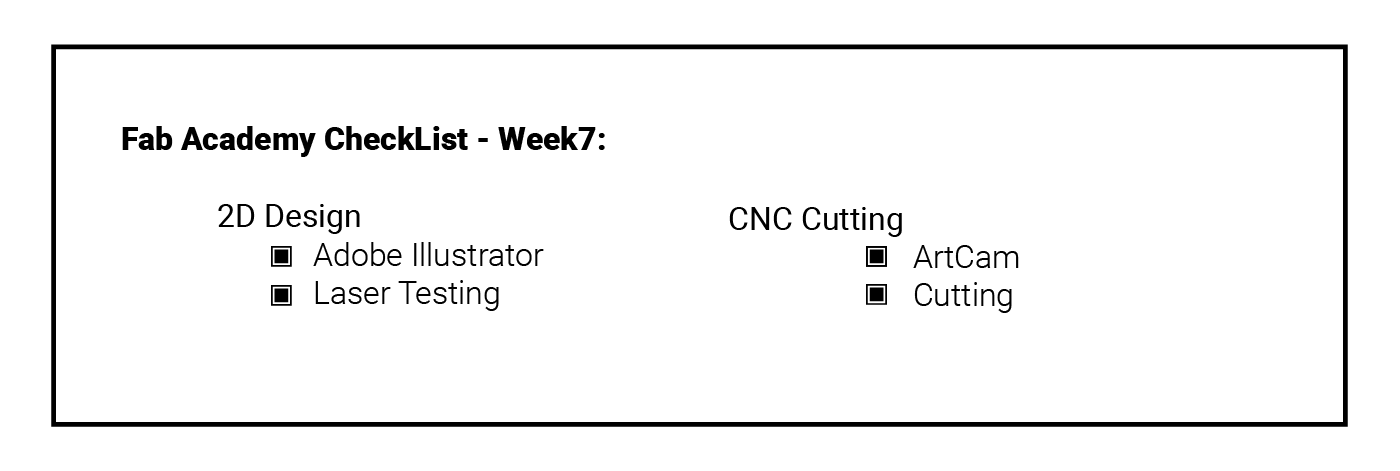
Week 7 checklist:
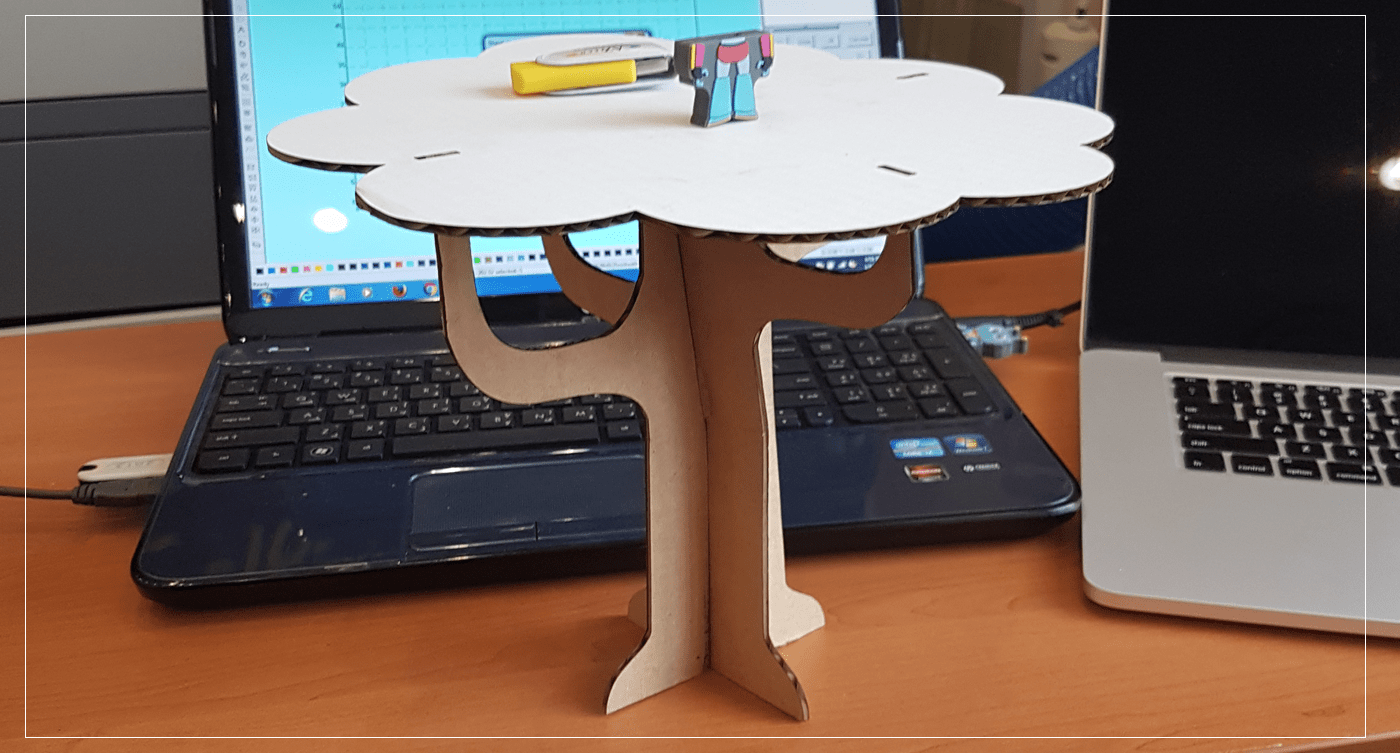
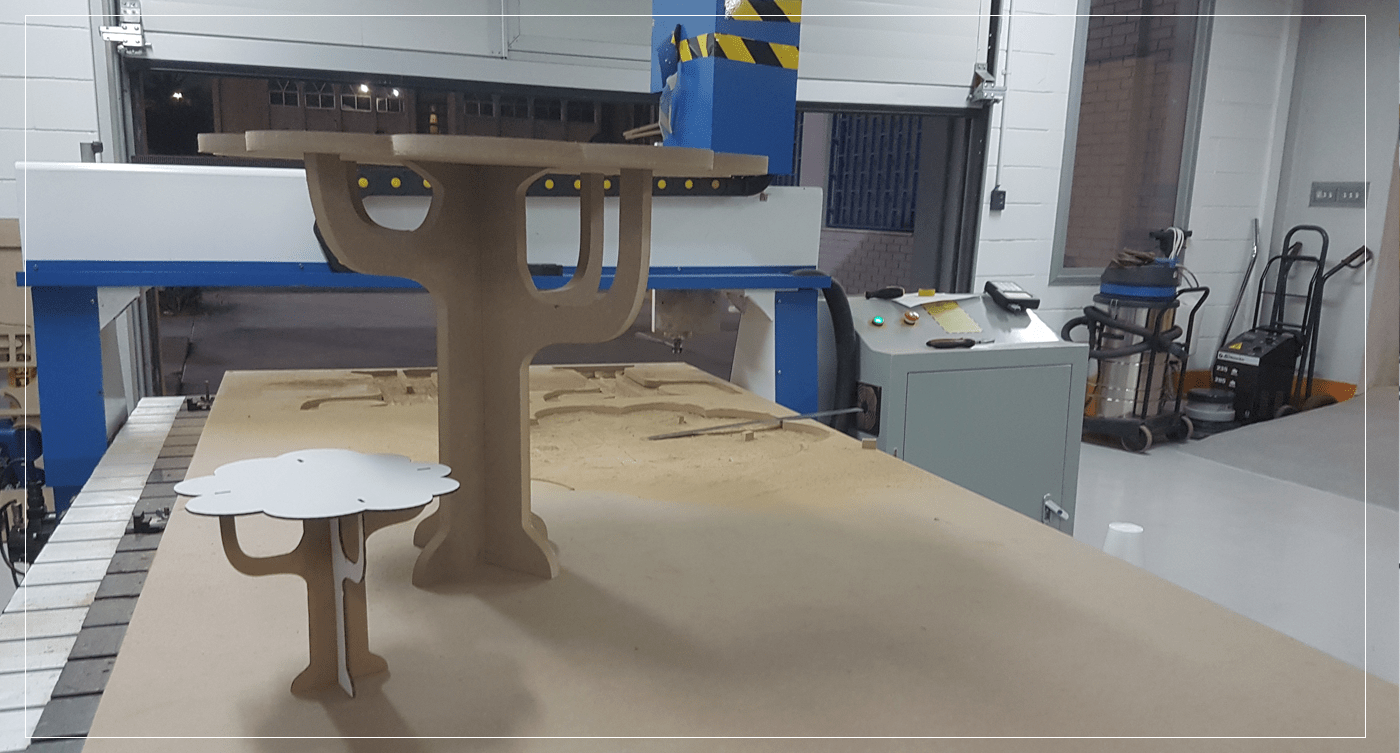
In this week we were asked to design and cut something BIG using CNC machine .. So I decided on making Tree Table for kids using PressFit technique, the Design was simple to make, and the most important thing was to measure the thickness of the material correctly!
So here I go..
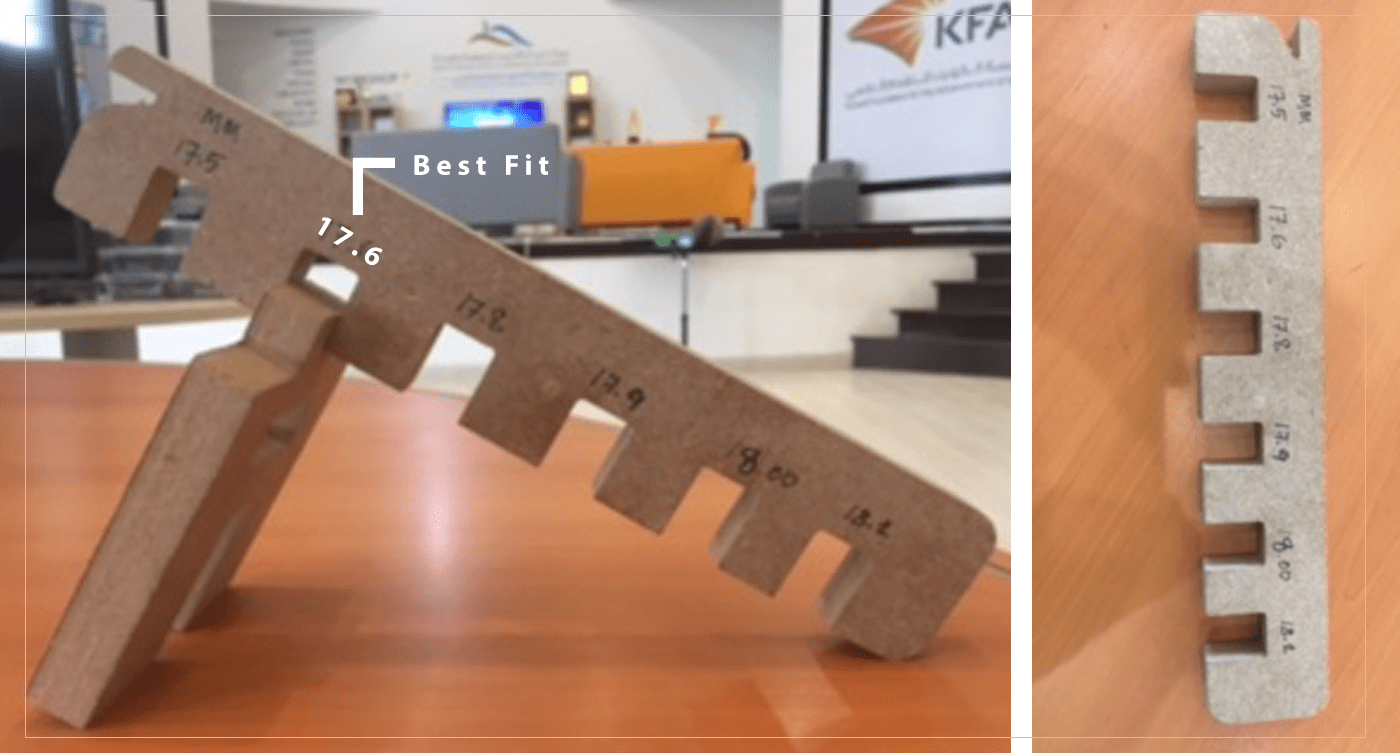
Pressfit test
As group we have made a test cut for the 18 mm MDF wood that we will be using for our projects to find the best fit, and it was 17.6 mm, so I will be using this number in my design ..
Design & Test Cut
I used Adobe illustrator to design my table, as for press fit designs, these are the most important things to put in mind while designing:
1. Measure the thickness of the Material and use it in all the areas marked bellow.
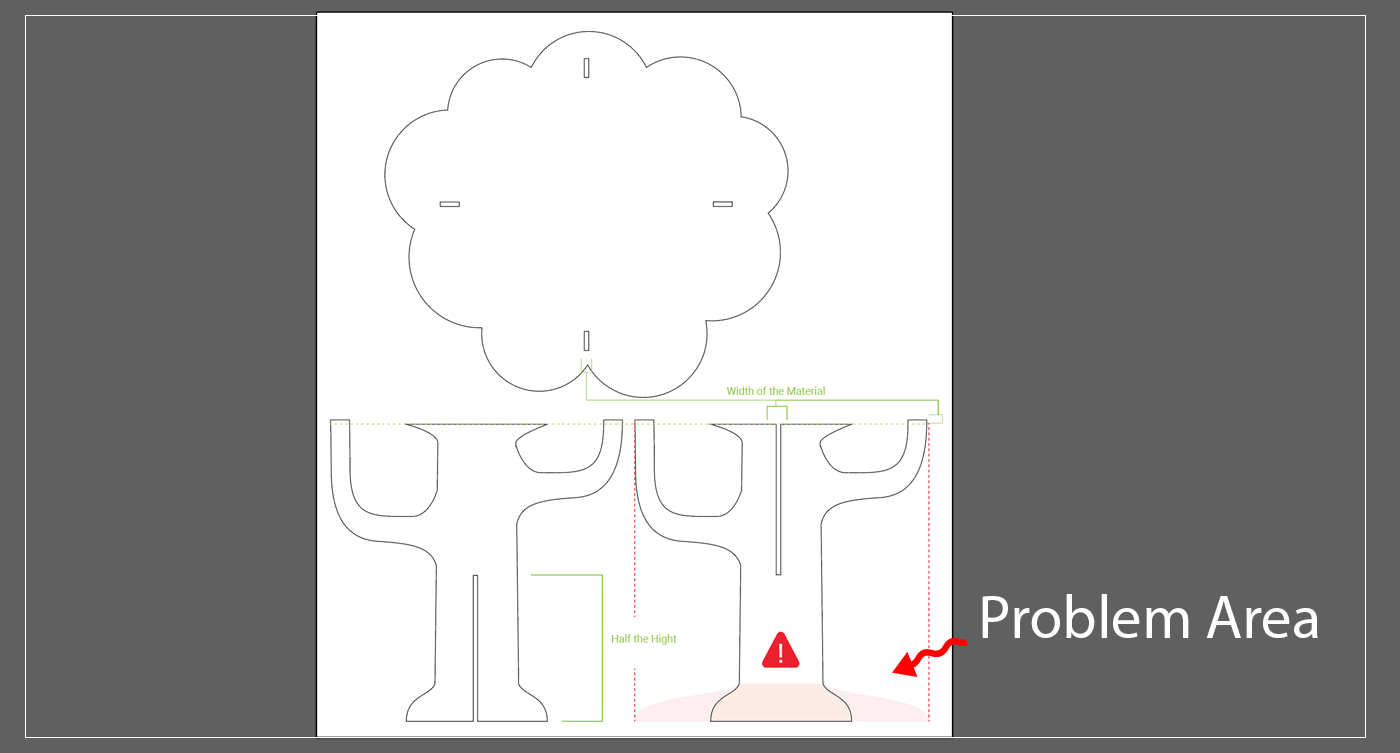
2. The height of the cut should be Half the height of the whole piece ( so two pieces would ).
3. the Bottom area should be FLAT ( a lesson learned from one of my colleges mistakes).
4. the Bottom part of the table should balance the top part ( My mistake!).
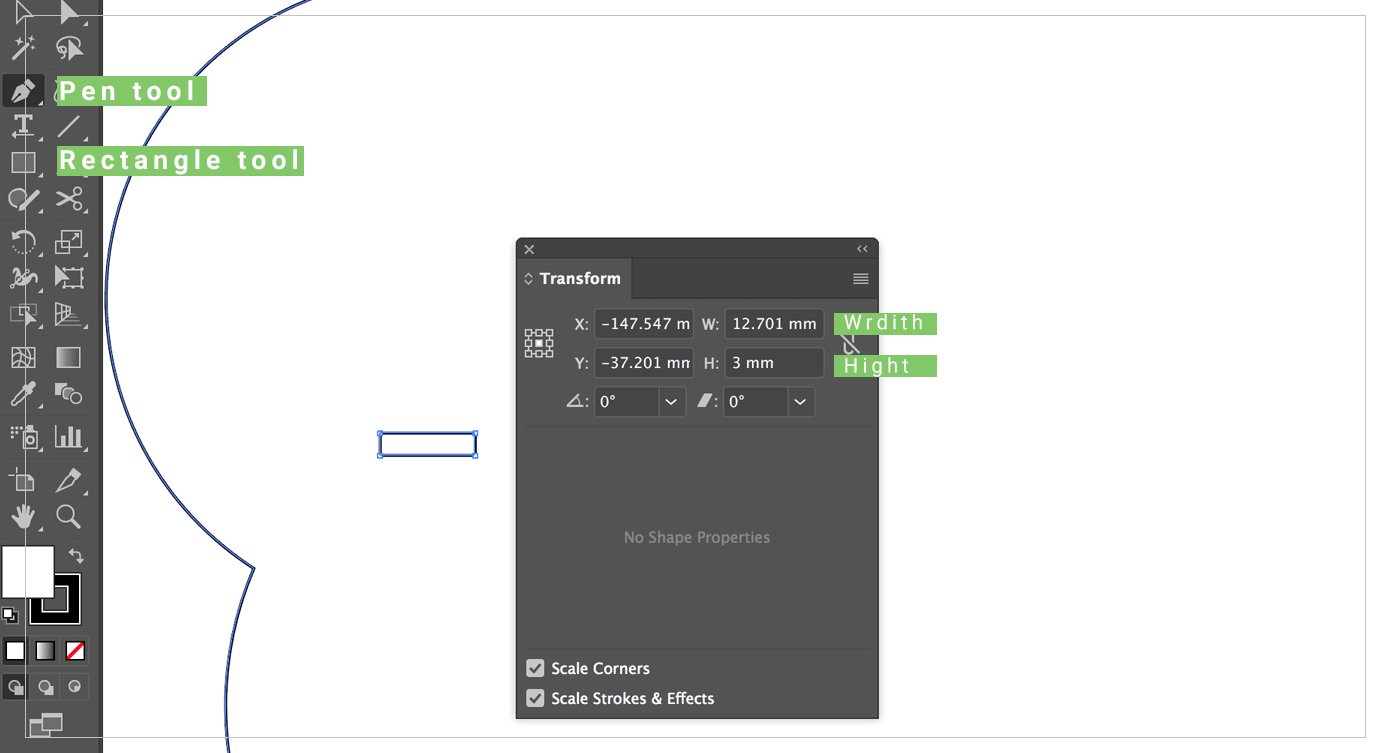
I have used Pen tool to draw the other frame of the parts, then use the Rectangle tool to draw the slots in the exact size.. to use the pen tool, you have to click on the first point with the left mouse button, then release the button, and move to the following point, press again and continue doing that until you close the path,, if you want to make curves you have to pull while pressing.. here is a video explaining it in more details ..
Before cutting the wood,, I decided to make a small model for my table using the laser cutter and cardboard, to check if there is any mistake and correct it before wasting the wood, and the model was fairly good,, I notice the problem with the legs, but I thought it was because of the cardboard !!
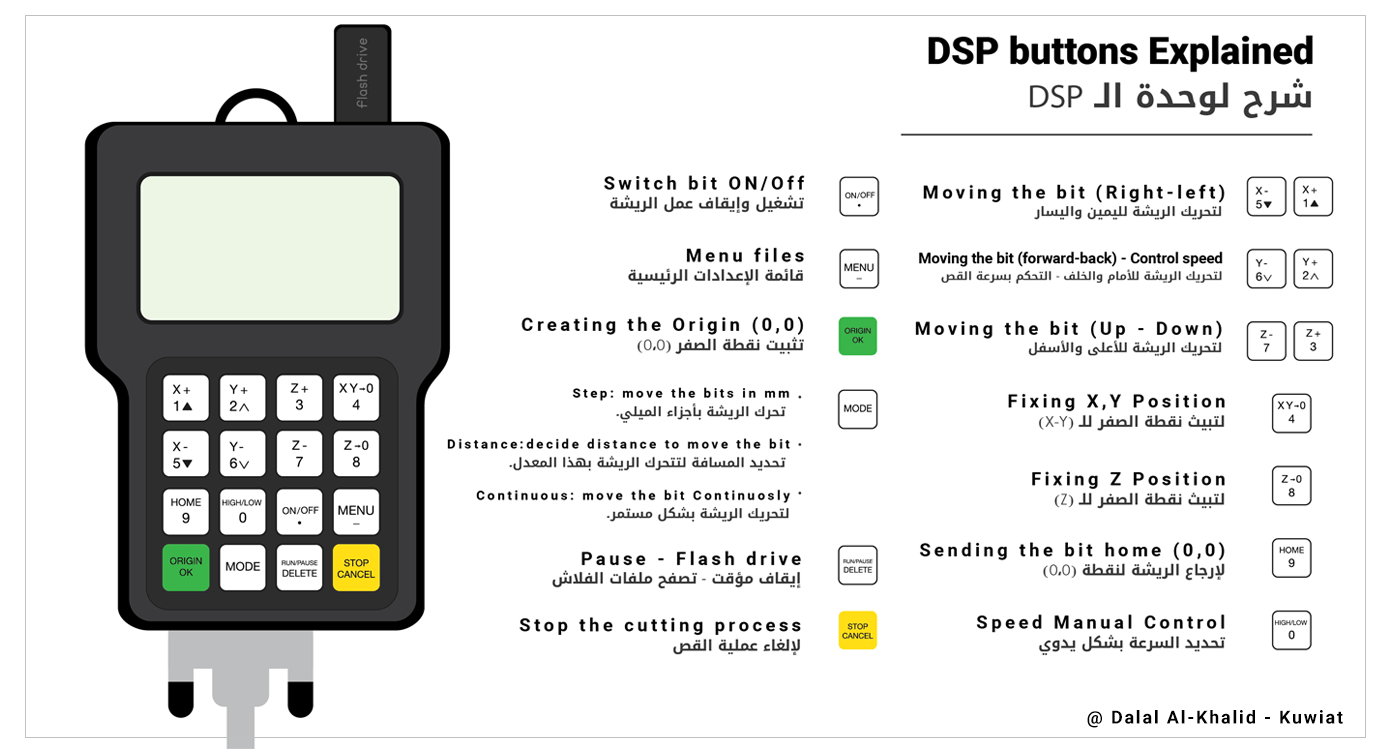
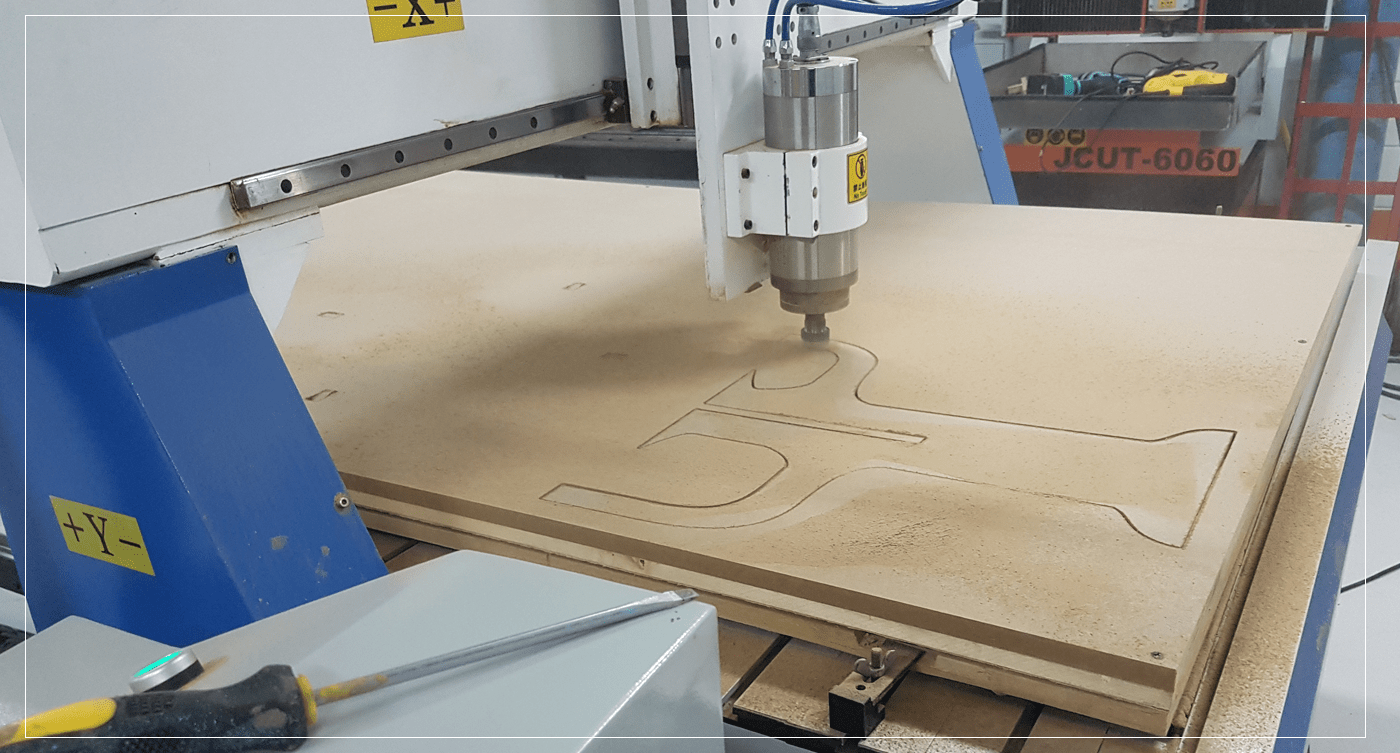
So I moved forward to the CNC Machine,, First I have explored the DSP, and how to use it .. here are a cheat sheet for the main buttons for our CNC Machine DSP ..
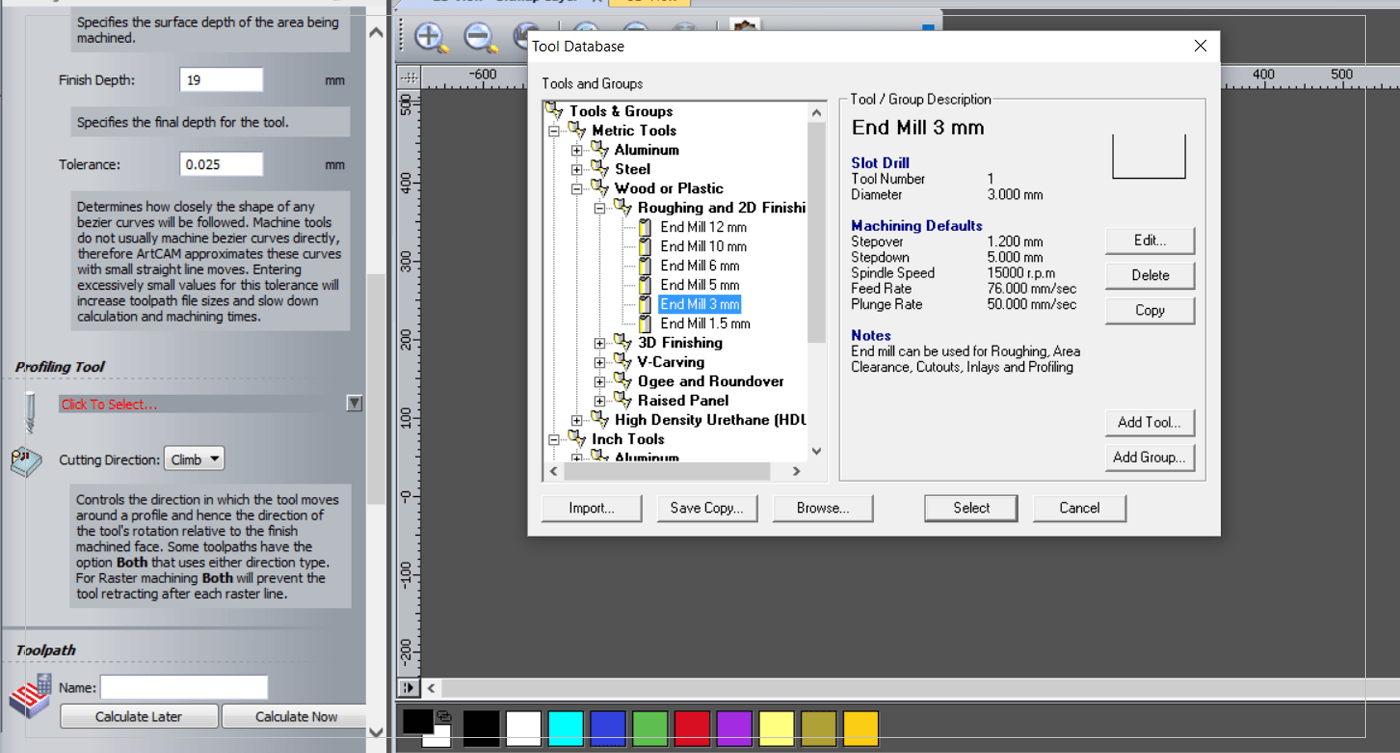
 After that I have to convert the DXF file to .NS file that our lab machine would recognize and cut,, I have used ArtCam to create the tool paths,, an important tip to consider while creating the tool paths, is that you have to cut the small pieces inside before cutting the outline, so that you would get precise cut ( without the large piece moving while the machine cuts that smaller once..)
The Process
Start by selecting the Outer parts that you need to mill, then do the following
1. Vector > Import DXF file to ArtCam.
2. Go to Toolpaths tab at the bottom right > 2D toolpath > Profilling
3. Put the follwoing settings:
- Profile Side: Outside.
- Start depth: 0
- Finish depth: 19
- Allowence: -0.15
- Tolrenace: 0.01
4. Choose Tool : End Mill 3 mm
5. Choose Material Thickness: 18 mm.
6. Pick Name for the part, then press Calculate Now.
7. Repeat for inside parts.
I was very happy with the results, the table works perfectly, and the dimensions were perfect as well. at this point I have seen the problems with the legs clearly, it still functions perfectly, but fixing that would make it perfect ..
[ Source File - DXF ]
[ Source File - ART ]
Future improvments..
After Milling my table and completing this project,, I have noticed that some of the joint were loose,, and after searching about this problem I have came across a technique called Dog bone!
When cutting materials with the CNC, a known problem is that while the CNC can make a perfect outer corner, the inner corners can never be more sharp than the diameter of the cutting tool. So if you are e.g. using a 6mm mill, all the inside corners will not be perfect right angles, but will instead have an inside diameter of 3 mm (half the cutting tool's diameter) Sometimes these small rounded corners don't matter, but they are almost always an issue with joints - where often another piece of plywood, which by nature is square, must fit precisely in a hole or slot. If the hole or slot has very rounded corners, the mating piece just isn't going to fit in.[Source]
To overcome this problem we have to remove extra material from the inside corners of the holes or slots, these extra cuts are called Dog bone due to the shape of the slot after the extra cut.
So in the future, I will experiment more with this technique until I get The PERFECT FIT.
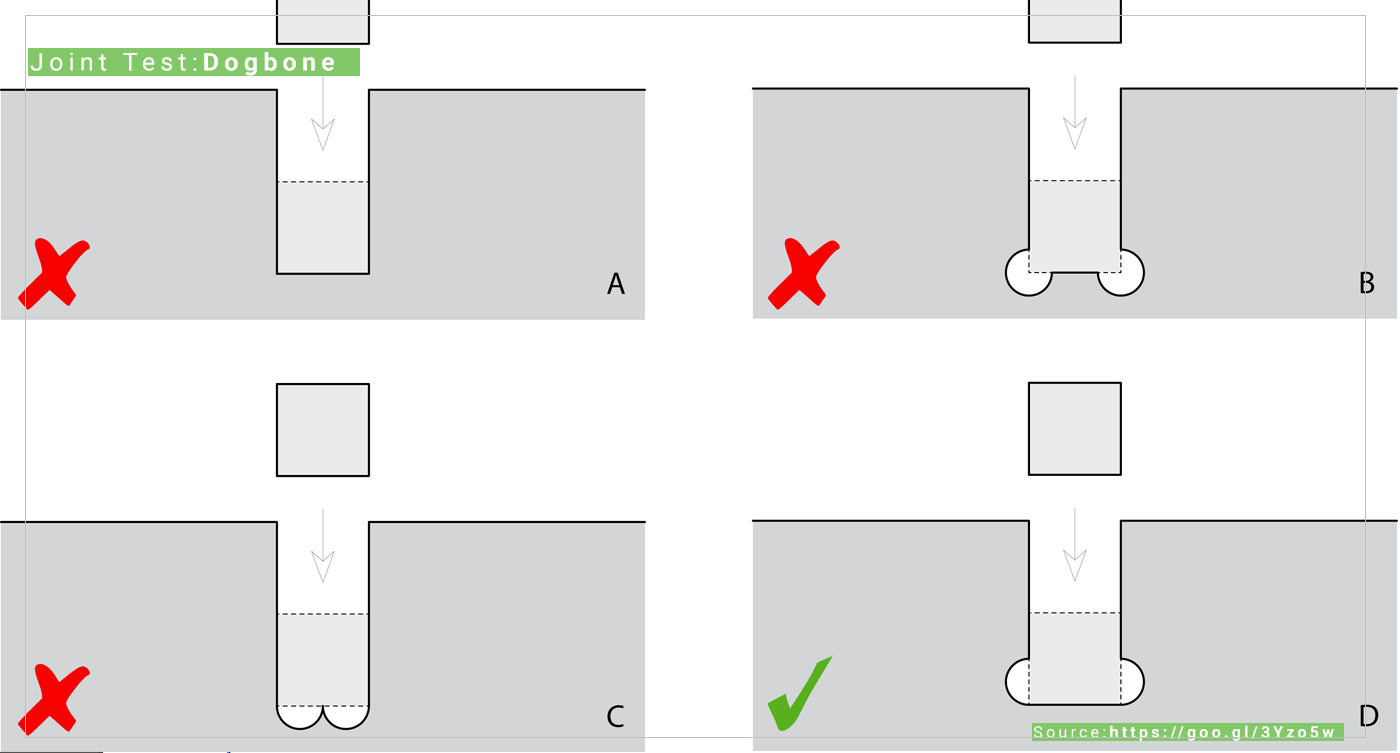
Image [Source]
Previous Week Home Next Week