Assignment 8. Embedded Programming
Week 8 checklist:
Reading the Datasheet:
While designing my board on Week 6, I take a sneek peek into the datasheet for both Attiny44 and the LED to be able to design my board, and choose the right components to solder my board.
Geeting Deeper into the Datasheep
Datasheet is a document that provides technical specifications about the product.
After reading the datasheet of the Attiny, I found All the important information on the second and third pages, where they explain the ports and their types ,, here what I have learned so far..
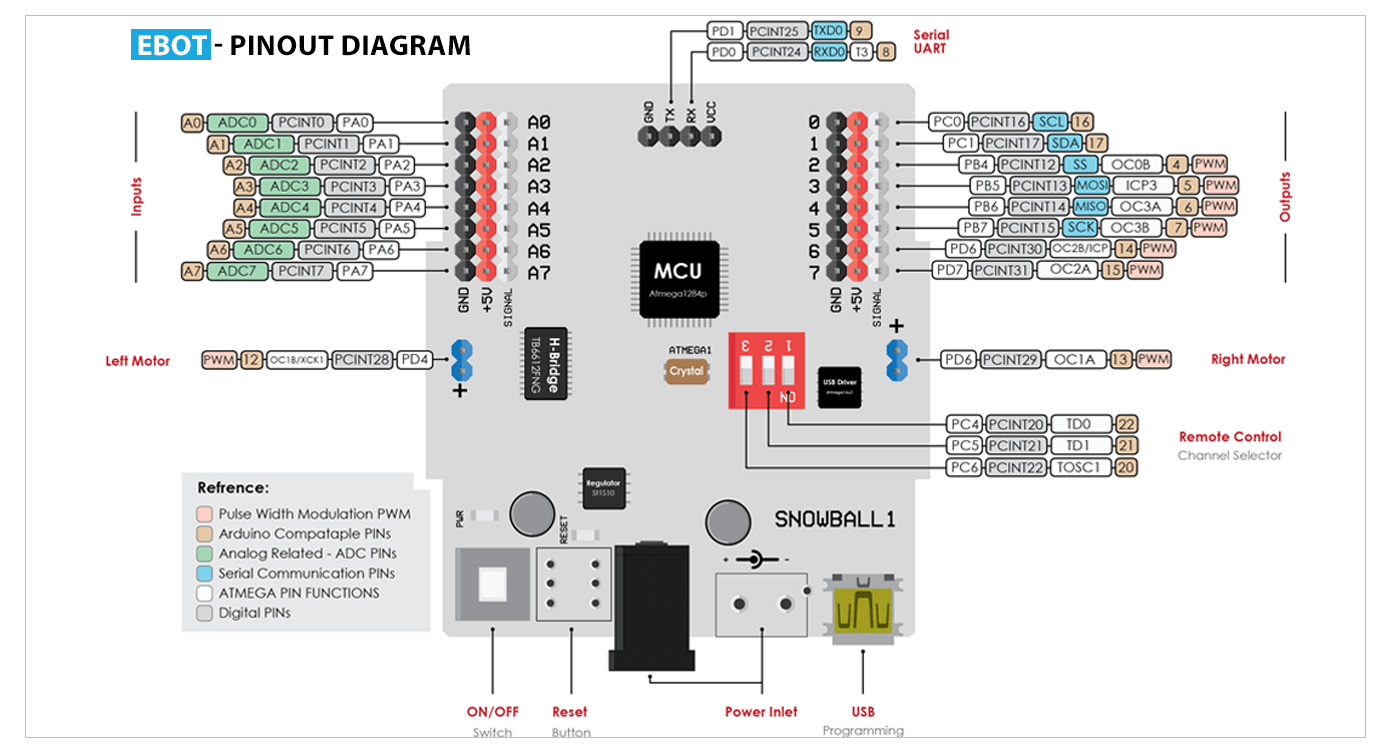
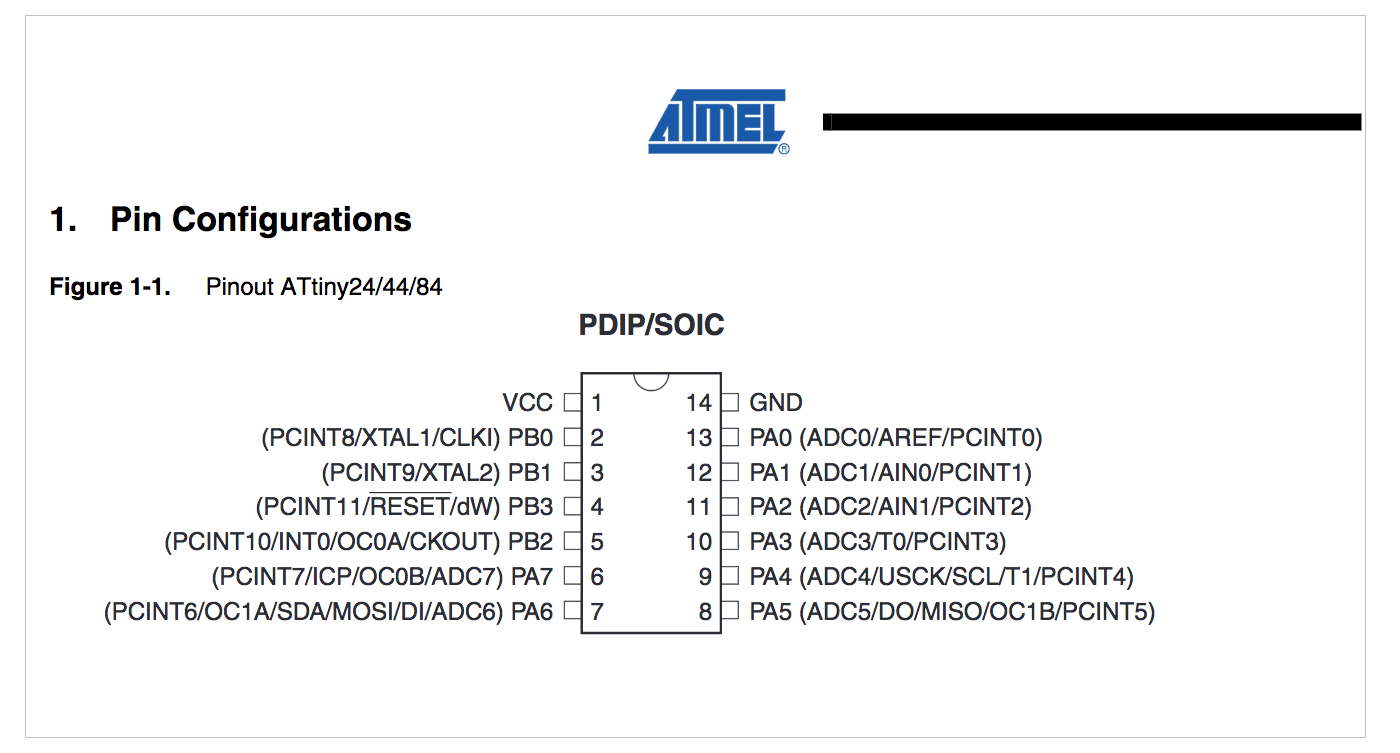 This figure (pinout) shows where are each pin in the actual MicroController unit, and their names in Arduino pin names .. this will help me in choosing where to connect each pin ..
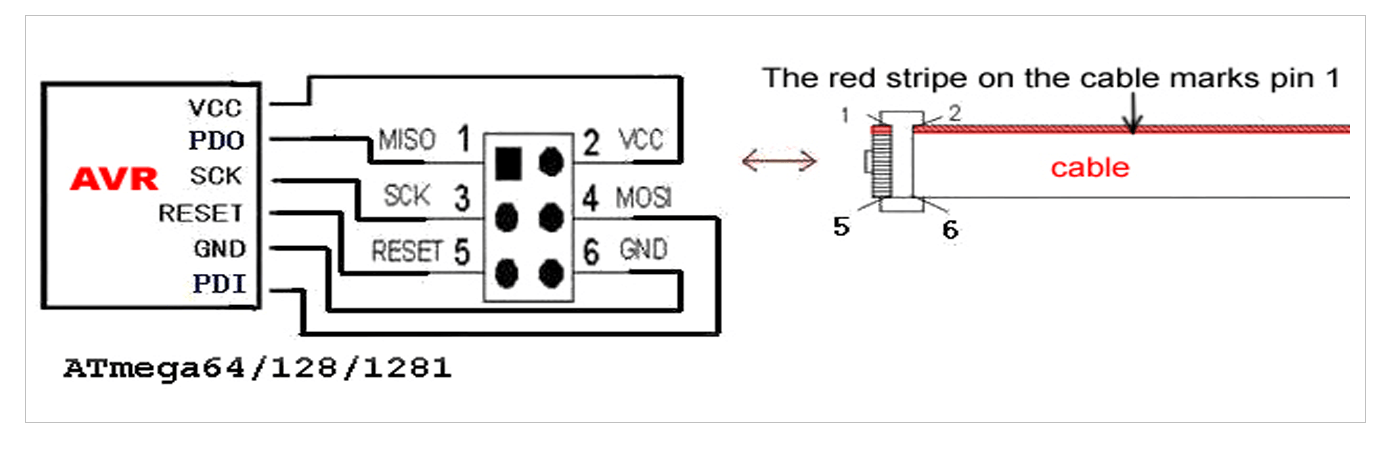
below image shows that 6 pins which we will be using to program our boards by using the ISP Cable..
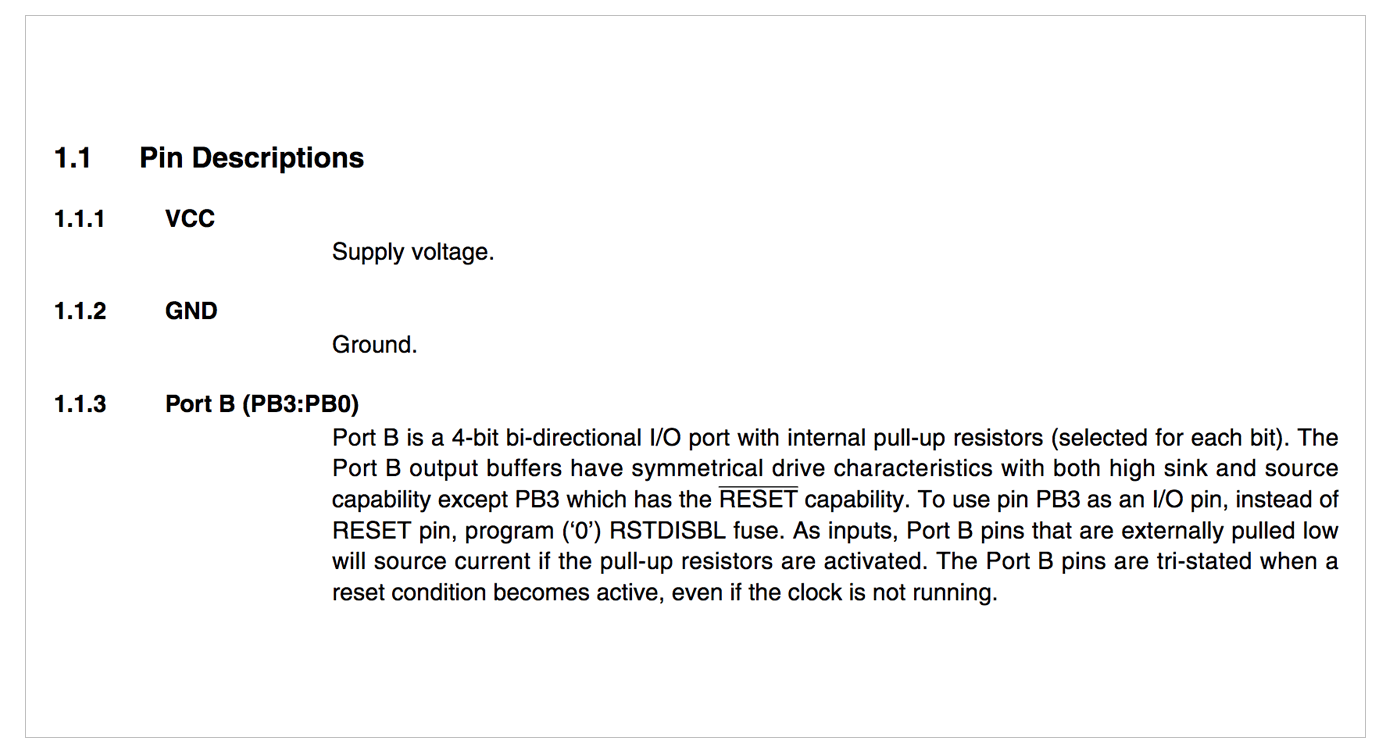
 The following page describes each pin and what can be used for, as well as the pins which I will be uisng to program my boards,, they are as follows ..
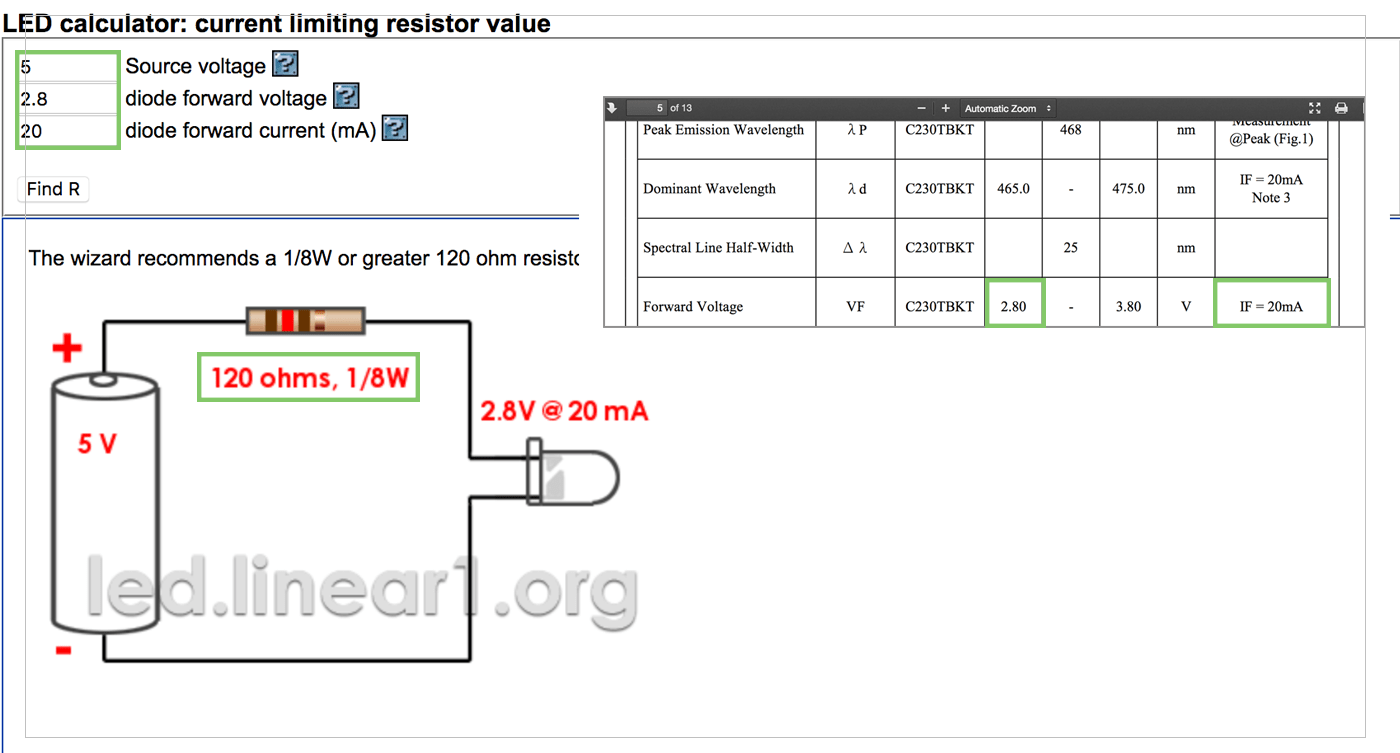
Calculate the Resistor for LED:
Going back to the datasheet of the LED,, I have used the LED calculator website to know the amount of resistor needed,, and the claculator shows that I will need 120R ,, but the neaset vlaue we have in our lab was 102R so I used that one.
Programming the board ..
For a while, I have been using couple of easy to use programming softwares based on C++ Language,, which are Arduino IDE, and Ebot IDE..
Ebot IDE:
Ebot is a Kuwaiti arduino driven Microcontroller, it's IDE was built using Google Blockly, which is Cloud based application, and it is supported by All platforms..
 One Major advantage of the software is teaches the programming in very simple way by using the visual and code interface,, so when I use that visual interface and drag the components, I can see the code directly on the code part ..

Arduino IDE:
Arduino IDE is widely spread global application that uses C++ programming language,, it is available for all operating systems, and lately they have introduced their cloud based application called Cloud ..
I have chosen to program with Arduino as it is considered a mid-range application, which means both beginners and Experts can use it with great capabilities and less confusion, moreover, tutorials are available all around the globe, which will help me learn faster..
After Checking my board's connections and solder the components,, I Have used Arduio IDE to program my board, I have been using this software for sometime,, so I have basic knowledge about programming, but I am still not an Expert!
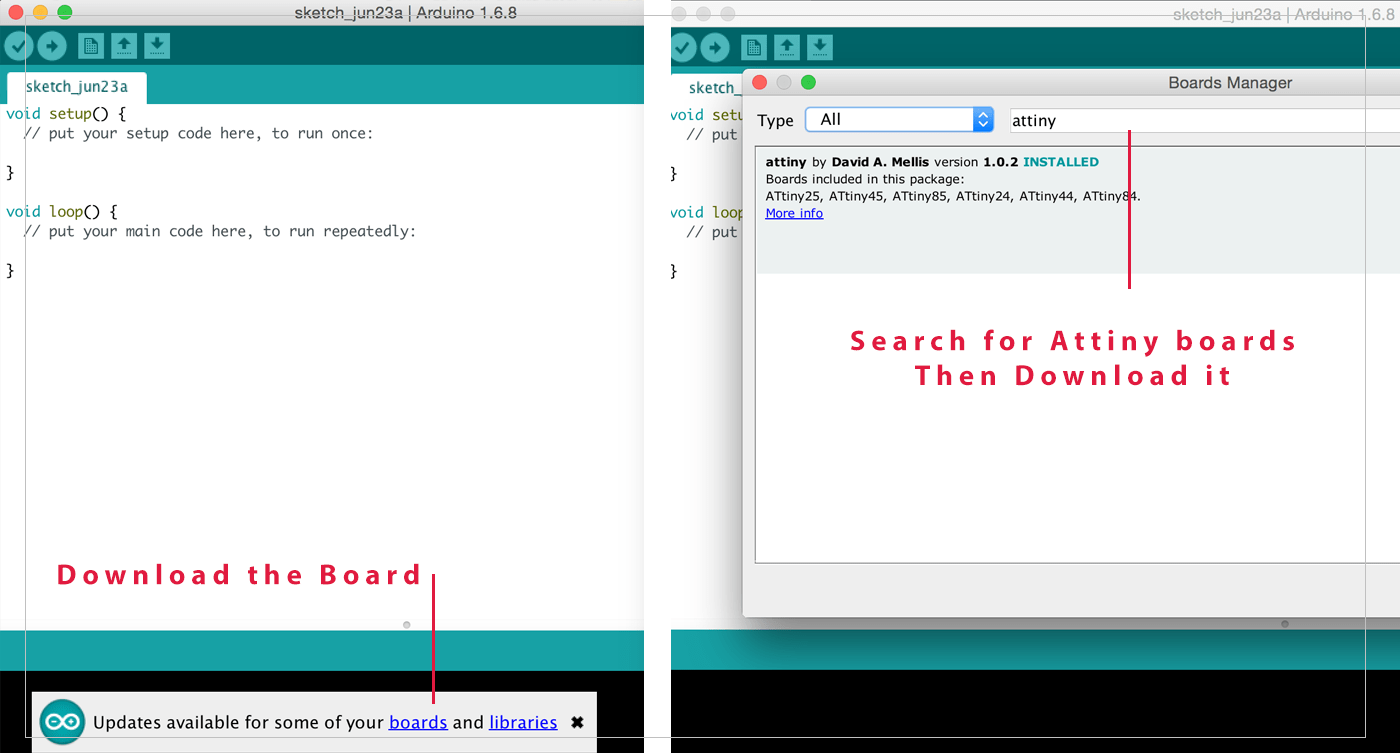
Adding Attiny to Arduino IDE:
When I first open the software, I received a message to update my boards and libraries,, I have clicked on the Boards, then search for Attiny and install it,,
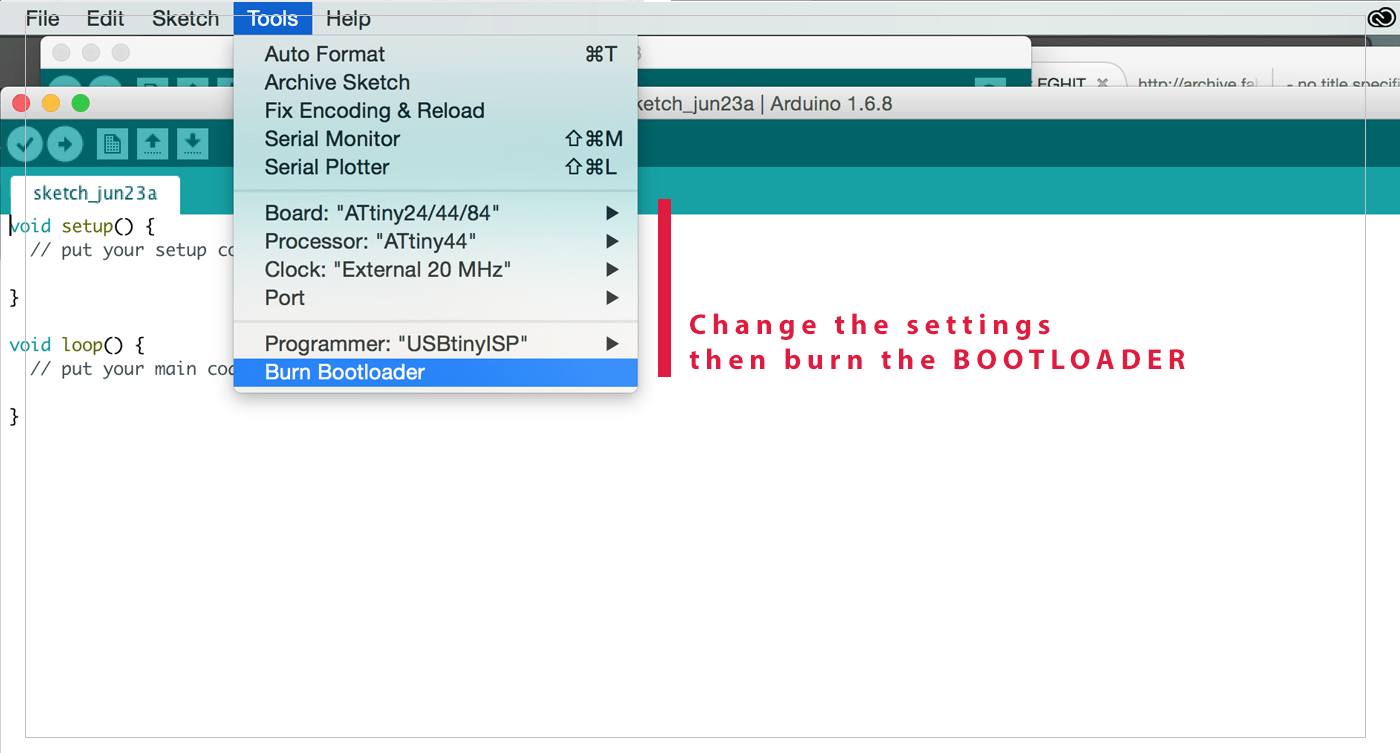
Burning the bootlaoder
After that I have change some settings from Tools menu to the following:
1. Board→ ATtiny
2. Processor→ ATtiny44
3. Clock → External 20 MHz
4. Programmer→ USBtinyISB
5. Burn Bootloader.
I have sucssfuly Burnt my Attiny44 Bootloader, which means all my connections are fine and I can proceed to programming ..
Programming the Board:
Pinout image is the main peice of information I keep going back to in the datasheet, I use it to figure out which pins I can use, and what is the name of the pin in Arduino so I can use these number in my code,, I have then looked at many different button codes, and decided this simple code made by arduino it is VERY simple that I could not modify! I have understood what EACH code is about, and its function, and then clean up the comments of the code.. here are the main functions:
- Const int : is a state the is used to is read-only.
- PinMode :is to define the if the pin is Input or Output.
- ButtonState is a Variable used to check when the button changes state from off to on.
simply the code uses a Variable to read the state of the button,, if it is pressed it would send a High signal and the LED will light up until, otherwise, the signal will be always on Low which means there is no signal passing, so the LED will not light up .. .
The Code
const int btn = 2;     // pushbutton pin
const int led = 3;      //LED pin


void setup() {

  pinMode(led, OUTPUT);    // LED pin as an output:

  pinMode(btn, INPUT);    // pushbutton pin as an input:
}

void loop() {

  buttonState = digitalRead(btn);    // read the state of the pushbutton value:


  if (buttonState == HIGH) {				 // check if the pushbutton is pressed.

    digitalWrite(led, HIGH);				 // turn LED on:
  } else {

    digitalWrite(led, LOW);				 // turn LED off:
  }
}
[ Source File - BRD File ]
[ Source File - SCH File ]
Previous Week Home Next Week