Assignment 14. Composites
In this week I will be making a vacuum formed mold using Composites mateirals..
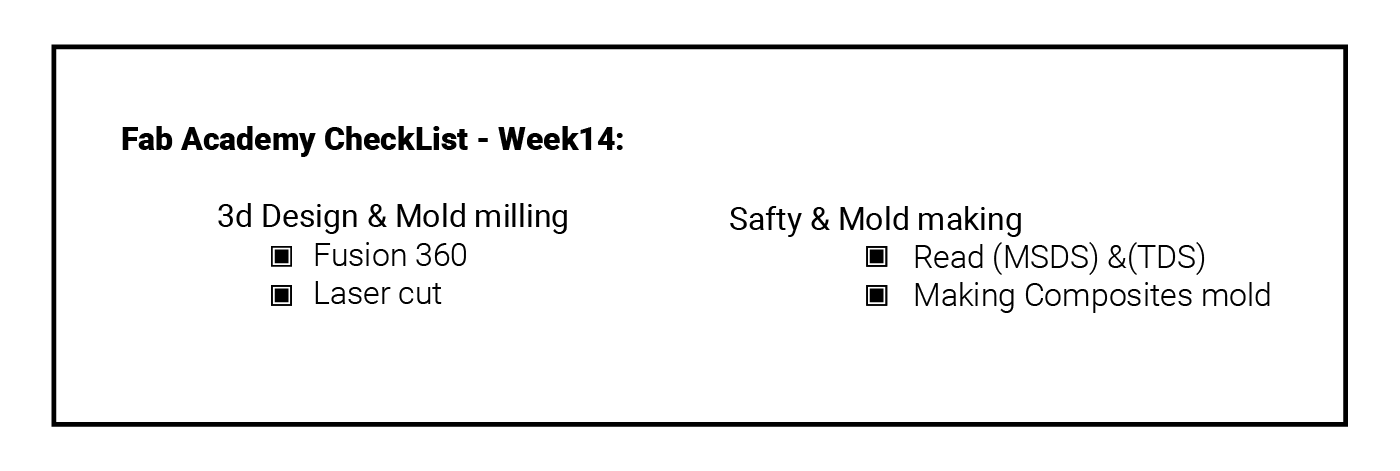
Week 14 checklist:
What is Comosites?
A Composite material is a material made from two or more constituent materials with significantly different physical or chemical properties that, when combined, produce a material with characteristics different from the individual components. [Wikipedia]
In our lab we have decided to make composities out of Burlap & light Cotton fabric, and bound them with Resin ..
Why vacuum formed mold?
Vacuum formed mold have many features which are stated below:
1. Easy to make by making a CNC.
2. Resin are easly avilable.
3. Mold made with Vacuuming can be easly realsed without using mold release agent.
The process
Making the Mold - Fusion 360:
I have started designing my 3d shape in Fusion 360,, I have been experimenting with couple of different software’s lately and I think this will be the one I will be using from now onward,, it is similar to OnShape, without having the problem of being affected by the connection! ( Many times I was not able to use OnShape because of the internet traffic, or slow internet) which was very frustrating!. I have Requested my Fablab license to fusion 360 last week, and started to experiment with it for few days .. one more advantage for this application, that I will be able to use it for free even after the license expires as they offer license for students, hobbyist and small business which is GREAT!
Moving forward to my project,, we were asked to design a mold with the following dimensions ( 300*300*15) the depth was a problem for me, as I was planning to make a boat with more depth, but it would take a lot of time to stack couple of squares on top of each other’s, and to mill them ( I would occupy the machine for very long time, which will delay my colleagues from completing their projects) .. so I deiced to make a flying disk mold that can fit perfectly with these dimensions ..
I have started to draw the shape of the flying desk using the Spline tool to draw the outline of the desk,, after that I have etruded the shape by pressing
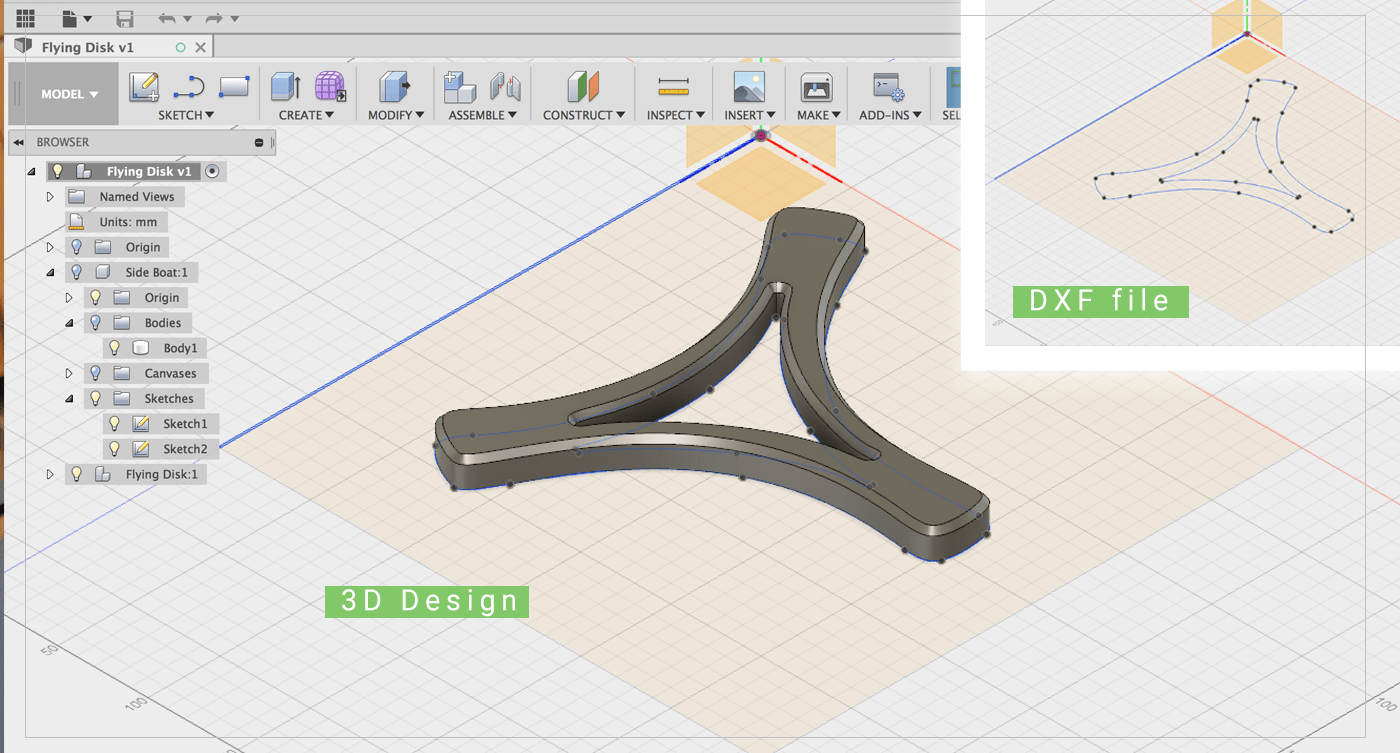
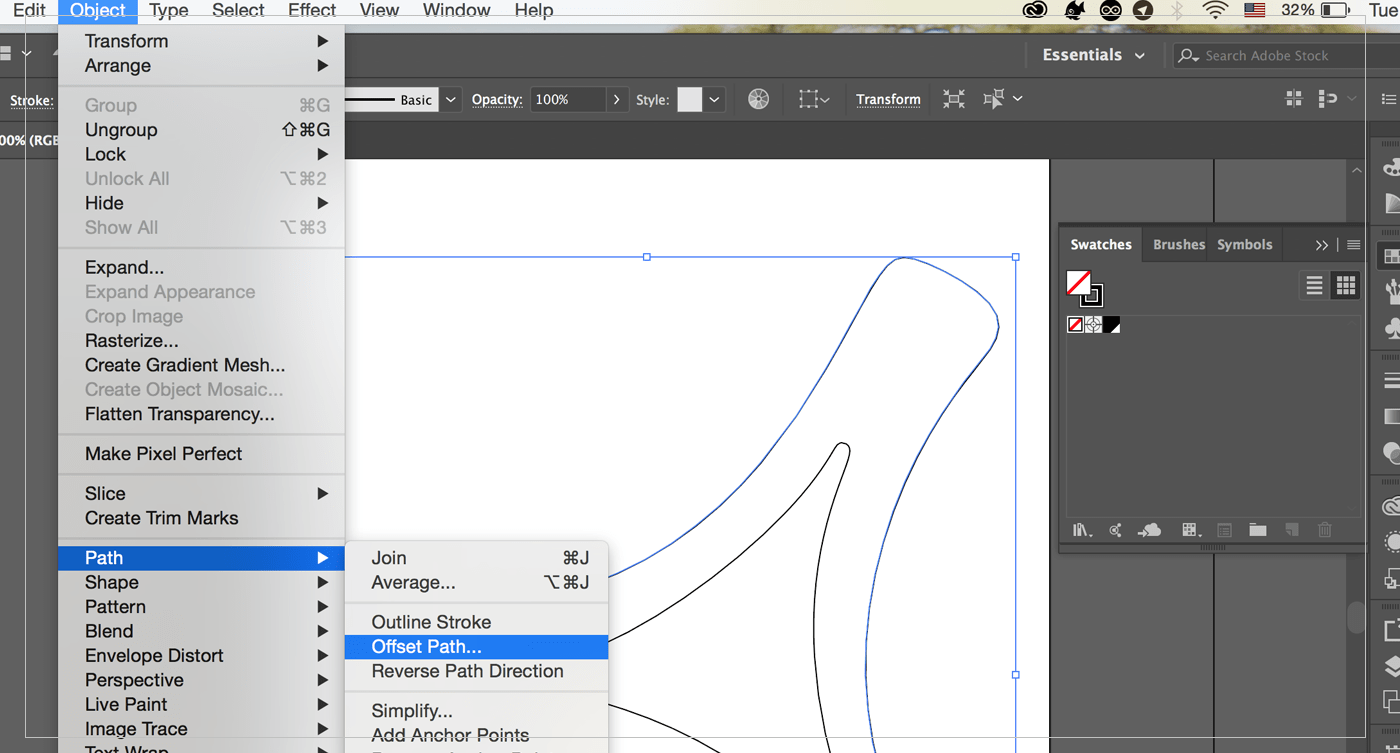
After that, I have exported a DXF file from Fusion 360 to cut the exact shape from fabric,, but then I have remembered that I need to offset it to have enough material to make the mold,, So I did that using Adobe Illustrator,, Then I have added triangles on each corner so it would fold perfectly around my mold
 I have then placed 2 types of fabric into the laser cutter and cut the shape,, I have also recycled a torn-out comics book to put it on the face my mold

Mold making steps:
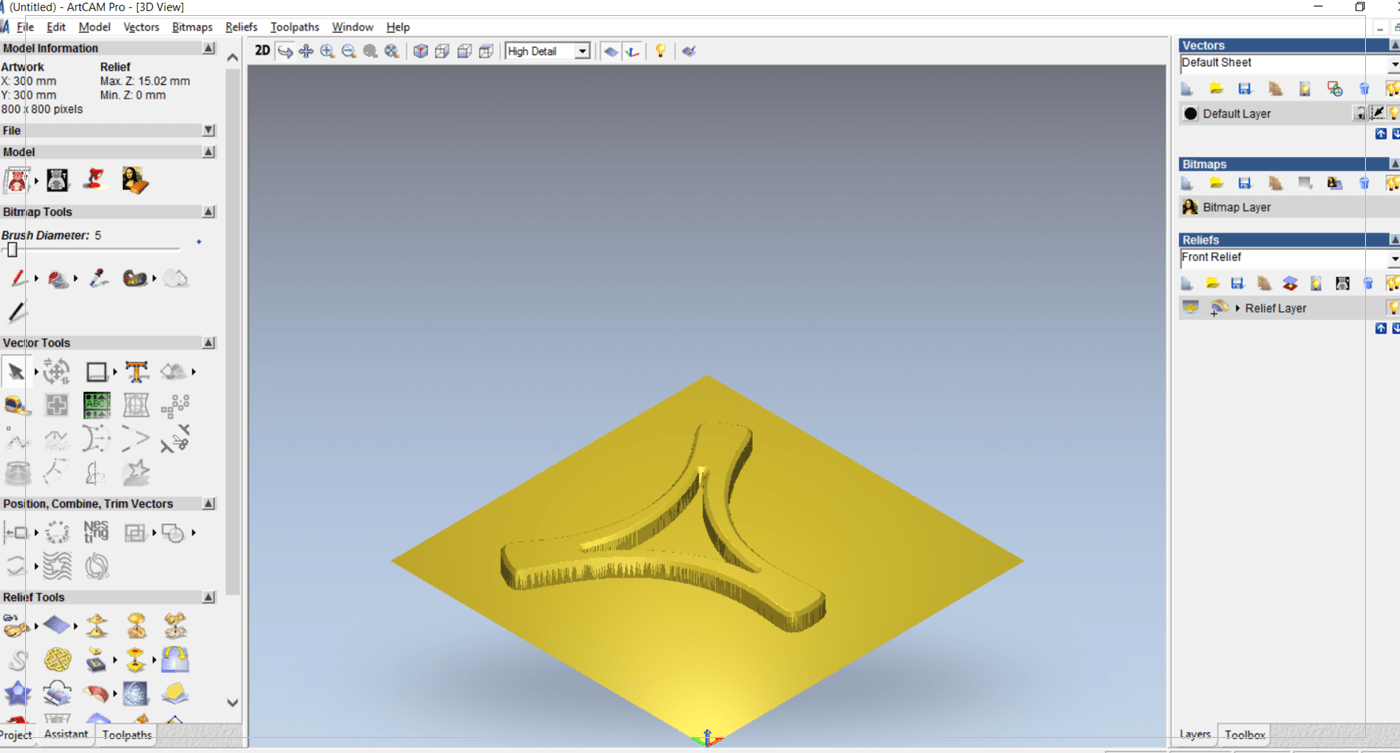
1. Import STL into ArtCam and place it to the center of the working area.
2. Scale the file to fit 300*300 mm.
3. To Genereate the toolpaths for the CNC machine, go to the bottom left panels and choose Assistant.
5. From 3D toolpaths choose Z level roughing.
6. To clean the materials around the shape, select Selected Vector From Area to machine, then choose your tool size ( in my case it was 3mm End mill).
//Tool settings: (Diameter:3mm - Stepover:1.2mm - Stepdown:5mm - Spindle Speed 15000 rpm - Feed Speed 76 mm/sec Plunge Rate 50 mm/sec).
7. From Material,, Enter the total size of your material in Material thickness, then keep the top hight at 0, and change the following vlaue to the toltal hight of your cast, then it would automatically calculate the rest of the matiral left.
8. From Startigey Choose None then name this step so that you would know it when prioritizing the machince work steps, then click calculate .
9. Finally, from Toolpath Operation click on Save toolpaths Save the tool path then save them as NS or PLT file.
[ Source File - ART File ]
Milling The Mold
The process was very easy,, I have fixed MDF wood to the machine, then, change the bit, download the NS files and start milling ..
Making the Mold
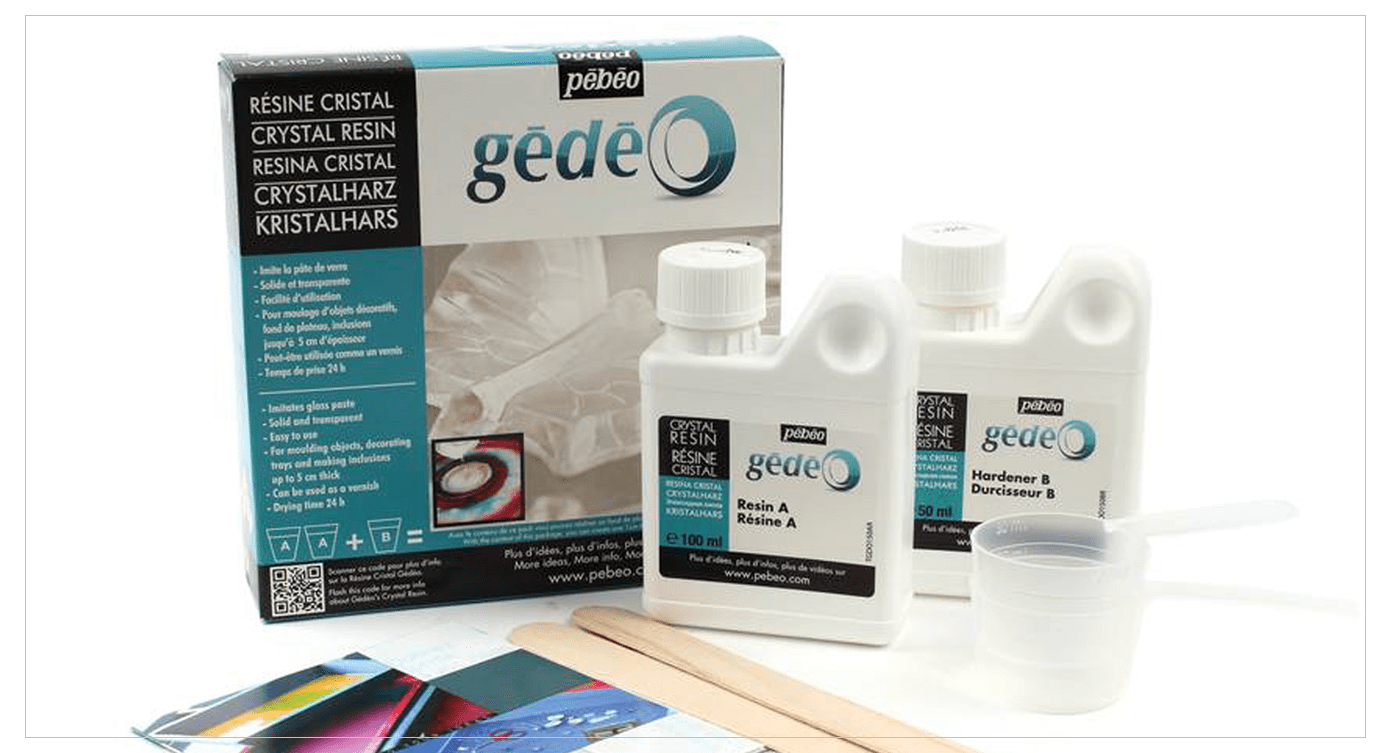
We have experimented with many Resin materials, until we found the perfect Matiral which is Gedeo Crystal Resin, this matiral was not cheap, but it did the job perfectly.
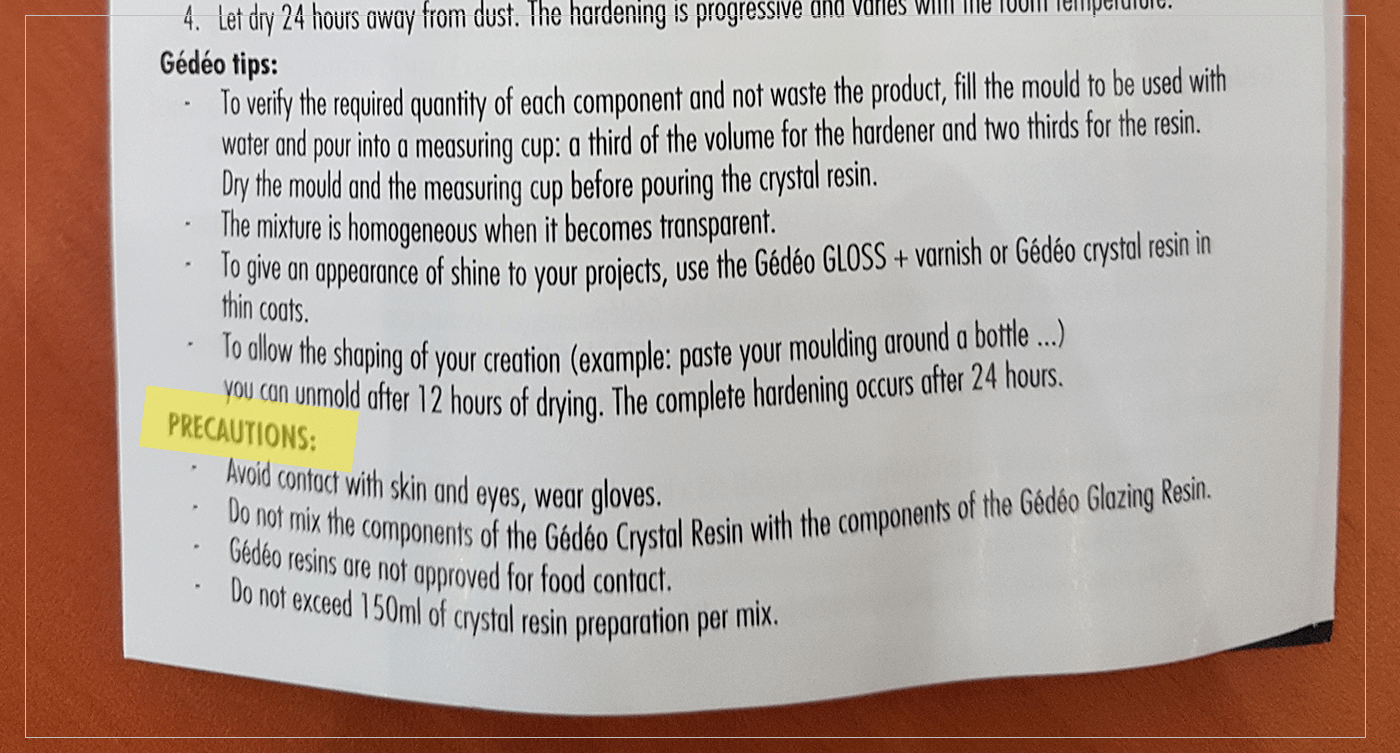
Instructions & Safety Guidelines :
I have first read the user guide of for the Resin and followed their simple Precautions
Composite making process:
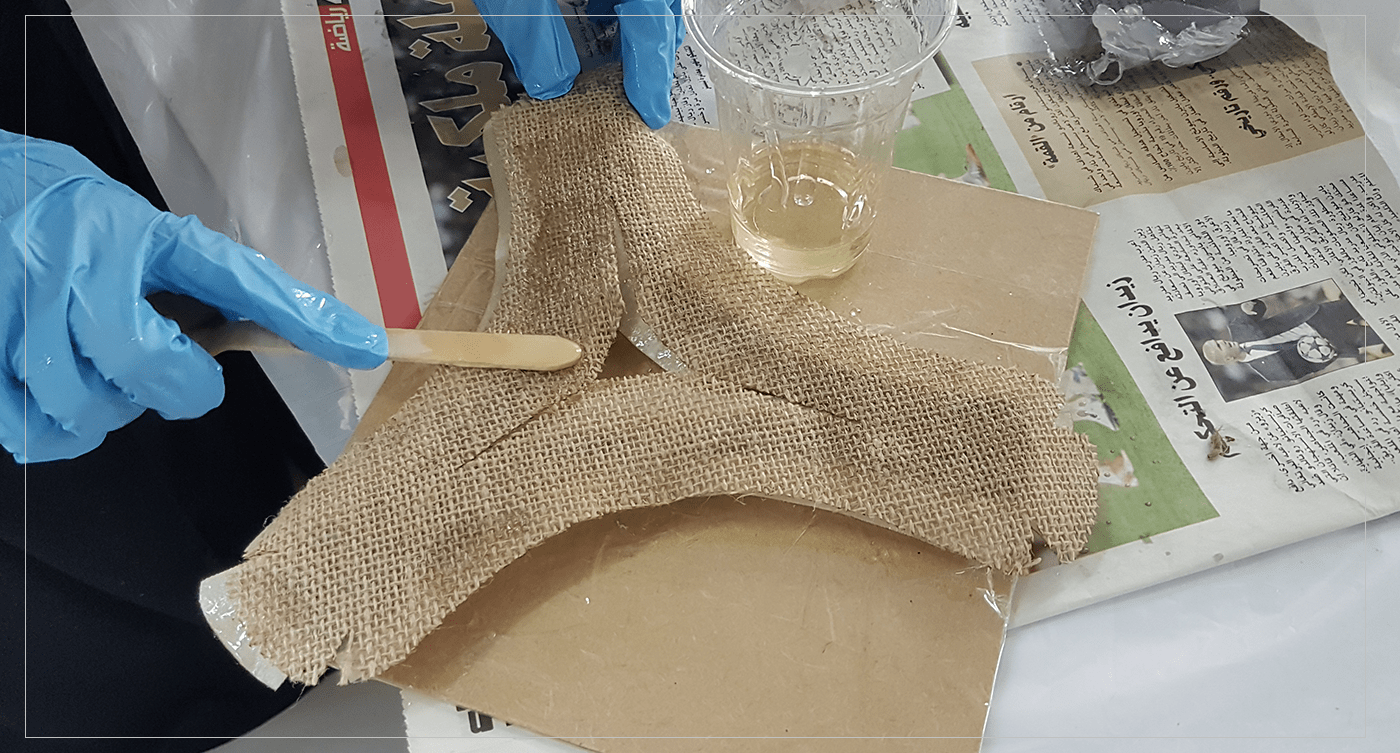
I have started the process of making the composite by Covering the board of my mold with tape as it was the best martial that sticks to the MDF board ( better than the plastic wrap which had changes the shape of the mold) After that I have mixed 2 parts of Crystal Resin ( 2 parts of Resin with 1 part of Hardener) to make the solution that would be used to cover the fabric layers, then I have started layering the fabric.. but first I have used my Comic paper layer, covering it with enough resin, then one layer of thin fabric, burlap, and finally thin fabric.. I have covered each layer with resin,,
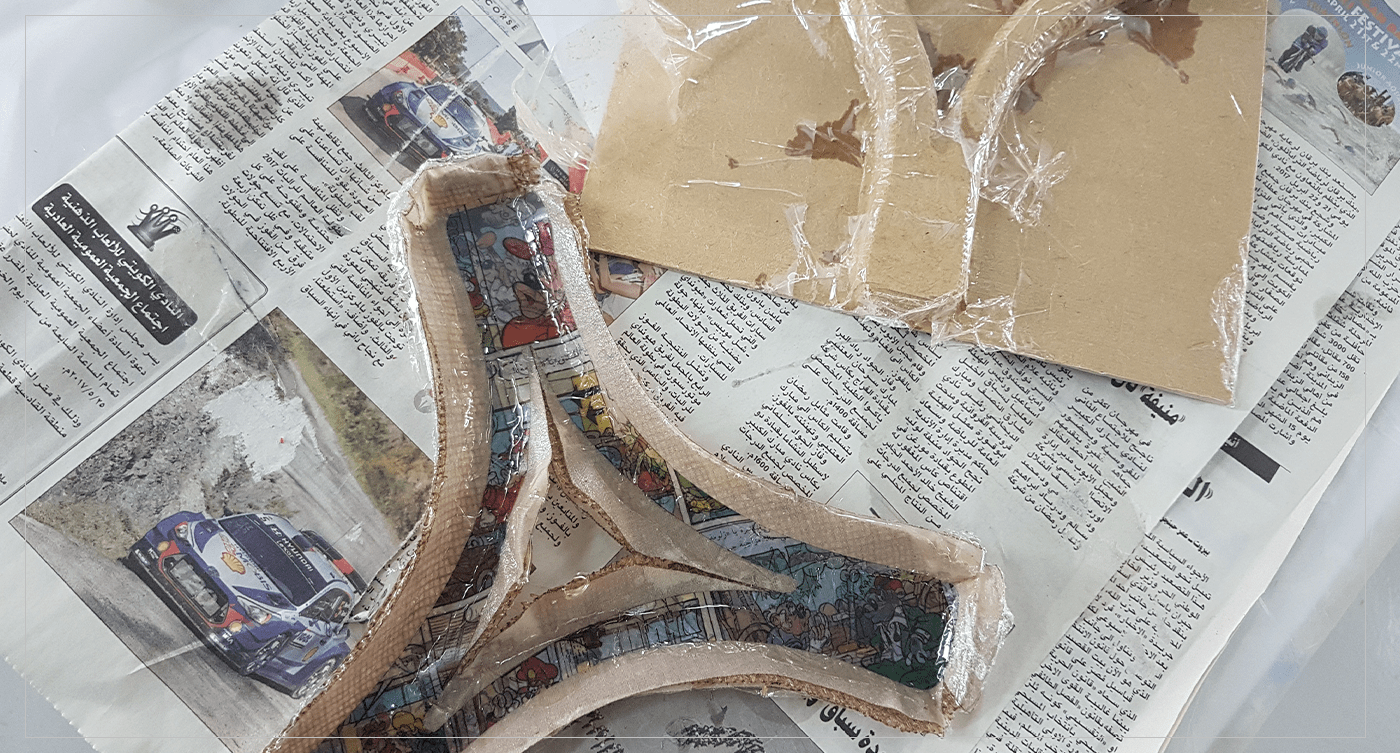
 After that, I have covered the whole project with plastic wrap to prevent it from sticking to the vacuum bag,, then insert it into the vacuum bag,, at first when we start to vacuum, nothing happened, the fabric was still loos around the mold, then we have made a cut in the plastic wrap at the center of the mold, and it works perfectly..
After one day, it was DONE : ) !
[ Source File - F3D File ]
[ Source File - DXF File ]
Previous Week Home Next Week