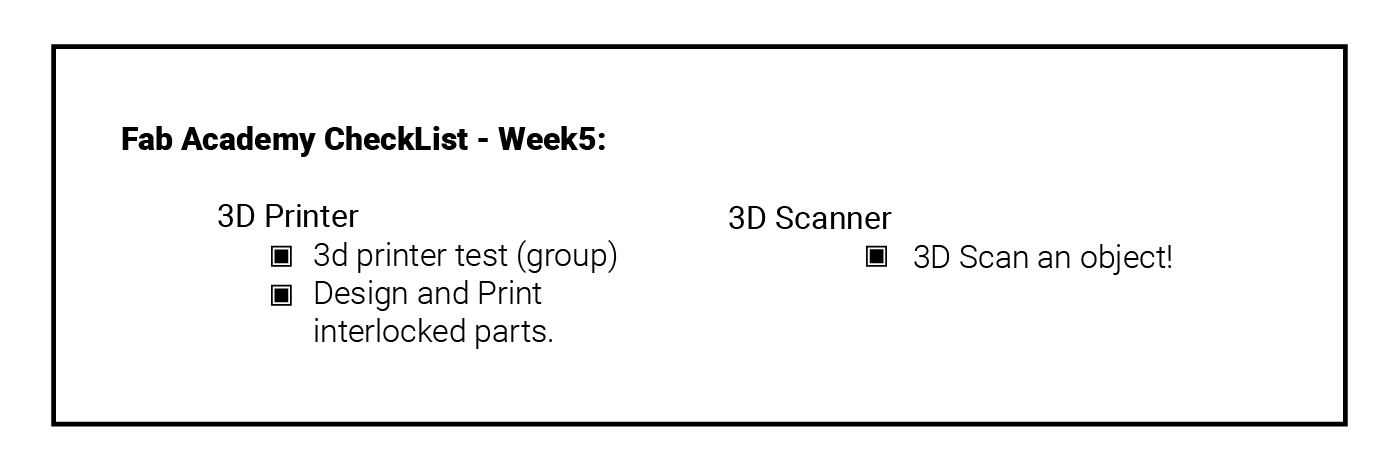
Assignment 5. 3D Scanning and Printing
The assignment for this week seems easy to make,, here are the list:
What is 3d Printing ?
Simpliy 3D printing or additive manufacturing is a process of making three dimensional solid objects from a digital file. [Source]
3D Printing
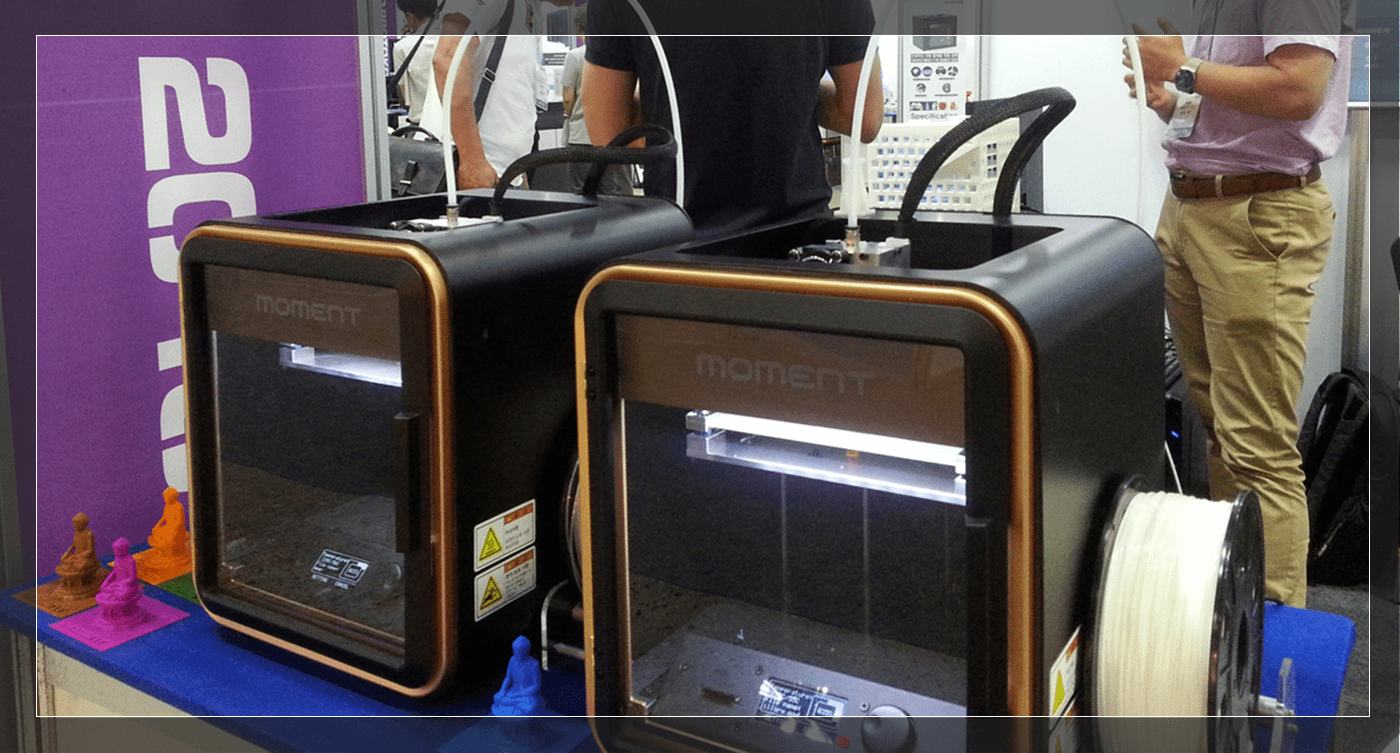
I am using Moment 3d printer .. it is a Korean branded high quality 3d printer, I have been testing it for couple of months now, one of the lessons I have learned the Hard way was that I should NEVER leave any machine to work without continuous supervision, because things might get wrong and I should stop it when as soon as the problem occurs!
3d Slicer software
a 3D printing slicing software controls every aspect of the 3D print. It translates 3D models into instructions your printer understands. Better instructions mean better prints, so a simple software upgrade makes all the difference in the world. In fact, more than 90% of experts agree that 3D printing software has the greatest impact on print quality, even more so than the 3D printer itself! [ Source]
Ultimaker-Cura Slicer
I will be using this software as a slicer for my 3d printed parts,, becaue it is Extremly easy to use, and avilable free of cost, and I have been using it for a while without having any problems ..
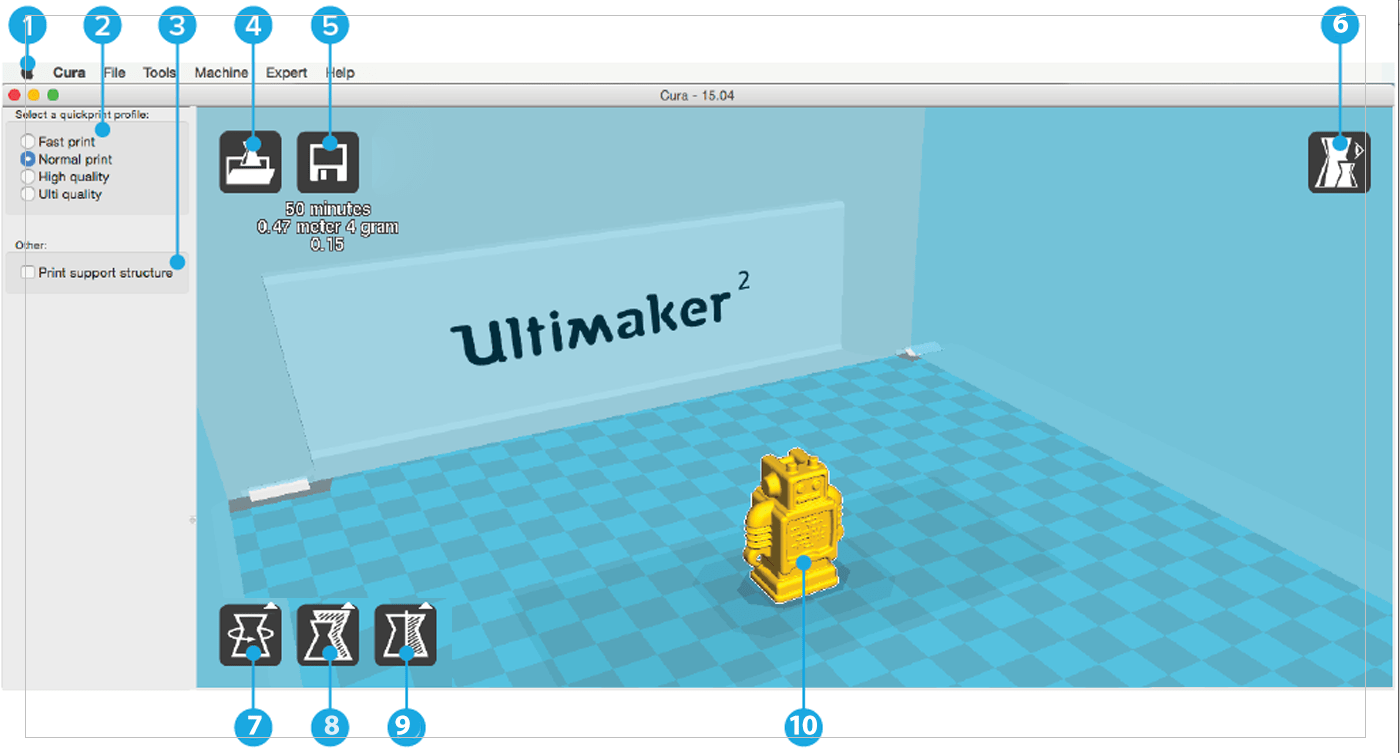
Main tools:
1. Menu bar: gives you access to preferences, machine settings and profiles.
2. Quick print profiles: default print profiles that can be used directly.
3. Support structure: offers the option to add support to the print
4. Load button: click this button to load a 3D model in Cura.
5. Save button: with this button 3D print files can be saved to your computer or directly on the SD card (if inserted).
6. View modes: use different view modes to check the printability of your model and to view the print path.
7. Rotate: rotate the model in the X, Y or Z direction.
8. Scale: change the (outer) dimensions of the 3D model.
9. Mirror: use this option to mirror the 3D model in X, Y or Z direction.
10. Visualization: shows the platform of the Ultimaker with the loaded 3D model(s).
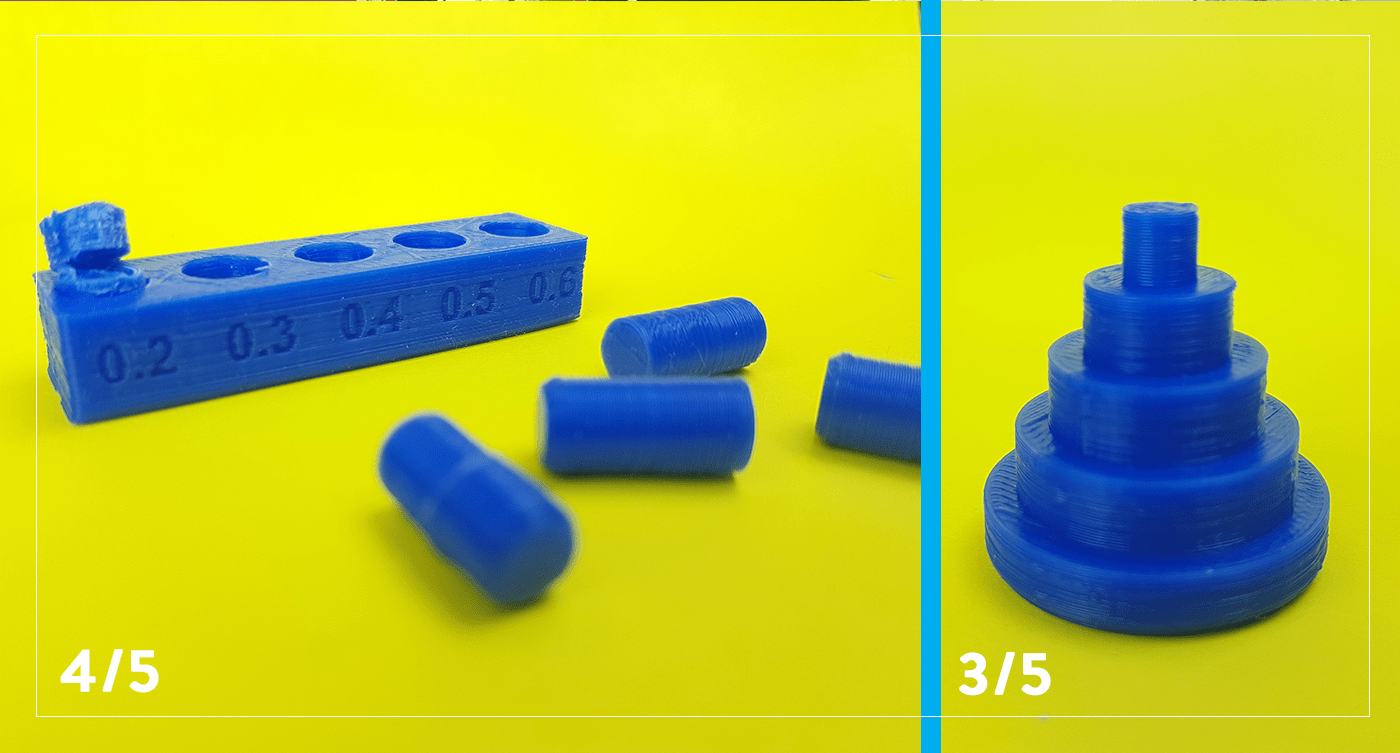
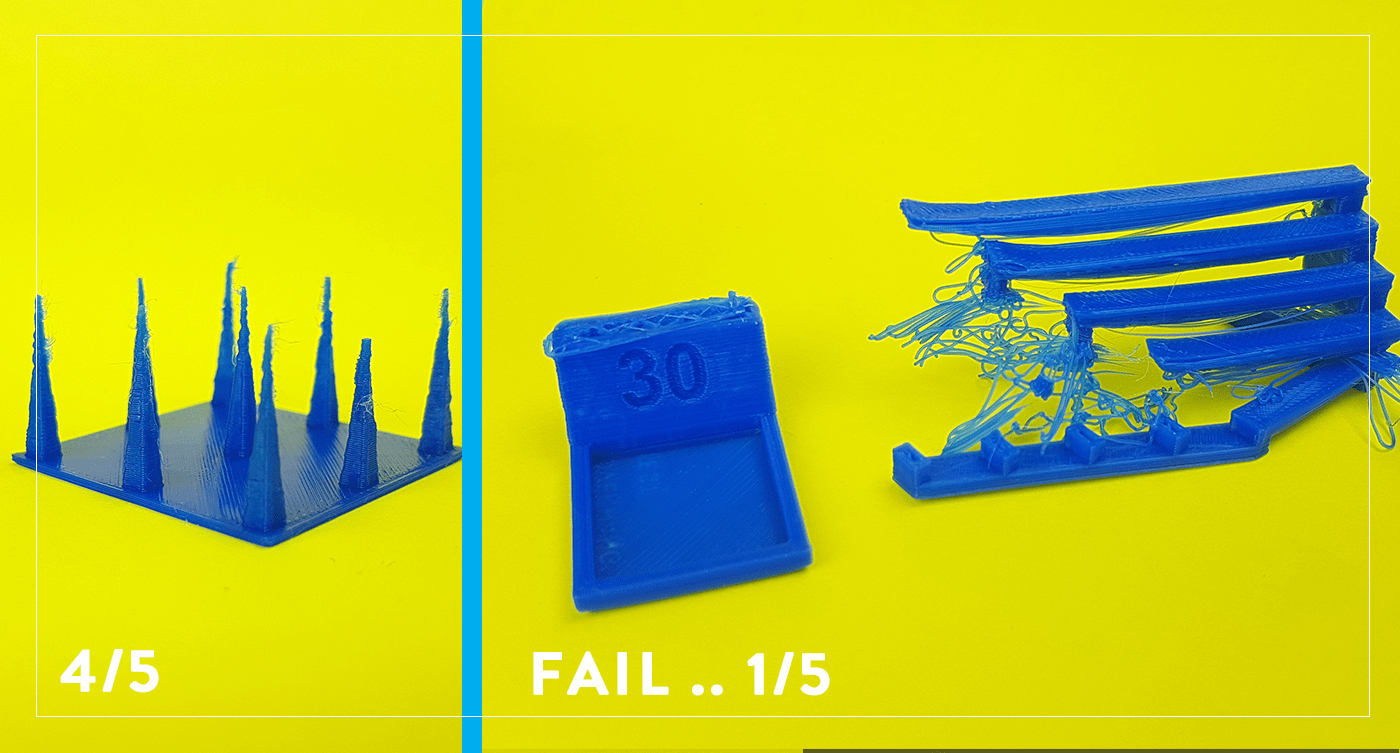
3d Printer test:
The 3d printer test is a file that is used to push the printer to its limits and test its capabilities to print very fine or hard designs..
There were many files to choose from, but most of them without any documentation of how to use these files to test my printer! So I searched for models with some evaluation tips to be able to know how well my printer is doing.. I found Make: 2015 3D Printer Shoot Out Test Models with a nice evacuation criteria for these models. There were many test files, I choose the once I would really like to test my printer for, which include:
1. Dimensional Accuracy
2. Bridging Performance
3. Overhang Performance
4. Negative Space Tolerances
5. Fine Positive Space Features Performance
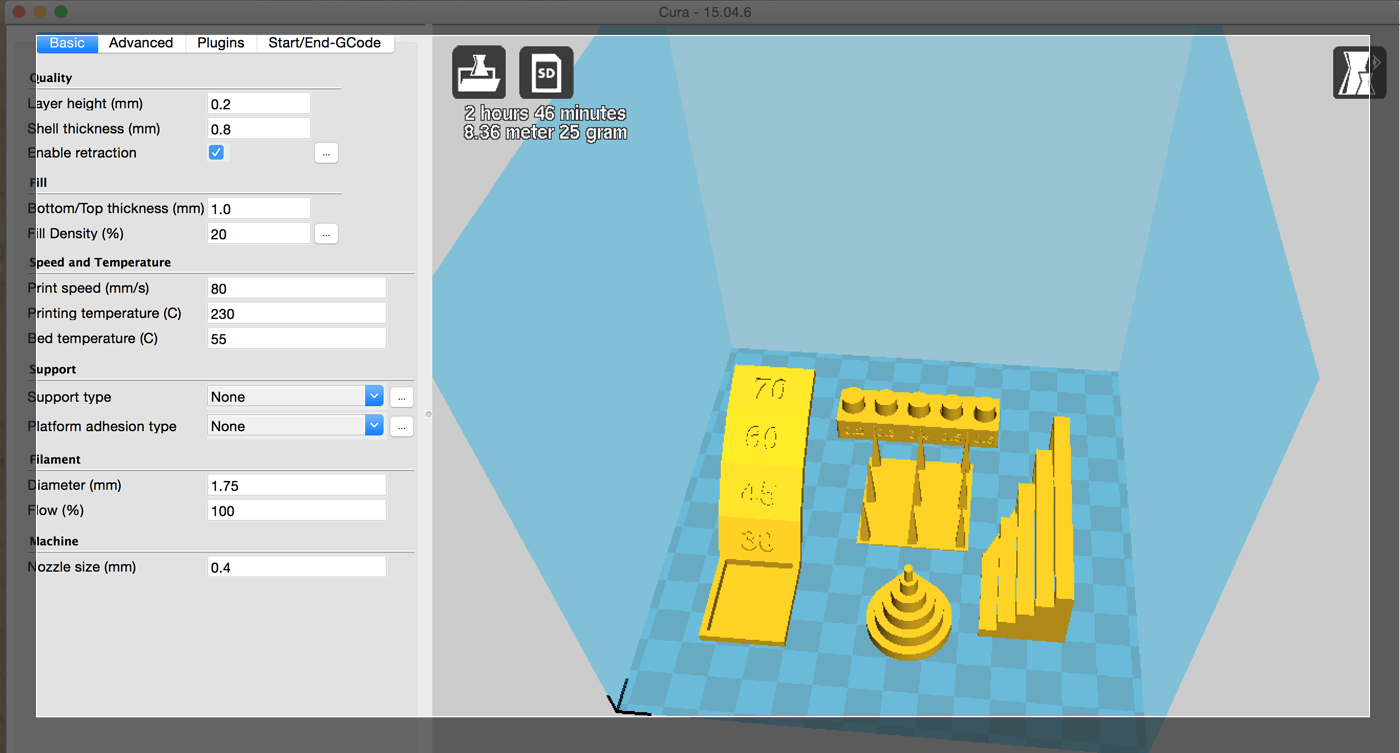 As the designer of these models suggested, I have choose the "medium" settings (layer height of 0.2mm and default speeds and temperatures).
Test Results:
After almost 3 hours of printing,, my machine has scored the following (depending on the MAKE evaluation reference):
1. Dimensional Accuracy: 3/5
2. Bridging Performance: 1/5
3. Overhang Performance: 1/5
4. Negative Space Tolerances: 4/5
5. Fine Positive Space Features Performance: 4/5
3D Design and Print:
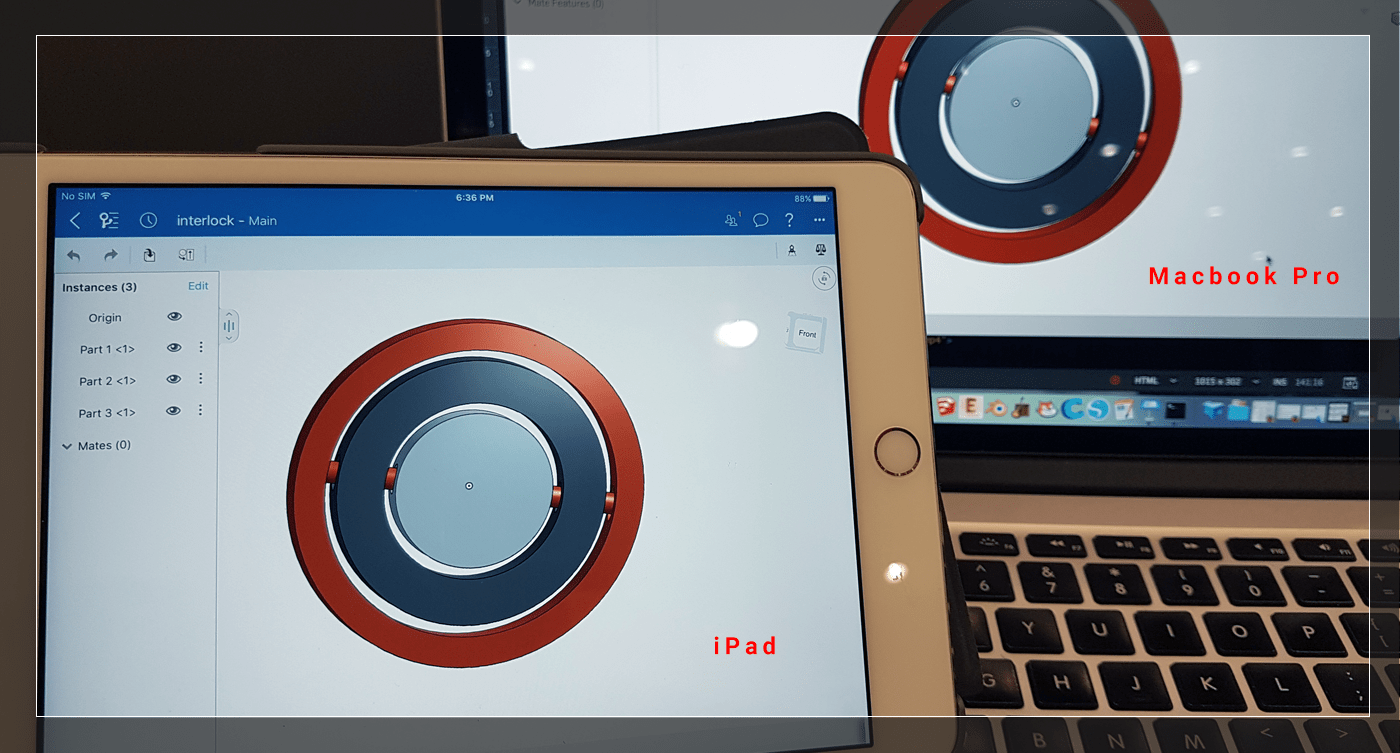
As I mentioned previoslly in week 2, I will be concentranting in this course on two 3d design softwares, Onshape, and Fusion,, This week I will be using OnShape web based application as well as its Smart devices version to design my file !
Before designing my project, I have been searching on the web for similar concepts, and the rules for designing an interlocked design ( which is impossible to make on any other machine in one piece), the main idea was to KNOW THE RULES, and design something VERY SIMPLE and will not take much time to print ..
Useful resources:
1. Maker Faire 2013 3D Printing Stage: Top Ten Tips for Designing to Print.
2. 3D Printing: how to make moveable parts.
3. How to design 3D Printable Hinges - Make moving parts!.
Design process:
So I have decided to make a set of circles inside each other and attach them with a rod form the inside,, this simple design will be impossible to make on any other machine, and it will be simple and easy to implement ( I have make the complete design on My Mobile Phone and iPad) and it also has a moving part (the middle circle)..
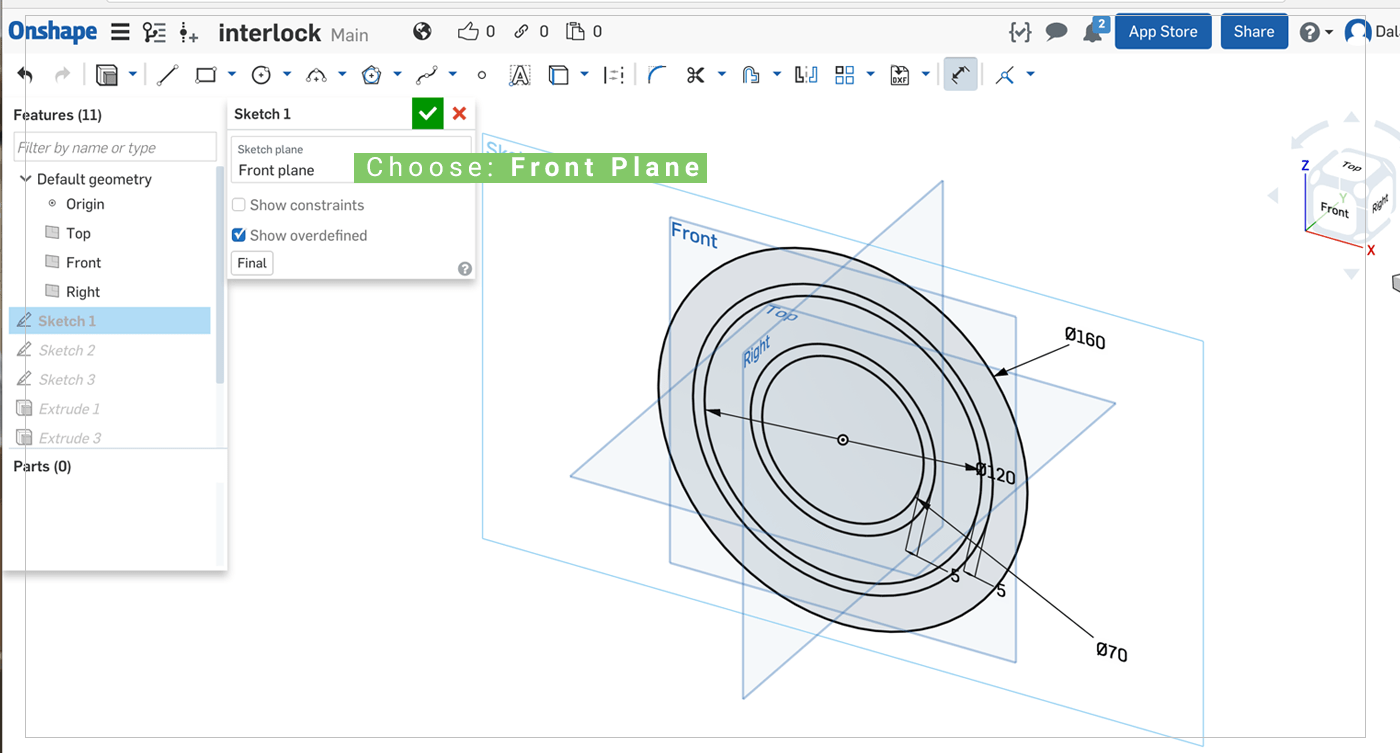
1. Opne OnShape, click on Create > Document > write a name for the file to start a new page for the design.
2. Click on Sketch and choose Front plane.
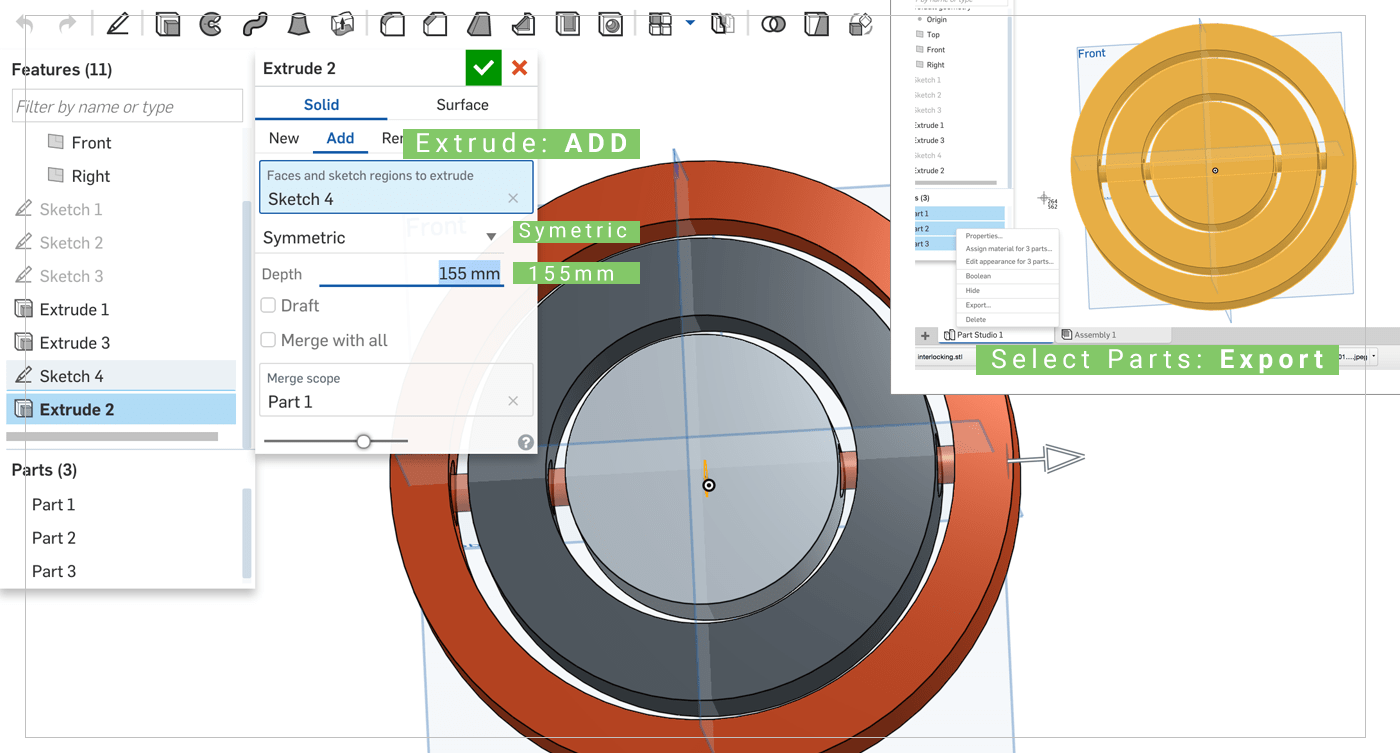
3. Draw the 3 Main circles ( Big: 160, Middle: 120, Small:70), then offset the Small and middle by 5mm, this will be the allowance between circles, so they can rotate freely.
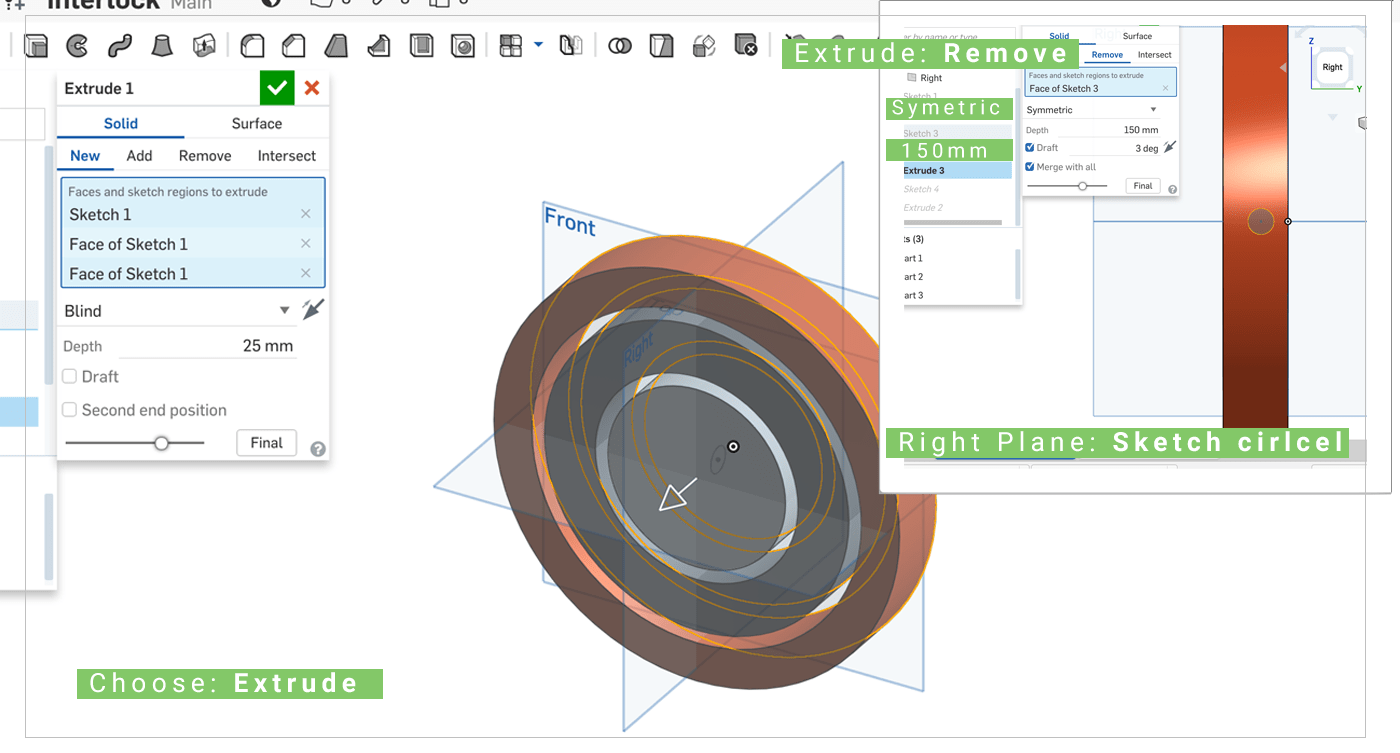 4. After that, click on Extrude to add depth to the circles ( I have added 25mm) .
5. Click on one of the side planes ( Right on my Case), then Draw a circle smaller than the value of extrude.
6. Extrude that Sketch and choose:
- REMOVE: which will remove the intersection parts from all the circles.
- Symetric: this feature will extrude the sketch form both sides.
- 150mm: choose a vlaue less than the size of the biggest circle, so that it will cut the last circle but not all the way through! in order to hold the rod inside.
 7. The Final Step was to draw the rod, to do so, draw a similar size circle on the Right panel again, and reduce it size depending on your 3d printers abilities ,, from the previous test my printer can handle until 0.3mm.. so I gave myself some space reduice the second circle size by 0.5mm.
8. Extrude this sketch and choose the following settings:
- ADD: to make the new rod into a new part.
- Symetric.
- 155mm: the extra 5mm will attach this part to the bigger circle, so other circles would rotate around it.
9. Finally,, Select all the parts from the bottom right section, Right click, Export, and save it as STL.
[ Source File - OnShape ]
[ Source File - CIRCULES DXF File ]
[ Source File - Holes DXF File ]
[ Source File - ROD DXF File ]
Printing the design:
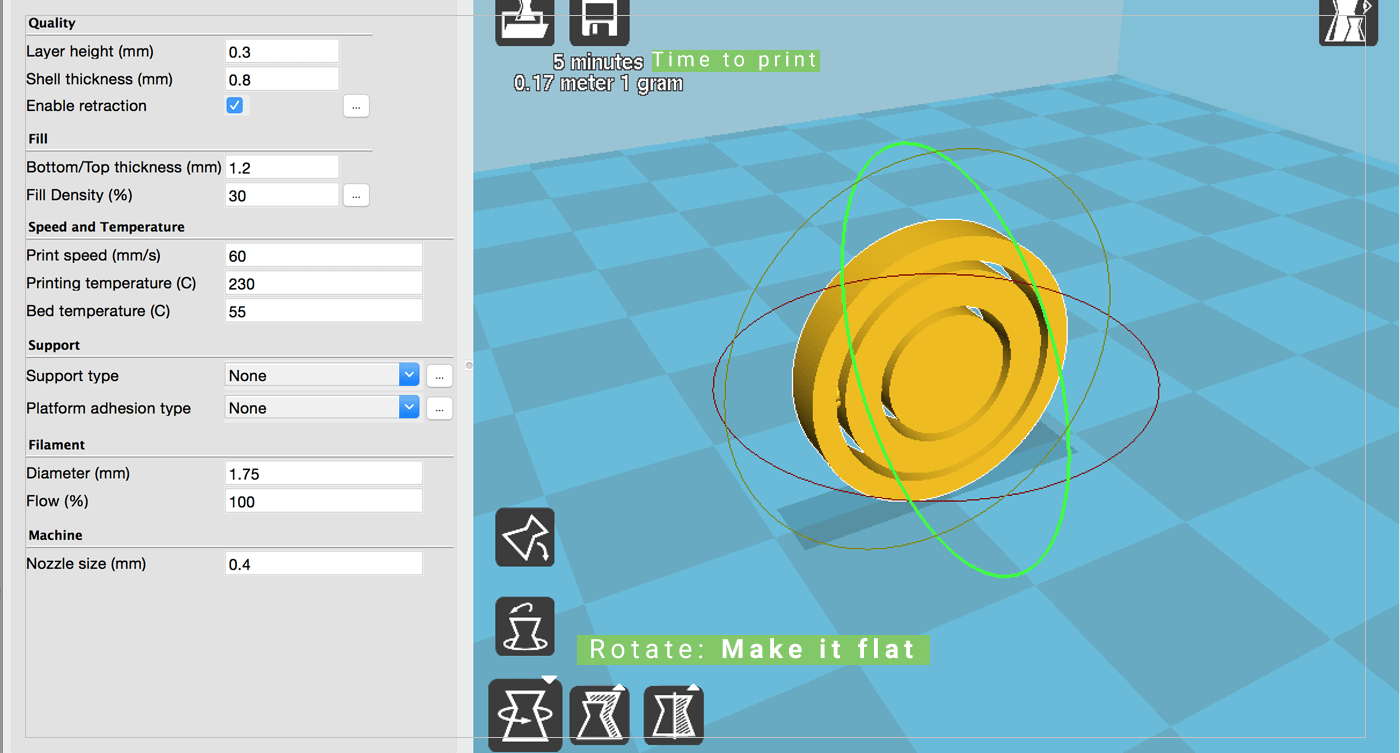
I have dragged and drop the STL File into Cura to print my design,, the design was not palced on the right face,, so I have used the Rotation tool to make it flat on the surface..
I have used the following settings to print a good qulity design with less time:
- Layer hight: 0.3.
- Shell Thickness: 0.8.
- Bottom Thickness: 1.2.
- Fill Density: 30.
- Print speed: 60.
- Printing Tempreture: 230.
- Bed Tempreture: 55.
- Diameter: 1.75.
- Nozzle size: 0.4.
Even this project was easy to make, I have faced couple of problems, here are they:
- Problem 1: parts did not stick to the plate
I had to add some glue-stick to increase the bound between the plastic and the plate, or I will have to increase the temperature for the heated bed.
- Problem 2: changing the depth on the Slicer
When I downloaded the STL file, I have open it on a Slicer to convert it to G-code so my printer will be able to print it,, I have used the default setting for fast prints, then I decided to change the depth of the circles to reduce the printing time, so I did inside Cura,, then after printing, I have discovered the the rod inside became flat! and I was not be able to rotate the circles, they were just sliding! So next time I have to put in mind that when I want to change any part I have to change it from onShape directly.
Update ..
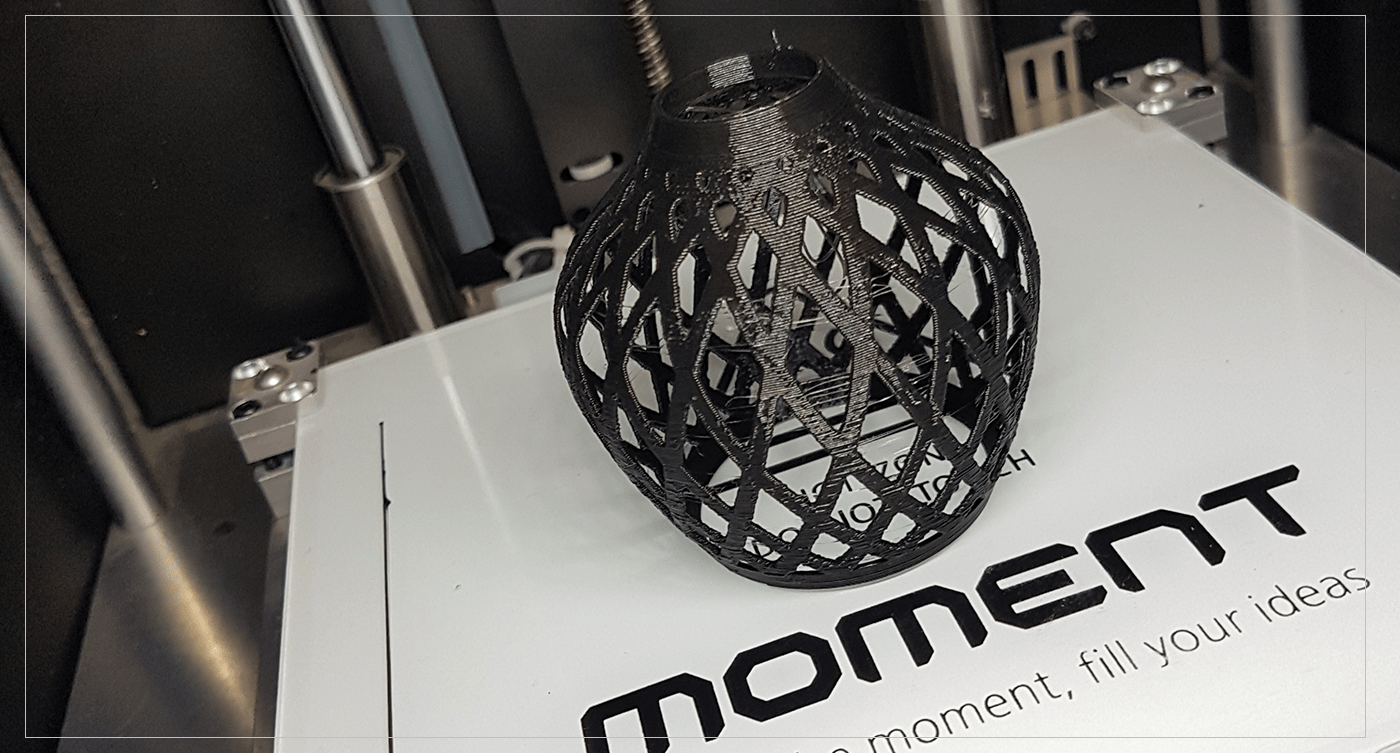
As I am learning on Fusion360, I have been experimenting with different designs each time, and I have designed a small vase that have complex intersections that it would be impossible to produce using any other machines,, this shape can be used for various applications ( lamp shade, Vase, Candle cover, cup holder ...
[ Source File - F3D File ]
3d Scanneing:
3D scanning is the process of turning a physical 3D object into a digital representation of that object. 3D scanning complements 3D printing, but its applications are not limited to 3D printing. [ Source]
My first Attempt was to use a mobile application called Autodesk 123D Catch* it has very specific rules which limit the objects that I can scan (eg. it should not be reflective, not transperant, better to be from fabric ...), and when I found the Perfect object, the results were VERY VERY bad!
*I was able to download it on my Samsung moible, then it was removed from Google Play Store as well as Apple stroe
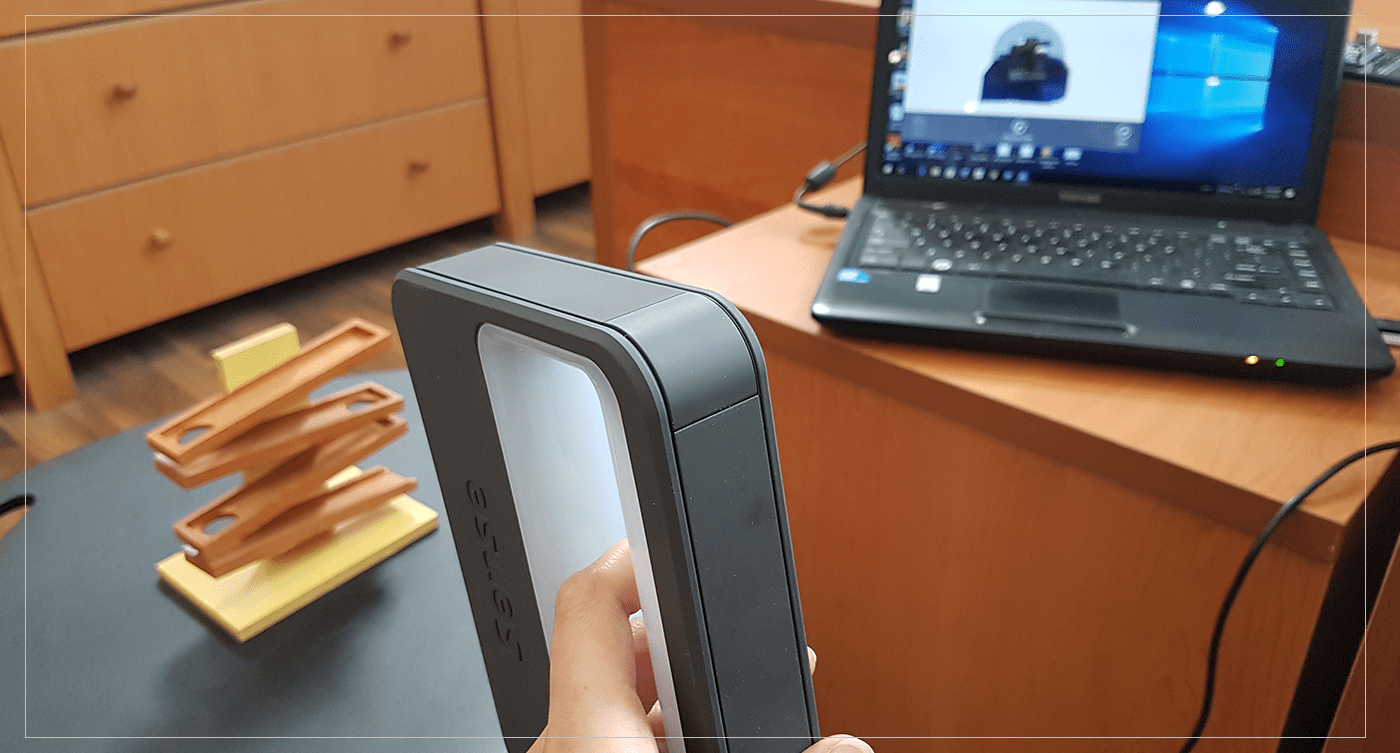
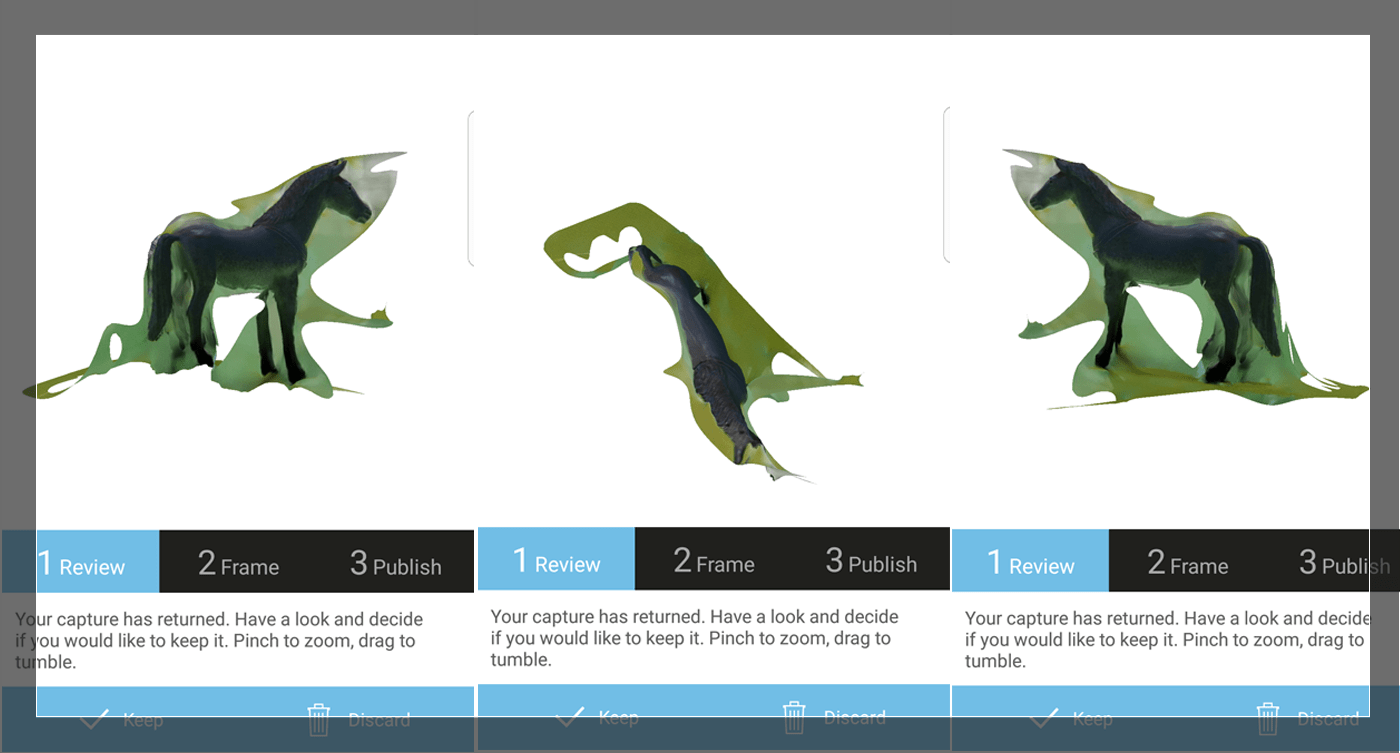 The Second Attempt I have tried was by using Sense Scanner, it was a better approach and much easier to handle,, it was almost plug and scan, where you will have to keep your hand as still as possible while holding the scanner, and put the object on a rotating table,, The end results was better, but not perfect,, I have experiment with couple of objects,, two of which I have got fairly good results,, the others where even having a very shiny surface, or many curves, or many details,,
[ Source File - Sense scan1 ]
[ Source File - Sense scan2 ]
Previous Week Home Next Week