Computer – Controlled Machining
Week 7
Assignment :
-
Make something big on a (CNC machine).
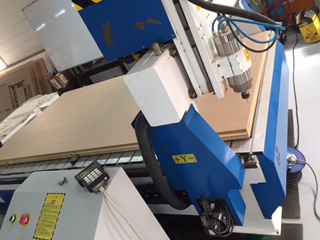
We are using J-Cut 1325 Machine
Design :
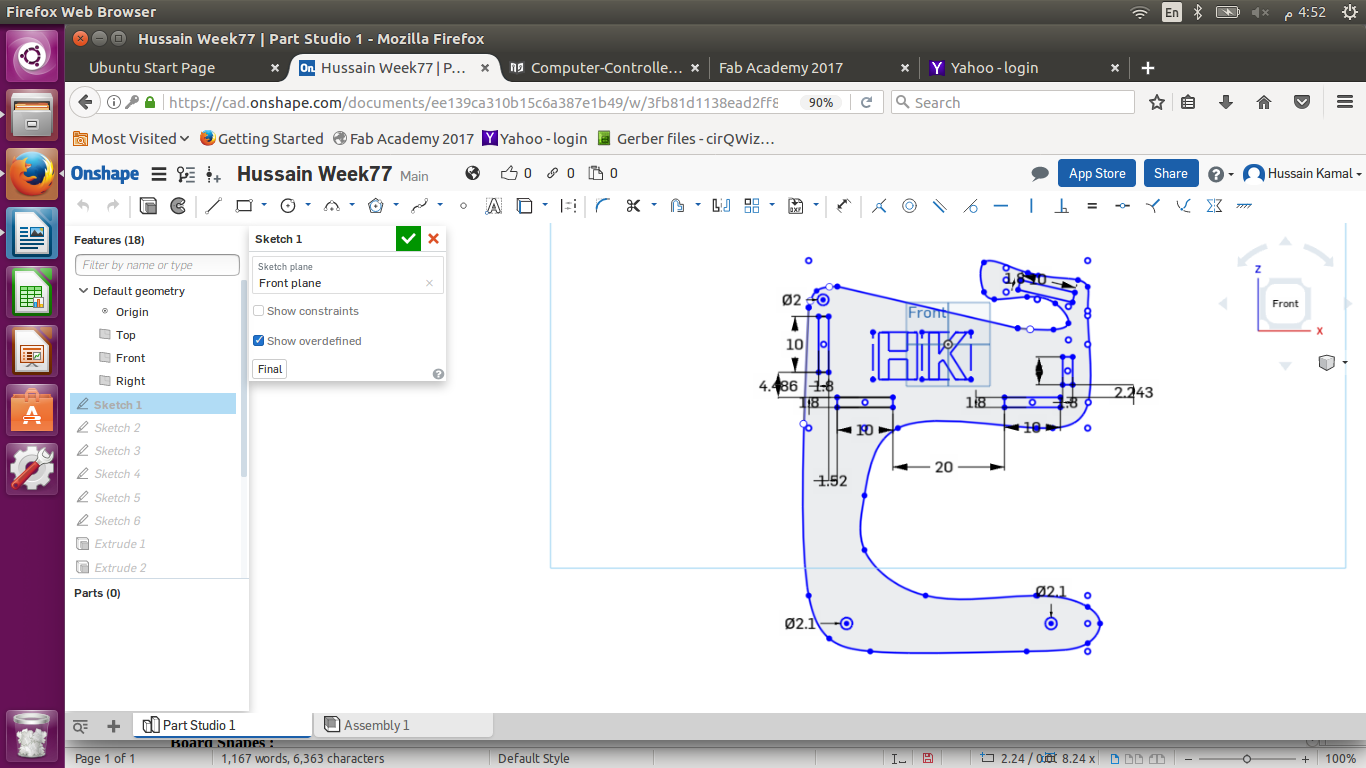
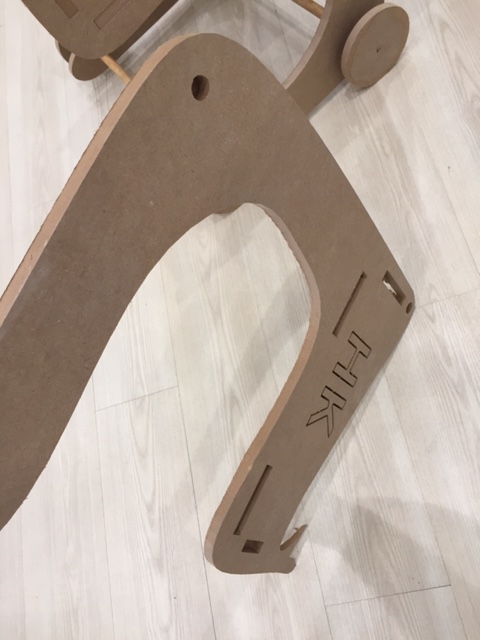
Main Shape :
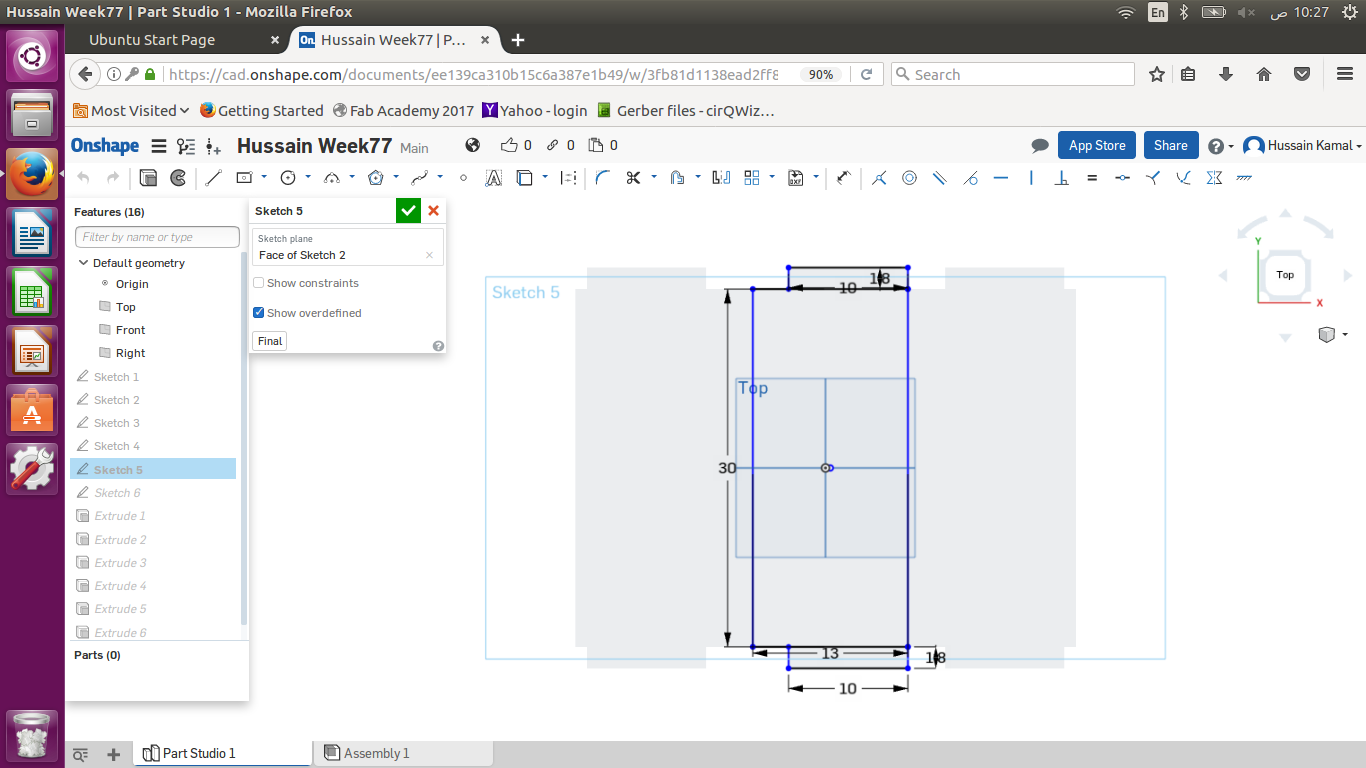
I used Onshape to design my object. I wanted to design a prototype shape of my final project ( Cart ). So I designed a simple shape of a cart to mirror it and have 2 of the shapes in parallel , considering all the press fits to fix the basket later , the horizontal small rectangles (10 cm x 1.8 cm) are the press fits to place the ground board of the cart. While the vertical rectangles (10 cm x 1.8 cm) & (5 cm x 1.8 cm) to hold the front & back boards of the basket as shown below .
Board Shapes :
Below are board shapes I designed to make the basket inside my cart , designing press fit shapes to be inserted in the press fit slots on the main cart shaped board, all boards bellow were drawn using center point rectangle tool and trim tool to trim the unnecessary lines to make it one complete obect.
Bottom side of the basket
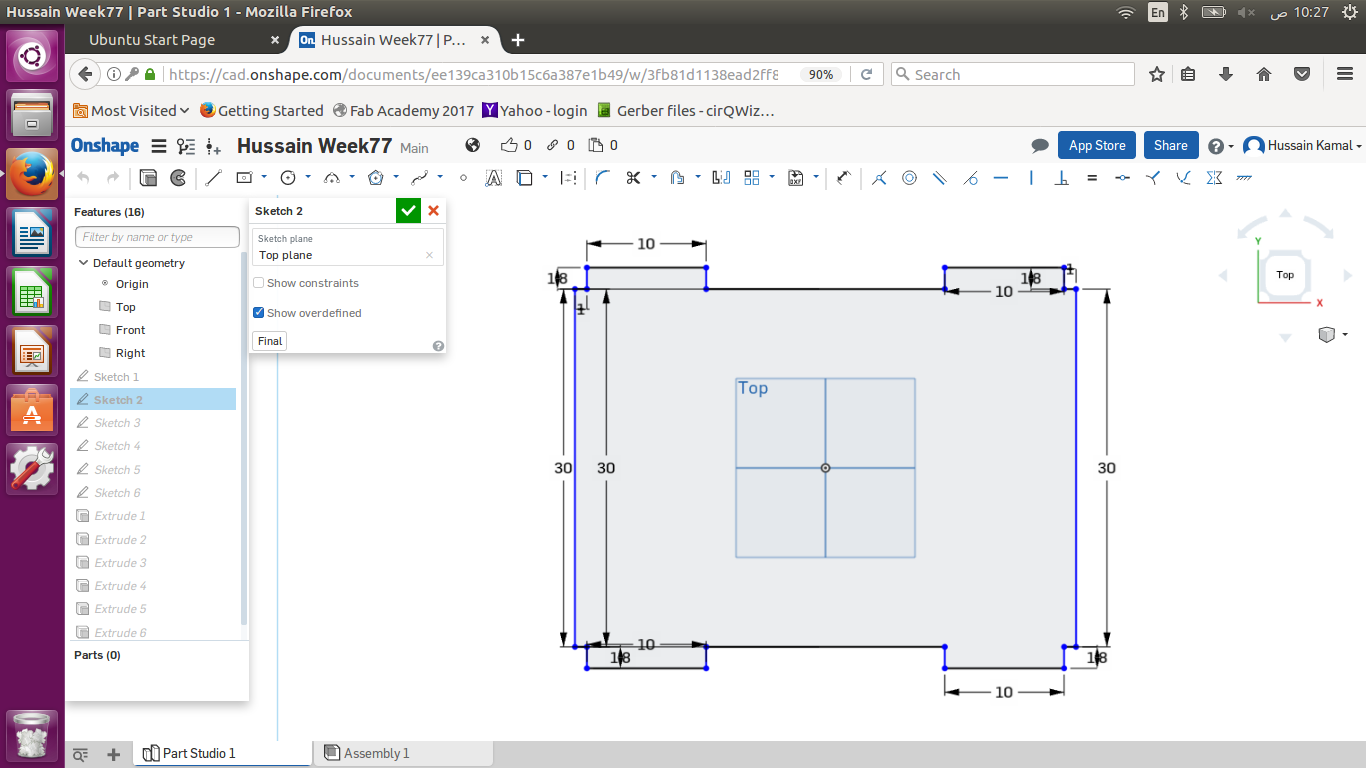
This is the bottom side of the basket. Later on I changed the length from 30 cm to 50 cm to widen my cart. The 4 press fits are 10 cm x 1.8 cm because the wooden sheet I’m cutting is 1.8 cm thick. And I fixed a .15 mm tolerance for the press fit slots on the main cart shape , so the holes will be bigger to fit the press fit.
Back side of the basket

Front Side of the basket

While this last board at the top of the cart and a little bit tilted , the purpose of this board is to place an iPad or iPhone.
Front part of the basket
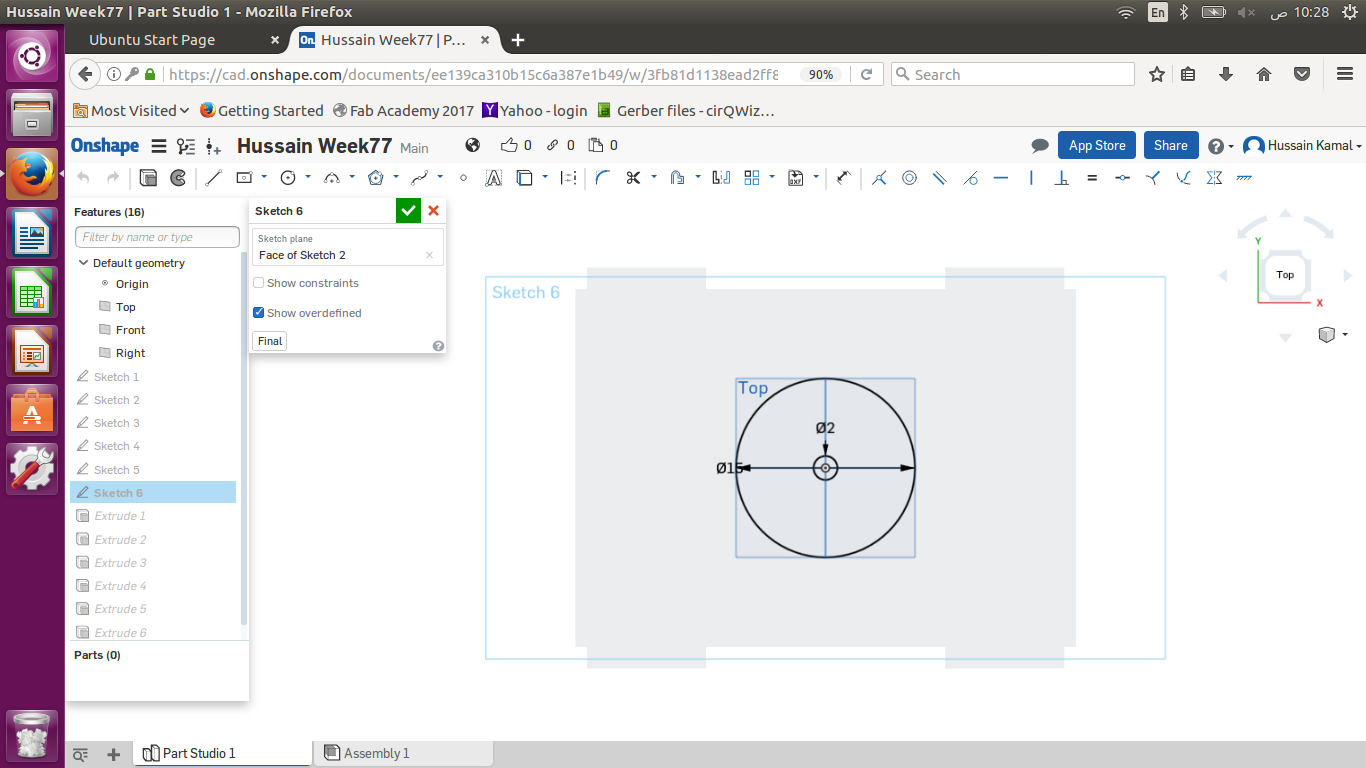
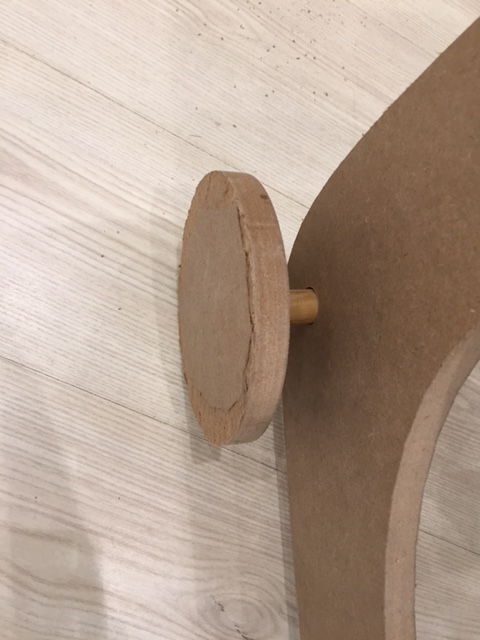
And finally , the wheel which has 2 cm hole in the middle to place the wooden bar for the wheels , as shown below :
Design Assembly :
Then I assembled all the sketches I made as different parts to test the fitting.
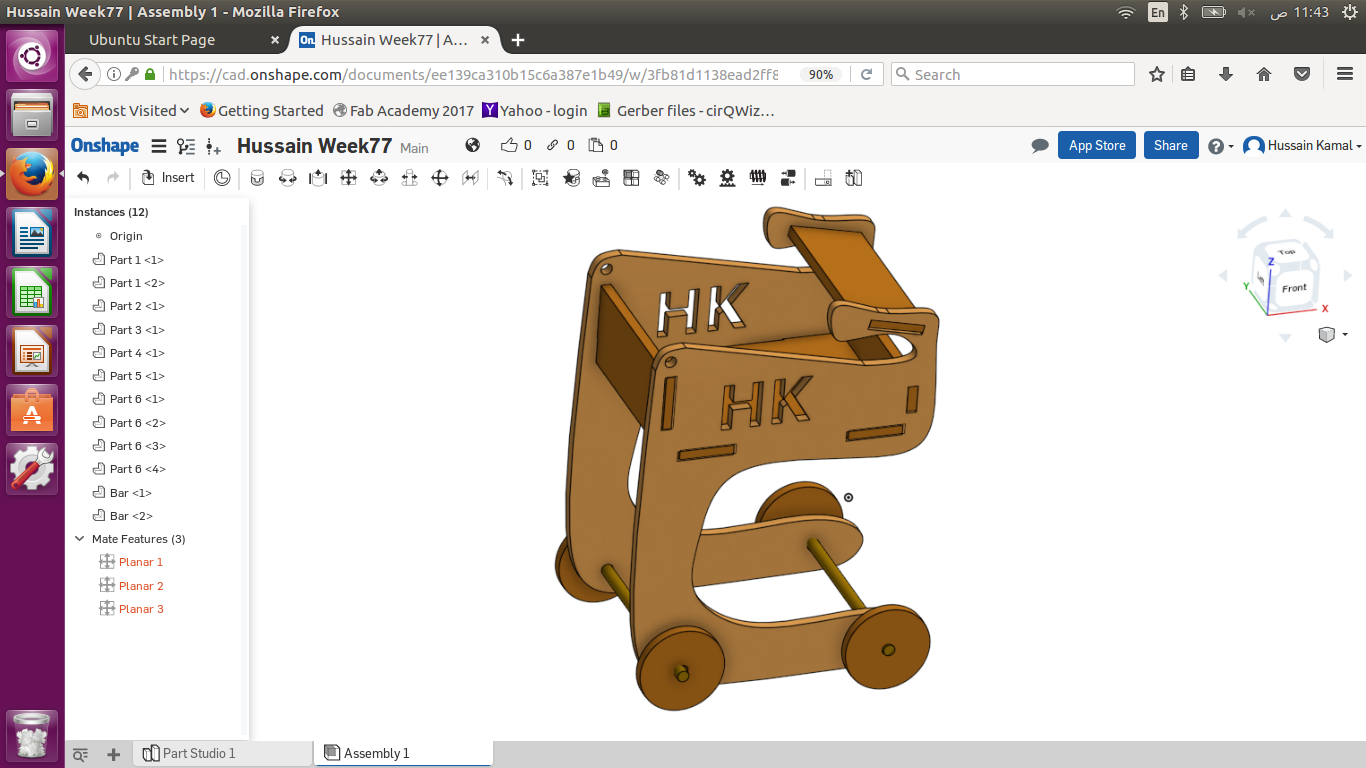
At the end , later I made the width of all the boards 50 cm instead of 30 cm to make the cart wider. And of course the bar sticks for the tires are dummies just to have a full picture of my cart. Then I exported the 6 sketches I made as .dxf files.
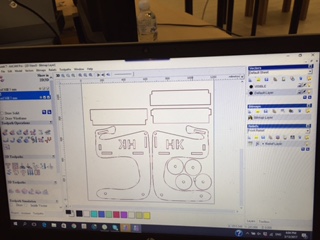
Then I used ArtCam software and imported the .dxf files to align the objects I wanted to print on the wooden sheet that I placed on the Controlled Cutting Machine to cut , CNC machine is running by .plt file. And fixed -0.15 mm as tolerance of all the press fit rectangles in my main cart shape , and for the tire holes in main cart shape as I made the tolerance .3 more bigger so that the 2 cm wooden pole I have would slide in and out to be a bit loose , so I can roll them easily through the hole for the tires to spin. But for the tires I didn’t make any tolerance so that It would be fitted exactly to the 2 cm wooden pole and not be loose at all. Then I exported the file as .plt
- My design is OK , then next thing I want is to choose tool path , for that
Toolpaths>New 2D toolpath
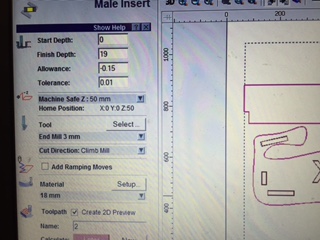
I fixed the cutting (finish) depth to be 19 mm as the wooden sheet is 18 mm so it will cut all the way through. I clicked select tool and chose 3 mm as a bit. Then I calculated the tool path to cut my objects and I saved tool paths. Spindle speed is the rotational frequency of the spindle of the machine, measured in revolutions per minute (RPM). The plunge rate is the speed of the z-axis cut from on place to another. Feed Rate is the speed of movement of the x-axis and y-axis.
CNC Cutting :
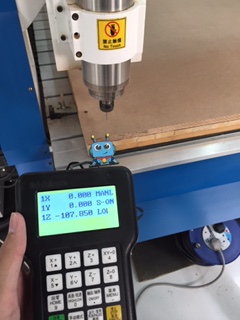
I set the home position , the controller is used to set the x-axis , y-axis and z-axis , also it is used to import the .plt file
Assembly :
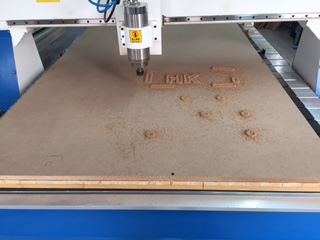
This is while the cutting proccess as you can see that it started cutting the holes (inner shapes first) then it will cut the borders (outer shapes) , so that the inner shapes would accurately cutted exactly as designed.
Problems :
My first problem is that I was going to print one side of the cart and the ground board of the basket and 4 wheels , while doing that I set the cutting depth to be 18 mm which is exactly same as the width of the wooden sheet , and for z depth I fixed to be as 0 when it barely touched the wooden sheet. So it did not cut all the way through the sheet and the shapes were drawn on one side only and not on the other side.
My second problem was that the second time I printed everything perfect, the tires were not, I made the middle hole in the wheel too wide while tolerating and it became loose, So I used first one I cut and machined with less tolerance but not cut all the way through the sheet. Actually I think it looks good for the tires having a one sided hole , except that it’s a little bit eaten on the edges because of the 18 mm depth which did not cut all the way.
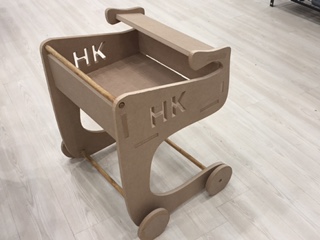
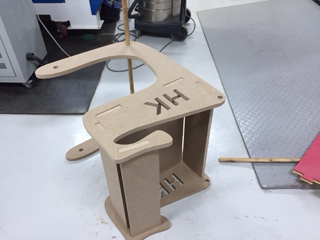
Result :
I fixed all the objects which exactly as I wanted and designed , also it was very smooth pushingthe trolley cart , the tires rolled smoothly.