Computer-Controlled Cutting
Laser Cutting
The Parametric Design
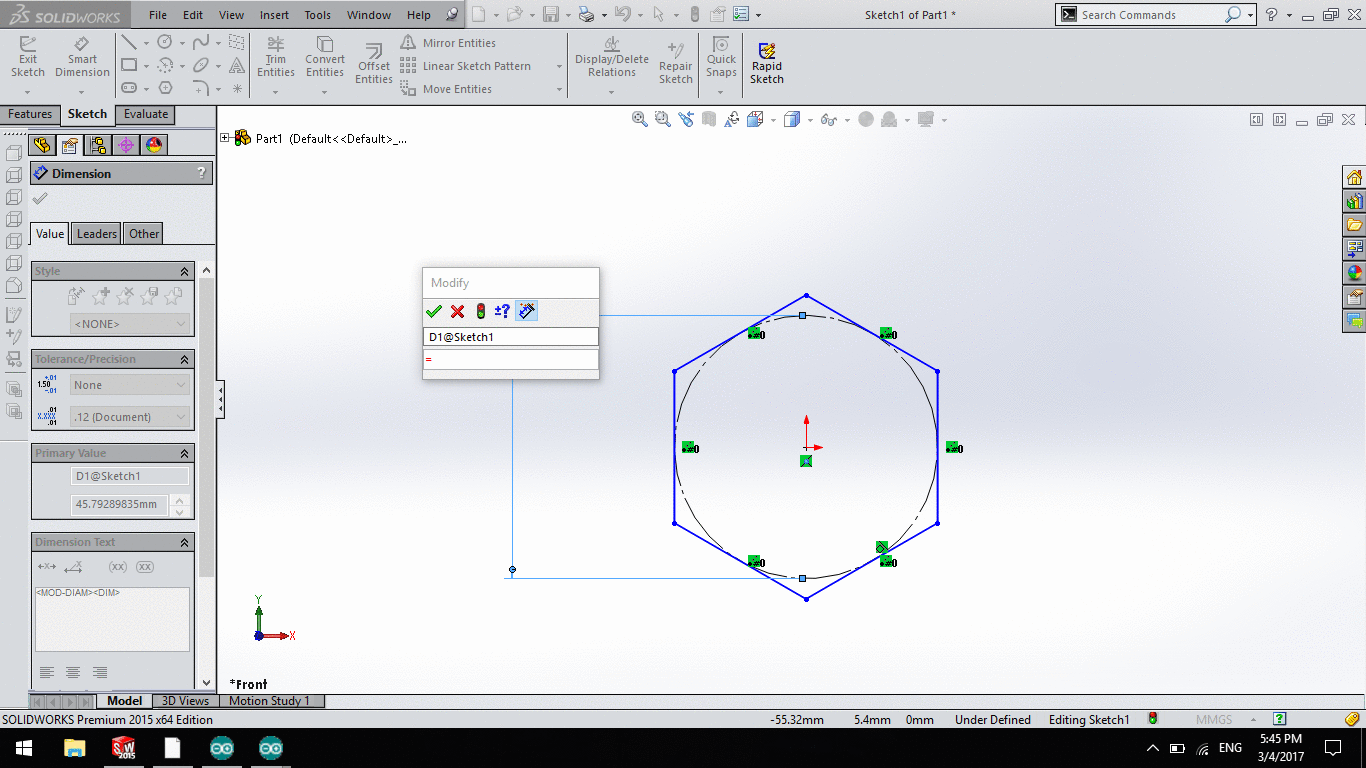
This week we we're told to make lasercutter parts, varying slot dimensions using parametric functions, So i started to think about what my design is going to be like. After alot of thining i decided to make 2 parts polygon and rectangle that can fit together. So i started designing in solidworks with drawing a polygon shape then adding a cut then made a rotational pattern to dublicate the cuts so the rectangle could fit in then added the parametric equations. Then i exported the design as dxf.
The laser cutting
We're told to make lasercutter test parts, varying slot dimensions using parametric functions, testing your laser kerf and cutting settings as a group project so we did that and you can check it out here.
cutting my design
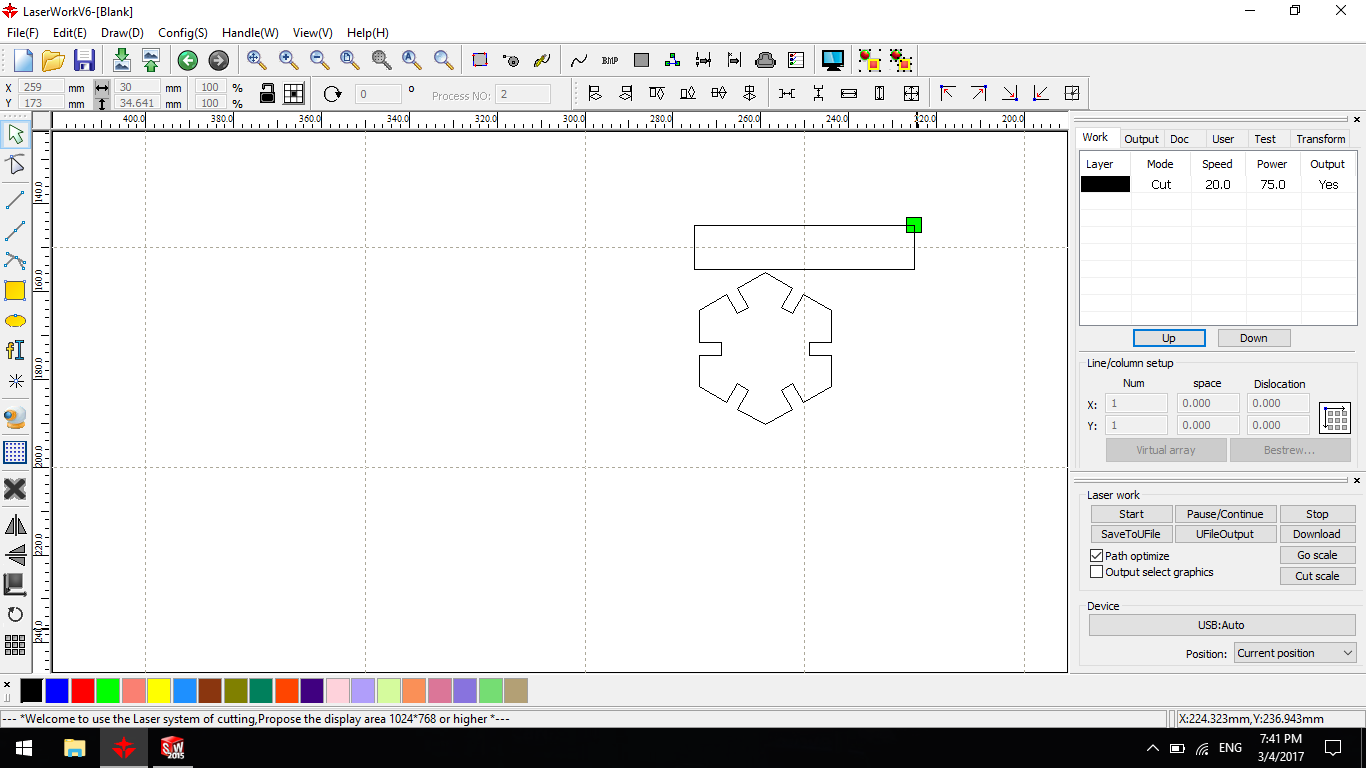
I opened the dxf file in LaserWorks V6 and adjusted the laser power to 75% and the cutting speed to 20mm/s then pressed download to download the file to the memory on the machine.
After that i turned on the laser cutter machine and the laser tube chiller. Adjusted the laser focus by adjusting the z height using a ruller, the focus point is 9mm away from the surface to the nozzle. then i placed the 3mm wooden plywood sheet in place and closed the glass door for safety. i disabled the door's safety switch and opened it during the cutting process just to take a picture.
.jpg)
.jpg)
.jpg)
After cutting the parts i made small scale chair that could be done with a bigger parts, a coffe coaster and two Smartphone docks portrait and landscape
Chair
.jpeg)
Coffe Coaster
.jpg)
.jpg)
SmartPone Dock
.jpg)
.jpg)
.jpg)
.jpg)
Download The Solidworks parametric Design files
Vinyl cutting
The Skin Design
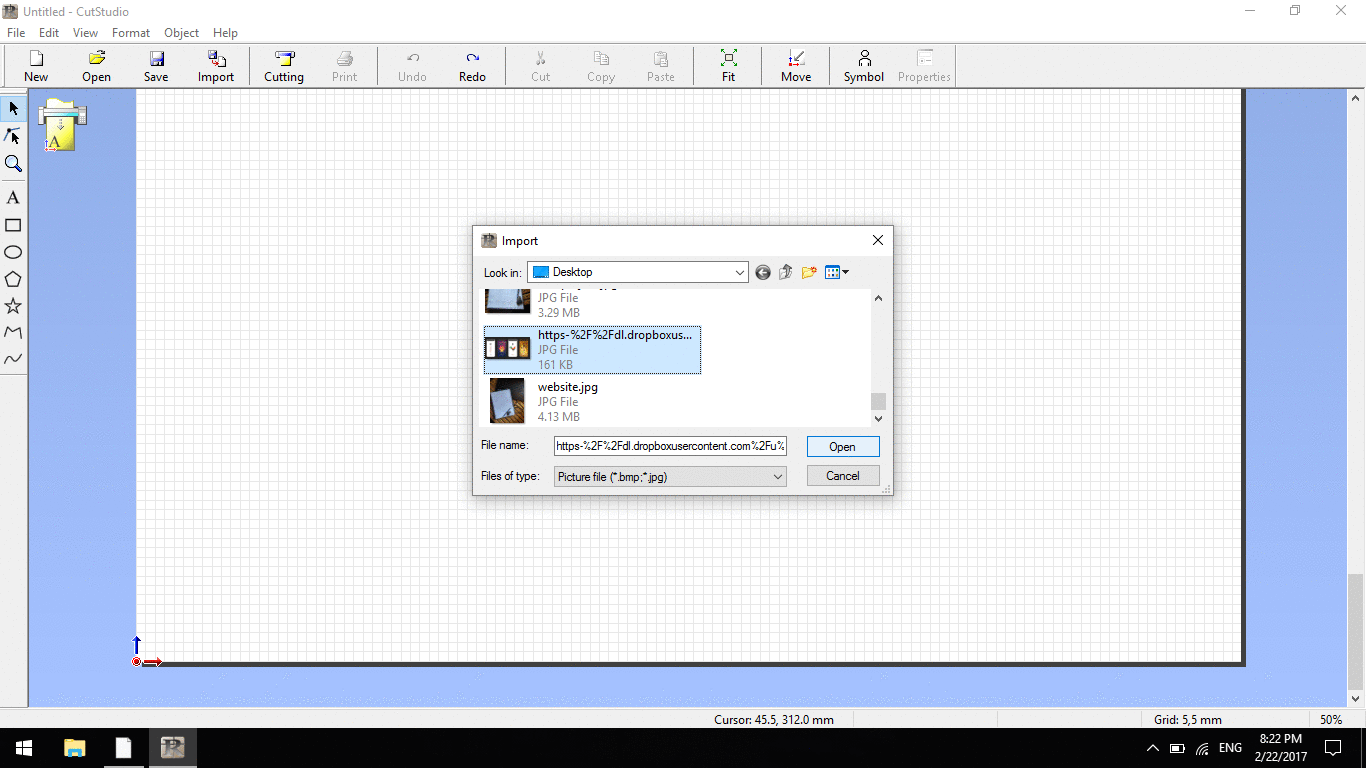
This week we're told to "cut something on the vinylcutter". i used the vinylcutter multiple times before and made lots of stickers for my laptop, but this time i wanted to make something new. So i decided to make Mobile Skin for my mobile Nexus 6p. so i googled for tempaltes for skins and i found a good picture of my mobile's skin design so i imported it in CutStudio then i did the following:
- Right-click on the image then select Image Outline....
- Choose the best value from Alignment Image Density slider to extract accurate contour line for the machine.
- Press Extract Contour Line to extract the vector lines then press Ok.
- Delete the original image.
- Right click then select Break Polyline to break the contour lines to parts so i can modify and remove the unwanted lines.
- Select unwanted curves and lines and delete them.
- Then i seleced the whole skin and pressed Right-click on it then select Properties.
- From The Size and Shapes i replaced the width and height of the skin to my mobile's real width and height.
Now the design is finnished. It is time to setup the machine and it's settings.
Preparing The VinylCutter
I started preparing the machine by loading the vinyl sheet in it using the handle in the back of the machine.
.jpg)
.jpg)
.jpg)
After Loading the vinyl sheet inside the machine, It's time to power it ON adjust the settings.
- After powering the machine on it will ask you if it was a Roll, Piece or Edge, in my case i selected Roll then the machine will automatically detect the dimensions of the roll or the sheet.
- Using the arrows move the cuuting head to a proper place in the sheet that you want the machine to cut in and then press and hold on the Origin Button.
.jpg)
.jpg)
.jpg)
- Adjust The Pen Force from the slider -in my case i used -0.5- and press test to test the pen force. Repeat untill you find the right value for pen force.
.jpg)
.jpg)
.jpg)
After adjusting all the settings press cutting and select your VinylCutter in my case i used Roland GX-24 then press ok. then the machine will start cutting the vinyl.
.jpg)
.jpg)
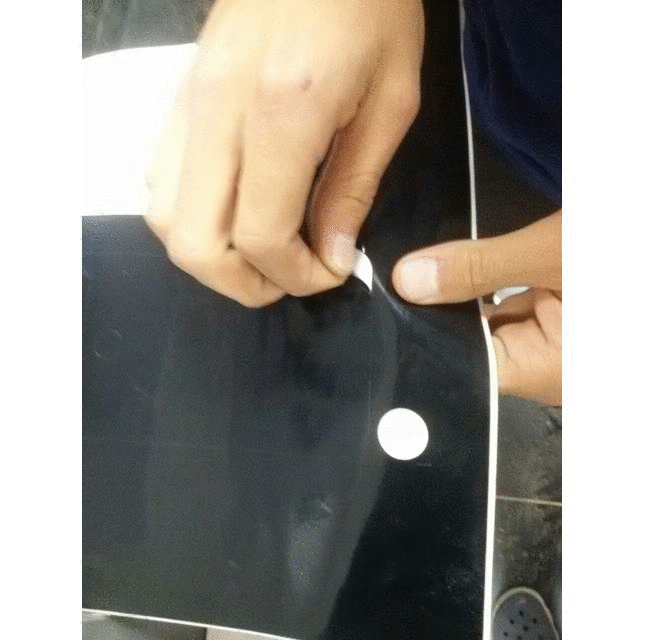
After the machine had finished, i carefully removed the skin and lay it over my mobile and using a credit card i removed the bubbles, then i cutted my name and by using blue scotch tape i removed the letters of my name and lay it over my mobile's back and removed some extars with tweezers.