11. Machine Design
Assignments
- automate your machine
- document the group project and your individual contribution
In this week, we are going to automate the machine. I had taken the responsibility of handling electronics and programming part.
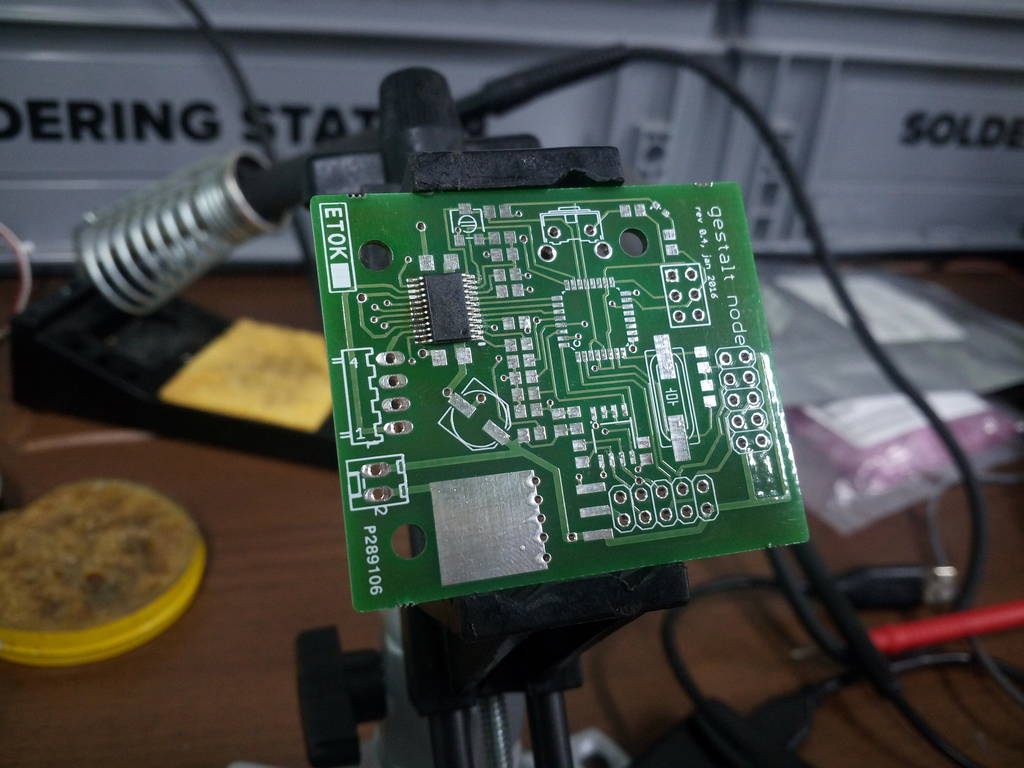
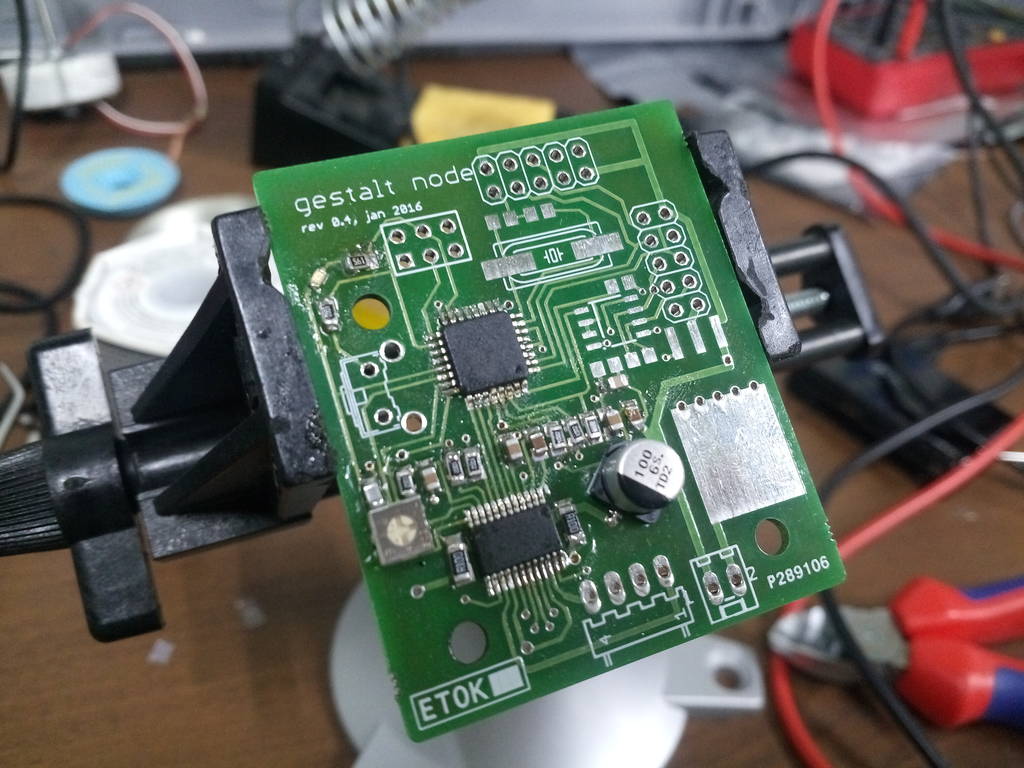
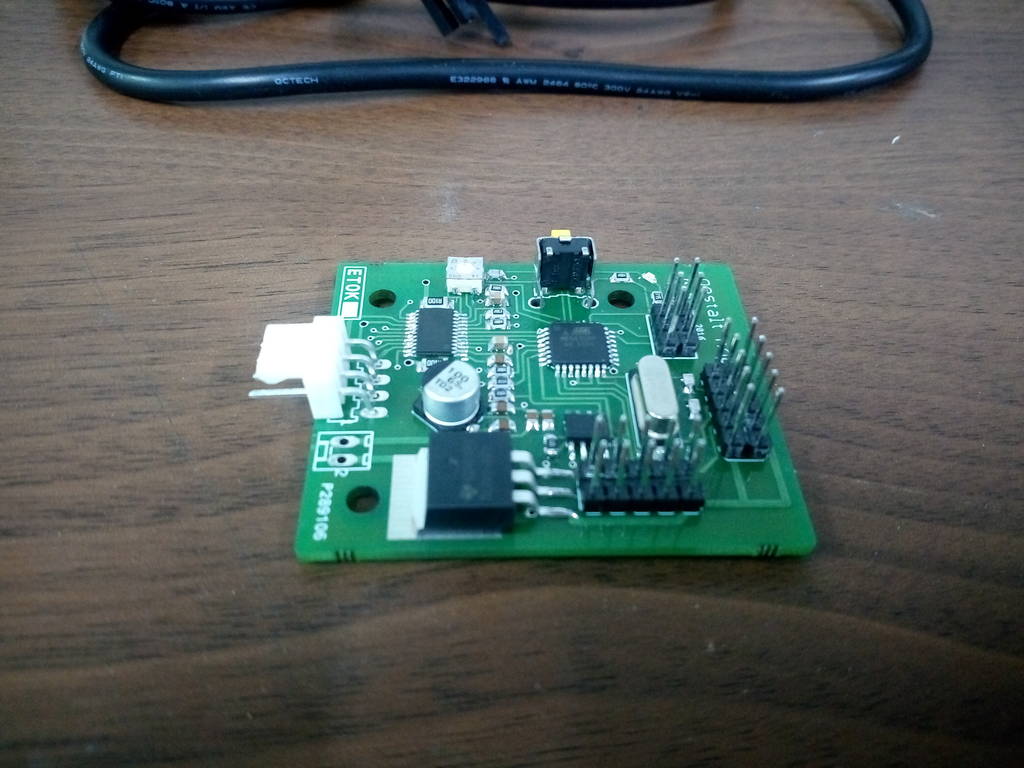
We decided to use gestalt nodes for controlling four stepper motors.
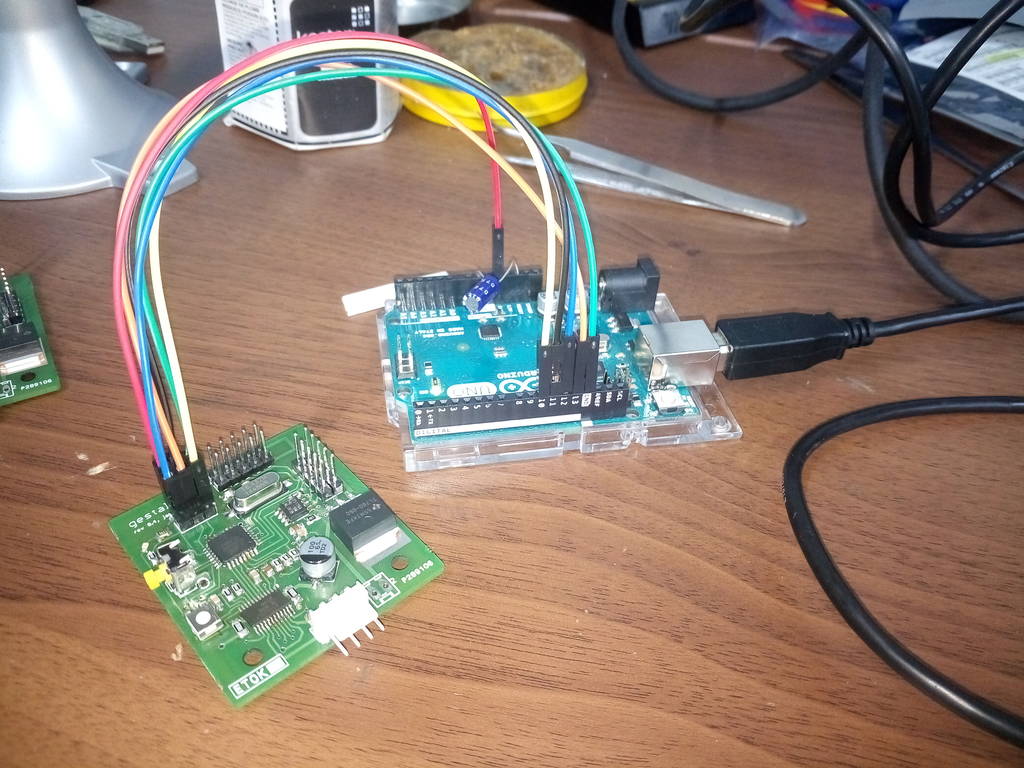
First we downloaded the eagle files for gestalt node & fab-net and gave the layout files to PCB manufacturer. We did the soldering in our LAB.
Thus we made 6 gestalt nodes (4 needed, 2 extra) and 2 Fab-nets (1 needed, 1 extra).
Programming gestalt node
Then we downloaded the required software needed to program and communicate with gestalt node from gitHub. Here is the link https://github.com/imoyer/086-005
You will find makefile in this folder. Since we were using arduino, we had to modify the makefile accordingly.


Then we tried programming using arduino by following the procedure we learned in the week of embedded programming.
However we faced problem in settong fuses. Everytime we tried to program fuses we got an error saying that it is failed.
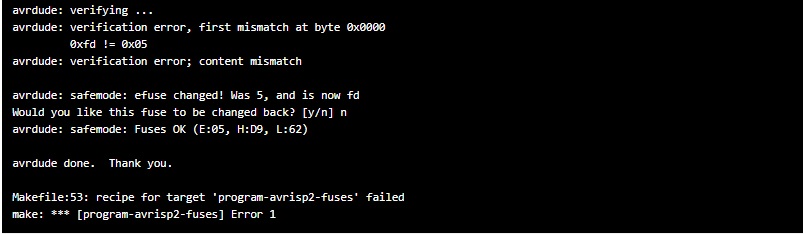
Fuses setting error was solved by replacing line in the existing makefile with the following one -
program-arduino-fuses:
avrdude -c stk500v1 -P /dev/ttyACM0 -u -p m328p -b19200 -U lfuse:w:0xff:m -U hfuse:w:0xd9:m -U efuse:w:0xfd:m
After changing this line, we were able to set fuses and program the gestalt node successfully.
Installing gestalt software on Windows in order to communicate with gestalt using PC/Laptop
- Install Python 2.7—not Python 3.4. There are numerous differences between Python 2 and 3, and Gestalt has been built with Python 2. Make sure to add Python to your PATH so you can run it from a command prompt.
- Install pySerial. There are many ways to do this, but perhaps the most “correct” way to do it is to first install pip, the Python package manager. pip comes with Python 3.4 and later, but since we’re on Python 2, we will have to go through a jankier process.
-
First, download this script for installing pip.Then, run the following commands:
	> python get-pip.py
	> python -m pip install pyserial
-
Then, go to the directory and run
> python setup.py install
This builds the code and installs it locally so you can import gestalt from Python code. Otherwise doing this will throw an error, and you may be tempted to make a bunch of copies of the files to try and fix it, which is sure to cause more havoc. - Test! At this point you should be able to get a basic two-node, two-axis machine running with the provided xy_plotter.py demo file. Make sure to set the correct serial port – it’ll be COM3 instead of the /dev/ttyUSB0 that is used for Linux.
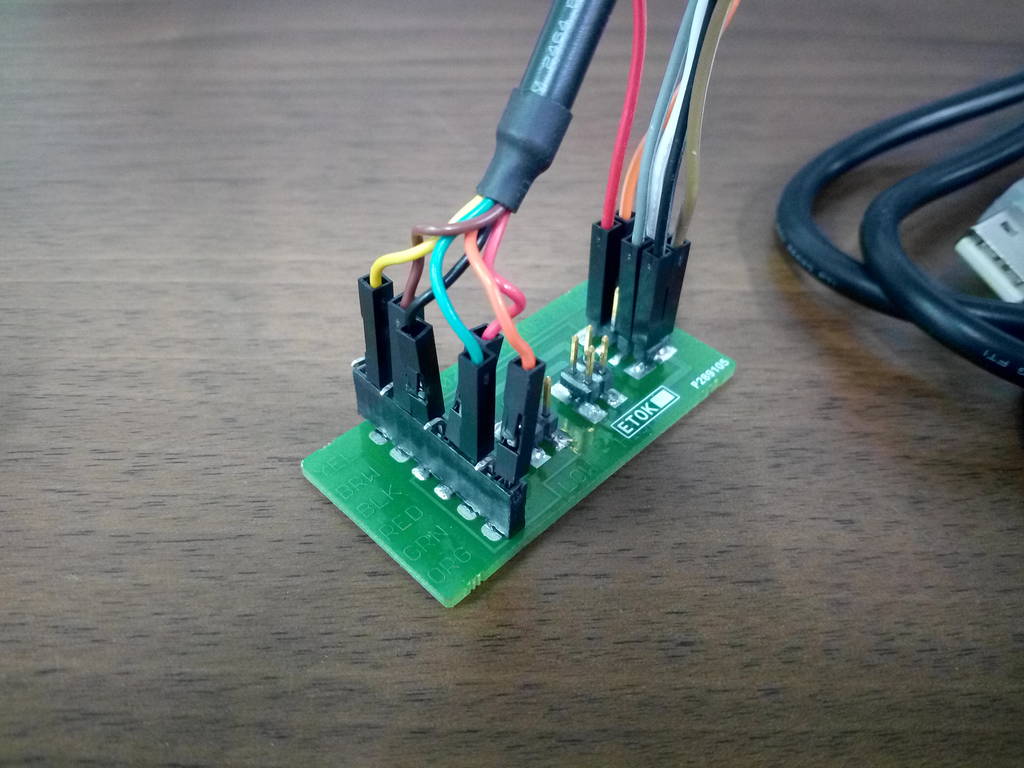
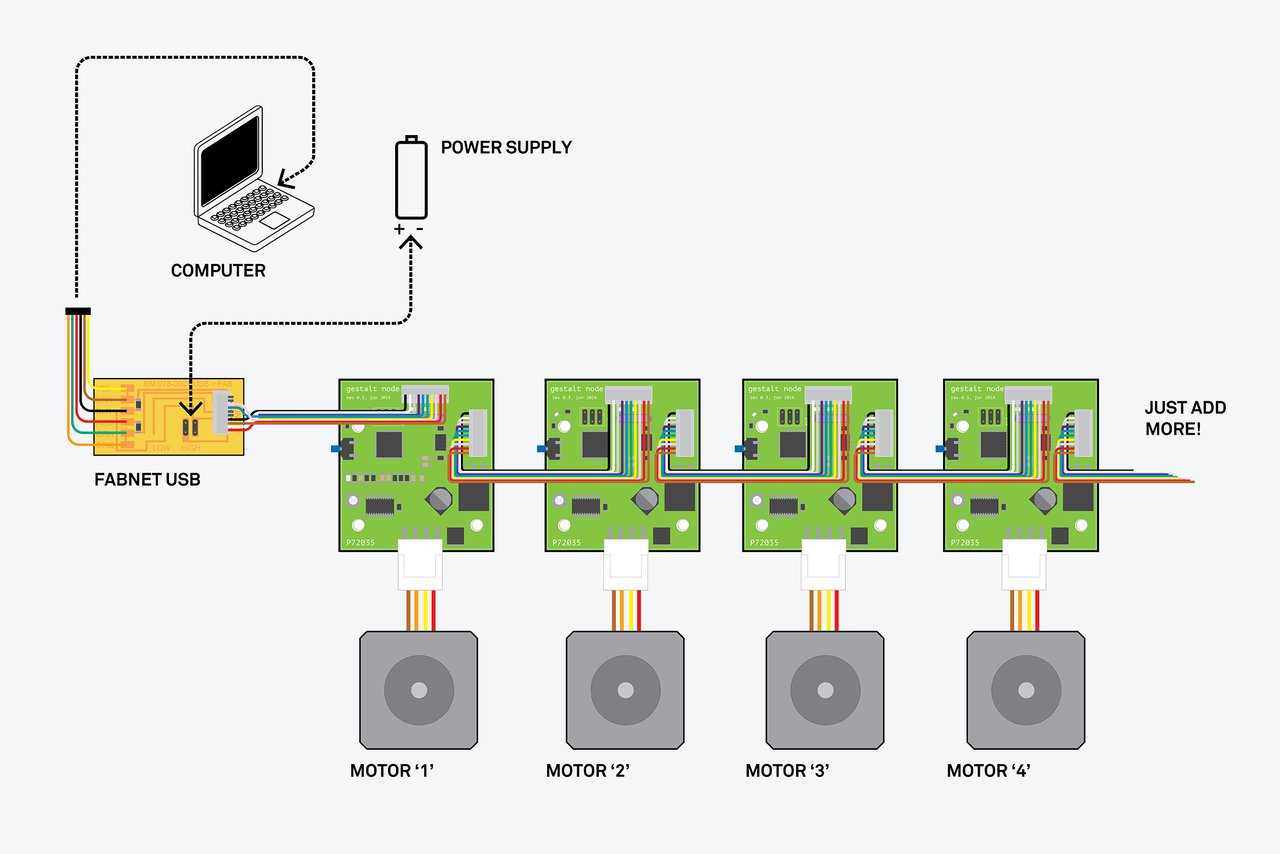
Driving stepper motors using gestalt nodes
This is the connection diagram for driving four stepper motors.
First we run a single motor using singlenode.py available in the extracted folder.
	# Forked from DFUnitVM Oct 2013
# set portname
# set location of hex file for bootloader
#

#------IMPORTS-------
from pygestalt import nodes
from pygestalt import interfaces
from pygestalt import machines
from pygestalt import functions
from pygestalt.machines import elements
from pygestalt.machines import kinematics
from pygestalt.machines import state
from pygestalt.utilities import notice
from pygestalt.publish import rpc	#remote procedure call dispatcher
import time
import io


#------VIRTUAL MACHINE------
class virtualMachine(machines.virtualMachine):

	def initInterfaces(self):
		if self.providedInterface: self.fabnet = self.providedInterface		#providedInterface is defined in the virtualMachine class.
		else: self.fabnet = interfaces.gestaltInterface('FABNET', interfaces.serialInterface(baudRate = 115200, interfaceType = 'ftdi', portName = 'COM7'))

	def initControllers(self):
		self.xAxisNode = nodes.networkedGestaltNode('X Axis', self.fabnet, filename = '086-005a.py', persistence = self.persistence)
		self.xNode = nodes.compoundNode(self.xAxisNode)

	def initCoordinates(self):
		self.position = state.coordinate(['mm'])

	def initKinematics(self):
		self.xAxis = elements.elementChain.forward([elements.microstep.forward(4), elements.stepper.forward(1.8), elements.leadscrew.forward(6.096), elements.invert.forward(True)])

		self.stageKinematics = kinematics.direct(1)	#direct drive on all axes

	def initFunctions(self):
		self.move = functions.move(virtualMachine = self, virtualNode = self.xNode, axes = [self.xAxis], kinematics = self.stageKinematics, machinePosition = self.position,planner = 'null')
		self.jog = functions.jog(self.move)	#an incremental wrapper for the move function
		pass

	def initLast(self):
#		self.machineControl.setMotorCurrents(aCurrent = 0.8, bCurrent = 0.8, cCurrent = 0.8)
#		self.xyzNode.setVelocityRequest(0)	#clear velocity on nodes. Eventually this will be put in the motion planner on initialization to match state.
		pass

	def publish(self):
#		self.publisher.addNodes(self.machineControl)
		pass

	def getPosition(self):
		return {'position':self.position.future()}

	def setPosition(self, position  = [None]):
		self.position.future.set(position)

	def setSpindleSpeed(self, speedFraction):
#		self.machineControl.pwmRequest(speedFraction)
		pass

#------IF RUN DIRECTLY FROM TERMINAL------
if __name__ == '__main__':
	stage = virtualMachine(persistenceFile = "test.vmp")
	#stage.xNode.loadProgram('../../../086-005/086-005a.hex')
	#stage.xNode.setMotorCurrent(1)

	stage.xNode.setVelocityRequest(8)

	#f = open('path.csv','r')
	#supercoords = []
	#for line in f.readlines():
	#	supernum = float(line)
	#	supercoords.append([supernum])

	supercoords = [[10],[20],[10],[0]]

	for coords in supercoords:
		stage.move(coords, 0)
		status = stage.xAxisNode.spinStatusRequest()
		while status['stepsRemaining'] > 0:
			time.sleep(0.001)
			status = stage.xAxisNode.spinStatusRequest()
Here is the video of controlling single motor
After this we run all four motors
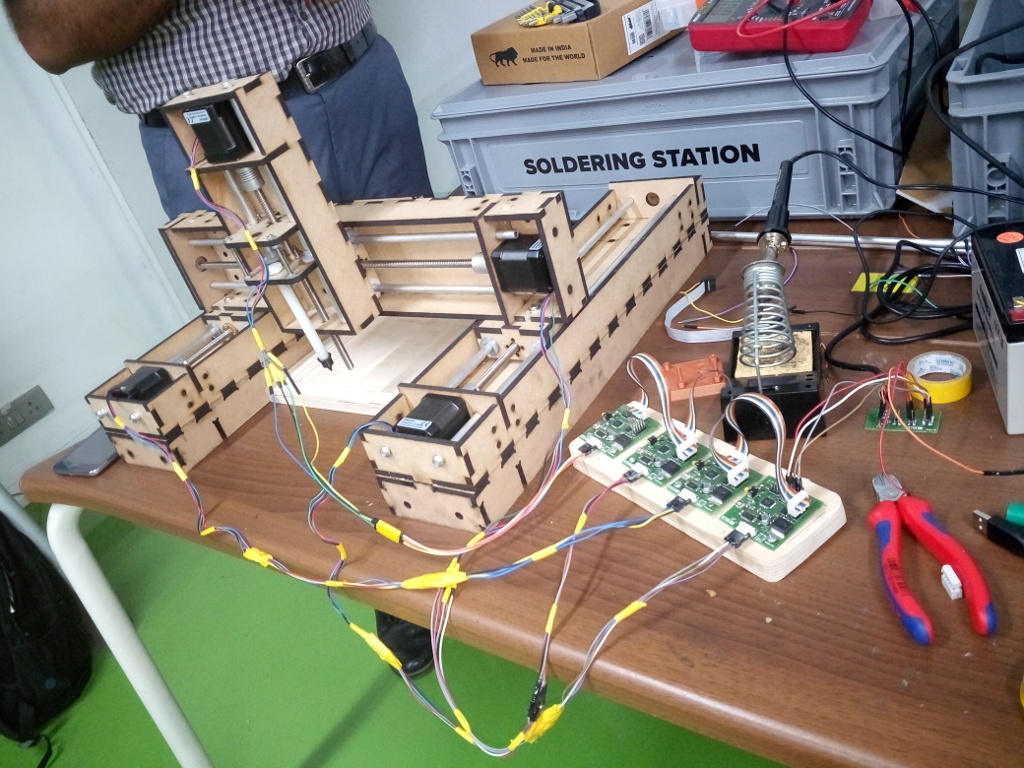
Here is the output video
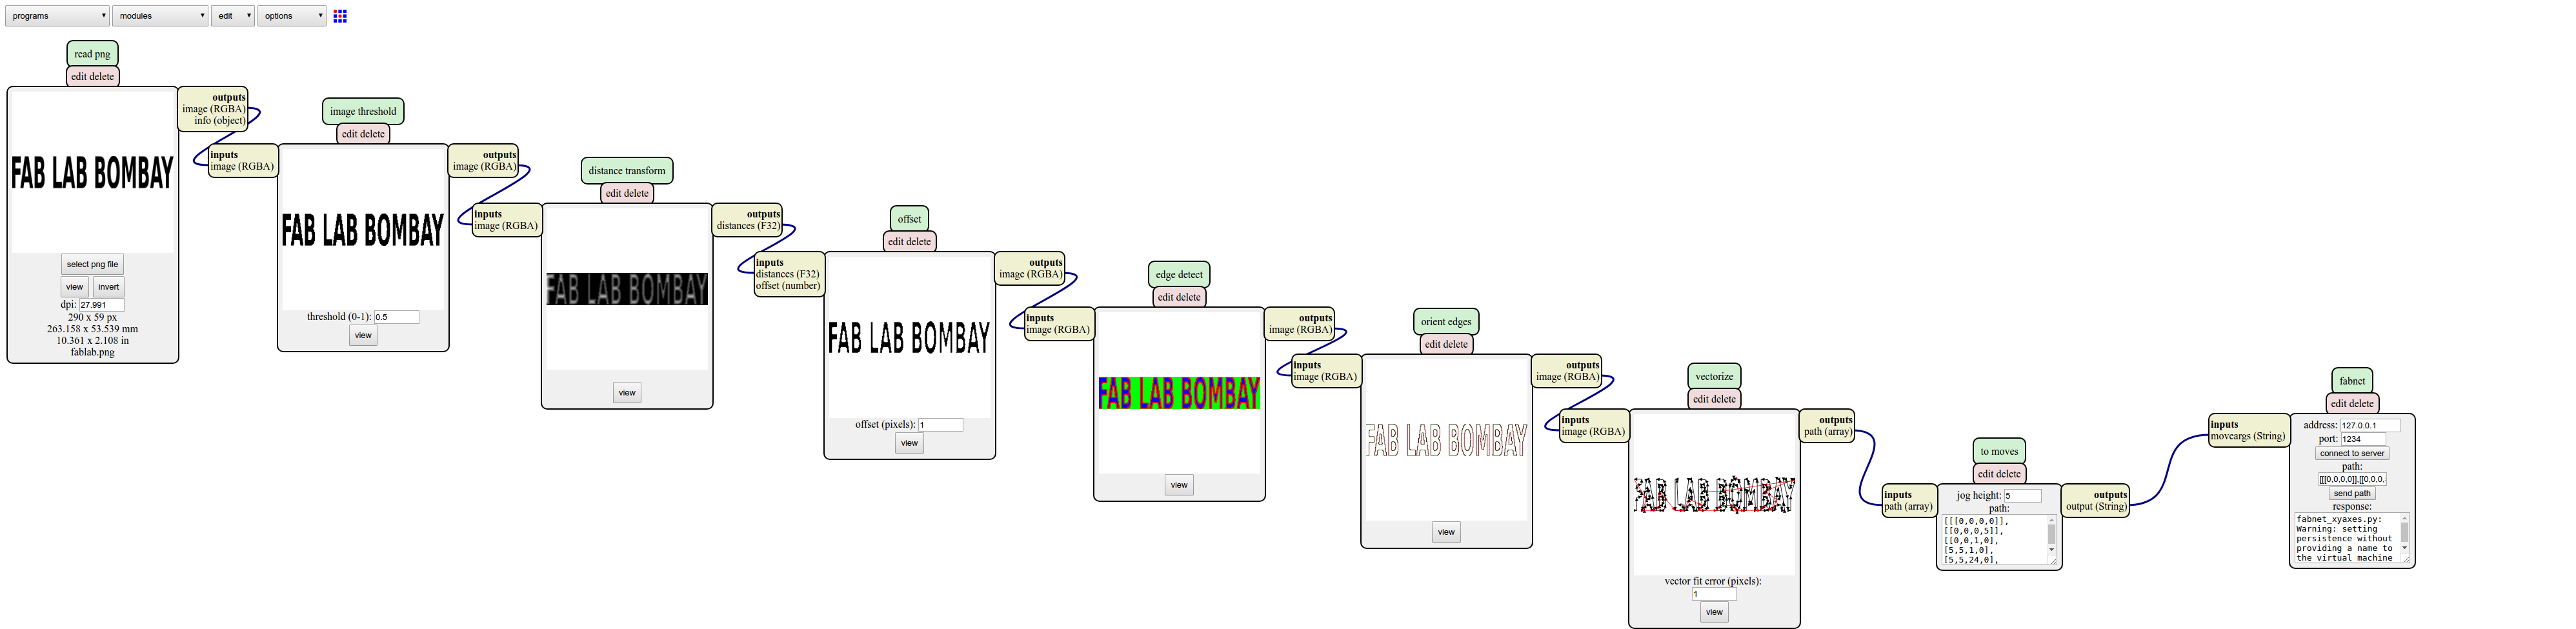
Using MODS to crate co-ordinates from png image
We used MODS to convert png to svg path & finally to co-ordinates which are actually the inputs for our machine.
Sudarshan modified the MODS program to create four co-ordinates since our machine is four-axis machine.
Output Video
Here si the final working video of our machine.