
Assignment
- Read the material safety data sheet (MSDS) and technical data sheet (TDS) for the resins that you're using
- Design and fabricate a 3D mold (~ft2) and produce a fiber composite part in it.
Safety data sheet.
1. We found the safety details of the material (epoxy and hardner) we are using on back side of the bottle. This instructions contains lots of safety instructions and instructions for use. Our instructor santi has also explain the way to use and safty information.
Here is the link which contains the details about epoxy resin that we are using in our lab.
2. Epoxy resins are thermosetting polymers with unique mechanical and resistance properties. They are the result of a chemical reaction called 'curing', which involves epoxides and other chemicals more commonly known as 'hardeners' or curing agents
3. From this https://en.wikipedia.org/wiki/Epoxy link I have also studied regarding the safty and I found that "Liquid epoxy resins in their uncured state are mostly classed as irritant to the eyes and skin, as well as toxic to aquatic organisms. Solid epoxy resins are generally safer than liquid epoxy resins, and many are classified non-hazardous materials. One particular risk associated with epoxy resins is sensitization"
4. Time to Cure: For coating artwork and creative projects, clarity is non-negotiable but a few extra hours of cure time doesn't usually hurt. ArtResin reaches 95% of its full cure within 24 hours, and 100% of its cure within 72 hours
This week we learned a lot regarding different things. We have too differet lectures one was on bioplastic by Clara and joaquim Melchor give us the lecture on different composite materials and he also give us the group assignment and in my group we made a curve a piece of wood as shown below.
These were the two additional things that we have learned this week.
For this assignment I was thinging to design a curvy sort of model, at last I reach to make a lamp. The image below shows from design to final finish.
1. Designing
I designed this lamp in Rhinoceros. for that I did the following steps.
- Draw the 10 vertex star in XY plan with diameter of 17cm.
- fillet its conrners my using fillet corner command.
- Draw a 90 degree curve along the z-axis.
- Extrude it along the curve.
2. Milling.
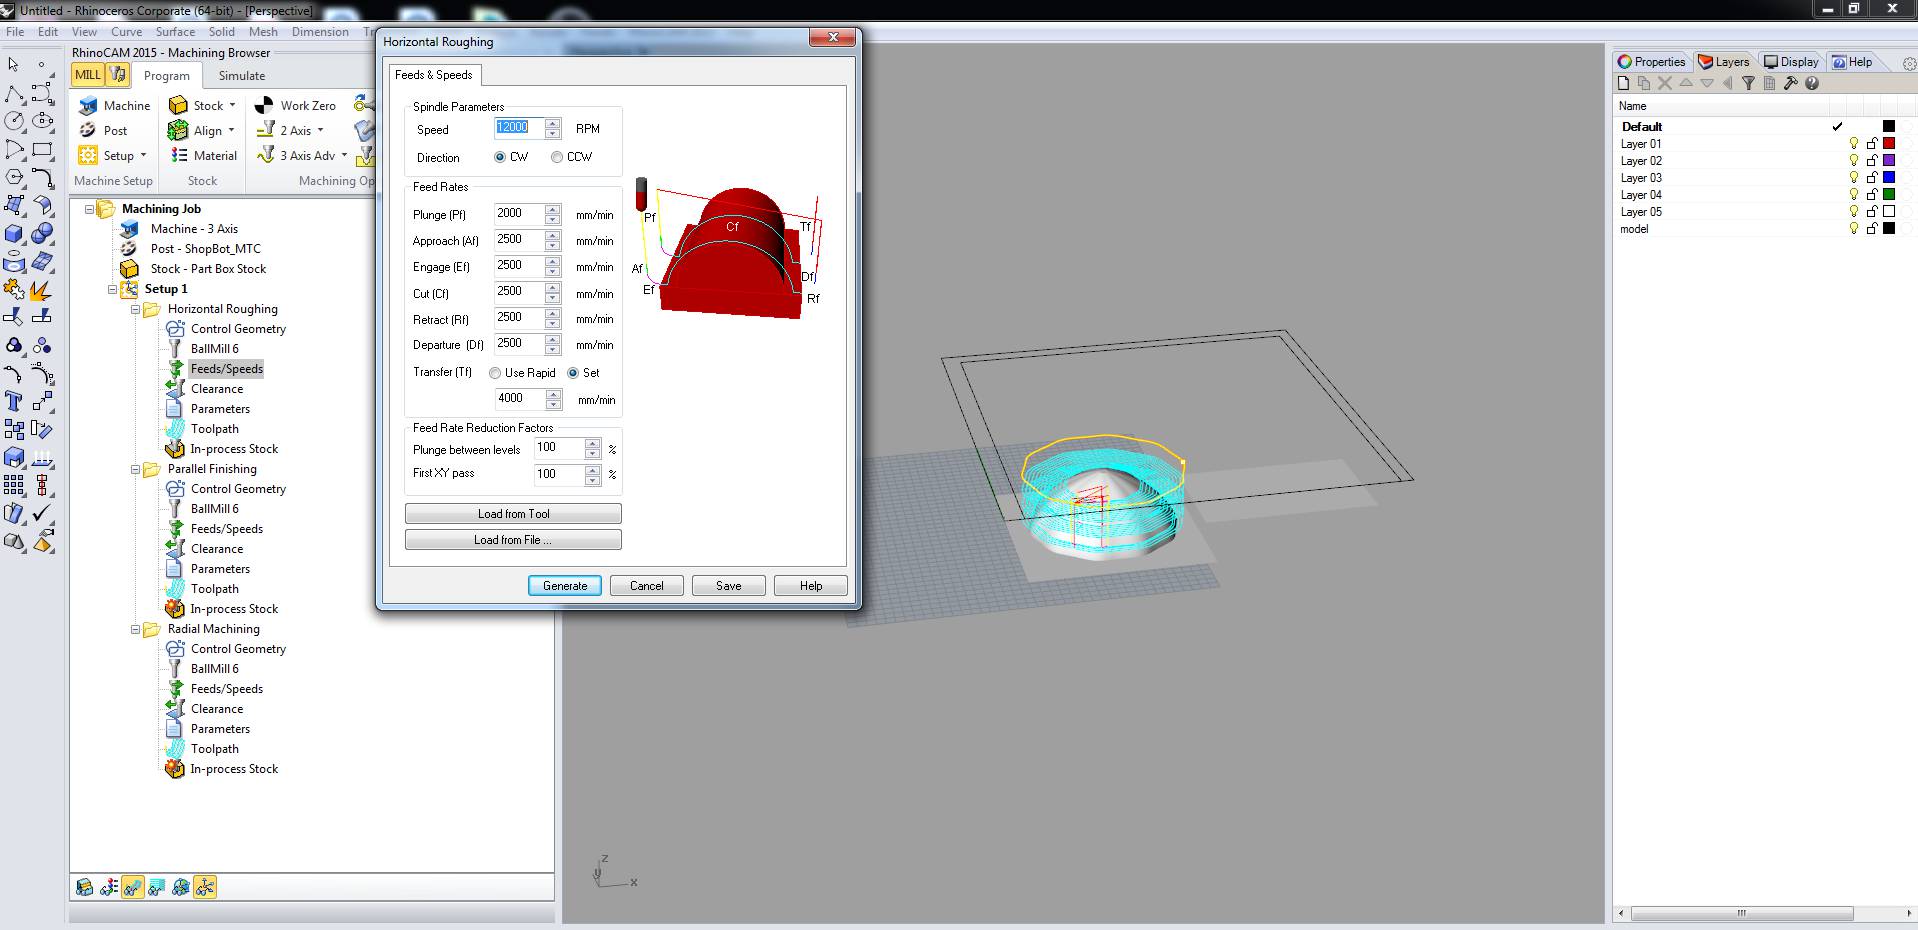
Before milling we need to do generate CGODE uisng RhinoCAM. For detail about RhinoCAM and its steps a detailed stpes and video is attached in Week7. .
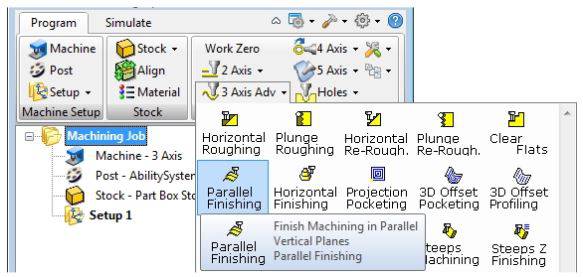
- Horizontal Roughing: This job makes the surfaces smooth. I am using foam, Cutting a soft material, like Renshape or foam, where we can use high feedrates and not load the machine, then flat roughing toolpath is always a good choice. The extra stock leftover will not be a problem for the finishing pass to remove and it will also reduce the milling time. Best link to understand horizental roughing and its step to do it in RhinoCAM (http://cmu-dfab.org/rcam-3rough/)
- Parallel Finsihing: Finishing Toolpaths will provide you with a finer, more detailed final part that more closely resembles your 3D Model. Specifically, Parallel Finishing Operations generate Toolpaths across your Part’s Surface in a Parallel Fashion. A good tutorail for parallel finishing is this (http://cmu-dfab.org/rcam-3pfinish/)
- Radial Machining: he Radial Finishing strategy creates passes along the radii of an arc, similar to the spokes of a wheel, which are then projected down on the surfaces. Here is the guide awesome (http://cmu-dfab.org/rcam-3radial/)
- Following Image will show the options of Horizontal Roughing, Parallel Finishing and Radial Machining.
- After roughing, the stock should have the majority of the excess material removed. We can now move on to finishing toolpaths where the part will be cut to final dimensions with an acceptable surface finish.
- In RhinoCAM I am using horizental roughing and parallel finishing as shown in the image below.
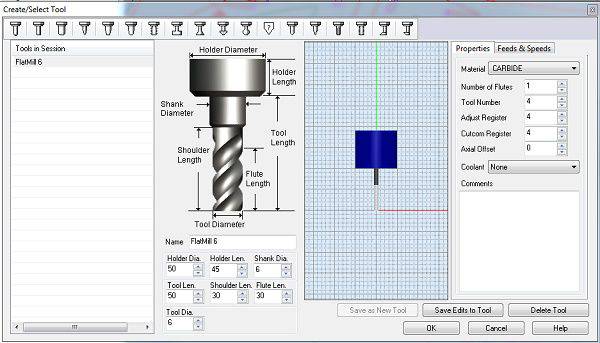
- Tool size, I am using 6mm flat tool for complete milling.
- The last part is to see the simulation of the complete operation of CNC machine. The video below shows the simulation of the operation.
Its done now and Generate GCODE and send to Shopbot and ready for mill.
Below are the few pics from milling.
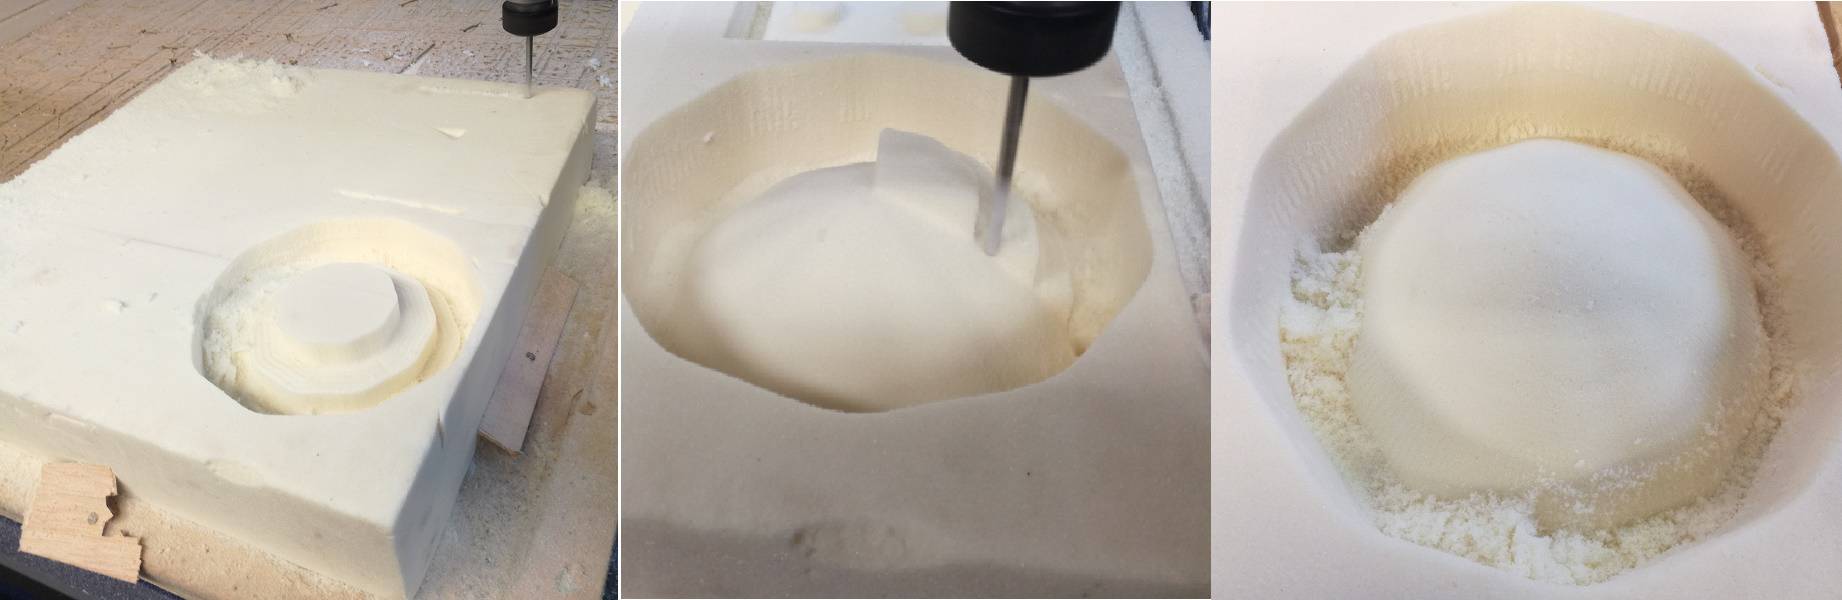
After making removing mold from base of the foam, the mold is ready.

3. Making composite.
The first thing is to make the material using 2:1 of epoxy and hardner.
Mix the material for atlest 10mins.
Get ready the layers of fabric we need to put on to the mold. In my case I am using 2 layers.
In my case I cut the each layer in 2 pieces so that I can easily put the fabric on the mold after putting resins on the fabric.
But be carefull to use the plastic layer on mold so that you can easily remove fabric from the mold as we can see the green plastic in the image given, otherwise it will stuck with the Foam mold due to resins on fabric.
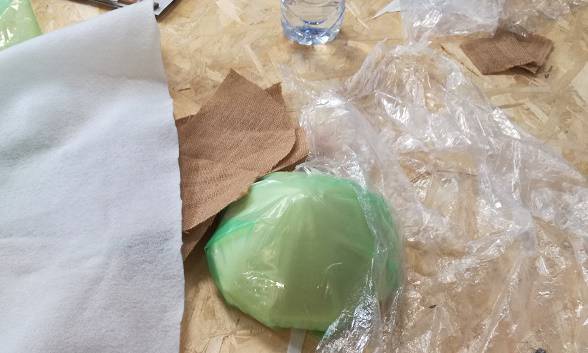
Following image shows the layers we need to use.
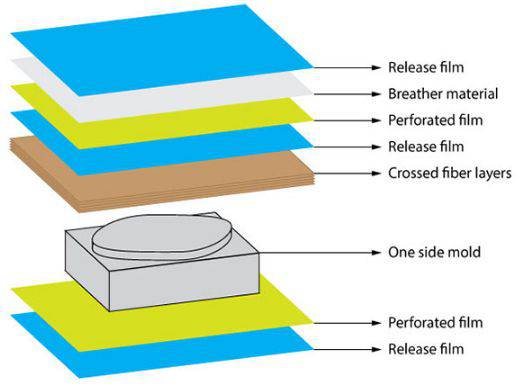
Before putting into the whole thing into the vacuum machine I am using few additional layer as shown the image. Then put the hole thing in to the vacuum machine.
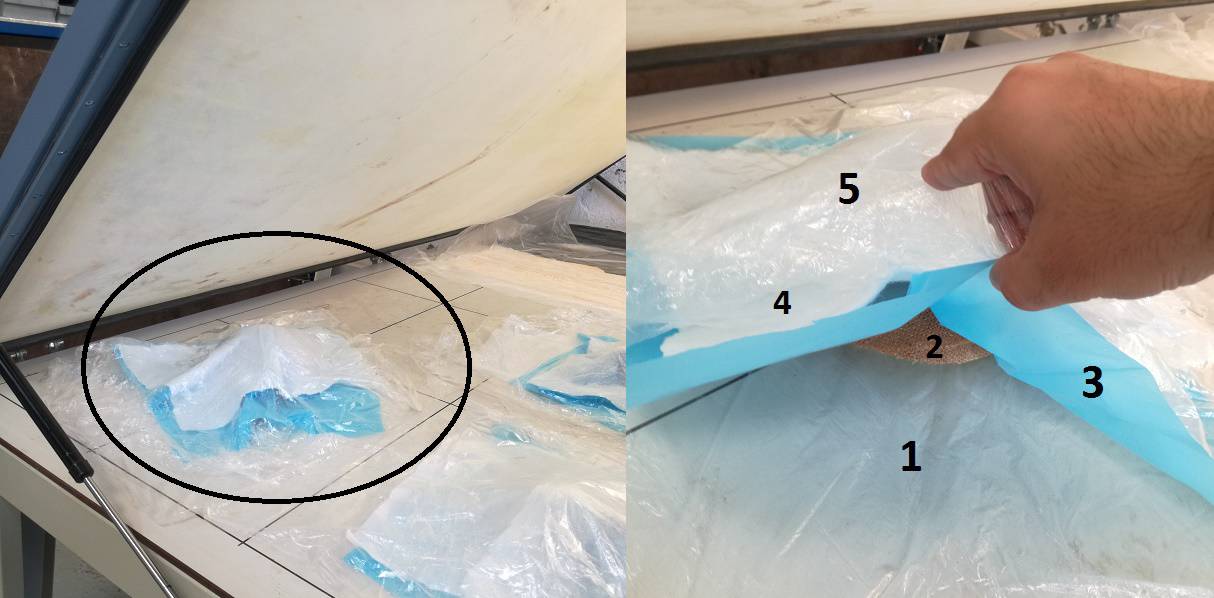
- In the image above
- 1 is transparent plastic to safe the surface of machine from material on mold.
- 2 is the mold coved with 2 layers of fabric with resins.
- 3 is blue layer of plastic is the plastic with holes help the mold to get dry.
- 4 is the white fabric to absorb the resins, so that resins do not hit the surface or top of the vacuum machine.
- 5 is the transparent plastic to help safe the top surface of machine.
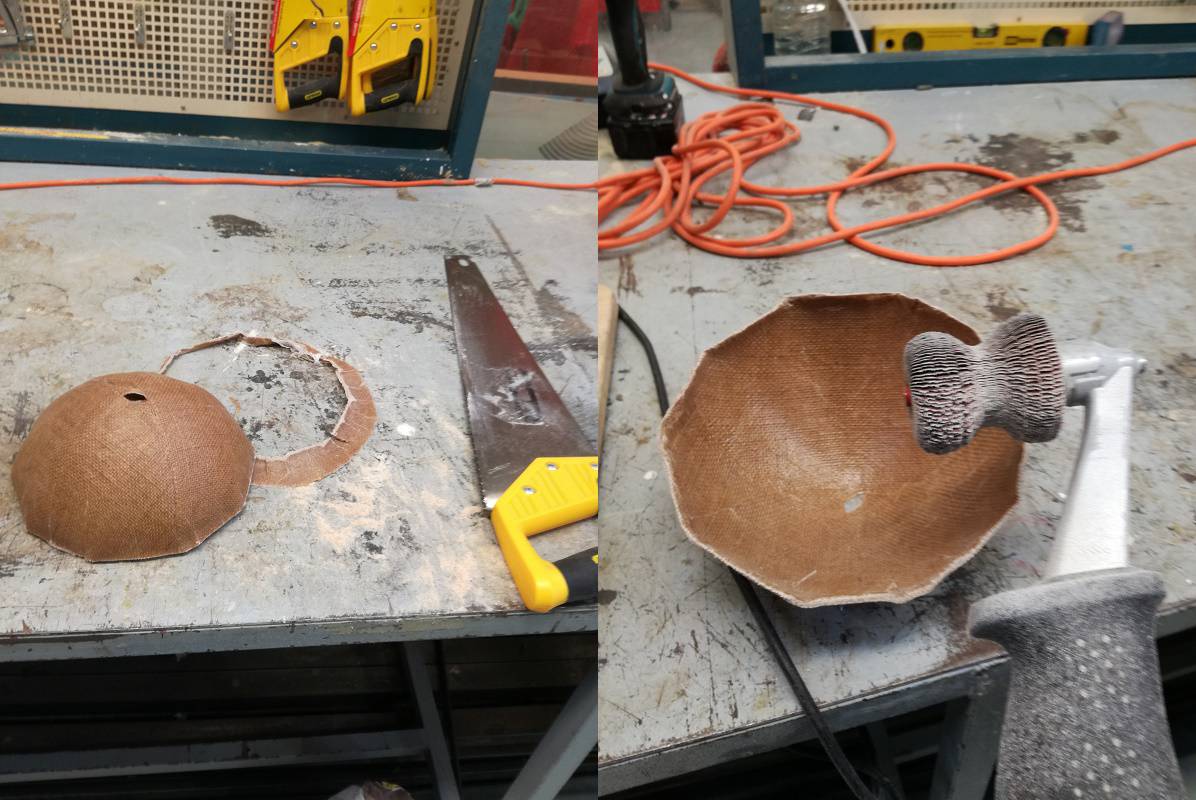
After 24 hours in vacuum machine are lamp is ready.
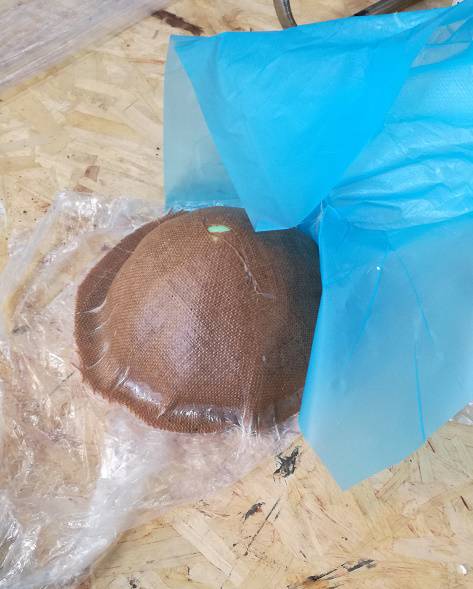
I was trying to make a lamp but apparently it also look like a helmet.!!

After cutting the additional fabric from the side.
Making some electrical connection for my lamp.
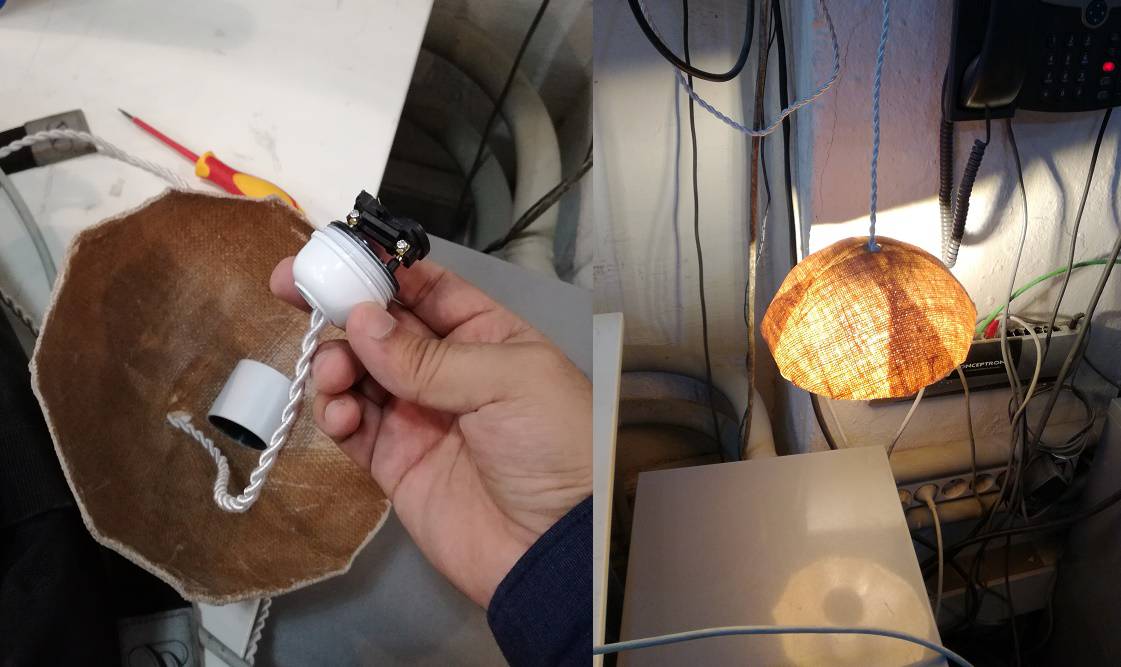
After making lots of effort and doing massy kind of thing finally I am happy to see the result.
Download All file of this week Here

This work is licensed under a Creative Commons Attribution-NonCommercial-ShareAlike 4.0 International License
.